display PONTIAC GRAND PRIX 2006 Owner's Guide
[x] Cancel search | Manufacturer: PONTIAC, Model Year: 2006, Model line: GRAND PRIX, Model: PONTIAC GRAND PRIX 2006Pages: 472, PDF Size: 2.82 MB
Page 160 of 472
Up-Shift Light
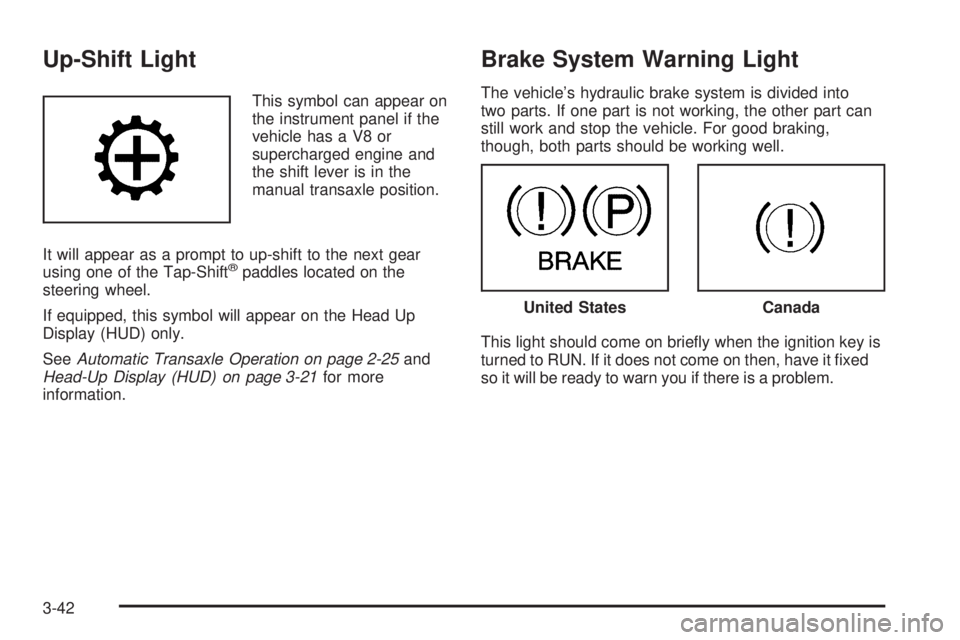
This symbol can appear on
the instrument panel if the
vehicle has a V8 or
supercharged engine and
the shift lever is in the
manual transaxle position.
It will appear as a prompt to up-shift to the next gear
using one of the Tap-Shift
®paddles located on the
steering wheel.
If equipped, this symbol will appear on the Head Up
Display (HUD) only.
SeeAutomatic Transaxle Operation on page 2-25and
Head-Up Display (HUD) on page 3-21for more
information.
Brake System Warning Light
The vehicle’s hydraulic brake system is divided into
two parts. If one part is not working, the other part can
still work and stop the vehicle. For good braking,
though, both parts should be working well.
This light should come on brie�y when the ignition key is
turned to RUN. If it does not come on then, have it �xed
so it will be ready to warn you if there is a problem.
United StatesCanada
3-42
Page 170 of 472
Driver Information Center (DIC)
The Driver Information Center (DIC) gives important
safety and maintenance facts. When the vehicle’s
ignition is turned on, all of the DIC lights illuminate for a
few seconds and an introductory message will appear.
After this, the DIC will begin working.
DIC Controls and Displays
(Base Level DIC)
The Driver Information Center (DIC) control buttons and
the message display screen are located above the radio.
The DIC gives important safety and maintenance facts
concerning the vehicle. The status of many of the
vehicle’s systems along with driver personal
programming mode menus and warning messages about
the vehicle’s systems may display on the DIC screen.
The vehicle’s transaxle position will also appear.
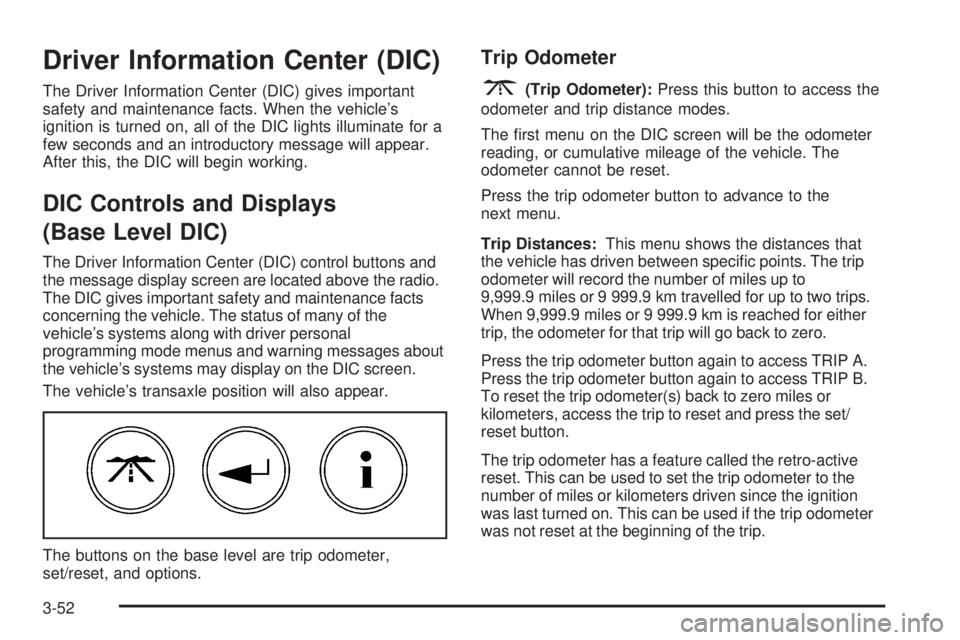
The buttons on the base level are trip odometer,
set/reset, and options.
Trip Odometer
3(Trip Odometer):Press this button to access the
odometer and trip distance modes.
The �rst menu on the DIC screen will be the odometer
reading, or cumulative mileage of the vehicle. The
odometer cannot be reset.
Press the trip odometer button to advance to the
next menu.
Trip Distances:This menu shows the distances that
the vehicle has driven between speci�c points. The trip
odometer will record the number of miles up to
9,999.9 miles or 9 999.9 km travelled for up to two trips.
When 9,999.9 miles or 9 999.9 km is reached for either
trip, the odometer for that trip will go back to zero.
Press the trip odometer button again to access TRIP A.
Press the trip odometer button again to access TRIP B.
To reset the trip odometer(s) back to zero miles or
kilometers, access the trip to reset and press the set/
reset button.
The trip odometer has a feature called the retro-active
reset. This can be used to set the trip odometer to the
number of miles or kilometers driven since the ignition
was last turned on. This can be used if the trip odometer
was not reset at the beginning of the trip.
3-52
Page 171 of 472
To use the retro-active reset feature, press and hold the
set/reset button for at least three seconds. The trip
odometer will display the number of miles or kilometers
driven since the ignition was last turned on and the
vehicle began moving. Once the vehicle has begun
moving, the trip odometer will accumulate mileage. For
example, if the vehicle was driven 5.0 miles (8.0 km)
before the vehicle is started again, and then the
retro-active reset feature is activated, the display will
show 5.0 miles (8.0 km). As the vehicle begins moving,
the display will increase to 5.1 miles (8.2 km), 5.2 miles
(8.4 km), etc.
If the retro-active reset feature is activated after the
vehicle is started, but before it begins moving, the display
will show the number of miles or kilometers that were
driven during the last ignition cycle.
Press the trip odometer button again to access
the odometer.
Set/Reset
r(Set/Reset):Press this button to set or reset
a menu item when using the trip odometer or
options buttons.
Options
4(Options):Press this button to access the Date,
Language, Display Units, Daytime Display
Enhancements, Engine Oil Monitor System, Tire In�ation
Monitor System, and Personal Programming modes.
Date:This menu sets the date.
The time is set through the radio. SeeSetting the Time
on page 3-96for more information.
To set the date, use the following procedure:
1. Press the options button until the date is displayed
on the DIC.
2. Press the set/reset button to access the RESET
YEAR screen. The second position in the year
will be selected. Press and hold the set/reset button
to scroll through the available digits. Release the
button when the correct digit appears.
3. Press the options button to advance to the �rst
position in the year. Press and hold the set/reset
button to scroll through the available digits. Release
the button when the correct digit appears.
4. Press the options button to advance to the months
of the year.
3-53
Page 172 of 472
5. Press the set/reset button to scroll through the
months of the year, releasing the button when
the correct month appears.
6. Press the options button to advance to the days of
the month.
7. Press the set/reset button to scroll through the days
of the month, releasing the button when the correct
day appears.
8. Press the options button again to advance to the
main date screen. The screen will now display the
new date.
Language:This menu allows the selection of the
language in which the DIC messages will appear. The
DIC can be programmed to one of three languages:
English, French or Spanish. The message on the HUD,
if equipped, will also appear in the language selected.
SeeHead-Up Display (HUD) on page 3-21.
To change the language, use the following procedure:
1. Press the options button to enter the
language screen.
2. Press the set/reset button to scroll through and set
the language choice.
3. Press the options button again to advance to the
next screen.Display Units:This menu allows selection of
measurements to be displayed in English or metric
units. The messages on the HUD, if equipped, and the
instrument panel cluster will also appear with the
type of measurement selected.
To set the measurement when Display Units is shown,
use the following procedure:
1. Press the set/reset button to select ENGLISH
or METRIC.
2. Press the options button again to advance to the
next screen.
DAYTIME DISPLAY ENHANCEMENTS:This menu
allows selection of the color of the display message.
When ON is selected for the daytime enhancement, the
messages will appear black on a red screen. This
combination makes it easier to see the DIC messages
during the daytime. When OFF is selected, or when
the headlamps are on, the messages will appear red on
a black background.
To set the daytime display enhancements, use the
following procedure:
1. Press the set/reset button to select OFF or ON.
2. Press the options button again to advance to
the next screen.
3-54
Page 173 of 472
ENGINE OIL MONITOR SYSTEM:This menu allows
the engine oil monitor system to be reset. To reset
the engine oil monitor system, seeEngine Oil Life
System on page 5-19.
Tire In�ation Monitor System:If the vehicle has ABS,
this menu sets the tire in�ation monitor system. See “Tire
In�ation Monitor System” underIn�ation - Tire Pressure
on page 5-67for more information.
To set or reset the tire in�ation monitor system, use the
following procedure:
1. Press the set/reset button to reset the tire in�ation
monitor system. The message, TIRE INFLATION
HAS BEEN SET, will appear on the screen if
the Check Tire Pressure message, indicating an
irregularity in the pressure of one of the tires,
had previously appeared on the DIC. If the Check
Tire Pressure message did not appear and the
set/reset button is pressed, the system will reset,
but no acknowledgment message will appear on the
screen.
2. Press the options button again to advance to the
next screen.
Select the set/reset button to return to the
main (date) screen.PERSONAL PROGRAMMING MODE:This menu
allows you to customize several features on your
vehicle. These adjustments can only be made while the
vehicle is in PARK (P). Press the set/reset button to
display the �rst screen.
Personal Programming Mode Screens
Press the options button to access these modes:
EXTERIOR LIGHTING DELAY:This screen allows this
feature to be turned off or allows the selection of the
number of seconds the headlamps, sidelamps, taillamps,
fog lamps, and back-up lamps are turned on after the
key is removed from the ignition, or the vehicle is
unlocked using the remote keyless entry transmitter.
If OFF is selected, the exterior lamps will not turn on.
If a time delay is chosen, the lamps will turn on for
the selected time. The time delay will be cancelled and
the exterior lamps will turn on automatically when
the key is removed from the ignition, or the vehicle is
unlocked using the remote keyless entry transmitter.
To program this mode, use the following procedure:
1. Press and release the set/reset button to scroll to
the selection to be programmed. Choose from
OFF, 15, 30, 60, or 90 seconds.
2. Press the options button again to advance to the
next screen.
3-55
Page 176 of 472
If LIGHTS and HORN are selected, the exterior lamps
will �ash when the LOCK button on the remote
keyless entry transmitter is pressed and the horn will
sound when the LOCK button on the remote keyless
entry transmitter is pressed again within �ve seconds of
the previous command.
To program this mode, use the following procedure:
1. Press the set/reset button to scroll to OFF, LIGHTS,
or LIGHTS and HORN.
2. Press the options button again to advance to the
next screen.
If the vehicle does not have a content theft-deterrent
system, the next screens with PROGRAMMING
FINISHED and DISPLAY OFF will appear.
If the vehicle does have a content theft-deterrent
system, the next screen will appear.
THEFT DETERRENT:The vehicle may have a content
theft-deterrent system. Once it is turned on, the
system will activate if someone tries to enter the vehicle
without using the remote keyless entry transmitter or
the correct key. This screen allows this feature to
be turned OFF or ON.
If OFF is selected, the theft-deterrent system will not
function.If ON is selected, the theft-deterrent system will be
activated.
To program this mode, use the following procedure:
1. Press the set/reset button to scroll to OFF or ON.
2. Press the options button again to advance to
the next screen.
KEY CYLINDER DISARM:If the vehicle has a content
theft-deterrent system, this screen allows this feature
to be turned OFF or ON.
If OFF is selected, the content theft-deterrent system
will not disarm when the vehicle is unlocked using
the door lock, or when someone tampers with the
door lock.
If ON is selected, the content theft-deterrent system
will disarm when the vehicle is unlocked using the door
key. This makes the vehicle more resistant to key
lock tampering.
To program this mode, use the following procedure:
1. Press the set/reset button to scroll to OFF or ON.
2. Press the options button again to advance to
the next screen.
3-58
Page 177 of 472
LOCK SWITCH ARM:If the vehicle has the content
theft-deterrent system and ON was selected on
the THEFT DETERRENT screen, this screen allows this
feature to be turned OFF or ON. If ON is selected,
the content theft-deterrent system starts the arming
process when a door lock switch is pressed while a
door is open.
If OFF is selected, the theft-deterrent system will not
activate this feature.
If ON is selected, the content theft-deterrent system will
arm when the doors are locked with the door lock
switch. The key must be removed from the ignition when
the doors are locked or the content theft-deterrent
system will not arm.
To program this mode, use the following procedure:
1. Press the set/reset button to scroll to OFF or ON.
2. Press the options button again to advance to
the next screen.REMOTE START:If your vehicle has the remote start
feature, this screen allows this feature to be turned
OFF or ON. The remote start feature allows you to start
the engine from outside of the vehicle using your
remote keyless entry transmitter. See “Remote Vehicle
Start” underRemote Keyless Entry System Operation
on page 2-4for more information.
If OFF is selected, the remote start feature will
be disabled.
If ON is selected, the remote start feature will
be enabled.
To program this mode, use the following procedure:
1. Press the set/reset button to scroll to OFF or ON.
2. Press the options button again to advance to
the next screen.
PROGRAMMING FINISHED will appear on the next
screen. This con�rms that the personal options
programming is complete.
DISPLAY OFF will appear on the next screen. The
screen will count down and then go blank. Press the
options button to advance to a new screen.
3-59
Page 178 of 472
DIC Controls and Displays (Uplevel
DIC with Trip Computer)
The Driver Information Center (DIC) control buttons and
the message display screen are located above the
radio. The DIC gives important safety and maintenance
facts concerning the vehicle. The status of many of
the vehicle’s systems along with driver personalization
menus and warning messages about the vehicle’s
systems may display on the DIC screen.
The outside temperature automatically appears on the
bottom right corner of the DIC display screen. If the
outside temperature is below 38°F (3°C), the temperature
reading will toggle between displaying the outside
temperature and the word ICE for two minutes. If there is
a problem with the system that controls the temperature
display, the letters OC (Open Circuit) or SC (Short
Circuit) will appear on the display. If this occurs, have the
vehicle serviced by
your GM dealer.
The vehicle’s transaxle position and the direction the
vehicle is traveling will also appear on the DIC screen.The compass is self-calibrating, which eliminates the
need to manually set the compass. However, under
certain circumstances, such as during a long distance
cross-country trip, it will be necessary to compensate for
compass variance and reset the zone through the
DIC. See “Setting the Compass” later in this section for
more information.
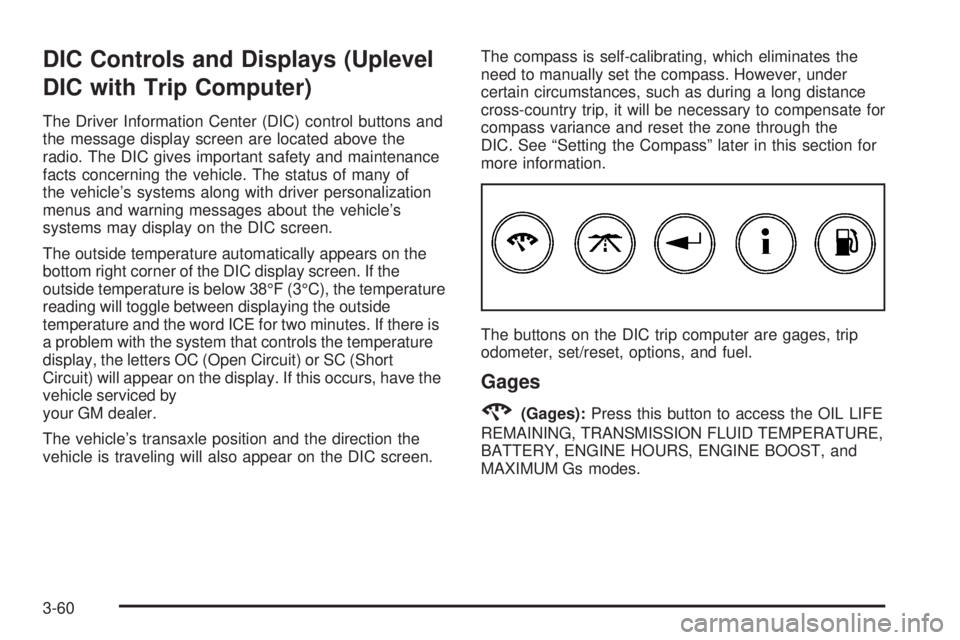
The buttons on the DIC trip computer are gages, trip
odometer, set/reset, options, and fuel.
Gages
2(Gages):Press this button to access the OIL LIFE
REMAINING, TRANSMISSION FLUID TEMPERATURE,
BATTERY, ENGINE HOURS, ENGINE BOOST, and
MAXIMUM Gs modes.
3-60
Page 179 of 472
OIL LIFE REMAINING:Press the gages button until
OIL LIFE REMAINING is displayed. This screen
indicates the percentage of oil life in the vehicle’s engine
that has not degraded. SeeEngine Oil on page 5-16
for more information.
After the oil has been changed in the vehicle, reset the
ENGINE OIL MONITOR screen in the options menu.
To reset the engine oil monitor system, seeEngine Oil
Life System on page 5-19.
Press the gages button again to advance to the
next screen.
TRANSMISSION FLUID TEMP:This screen displays
this message along with the temperature (F° or C°)
of the transmission �uid.
Press the gages button again to advance to the next
screen.
BATTERY:This screen displays the amount of volts
the battery is generating.
Your vehicle’s charging system regulates voltage based
on the state of the battery. The battery voltage may
�uctuate when viewing this information on the DIC. This
is normal.
Press the gages button again to advance to the
next screen.ENGINE HOURS:This screen shows the number of
cumulative hours the engine has operated while the key
was in the RUN position. This screen cannot be reset.
Press the gages button to scroll to the next screen.
ENGINE BOOST:If the vehicle has the supercharged
engine, this screen will appear. It shows a graphic
that indicates the amount of boost the engine is
receiving.
Press the gages button again to scroll to the
next screen.
MAXIMUM Gs:If you have the GXP option, this screen
will appear. The DIC monitors and keeps track of the
maximum levels for acceleration, deceleration, and
lateral-acceleration achieved since the screen was last
reset. If you try to select this screen while the vehicle
is moving, the message MAXIMUM Gs NOT
AVAILABLE WHILE MOVING will display. To view the
maximum accelerations achieved since last reset,
you must bring the vehicle to a stop. Then the values
will be displayed. To reset the values to zero, press and
hold the set/reset button.
Press the gages button again to scroll to the
next screen.
3-61
Page 180 of 472
Trip Odometer
3(Trip Odometer):Press this button to access the
Odometer, Trip Distances, AVERAGE SPEED, and
TIME ELAPSED modes.
Odometer:When the trip odometer button is pressed,
the �rst menu displayed on the DIC screen is the
odometer reading, or cumulative mileage of the vehicle.
The odometer cannot be reset.
Press the trip odometer button again to advance to the
next menu.
Trip Distances:This menu shows the distances that
the vehicle has driven between speci�c points. The
trip odometer will record the number of miles up
to 9,999.9 miles or 9 999.9 km travelled for up to
two trips. When 9,999.9 miles or 9 999.9 km is reached
for either trip, the odometer for that trip will go back
to zero.
To reset the trip distances, use the following procedures:
1. Press the trip odometer button again to access
TRIP A. Press the trip odometer button again to
access TRIP B. To reset the trip odometer(s) back to
zero miles or to zero kilometers, access the trip that
needs to be reset and press the set/reset button.
2. Press the trip odometer button again to access
the odometer.The trip odometer has a feature called the retro-active
reset. This can be used to set the trip odometer to
the number of miles (kilometers) driven since the ignition
was last turned on. This can be used if the trip
odometer is not reset at the beginning of the trip.
To use the retro-active reset feature, press and hold the
set/reset button for at least three seconds. The trip
odometer will display the number of miles or kilometers
driven since the ignition was last turned on and the
vehicle was moving. Once the vehicle begins moving,
the trip odometer will accumulate mileage. For example,
if the vehicle was driven 5.0 miles (8.0 km) before it
is started again, and then the retro-active reset feature
is activated, the display will show 5.0 miles (8.0 km).
As the vehicle begins moving, the display will then
increase to 5.1 miles (8.2 km), 5.2 miles (8.4 km), etc.
If the retro-active reset feature is activated after the
vehicle is started, but before it begins moving, the
display will show the number of miles or kilometers that
were driven during the last ignition cycle.
Average Speed:The average speed is displayed in
miles per hour (mph) or kilometers per hour (km/h). The
average speed is calculated from the various vehicle
speeds recorded since the last reset of this menu item.
To reset the average speed, press the set/reset
button. The display will return to zero.
Press the trip odometer button again to advance to the
next screen.
3-62