tires PONTIAC GTO 2005 User Guide
[x] Cancel search | Manufacturer: PONTIAC, Model Year: 2005, Model line: GTO, Model: PONTIAC GTO 2005Pages: 318, PDF Size: 2.06 MB
Page 173 of 318
Here are some things you can check before a trip:
•Windshield Washer Fluid:Is the reservoir full? Are
all windows clean inside and outside?
•Wiper Blades:Are they in good shape?
•Fuel, Engine Oil, Other Fluids:Have you checked
all levels?
•Lamps:Are they all working? Are the lenses clean?
•Tires:They are vitally important to a safe,
trouble-free trip. Is the tread good enough for
long-distance driving? Are the tires all inflated to the
recommended pressure?
•Weather Forecasts:What is the weather outlook
along your route? Should you delay your trip a
short time to avoid a major storm system?
•Maps:Do you have up-to-date maps?
Highway Hypnosis
Is there actually such a condition as highway hypnosis?
Or is it just plain falling asleep at the wheel? Call it
highway hypnosis, lack of awareness, or whatever.
There is something about an easy stretch of road with
the same scenery, along with the hum of the tires on the
road, the drone of the engine, and the rush of the
wind against the vehicle that can make you sleepy. Do
not let it happen to you! If it does, your vehicle can
leave the road in less than a second, and you could
crash and be injured.
What can you do about highway hypnosis? First, be
aware that it can happen.
Then here are some tips:
•Make sure your vehicle is well ventilated, with a
comfortably cool interior.
•Keep your eyes moving. Scan the road ahead and
to the sides. Check your rearview mirrors and your
instruments frequently.
•If you get sleepy, pull off the road into a rest,
service, or parking area and take a nap, get some
exercise, or both. For safety, treat drowsiness
on the highway as an emergency.
4-21
Page 174 of 318
Hill and Mountain Roads
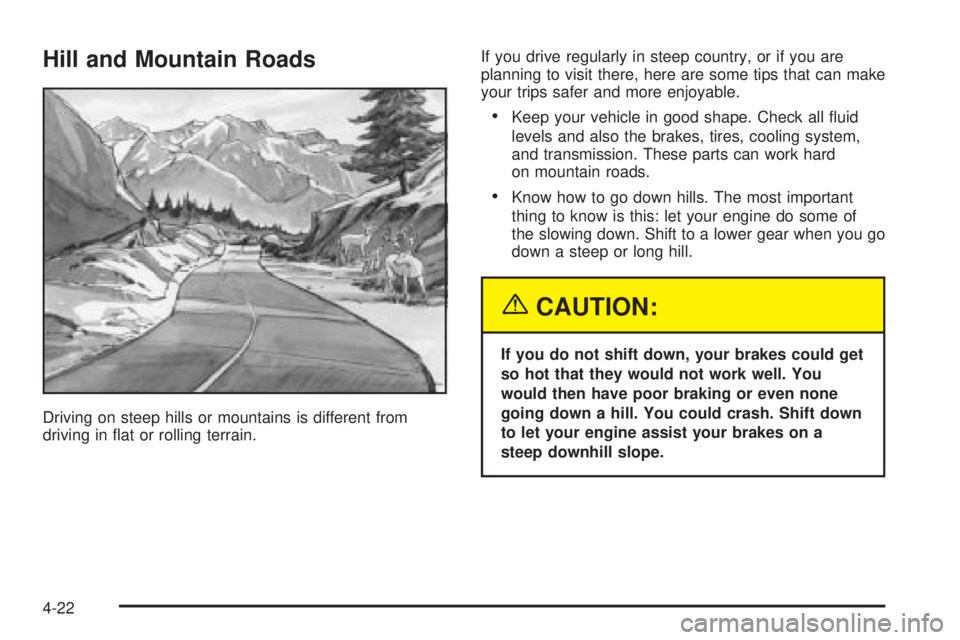
Driving on steep hills or mountains is different from
driving in flat or rolling terrain.If you drive regularly in steep country, or if you are
planning to visit there, here are some tips that can make
your trips safer and more enjoyable.
•Keep your vehicle in good shape. Check all fluid
levels and also the brakes, tires, cooling system,
and transmission. These parts can work hard
on mountain roads.
•Know how to go down hills. The most important
thing to know is this: let your engine do some of
the slowing down. Shift to a lower gear when you go
down a steep or long hill.
{CAUTION:
If you do not shift down, your brakes could get
so hot that they would not work well. You
would then have poor braking or even none
going down a hill. You could crash. Shift down
to let your engine assist your brakes on a
steep downhill slope.
4-22
Page 176 of 318

Winter Driving
Here are some tips for winter driving:
•Have your vehicle in good shape for winter.
•You may want to put winter emergency supplies in
your trunk.
Also seeTires on page 5-52.Include an ice scraper, a small brush or broom, a
supply of windshield washer fluid, a rag, some winter
outer clothing, a small shovel, a flashlight, a red
cloth, and a couple of reflective warning triangles. And,
if you will be driving under severe conditions, include
a small bag of sand, a piece of old carpet, or a couple of
burlap bags to help provide traction. Be sure you
properly secure these items in your vehicle.
4-24
Page 177 of 318

Driving on Snow or Ice
Most of the time, those places where your tires meet
the road probably have good traction.
However, if there is snow or ice between your tires and
the road, you can have a very slippery situation. You
will have a lot less traction, or grip, and will need to be
very careful.
What is the worst time for this? Wet ice. Very cold snow
or ice can be slick and hard to drive on. But wet ice
can be even more trouble because it may offer the leasttraction of all. You can get wet ice when it is about
freezing, 32°F (0°C), and freezing rain begins to fall. Try
to avoid driving on wet ice until salt and sand crews
can get there.
Whatever the condition — smooth ice, packed, blowing,
or loose snow — drive with caution.
Traction control improves your ability to accelerate when
driving on a slippery road. Even though your vehicle
has a traction control system (TCS), you will want
to slow down and adjust your driving to the road
conditions. Under certain conditions, you may want to
turn the TCS off, such as when driving through
deep snow and loose gravel, to help maintain vehicle
motion at lower speeds. SeeTraction Control System
(TCS) on page 4-8. Also see “Winter Tires” underTires
on page 5-52.
4-25
Page 180 of 318

If Your Vehicle is Stuck in Sand,
Mud, Ice or Snow
In order to free your vehicle when it is stuck, you will
need to spin the wheels, but you do not want to
spin your wheels too fast. The method known as rocking
can help you get out when you are stuck, but you
must use caution.
{CAUTION:
If you let your tires spin at high speed, they can
explode, and you or others could be injured.
And, the transmission or other parts of the
vehicle can overheat. That could cause an
engine compartment re or other damage.
When you are stuck, spin the wheels as little as
possible. Do not spin the wheels above 35 mph
(55 km/h) as shown on the speedometer.
Notice:Spinning your wheels can destroy parts of
your vehicle as well as the tires. If you spin the
wheels too fast while shifting your transmission
back and forth, you can destroy your transmission.
For more information about using tire chains on your
vehicle, seeTire Chains on page 5-67.
Rocking Your Vehicle to Get It Out
First, turn your steering wheel left and right. That
will clear the area around your front wheels. If your
vehicle has traction control, you should turn the system
off. SeeTraction Control System (TCS) on page 4-8.
Then shift back and forth between REVERSE (R) and a
forward gear, spinning the wheels as little as possible.
For a manual transmission, shift slowly between
either FIRST (1) or SECOND (2) and REVERSE (R),
allowing the wheels to stop before shifting into
gear. Release the accelerator pedal while you shift, and
press lightly on the accelerator pedal when the
transmission is in gear. By slowly spinning your wheels
in the forward and reverse directions, you will cause
a rocking motion that may free your vehicle. If that does
not get you out after a few tries, you may need to be
towed out. If you do need to be towed out, seeTowing
Your Vehicle on page 4-34.
4-28
Page 182 of 318

The Tire and Loading Information label also shows the
tire size of the original equipment tires (C) and the
recommended cold tire inflation pressures (D). For more
information on tires and inflation seeTires on page 5-52
andInflation - Tire Pressure on page 5-59.
There is also important loading information on the
Certification label. It tells you the Gross Vehicle Weight
Rating (GVWR) and the Gross Axle Weight Rating
(GAWR) for the front and rear axle; see “Certification
Label” later in this section.
Steps for Determining Correct Load Limit
1. Locate the statement “The combined weight of
occupants and cargo should never exceed
XXX kg or XXX pounds” on your vehicle placard.
2. Determine the combined weight of the driver and
passengers that will be riding in your vehicle.
3. Subtract the combined weight of the driver and
passengers from XXX kilograms or XXX pounds.4. The resulting figure equals the available amount of
cargo and luggage load capacity. For example, if
the “XXX” amount equals 1400 lbs and there will be
five 150 lb passengers in your vehicle, the amount
of available cargo and luggage load capacity is
650 lbs (1400−750 (5 x 150) = 650 lbs).
5. Determine the combined weight of luggage and
cargo being loaded on the vehicle. That weight
may not safely exceed the available cargo
and luggage load capacity calculated in Step 4.
6. If your vehicle will be towing a trailer, the load from
your trailer will be transferred to your vehicle.
Consult this manual to determine how this reduces
the available cargo and luggage load capacity of
your vehicle.
If your vehicle can tow a trailer, seeTowing a Trailer
on page 4-34for important information on towing a
trailer, towing safety rules, and trailering tips.
4-30
Page 187 of 318
Service............................................................5-3
Doing Your Own Service Work.........................5-4
Adding Equipment to the Outside of
Your Vehicle..............................................5-5
Fuel................................................................5-5
Gasoline Octane............................................5-5
Gasoline Specifications....................................5-5
California Fuel...............................................5-6
Additives.......................................................5-6
Fuels in Foreign Countries...............................5-7
Filling the Tank..............................................5-8
Filling a Portable Fuel Container.....................5-10
Checking Things Under the Hood....................5-10
Hood Release..............................................5-11
Engine Compartment Overview.......................5-12
Engine Oil...................................................5-13
Engine Oil Life System..................................5-16
Engine Air Cleaner/Filter................................5-18
Automatic Transmission Fluid.........................5-19
Manual Transmission Fluid.............................5-21
Hydraulic Clutch...........................................5-22
Engine Coolant.............................................5-23
Radiator Pressure Cap..................................5-26
Engine Overheating.......................................5-26
Cooling System............................................5-29Power Steering Fluid.....................................5-34
Windshield Washer Fluid................................5-35
Brakes........................................................5-36
Battery........................................................5-39
Jump Starting...............................................5-40
Headlamp Aiming...........................................5-45
Bulb Replacement..........................................5-47
Halogen Bulbs..............................................5-47
Headlamps..................................................5-47
Front Turn Signal and Parking Lamps..............5-49
Taillamps, Turn Signal, Stoplamps and
Back-up Lamps.........................................5-50
Replacement Bulbs.......................................5-51
Windshield Wiper Blade Replacement..............5-52
Tires..............................................................5-52
Tire Sidewall Labelling...................................5-54
Tire Terminology and Definitions.....................5-56
Inflation - Tire Pressure.................................5-59
Tire Inspection and Rotation...........................5-62
When It Is Time for New Tires.......................5-63
Buying New Tires.........................................5-64
Uniform Tire Quality Grading..........................5-64
Wheel Alignment and Tire Balance..................5-66
Wheel Replacement......................................5-66
Section 5 Service and Appearance Care
5-1
Page 188 of 318
Tire Chains..................................................5-67
If a Tire Goes Flat........................................5-68
Changing a Flat Tire.....................................5-68
Removing the Spare Tire and Tools................5-70
Removing the Flat Tire and Installing
the Spare Tire..........................................5-71
Storing a Flat or Spare Tire and Tools............5-75
Compact Spare Tire......................................5-76
Appearance Care............................................5-76
Fabric/Carpet...............................................5-77
Vinyl...........................................................5-78
Leather.......................................................5-79
Instrument Panel..........................................5-79
Interior Plastic Components............................5-79
Glass Surfaces.............................................5-79
Care of Safety Belts......................................5-79
Weatherstrips...............................................5-80
Washing Your Vehicle...................................5-80
Cleaning Exterior Lamps/Lenses.....................5-80Finish Care..................................................5-80
Windshield and Wiper Blades.........................5-81
Aluminum Wheels.........................................5-81
Tires...........................................................5-82
Sheet Metal Damage.....................................5-82
Finish Damage.............................................5-82
Underbody Maintenance................................5-83
Chemical Paint Spotting.................................5-83
Vehicle Care/Appearance Materials..................5-84
Vehicle Identication......................................5-85
Vehicle Identification Number (VIN).................5-85
Service Parts Identification Label.....................5-85
Electrical System............................................5-85
Add-On Electrical Equipment..........................5-85
Fuses and Circuit Breakers............................5-86
Instrument Panel Fuse Block..........................5-86
Engine Compartment Fuse Block....................5-88
Capacities and Specications..........................5-90
Section 5 Service and Appearance Care
5-2
Page 224 of 318

Brake Wear
Your vehicle has four-wheel disc brakes.
Some driving conditions or climates may cause a brake
squeal when the brakes are first applied or lightly
applied. This does not mean something is wrong with
your brakes.
Properly torqued wheel nuts are necessary to help
prevent brake pulsation. When tires are rotated, inspect
brake pads for wear and evenly tighten wheel nuts in
the proper sequence to GM torque specifications.
Brake linings should always be replaced as complete
axle sets.
Brake Pedal Travel
See your dealer if the brake pedal does not return to
normal height, or if there is a rapid increase in
pedal travel. This could be a sign of brake trouble.
Brake Adjustment
Every time you make a moderate brake stop, your disc
brakes adjust for wear. If you rarely make a moderate
or heavier stop, then your brakes might not adjust
correctly. If you drive in that way, then — very
carefully — make a few moderate brake stops about
every 1,000 miles (1 600 km), so your brakes will
adjust properly.
Replacing Brake System Parts
The braking system on a vehicle is complex. Its many
parts have to be of top quality and work well together if
the vehicle is to have really good braking. Your
vehicle was designed and tested with top-quality
GM brake parts. When you replace parts of your braking
system — for example, when your brake linings wear
down and you need new ones put in — be sure you get
new approved GM replacement parts. If you do not,
your brakes may no longer work properly. For example,
if someone puts in brake linings that are wrong for
your vehicle, the balance between your front and rear
brakes can change — for the worse. The braking
performance you have come to expect can change in
many other ways if someone puts in the wrong
replacement brake parts.
5-38
Page 231 of 318
Headlamp Aiming
The vehicle has a visual optical headlamp aiming
system. The aim has been preset at the factory and
should need no further adjustment
However, if the vehicle is damaged in an accident, the
headlamp aim may be affected and adjustment may
be necessary.
If oncoming vehicles flash their high beams at you, this
may also mean the vertical aim needs to be adjusted.
It is recommended that the vehicle is taken to your
dealer for service if the headlamps need to be re-aimed.
It is possible however, to re-aim the headlamps as
described in the following procedure.
The vehicle should be properly prepared as follows:
•The vehicle should be placed so the headlamps
are 15 ft. (4.6 m) from a light colored wall or
other flat surface.
•The vehicle must have all four tires on a perfectly
level surface which is level all the way to the wall
or other flat surface.
•The vehicle should be placed so it is perpendicular
to the wall or other flat surface.
•The vehicle should not have any snow, ice, or mud
on it.
•The vehicle should be fully assembled and all other
work stopped while headlamp aiming is being
performed.
•The vehicle should be normally loaded with a full
tank of fuel and one person or 160 lbs (75 kg)
sitting on the driver’s seat.
•Tires should be properly inflated.
•The spare tire is in its original location in
the vehicle.
Headlamp aiming is done with the vehicle’s low-beam
headlamps. The high-beam headlamps will be correctly
aimed if the low-beam headlamps are aimed properly.
5-45