PONTIAC VIBE 2010 Owners Manual
Manufacturer: PONTIAC, Model Year: 2010, Model line: VIBE, Model: PONTIAC VIBE 2010Pages: 318, PDF Size: 1.7 MB
Page 111 of 318

Automatic Headlamp
System
When it is dark enough outside,
the automatic headlamp system
turns on the low-beam headlamps
at the normal brightness along with
other lamps such as the taillamps,
sidemarker, parking lamps and
instrument panel lights. An indicator
light on the instrument panel comes
on when the headlamps are on.
SeeInstrument Cluster on page 4-9 .
If the vehicle is driven through a
parking garage, overcast weather,
or a tunnel, the automatic headlamp
system may turn on. There is a
delay before the lights turn on when
starting the car at night.
Do not cover the automatic light
sensor, located on the top left corner
of the instrument panel. If the sensor
is covered the headlamps will stay on
continuously.
Hazard Warning Flashers
|
(Hazard Warning Flasher):
Press this button located on the
instrument panel, to make the front
and rear turn signal lamps flash on
and off. This warns others that you
are having trouble.
Press
|again to turn the
flashers off.
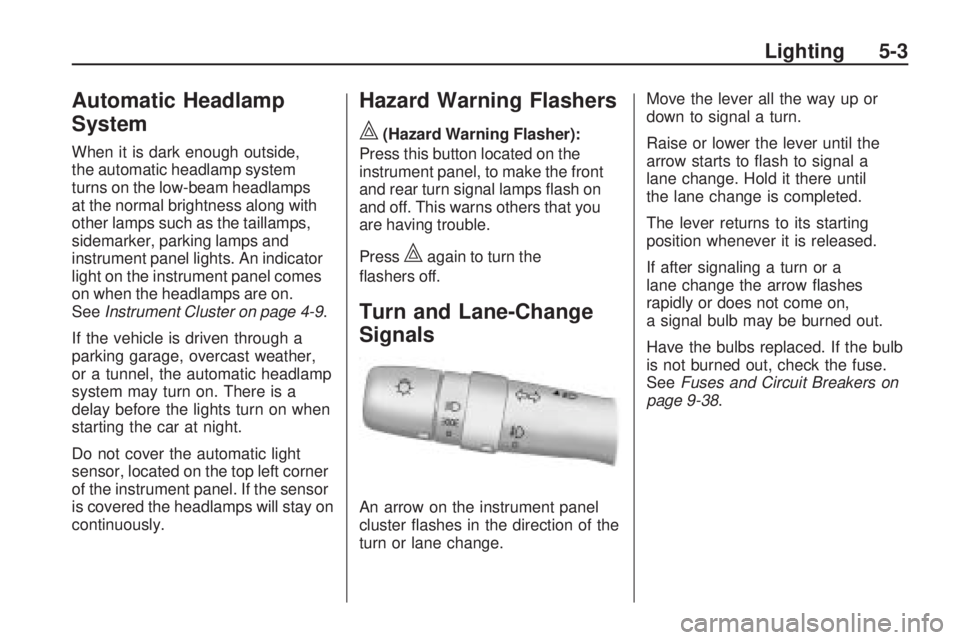
Turn and Lane-Change
Signals
An arrow on the instrument panel
cluster flashes in the direction of the
turn or lane change. Move the lever all the way up or
down to signal a turn.
Raise or lower the lever until the
arrow starts to flash to signal a
lane change. Hold it there until
the lane change is completed.
The lever returns to its starting
position whenever it is released.
If after signaling a turn or a
lane change the arrow flashes
rapidly or does not come on,
a signal bulb may be burned out.
Have the bulbs replaced. If the bulb
is not burned out, check the fuse.
See
Fuses and Circuit Breakers on
page 9-38.
Lighting 5-3
Page 112 of 318

Fog Lamps
#
(Fog Lamps):For vehicles with
fog lamps, move the band on the turn
signal/multifunction lever to
#to turn
them on. The fog lamps only come
on when the headlamps are on
low beam.
Some localities have laws that
require the headlamps to be
on along with the fog lamps.
Interior Lighting
Instrument Panel
Illumination Control
Use the trip odometer knob located
on the right side of the instrument
panel cluster to adjust the instrument
panel brightness.
Turn the knob clockwise or
counterclockwise to brighten
or dim the instrument panel.
The brightness of the instrument
panel lights decreases when
the headlamps are on.
Dome Lamps
The interior lamps control is located
on the overhead lamp. To change
the interior lamps setting, slide
the switch to one of the following
positions:
OFF: Turns the lamp off.
ON: Keeps the lamp on all the time.
Door: Turns the lamp on when
any door or the liftgate is opened.
The lamp goes off when all the side
doors and the liftgate are closed.
If the lamp switch is in the door
position and a door is left open,
the lamps will go off automatically
after 20 minutes.
5-4 Lighting
Page 113 of 318

Reading Lamps
For vehicles with a sunroof, there is
a reading lamp near the sunroof
switch.
OFF:Turns the lamp off.
ON: Keeps the lamp on all the time.
Door: Turns the lamp on when
any door or the liftgate is opened.
The lamp goes off when all the side
doors and the liftgate are closed.
Lighting Features
Entry Lighting
After all the doors and liftgate are
closed, and the key is out of the
ignition, in LOCK/OFF or ACC/
ACCESSORY, the light remains
on for about 15 seconds and then
goes out, except under the following
conditions:
•The ignition is turned to ACC/
ACCESSORY or ON/RUN after
all the doors and liftgate are
closed.
•All the doors and the liftgate are
locked and the light is still on.
When any door is unlocked with the
key or Remote Keyless Entry (RKE)
system transmitter, the light comes
on for 15 seconds, even if the door is
not opened.
Battery Power Protection
The vehicle has a battery saver
feature designed to protect
the vehicle’s battery.
This feature will only work with the
dome lamp in the Door position.
When any interior lamp is left on
and the ignition is turned off, the
battery rundown protection system
automatically turns the lamp off after
20 minutes. This prevents draining of
the battery.
Lighting 5-5
Page 114 of 318

✍NOTES
5-6 Lighting
Page 115 of 318

Infotainment
System
IntroductionIntroduction.........................
.6-1
Operation ............................
.6-2
RadioAM-FM Radio......................
.6-4
Satellite Radio .....................
.6-6
Radio Reception ..................
.6-8
Fixed Mast Antenna ..............
.6-8
Satellite Radio Antenna ..........6-9
Audio PlayersCD Player...........................
.6-9
MP3 .................................
.6-11
Auxiliary Devices ................
.6-14
Introduction
Read the following pages to
become familiar with the audio
system’s features.
{CAUTION
Taking your eyes off the road for
extended periods could cause a
crash resulting in injury or death
to you or others. Do not give
extended attention to
entertainment tasks while driving.
This system provides access to
many audio and non audio listings.
To minimize taking your eyes
off the road while driving, do the
following while the vehicle is parked:
•Become familiar with the
operation and controls of
the audio system.
•Set up the tone, speaker
adjustments, and preset radio
stations. For more information, see
Defensive
Driving on page 8-2.
Notice: Contact your dealer/
retailer before adding any
equipment.
Adding audio or communication
equipment could interfere with the
operation of the vehicle’s engine,
radio, or other systems, and could
damage them. Follow federal
rules covering mobile radio
and telephone equipment.
The vehicle has Retained Accessory
Power (RAP). With RAP, the audio
system can be played even after the
ignition is turned off. See Retained
Accessory Power (RAP) on
page 8-18 for more information.
Infotainment System 6-1
Page 116 of 318

Operation
Playing the Radio
PWR VOL (Power/Volume):Press
to turn the radio on and off. Turn
the PWR VOL knob to adjust
the volume.
CLOCK: Press to adjust the time.
Setting the Clock
The date does not automatically
display. To see the date press the
CLOCK button while the radio is on. The date display times out and goes
back to the normal radio and time
display. To adjust the time and date:
1. Turn the ignition key to
ACC/ACCESSORY or ON/RUN.
2. Press the PWR VOL (Power/ Volume) knob to turn on the radio.
3. Press the CLOCK button, and the HR, MIN, MM, DD, YYYY (hour,
minute, month, day, and year)
categories display.
4. Press the button under the category to be adjusted.
5. To increase the time or date, do one of the following: turn
the TUNE ADJ (Tune/Adjust)
knob clockwise, press SEEK/
TRACK
y, press FWD(
(Forward), or continue to press
the button under the category to
be adjusted.
Radio with CD (MP3) shown, Radio with CD (Base) similar
6-2 Infotainment System
Page 117 of 318

6. To decrease the time ordate, do one of the following:
turn the TUNE ADJ knob
counterclockwise, press
SEEK/TRACK
z, or press
REV
)(Reverse).
7. To save the settings, press the CLOCK button, or let
the display time out.
To change the time default setting
from 12 hour to 24 hour, and to
change the date default setting from
month/day/year to day/month/year:
1. Press the CLOCK button and then the button below the forward
arrow label on the display.
The 12H and 24H, and the
date MMDD (month and day)
and DDMM (day and month)
categories will display. 2. Press the button below the
12H or 24H label, and the date
MMDD (month and day) or
DDMM (day and month) label
to choose how the radio displays
the time and date.
3. To save the settings, press the CLOCK button, or let
the screen time out.
Setting the Tone
(Bass/Midrange/Treble)
To adjust the bass, midrange, and
treble:
1. Press the TUNE ADJ knob.
2. Turn the TUNE ADJ knob, orpress the button below BASS,
MID, or TREB so it is highlighted.
3. Press the TUNE ADJ knob to select BASS, MID, or TREB.
4. Turn the TUNE ADJ knob to adjust the level.
5. Press the TUNE ADJ knob to set the adjustment. EQ (Equalization):
To select
customized equalization settings:
1. Press the EQ button.
2. Press the button below the tab: POP, ROCK, COUNTRY,
TALK, JAZZ, and CLASSICAL.
Adjusting the Speakers
(Balance/Fade)
To adjust the balance or fade,
perform the following steps:
1. Press the TUNE ADJ knob.
2. Turn the TUNE ADJ knobor press the button below
BAL FADE so it is highlighted.
3. Press the TUNE ADJ knob to select the tone to adjust.
4. Turn the TUNE ADJ knob to adjust the audio balance to the
right or the left speakers and the
fade to adjust the audio volume
to the front or rear speakers.
5. Press the TUNE ADJ knob to set the adjustment.
Infotainment System 6-3
Page 118 of 318

Setting Preset Stations
FAV (Favorites):Press to select up
to six pages of favorites. Each page
contains six favorite stations, and
each page of favorites can contain
any combination of AM, FM, or XM™
(if equipped) stations.
For vehicles without XM, only
four pages of favorites are available.
To setup the number of favorites
pages:
1. Press the MENU button to display the radio setup menu.
2. Press the button located below the FAV 1-6 label. 3. Select the desired number of
favorites pages by pressing
the button located below the
displayed page numbers.
4. Press the FAV button, or let the menu time out, to return to the
radio screen.
To store a radio station as a
favorite:
1. Tune to the desired radio station.
2. Press the FAV button to display the page where it can be stored.
3. Press and hold one of the six buttons until a beep sounds.
4. Repeat the steps to store another radio station.
Radio
AM-FM Radio
Radio Data System (RDS)
The audio system has Radio Data
System (RDS). RDS features are
available for use only on FM stations
that broadcast RDS information.
With RDS:
•Stations can be selected based
on programming.
•Stations with traffic
announcements can be selected.
•Announcements concerning local
and national emergencies can be
received.
•Messages display from radio
stations.
6-4 Infotainment System
Page 119 of 318

RDS relies on receiving specific
information from radio stations and
only works when the information is
available. In rare cases, a radio
station could broadcast incorrect
information that causes the radio
features to work improperly. Contact
the radio station if this happens.
When the radio is tuned to an
RDS station, the station name
or call letters display instead of the
frequency. RDS stations can also
provide the time of day, a program
type (PTY) for current programming,
and the name of the program being
broadcast.
RDS Messages
ALERT:Displays when local
or national emergency
announcements are received.
If the radio tunes to a related network
station for the announcement,
it returns to the original station
when the announcement ends. The announcement should be heard
even if the volume is low or a CD is
playing. If a CD is playing, it will stop
playing during the announcement.
•The RDS alert feature is not
supported by all RDS radio
stations.
•The RDS alert feature cannot be
turned off.
•Alert is not affected by tests of the
emergency broadcast system.
MSG (Message): Displays if the
current RDS station has a message.
The message displays the artist,
song title, call in phone numbers,
etc. If the entire message does
not display, parts of the message
appear every three seconds until
the message is completed.
MSG disappears from the display
once the completed message
has displayed.
Finding a Station
BAND: Press to select AM, FM, or
XM (if equipped).
TUNE ADJ (Tune/Adjust): Turn to
select radio stations.
ySEEK TRACKz: Press to go
to the previous or next radio station.
The radio only stops at stations
with a strong signal.
SCAN: Press to enter scan mode.
The radio will display Scanning, then
goes to the next station, plays for a
few seconds, then continues on to
the next station. Press SCAN again
to stop scanning. The radio only
stops at stations with a strong signal.
INFO (Information) (FM-RDS,
XM™ Satellite Radio Service, and
MP3 Features): Press to display
information for the current FM-RDS,
XM station, or MP3 song. Choose
from Channel, Song, Artist, and
CAT (category).
NO INFO displays when information
is not available from the station.
Infotainment System 6-5
Page 120 of 318

Satellite Radio
Vehicles with an XM™ Satellite
Radio tuner and a valid XM Satellite
Radio subscription can receive
XM programming.
XM Satellite Radio Service
XM is a satellite radio service that
is based in the 48 contiguous
United States and 10 Canadian
provinces. XM Satellite Radio
has a wide variety of programming
and commercial-free music,
coast-to-coast, and in digital-quality
sound. During your trial or when
you subscribe, you will get unlimited
access to XM Radio Online for when
you are not in your vehicle. A service
fee is required to receive the XM
service. For more information,
contact XM at www.xmradio.com
or call 1-800-929-2100 in the U.S.
and www.xmradio.ca or call
1-877-438-9677 in Canada.
Finding a Station
BAND:Press to select AM, FM,
or XM.
TUNE ADJ (Tune/Adjust): Turn to
select radio stations.
ySEEK TRACKz: Press to go
to the previous or next radio station.
The radio only stops at stations
with a strong signal.
SCAN: Press to enter scan mode.
The radio will display Scanning, then
goes to the next station, plays for a
few seconds, then continues on to
the next station. Press SCAN again
to stop scanning. The radio only
stops at stations with a strong signal.
INFO (Information) (FM-RDS,
XM™ Satellite Radio Service, and
MP3 Features): Press to display
information for the current FM-RDS,
XM station, or MP3 song. Choose
from Channel, Song, Artist, and
CAT (category).
NO INFO displays when information
is not available from the station.
Finding a Category (CAT)
Station
XM stations are organized in
categories.
To select and find a desired
category:
1. Press the CAT button.
2. Turn the TUNE ADJ knob to select a category.
3. Press
yorzto go to the
category’s first station, when the
desired category is displayed.
4. Press
yorzto go to another
station within the selected
category.
5. Press CAT to exit the category select mode or wait for CAT to
time out.
If CAT times out and is no longer on
the display, return to Step 1.
NOT FOUND displays if the desired
category cannot be found.
6-6 Infotainment System