instrument panel PORSCHE 911 TURBO 2014 6.G Service Manual
[x] Cancel search | Manufacturer: PORSCHE, Model Year: 2014, Model line: 911 TURBO, Model: PORSCHE 911 TURBO 2014 6.GPages: 300, PDF Size: 10.61 MB
Page 115 of 300
Instrument Panel and Multi-Function Display 113
Warning light
The warning light in the instrument panel lights up: – When a loss in pressure has been detected (warning light: lights up continuously).– In the event of a defect in TPMS or a temporary fault (warning light: flashes for 60 seconds, then lights up continuously).– When learning new fitted wheels/wheel transmitters, as long as the vehicle’s own wheels have not yet been recognized (warning light: flashes for 60 seconds, then lights up continuously).
A warning message also appears on the multi- function display in the instrument panel.fPlease see the chapter “OVERVIEW OF WARNING AND INFORMATION MESSAGES” on page 129.
The tire pressure warning light on the instrument panel goes out only when the cause of the fault has been rectified.
Changing a wheel and replacing tires
fNew wheels must be fitted with radio transmitters for Tire Pressure Monitoring System. Before tires are changed, the battery charge condition of the wheel transmitters should be checked.fPlease contact an authorized Porsche dealer.fSwitch off the ignition when changing a wheel.
The tire settings on the multi-function display must be updated after changing a wheel.If the tire settings are not updated, the message “Tire change? Update settings” is displayed on the multi-function display.fUpdate the multi-function display settings the next time the vehicle is stationary.
Pressure increase as the result of temperature increase
In accordance with physical principles, the tire pressure changes as the temperature changes.For every 18 °F (10 °C) change in temperature, the tire pressure increases or decreases by around 1.5 psi/0.1 bar/10 kPa.
Partial monitoring
Monitoring of the other wheels is continued if there is a fault in one or two wheel transmitters.– The tire pressure warning light lights up.– The message “Restricted monitoring” appears on the multi-function display.– No tire pressures are displayed on the multi-function display for wheels with faulty wheel transmitters.
No monitoring
In the event of faults, Tire Pressure Monitoring System cannot monitor the tire pressure. The warning light on the instrument panel lights up and a corresponding message appears on the multi-function display.
Monitoring is not active: – In the event of a defect in TPMS or if more than 2 wheel transmitters are defective.– If wheel transmitters for Tire Pressure Monitoring System are missing.– During the learning phase after the tire settings have been updated.– After a wheel change without updating the tire settings.– If more than four wheel transmitters are recognized.– If there is external interference by other radio sources, e.g. wireless headphones.– If tire temperatures are too high.fPlease see the chapter “OVERVIEW OF WARNING AND INFORMATION MESSAGES” on page 129.
14_991_Turbo_21.book Seite 113 Mittwoch, 9. April 2014 2:19 14
Page 116 of 300
114 Instrument Panel and Multi-Function Display
Allwheel Menu
(Porsche Traction Management PTM)
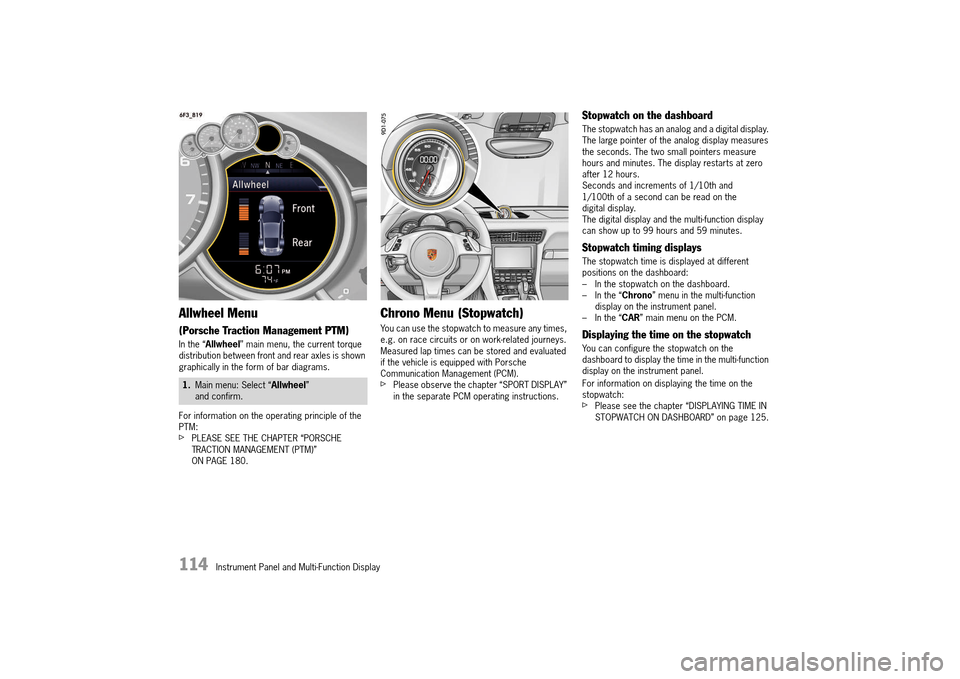
In the “Allwheel” main menu, the current torque distribution between front and rear axles is shown graphically in the form of bar diagrams.
For information on the operating principle of the PTM:fPLEASE SEE THE CHAPTER “PORSCHE TRACTION MANAGEMENT (PTM)” ON PAGE 180.
Chrono Menu (Stopwatch)
You can use the stopwatch to measure any times, e.g. on race circuits or on work-related journeys. Measured lap times can be stored and evaluated if the vehicle is equipped with Porsche Communication Management (PCM).fPlease observe the chapter “SPORT DISPLAY” in the separate PCM operating instructions.
Stopwatch on the dashboard
The stopwatch has an analog and a digital display. The large pointer of the analog display measures the seconds. The two small pointers measure hours and minutes. The display restarts at zero after 12 hours.Seconds and increments of 1/10th and 1/100th of a second can be read on the digital display. The digital display and the multi-function display can show up to 99 hours and 59 minutes.
Stopwatch timing displays
The stopwatch time is displayed at different positions on the dashboard:– In the stopwatch on the dashboard.– In the “ Chrono” menu in the multi-function display on the instrument panel.– In the “ CAR” main menu on the PCM.
Displaying the time on the stopwatch
You can configure the stopwatch on the dashboard to display the time in the multi-function display on the instrument panel.
For information on displaying the time on the stopwatch:fPlease see the chapter “DISPLAYING TIME IN STOPWATCH ON DASHBOARD” on page 125.
1. Main menu: Select “Allwheel” and confirm.
14_991_Turbo_21.book Seite 114 Mittwoch, 9. April 2014 2:19 14
Page 117 of 300
Instrument Panel and Multi-Function Display 115
Chrono on multi-function display
All stopwatch displays are started and stopped in the “ Chrono” menu on the multi-function display.
For instructions on using the multi-function display:fPlease see the chapter “OPERATING THE MULTI-FUNCTION DISPLAY ON THE INSTRUMENT PANEL” on page 96.
Information
If you exit the “ Chrono” menu while the stopwatch is running, measurement will continue.
The stopwatch stops after the ignition is switched off. If the ignition is switched on again within approximately 4 minutes, the stopwatch will continue to run.
The only way to reset the stopwatch to zero is by selecting “ Reset” in the “Chrono” menu.
For information on resetting the stopwatch:fPlease see the chapter “RESETTING THE STOPWATCH TIME” on page 116.
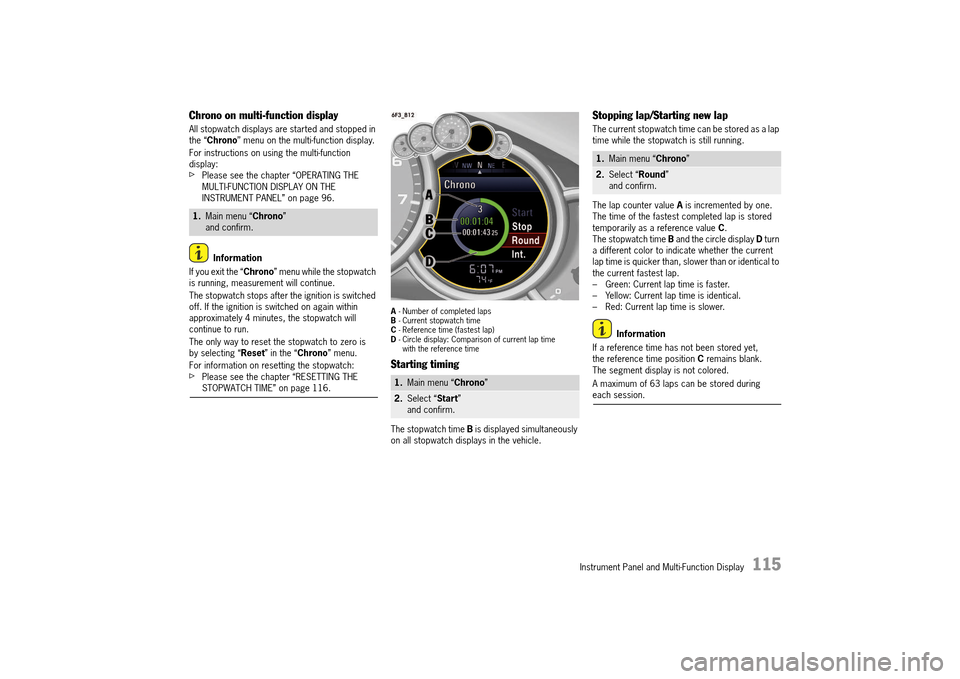
A - Number of completed laps B - Current stopwatch time C - Reference time (fastest lap) D - Circle display: Comparison of current lap time with the reference time
Starting timing
The stopwatch time B is displayed simultaneously on all stopwatch displays in the vehicle.
Stopping lap/Starting new lap
The current stopwatch time can be stored as a lap time while the stopwatch is still running.
The lap counter value A is incremented by one. The time of the fastest completed lap is stored temporarily as a reference value C. The stopwatch time B and the circle display D turn a different color to indicate whether the current lap time is quicker than, slower than or identical to the current fastest lap.– Green: Current lap time is faster.– Yellow: Current lap time is identical.– Red: Current lap time is slower.
Information
If a reference time has not been stored yet, the reference time position C remains blank. The segment display is not colored.
A maximum of 63 laps can be stored during each session.
1. Main menu “Chrono” and confirm.
1. Main menu “Chrono”
2.Select “Start” and confirm.
1. Main menu “Chrono”
2.Select “Round” and confirm.
14_991_Turbo_21.book Seite 115 Mittwoch, 9. April 2014 2:19 14
Page 118 of 300
116 Instrument Panel and Multi-Function Display
Storing intermediate time
You can store an intermediate time while the stopwatch is still running.
The intermediate time is displayed temporarily on the multi-function display. It is not stored.Timing continues in the background.
Stopping timing
You can stop the stopwatch at any time.
The stopwatch time B stops.
Continuing timing
You can resume timing again after stopping the stopwatch.
The stopwatch time B continues.
Resetting the stopwatch time
The stopwatch time can be reset to zero.
All stopwatch time displays are reset to zero.
G-Force Menu
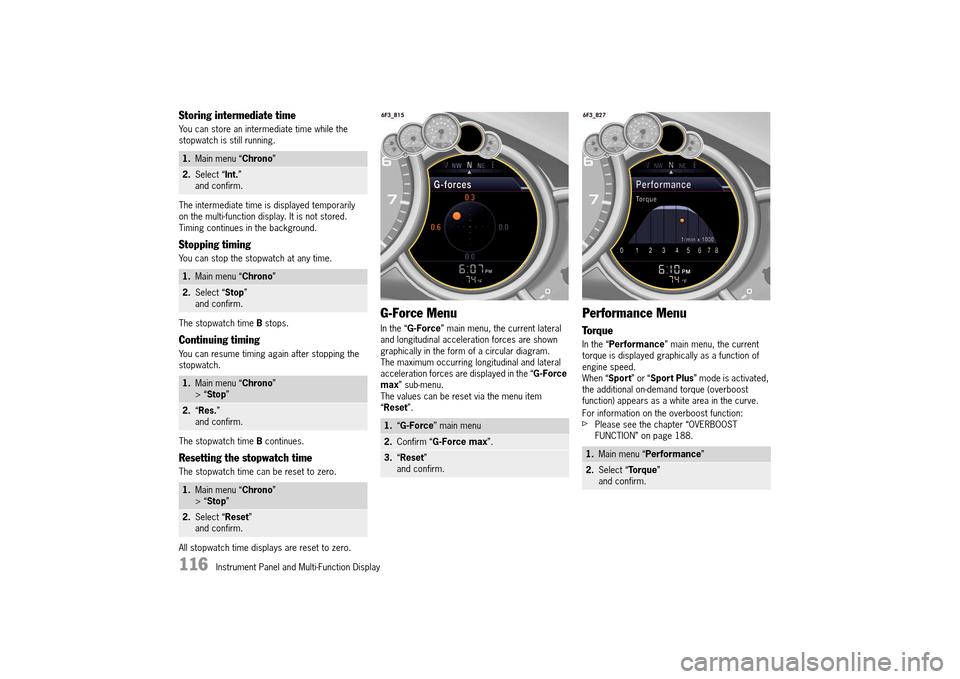
In the “ G-Force” main menu, the current lateral and longitudinal acceleration forces are shown graphically in the form of a circular diagram. The maximum occurring longitudinal and lateral acceleration forces are displayed in the “ G-Force max ” sub-menu. The values can be reset via the menu item “ Reset”.
Performance Menu
Torque
In the “Performance” main menu, the current torque is displayed graphically as a function of engine speed.When “ Sport” or “Sport Plus” mode is activated, the additional on-demand torque (overboost function) appears as a white area in the curve.
For information on the overboost function:fPlease see the chapter “OVERBOOST FUNCTION” on page 188.
1. Main menu “Chrono”
2.Select “Int.” and confirm.
1. Main menu “Chrono”
2.Select “Stop” and confirm.
1. Main menu “Chrono” > “ Stop”
2.“Res.” and confirm.
1. Main menu “Chrono” > “ Stop”
2.Select “Reset” and confirm.
1. “G-Force” main menu
2.Confirm “G-Force max”.
3.“Reset” and confirm.
1. Main menu “Performance”
2.Select “Torque” and confirm.
14_991_Turbo_21.book Seite 116 Mittwoch, 9. April 2014 2:19 14
Page 119 of 300
Instrument Panel and Multi-Function Display 117
ACC Menu
For information on operating and display options for the adaptive cruise control:fPlease see the chapter “ADAPTIVE CRUISE CONTROL” on page 157.
Vehicle Settings on the
Multi-Function Display
Different settings can be adjusted in the multi-function display on the instrument panel depending on the vehicle equipment.
On vehicles with memory, the settings are stored on the car key or the person buttons in the driver’s door.
For information on the memory:fPlease see the chapter “STORING PERSONAL SETTINGS” on page 143.
Setting or operating the multi-function display when driving could distract you from paying attention to traffic. You could lose control of the vehicle. fCarry out any complicated operating or setting procedures only with the vehicle stationary and in park.
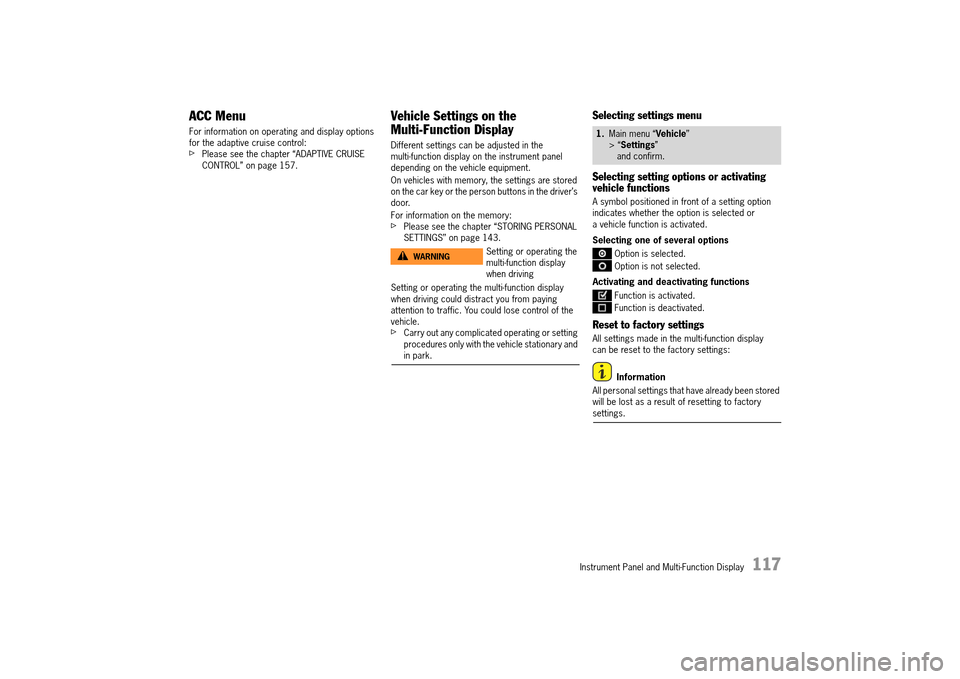
Selecting settings menu
Selecting setting options or activating vehicle functions
A symbol positioned in front of a setting option indicates whether the option is selected or a vehicle function is activated.
Selecting one of several options
Option is selected.
Option is not selected.
Activating and deactivating functions
Function is activated.
Function is deactivated.
Reset to factory settings
All settings made in the multi-function display can be reset to the factory settings:
Information
All personal settings that have already been stored will be lost as a result of resetting to factory settings.
Setting or operating the multi-function display when driving
WARNINGh
1. Main menu “Vehicle” > “ Settings” and confirm.
14_991_Turbo_21.book Seite 117 Mittwoch, 9. April 2014 2:19 14
Page 120 of 300
118 Instrument Panel and Multi-Function Display
Adapting appearance of multi-function display
The contents and appearance of the multi-function display can be adapted individually.
Selecting main menu display contents
Individual elements in the main menu can be hidden and shown as required.
The main menu items “ Vehicle” and “ACC” cannot be hidden.
Adapting display contents of audio main menu
In the audio main menu, you can display either a list of all radio stations currently within range or a list of all stored radio stations.
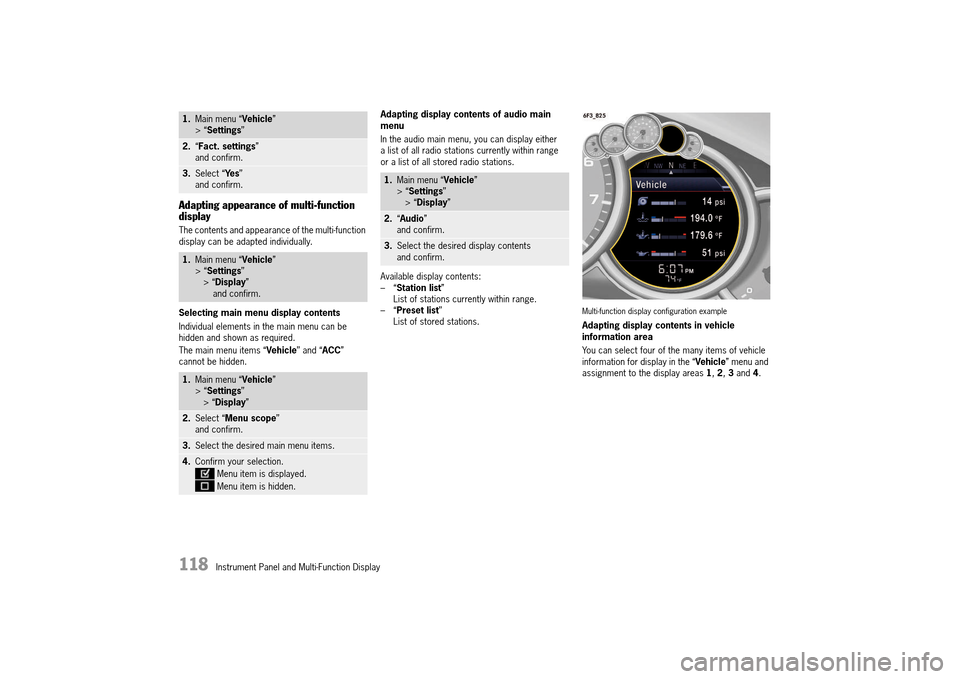
Available display contents: –“ Station list” List of stations currently within range.–“ Preset list” List of stored stations.Multi-function display configuration example
Adapting display contents in vehicle information area
You can select four of the many items of vehicle information for display in the “ Vehicle” menu and assignment to the display areas 1, 2, 3 and 4.
1.Main menu “Vehicle” > “ Settings”
2.“Fact. settings” and confirm.
3. Select “Ye s” and confirm.
1. Main menu “Vehicle” > “ Settings” > “ Display” and confirm.
1. Main menu “Vehicle” > “ Settings” > “ Display”
2.Select “Menu scope” and confirm.
3. Select the desired main menu items.
4.Confirm your selection.
Menu item is displayed.
Menu item is hidden.
1. Main menu “Vehicle” > “ Settings” > “ Display”
2.“Audio” and confirm.
3. Select the desired display contents and confirm.
14_991_Turbo_21.book Seite 118 Mittwoch, 9. April 2014 2:19 14
Page 121 of 300
Instrument Panel and Multi-Function Display 119
Available display contents: –“ Veh. voltage” –“ Oil pressure” –“ Oil temperature” –“ Boost pressure” –“ Coolant temp.” – Coolant temperature –“ Fuel Range” –“ Dst: Arrival” – Arrival time at destination –“ Int.: Arrival” – Arrival time at intermediate destination –“ Dst: Trip time” – Driving time to destination –“ Int.: Trip time” – Driving time to intermediate destination–“ Compass” –“ GPS height” –“ Time” –“ Date”. –“ Station/Track” – Current radio station/ music track–“ Phone info” – Network strength/network name–“ Blank line” – Line remains empty
Information
One item of information cannot be assigned to several areas or one area and the “Upper line”.
Adapting upper status area
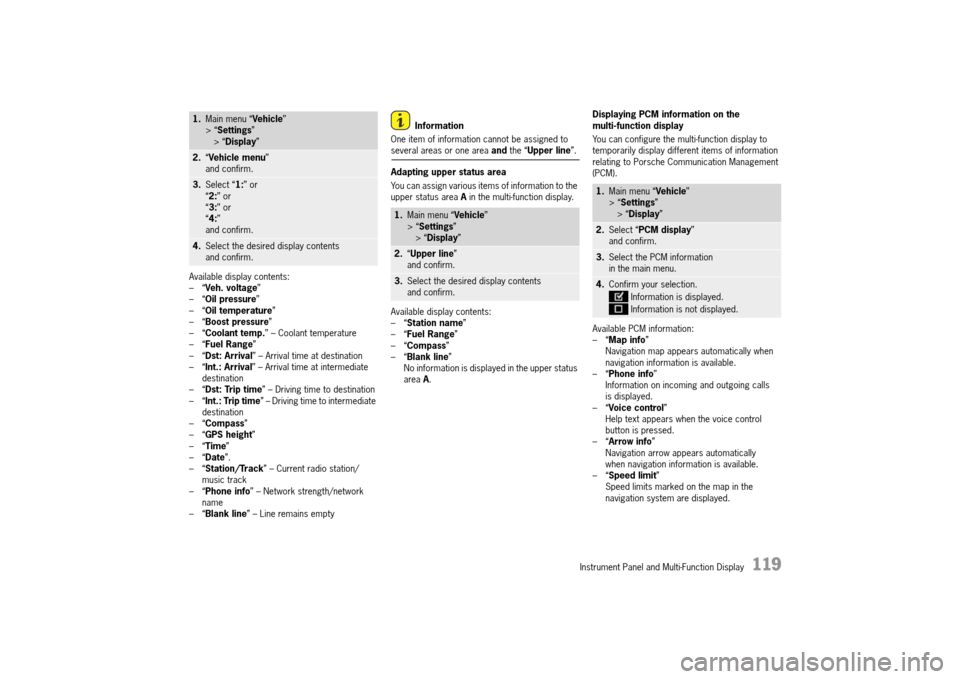
You can assign various items of information to the upper status area A in the multi-function display.
Available display contents: –“ Station name” –“ Fuel Range” –“ Compass” –“ Blank line” No information is displayed in the upper status area A.
Displaying PCM information on the multi-function display
You can configure the multi-function display to temporarily display different items of information relating to Porsche Communication Management (PCM).
Available PCM information: –“ Map info” Navigation map appears automatically when navigation information is available.–“ Phone info” Information on incoming and outgoing calls is displayed.–“ Voice control” Help text appears when the voice control button is pressed.–“ Arrow info” Navigation arrow appears automatically when navigation information is available.–“ Speed limit” Speed limits marked on the map in the navigation system are displayed.
1. Main menu “Vehicle” > “ Settings” > “ Display”
2.“Vehicle menu” and confirm.
3. Select “1:” or “ 2:” or “ 3:” or “ 4:” and confirm.
4. Select the desired display contents and confirm.
1. Main menu “Vehicle” > “ Settings” > “ Display”
2.“Upper line” and confirm.
3. Select the desired display contents and confirm.
1. Main menu “Vehicle” > “ Settings” > “ Display”
2.Select “PCM display” and confirm.
3. Select the PCM information in the main menu.
4. Confirm your selection.
Information is displayed.
Information is not displayed.
14_991_Turbo_21.book Seite 119 Mittwoch, 9. April 2014 2:19 14
Page 122 of 300
120 Instrument Panel and Multi-Function Display
Adapting lower status area
You can assign the current time and outside temperature to the lower status area B in the multi-function display.
Available display contents: –“ Time” –“ Temperature” –“ Time & Temp.”
Adjusting display brightness
The brightness of the multi-function display can be adjusted to suit individual requirements.
Light and visibility settings
The exterior lights, interior lighting and visual aids for reversing the vehicle can be adapted individually.
Adjusting exterior lights
You can adapt the exterior light functions on the vehicle e.g. off delays of the Welcome Home and Entry functions in the “ Exterior lights” menu.
Activating and deactivating High Beam Assistant
High Beam Assistant can be activated and deactivated. The settings remain stored when the ignition is switched on and off.
Adjusting off delay for Welcome Home and Entry functions
The off delay of the Welcome Home and Entry functions can be adapted individually.
Adjusting interior lights
Interior light functions on the vehicle can be adapted individually in the “ Interior lights” menu.
Activating or deactivating interior lights when the door is opened (depending on equipment)
You can configure the interior lights to be switched on when the door is opened.
1. Main menu “Vehicle” > “ Settings” > “ Display”
2.“Lower line” and confirm.
3. Select the desired display contents and confirm.
1. Main menu “Vehicle” > “ Settings” > “ Display”
2.“Brightness” and confirm.
3. Adjust to the desired display brightness and confirm the setting.
1. Main menu “Vehicle” > “ Settings” > “ Light & Visibility” and confirm.
1. Main menu “Vehicle” > “ Settings” > “ Light & Visibility” > “ Exterior lights” and confirm.
1. Main menu: Select “Vehicle” > “ Settings” > “ Light & Visibility” > “ Exterior lights”
2.Select “High beam assist.”
3.Confirm your selection.
High Beam Assistant is activated.
High Beam Assistant is deactivated.
1. Main menu “Vehicle” > “ Settings” > “ Light & Visibility” > “ Exterior lights”
2.“Fade-out” and confirm.
3. Set desired off delay and confirm the setting.
1. Main menu: Select “Vehicle” > “ Settings” > “ Light & Visibility” > “ Interior lights” and confirm.
1. Main menu “Vehicle” > “ Settings” > “ Light & Visibility” > “ Interior lights”
2.Select “by opening door” in the display.
14_991_Turbo_21.book Seite 120 Mittwoch, 9. April 2014 2:19 14
Page 123 of 300
Instrument Panel and Multi-Function Display 121
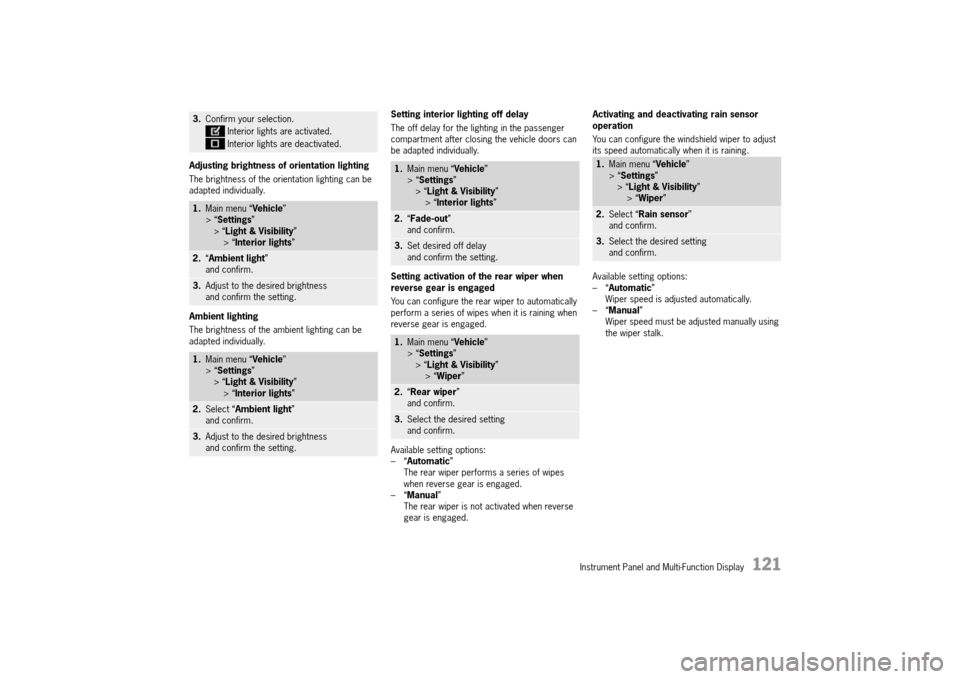
Adjusting brightness of orientation lighting
The brightness of the orientation lighting can be adapted individually.
Ambient lighting
The brightness of the ambient lighting can be adapted individually.
Setting interior lighting off delay
The off delay for the lighting in the passenger compartment after closing the vehicle doors can be adapted individually.
Setting activation of the rear wiper when reverse gear is engaged
You can configure the rear wiper to automatically perform a series of wipes when it is raining when reverse gear is engaged.
Available setting options: –“ Automatic” The rear wiper performs a series of wipes when reverse gear is engaged.–“ Manual” The rear wiper is not activated when reverse gear is engaged.
Activating and deactivating rain sensor operation
You can configure the windshield wiper to adjust its speed automatically when it is raining.
Available setting options: –“ Automatic” Wiper speed is adjusted automatically.–“ Manual” Wiper speed must be adjusted manually using the wiper stalk.
3. Confirm your selection.
Interior lights are activated.
Interior lights are deactivated.
1. Main menu “Vehicle” > “ Settings” > “ Light & Visibility” > “ Interior lights”
2.“Ambient light” and confirm.
3. Adjust to the desired brightness and confirm the setting.
1. Main menu “Vehicle” > “ Settings” > “ Light & Visibility” > “ Interior lights”
2.Select “Ambient light” and confirm.
3. Adjust to the desired brightness and confirm the setting.
1. Main menu “Vehicle” > “ Settings” > “ Light & Visibility” > “ Interior lights”
2.“Fade-out” and confirm.
3. Set desired off delay and confirm the setting.
1. Main menu “Vehicle” > “ Settings” > “ Light & Visibility” > “ Wiper”
2.“Rear wiper” and confirm.
3. Select the desired setting and confirm.
1. Main menu “Vehicle” > “ Settings” > “ Light & Visibility” > “ Wiper”
2.Select “Rain sensor” and confirm.
3. Select the desired setting and confirm.
14_991_Turbo_21.book Seite 121 Mittwoch, 9. April 2014 2:19 14
Page 124 of 300
122 Instrument Panel and Multi-Function Display
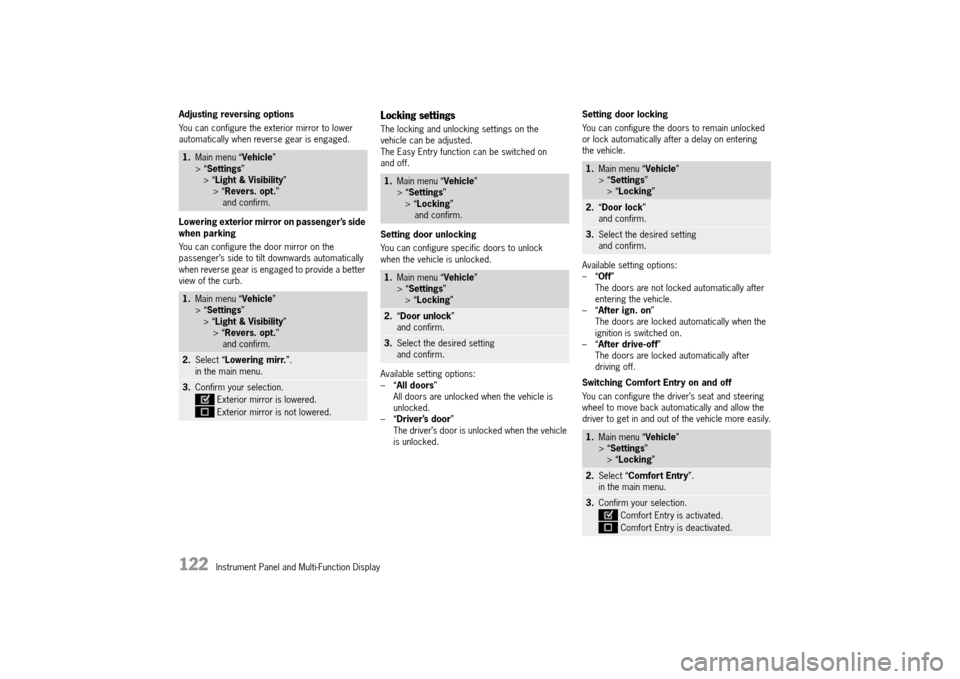
Adjusting reversing options
You can configure the exterior mirror to lower automatically when reverse gear is engaged.
Lowering exterior mirror on passenger’s side when parking
You can configure the door mirror on the passenger’s side to tilt downwards automatically when reverse gear is engaged to provide a better view of the curb.
Locking settings
The locking and unlocking settings on the vehicle can be adjusted.The Easy Entry function can be switched on and off.
Setting door unlocking
You can configure specific doors to unlock when the vehicle is unlocked.
Available setting options: –“ All doors” All doors are unlocked when the vehicle is unlocked.–“ Driver’s door” The driver’s door is unlocked when the vehicle is unlocked.
Setting door locking
You can configure the doors to remain unlocked or lock automatically after a delay on entering the vehicle.
Available setting options: –“ Off” The doors are not locked automatically after entering the vehicle.–“ After ign. on” The doors are locked automatically when the ignition is switched on.–“ After drive-off” The doors are locked automatically after driving off.
Switching Comfort Entry on and off
You can configure the driver’s seat and steering wheel to move back automatically and allow the driver to get in and out of the vehicle more easily.
1. Main menu “Vehicle” > “ Settings” > “ Light & Visibility” > “ Revers. opt.” and confirm.
1. Main menu “Vehicle” > “ Settings” > “ Light & Visibility” > “ Revers. opt.” and confirm.
2. Select “Lowering mirr.”. in the main menu.
3. Confirm your selection.
Exterior mirror is lowered.
Exterior mirror is not lowered.
1. Main menu “Vehicle” > “ Settings” > “ Locking” and confirm.
1. Main menu “Vehicle” > “ Settings” > “ Locking”
2.“Door unlock” and confirm.
3. Select the desired setting and confirm.
1. Main menu “Vehicle” > “ Settings” > “ Locking”
2.“Door lock” and confirm.
3. Select the desired setting and confirm.
1. Main menu “Vehicle” > “ Settings” > “ Locking”
2.Select “Comfort Entry”. in the main menu.
3. Confirm your selection.
Comfort Entry is activated.
Comfort Entry is deactivated.
14_991_Turbo_21.book Seite 122 Mittwoch, 9. April 2014 2:19 14