instrument panel PORSCHE 911 TURBO 2014 6.G User Guide
[x] Cancel search | Manufacturer: PORSCHE, Model Year: 2014, Model line: 911 TURBO, Model: PORSCHE 911 TURBO 2014 6.GPages: 300, PDF Size: 10.61 MB
Page 57 of 300
Air Conditioning 55
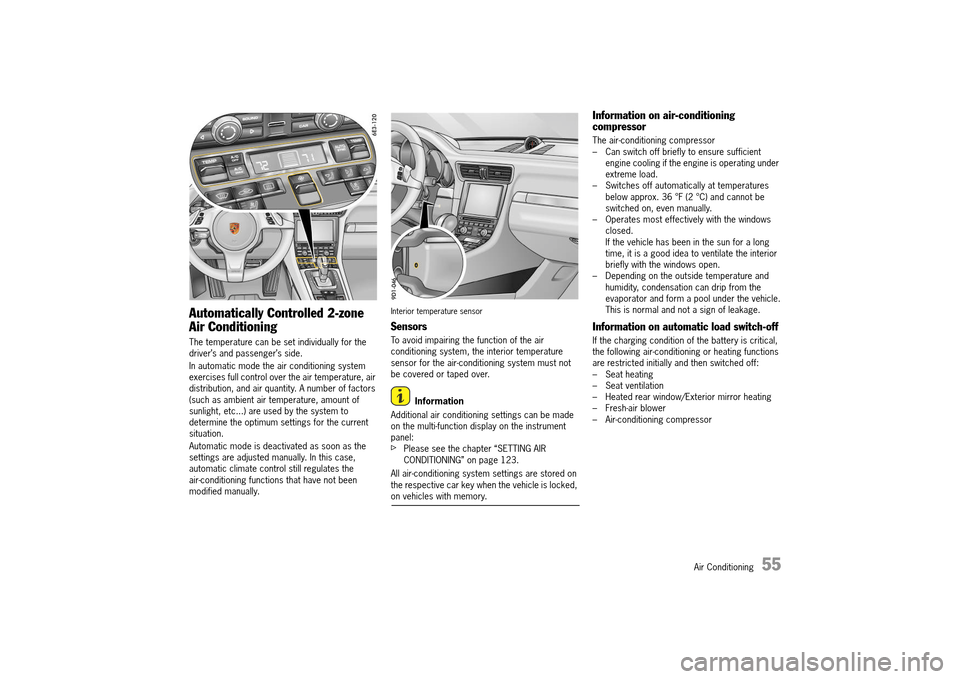
Automatically Controlled 2-zone
Air Conditioning
The temperature can be set individually for the driver’s and passenger’s side.
In automatic mode the air conditioning system exercises full control over the air temperature, air distribution, and air quantity. A number of factors (such as ambient air temperature, amount of sunlight, etc...) are used by the system to determine the optimum settings for the current situation.
Automatic mode is deactivated as soon as the settings are adjusted manually. In this case, automatic climate control still regulates the air-conditioning functions that have not been modified manually.
Interior temperature sensor
Sensors
To avoid impairing the function of the air conditioning system, the interior temperature sensor for the air-conditioning system must not be covered or taped over.
Information
Additional air conditioning settings can be made on the multi-function display on the instrument panel:fPlease see the chapter “SETTING AIR CONDITIONING” on page 123.
All air-conditioning system settings are stored on the respective car key when the vehicle is locked, on vehicles with memory.
Information on air-conditioning compressor
The air-conditioning compressor – Can switch off briefly to ensure sufficient engine cooling if the engine is operating under extreme load.– Switches off automatically at temperatures below approx. 36 °F (2 °C) and cannot be switched on, even manually.– Operates most effectively with the windows closed.If the vehicle has been in the sun for a long time, it is a good idea to ventilate the interior briefly with the windows open.– Depending on the outside temperature and humidity, condensation can drip from the evaporator and form a pool under the vehicle.This is normal and not a sign of leakage.
Information on automatic load switch-off
If the charging condition of the battery is critical, the following air-conditioning or heating functions are restricted initially and then switched off:– Seat heating– Seat ventilation– Heated rear window/Exterior mirror heating– Fresh-air blower– Air-conditioning compressor
14_991_Turbo_21.book Seite 55 Mittwoch, 9. April 2014 2:19 14
Page 61 of 300
Air Conditioning 59
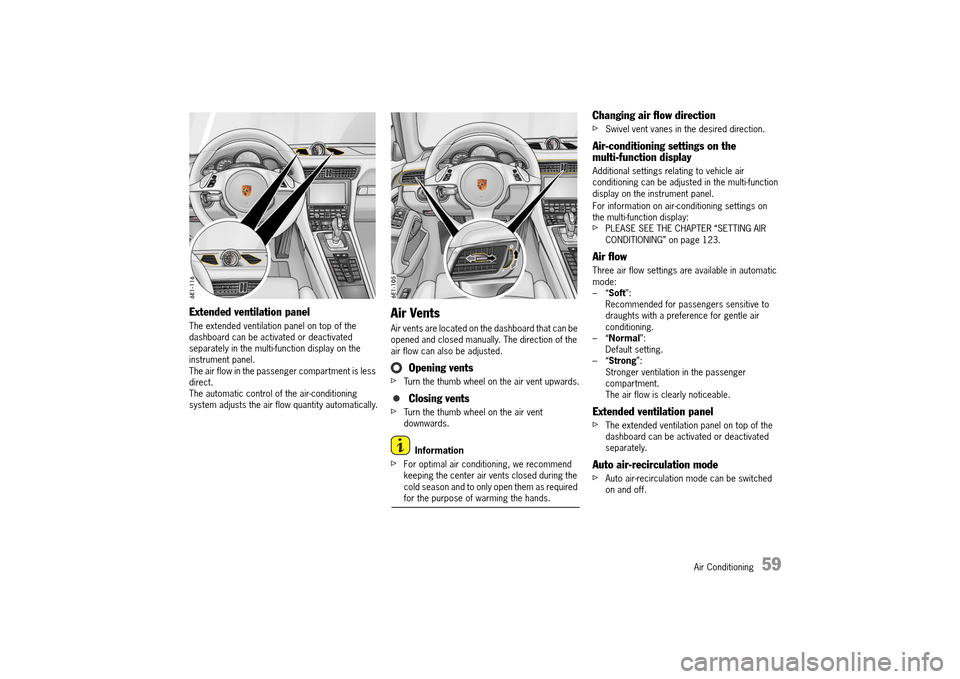
Extended ventilation panel
The extended ventilation panel on top of the dashboard can be activated or deactivated separately in the multi-function display on the instrument panel.The air flow in the passenger compartment is less direct.The automatic control of the air-conditioning system adjusts the air flow quantity automatically.
Air Vents
Air vents are located on the dashboard that can be opened and closed manually. The direction of the air flow can also be adjusted.
Opening vents
fTurn the thumb wheel on the air vent upwards.
Closing vents
fTurn the thumb wheel on the air vent downwards.
Information
fFor optimal air conditioning, we recommend keeping the center air vents closed during the cold season and to only open them as required for the purpose of warming the hands.
Changing air flow direction
fSwivel vent vanes in the desired direction.
Air-conditioning settings on the multi-function display
Additional settings relating to vehicle air conditioning can be adjusted in the multi-function display on the instrument panel.
For information on air-conditioning settings on the multi-function display:fPLEASE SEE THE CHAPTER “SETTING AIR CONDITIONING” on page 123.
Air flow
Three air flow settings are available in automatic mode:–“ Soft”: Recommended for passengers sensitive to draughts with a preference for gentle air conditioning.–“ Normal”: Default setting.–“ Strong”: Stronger ventilation in the passenger compartment.The air flow is clearly noticeable.
Extended ventilation panel
fThe extended ventilation panel on top of the dashboard can be activated or deactivated separately.
Auto air-recirculation mode
fAuto air-recirculation mode can be switched on and off.
14_991_Turbo_21.book Seite 59 Mittwoch, 9. April 2014 2:19 14
Page 82 of 300
80 Lights, Turn Signals and Windshield Wipers
If you drive without lights, this may significantly restrict your visibility and also the ability of other road users to see your vehicle.fAlways carefully monitor the automatic driving light control.
Information
In the event of a fault in the automatic driving light assistant/Porsche Dynamic Light System (PDLS), the PDLS warning light in the instrument panel flashes.
For information on indicator lights and warning lights on the instrument panel:fPlease see the chapter “INSTRUMENT PANEL USA MODELS” on page 90.fPlease see the chapter “OVERVIEW OF WARNING AND INFORMATION MESSAGES” on page 129.
Rain function
The driving light is switched on automatically after five seconds of continuous wiper operation.
If the wipers have not been used for approx. 4 minutes, the driving light is switched off.
Automatic Coming Home lights (Welcome Home function/Entry function)
Switching on Automatic Coming Home lights
fSet light switch to .
The following lights remain switched on for a certain period to allow you to get in and out of your vehicle safely and with improved visibility in darkness:– Daytime driving lights,– Courtesy lights in the folded out exterior mirrors (on vehicles with electrically foldable mirrors),– Rear side marker lights,– License plate lights.
Welcome Home function (off delay)
When the vehicle is locked, the lights remain switched on for the duration of the off delay preset on the multi-function display.
For information on adjusting the off delay of the external lights on the multi-function display:fPlease see the chapter “ADJUSTING EXTERIOR LIGHTS” on page 120.
Entry function/Exit function
When the vehicle is unlocked, the area around the vehicle is illuminated for the duration of the off delay preset on the multi-function display.
The lights are switched off when the ignition is switched on or the light switch is set to a position other than .
For information on adjusting the off delay of the external lights on the multi-function display:fPLEASE SEE THE CHAPTER “ADJUSTING EXTERIOR LIGHTS” on page 120.
Porsche Dynamic Light System (PDLS)
Dynamic cornering light
Above a speed of approx. 5 mph (8 km/h), the low beam light is swiveled in the direction of the curve to illuminate the road more clearly, depending on the speed of the vehicle and the extent to which the steering wheel is turned.
In the event of a fault in the dynamic cornering light, the PDLS warning light in the instrument panel flashes.
Highway function in darkness
The distribution characteristics of the driving light change when driving in darkness at vehicle speeds above approx. 80 mph (130 km/h).The light beam becomes longer and the field of vision increases.
Fog lights
The distribution characteristics of the driving light change when the rear fog light is switched on at vehicle speeds below approx. 43 mph (70 km/h).The light beam becomes wider and reduces glare.
Driving without lightsWARNINGh
14_991_Turbo_21.book Seite 80 Mittwoch, 9. April 2014 2:19 14
Page 83 of 300
Lights, Turn Signals and Windshield Wipers 81
Porsche Dynamic Light System Plus (PDLS Plus)
High Beam Assistant
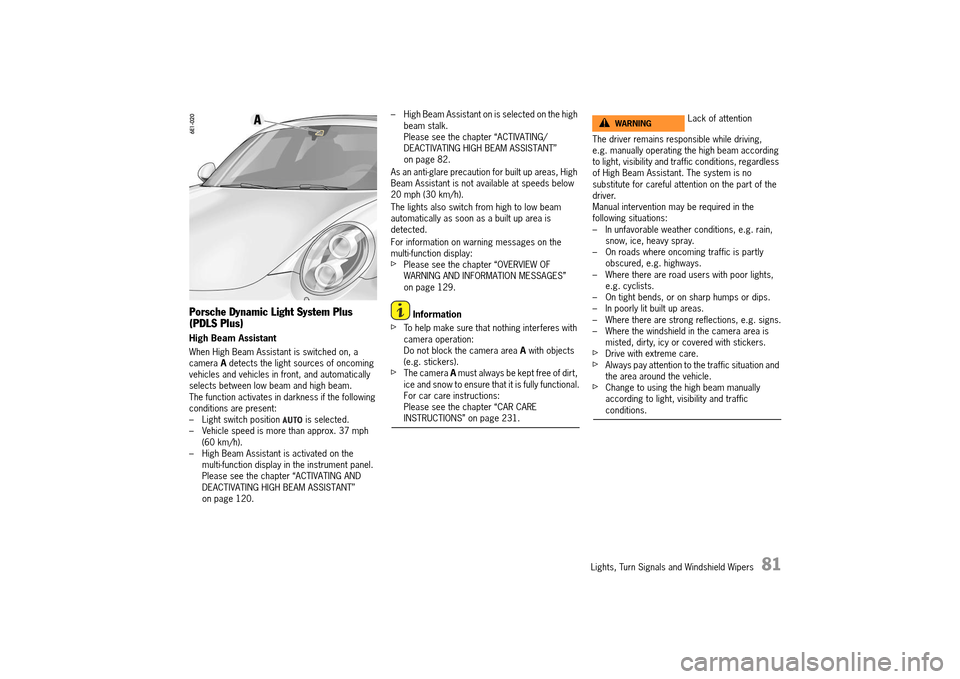
When High Beam Assistant is switched on, a camera A detects the light sources of oncoming vehicles and vehicles in front, and automatically selects between low beam and high beam.The function activates in darkness if the following conditions are present:– Light switch position is selected.– Vehicle speed is more than approx. 37 mph (60 km/h).– High Beam Assistant is activated on the multi-function display in the instrument panel.Please see the chapter “ACTIVATING AND DEACTIVATING HIGH BEAM ASSISTANT” on page 120.
– High Beam Assistant on is selected on the high beam stalk.Please see the chapter “ACTIVATING/DEACTIVATING HIGH BEAM ASSISTANT” on page 82.
As an anti-glare precaution for built up areas, High Beam Assistant is not available at speeds below 20 mph (30 km/h).
The lights also switch from high to low beam automatically as soon as a built up area is detected.
For information on warning messages on the multi-function display:fPlease see the chapter “OVERVIEW OF WARNING AND INFORMATION MESSAGES” on page 129.
Information
fTo help make sure that nothing interferes with camera operation:Do not block the camera area A with objects (e.g. stickers).fThe camera A must always be kept free of dirt, ice and snow to ensure that it is fully functional.For car care instructions: Please see the chapter “CAR CARE INSTRUCTIONS” on page 231.
The driver remains responsible while driving, e.g. manually operating the high beam according to light, visibility and traffic conditions, regardless of High Beam Assistant. The system is no substitute for careful attention on the part of the driver.Manual intervention may be required in the following situations:– In unfavorable weather conditions, e.g. rain, snow, ice, heavy spray.– On roads where oncoming traffic is partly obscured, e.g. highways.– Where there are road users with poor lights, e.g. cyclists.– On tight bends, or on sharp humps or dips.– In poorly lit built up areas.– Where there are strong reflections, e.g. signs.– Where the windshield in the camera area is misted, dirty, icy or covered with stickers.fDrive with extreme care.fAlways pay attention to the traffic situation and the area around the vehicle.fChange to using the high beam manually according to light, visibility and traffic conditions.
Lack of attentionWARNINGh
14_991_Turbo_21.book Seite 81 Mittwoch, 9. April 2014 2:19 14
Page 84 of 300
82 Lights, Turn Signals and Windshield Wipers
Instrument Lighting
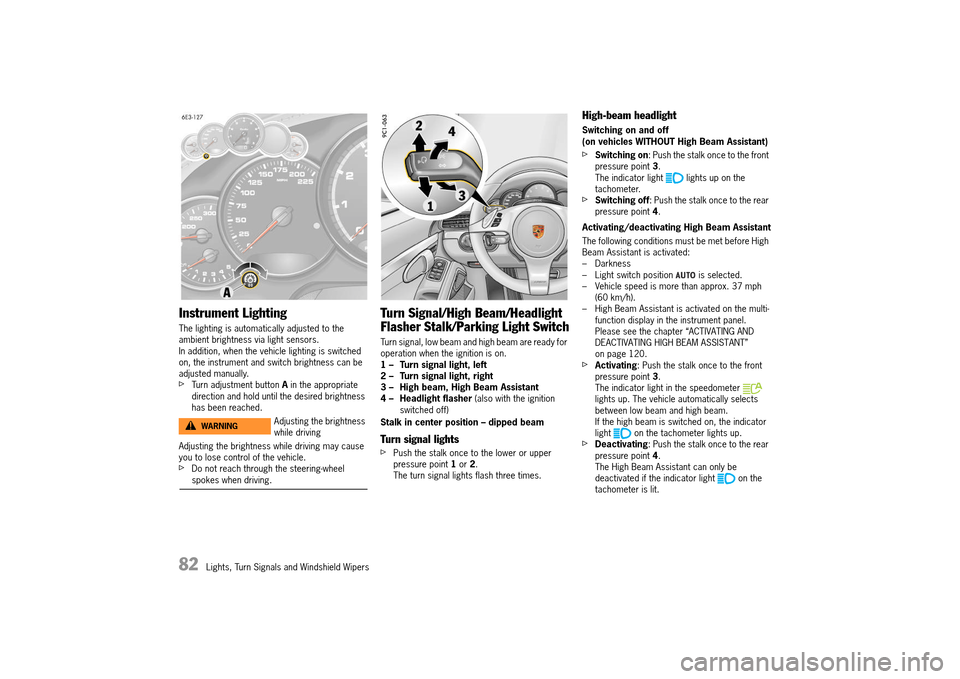
The lighting is automatically adjusted to the ambient brightness via light sensors.In addition, when the vehicle lighting is switched on, the instrument and switch brightness can be adjusted manually.fTurn adjustment button A in the appropriate direction and hold until the desired brightness has been reached.
Adjusting the brightness while driving may cause you to lose control of the vehicle.fDo not reach through the steering-wheel spokes when driving.
Turn Signal/High Beam/Headlight
Flasher Stalk/Parking Light Switch
Turn signal, low beam and high beam are ready for operation when the ignition is on.1 – Turn signal light, left2 – Turn signal light, right3 – High beam, High Beam Assistant4 – Headlight flasher (also with the ignition switched off)
Stalk in center position – dipped beam
Turn signal lights
fPush the stalk once to the lower or upper pressure point 1 or 2. The turn signal lights flash three times.
High-beam headlight
Switching on and off (on vehicles WITHOUT High Beam Assistant)
fSwitching on : Push the stalk once to the front pressure point 3. The indicator light lights up on the tachometer.fSwitching off : Push the stalk once to the rear pressure point 4.
Activating/deactivating High Beam Assistant
The following conditions must be met before High Beam Assistant is activated:– Darkness– Light switch position is selected.– Vehicle speed is more than approx. 37 mph (60 km/h).– High Beam Assistant is activated on the multi-function display in the instrument panel.Please see the chapter “ACTIVATING AND DEACTIVATING HIGH BEAM ASSISTANT” on page 120.fActivating : Push the stalk once to the front pressure point 3. The indicator light in the speedometer lights up. The vehicle automatically selects between low beam and high beam.If the high beam is switched on, the indicator light on the tachometer lights up.fDeactivating : Push the stalk once to the rear pressure point 4. The High Beam Assistant can only be deactivated if the indicator light on the tachometer is lit.
Adjusting the brightness while drivingWARNINGh
14_991_Turbo_21.book Seite 82 Mittwoch, 9. April 2014 2:19 14
Page 85 of 300
Lights, Turn Signals and Windshield Wipers 83
Switching on and off (on vehicles WITH High Beam Assistant)
If the High Beam Assistant was deactivated or if the requirements are not met, high beam can be switched on and off manually.
The following conditions must be met: – Darkness– The light switch position is selected.fSwitching on : Push the stalk twice to the front pressure point 3. The indicator light on the tachometer lights up.fSwitching off : Push the stalk once to the rear pressure point 4.
Operating the headlight flasher
fPush the stalk once to the rear pressure point 4. The indicator light on the tachometer lights up briefly.
For information on High Beam Assistant: fPlease see the chapter “HIGH BEAM ASSISTANT” on page 81.
Parking light
The parking light can only be switched on when the ignition is switched off.fMove the stalk up 2 or down 1 to switch on the right or left parking light.
If the parking light is switched on, the message “ Parking light on” will appear on the multi- function display in the instrument panel after the ignition is switched off.
For information on warning messages on the multi- function display:fPlease see the chapter “OVERVIEW OF WARNING AND INFORMATION MESSAGES” on page 129.
Emergency Flasher
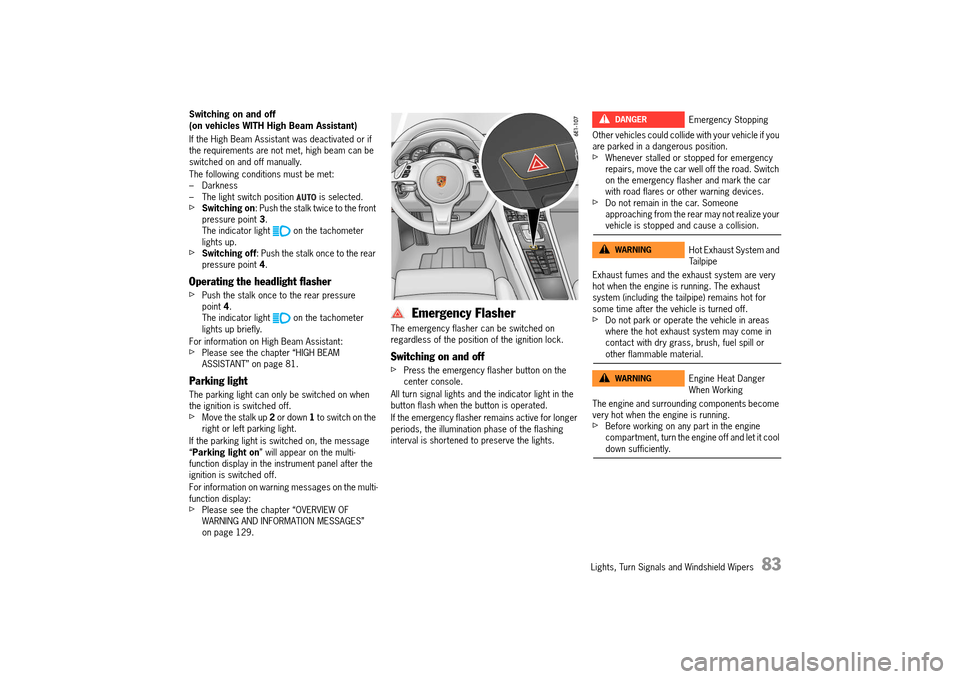
The emergency flasher can be switched on regardless of the position of the ignition lock.
Switching on and off
fPress the emergency flasher button on the center console.
All turn signal lights and the indicator light in the button flash when the button is operated.
If the emergency flasher remains active for longer periods, the illumination phase of the flashing interval is shortened to preserve the lights.
Other vehicles could collide with your vehicle if you are parked in a dangerous position.fWhenever stalled or stopped for emergency repairs, move the car well off the road. Switch on the emergency flasher and mark the car with road flares or other warning devices.fDo not remain in the car. Someone approaching from the rear may not realize your vehicle is stopped and cause a collision.
Exhaust fumes and the exhaust system are very hot when the engine is running. The exhaust system (including the tailpipe) remains hot for some time after the vehicle is turned off.fDo not park or operate the vehicle in areas where the hot exhaust system may come in contact with dry grass, brush, fuel spill or other flammable material.
The engine and surrounding components become very hot when the engine is running.fBefore working on any part in the engine compartment, turn the engine off and let it cool down sufficiently.
Emergency Stopping
Hot Exhaust System and Tailpipe
Engine Heat Danger When Working
DANGERh
WARNINGh
WARNINGh
14_991_Turbo_21.book Seite 83 Mittwoch, 9. April 2014 2:19 14
Page 91 of 300
Instrument Panel and Multi-Function Display 89
Instrument Panel and Multi-Function Display
Instrument Panel USA Models ........................ 90 Instrument Panel Canada Models ................... 91Displays on the Instrument Panel ................... 92Battery/Alternator ........................................ 95Check Engine (Emission Control) ................... 95Acoustic Signals........................................... 95Operating the Multi-Function Display on the Instrument Panel .......................................... 96Vehicle Menu.............................................. 100Audio Menu ................................................ 102Phone Menu ............................................... 103Map Menu.................................................. 103Navigation Menu......................................... 104Trip Menu .................................................. 105Tire Pressure Menu (Tire Pressure Monitoring System, TPMS) .......................... 105Allwheel Menu ............................................ 114Chrono Menu (Stopwatch) ........................... 114G-Force Menu............................................. 116Performance Menu ..................................... 116ACC Menu ................................................. 117Vehicle Settings on theMulti-Function Display ................................. 117Overview of Warning and Information Messages ............................. 129
14_991_Turbo_21.book Seite 89 Mittwoch, 9. April 2014 2:19 14
Page 92 of 300
90 Instrument Panel and Multi-Function Display
Instrument Panel USA Models
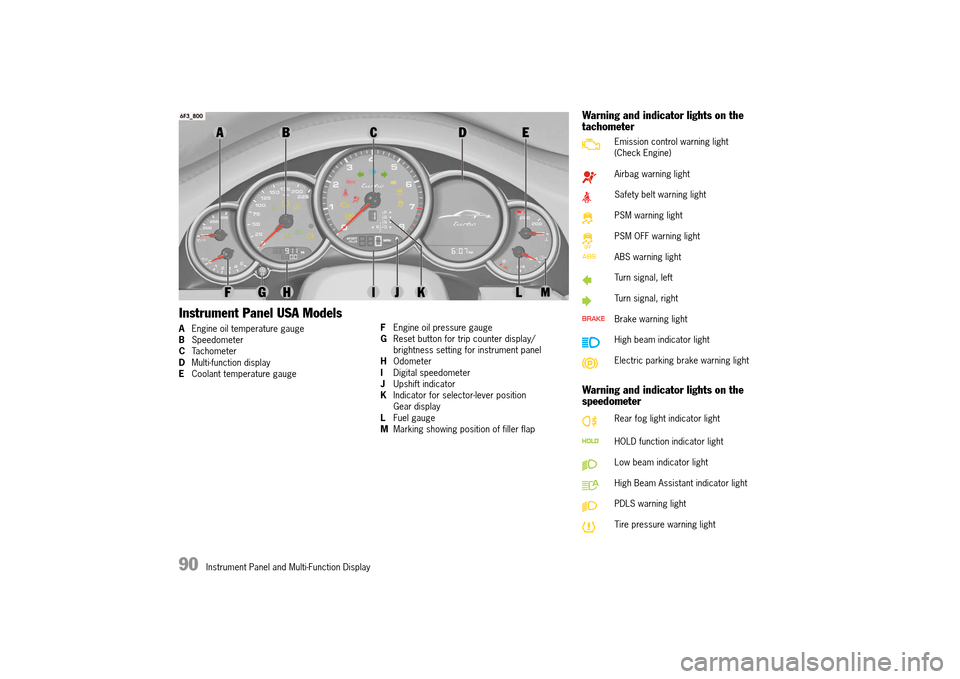
AEngine oil temperature gauge B Speedometer C Tachometer D Multi-function display E Coolant temperature gauge
F Engine oil pressure gauge G Reset button for trip counter display/ brightness setting for instrument panelH Odometer I Digital speedometer J Upshift indicator K Indicator for selector-lever position Gear displayL Fuel gauge M Marking showing position of filler flap
Warning and indicator lights on the tachometer
Warning and indicator lights on the speedometer
Emission control warning light (Check Engine)
Airbag warning light
Safety belt warning light
PSM warning light
PSM OFF warning light
ABS warning light
Turn signal, left
Turn signal, right
Brake warning light
High beam indicator light
Electric parking brake warning light
Rear fog light indicator light
HOLD function indicator light
Low beam indicator light
High Beam Assistant indicator light
PDLS warning light
Tire pressure warning light
14_991_Turbo_21.book Seite 90 Mittwoch, 9. April 2014 2:19 14
Page 93 of 300
Instrument Panel and Multi-Function Display 91
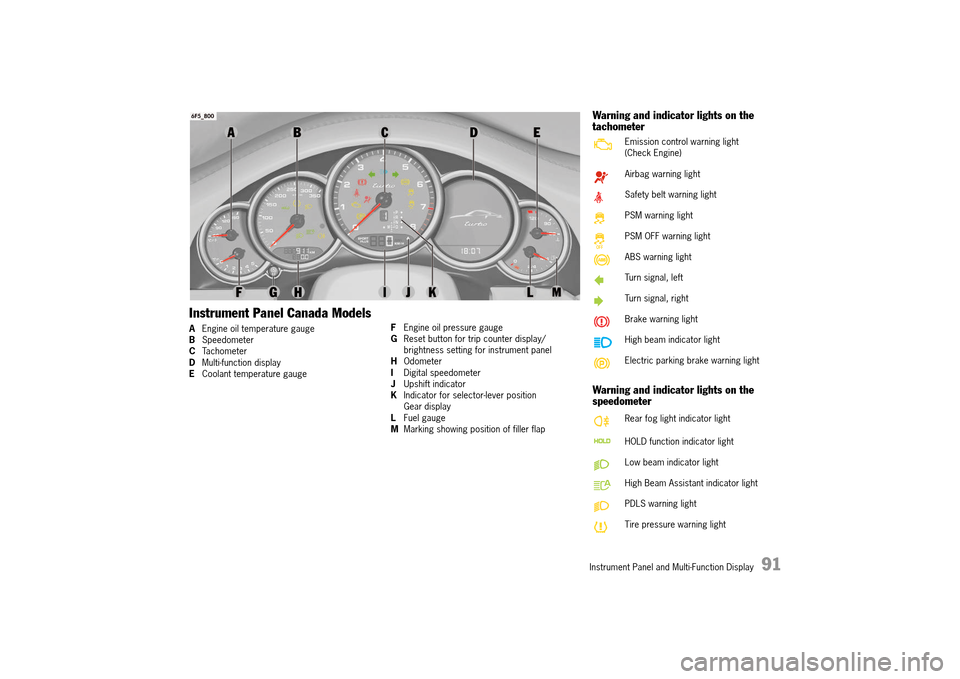
Instrument Panel Canada Models
AEngine oil temperature gauge B Speedometer C Tachometer D Multi-function display E Coolant temperature gauge
F Engine oil pressure gauge G Reset button for trip counter display/ brightness setting for instrument panelH Odometer I Digital speedometer J Upshift indicator K Indicator for selector-lever position Gear displayL Fuel gauge M Marking showing position of filler flap
Warning and indicator lights on the tachometer
Warning and indicator lights on the speedometer
Emission control warning light (Check Engine)
Airbag warning light
Safety belt warning light
PSM warning light
PSM OFF warning light
ABS warning light
Turn signal, left
Turn signal, right
Brake warning light
High beam indicator light
Electric parking brake warning light
Rear fog light indicator light
HOLD function indicator light
Low beam indicator light
High Beam Assistant indicator light
PDLS warning light
Tire pressure warning light
14_991_Turbo_21.book Seite 91 Mittwoch, 9. April 2014 2:19 14
Page 94 of 300
92 Instrument Panel and Multi-Function Display
Displays on the Instrument Panel
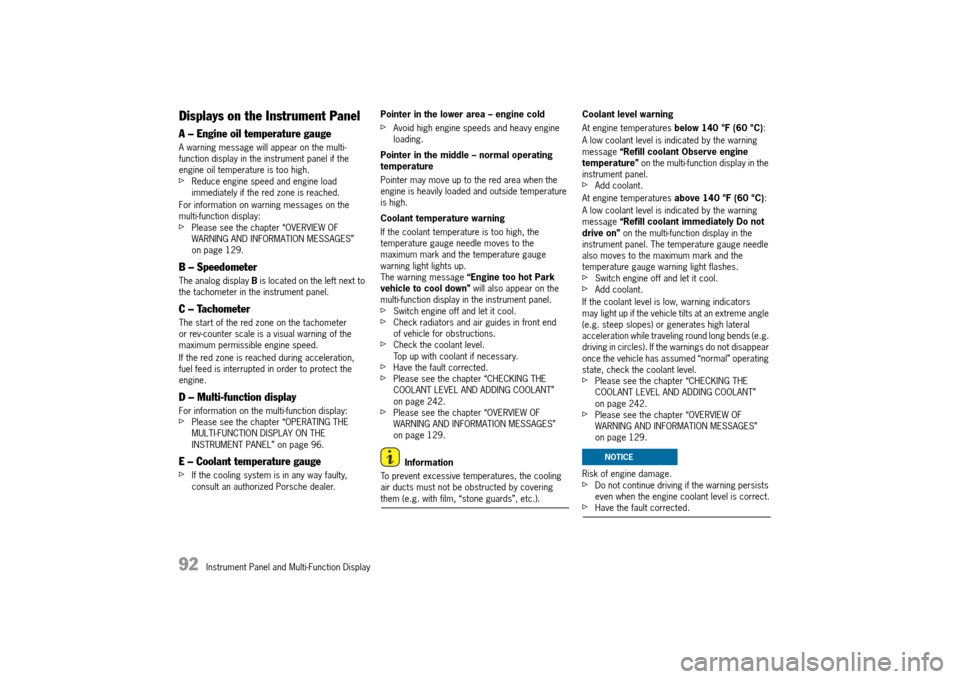
A – Engine oil temperature gauge
A warning message will appear on the multi- function display in the instrument panel if the engine oil temperature is too high.fReduce engine speed and engine load immediately if the red zone is reached.
For information on warning messages on the multi-function display:fPlease see the chapter “OVERVIEW OF WARNING AND INFORMATION MESSAGES” on page 129.
B – Speedometer
The analog display B is located on the left next to the tachometer in the instrument panel.
C – Tachometer
The start of the red zone on the tachometer or rev-counter scale is a visual warning of the maximum permissible engine speed.
If the red zone is reached during acceleration, fuel feed is interrupted in order to protect the engine.
D – Multi-function display
For information on the multi-function display:fPlease see the chapter “OPERATING THE MULTI-FUNCTION DISPLAY ON THE INSTRUMENT PANEL” on page 96.
E – Coolant temperature gauge
fIf the cooling system is in any way faulty, consult an authorized Porsche dealer.
Pointer in the lower area – engine cold
fAvoid high engine speeds and heavy engine loading.
Pointer in the middle – normal operating temperature
Pointer may move up to the red area when the engine is heavily loaded and outside temperature is high.
Coolant temperature warning
If the coolant temperature is too high, the temperature gauge needle moves to the maximum mark and the temperature gauge warning light lights up.The warning message “Engine too hot Park vehicle to cool down” will also appear on the multi-function display in the instrument panel.fSwitch engine off and let it cool. fCheck radiators and air guides in front end of vehicle for obstructions.fCheck the coolant level.Top up with coolant if necessary.fHave the fault corrected.fPlease see the chapter “CHECKING THE COOLANT LEVEL AND ADDING COOLANT” on page 242.fPlease see the chapter “OVERVIEW OF WARNING AND INFORMATION MESSAGES” on page 129.
Information
To prevent excessive temperatures, the cooling air ducts must not be obstructed by covering them (e.g. with film, “stone guards”, etc.).
Coolant level warning
At engine temperatures below 140 °F (60 °C):
A low coolant level is indicated by the warning message “Refill coolant Observe engine temperature” on the multi-function display in the instrument panel.fAdd coolant.
At engine temperatures above 140 °F (60 °C):
A low coolant level is indicated by the warning message “Refill coolant immediately Do not drive on” on the multi-function display in the instrument panel. The temperature gauge needle also moves to the maximum mark and the temperature gauge warning light flashes.fSwitch engine off and let it cool.fAdd coolant.
If the coolant level is low, warning indicators may light up if the vehicle tilts at an extreme angle (e.g. steep slopes) or generates high lateral acceleration while traveling round long bends (e.g. driving in circles). If the warnings do not disappear once the vehicle has assumed “normal” operating state, check the coolant level.fPlease see the chapter “CHECKING THE COOLANT LEVEL AND ADDING COOLANT” on page 242.fPlease see the chapter “OVERVIEW OF WARNING AND INFORMATION MESSAGES” on page 129.
Risk of engine damage.fDo not continue driving if the warning persists even when the engine coolant level is correct.fHave the fault corrected.
NOTICE
14_991_Turbo_21.book Seite 92 Mittwoch, 9. April 2014 2:19 14