ignition PORSCHE BOXSTER 2005 2.G User Guide
[x] Cancel search | Manufacturer: PORSCHE, Model Year: 2005, Model line: BOXSTER, Model: PORSCHE BOXSTER 2005 2.GPages: 276, PDF Size: 4.05 MB
Page 28 of 276
28
Controls, Instruments
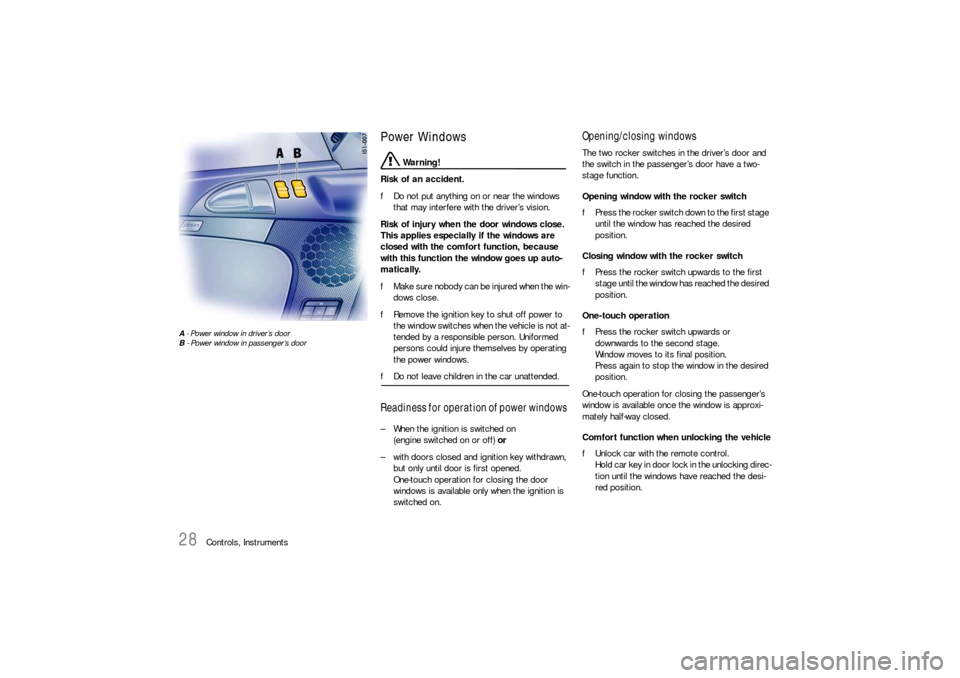
A - Power window in driver’s door
B - Power window in passenger’s door
Power Windows
Warning!
Risk of an accident.
fDo not put anything on or near the windows
that may interfere with the driver’s vision.
Risk of injury when the door windows close.
This applies especially if the windows are
closed with the comfort function, because
with this function the window goes up auto-
matically.
fMake sure nobody can be injured when the win-
dows close.
fRemove the ignition key to shut off power to
the window switches when the vehicle is not at-
tended by a responsible person. Uniformed
persons could injure themselves by operating
the power windows.
fDo not leave children in the car unattended.Readiness for operation of power windows – When the ignition is switched on
(engine switched on or off) or
– with doors closed and ignition key withdrawn,
but only until door is first opened.
One-touch operation for closing the door
windows is available only when the ignition is
switched on.
Opening/closing windowsThe two rocker switches in the driver’s door and
the switch in the passenger’s door have a two-
stage function.
Opening window with the rocker switch
fPress the rocker switch down to the first stage
until the window has reached the desired
position.
Closing window with the rocker switch
fPress the rocker switch upwards to the first
stage until the window has reached the desired
position.
One-touch operation
fPress the rocker switch upwards or
downwards to the second stage.
Window moves to its final position.
Press again to stop the window in the desired
position.
One-touch operation for closing the passenger’s
window is available once the window is approxi-
mately half-way closed.
Comfort function when unlocking the vehicle
fUnlock car with the remote control.
Hold car key in door lock in the unlocking direc-
tion until the windows have reached the desi-
red position.
Page 29 of 276

Controls, Instruments
29
Closing door windowsfPress rocker switch A until the door window
has reached the desired position.
One-touch operation (with ignition on)
fPress rocker switch A briefly.
Window moves to its final position.
Press again to stop the window in the desired
position.
Anti-crushing protection If the door window is blocked during closing, it will
stop and open again by about an inch.
Warning!
Risk of severe personal injuries.
If the rocker switch “A” is pressed again
within 10
seconds of the window being blo-
cked, the window will close with its full clo-
sing force. Anti-crushing protection is disab-
led.
fOnce the anti-crushing protection acts to stop
the window and opens it slightly, do not press
the rocker switch again within 10 seconds wit-
hout checking to make sure that nothing is blo-
cking the path of the window.The window will close with full closing force.
One-touch operation is disabled for 10 seconds af-
ter blockage of a side window.
Automatic window lowering fPlease observe the chapter “DOORS” on Page
25.
fPlease observe the chapter “CONVERTIBLE
TO P ” o n P a g e 1 5 4 .Storing end position of the windows If the battery is disconnected and reconnected,
the windows will not be raised automatically when
the door is closed.
1. Close the windows with the rocker switch on-
ce.
2. Press front half of rocker switch again to store
the end position of the windows in the control
unit.
Page 31 of 276
Controls, Instruments
31
Door Mirrors Before driving the vehicle, adjust the outside and
inside mirrors.
It is important for safe driving that you have good
vision to the rear.
Warning!
Risk of an accident.
fDo not put anything on or near the windows or
the mirrors that may interfere with the driver’s vision.
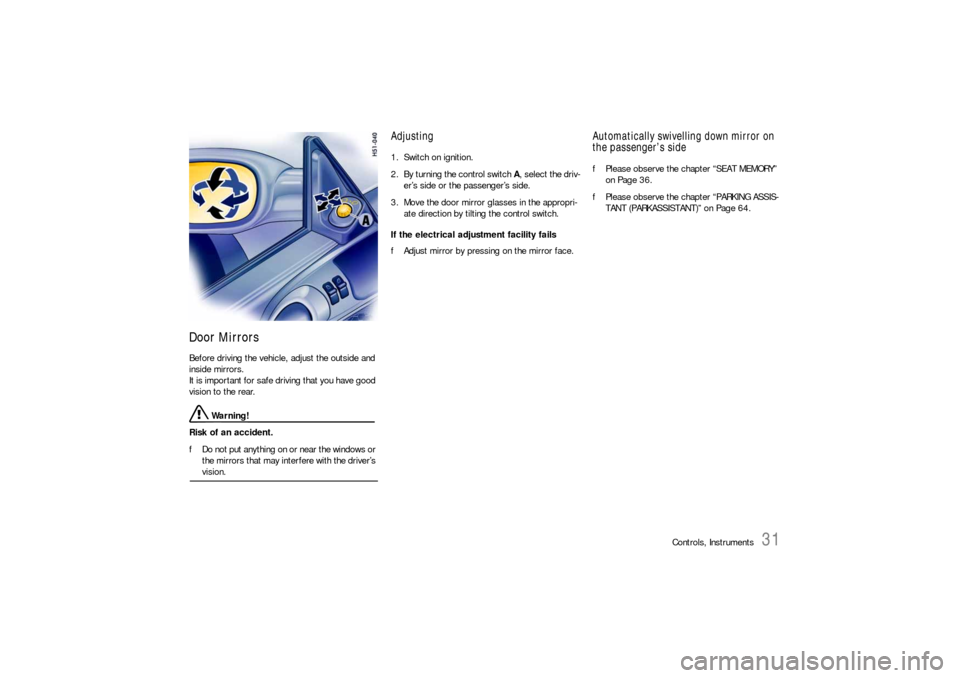
Adjusting 1. Switch on ignition.
2. By turning the control switch A, select the driv-
er’s side or the passenger’s side.
3. Move the door mirror glasses in the appropri-
ate direction by tilting the control switch.
If the electrical adjustment facility fails
fAdjust mirror by pressing on the mirror face.
Automatically swivelling down mirror on
the passenger’s sidefPlease observe the chapter “SEAT MEMORY”
on Page 36.
fPlease observe the chapter “PARKING ASSIS-
TANT (PARKASSISTANT)” on Page 64.
Page 33 of 276
Controls, Instruments
33
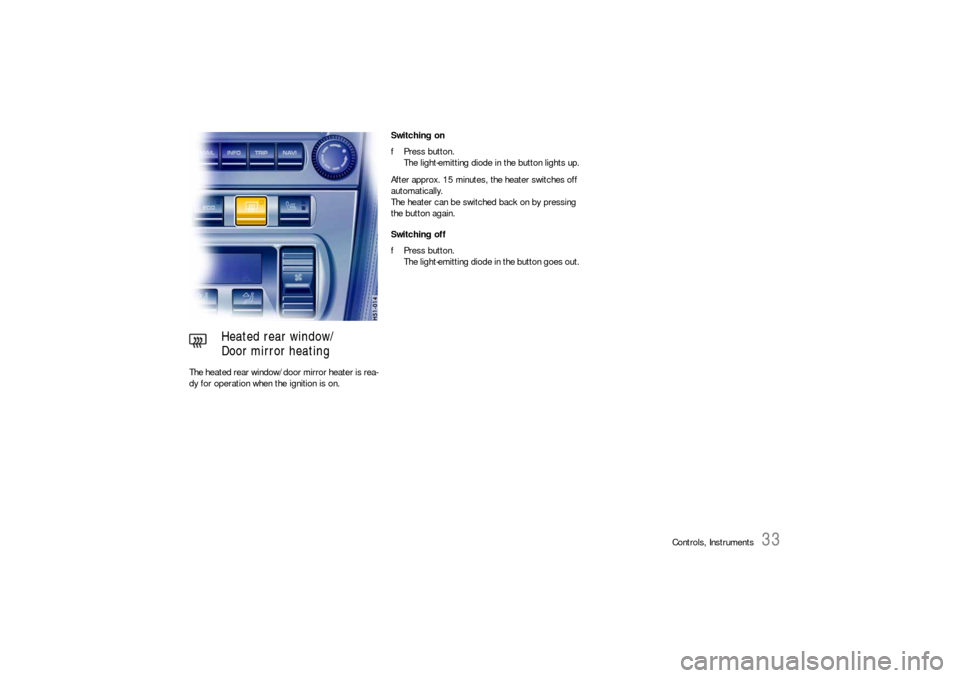
The heated rear window/door mirror heater is rea-
dy for operation when the ignition is on. Switching on
fPress button.
The light-emitting diode in the button lights up.
After approx. 15 minutes, the heater switches off
automatically.
The heater can be switched back on by pressing
the button again.
Switching off
fPress button.
The light-emitting diode in the button goes out.
Heated rear window/
Door mirror heating
Page 36 of 276
36
Controls, Instruments
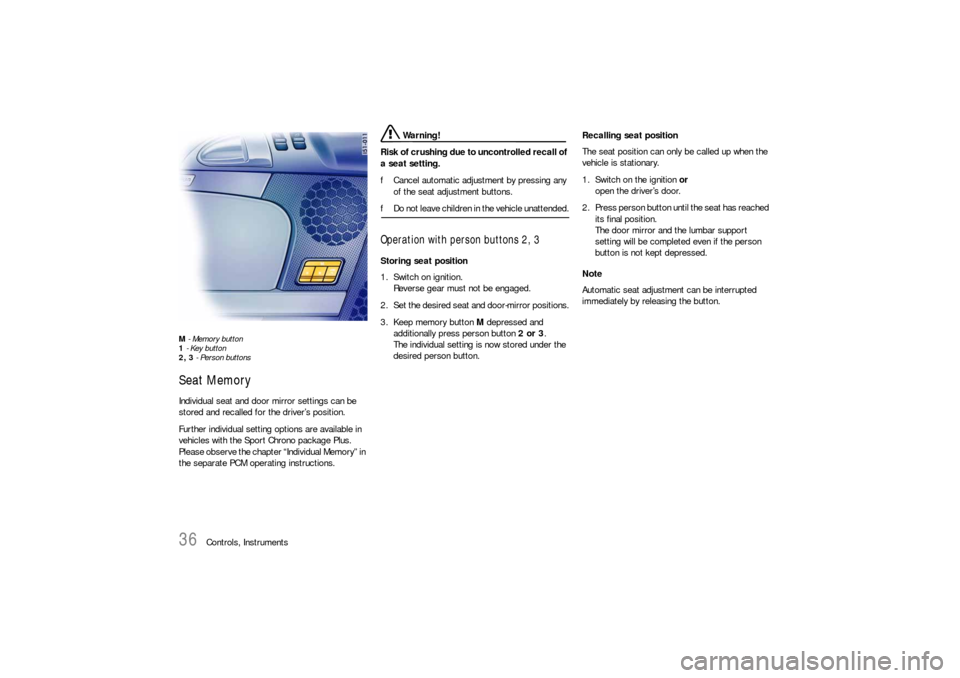
M - Memory button
1 - Key button
2, 3 - Person buttonsSeat MemoryIndividual seat and door mirror settings can be
stored and recalled for the driver’s position.
Further individual setting options are available in
vehicles with the Sport Chrono package Plus.
Please observe the chapter “Individual Memory” in
the separate PCM operating instructions.
Warning!
Risk of crushing due to uncontrolled recall of
a seat setting.
fCancel automatic adjustment by pressing any
of the seat adjustment buttons.
fDo not leave children in the vehicle unattended.Operation with person buttons 2, 3Storing seat position
1. Switch on ignition.
Reverse gear must not be engaged.
2. Set the desired seat and door-mirror positions.
3. Keep memory button M depressed and
additionally press person button 2 or 3.
The individual setting is now stored under the
desired person button.Recalling seat position
The seat position can only be called up when the
vehicle is stationary.
1. Switch on the ignition or
open the driver’s door.
2. Press person button until the seat has reached
its final position.
The door mirror and the lumbar support
setting will be completed even if the person
button is not kept depressed.
Note
Automatic seat adjustment can be interrupted
immediately by releasing the button.
Page 37 of 276

Controls, Instruments
37
Operating with the remote control of the
vehicle keyEach remote control (up to six) can be assigned an
individual seat and door mirror position.
The stored seat and door mirror position is set au-
tomatically when the vehicle is unlocked using the
corresponding remote control.
Storing seat position
1. Switch the ignition on with the desired vehicle
key.
Reverse gear must not be engaged.
2. Set the desired seat and door-mirror positions.
3. Keep memory button M depressed and
additionally press key button 1.
The individual setting is now assigned to this
remote control and to the key button.Storing individual lowered position of the
passenger’s door mirror as a parking aid
Once the driver's seat setting has been stored, an
individual lowered position of the passenger's
door mirror may be stored for driving in reverse:
1. Switch the ignition on with the desired vehicle
key.
2. Engage reverse gear.
3. Select passenger side with mirror switch.
The passenger’s mirror swivels downwards.
4. Set passenger’s door mirror to desired final
position.
5. Keep memory button M depressed and
additionally press key button 1.
The individual setting is now assigned to this
remote control and to the key button.Recalling seat position
fUnlock the locked vehicle or the luggage
compartment with the remote control.
The stored seat position is automatically set.
The seat position assigned to a remote control
can also be recalled with the key button 1 if the
corresponding key was used to switch on the
ignition.
If no seat position has been assigned to a remote
control, the key button will not work.
Note on operation
Automatic seat adjustment can be interrupted
immediately:
– by switching on the ignition,
– by pressing the central locking button,
– by pressing any memory or seat adjustment
button.
Clearing the stored seat position
1. Switch the ignition on with the desired vehicle
key.
fPress memory button twice and key button 1
once consecutively.
Page 38 of 276
38
Controls, Instruments
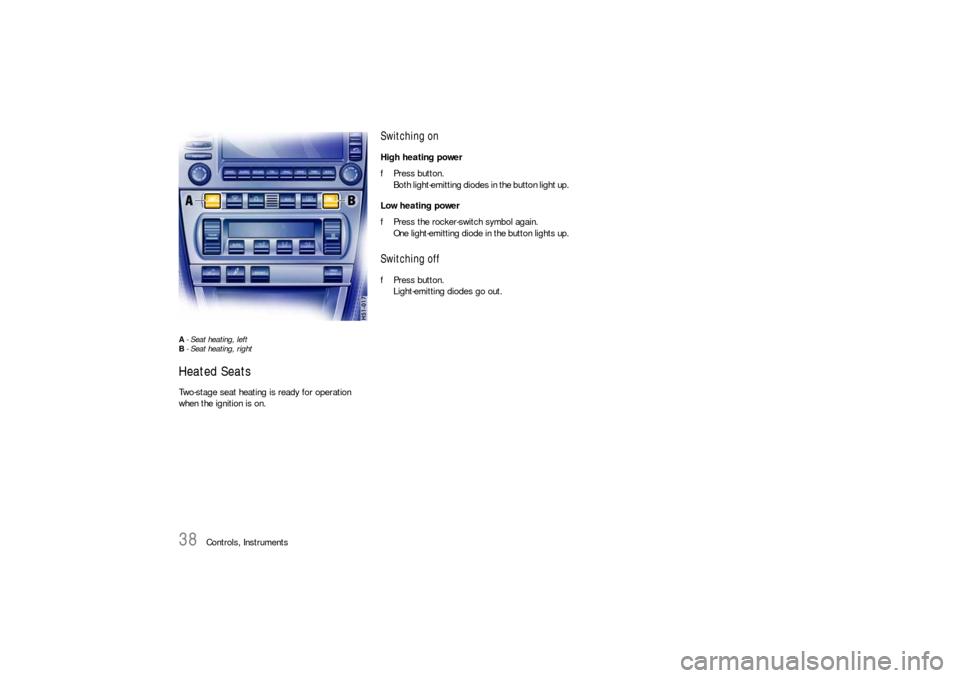
A- Seat heating, left
B- Seat heating, rightHeated SeatsTwo-stage seat heating is ready for operation
when the ignition is on.
Switching onHigh heating power
fPress button.
Both light-emitting diodes in the button light up.
Low heating power
fPress the rocker-switch symbol again.
One light-emitting diode in the button lights up.Switching offfPress button.
Light-emitting diodes go out.
Page 40 of 276
40
Controls, Instruments
Multi-functional steering wheel
Warning!
There is a danger of accident if you set or
operate the on-board computer, radio,
navigation system, telephone or other equip-
ment when driving.
This could distract you from the traffic and
cause you to lose control of the vehicle.
fOperate these components while driving only if
the traffic situation allows you to do so safely.
fCarry out any complicated operating or setting procedures only with the vehicle stationary.
Depending on the equipment in your vehicle, you
can use the function keys of the multi-functional
steering wheel to operate the following Porsche
communication systems:
–PCM,
– Telephone,
– Radio with CD drive,
–CD changer.
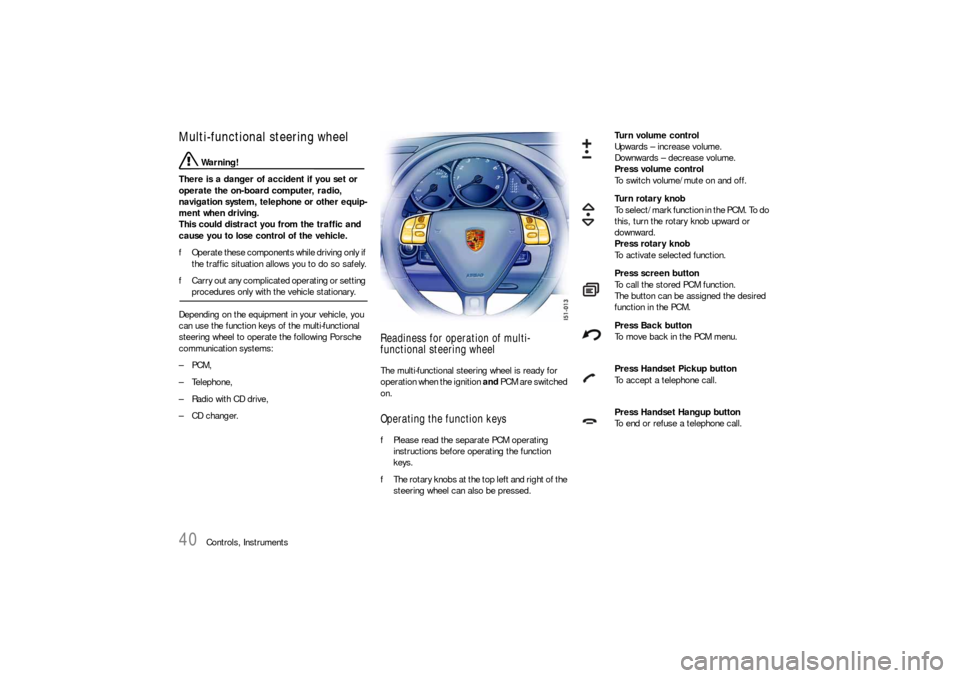
Readiness for operation of multi-
functional steering wheelThe multi-functional steering wheel is ready for
operation when the ignition and PCM are switched
on.Operating the function keysfPlease read the separate PCM operating
instructions before operating the function
keys.
fThe rotary knobs at the top left and right of the
steering wheel can also be pressed.
Turn volume control
Upwards – increase volume.
Downwards – decrease volume.
Press volume control
To switch volume/mute on and off.
Turn rotary knob
To select/mark function in the PCM. To do
this, turn the rotary knob upward or
downward.
Press rotary knob
To activate selected function.
Press screen button
To call the stored PCM function.
The button can be assigned the desired
function in the PCM.
Press Back button
To move back in the PCM menu.
Press Handset Pickup button
To accept a telephone call.
Press Handset Hangup button
To end or refuse a telephone call.
Page 43 of 276
Controls, Instruments
43
An audio-visual warning system is interconnec-
ted with the driver’s safety belt.
Every time the ignition is turned on, the gong will
sound for about 6 seconds to remind driver and
passenger to buckle up.
In addition, the gong will sound if the vehicle speed
exceeds 6mph (10 km/h).
The safety belt warning light in the instrument
panel and on-board computer will go off as soon
as the driver has buckled up.
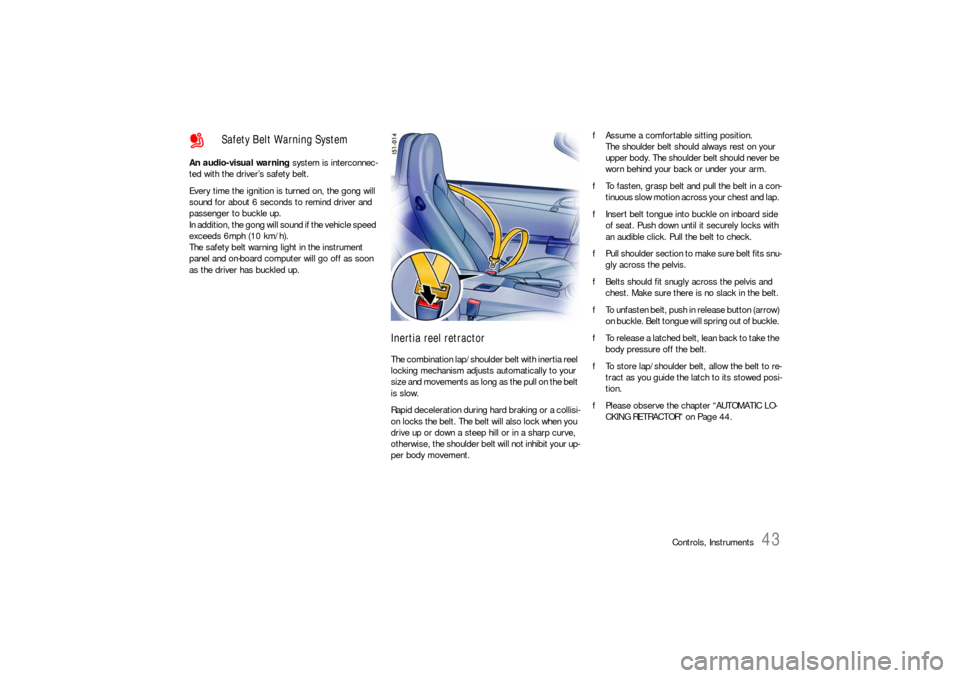
Inertia reel retractor The combination lap/shoulder belt with inertia reel
locking mechanism adjusts automatically to your
size and movements as long as the pull on the belt
is slow.
Rapid deceleration during hard braking or a collisi-
on locks the belt. The belt will also lock when you
drive up or down a steep hill or in a sharp curve,
otherwise, the shoulder belt will not inhibit your up-
per body movement. fAssume a comfortable sitting position.
The shoulder belt should always rest on your
upper body. The shoulder belt should never be
worn behind your back or under your arm.
fTo fasten, grasp belt and pull the belt in a con-
tinuous slow motion across your chest and lap.
fInsert belt tongue into buckle on inboard side
of seat. Push down until it securely locks with
an audible click. Pull the belt to check.
fPull shoulder section to make sure belt fits snu-
gly across the pelvis.
fBelts should fit snugly across the pelvis and
chest. Make sure there is no slack in the belt.
fTo unfasten belt, push in release button (arrow)
on buckle. Belt tongue will spring out of buckle.
fTo release a latched belt, lean back to take the
body pressure off the belt.
fTo store lap/shoulder belt, allow the belt to re-
tract as you guide the latch to its stowed posi-
tion.
fPlease observe the chapter “AUTOMATIC LO-
CKING RETRACTOR” on Page 44.
Safety Belt Warning System
Page 48 of 276
48
Controls, Instruments
Key-operated airbag deactivation
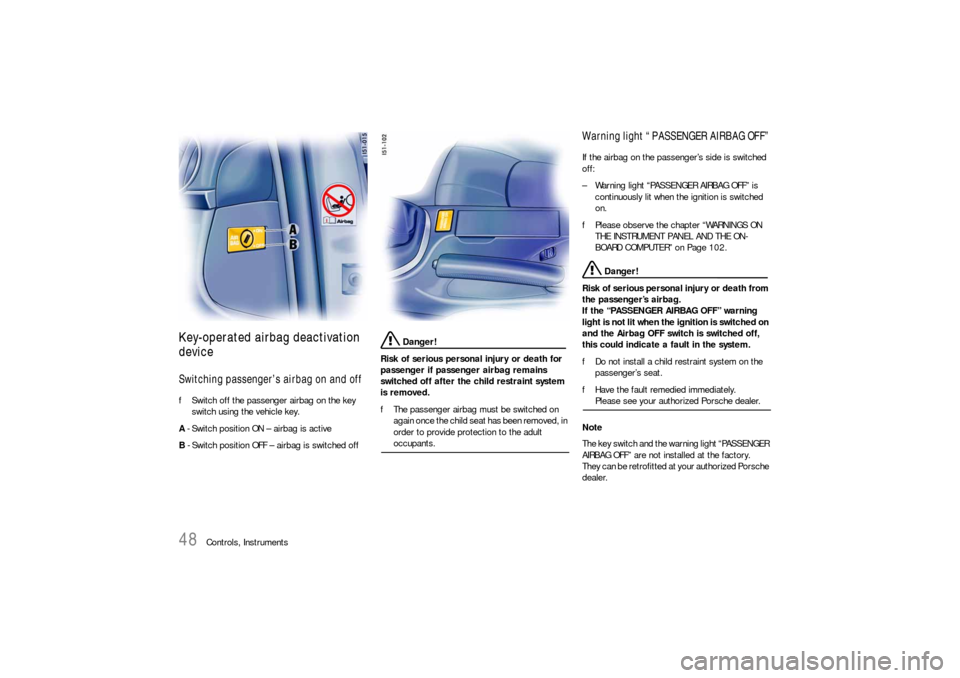
deviceSwitching passenger’s airbag on and offfSwitch off the passenger airbag on the key
switch using the vehicle key.
A - Switch position ON – airbag is active
B - Switch position OFF – airbag is switched off
Danger!
Risk of serious personal injury or death for
passenger if passenger airbag remains
switched off after the child restraint system
is removed.
fThe passenger airbag must be switched on
again once the child seat has been removed, in
order to provide protection to the adult occupants.
Warning light “PASSENGER AIRBAG OFF”If the airbag on the passenger’s side is switched
off:
– Warning light “PASSENGER AIRBAG OFF” is
continuously lit when the ignition is switched
on.
fPlease observe the chapter “WARNINGS ON
THE INSTRUMENT PANEL AND THE ON-
BOARD COMPUTER” on Page 102.
Danger!
Risk of serious personal injury or death from
the passenger’s airbag.
If the “PASSENGER AIRBAG OFF” warning
light is not lit when the ignition is switched on
and the Airbag OFF switch is switched off,
this could indicate a fault in the system.
fDo not install a child restraint system on the
passenger’s seat.
fHave the fault remedied immediately. Please see your authorized Porsche dealer.
Note
The key switch and the warning light “PASSENGER
AIRBAG OFF” are not installed at the factory.
They can be retrofitted at your authorized Porsche
dealer.