PORSCHE BOXSTER 2009 2.G Owners Manual
Manufacturer: PORSCHE, Model Year: 2009, Model line: BOXSTER, Model: PORSCHE BOXSTER 2009 2.GPages: 294, PDF Size: 6.89 MB
Page 151 of 294
Instruments, On-Board Computer, Warnings
149
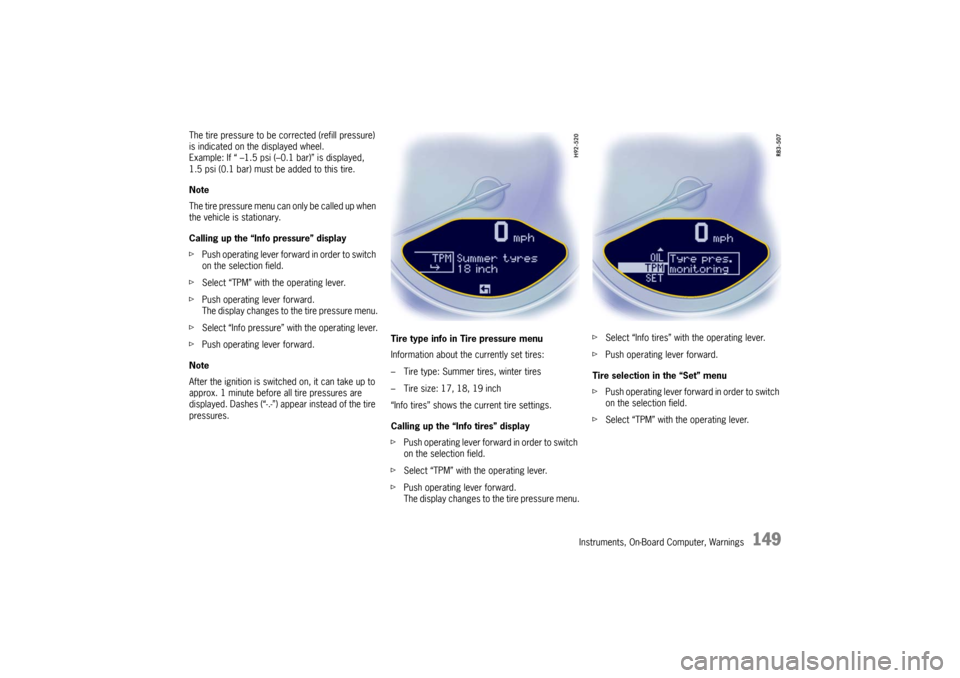
The tire pressure to be corrected (refill pressure)
is indicated on the displayed wheel.
Example: If “ –1.5 psi (–0.1 bar)” is displayed,
1.5 psi (0.1 bar) must be added to this tire.
Note
The tire pressure menu can only be called up when
the vehicle is stationary.
Calling up the “Info pressure” display
fPush operating lever forward in order to switch
on the selection field.
f Select “TPM” with the operating lever.
f Push operating lever forward.
The display changes to the tire pressure menu.
f Select “Info pressure” with the operating lever.
f Push operating lever forward.
Note
After the ignition is switch ed on, it can take up to
approx. 1 minute before all tire pressures are
displayed. Dashes (“-.-”) appear instead of the tire
pressures. Tire type info in Tire pressure menu
Information about the currently set tires:
– Tire type: Summer tires, winter tires
– Tire size: 17, 18, 19 inch
“Info tires” shows the current tire settings.
Calling up the “Info tires” display
f
Push operating lever forward in order to switch
on the selection field.
f Select “TPM” with the operating lever.
f Push operating lever forward.
The display changes to the tire pressure menu. f
Select “Info tires” with the operating lever.
f Push operating lever forward.
Tire selection in the “Set” menu
f Push operating lever forward in order to switch
on the selection field.
f Select “TPM” with the operating lever.
Page 152 of 294
150
Instruments, On-Board Computer, Warnings
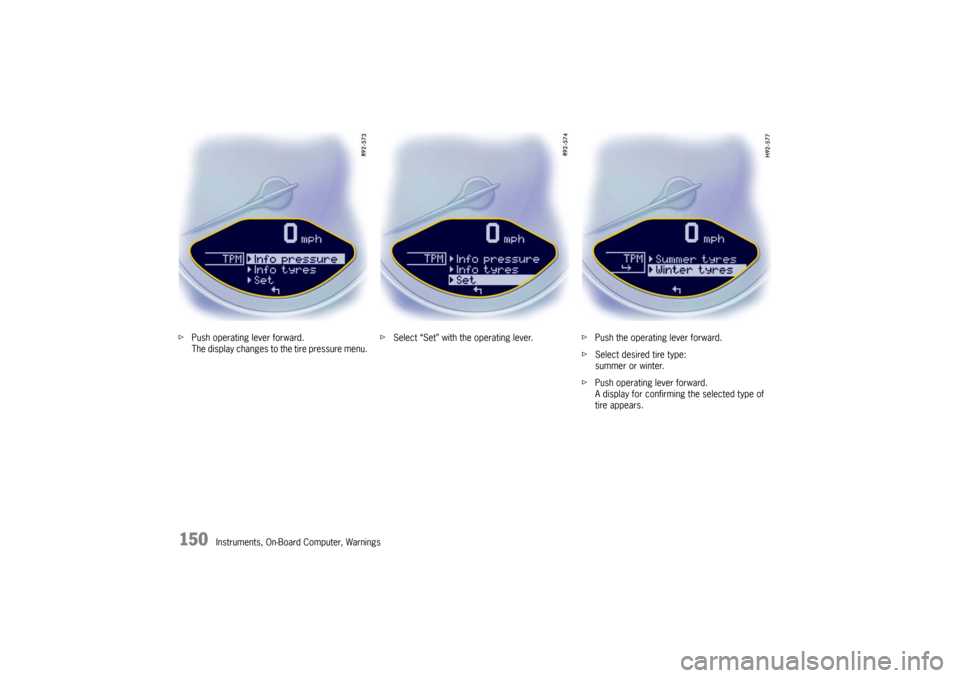
f
Push operating lever forward.
The display changes to the tire pressure menu. f
Select “Set” with the operating lever. fPush the operating lever forward.
f Select desired tire type:
summer or winter.
f Push operating lever forward.
A display for confirming the selected type of
tire appears.
Page 153 of 294
Instruments, On-Board Computer, Warnings
151
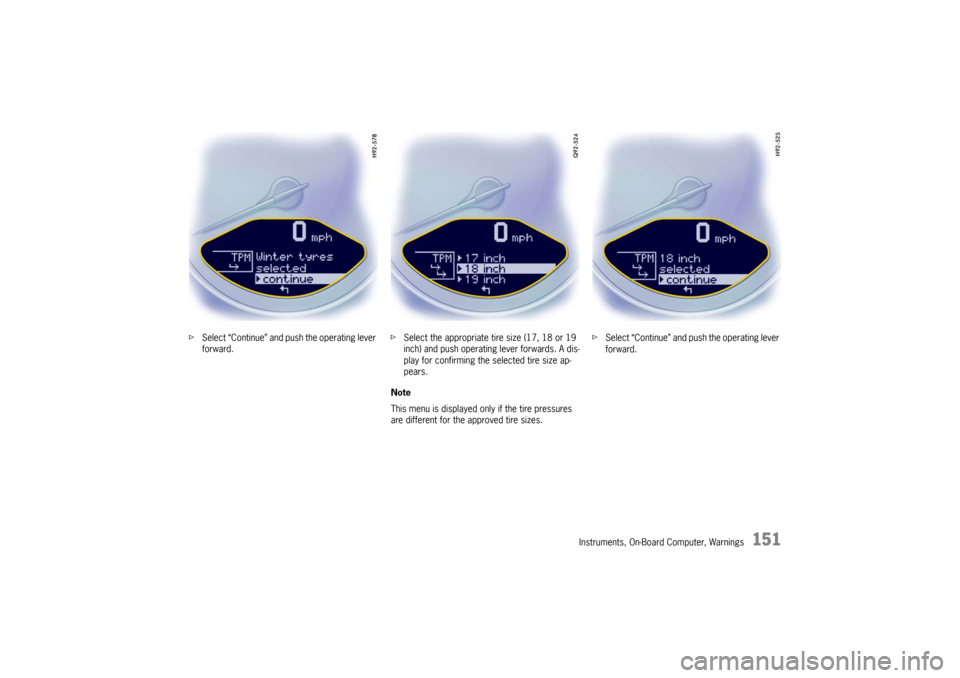
fSelect “Continue” and push the operating lever
forward. f
Select the appropriate tire size (17, 18 or 19
inch) and push operating lever forwards. A dis-
play for confirming the selected tire size ap-
pears.
Note
This menu is displayed only if the tire pressures
are different for the approved tire sizes. f
Select “Continue” and push the operating lever
forward.
Page 154 of 294
152
Instruments, On-Board Computer, Warnings
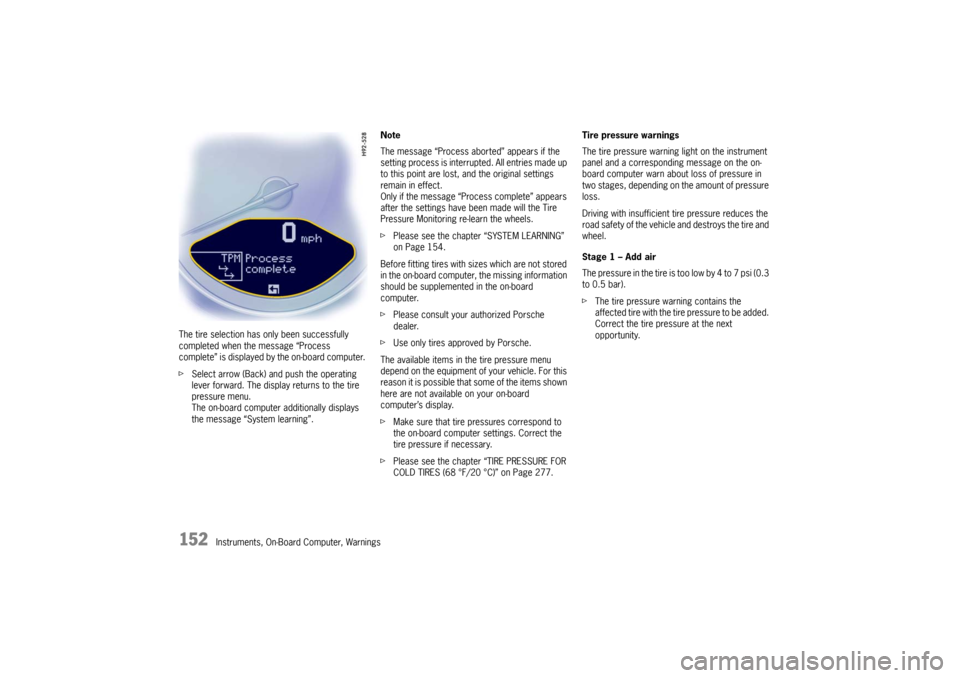
The tire selection has only been successfully
completed when the message “Process
complete” is displayed by the on-board computer.
f
Select arrow (Back) and push the operating
lever forward. The display returns to the tire
pressure menu.
The on-board computer additionally displays
the message “System learning”. Note
The message “Process aborted” appears if the
setting process is interrupted. All entries made up
to this point are lost, and the original settings
remain in effect.
Only if the message “Process complete” appears
after the settings have been made will the Tire
Pressure Monitoring re-learn the wheels.
f
Please see the chapter “SYSTEM LEARNING”
on Page 154.
Before fitting tires with sizes which are not stored
in the on-board computer, the missing information
should be supplemented in the on-board
computer.
f Please consult your authorized Porsche
dealer.
f Use only tires approved by Porsche.
The available items in the tire pressure menu
depend on the equipment of your vehicle. For this
reason it is possible that some of the items shown
here are not available on your on-board
computer’s display.
f Make sure that tire pressures correspond to
the on-board computer settings. Correct the
tire pressure if necessary.
f Please see the chapter “TIRE PRESSURE FOR
COLD TIRES (68 °F/20 °C)” on Page 277. Tire pressure warnings
The tire pressure warning light on the instrument
panel and a corresponding message on the on-
board computer warn about loss of pressure in
two stages, depending on the amount of pressure
loss.
Driving with insufficient tire pressure reduces the
road safety of the vehicle
and destroys the tire and
wheel.
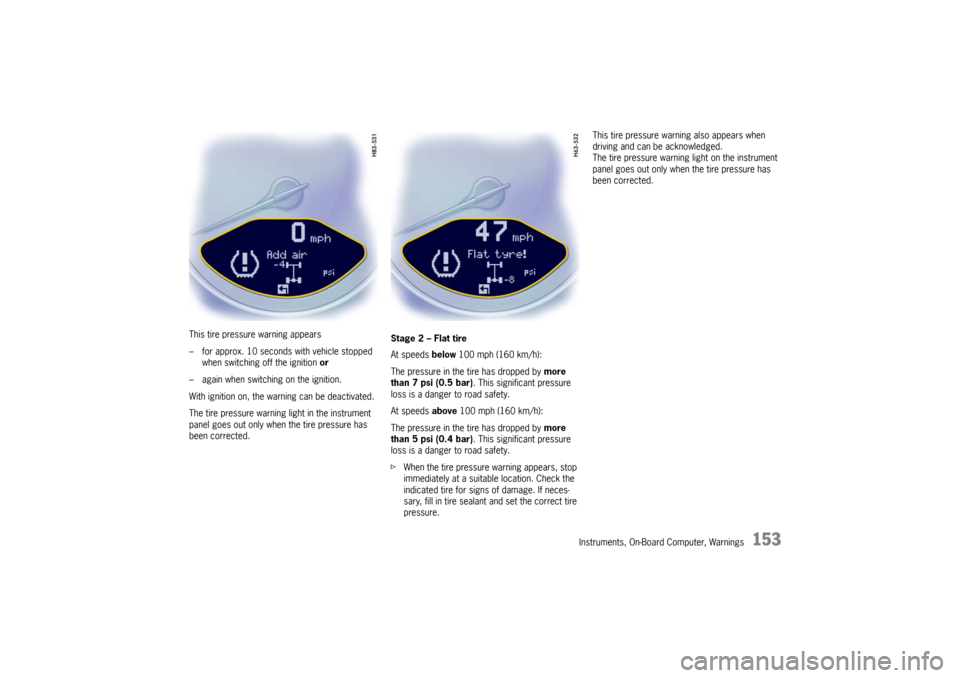
Stage 1 – Add air
The pressure in the tire is too low by 4 to 7 psi (0.3
to 0.5 bar).
f The tire pressure warning contains the
affected tire with the tire pressure to be added.
Correct the tire pressure at the next
opportunity.
Page 155 of 294
Instruments, On-Board Computer, Warnings
153
This tire pressure warning appears
– for approx. 10 seconds with vehicle stopped when switching off the ignition or
– again when switching on the ignition.
With ignition on, the warning can be deactivated.
The tire pressure warning light in the instrument
panel goes out only when the tire pressure has
been corrected. Stage 2 – Flat tire
At speeds
below 100 mph (160 km/h):
The pressure in the tire has dropped by more
than 7 psi (0.5 bar) . This significant pressure
loss is a danger to road safety.
At speeds above 100 mph (160 km/h):
The pressure in the tire has dropped by more
than 5 psi (0.4 bar) . This significant pressure
loss is a danger to road safety.
f When the tire pressure warning appears, stop
immediately at a suitable location. Check the
indicated tire for signs of damage. If neces-
sary, fill in tire sealant and set the correct tire
pressure. This tire pressure warning also appears when
driving and can be acknowledged.
The tire pressure warning light on the instrument
panel goes out only when the tire pressure has
been corrected.
Page 156 of 294

154
Instruments, On-Board Computer, Warnings
System learningThe Tire Pressure Monitoring begins to “learn” the
wheels after a wheel change, wheel transmitter
replacement or update of the tire settings. During
this process, the Tire Pressure Monitoring recog-
nizes the tires and their locations.
The on-board computer displayes the message
“TPM is learning, monitoring not act.”.The Tire Pressure Monitoring requires a certain
amount of time to learn the wheels. During this
time, the current tire pressures are not available
on the on-board-computer:
– The tire pressure warning light remains lit until
all wheels have been learned.
– The display of the tire pressure function of the on-board computer shows lines.
– The required pressures for cold tires at 68 °F (20 °C) are indicated in the Info pressure
display in the tire pressure menu.
Position and pressure information is displayed as
soon as the Tire Pressure Monitoring has as-
signed the wheels identified as belonging to the
vehicle to the correct wheel positions.
The wheel learning process takes place
exclusively when the vehicle is being driven
(vehicle speed above 25 km/h (16 mph)).
f Check the tire pressure for all wheels on the
“Info pressure” display.
f Correct the tire pressure to the required
pressure if necessary.
Changing a wheel and replacing tiresfNew wheels must be fitt ed with radio transmit-
ters for the Tire Pressure Monitoring.
Before tires are changed, the battery charge
state of the wheel transmitters should be
checked at an authorized Porsche dealer.
f Switch the ignition off when changing a wheel.
The tire settings on the on-board computer must
be updated after changing a wheel.
If the tire settings are not updated, the message
“Wheel change? Input new TPM settings!” is
displayed on the on-board computer.
f Update the on-board computer settings when
the vehicle is stationary the next time.
Page 157 of 294

Instruments, On-Board Computer, Warnings
155
Warning!
Your vehicle has also be en equipped with a TPM
malfunction indicator to indicate when the system
is not operating properly.
The TPM malfunction indicator is combined with
the low tire pressure telltale.
When the system detects a malfunction, the tellta-
le will flash for approximately one minute and then
remain continuously illuminated. This sequence
will continue upon subsequent vehicle start-ups as
long as the malfunction exists.
When the malfunction indi cator is illuminated, the
system may not be able to detect or signal low tire
pressure as intended.
TPM malfuntions may occur for a variety of
reasons, including the installation of replacement
or alternate tires or wheels on the vehicle that
prevent the TPM from functioning properly.
Always check the TPM malfunction telltale after
replacing one or more tires or wheels on your
vehicle to ensure that the replacement or alter-
nate tires and wheels allow the TPM to continue to
function properly.
The warning light in the speedometer lights up:
– When a loss in pressure has been detected.
– When learning newly mounted wheels/wheel sensors, as long as the vehicle’s own wheels
have not yet been recognized. In the event of a defect in Tire Pressure Monitoring
or a temporary fault, the warning light in the
speedometer flashes for approx. one minute and
then remains continuously illuminated.
The tire pressure warning light in the instrument
panel goes out only when
the cause of the fault
has been rectified.
Partial monitoringMonitoring of the other wheels is continued if there
is a fault in one or two wheel transmitters.
– The tire pressure warning light lights up.
– The message “TPM partial monitoring” is displayed on the on-board computer.
– No tire pressures are displayed on the on- board computer for wheels with faulty wheel
transmitters.
No monitoringIn the event of faults the Tire Pressure Monitoring
cannot monitor the tire pressure.
The warning light in the speedometer flashes for
approx. one minute and then remains continuously
illuminated and a corresponding message
appears on the on-board computer.
Monitoring is not active when:
– the Tire Pressure Monitoring is faulty,
– wheel transmitters for the Tire Pressure Monitoring are missing,
– during the learning phase after the tire settings have been updated,
– after a wheel change without updating the tire settings,
– more than four wheel transmitters are detected,
– there is external interference by other radio sources, e.g. wireless headphones,
– tire temperatures are too high.
f Please see the chapter “WARNINGS ON THE
INSTRUMENT PANEL AND THE ON-BOARD
COMPUTER” on Page 162.
Warning light
Page 158 of 294

156
Instruments, On-Board Computer, Warnings
Pressure increase as the result of
temperature increaseIn accordance with physical principles, the air
pressure changes as the temperature changes.
The tire pressure increases or decreases by
around 1.5 psi (0.1 bar) for every 18 °F (10 °C)
change in temperature.
The Tire Pressure Monitoring takes this relation-
ship between tire pressure and temperature into
account.
Tire pressure specificationsInformation on tire pressure for public roads can
be found in this Owner's Manual in the Technical
Data chapter or on the tire-pressure plate in the
left door aperture.
These values apply to cold tires at 68 °F (20 °C)
ambient temperature.
Page 159 of 294
Instruments, On-Board Computer, Warnings
157
OIL
Display and measurement of the engine
oil level
Caution!
Risk of engine damage.
f Regularly check the oil level each time before
refueling.
f Do not allow the oil level to fall below the minimum mark.
Conditions for measuring the oil level
1. Vehicle stationary.
2. It is important to ensure that the vehicle is horizontal for correct oil level measurement
to occur.
3. Engine must be at operating temperature (at least 140 °F/60 °C).
4. Engine must be idling. Initiating oil level measurement
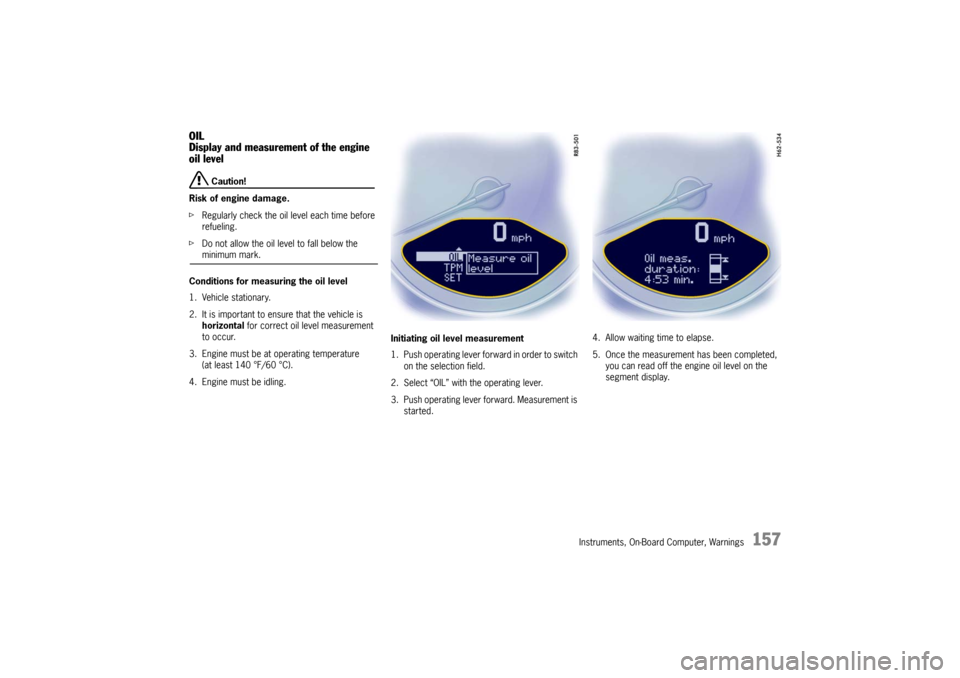
1. Push operating lever forward in order to switch
on the selection field.
2. Select “OIL” with the operating lever.
3. Push operating lever forward. Measurement is started. 4. Allow waiting time to elapse.
5. Once the measurement has been completed,
you can read off the engine oil level on the
segment display.
Page 160 of 294
158
Instruments, On-Board Computer, Warnings
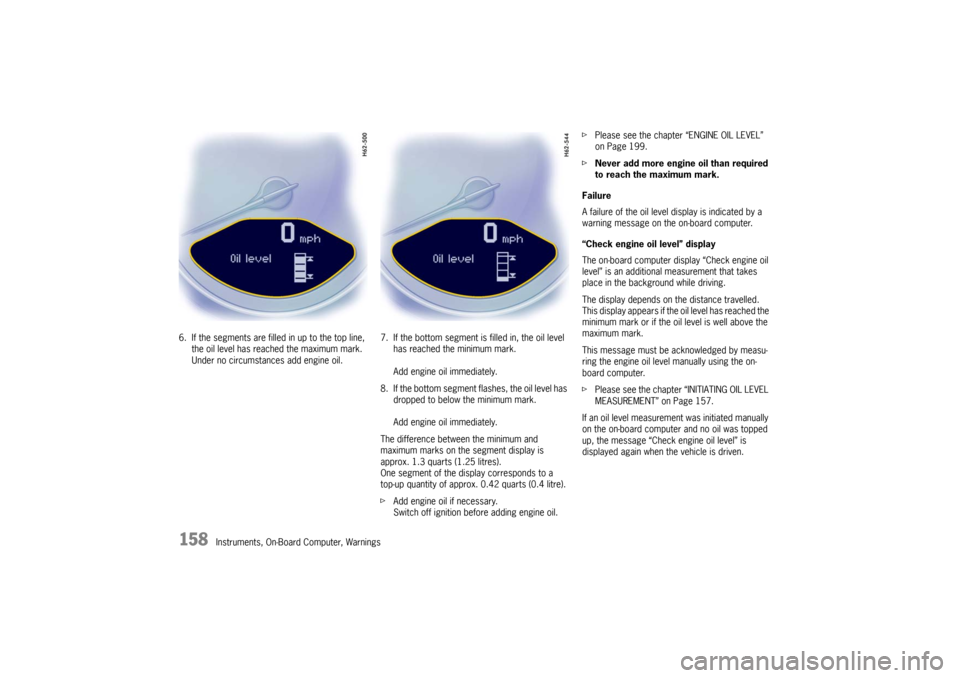
6. If the segments are fille
d in up to the top line,
the oil level has reached the maximum mark.
Under no circumstances add engine oil. 7. If the bottom segment is filled in, the oil level
has reached the minimum mark.
Add engine oil immediately.
8. If the bottom segment fl ashes, the oil level has
dropped to below the minimum mark.
Add engine oil immediately.
The difference between the minimum and
maximum marks on the segment display is
approx. 1.3 quarts (1.25 litres).
One segment of the display corresponds to a
top-up quantity of approx. 0.42 quarts (0.4 litre).
f Add engine oil if necessary.
Switch off ignition before adding engine oil. f
Please see the chapter “ENGINE OIL LEVEL”
on Page 199.
f Never add more engine oil than required
to reach the maximum mark.
Failure
A failure of the oil level display is indicated by a
warning message on the on-board computer.
“Check engine oil level” display
The on-board computer display “Check engine oil
level” is an additional measurement that takes
place in the background while driving.
The display depends on the distance travelled.
This display appears if th e oil level has reached the
minimum mark or if the o il level is well above the
maximum mark.
This message must be acknowledged by measu-
ring the engine oil leve l manually using the on-
board computer.
f Please see the chapter “INITIATING OIL LEVEL
MEASUREMENT” on Page 157.
If an oil level measurement was initiated manually
on the on-board computer and no oil was topped
up, the message “Check engine oil level” is
displayed again when the vehicle is driven.