PORSCHE BOXSTER S 2010 2.G Owners Manual
Manufacturer: PORSCHE, Model Year: 2010, Model line: BOXSTER S, Model: PORSCHE BOXSTER S 2010 2.GPages: 294, PDF Size: 6.89 MB
Page 101 of 294

Operation, Safety
99
Car Telephone and
Aftermarket Alarms Important legal and safety information
regarding the use of cellular telephones
Some states may prohibit the use of cellular tele-
phones while driving a vehicle. Check the laws and
regulations on the use of cellular telephones in the
areas where you drive.
Danger!
Risk of an accident.
Severe personal injury or death can result in
the event of an accident.
Looking away from the road or turning your
attention away from your driving can cause
an accident and seri ous or fatal injury.
When using your cellular telephone, you should al-
ways:
f Give full attention to your driving - pull off the
road and park before making or answering a
call if traffic conditions so require; and
f Keep both hands on the steering wheel - use
hands-free operation (if available) - pull off the
road and park before using a hand-held tele-phone. It is essential to observe the telephone
manufacturer's instructions before operating
the telephone.
Any portable telephone or radio transmitter which
is used in a Porsche must
be properly installed in
accordance with the technical requirements of
Porsche.
The transmission power must not exceed
10 W.
The devices must possess a type approval for
your vehicle and have an “e” symbol.
If you should require equipment with transmission
power values greater than 10 W, please consult
your authorized Porsche dealer for this purpose.
The dealer is familiar with the technical require-
ments for installing devices of this kind.
The antennas for all radios and telephones with a
transmitting antenna must be externally mounted.
The improper installation of radios or telephones
or use of a radio or tele phone with a transmitting
antenna inside the car may cause the warning
lights to come on.
Improper installation of such equipment can cre-
ate a discharged battery or excessive current
draw from added equipment. If aftermarket systems are
installed by non-dealer-
ship technicians or outside the selling dealer,
problems may result. Installation of aftermarket
equipment is not covered under the New Car War-
ranty.
f Consult your authorized Porsche dealer about
the installation of non Porsche approved equip-
ment.
Reception quality
The reception quality of your car telephone will
change constantly when you are driving. Interfer-
ence caused by buildings, landscape and weather
is unavoidable. It may become particularly difficult
to hear when using the hands-free function due to
external noise such as engine and wind noise.
Automatic car-wash
f Unscrew external antennas before using an au-
tomatic car-wash.
Page 102 of 294
100
Operation, Safety
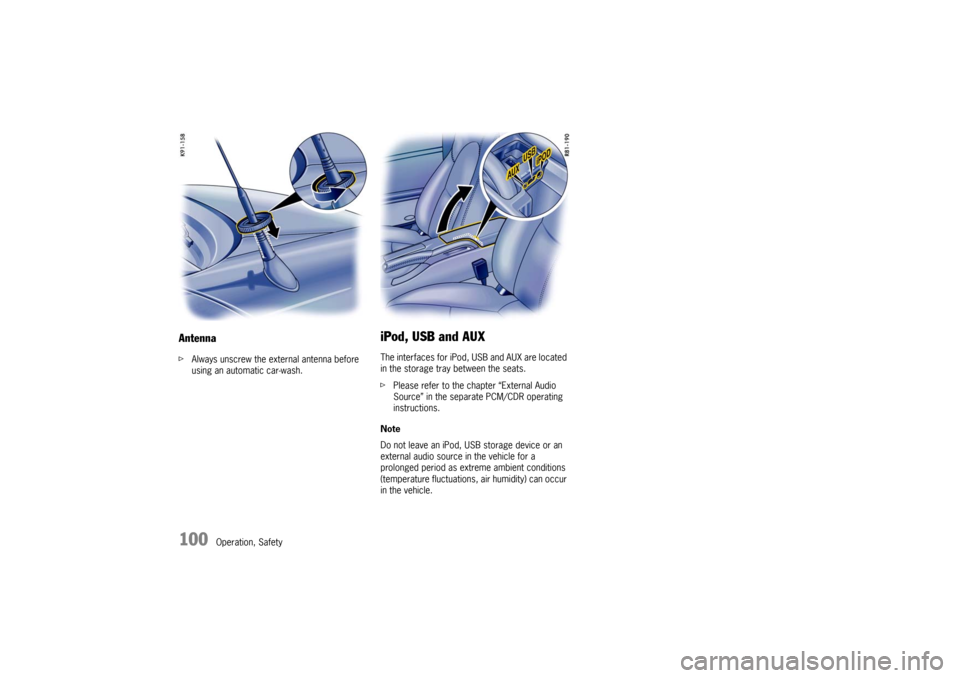
AntennafAlways unscrew the external antenna before
using an automatic car-wash.
iPod, USB and AUXThe interfaces for iPod, USB and AUX are located
in the storage tray between the seats.
fPlease refer to the chapter “External Audio
Source” in the separate PCM/CDR operating
instructions.
Note
Do not leave an iPod, USB storage device or an
external audio source in the vehicle for a
prolonged period as extreme ambient conditions
(temperature fluctuations, air humidity) can occur
in the vehicle.
Page 103 of 294
Operation, Safety
101
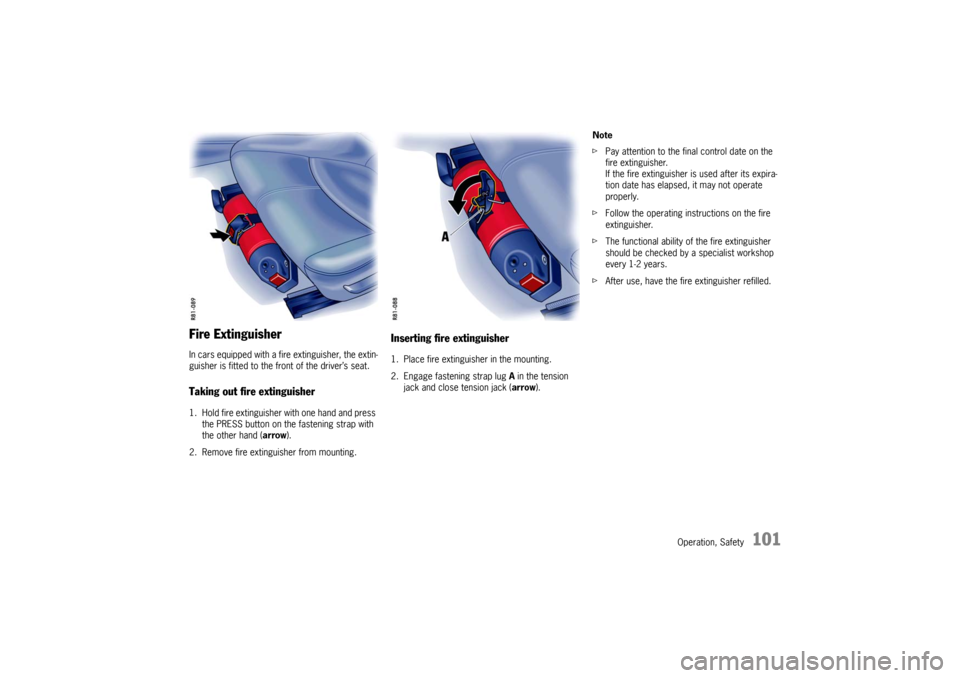
Fire ExtinguisherIn cars equipped with a fire extinguisher, the extin-
guisher is fitted to the fr ont of the driver’s seat.Taking out fire extinguisher1. Hold fire extinguisher with one hand and press
the PRESS button on the fastening strap with
the other hand ( arrow).
2. Remove fire extinguisher from mounting.
Inserting fire extinguisher1. Place fire extinguish er in the mounting.
2. Engage fastening strap lug A in the tension
jack and close tension jack ( arrow). Note
f
Pay attention to the final control date on the
fire extinguisher.
If the fire extinguisher is used after its expira-
tion date has elapsed, it may not operate
properly.
f Follow the operating instructions on the fire
extinguisher.
f The functional ability of the fire extinguisher
should be checked by a specialist workshop
every 1-2 years.
f After use, have the fire extinguisher refilled.
Page 104 of 294
102
Operation, Safety
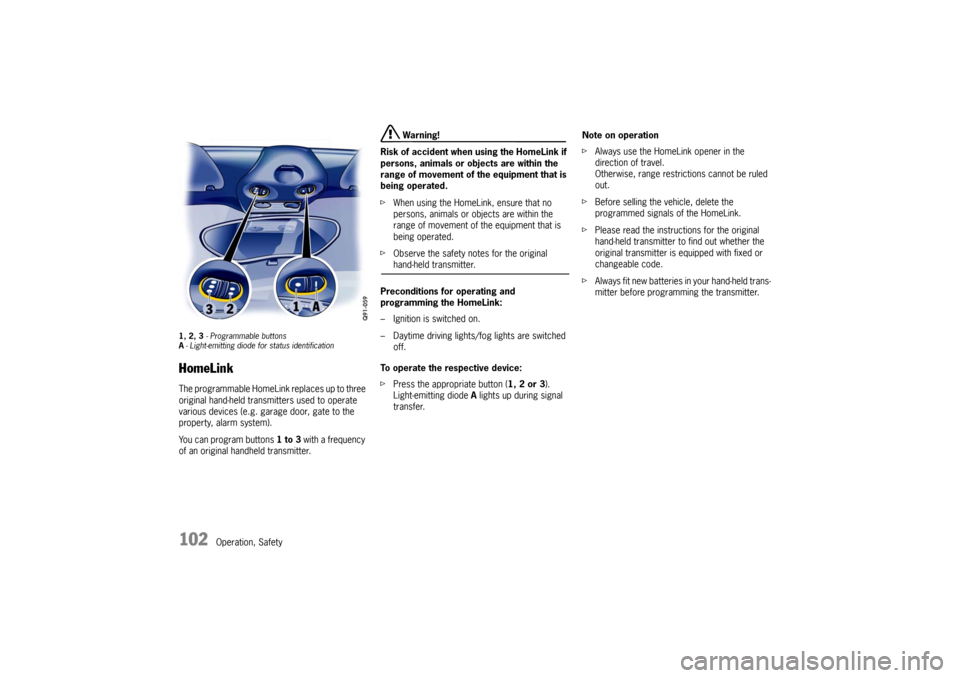
1, 2, 3 - Programmable buttons
A - Light-emitting diode for status identificationHomeLinkThe programmable HomeLink replaces up to three
original hand-held transmitters used to operate
various devices (e.g. garage door, gate to the
property, alarm system).
You can program buttons 1 to 3 with a frequency
of an original handheld transmitter.
Warning!
Risk of accident when using the HomeLink if
persons, animals or objects are within the
range of movement of the equipment that is
being operated.
f When using the HomeLink, ensure that no
persons, animals or objects are within the
range of movement of the equipment that is
being operated.
f Observe the safety notes for the original hand-held transmitter.
Preconditions for operating and
programming the HomeLink:
– Ignition is switched on.
– Daytime driving lights/fog lights are switched off.
To operate the respective device:
f Press the appropriate button ( 1, 2 or 3).
Light-emitting diode A lights up during signal
transfer. Note on operation
f
Always use the HomeLink opener in the
direction of travel.
Otherwise, range restrictions cannot be ruled
out.
f Before selling the vehicle, delete the
programmed signals of the HomeLink.
f Please read the instructions for the original
hand-held transmitter to find out whether the
original transmitter is equipped with fixed or
changeable code.
f Always fit new batteries in your hand-held trans-
mitter before programming the transmitter.
Page 105 of 294
Operation, Safety
103
Allocating signals to the buttonsfPlease follow the operating instructions for the
original hand-held transmitter.
Prior to programming the HomeLink for the
first time
The following process dele tes the standard codes
set at the factory. Do not repeat the process if you
program further buttons.
f Keep the two outer buttons 1 and 3
depressed for approx. 20 seconds until light-
emitting diode A begins to flash quickly.
All programmed signals of buttons 1 to 3 are
deleted. Programming HomeLink with fixed code
hand-held transmitters
1. Press and hold the desired button until the
light-emitting diode begins to flash slowly.
You then have approx. 5 minutes to perform
steps 2 and 3.
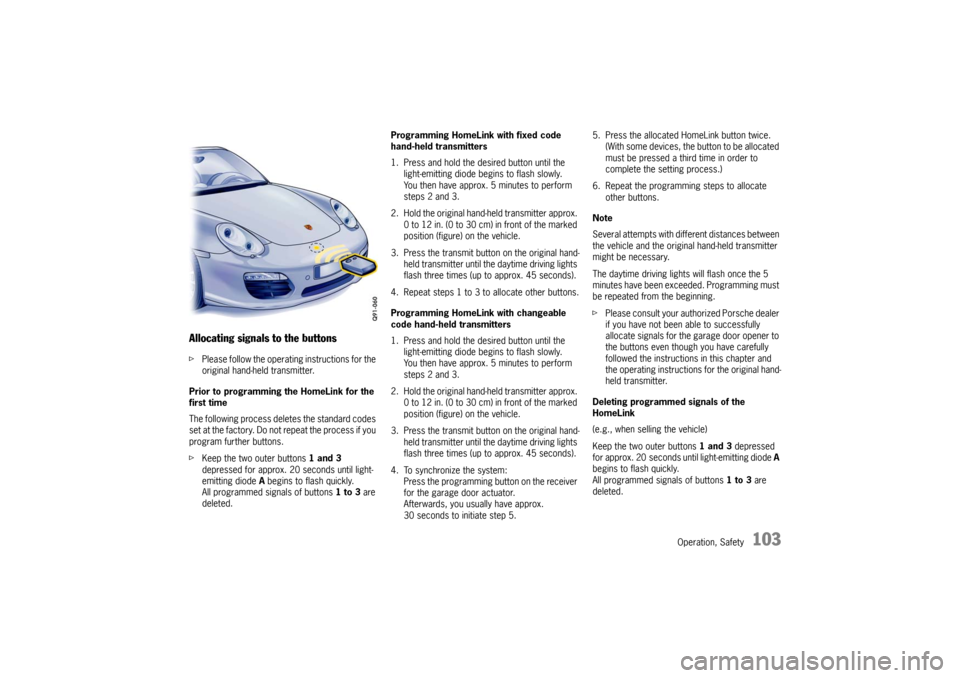
2. Hold the original hand -held transmitter approx.
0 to 12 in. (0 to 30 cm ) in front of the marked
position (figure) on the vehicle.
3. Press the transmit button on the original hand- held transmitter until the daytime driving lights
flash three times (up to approx. 45 seconds).
4. Repeat steps 1 to 3 to allocate other buttons.
Programming HomeLink with changeable
code hand-held transmitters
1. Press and hold the desired button until the light-emitting diode begins to flash slowly.
You then have approx. 5 minutes to perform
steps 2 and 3.
2. Hold the original hand -held transmitter approx.
0 to 12 in. (0 to 30 cm ) in front of the marked
position (figure) on the vehicle.
3. Press the transmit button on the original hand- held transmitter until the daytime driving lights
flash three times (up to approx. 45 seconds).
4. To synchronize the system: Press the programming button on the receiver
for the garage door actuator.
Afterwards, you usually have approx.
30 seconds to initiate step 5. 5. Press the allocated HomeLink button twice.
(With some devices, the button to be allocated
must be pressed a third time in order to
complete the setting process.)
6. Repeat the programming steps to allocate other buttons.
Note
Several attempts with different distances between
the vehicle and the original hand-held transmitter
might be necessary.
The daytime driving lights will flash once the 5
minutes have been exceeded. Programming must
be repeated from the beginning.
f Please consult your authorized Porsche dealer
if you have not been able to successfully
allocate signals for the garage door opener to
the buttons even though you have carefully
followed the instructions in this chapter and
the operating instructions for the original hand-
held transmitter.
Deleting programmed signals of the
HomeLink
(e.g., when selling the vehicle)
Keep the two outer buttons 1 and 3 depressed
for approx. 20 seconds until light-emitting diode A
begins to flash quickly.
All programmed signals of buttons 1 to 3 are
deleted.
Page 106 of 294

104
Operation, Safety
Page 107 of 294
Automatic Air Conditioning System, Heated Rear Window/Door Mirror Heating
105
Automatic Air Conditioning System, Heated Rear Window/Door Mirror Heatin\
g
Air conditioning ............
............................. 106
Automatic Air Conditioning System ............. 109
Central and Side Vents .............................. 112
Fresh-air Intake ............ ............................. 112
Heated Rear Window/Door Mirror Heating ... 113
Page 108 of 294
106
Automatic air conditioning system, Heated rear window/Door mirror heating
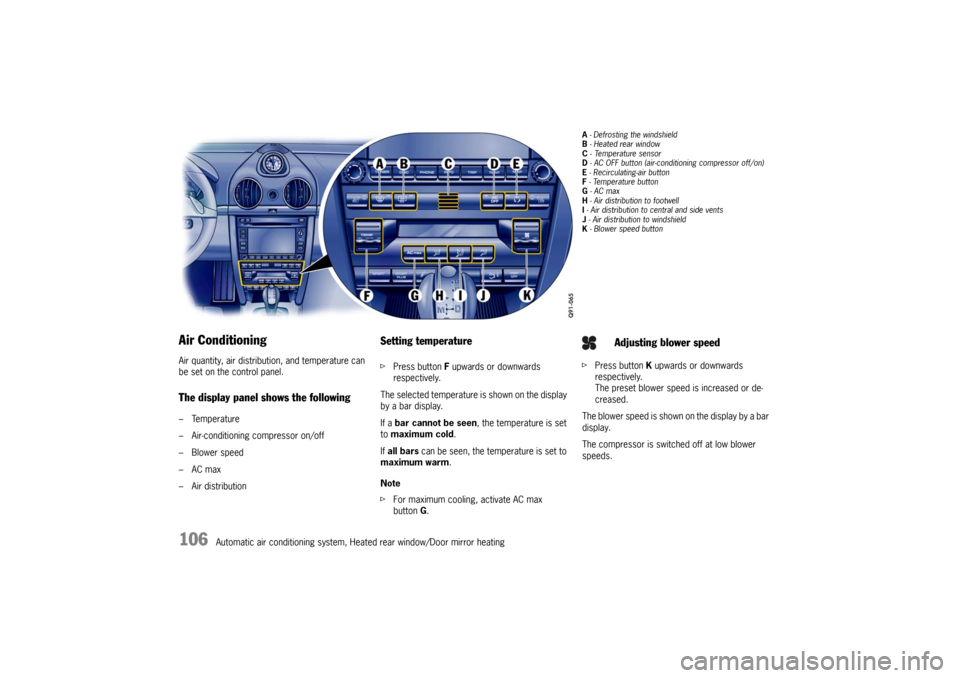
Air ConditioningAir quantity, air distribution, and temperature can
be set on the control panel.The display panel shows the following– Temperature
– Air-conditioning compressor on/off
–Blower speed
–AC max
– Air distribution
Setting temperaturefPress button F upwards or downwards
respectively.
The selected temperature is shown on the display
by a bar display.
If a bar cannot be seen , the temperature is set
to maximum cold .
If all bars can be seen, the temperature is set to
maximum warm.
Note
f For maximum cooling, activate AC max
button G.
A - Defrosting the windshield
B - Heated rear window
C - Te m p e r a t u r e s e n s o r
D - AC OFF button (air-conditioning compressor off/on)
E - Recirculating-air button
F - Temperature button
G - AC max
H - Air distribution to footwell
I - Air distribution to central and side vents
J - Air distribution to windshield
K - Blower speed buttonf Press button K upwards or downwards
respectively.
The preset blower speed is increased or de-
creased.
The blower speed is shown on the display by a bar
display.
The compressor is switched off at low blower
speeds.
Adjusting blower speed
Page 109 of 294
Automatic air conditioning system, Heated rear window/Door mirror heating
107
fPress button A (switch on or off).
The light-emitting diode in the button lights up.
The windshield is demisted or defrosted as
quickly as possible.
Air flows to the windshield only.
The outside-air supply is interrupted and only the
inside air is circulated.
Warning!
Risk of accident due to impaired vision,
resulting in serious personal injury or death.
In recirculating-air setting, the windows may
fog up.
f Only select recirculating-air setting for short
periods.
f If the windows fog up, sw itch recirculating-air
setting off immediately by pressing the
recirculating-air button again and select the ”Defrost windshield“ function.
Switching recirculating-air mode on or off
f Press recirculating-air button E.
The light-emitting diode in the button lights up.
AC OFF– switching the air-conditioning
compressor on and offThe air conditioning compressor switches off
automatically at temperatures below approx.
37 °F/3 °C and cannot be switched on, even
manually.
Whenever outside temperatures exceed approx.
37 °F/3 °C, the air-conditioning compressor can
be switched on or off manually.
The compressor can be switched off manual to
save fuel.
f Press AC OFF button D.
The light-emitting diode in the button lights up.
The compressor is switched off.
f If the interior temperature is too high, switch
on the compressor again.
To dry incoming air in damp weather, do not
switch off the air-conditioning compressor.
This prevents fogging of windows.AC max operationIn AC max operation, the interior of your vehicle is
cooled as quickly as possible.
f Press AC max button H.
The light-emitting diode in the button lights up.
Air distributionThe individual air distributions can be combined as
desired.
If an air distribution is not selected, no symbol
appears in the display panel. Air flows then from
all vents as well as to the windshield.
Recommended setting in Summer –
Air distribution to central and side vents
Recommended setting in Winter –
Air distribution to footwell and windshield
f Press button H.
The selection appears on the display panel.
The air flows to the footwell.
f Press button I.
The selection appears on the display panel.
The air flows from the central and side vents.
Vents must be open.
f Press button J.
The selection appears on the display panel.
The air flows to the windshield.
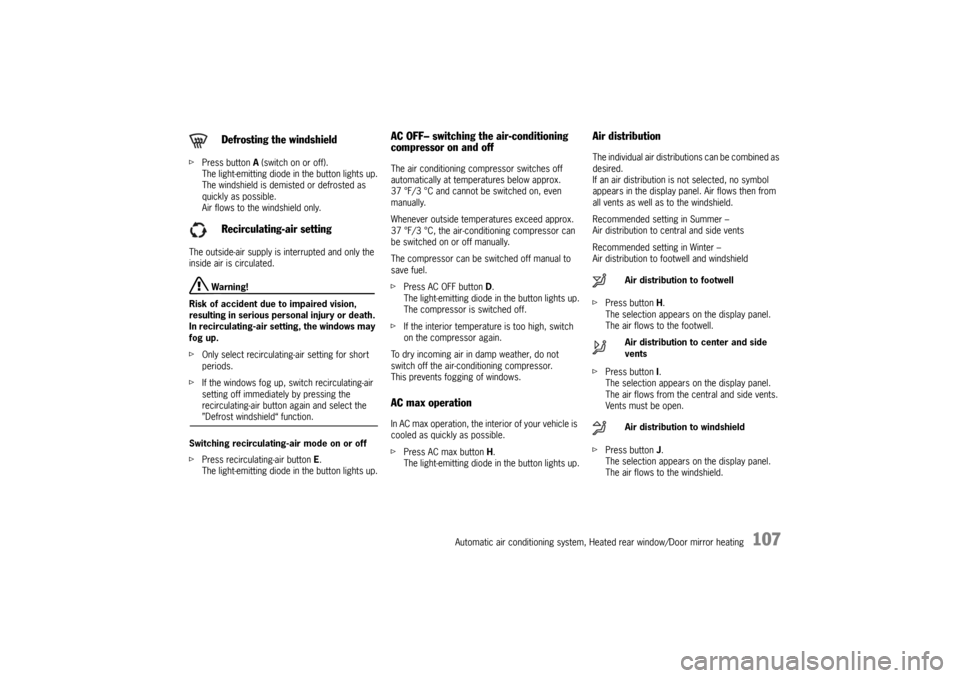
Defrosting the windshield
Recirculating-air setting
Air distribution to footwell
Air distribution to center and side
vents
Air distribution to windshield
Page 110 of 294

108
Automatic air conditioning system, Heated rear window/Door mirror heating
Information on air-conditioning
compressor– May switch off briefly to ensure sufficient engine cooling if the engine is operating under
extreme load.
– The air-conditioning compressor switches off automatically at temperatures below approx.
37 °F/3 °C and cannot be switched on, even
manually.
– Operates most effectively with the windows closed.
If the vehicle has been in the sun for a long
time, it is a good idea to ventilate the interior
briefly with the windows open.
– Depending on the outside temperature and hu- midity, condensation can drip from the evapo-
rator and form a pool under the car.
This is normal and not a sign of leakage.
– If uncooled air flows out when the lowest temperature has been set, switch off the air
conditioning compressor and have the fault
remedied.
Please contact your auth orized Porsche dealer
for further information.