PORSCHE PANAMERA 2009 1.G Information Manual
Manufacturer: PORSCHE, Model Year: 2009, Model line: PANAMERA, Model: PORSCHE PANAMERA 2009 1.GPages: 343, PDF Size: 7.96 MB
Page 81 of 343
Air Conditioning
79
Setting air quantityThe selected air quantity is shown in a bar display
above the button . The more bars that are
displayed, the more air flows into the passenger
compartment.
Increasing air quantity
fPress button for the air quantity to the
relevant air-conditioned area upwards.
Reducing air quantity
f Press button for the air quantity to the
relevant air-conditioned area downwards.
Press button for the relevant air-conditioned
area to switch back to automatic mode.
If the air quantity was reduced so much that OFF
appears on the air-conditioning system display,
the supply of air from the outside is interrupted.
Warning!
Risk of accidents due to impaired vision.
The windows can mist up if the air quantity
setting is OFF.
f Only select air quantity setting OFF for short
periods.
f If windows mist up, press for the left and
right vehicle side on the front control panel upwards (increase air quantity).
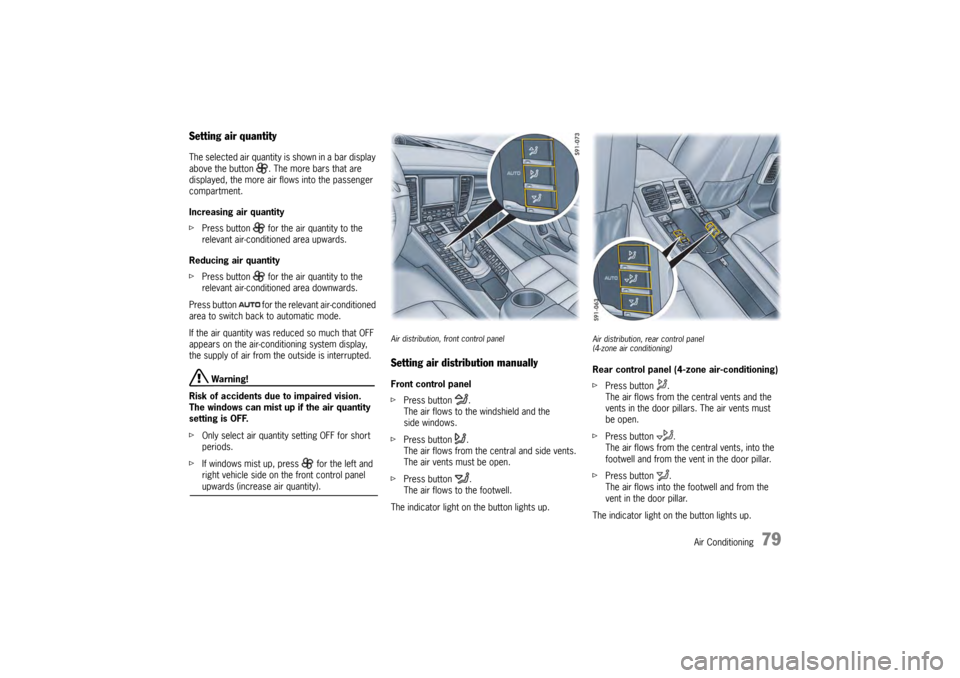
Air distribution, front control panelSetting air distribution manuallyFront control panel
f Press button .
The air flows to the windshield and the
side windows.
f Press button .
The air flows from the central and side vents.
The air vents must be open.
f Press button .
The air flows to the footwell.
The indicator light on the button lights up.
Air distribution, rear control panel
(4-zone air conditioning)Rear control panel (4-zone air-conditioning)
f Press button .
The air flows from the central vents and the
vents in the door pillars. The air vents must
be open.
f Press button .
The air flows from the ce ntral vents, into the
footwell and from the vent in the door pillar.
f Press button .
The air flows into the footwell and from the
vent in the door pillar.
The indicator light on the button lights up.
Page 82 of 343
80
Air Conditioning
Cancelling manual air distributionfPress the relevant air distribution button again.
The indicator light on the button goes out.
or
Press button for the relevant
air-conditioned area.
The indicator light on the button lights up.
Air quantity and distribution are controlled
automatically and variations are compensated.
Air distribution in the rear air-conditioned
areas when MONO or REAR mode is
activated (4-zone air conditioning)If the button or is pressed on the front
control panel, air flows from the central and side
vents in the rear of the vehicle.
If the button is pressed on the front control
panel, air flows into the footwells in the rear of
the vehicle.
For information on MONO mode:
fPlease see the chapter “ACCEPTING
SETTINGS FOR DRIVER’S SIDE FOR THE
ENTIRE VEHICLE” on page 74.
For information on REAR mode:
f Please see the chapter “ADJUSTING REAR AIR-
CONDITIONED AREAS WITH THE FRONT
CONTROL PANEL – REAR MODE (4-ZONE AIR
CONDITIONING)” on page 81.
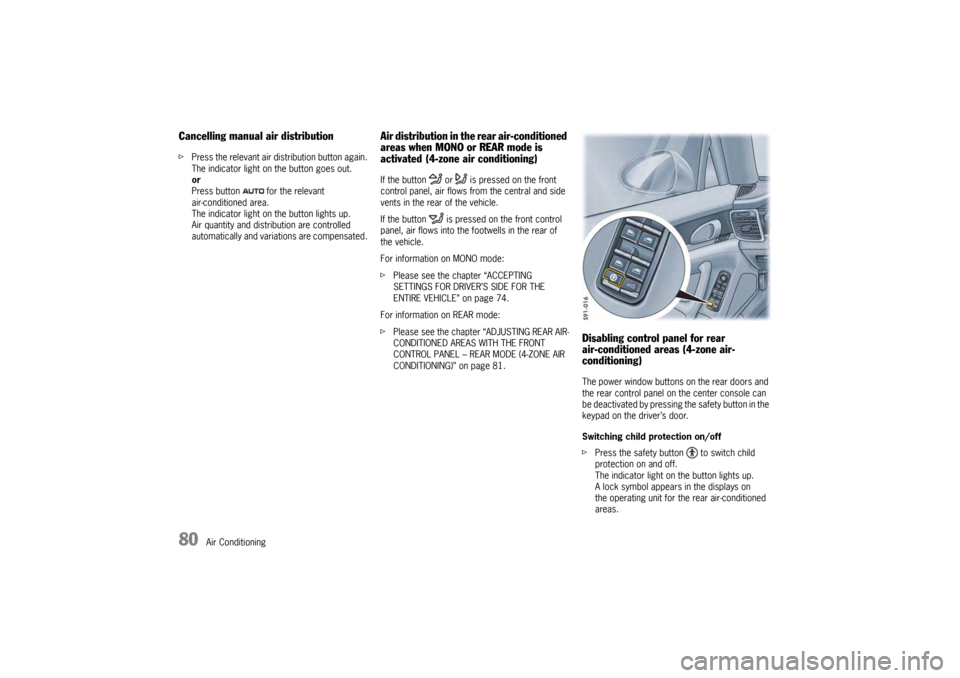
Disabling control panel for rear
air-conditioned areas (4-zone air-
conditioning)The power window buttons on the rear doors and
the rear control panel on the center console can
be deactivated by pressing the safety button in the
keypad on the driver’s door.
Switching child protection on/off
fPress the safety button to switch child
protection on and off.
The indicator light on the button lights up.
A lock symbol appears in the displays on
the operating unit for the rear air-conditioned
areas.
Page 83 of 343
Air Conditioning
81
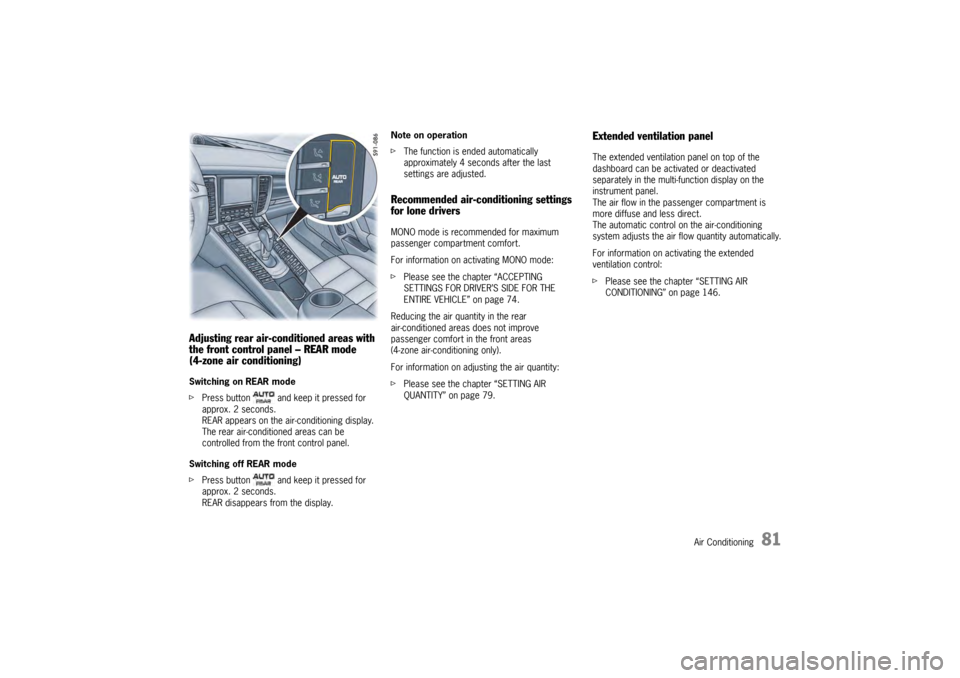
Adjusting rear air-conditioned areas with
the front control panel – REAR mode
(4-zone air conditioning)Switching on REAR mode
fPress button and keep it pressed for
approx. 2 seconds.
REAR appears on the air-conditioning display.
The rear air-conditioned areas can be
controlled from the front control panel.
Switching off REAR mode
f Press button and keep it pressed for
approx. 2 seconds.
REAR disappears from the display. Note on operation
f
The function is ended automatically
approximately 4 seconds after the last
settings are adjusted.
Recommended air-conditioning settings
for lone driversMONO mode is recommended for maximum
passenger compartment comfort.
For information on activating MONO mode:
fPlease see the chapter “ACCEPTING
SETTINGS FOR DRIVER’S SIDE FOR THE
ENTIRE VEHICLE” on page 74.
Reducing the air quantity in the rear
air-conditioned areas does not improve
passenger comfort in the front areas
(4-zone air-conditioning only).
For information on adju sting the air quantity:
f Please see the chapter “SETTING AIR
QUANTITY” on page 79.
Extended ventilation panelThe extended ventilation panel on top of the
dashboard can be activated or deactivated
separately in the multi- function display on the
instrument panel.
The air flow in the passenger compartment is
more diffuse and less direct.
The automatic control on the air-conditioning
system adjusts the air flow quantity automatically.
For information on activating the extended
ventilation control:
f Please see the chapter “SETTING AIR
CONDITIONING” on page 146.
Page 84 of 343
82
Air Conditioning
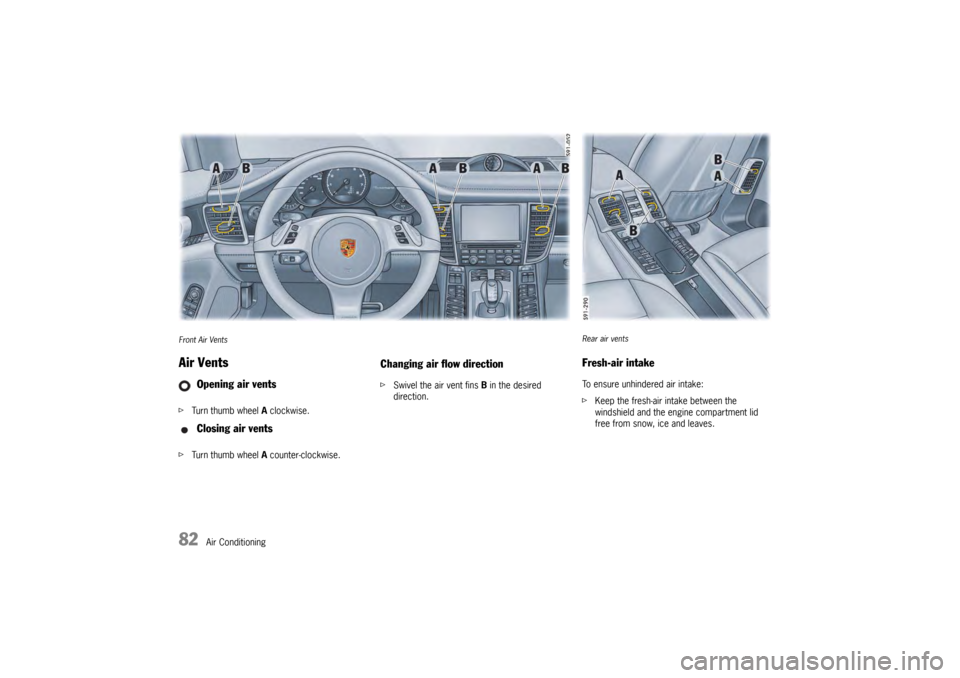
Front Air VentsAir VentsfTurn thumb wheel A clockwise.
f Turn thumb wheel A counter-clockwise.
Changing air flow directionf Swivel the air vent fins B in the desired
direction.
Opening air vents
Closing air vents
Rear air ventsFresh-air intakeTo ensure unhindered air intake:
fKeep the fresh-air intake between the
windshield and the engine compartment lid
free from snow, ice and leaves.
Page 85 of 343
Air Conditioning
83
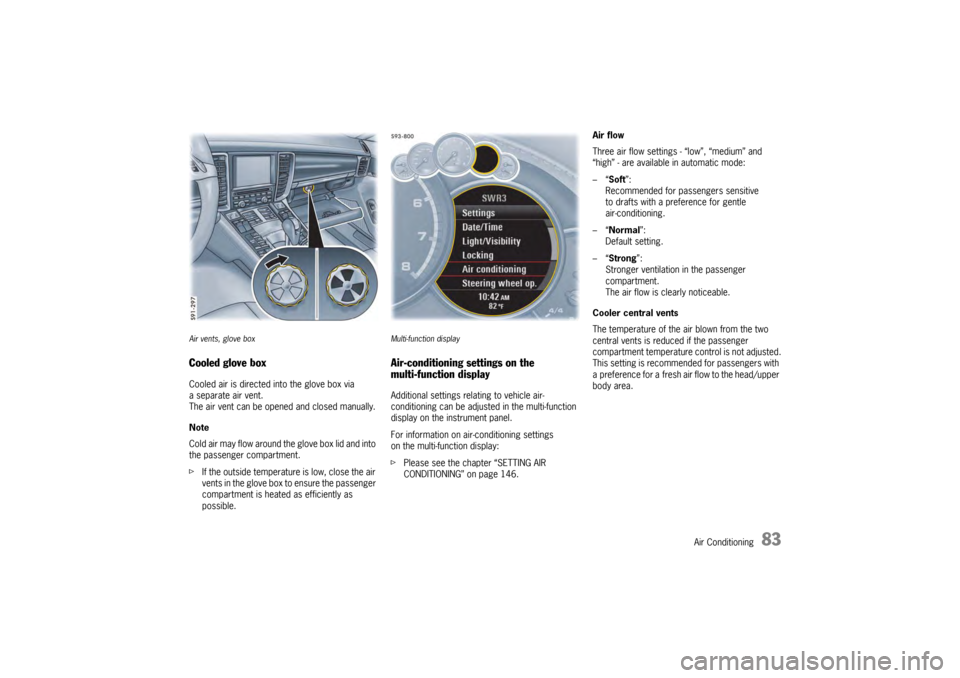
Air vents, glove boxCooled glove boxCooled air is directed into the glove box via
a separate air vent.
The air vent can be opened and closed manually.
Note
Cold air may flow around the glove box lid and into
the passenger compartment.
f If the outside temperatur e is low, close the air
vents in the glove box to ensure the passenger
compartment is heated as efficiently as
possible.
Multi-function displayAir-conditioning settings on the
multi-function displayAdditional settings relating to vehicle air-
conditioning can be adjusted in the multi-function
display on the instrument panel.
For information on air-conditioning settings
on the multi-function display:
f Please see the chapter “SETTING AIR
CONDITIONING” on page 146. Air flow
Three air flow settings - “low”, “medium” and
“high” - are available in automatic mode:
–“
Soft ”:
Recommended for passengers sensitive
to drafts with a preference for gentle
air-conditioning.
–“ Normal”:
Default setting.
–“ Strong ”:
Stronger ventilation in the passenger
compartment.
The air flow is clearly noticeable.
Cooler central vents
The temperature of the air blown from the two
central vents is reduced if the passenger
compartment temperature control is not adjusted.
This setting is recommended for passengers with
a preference for a fresh air flow to the head/upper
body area.
Page 86 of 343
84
Air Conditioning
Extended ventilation panelFor information on the extended ventilation panel:
fPlease see the chapter “EXTENDED
VENTILATION PANEL” on page 81.
Automatic air-recirculation
For information on automatic air-recirculation
mode:
f Please see the chapter “AIR-RECIRCULATION
MODE” on page 74.
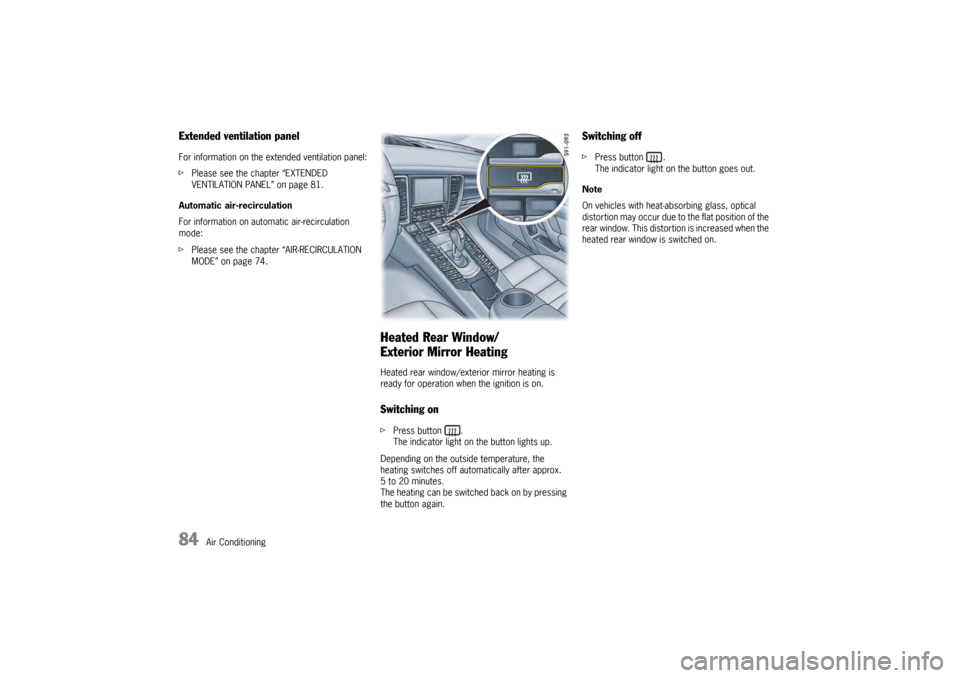
Heated Rear Window/
Exterior Mirror HeatingHeated rear window/exterior mirror heating is
ready for operation when the ignition is on.Switching onfPress button .
The indicator light on the button lights up.
Depending on the outside temperature, the
heating switches off automatically after approx.
5 to 20 minutes.
The heating can be switched back on by pressing
the button again.
Switching offf Press button .
The indicator light on the button goes out.
Note
On vehicles with heat-absorbing glass, optical
distortion may occur due to the flat position of the
rear window. This distortion is increased when the
heated rear window is switched on.
Page 87 of 343
Windows and Slide/Tilt Roof
85
Windows and Slide/Tilt Roof
Power Windows............
................................ 86
Slide/Tilt Roof ......... ..................................... 88
Page 88 of 343
86
Windows and Slide/Tilt Roof
Power Windows
Warning!
Risk of injury when closing the windows,
especially when windows close
automatically.
f Take care to ensure that nobody can be injured
when the windows close.
f Always remove ignition key when leaving the
vehicle or switch ignition off on vehicles with
Porsche Entry & Drive. Always take the ignition
key with you when leaving the vehicle.
Uninformed persons could injure themselves
by operating the power windows.
f In case of danger, immediately release the
button on the ignition key or the button in
the door handle on vehicles with Porsche
Entry & Drive.
f Do not leave children in the vehicle unattended.
Risk of an accident.
f Do not put anything on or near the windows that may interfere with the driver’s vision.
Readiness for operation of power windows– With ignition switched on.
– A maximum of 10 minutes after the ignition is
switched off, but only until driver’s or
passenger door is first opened.
– The one-touch operation for closing the door windows is available only when the ignition is
switched on.
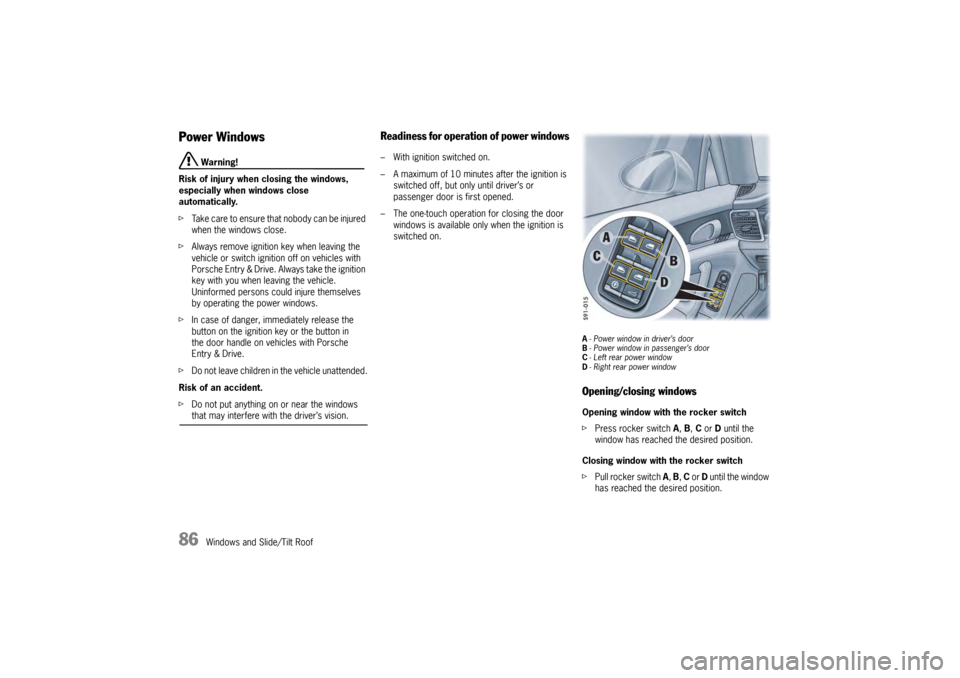
A- Power window in driver’s door
B - Power window in passenger’s door
C -Left rear power window
D - Right rear power windowOpening/closing windowsOpening window with the rocker switch
f Press rocker switch A, B, C or D until the
window has reached the desired position.
Closing window with the rocker switch
f Pull rocker switch A, B, C or D until the window
has reached the desired position.
Page 89 of 343
Windows and Slide/Tilt Roof
87
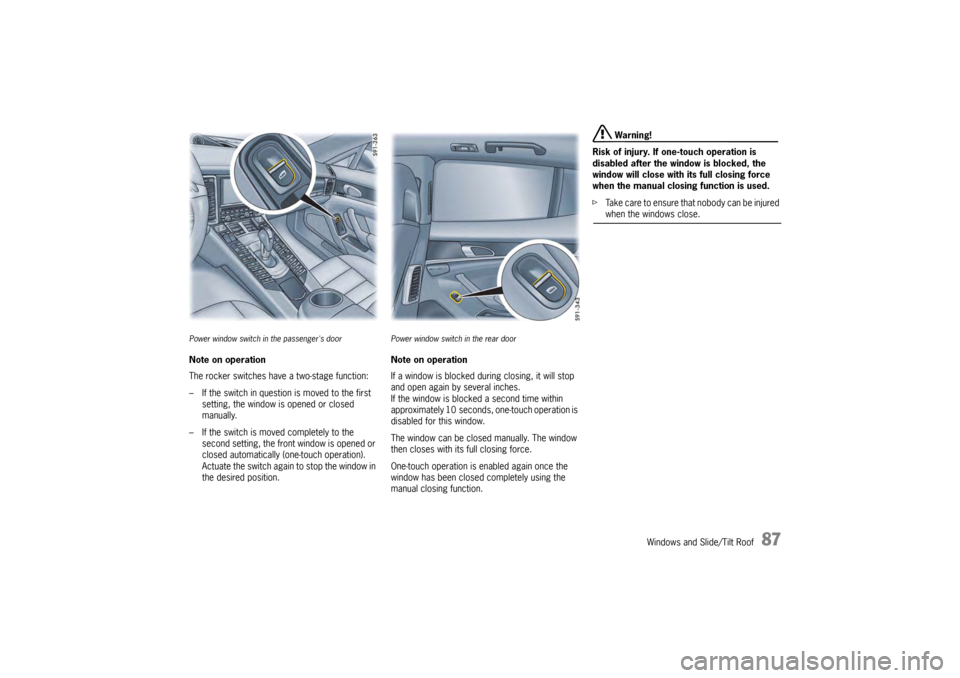
Power window switch in the passenger's doorNote on operation
The rocker switches have a two-stage function:
– If the switch in question is moved to the first
setting, the window is opened or closed
manually.
– If the switch is moved completely to the second setting, the front window is opened or
closed automatically (one-touch operation).
Actuate the switch again to stop the window in
the desired position.
Power window switch in the rear doorNote on operation
If a window is blocked during closing, it will stop
and open again by several inches.
If the window is blocked a second time within
approximately 10 seconds, one-touch operation is
disabled for this window.
The window can be closed manually. The window
then closes with its full closing force.
One-touch operation is enabled again once the
window has been closed completely using the
manual closing function.
Warning!
Risk of injury. If one-touch operation is
disabled after the wind ow is blocked, the
window will close with its full closing force
when the manual closing function is used.
f Take care to ensure that nobody can be injured when the windows close.
Page 90 of 343
88
Windows and Slide/Tilt Roof
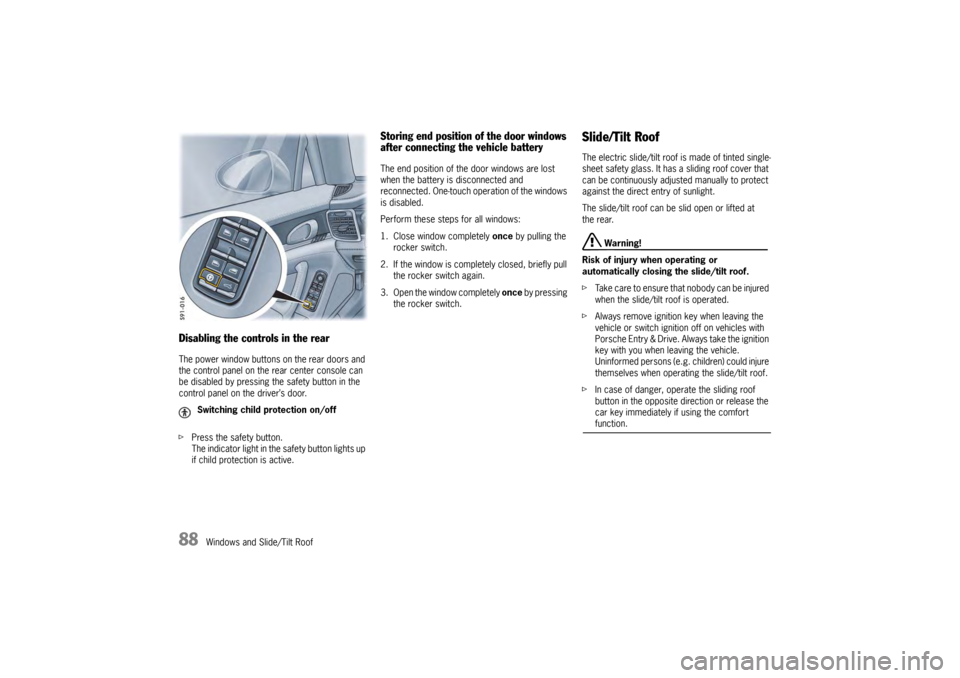
Disabling the controls in the rearThe power window buttons on the rear doors and
the control panel on the rear center console can
be disabled by pressing the safety button in the
control panel on the driver’s door.
fPress the safety button.
The indicator light in the safety button lights up
if child protection is active.
Storing end position of the door windows
after connecting the vehicle batteryThe end position of the door windows are lost
when the battery is disconnected and
reconnected. One-touch operation of the windows
is disabled.
Perform these steps for all windows:
1. Close window completely once by pulling the
rocker switch.
2. If the window is comple tely closed, briefly pull
the rocker switch again.
3. Open the window completely once by pressing
the rocker switch.
Slide/Tilt RoofThe electric slide/tilt roof is made of tinted single-
sheet safety glass. It has a sliding roof cover that
can be continuously adjusted manually to protect
against the direct entry of sunlight.
The slide/tilt roof can be slid open or lifted at
the rear.
Warning!
Risk of injury when operating or
automatically closing the slide/tilt roof.
f Take care to ensure that nobody can be injured
when the slide/tilt roof is operated.
f Always remove ignition key when leaving the
vehicle or switch ignition off on vehicles with
Porsche Entry & Drive. Always take the ignition
key with you when leaving the vehicle.
Uninformed persons (e.g. children) could injure
themselves when operating the slide/tilt roof.
f In case of danger, operate the sliding roof
button in the opposite di rection or release the
car key immediately if using the comfort function.
Switching child protection on/off