tow RAM 1500 2022 Owners Manual
[x] Cancel search | Manufacturer: RAM, Model Year: 2022, Model line: 1500, Model: RAM 1500 2022Pages: 496, PDF Size: 18.03 MB
Page 450 of 496
448SERVICING AND MAINTENANCE
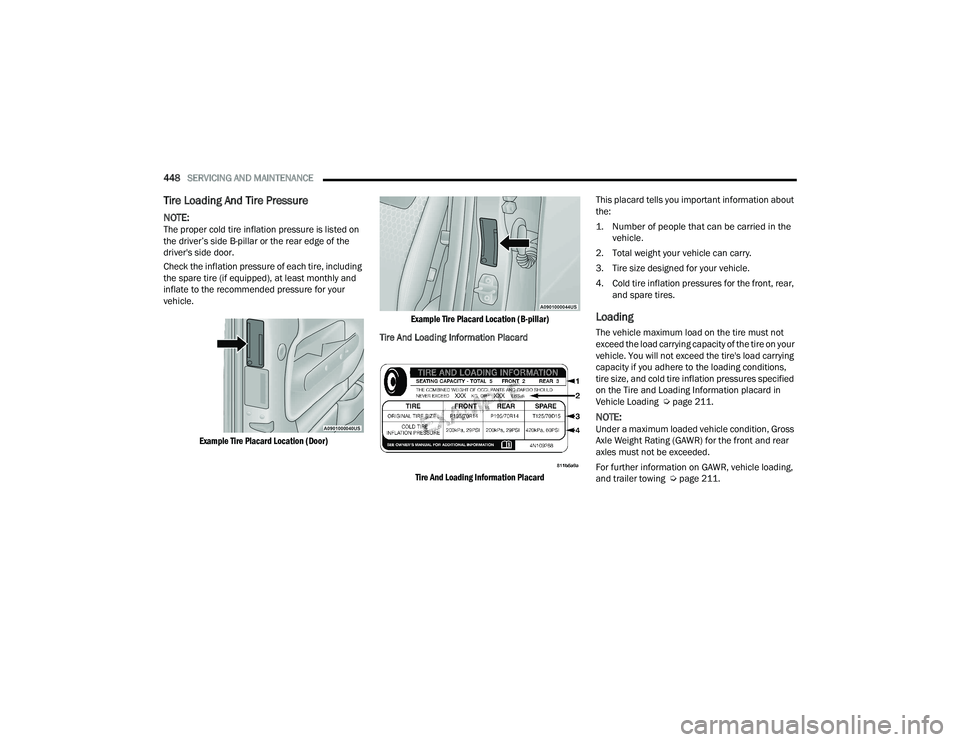
Tire Loading And Tire Pressure
NOTE:The proper cold tire inflation pressure is listed on
the driver’s side B-pillar or the rear edge of the
driver's side door.
Check the inflation pressure of each tire, including
the spare tire (if equipped), at least monthly and
inflate to the recommended pressure for your
vehicle.
Example Tire Placard Location (Door) Example Tire Placard Location (B-pillar)
Tire And Loading Information Placard
Tire And Loading Information Placard
This placard tells you important information about
the:
1. Number of people that can be carried in the
vehicle.
2. Total weight your vehicle can carry.
3. Tire size designed for your vehicle.
4. Cold tire inflation pressures for the front, rear, and spare tires.
Loading
The vehicle maximum load on the tire must not
exceed the load carrying capacity of the tire on your
vehicle. You will not exceed the tire's load carrying
capacity if you adhere to the loading conditions,
tire size, and cold tire inflation pressures specified
on the Tire and Loading Information placard in
Vehicle Loading Ú page 211.
NOTE:Under a maximum loaded vehicle condition, Gross
Axle Weight Rating (GAWR) for the front and rear
axles must not be exceeded.
For further information on GAWR, vehicle loading,
and trailer towing Ú page 211.
22_DT_OM_EN_USC_t.book Page 448
Page 451 of 496
SERVICING AND MAINTENANCE449
To determine the maximum loading conditions of
your vehicle, locate the statement “The combined
weight of occupants and cargo should never
exceed XXX kg or XXX lbs” on the Tire and Loading
Information placard. The combined weight of
occupants, cargo/luggage and trailer tongue
weight (if applicable) should never exceed the
weight referenced here.
Steps For Determining Correct Load
Limit—
(1) Locate the statement “The combined
weight of occupants and cargo should
never exceed XXX kg or XXX lbs.” on your
vehicle's placard.
(2) Determine the combined weight of
the driver and passengers that will be
riding in your vehicle.
(3) Subtract the combined weight of the
driver and passengers from XXX kg or
XXX lbs. (4) The resulting figure equals the
available amount of cargo and luggage
load capacity. For example, if “XXX”
amount equals 1400 lbs. and there will
be five 150 lb passengers in your
vehicle, the amount of available cargo
and luggage load capacity is 650 lbs.
(1400-750 (5x150) = 650 lbs.)
(5) Determine the combined weight of
luggage and cargo being loaded on the
vehicle. That weight may not safely
exceed the available cargo and luggage
load capacity calculated in Step 4.
(6) If your vehicle will be towing a trailer,
load from your trailer will be transferred
to your vehicle. Consult this manual to
determine how this reduces the
available cargo and luggage load
capacity of your vehicle.
Metric Example For Load Limit
For example, if “XXX” amount equals 635 kg and
there will be five 68 kg passengers in your vehicle,
the amount of available cargo and luggage load
capacity is 295 kg (635-340 (5x68) = 295 kg) as
shown in step 4.
NOTE:
If your vehicle will be towing a trailer, load from
your trailer will be transferred to your vehicle.
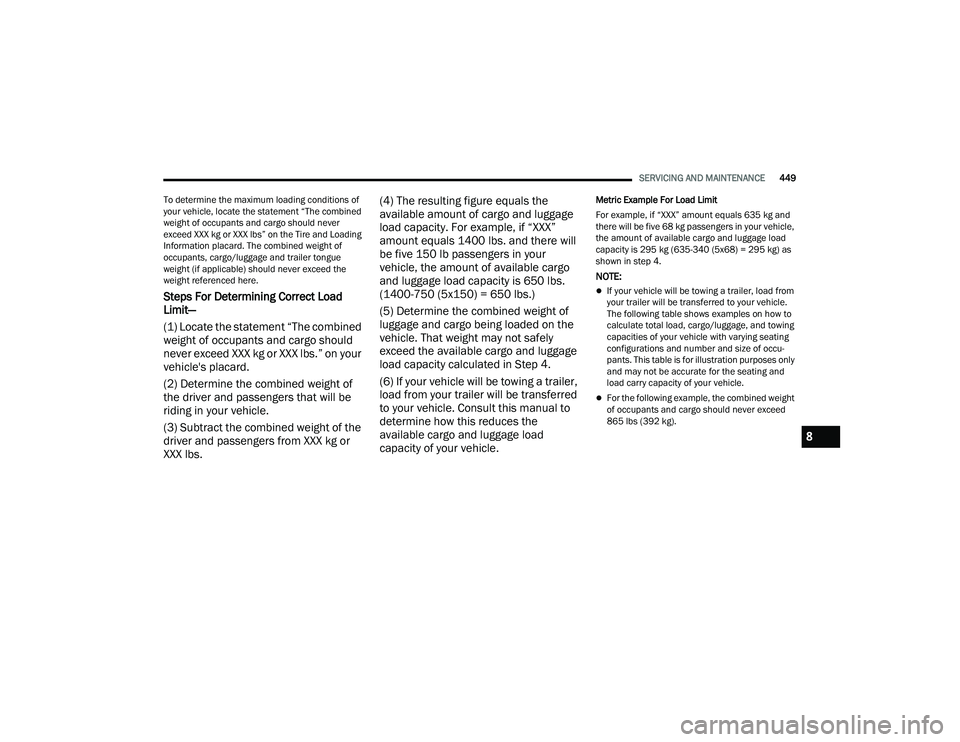
The following table shows examples on how to
calculate total load, cargo/luggage, and towing
capacities of your vehicle with varying seating
configurations and number and size of occu
-
pants. This table is for illustration purposes only
and may not be accurate for the seating and
load carry capacity of your vehicle.
For the following example, the combined weight
of occupants and cargo should never exceed
865 lbs (392 kg).
8
22_DT_OM_EN_USC_t.book Page 449
Page 455 of 496

SERVICING AND MAINTENANCE453
Consult an authorized tire dealer for tire repairs
and additional information.
Damaged Run Flat tires, or Run Flat tires that have
experienced a loss of pressure should be replaced
immediately with another Run Flat tire of identical
size and service description (Load Index and
Speed Symbol). Replace the tire pressure sensor
as well as it is not designed to be reused.
Run Flat Tires — If Equipped
Run Flat tires allow you the capability to drive
50 miles (80 km) at 50 mph (80 km/h) after a
rapid loss of inflation pressure. This rapid loss of
inflation is referred to as the Run Flat mode. A Run
Flat mode occurs when the tire inflation pressure is
of/or below 14 psi (96 kPa). Once a Run Flat tire
reaches the Run Flat mode it has limited driving
capabilities and needs to be replaced immediately.
A Run Flat tire is not repairable. When a Run Flat
tire is changed after driving with underinflated tire
condition, please replace the TPMS sensor as it is
not designed to be reused when driven under Run
Flat mode 14 psi (96 kPa) condition.
NOTE:The TPMS Sensor must be replaced after driving
the vehicle on a flat tire condition. It is not recommended driving a vehicle loaded at
full capacity or to tow a trailer while a tire is in the
Run Flat mode.
For more information Ú
page 328.
Tire Spinning
When stuck in mud, sand, snow, or ice conditions,
do not spin your vehicle's wheels above 30 mph
(48 km/h) or for longer than 30 seconds
continuously without stopping.
For further information Ú page 389.
Tread Wear Indicators
Tread wear indicators are in the original equipment
tires to help you in determining when your tires
should be replaced.
Tire Tread
These indicators are molded into the bottom of the
tread grooves. They will appear as bands when the
tread depth becomes a 1/16 of an inch (1.6 mm).
When the tread is worn to the tread wear
indicators, the tire should be replaced.
For further information Ú page 454.
WARNING!
Fast spinning tires can be dangerous. Forces
generated by excessive wheel speeds may
cause tire damage or failure. A tire could
explode and injure someone. Do not spin your
vehicle's wheels faster than 30 mph (48 km/h)
for more than 30 seconds continuously when
you are stuck, and do not let anyone near a
spinning wheel, no matter what the speed.
1 — Worn Tire
2 — New Tire
8
22_DT_OM_EN_USC_t.book Page 453
Page 457 of 496

SERVICING AND MAINTENANCE455
TIRE TYPES
All Season Tires — If Equipped
All Season tires provide traction for all seasons
(Spring, Summer, Autumn, and Winter). Traction
levels may vary between different all season tires.
All season tires can be identified by the M+S, M&S,
M/S or MS designation on the tire sidewall. Use all
season tires only in sets of four; failure to do so
may adversely affect the safety and handling of
your vehicle.
Summer Or Three Season Tires — If
Equipped
Summer tires provide traction in both wet and dry
conditions, and are not intended to be driven in
snow or on ice. If your vehicle is equipped with
Summer tires, be aware these tires are not
designed for Winter or cold driving conditions.
Install Winter tires on your vehicle when ambient
temperatures are less than 40°F (5°C) or if roads
are covered with ice or snow. For more
information, contact an authorized dealer. Summer tires do not contain the all season
designation or mountain/snowflake symbol on the
tire sidewall. Use Summer tires only in sets of four;
failure to do so may adversely affect the safety and
handling of your vehicle.
Snow Tires
Some areas of the country require the use of snow
tires during the Winter. Snow tires can be identified
by a “mountain/snowflake” symbol on the tire
sidewall.
If you need snow tires, select tires
equivalent in size and type to the
original equipment tires. Use snow tires
only in sets of four; failure to do so may
adversely affect the safety and handling of your
vehicle.
Snow tires generally have lower speed ratings than
what was originally equipped with your vehicle and
should not be operated at sustained speeds over
75 mph (120 km/h). For speeds above 75 mph
(120 km/h) refer to original equipment or an authorized tire dealer for recommended safe
operating speeds, loading and cold tire inflation
pressures.
While studded tires improve performance on ice,
skid and traction capability on wet or dry surfaces
may be poorer than that of non-studded tires.
Some states prohibit studded tires; therefore, local
laws should be checked before using these tire
types.
SPARE TIRES — IF EQUIPPED
NOTE:For vehicles equipped with Tire Service Kit instead
of a spare tire, please refer to “Tire Service Kit” in
“In Case Of Emergency” for further information.
For restrictions when towing with a spare tire
designated for temporary emergency use
Ú
page 220.
CAUTION!
Replacing original tires with tires of a different
size may result in false speedometer and
odometer readings.
WARNING!
Do not use Summer tires in snow/ice conditions.
You could lose vehicle control, resulting in
severe injury or death. Driving too fast for
conditions also creates the possibility of loss of
vehicle control.
CAUTION!
Because of the reduced ground clearance, do
not take your vehicle through an automatic car
wash with a compact or limited use temporary
spare installed. Damage to the vehicle may
result.
8
22_DT_OM_EN_USC_t.book Page 455
Page 465 of 496
SERVICING AND MAINTENANCE463
Special Care
If you drive on salted or dusty roads or if you
drive near the ocean, hose off the undercarriage
at least once a month.
It is important that the drain holes in the lower
edges of the doors, rocker panels, and trunk be
kept clear and open.
If you detect any stone chips or scratches in the
paint, touch them up immediately.
If your vehicle is damaged due to a collision or
similar cause that destroys the paint and protec -
tive coating, have your vehicle repaired as soon
as possible.
If you carry special cargo such as chemicals,
fertilizers, de-icer salt, etc., be sure that such
materials are well packaged and sealed.
If a lot of driving is done on gravel roads,
consider mud or stone shields behind each
wheel.
Use Mopar® Touch Up Paint on scratches as
soon as possible. An authorized dealer has
touch up paint to match the color of your
vehicle.
Spray-On Bedliner – If Equipped
During ownership, the shine and luster of the
Spray-On Bedliner can fade from oxidation, road
dirt, heavy-duty hauling and hard water stains.
Weathering and UV exposure will lead to fading.
To help maintain the appearance of your Spray-On
Bedliner, the manufacturer recommends you
periodically rinse all loose dirt from your truck bed
and clean your truck at least twice per year using
the Mopar® Spray-On Bedliner Conditioner
available at a local authorized dealer. To Help Maintain The Appearance Of Your
Spray-On Bedliner, Follow The Steps Below:
1. Rinse your truck bed out with water to remove any loose dirt and debris.
2. Mix a mild soap or detergent with water. Then apply solution with a soft cloth or brush.
3. Rinse bedliner with water.
4. Once dry, apply a small amount of Mopar® Spray-On Bedliner Conditioner to a moist towel
or sponge and wipe over the entire surface of
the truck bedliner.
Spray-On Bedliners are chemically-resistant to
many different types of chemicals (including
gasoline, oil, hydraulic fluids) for short periods of
time. If a spill occurs on your Spray-On Bedliner,
rinse the truck out as soon as possible to avoid
permanent damage.
CAUTION!
Do not use scouring pads, steel wool, a bristle
brush, metal polishes, or oven cleaner. These
products may damage the bumper’s protec -
tive finish. Such damage is not covered by the
New Vehicle Limited Warranty. Only car wash
soap, Mopar® Chrome Cleaner, or equivalent
is recommended.
Avoid products or automatic car washes that
use acidic solutions, strong alkaline additives,
or harsh brushes. Many aftermarket cleaners
and automatic car washes may damage the
bumper’s protective finish. Such damage is
not covered by the New Vehicle Limited
Warranty. Only car wash soap, Mopar®
Chrome Cleaner, or equivalent is recom -
mended.
WARNING!
Do not use silicon-based protection products to
clean your bedliner. Silicon-based products can
become slippery and may result in personal
injury.
8
22_DT_OM_EN_USC_t.book Page 463
Page 466 of 496

464SERVICING AND MAINTENANCE
Repairing The Spray-On Bedliner
While extremely tough, it is possible to damage a
Spray-On Bedliner. One common condition is when
loading a heavy pallet and dragging that pallet
across the floor of the bed. If a nail or sharp point
is exposed under the weight of the pallet a scratch
or tear is possible. While not covered by your new
vehicle warranty, a cosmetic fix to cover the metal
exposed by the scratch is required. To repair a tear
or gouge, follow the directions provided in the
Mopar® Quick Repair Kit.
INTERIORS
SEATS AND FABRIC PARTS
Use Mopar® Total Clean to clean fabric upholstery
and carpeting.
Stain Repel Fabric Cleaning Procedure — If
Equipped
Stain Repel seats may be cleaned in the following
manner:
Remove as much of the stain as possible by
blotting with a clean, dry towel.
Blot any remaining stain with a clean, damp
towel.
For tough stains, apply Mopar® Total Clean, or
a mild soap solution to a clean, damp cloth and
remove stain. Use a fresh, damp towel to
remove soap residue.
For grease stains, apply Mopar® Multi-Purpose
Cleaner to a clean, damp cloth and remove
stain. Use a fresh, damp towel to remove soap
residue.
Do not use any harsh solvents or any other form
of protectants on Stain Repel products.
Seat Belt Maintenance
Do not bleach, dye or clean the belts with chemical
solvents or abrasive cleaners. This will weaken the
fabric. If the belts need cleaning, use a mild soap solution
or lukewarm water. Do not remove the belts from
the vehicle to wash them. Dry with a soft cloth.
Sun damage can also weaken the fabric. Replace
the belts if they appear frayed or worn or if the
buckles do not work properly.
NOTE:If the belts retract slowly, inspect the upper turning
loop for soiling. If soiling is present, clean with a
wet soft cloth until all residue is removed.
WARNING!
Do not use volatile solvents for cleaning
purposes. Many are potentially flammable, and
if used in closed areas they may cause
respiratory harm.
WARNING!
A frayed or torn seat belt could rip apart in a
collision and leave you with no protection.
Inspect the seat belt system periodically,
checking for cuts, frays, or loose parts.
Damaged parts must be replaced immediately.
Do not disassemble or modify the seat belt
system. If your vehicle is involved in a collision,
or if you have questions regarding seat belt or
retractor conditions, take your vehicle to an
authorized FCA dealer or authorized FCA
Certified Collision Care Program facility for
inspection.
22_DT_OM_EN_USC_t.book Page 464
Page 467 of 496
SERVICING AND MAINTENANCE465
PLASTIC AND COATED PARTS
Use Mopar® Total Clean to clean vinyl upholstery.
Cleaning Plastic Instrument Cluster
Lenses
The lenses in front of the instruments in this
vehicle are molded in clear plastic. When cleaning
the lenses, care must be taken to avoid scratching
the plastic. Clean with a wet soft cloth. A mild soap solution
may be used, but do not use high alcohol content
or abrasive cleaners. If soap is used, wipe clean
with a clean damp cloth. Dry with a soft cloth.
LEATHER SURFACES
Mopar® Total Clean is specifically recommended
for leather upholstery.
Your leather upholstery can be best preserved by
regular cleaning with a damp soft cloth. Small
particles of dirt can act as an abrasive and damage
the leather upholstery and should be removed
promptly with a damp cloth. Stubborn soils can be
removed easily with a soft cloth and Mopar® Total
Clean. Care should be taken to avoid soaking your
leather upholstery with any liquid. Please do not
use polishes, oils, cleaning fluids, solvents,
detergents, or ammonia-based cleaners to clean
your leather upholstery.
NOTE:If equipped with light colored leather, it tends to
show any foreign material, dirt, and fabric dye
transfer more so than darker colors. The leather is
designed for easy cleaning, and the manufacturer
recommends Mopar® Total Clean leather cleaner
applied on a cloth to clean the leather seats as
needed.
GLASS SURFACES
All glass surfaces should be cleaned on a regular
basis with Mopar® Glass Cleaner, or any
commercial household-type glass cleaner. Never
use an abrasive type cleaner. Use caution when
cleaning the inside rear window equipped with
electric defrosters or windows equipped with radio
antennas. Do not use scrapers or other sharp
instruments that may scratch the elements.
When cleaning the rear view mirror, spray cleaner
on the towel or cloth that you are using. Do not
spray cleaner directly on the mirror.
CAUTION!
Direct contact of air fresheners, insect repel
-
lents, suntan lotions, or hand sanitizers to the
plastic, painted, or decorated surfaces of the
interior may cause permanent damage. Wipe
away immediately.
Damage caused by these type of products
may not be covered by your New Vehicle
Limited Warranty.
CAUTION!
Do not use Alcohol and Alcohol-based and/or
Ketone based cleaning products to clean leather
upholstery, as damage to the upholstery may
result.
8
22_DT_OM_EN_USC_t.book Page 465
Page 478 of 496

476TECHNICAL SPECIFICATIONS
CHASSIS FLUIDS AND LUBRICANTS
Component Fluid, Lubricant, or Genuine Part
Automatic Transmission Use only Mopar® ZF 8 & 9 Speed ATF Automatic Transmission Fluid, or
equivalent. Failure to use the correct fluid may affect the function or
performance of your transmission.
Transfer Case – 48-11 Active On-Demand 2–speed Transfer Case (With 4WD
AUTO) We recommend using Mobil Fluid LT.
Transfer Case – 48-12 Part Time 2–Speed Transfer Case (Without 4WD AUTO) We recommend using Shell Spirax S2 ATF A389.
Front Axle We recommend using Mopar® GL-5 Synthetic Axle Lubricant SAE 75W-85.
Rear Axle (3.21/3.55) We recommend using Mopar® Synthetic Gear Lubricant SAE 75W-90
(MS-A0160). Limited-Slip Rear Axles require the addition of 5 oz. (148 ml)
Mopar® Limited Slip Additive (MS-10111).
Rear Axle (3.92) We recommend using Mopar® Synthetic Gear Lubricant SAE 75W-140
(MS-8985). Limited-Slip Rear Axles require the addition of 5 oz. (148 ml)
Mopar® Limited Slip Additive (MS-10111).
Max Tow Rear Axle (3.92) We recommend using Dana SAE 80W90 Axle Lubricant.
Brake Master Cylinder We recommend using Mopar® DOT 3 Brake Fluid, SAE J1709.
22_DT_OM_EN_USC_t.book Page 476
Page 484 of 496
482 Bed Divider
...................................................... 97Bed Step.......................................................... 90Bedliner......................................................... 463Belts, Seat..................................................... 368Blind Spot Monitoring.................................... 319Bluetooth Connecting To A Particular MobilePhone Or Audio Device After Pairing
..... 276Body Builders Guide........................................ 11Body Mechanism Lubrication........................ 418Bodywork....................................................... 461B-Pillar Location............................................. 448Brake Assist System...................................... 313Brake Control System.................................... 313Brake Fluid.......................................... 425, 476Brake System...................................... 425, 466Fluid Check............................................... 425Master Cylinder......................................... 425Parking...................................................... 150Warning Light............................................ 128Brake/Transmission Interlock....................... 154Bulb Replacement......................................... 438Bulbs, Light.......................................... 370, 438
C
Camera.......................................................... 199Camera, AUX.................................................. 203Camera, Rear................................................ 199Camera, Surround View................................. 200
Camera, Trailer 360...................................... 203Capacities, Fuel............................................ 472Caps, FillerOil (Engine)............................................... 403Radiator (Coolant Pressure)..................... 423Car Washes................................................... 462Carbon Monoxide Warning............................ 370Care And Maintenance................................. 461Cargo Light..............................................57, 135CD................................................................. 270Cellular Phone.............................................. 302Center High Mounted Stop Light................... 443Center Seat Storage Compartment.................. 70Charge Air Cooler.......................................... 424Chart, Tire Sizing........................................... 445Check Engine Light
(Malfunction Indicator Light)......................... 139Checking Your Vehicle For Safety................. 368Checks, Safety.............................................. 368Child Restraint.............................................. 354Child RestraintsBooster Seats........................................... 357Child Seat Installation..................... 363, 364How To Stow An unused ALR Seat Belt.... 362Infant And Child Restraints....................... 356Locating The LATCH Anchorages.............. 361Lower Anchors And Tethers ForChildren................................................ 359Older Children And Child Restraints......... 357Seating Positions...................................... 358
Clean Air Gasoline......................................... 468CleaningWheels...................................................... 457Climate Control................................................62Automatic....................................................62Manual........................................................65Cold Weather Operation................................ 145Compact Spare Tire...................................... 456Connected Services...................................... 282Connected Services FAQ............................... 297Connected Services Features....................... 286Connected Services, Getting Started............ 284Connected Services, Introduction................. 283Contract, Service........................................... 478Controls........................................................ 262Cooling Pressure Cap (Radiator Cap)............ 423Cooling System.................................... 130, 421Adding Coolant (Antifreeze)...................... 422Coolant Level..........................421, 423, 424Cooling Capacity....................................... 472Disposal Of Used Coolant......................... 423Drain, Flush, And Refill............................. 422Inspection........................................ 423, 424Points To Remember................................ 424Pressure Cap............................................ 423Radiator Cap............................................. 423Selection Of Coolant (Antifreeze)......................... 422, 472, 473Corrosion Protection..................................... 461
22_DT_OM_EN_USC_t.book Page 482
Page 485 of 496

483
Cruise Control Accel/Decel
............................................... 177Cancel....................................................... 177Resume..................................................... 177Cruise Control (Speed Control)... 133, 176, 178Cruise Light......................................... 136, 137Customer Assistance..................................... 477Cybersecurity................................................. 233
D
Daytime Running Lights................................... 55Dealer Service............................................... 408Defroster, Windshield...................... 62, 65, 368Deleting A Phone........................................... 276Diagnostic System, Onboard......................... 138Diesel Exhaust Fluid...................................... 209Adding....................................................... 209Fill Procedure............................................ 210Storage...................................................... 209Diesel Fuel..................................................... 469Diesel Fuel Requirements............................. 469Bulk Storage Of......................................... 209Diesel Fuel System, Re-Priming..................... 414Differential, Limited Slip................................ 173Dimmer Control Switch.................................... 60Disable Vehicle Towing.................................. 390
Disc Drive..................................................... 270Disconnecting............................................... 276DisposalAntifreeze (Engine Coolant)...................... 423Disturb.......................................................... 279Door Ajar Light..................................... 129, 130Door LocksAutomatic.................................................... 32Doors............................................................... 28Draining Fuel/Water Separator Filter............ 412Driver Memory Presets................................. 268Driver’s Seat Back Tilt...................................... 35DrivingThrough Flowing, Rising, Or ShallowStanding Water
.................................... 231Driving Tips................................................... 230Dual Rear Wheels......................................... 466
E
Electric Brake Control System....................... 313Anti-Lock Brake System............................ 312Electronic Roll Mitigation................. 314, 319Electric Parking Brake................................... 150Electric Power Steering................................. 173Electrical Power Outlets................................... 76Electronic Range Select (ERS)...................... 158Electronic Stability Control
(ESC)........................................... 131, 132, 314
Electronic Throttle Control Warning Light...... 129Electronically Shifted Transfer Case.... 160, 162Emergency Braking....................................... 327Emergency Gas Can Refueling...................... 386Emergency, In Case OfFreeing Vehicle When Stuck..................... 389Hazard Warning Flasher........................... 371Jump Starting........................................... 384Emission Control System Maintenance......... 139Engine........................................................... 403Air Cleaner................................................ 410Block Heater............................................. 149Break-In Recommendations..................... 150Compartment............... 403, 404, 405, 406CompartmentIdentification............ 403, 404, 405, 406Coolant (Antifreeze).................................. 473Exhaust Gas Caution................................ 370Fails To Start............................................. 143Flooded, Starting...................................... 143Fuel Requirements.......................... 467, 472Idling......................................................... 147Jump Starting........................................... 384Oil...........................................409, 472, 473Oil Filler Cap............................................. 403Oil Filter.................................................... 409
11
22_DT_OM_EN_USC_t.book Page 483