ECO mode RAM 1500 2022 User Guide
[x] Cancel search | Manufacturer: RAM, Model Year: 2022, Model line: 1500, Model: RAM 1500 2022Pages: 496, PDF Size: 18.03 MB
Page 32 of 496

30GETTING TO KNOW YOUR VEHICLE
If the door lock switch is pushed while the ignition
is in ACC or ON/RUN and the driver's door is open,
the doors will not lock.
If a rear door is locked, it cannot be opened from
inside the vehicle without first unlocking the door.
The door may be unlocked manually by raising the
lock knob.
POWER SIDE STEPS — IF EQUIPPED
The Power Side Steps will extend a step for easier
entry and exit of the vehicle.
When configured for “Auto” mode, the Power Side
Steps will deploy when any of the doors are
opened, or when the deploy setting is activated
through the touchscreen. When configured for
“Store” mode, the steps will not deploy unless the
setting is selected manually through the “Controls”
menu within the touchscreen.
If the vehicle speed exceeds 5 mph (8 km/h), or if the retract setting is selected within Uconnect
Settings Ú page 234, the steps will retract.
KEYLESS ENTER ‘N GO™ — PASSIVE
E
NTRY
The Passive Entry system is an enhancement to
the vehicle’s key fob and a feature of Keyless
Enter ‘n Go™ — Passive Entry. This feature allows you to lock and unlock the vehicle’s door(s) without
having to push the key fob lock or unlock buttons.
NOTE:
Passive Entry may be programmed on or off
within Uconnect Settings Ú
page 234.
The key fob may not be detected by the vehicle
Passive Entry system if it is located next to a
mobile phone, laptop, or other electronic device;
these devices may block the key fob’s wireless
signal and prevent the Passive Entry system
from locking/unlocking the vehicle.
Passive Entry Unlock initiates illuminated
approach (low beams, license plate lamp, posi -
tion lamps) for whichever time duration is set
between 0, 30, 60 or 90 seconds. Passive Entry
Unlock also initiates two flashes of the turn
signal lamps.
If wearing gloves, or if it has been raining/
snowing on the Passive Entry door handle, the
unlock sensitivity can be affected, resulting in a
slower response time.
If the vehicle is unlocked by Passive Entry and
no door is opened within 60 seconds, the
vehicle will relock and (if equipped) will arm the
Vehicle Security system. To Unlock From The Driver Or Passenger Side
With a valid Passive Entry key fob within 5 ft
(1.5 m) of the door handle, grab the handle to
unlock the vehicle. Grabbing the driver’s door
handle will unlock the driver door automatically.
Grabbing the passenger door handle will unlock all
doors and the tailgate automatically.
Grab The Door Handle To Unlock
NOTE:
Either the driver door only or all doors will unlock
when you grab hold of the front driver’s door
handle, depending on the selected setting in the
Uconnect system Ú page 234.
All doors will unlock when the front passenger
door handle is grabbed regardless of the
driver’s door unlock preference setting.
22_DT_OM_EN_USC_t.book Page 30
Page 40 of 496
38GETTING TO KNOW YOUR VEHICLE
POWER ADJUSTMENT (FRONT SEATS) —
I
F EQUIPPED
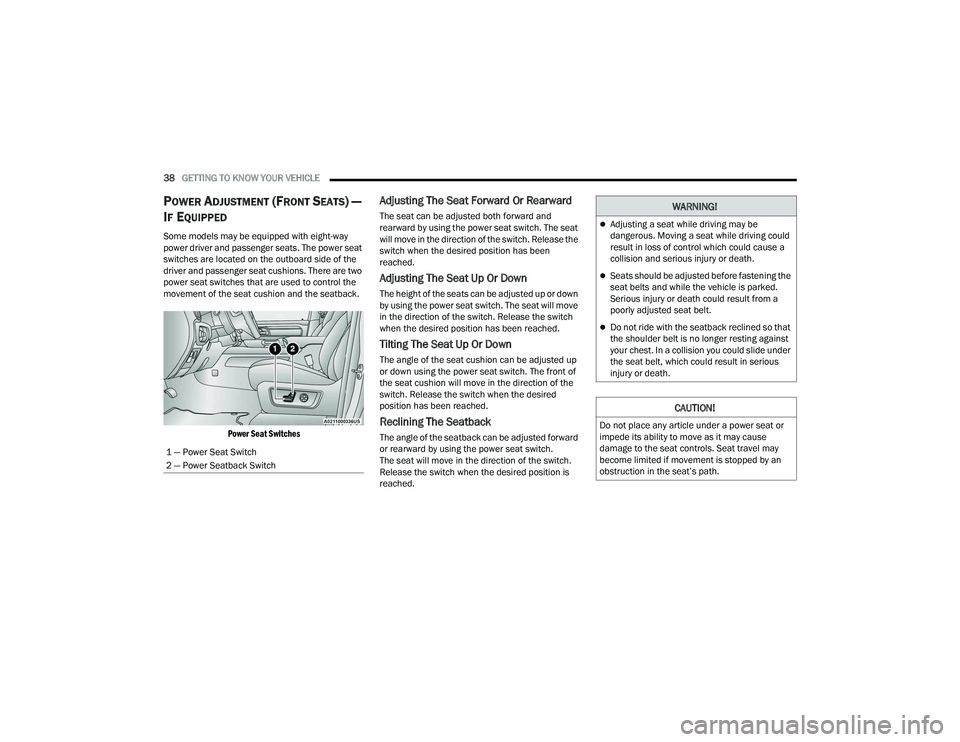
Some models may be equipped with eight-way
power driver and passenger seats. The power seat
switches are located on the outboard side of the
driver and passenger seat cushions. There are two
power seat switches that are used to control the
movement of the seat cushion and the seatback.
Power Seat Switches
Adjusting The Seat Forward Or Rearward
The seat can be adjusted both forward and
rearward by using the power seat switch. The seat
will move in the direction of the switch. Release the
switch when the desired position has been
reached.
Adjusting The Seat Up Or Down
The height of the seats can be adjusted up or down
by using the power seat switch. The seat will move
in the direction of the switch. Release the switch
when the desired position has been reached.
Tilting The Seat Up Or Down
The angle of the seat cushion can be adjusted up
or down using the power seat switch. The front of
the seat cushion will move in the direction of the
switch. Release the switch when the desired
position has been reached.
Reclining The Seatback
The angle of the seatback can be adjusted forward
or rearward by using the power seat switch.
The seat will move in the direction of the switch.
Release the switch when the desired position is
reached.
1 — Power Seat Switch
2 — Power Seatback Switch
WARNING!
Adjusting a seat while driving may be
dangerous. Moving a seat while driving could
result in loss of control which could cause a
collision and serious injury or death.
Seats should be adjusted before fastening the
seat belts and while the vehicle is parked.
Serious injury or death could result from a
poorly adjusted seat belt.
Do not ride with the seatback reclined so that
the shoulder belt is no longer resting against
your chest. In a collision you could slide under
the seat belt, which could result in serious
injury or death.
CAUTION!
Do not place any article under a power seat or
impede its ability to move as it may cause
damage to the seat controls. Seat travel may
become limited if movement is stopped by an
obstruction in the seat’s path.
22_DT_OM_EN_USC_t.book Page 38
Page 42 of 496

40GETTING TO KNOW YOUR VEHICLE
Front Heated Seats — If Equipped
The heated seat control buttons are
located on the center stack below the
radio screen, or within the Uconnect
system.
Push the heated seat button once to turn the
HI setting on.
Push the heated seat button a second time to
turn the MED setting on.
Push the heated seat button a third time to turn
the LO setting on.
Push the heated seat button a fourth time to
turn the heating elements off.
NOTE:
Once a heat setting is selected, heat will be felt
within two to five minutes.
The engine must be running for the heated
seats to operate.
The level of heat selected will stay on until the
operator changes it.
For information on use with the Remote Start
system, see Ú page 26.
Rear Heated Seats — If Equipped
On some models, the two rear outboard
seats may be equipped with heated
seats. There are two heated seat
switches that allow the rear passengers
to operate the seats independently. The heated
seat switches for each heater are located on the
rear of the center console.
You can choose from HI, MED, LO, or OFF heat
settings. Indicator lights in each switch indicate the
level of heat in use.
Push the heated seat button once to turn the
HI setting on.
Push the heated seat button a second time to
turn the MED setting on.
Push the heated seat button a third time to turn
the LO setting on.
Push the heated seat button a fourth time to
turn the heating elements off.
NOTE:The level of heat selected will stay on until the
operator changes it.
VENTILATED SEATS — IF EQUIPPED
Front Ventilated Seats
The ventilated seat control buttons are
located on the center stack below the
radio screen, or within the Uconnect
system. The fans operate at three
speeds, HI, MED and LO.
Press the ventilated seat button once to
choose HI.
Press the ventilated seat button a second time
to choose MED.
Press the ventilated seat button a third time to
choose LO.
Press the ventilated seat button a fourth time to
turn the ventilation off.
NOTE:The engine must be running for the ventilated
seats to operate.
For information on use with the Remote Start
system, see Ú page 26.
22_DT_OM_EN_USC_t.book Page 40
Page 55 of 496
GETTING TO KNOW YOUR VEHICLE53
5. Push and hold the programmed HomeLink® button and observe the indicator light.
NOTE:
If the indicator light stays on constantly,
programming is complete and the garage
door/device should activate when the
HomeLink® button is pushed.
To program the two remaining HomeLink®
buttons, repeat each step for each
remaining button. DO NOT erase the
channels.
If you unplugged the garage door opener/device
for programming, plug it back in at this time.
Reprogramming A Single HomeLink® Button
(Canadian/Gate Operator)
To reprogram a channel that has been previously
trained, follow these steps:
1. Place the ignition in the ON/RUN position.
2. Press and hold the desired HomeLink® button until the indicator light begins to flash after
20 seconds. Do not release the button.
3. Without releasing the button, proceed with “Canadian/Gate Operator Programming”
Step 2 and follow all remaining steps.
SECURITY
It is advised to erase all channels before you sell or
turn in your vehicle.
To do this, push and hold the two outside buttons
for 20 seconds until the indicator flashes. Note
that all channels will be erased. Individual
channels cannot be erased.
The HomeLink® Universal Transceiver is disabled
when the Vehicle Security system is active.
TROUBLESHOOTING TIPS
If you are having trouble programming
HomeLink®, here are some of the most common
solutions:
Replace the battery in the garage door opener
hand-held transmitter.
Push the LEARN button on the garage door
opener to complete the training for a rolling
code.
Did you unplug the device for programming and
remember to plug it back in? If you have any problems, or require assistance,
please call toll-free 1-800-355-3515 or, on the
Internet at
HomeLink.com for information or
assistance.
WARNING!
Vehicle exhaust contains carbon monoxide, a
dangerous gas. Do not run your vehicle in the
garage while programming the transceiver.
Exhaust gas can cause serious injury or death.
Your motorized door or gate will open and
close while you are programming the universal
transceiver. Do not program the transceiver if
people, pets or other objects are in the path of
the door or gate. Only use this transceiver with
a garage door opener that has a “stop and
reverse” feature as required by Federal safety
standards. This includes most garage door
opener models manufactured after 1982. Do
not use a garage door opener without these
safety features.
2
22_DT_OM_EN_USC_t.book Page 53
Page 58 of 496

56GETTING TO KNOW YOUR VEHICLE
AUTOMATIC HEADLIGHTS — IF EQUIPPED
This system automatically turns the headlights on
or off according to ambient light levels. To turn the
system on, rotate the headlight switch to the AUTO
position.
When the system is on, the Headlight Delay feature
is also on. This means the headlights will stay on
for up to 90 seconds after you place the ignition
into the OFF position. To turn the automatic
headlights off, turn the headlight switch out of the
AUTO position.
NOTE:The engine must be running before the headlights
will turn on in the Automatic Mode.
PARKING LIGHTS AND PANEL LIGHTS
To turn on the parking lights and instrument panel
lights, rotate the headlight switch clockwise. To
turn off the parking lights, rotate the headlight
switch back to the O (off) position.
NOTE:For vehicles sold in Canada, the first headlight
switch position is the parking lights and instrument
panel lights position (instead of the OFF position).
To turn off the parking lights, rotate the headlight
switch to the AUTO position.
AUTOMATIC HEADLIGHTS WITH WIPERS
If your vehicle is equipped with Automatic
Headlights, it also has this
customer-programmable feature. When your
headlights are in the automatic mode and the
engine is running, they will automatically turn on
when the wiper system is on. This feature is
programmable through the Uconnect system
Úpage 234.
If your vehicle is equipped with the Rain Sensing
Wiper system Ú page 62, and it is activated, the
headlights will automatically turn on after the
wipers complete five wipe cycles within
approximately one minute. They will turn off
approximately four minutes after the wipers
completely stop.
NOTE:When your headlights come on during the daytime,
the instrument panel lights will automatically dim
to the lower nighttime intensity.
HEADLIGHT DELAY
To assist when exiting the vehicle, the headlight
delay feature will leave the headlights on for up to
90 seconds. This delay is initiated when the
ignition is placed in the OFF position while the
headlight switch is on, and then the headlight
switch is cycled off. Headlight delay can be
cancelled by either turning the headlight switch on
then off, or by placing the ignition in the ON
position.
NOTE:
This feature can be programmed through the
Uconnect system Ú page 234.
The headlight delay feature is automatically
activated if the headlight switch is left in the
AUTO position when the ignition is placed in the
OFF position.
LIGHTS-ON REMINDER
If the headlights, parking lights, or cargo lights are
left on after the ignition is placed in the OFF
position, the vehicle will chime when the driver’s
door is opened.
22_DT_OM_EN_USC_t.book Page 56
Page 65 of 496
GETTING TO KNOW YOUR VEHICLE63
NOTE:Icons and descriptions can vary based upon
vehicle equipment.
MAX A/C Button
Press and release the MAX A/C button on
the touchscreen to change the current
setting to the coldest output of air. The
MAX A/C indicator illuminates when
MAX A/C is on. Pressing the button again will cause
the MAX A/C operation to exit.
NOTE:
MAX A/C sets the control for maximum cooling
performance.
The MAX A/C button is only available on the
touchscreen.
A/C Button
Press and release this button on the
touchscreen, or push the button on the
faceplate to change the current setting. The
A/C indicator illuminates when A/C is on.
Recirculation Button
Press and release this button on the
touchscreen, or push the button on the
faceplate, to change the system between
Recirculation mode and outside air
mode. The Recirculation indicator and the A/C
indicator illuminate when the Recirculation button
is pressed. Recirculation can be used when outside conditions, such as smoke, odors, dust, or
high humidity are present. Recirculation can be
used in all modes. Recirculation may be
unavailable (button on the touchscreen greyed
out) if conditions exist that could create fogging on
the inside of the windshield. The A/C can be
deselected manually without disturbing the mode
control selection. Continuous use of the
Recirculation mode may make the inside air stuffy
and window fogging may occur. Extended use of
this mode is not recommended. Recirculation
mode may automatically adjust to optimize
customer experience for warming, cooling,
dehumidification, etc.
In cold weather, use of Recirculation mode may
lead to excessive window fogging. The recirculation
feature may be unavailable if conditions exist that
could create fogging on the inside of the
windshield.
Auto Button
Set your desired temperature and press
AUTO. AUTO will achieve and maintain
your desired temperature by
automatically adjusting the blower speed
and air distribution. Air Conditioning (A/C) may be
active during AUTO operation to improve
performance. AUTO mode is highly recommended
for efficiency. You can turn AUTO on in one of two ways:
Press and release this button on the touch
-
screen.
Push the button on the faceplate.
Toggling this function will cause the system to
switch between manual mode and automatic
mode Ú page 67.
Front Defrost Button
Press and release the Front Defrost
button on the touchscreen, or push and
release the button on the faceplate, to
change the current airflow setting to
Defrost mode. The Front Defrost indicator
illuminates when Front Defrost is on. Air comes
from the windshield and side window demist
outlets. When the defrost button is selected, the
blower level may increase. Use Defrost mode with
maximum temperature settings for best
windshield and side window defrosting and
defogging. When toggling the front defrost mode
button, the climate system will return to the
previous setting.
2
22_DT_OM_EN_USC_t.book Page 63
Page 68 of 496
66GETTING TO KNOW YOUR VEHICLE
A/C Button
Push the A/C button to engage the Air
Conditioning (A/C). The A/C indicator
illuminates when A/C is on.
NOTE:
For Manual Climate Controls, if the system is in
Mix, Floor or Defrost mode, the A/C can be
turned off, but the A/C system shall remain
active to prevent fogging of the windows.
If fog or mist appears on the windshield or side
glass, select Defrost mode, and increase blower
speed if needed.
If your air conditioning performance seems
lower than expected, check the front of the A/C
condenser (located in front of the radiator), for
an accumulation of dirt or insects. Clean with a
gentle water spray from the front of the radiator
and through the condenser.
Recirculation Button
Push the Recirculation button to change
the system between recirculation mode
and outside air mode. The Recirculation
indicator and the A/C indicator illuminate
when the Recirculation button is pressed.
Recirculation can be used when outside
conditions, such as smoke, odors, dust, or
humidity are present. Recirculation can be used in
all modes except for Defrost. Recirculation may be
unavailable if conditions exist that could create fogging on the inside of the windshield. The A/C
can be deselected manually without disturbing the
mode control selection. Continuous use of the
Recirculation mode may make the inside air stuffy
and window fogging may occur. Extended use of
this mode is not recommended.
On systems with Manual Climate Controls, the
Recirculation mode is not allowed in Defrost mode
to improve window cleaning operation.
Recirculation is disabled automatically if this mode
is selected. Attempting to use Recirculation while
in this mode causes the LED in the control button
to blink and then turn off.
Front Defrost Setting
Turn the mode control knob to the Front
Defrost mode setting. Air comes from the
windshield and side window demist
outlets. When the defrost button is
selected, the blower level may increase. Use
Defrost mode with maximum temperature settings
for best windshield and side window defrosting
and defogging.
Rear Defrost Button
Push and release the Rear Defrost
Control button to turn on the rear window
defroster and the heated outside mirrors
(if equipped). The Rear Defrost indicator
illuminates when the rear window defroster is on. The rear window defroster automatically turns off
after 10 minutes.
Temperature Control
Temperature Control regulates the temperature of
the air forced through the climate system.
The temperature increases as you
turn the temperature control knob
clockwise.
The temperature decreases as you
turn the temperature control knob
counterclockwise.
CAUTION!
Failure to follow these cautions can cause
damage to the heating elements:
Use care when washing the inside of the rear
window. Do not use abrasive window cleaners
on the interior surface of the window. Use a
soft cloth and a mild washing solution, wiping
parallel to the heating elements. Labels can
be peeled off after soaking with warm water.
Do not use scrapers, sharp instruments, or
abrasive window cleaners on the interior
surface of the window.
Keep all objects a safe distance from the
window.
22_DT_OM_EN_USC_t.book Page 66
Page 70 of 496

68GETTING TO KNOW YOUR VEHICLE
To provide you with maximum comfort in the
Automatic mode during cold start-ups, the blower
fan will remain on low until the engine warms up.
The blower will increase in speed and transition
into Auto mode.
Manual Operation Override
This system offers a full complement of manual
override features. The AUTO symbol in the front
ATC display will be turned off when the system is
being used in the manual mode.
CLIMATE VOICE RECOGNITION —
I
F EQUIPPED
Adjust vehicle temperatures hands-free and keep
everyone comfortable while you keep moving
ahead.
Push the VR button on the steering wheel. After the
beep, say one of the following commands:
“ Set driver temperature to 70 degrees ”
“Set passenger temperature to 70 degrees ”
Did you know: Voice Command for Climate may
only be used to adjust the interior temperature of
your vehicle. Voice Command will not work to
adjust the heated seats or steering wheel if
equipped.
OPERATING TIPS
Refer to the chart at the end of this section for
suggested control settings for various weather
conditions.
Summer Operation
The engine cooling system must be protected with
a high-quality antifreeze coolant to provide proper
corrosion protection and to protect against engine
overheating. OAT coolant (conforming to
MS.90032) is recommended.
Winter Operation
To ensure the best possible heater and defroster
performance, make sure the engine cooling
system is functioning properly and the proper
amount, type, and concentration of coolant is
used. Use of the Air Recirculation mode during
Winter months is not recommended, because it
may cause window fogging.
Vacation/Storage
For information on maintaining the Climate Control
system when the vehicle is being stored for an
extended period of time, see Ú page 461.
Window Fogging
Vehicle windows tend to fog on the inside in mild,
rainy, and/or humid weather. To clear the
windows, select Defrost or Mix mode and increase
the front blower speed. Do not use the
Recirculation mode without A/C for long periods,
as fogging may occur.
Outside Air Intake
Make sure the air intake, located directly in front of
the windshield, is free of obstructions, such as
leaves. Leaves collected in the air intake may
reduce airflow, and if they enter the air distribution
box, they could plug the water drains. In Winter
months, make sure the air intake is clear of ice,
slush, and snow.
Cabin Air Filter
The Climate Control system filters out dust and
pollen from the air. Contact an authorized dealer to
service your cabin air filter, and to have it replaced
when needed.
Stop/Start System — If Equipped
While in an Autostop, the Climate Control system
may automatically adjust airflow to maintain cabin
comfort. Customer settings will be maintained
upon return to an engine running condition.
22_DT_OM_EN_USC_t.book Page 68
Page 85 of 496
GETTING TO KNOW YOUR VEHICLE83
Any release of the switch during open or close
operation will stop the sunroof movement. The
sunroof will remain in a partially opened position
until the switch is operated and held again.
NOTE:If the sunshade is in the closed position when
Express or Manual Open operation is initiated the
sunshade will automatically open to the half open
position prior to the sunroof opening.
Pinch Protect Feature
This feature will detect an obstruction in the
opening of the sunroof during Express Close
operation. If an obstruction in the path of the
sunroof is detected, the sunroof will automatically
retract. Remove the obstruction if this occurs.
NOTE:
If three consecutive sunroof close attempts result in
Pinch Protect reversals, Pinch Protect will disable
and the sunroof must be closed in Manual Mode.
Venting Sunroof
Push and release the Vent button within one half
second and the sunroof will open to the vent
position. This is called “Express Vent”, and it will
occur regardless of sunroof position. During
Express Vent operation, any other actuation of the
switch will stop the sunroof.
Sunshade Operation
The sunshade can be opened manually. However,
the sunshade will open automatically as the
sunroof opens.
NOTE:The sunshade cannot be closed if the sunroof is
open.
Ignition Off Operation
The power sunroof switch will remain active for up
to approximately 10 minutes after the ignition
switch is placed in the OFF position. Opening either
front door will cancel this feature.
NOTE:Ignition Off time is programmable through the
Uconnect system Ú page 234.
Sunroof Maintenance
Use only a non-abrasive cleaner and a soft cloth to
clean the glass panel. Periodically check for and
clear out any debris that may have collected in the
tracks.
DUAL PANE POWER SUNROOF —
I
F EQUIPPED
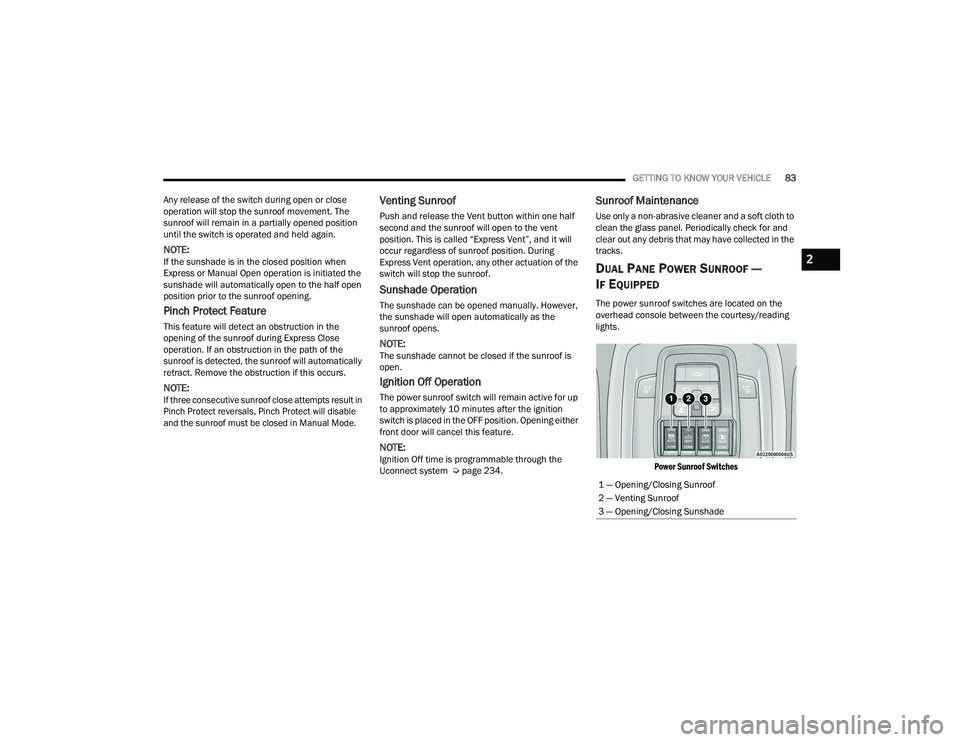
The power sunroof switches are located on the
overhead console between the courtesy/reading
lights.
Power Sunroof Switches
1 — Opening/Closing Sunroof
2 — Venting Sunroof
3 — Opening/Closing Sunshade
2
22_DT_OM_EN_USC_t.book Page 83
Page 87 of 496
GETTING TO KNOW YOUR VEHICLE85
Manual Open/Close
Push and hold the sunshade switch rearward, the
sunshade will open to the half open position and
stop automatically. Push and hold the sunshade
switch again and the sunshade will open to the full
open position.
Push and hold the switch forward and the
sunshade will close and stop at full closed position.
Releasing the switch while the sunshade is in
motion will stop the sunshade in a partially open
position.
Pinch Protect Feature
This feature will detect an obstruction in the
opening of the sunroof during Express Close
operation. If an obstruction in the path of the
sunroof is detected, the sunroof will automatically
retract. Remove the obstruction if this occurs.
NOTE:If three consecutive sunroof close attempts result
in Pinch Protect reversals, Pinch Protect will
disable and the sunroof must be closed in
Manual Mode.
Venting Sunroof
Push and release the Vent button within one half
second and the sunroof will open to the vent
position. This is called “Express Vent” and it will
occur regardless of sunroof position. During
Express Vent operation, any movement of the
switch will stop the sunroof.
NOTE:If the sunshade was not already open, it will auto -
matically open prior to the roof opening to the vent
position.
Ignition Off Operation
The power sunroof switch will remain active for up
to approximately 10 minutes after the ignition
switch is placed in the OFF position. Opening either
front door will cancel this feature.
NOTE:Ignition Off time is programmable through the
Uconnect system Ú page 234.
Sunroof Maintenance
Use only a non-abrasive cleaner and a soft cloth to
clean the glass panel. Periodically check for and
clear out any debris that may have collected in the
tracks.
HOOD
TO OPEN THE HOOD
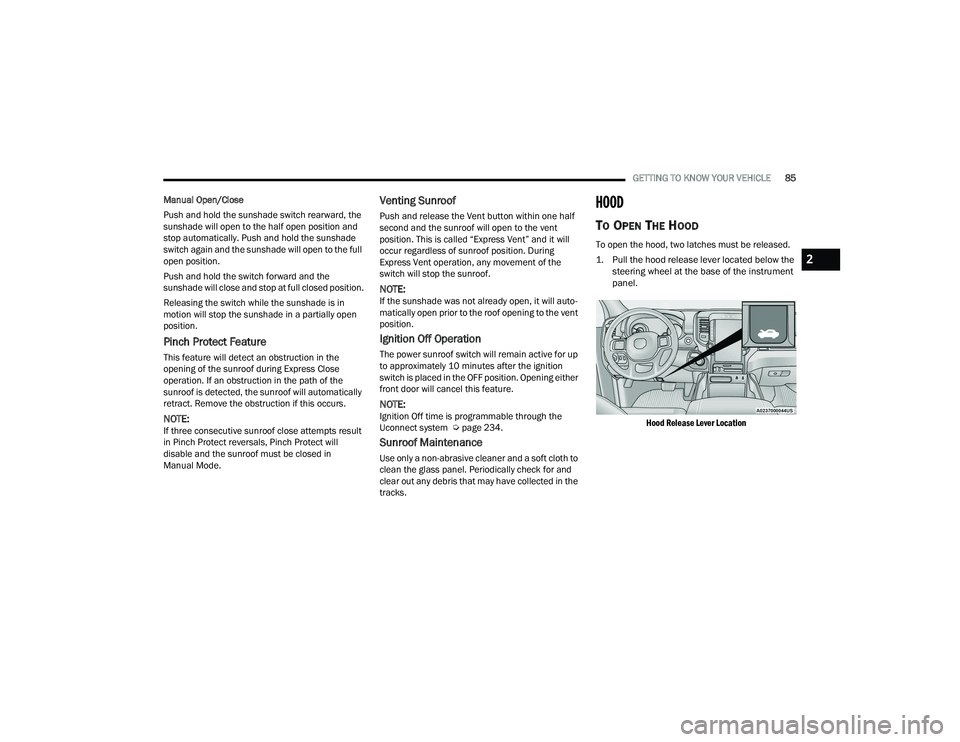
To open the hood, two latches must be released.
1. Pull the hood release lever located below the
steering wheel at the base of the instrument
panel.
Hood Release Lever Location
2
22_DT_OM_EN_USC_t.book Page 85