ESP RAM 1500 2023 Owner's Manual
[x] Cancel search | Manufacturer: RAM, Model Year: 2023, Model line: 1500, Model: RAM 1500 2023Pages: 416, PDF Size: 20.59 MB
Page 161 of 416
STARTING AND OPERATING159
When pushed, the LED on the ParkSense Active Park
Assist switch will blink momentarily, and then the LED will
turn off if any of the above conditions are not present.
PARALLEL/PERPENDICULAR PARKING
S
PACE ASSISTANCE OPERATION
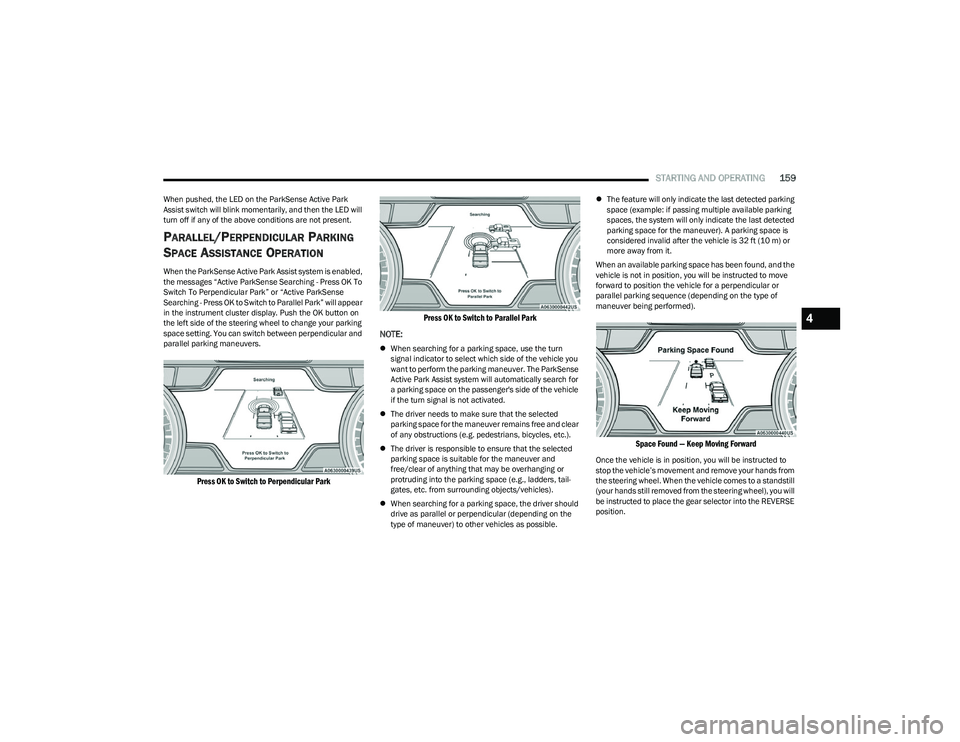
When the ParkSense Active Park Assist system is enabled,
the messages “Active ParkSense Searching - Press OK To
Switch To Perpendicular Park” or “Active ParkSense
Searching - Press OK to Switch to Parallel Park” will appear
in the instrument cluster display. Push the OK button on
the left side of the steering wheel to change your parking
space setting. You can switch between perpendicular and
parallel parking maneuvers.
Press OK to Switch to Perpendicular Park Press OK to Switch to Parallel Park
NOTE:
When searching for a parking space, use the turn
signal indicator to select which side of the vehicle you
want to perform the parking maneuver. The ParkSense
Active Park Assist system will automatically search for
a parking space on the passenger's side of the vehicle
if the turn signal is not activated.
The driver needs to make sure that the selected
parking space for the maneuver remains free and clear
of any obstructions (e.g. pedestrians, bicycles, etc.).
The driver is responsible to ensure that the selected
parking space is suitable for the maneuver and
free/clear of anything that may be overhanging or
protruding into the parking space (e.g., ladders, tail-
gates, etc. from surrounding objects/vehicles).
When searching for a parking space, the driver should
drive as parallel or perpendicular (depending on the
type of maneuver) to other vehicles as possible.
The feature will only indicate the last detected parking
space (example: if passing multiple available parking
spaces, the system will only indicate the last detected
parking space for the maneuver). A parking space is
considered invalid after the vehicle is 32 ft (10 m) or
more away from it.
When an available parking space has been found, and the
vehicle is not in position, you will be instructed to move
forward to position the vehicle for a perpendicular or
parallel parking sequence (depending on the type of
maneuver being performed).
Space Found — Keep Moving Forward
Once the vehicle is in position, you will be instructed to
stop the vehicle’s movement and remove your hands from
the steering wheel. When the vehicle comes to a standstill
(your hands still removed from the steering wheel), you will
be instructed to place the gear selector into the REVERSE
position.
4
23_DT_OM_EN_USC_t.book Page 159
Page 162 of 416

160STARTING AND OPERATING
The system may then instruct the driver to wait for steering
to complete before then instructing to check surroundings
and move backward.
Move Backward Into Parallel Parking Space
Move Backward Into Perpendicular Parking Space
The system may instruct several more gear shifts
(DRIVE and REVERSE), with hands off of the steering
wheel, before instructing the driver to check surroundings
and complete the parking maneuver. When the vehicle is in the parking position, the maneuver
is complete and the driver will be instructed to check the
vehicle's parking position, then shift the vehicle into PARK.
The message "Active ParkSense Complete - Check Parking
Position" will be displayed momentarily.
NOTE:
It is the driver's responsibility to use the brake and
accelerator during the semi-automatic parking
maneuver.
It is the driver's responsibility to use the brake and stop
the vehicle. The driver should check their surroundings
and be prepared to stop the vehicle either when
instructed to, or when driver intervention is required.
When the system instructs the driver to remove their
hands from the steering wheel, the driver should check
their surroundings and begin to back up slowly.
The ParkSense Active Park Assist system will allow a
maximum of eight shifts between DRIVE and REVERSE.
If the maneuver cannot be completed within eight
shifts, the system will cancel and the instrument
cluster display will instruct the driver to complete the
maneuver manually.
The system will cancel the maneuver if the vehicle
speed exceeds 5 mph (7 km/h) during active steering
guidance into the parking space. The system will
provide a warning to the driver at 3 mph (5 km/h) that
tells them to slow down. The driver is then responsible
for completing the maneuver if the system is canceled.
If the system is canceled during the maneuver for any
reason, the driver must take control of the vehicle.
WARNING!
Drivers must be careful when performing parallel or
perpendicular parking maneuvers even when using the
ParkSense Active Park Assist system. Always check
carefully behind and in front of your vehicle, look
behind and in front of you, and be sure to check for
pedestrians, animals, other vehicles, obstructions, and
blind spots before backing up and moving forward. You
are responsible for safety and must continue to pay
attention to your surroundings. Failure to do so can
result in serious injury or death.
CAUTION!
The ParkSense Active Park Assist system is only a
parking aid and it is unable to recognize every
obstacle, including small obstacles. Parking curbs
might be temporarily detected or not detected at all.
Obstacles located above or below the sensors’ field
of view will not be detected when they are in close
proximity.
The vehicle must be driven slowly when using the
ParkSense Active Park Assist system in order to be
able to stop in time when an obstacle is detected.
It is recommended that the driver looks over his/her
shoulders when using the ParkSense Active Park
Assist system.
23_DT_OM_EN_USC_t.book Page 160
Page 165 of 416
STARTING AND OPERATING163
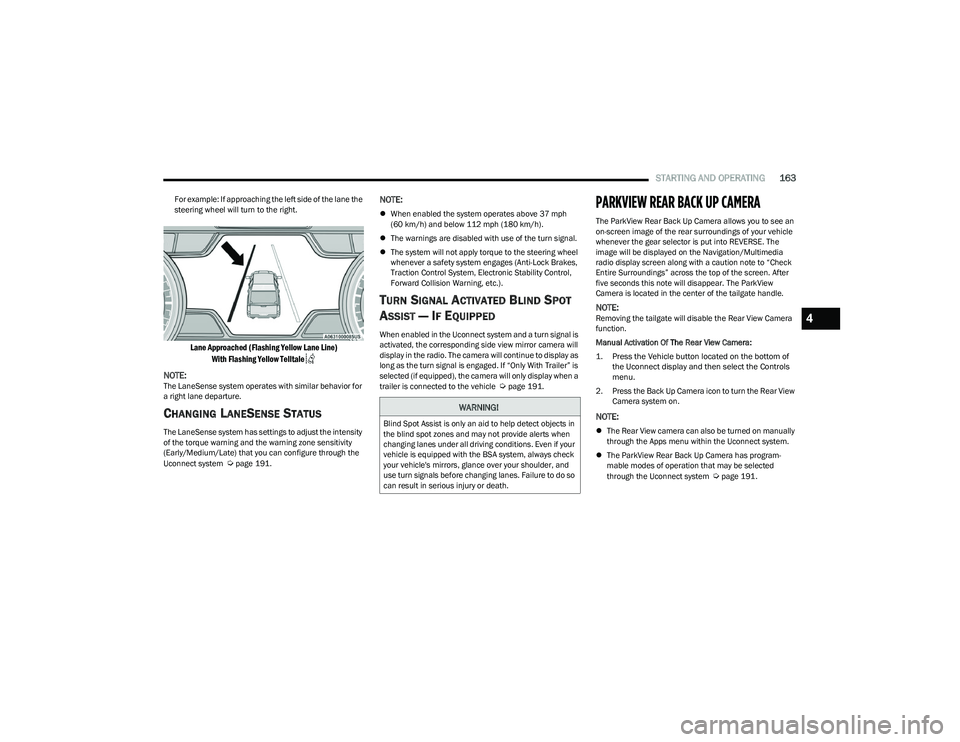
For example: If approaching the left side of the lane the
steering wheel will turn to the right.
Lane Approached (Flashing Yellow Lane Line)
With Flashing Yellow Telltale
NOTE:
The LaneSense system operates with similar behavior for
a right lane departure.
CHANGING LANESENSE STATUS
The LaneSense system has settings to adjust the intensity
of the torque warning and the warning zone sensitivity
(Early/Medium/Late) that you can configure through the
Uconnect system
Úpage 191.
NOTE:
When enabled the system operates above 37 mph
(60 km/h) and below 112 mph (180 km/h).
The warnings are disabled with use of the turn signal.
The system will not apply torque to the steering wheel
whenever a safety system engages (Anti-Lock Brakes,
Traction Control System, Electronic Stability Control,
Forward Collision Warning, etc.).
TURN SIGNAL ACTIVATED BLIND SPOT
A
SSIST — IF EQUIPPED
When enabled in the Uconnect system and a turn signal is
activated, the corresponding side view mirror camera will
display in the radio. The camera will continue to display as
long as the turn signal is engaged. If “Only With Trailer” is
selected (if equipped), the camera will only display when a
trailer is connected to the vehicle
Úpage 191.
PARKVIEW REAR BACK UP CAMERA
The ParkView Rear Back Up Camera allows you to see an
on-screen image of the rear surroundings of your vehicle
whenever the gear selector is put into REVERSE. The
image will be displayed on the Navigation/Multimedia
radio display screen along with a caution note to “Check
Entire Surroundings” across the top of the screen. After
five seconds this note will disappear. The ParkView
Camera is located in the center of the tailgate handle.
NOTE:Removing the tailgate will disable the Rear View Camera
function.
Manual Activation Of The Rear View Camera:
1. Press the Vehicle button located on the bottom of
the Uconnect display and then select the Controls
menu.
2. Press the Back Up Camera icon to turn the Rear View Camera system on.
NOTE:
The Rear View camera can also be turned on manually
through the Apps menu within the Uconnect system.
The ParkView Rear Back Up Camera has program -
mable modes of operation that may be selected
through the Uconnect system
Úpage 191.
WARNING!
Blind Spot Assist is only an aid to help detect objects in
the blind spot zones and may not provide alerts when
changing lanes under all driving conditions. Even if your
vehicle is equipped with the BSA system, always check
your vehicle's mirrors, glance over your shoulder, and
use turn signals before changing lanes. Failure to do so
can result in serious injury or death.
4
23_DT_OM_EN_USC_t.book Page 163
Page 166 of 416
164STARTING AND OPERATING
When the vehicle is shifted out of REVERSE with camera
delay turned off, the rear camera mode is exited and the
previous screen appears. When the vehicle is shifted out
of REVERSE with camera delay turned on, the camera
image will continue to be displayed for up to 10 seconds
after shifting out of REVERSE unless the following
conditions occur: The vehicle speed exceeds 8 mph
(13 km/h), the vehicle is shifted into PARK, the vehicle’s
ignition is placed in the OFF position, or the user presses
the touchscreen X button to exit out of the camera video
display.
Whenever the Rear View Camera image is activated
through the Back Up Camera button in the Controls menu,
and the vehicle speed is greater than, or equal to, 8 mph
(13 km/h), a display timer for the image is initiated.
The image will continue to be displayed until the display
timer exceeds 10 seconds.
NOTE:
If the vehicle speed remains below 8 mph (13 km/h),
the Rear View Camera image will be displayed continu -
ously until deactivated via the touchscreen X button,
the transmission is shifted into PARK, or the ignition is
placed in the OFF position.
The touchscreen X button to disable the camera image
is made available ONLY when the vehicle is not in
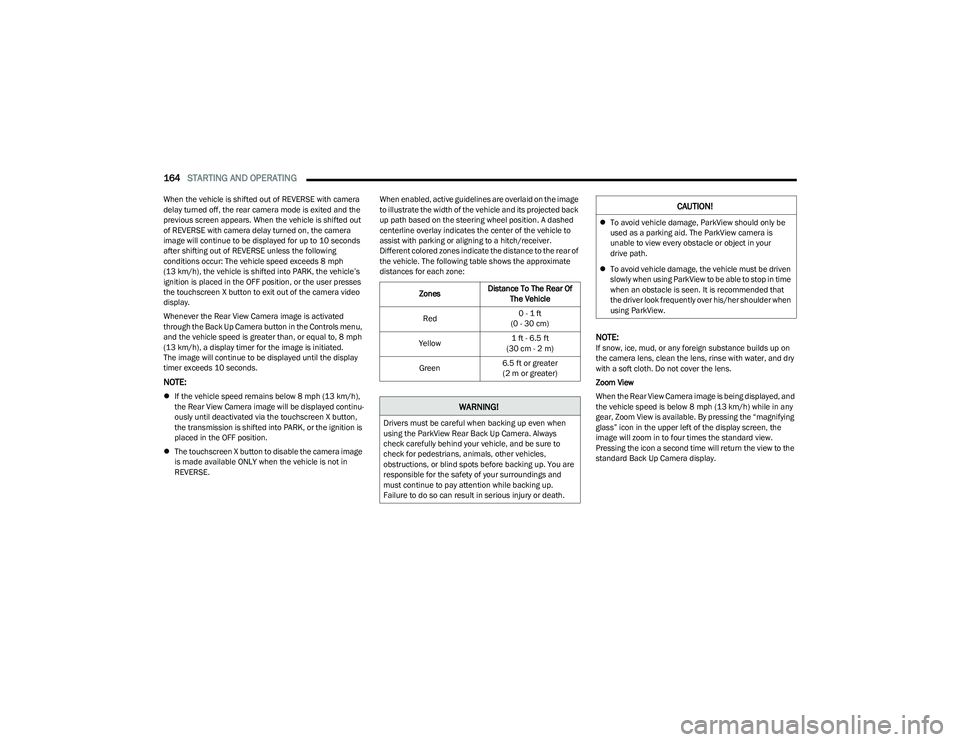
REVERSE. When enabled, active guidelines are overlaid on the image
to illustrate the width of the vehicle and its projected back
up path based on the steering wheel position. A dashed
centerline overlay indicates the center of the vehicle to
assist with parking or aligning to a hitch/receiver.
Different colored zones indicate the distance to the rear of
the vehicle. The following table shows the approximate
distances for each zone:
NOTE:If snow, ice, mud, or any foreign substance builds up on
the camera lens, clean the lens, rinse with water, and dry
with a soft cloth. Do not cover the lens.
Zoom View
When the Rear View Camera image is being displayed, and
the vehicle speed is below 8 mph (13 km/h) while in any
gear, Zoom View is available. By pressing the “magnifying
glass” icon in the upper left of the display screen, the
image will zoom in to four times the standard view.
Pressing the icon a second time will return the view to the
standard Back Up Camera display.
Zones
Distance To The Rear Of
The Vehicle
Red 0 - 1 ft
(0 - 30 cm)
Yellow 1 ft - 6.5 ft
(30 cm - 2 m)
Green 6.5 ft or greater
(2 m or greater)
WARNING!
Drivers must be careful when backing up even when
using the ParkView Rear Back Up Camera. Always
check carefully behind your vehicle, and be sure to
check for pedestrians, animals, other vehicles,
obstructions, or blind spots before backing up. You are
responsible for the safety of your surroundings and
must continue to pay attention while backing up.
Failure to do so can result in serious injury or death.
CAUTION!
To avoid vehicle damage, ParkView should only be
used as a parking aid. The ParkView camera is
unable to view every obstacle or object in your
drive path.
To avoid vehicle damage, the vehicle must be driven
slowly when using ParkView to be able to stop in time
when an obstacle is seen. It is recommended that
the driver look frequently over his/her shoulder when
using ParkView.
23_DT_OM_EN_USC_t.book Page 164
Page 168 of 416
166STARTING AND OPERATING
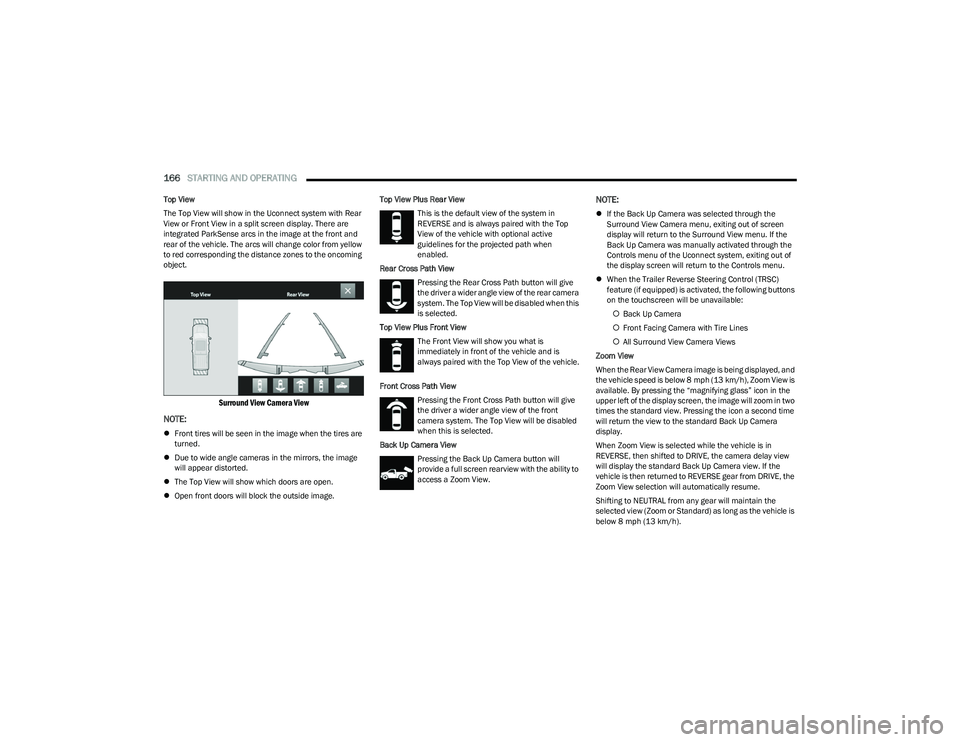
Top View
The Top View will show in the Uconnect system with Rear
View or Front View in a split screen display. There are
integrated ParkSense arcs in the image at the front and
rear of the vehicle. The arcs will change color from yellow
to red corresponding the distance zones to the oncoming
object.
Surround View Camera View
NOTE:
Front tires will be seen in the image when the tires are
turned.
Due to wide angle cameras in the mirrors, the image
will appear distorted.
The Top View will show which doors are open.
Open front doors will block the outside image. Top View Plus Rear View
This is the default view of the system in
REVERSE and is always paired with the Top
View of the vehicle with optional active
guidelines for the projected path when
enabled.
Rear Cross Path View Pressing the Rear Cross Path button will give
the driver a wider angle view of the rear camera
system. The Top View will be disabled when this
is selected.
Top View Plus Front View The Front View will show you what is
immediately in front of the vehicle and is
always paired with the Top View of the vehicle.
Front Cross Path View Pressing the Front Cross Path button will give
the driver a wider angle view of the front
camera system. The Top View will be disabled
when this is selected.
Back Up Camera View Pressing the Back Up Camera button will
provide a full screen rearview with the ability to
access a Zoom View.
NOTE:
If the Back Up Camera was selected through the
Surround View Camera menu, exiting out of screen
display will return to the Surround View menu. If the
Back Up Camera was manually activated through the
Controls menu of the Uconnect system, exiting out of
the display screen will return to the Controls menu.
When the Trailer Reverse Steering Control (TRSC)
feature (if equipped) is activated, the following buttons
on the touchscreen will be unavailable:
Back Up Camera
Front Facing Camera with Tire Lines
All Surround View Camera Views
Zoom View
When the Rear View Camera image is being displayed, and
the vehicle speed is below 8 mph (13 km/h), Zoom View is
available. By pressing the “magnifying glass” icon in the
upper left of the display screen, the image will zoom in two
times the standard view. Pressing the icon a second time
will return the view to the standard Back Up Camera
display.
When Zoom View is selected while the vehicle is in
REVERSE, then shifted to DRIVE, the camera delay view
will display the standard Back Up Camera view. If the
vehicle is then returned to REVERSE gear from DRIVE, the
Zoom View selection will automatically resume.
Shifting to NEUTRAL from any gear will maintain the
selected view (Zoom or Standard) as long as the vehicle is
below 8 mph (13 km/h).
23_DT_OM_EN_USC_t.book Page 166
Page 169 of 416
STARTING AND OPERATING167
(Continued)
If the vehicle is in PARK, Zoom View is available until the
gear selector is placed in DRIVE or REVERSE and speeds
are at or above 8 mph (13 km/h).
NOTE:
If the vehicle is in DRIVE, NEUTRAL, or REVERSE, and
speed is greater than or equal to 8 mph (13 km/h),
Zoom View is unavailable and the icon will appear grey.
While in Zoom View, the guidelines will not be visible.
Deactivation
The system is deactivated in the following conditions if it
was activated automatically:
When the vehicle is shifted out of REVERSE with
camera delay turned on, the camera image will
continue to be displayed for up to 10 seconds after
shifting out of REVERSE unless the vehicle speed
exceeds 8 mph (13 km/h), the vehicle is shifted into
PARK or the ignition is placed in the OFF position. There
is a touchscreen X button to disable the display of the
camera image.
When the vehicle is shifted out of REVERSE with
camera delay turned off, the Surround View Camera
mode is exited and the last known screen appears
again.
The system is deactivated in the following conditions if it
was activated manually from the Uconnect controls menu
via Surround View button or Back Up Camera button:
The touchscreen X button is pressed
Vehicle is shifted into PARK
Ignition is placed in the OFF position
Vehicle speed is over 8 mph (13 km/h) for 10 seconds
NOTE:If the Surround View Camera is activated manually, and
the vehicle is shifted into REVERSE, deactivation methods
for automatic activation are assumed.
The camera delay system is turned off manually through
the Uconnect settings menu
Úpage 191.
NOTE:
If snow, ice, mud, or any foreign substance builds up on
the camera lenses, clean the lenses, rinse with water,
and dry with a soft cloth. Do not cover the lenses.
If a malfunction with the system has occurred, see an
authorized dealer. For information on Auxiliary Cameras (if equipped), see
Úpage 170.
FORWARD FACING CAMERA WITH TIRE
L
INES — IF EQUIPPED
The Forward Facing Camera displays a front view image of
the road ahead, along with tire lines to guide the driver
when driving on narrow roads. Tire lines can be activated/
deactivated through the Uconnect Settings.
Activation
The Forward Facing Camera can be activated in the
following ways:
Pressing the Forward Facing Camera button in the
Controls screen or Apps menu
Pressing the Forward Facing Camera button located in
the upper left corner of the Back Up camera display
Once activated, the camera image will remain on as long
as the vehicle speed is below 8 mph (13 km/h).WARNING!
Drivers must be careful when backing up even when
using the Surround View Camera. Always check
carefully behind your vehicle, and be sure to check for
pedestrians, animals, other vehicles, obstructions, or
blind spots before backing up. You are responsible for
the safety of your surroundings and must continue to
pay attention while backing up. Failure to do so can
result in serious injury or death.
CAUTION!
To avoid vehicle damage, Surround View should only
be used as a parking aid. The Surround View camera
is unable to view every obstacle or object in your
drive path.
To avoid vehicle damage, the vehicle must be driven
slowly when using Surround View to be able to stop
in time when an obstacle is seen. It is recommended
that the driver look frequently over his/her shoulder
when using Surround View.
CAUTION!
4
23_DT_OM_EN_USC_t.book Page 167
Page 172 of 416
170STARTING AND OPERATING
The system is deactivated in the following conditions if it
was activated manually from the Uconnect controls menu
via the Trailer Surround Camera button:
The touchscreen X button is pressed
Vehicle is shifted into PARK
Ignition is placed in the OFF position
Vehicle speed is over 8 mph (13 km/h) for 10 seconds
NOTE:If the Trailer Surround Camera is activated manually, and
the vehicle is shifted into REVERSE, deactivation methods
for automatic activation are assumed.
The camera delay system is turned off manually through
the Uconnect system
Úpage 191.
NOTE:
If snow, ice, mud, or any foreign substance builds up on
the camera lenses, clean the lenses, rinse with water,
and dry with a soft cloth. Do not cover the lenses.
If a malfunction with the system has occurred, see an
authorized dealer.
AUX CAMERA — IF EQUIPPED
Your vehicle may be equipped with one or two AUX
Cameras, which display rearview and side view images
from the trailer on the touchscreen.
NOTE:Two Aux Cameras are only available on vehicles with NAV
equipped radios if the vehicle is not equipped with a
Center High Mounted Stop Lamp (CHMSL) and Surround
View Camera system.
Activation
The AUX Camera is activated by first pressing the Back Up
Camera or Cargo Camera (if equipped) button on the
touchscreen, followed by the AUX button located in the
upper left corner of the rearview display. On vehicles with
Surround View Camera (if equipped), the AUX Camera can
be activated when the vehicle is in REVERSE by first
pressing the More Cams button in the Surround View
screen, followed by the AUX tab. The AUX camera can also be activated when the vehicle is
in REVERSE by pressing the AUX button.
If equipped with two AUX Cameras, you can switch
between each camera by pressing the AUX 1 or AUX 2
buttons on the Trailer Camera display.
Deactivation
The AUX Camera is deactivated by pressing the
touchscreen X button. This will return the display back to
the previously displayed screen.NOTE:
If the AUX button is pressed and no AUX Camera is
connected, the touchscreen will display a blue screen
along with the message “Camera System Unavailable.”
The screen can be exited out by pressing the touch -
screen X button. This will return the display back to the
previously displayed screen.
Zoom View is not available with the AUX Camera
feature.
The display will always default to the Trailer Camera
display AUX 1.
WARNING!
Drivers must be careful when backing up even when
using the Trailer Surround View Camera. Always check
carefully behind your vehicle, and be sure to check for
pedestrians, animals, other vehicles, obstructions, or
blind spots before backing up. You are responsible for
the safety of your surroundings and must continue to
pay attention while backing up. Failure to do so can
result in serious injury or death.
CAUTION!
To avoid vehicle damage, Trailer Surround View
should only be used as a parking aid. The Trailer
Surround View Camera is unable to view every
obstacle or object in your drive path.
To avoid vehicle damage, the vehicle must be driven
slowly when using Trailer Surround View to be able to
stop in time when an obstacle is seen. It is recom -
mended that the driver look frequently over his/her
shoulder when using Trailer Surround View.
AUX 1 Camera Button
AUX 2 Camera Button
23_DT_OM_EN_USC_t.book Page 170
Page 181 of 416

STARTING AND OPERATING179
(Continued)
Some trailers (such as boat trailers) will need to
recalibrate while loaded and unloaded.
NOTE:
The system may not detect a trailer in low light condi -
tions. In sunny conditions, the performance may be
degraded as shadows pass over the trailer.
The driver is always responsible for safe operation of
truck and trailer.
The driver is always in control of the truck as well as the
trailer and is responsible for controlling the throttle and
brakes.
The system may not function when the camera lens is
blocked, blurred (covered with water, snow, ice, dirt,
etc) and will not work unless the tailgate is upright and
fully latched.
TOWING REQUIREMENTS
To promote proper break-in of your new vehicle drivetrain
components, the following guidelines are recommended. Perform the maintenance listed in the Scheduled
Servicing section for the proper maintenance intervals
Úpage 333. When towing a trailer, never exceed the
GAWR or GCWR ratings.
Towing Requirements — Tires
Do not attempt to tow a trailer while using a compact
spare tire.
Do not drive more than 50 mph (80 km/h) when towing
while using a full size spare tire.
Proper tire inflation pressures are essential to the safe
and satisfactory operation of your vehicle.
Check the trailer tires for proper tire inflation pressures
before trailer usage.
Check for signs of tire wear or visible tire damage
before towing a trailer.
Replacing tires with a higher load carrying capacity will
not increase the vehicle's GVWR and GAWR limits.
For further information
Úpage 370.
CAUTION!
Do not tow a trailer at all during the first 500 miles
(805 km) the new vehicle is driven. The engine, axle
or other parts could be damaged.
Then, during the first 500 miles (805 km) that a
trailer is towed, do not drive over 50 mph (80 km/h)
and do not make starts at full throttle. This helps the
engine and other parts of the vehicle wear in at the
heavier loads.
WARNING!
Make certain that the load is secured in the trailer
and will not shift during travel. When trailering cargo
that is not fully secured, dynamic load shifts can
occur that may be difficult for the driver to control.
You could lose control of your vehicle and have a
collision.
When hauling cargo or towing a trailer, do not over -
load your vehicle or trailer. Overloading can cause a
loss of control, poor performance or damage to
brakes, axle, engine, transmission, steering, suspen -
sion, chassis structure or tires.
Safety chains must always be used between your
vehicle and trailer. Always connect the chains to the
hook retainers of the vehicle hitch. Cross the chains
under the trailer tongue and allow enough slack for
turning corners.
Vehicles with trailers should not be parked on a
grade. When parking, apply the parking brake on the
tow vehicle. Put the tow vehicle transmission in
PARK. For four-wheel drive vehicles, make sure the
transfer case is not in NEUTRAL. Always, block or
"chock" the trailer wheels.
GCWR must not be exceeded.
Total weight must be distributed between the tow
vehicle and the trailer such that the following four
ratings are not exceeded :
GVWR
GTW
GAWR
Tongue weight rating for the trailer hitch utilized
WARNING!
4
23_DT_OM_EN_USC_t.book Page 179
Page 195 of 416
MULTIMEDIA193
My Profile
When the My Profile button is pressed on the touchscreen, the system displays options related to the vehicle’s profiles.
NOTE:Depending on the vehicle’s options, feature settings may vary.
Setting Name Description
Language This setting will change the language of the Uconnect system and Instrument Cluster
Display. The available languages are English, Français, Italiano, and Español.
Display Mode This setting will adjust the display for the radio to “Auto” or “Manual”. “Manual” allows for
more customization with the radio display.
Display Brightness Headlights On This setting will allow you to set the brightness when the headlights are on. To access this
setting, Display Mode must be set to “Manual”. The “+” setting will increase the
brightness; the “-” will decrease the brightness.
Display Brightness Headlights Off This setting will allow you to set the brightness when the headlights are off. To access this
setting, Display Mode must be set to “Manual”. The “+” setting will increase the
brightness; the “-” will decrease the brightness.
Set Theme This setting will allow you to change the display theme.
Units This setting will allow you to change the units to “US”, “Metric”, or “Custom”. The
available options within Custom are “Speed” (MPH or km/h), “Distance” (mi or km), “Fuel
Consumption” (MPG [US], MPG [UK], L/100 km, or km/L), “Pressure” (psi, kPa, or bar),
“Temperature” (°C or °F), “Power” (HP [US], Gal HP [UK], or kW), and “Torque” (lb-ft or
Nm) units of measurement independently.
Theme Mode This setting will allow you to adjust the brightness of your theme. Setting options are
“Light”, “Dark” and “Auto”. Select to show themes in Light or Dark mode. “Auto” changes
the theme with the headlights.
Touchscreen Beep This setting will allow you to turn the touchscreen beep on or off.
Show Main Category Bar Labels This setting will allow the main category bar labels to be shown on or off.
Navigation Next Turn Pop-ups Displayed in Cluster This setting will display navigation prompts in the Instrument Cluster Display.
5
23_DT_OM_EN_USC_t.book Page 193
Page 198 of 416

196MULTIMEDIA
Display
When the Display button is pressed on the touchscreen, the system will display the options related to the theme (if equipped), brightness, and color of the touchscreen. The available
settings are:
NOTE:Depending on the vehicle’s options, feature settings may vary.
Setting Name Description
Language This setting will change the language of the Uconnect system and Instrument Cluster
Display. The available languages are English, Français, Italiano, and Español.
Display Mode This setting will allow you to set the brightness manually or have the system set
it automatically. The “Auto” setting has the system automatically adjust the
display brightness. The “Manual” setting will allow the user to adjust the brightness
of the display.
Display Brightness With Headlights ON/Brightness This setting will allow you to set the brightness when the headlights are on. To access this
setting, Display Mode must be set to Manual. The “+” setting will increase the brightness;
the “-” will decrease the brightness.
Display Brightness With Headlights OFF/Brightness This setting will allow you to set the brightness when the headlights are off. To access this
setting, Display Mode must be set to Manual. The “+” setting will increase the brightness;
the “-” will decrease the brightness.
Set Theme This setting will allow you to change the display theme.
Units This setting will allow you to change the units. The available options are “Speed” (MPH or
km/h), “Distance” (mi or km), “Fuel Consumption” (MPG [US], MPG [UK], L/100 km, or
km/L), “Pressure” (psi, kPa, or bar), “Temperature” (°C or °F), “Power” (HP [US], Gal HP
[UK], or kW), and “Torque” (lb-ft or Nm) units of measurement independently.
Theme Mode This setting will allow you to adjust the brightness of your theme. Setting options are
“Light”, “Dark” and “Auto”. Select to show themes in Light or Dark mode. “Auto” changes
the theme with the headlights.
Touchscreen Beep This setting will allow you to turn the touchscreen beep on or off.
23_DT_OM_EN_USC_t.book Page 196