wheel Ram 2500 2018 Manual Online
[x] Cancel search | Manufacturer: RAM, Model Year: 2018, Model line: 2500, Model: Ram 2500 2018Pages: 372, PDF Size: 7.1 MB
Page 279 of 372
• Dual wheel models require a special heavy-duty lug nut tightening adapter (included
with the vehicle) to correctly tighten the lug
nuts. Also, when it is necessary to remove
and install dual rear wheels, use a proper
vehicle lifting device.
NOTE:
When installing a spare tire as part of a dual
rear wheel end combination, the tire diam-
eter of the two individual tires must be com-
pared. If there is a significant difference, the
larger tire should be installed in a front loca-
tion. The correct direction of rotation for dual
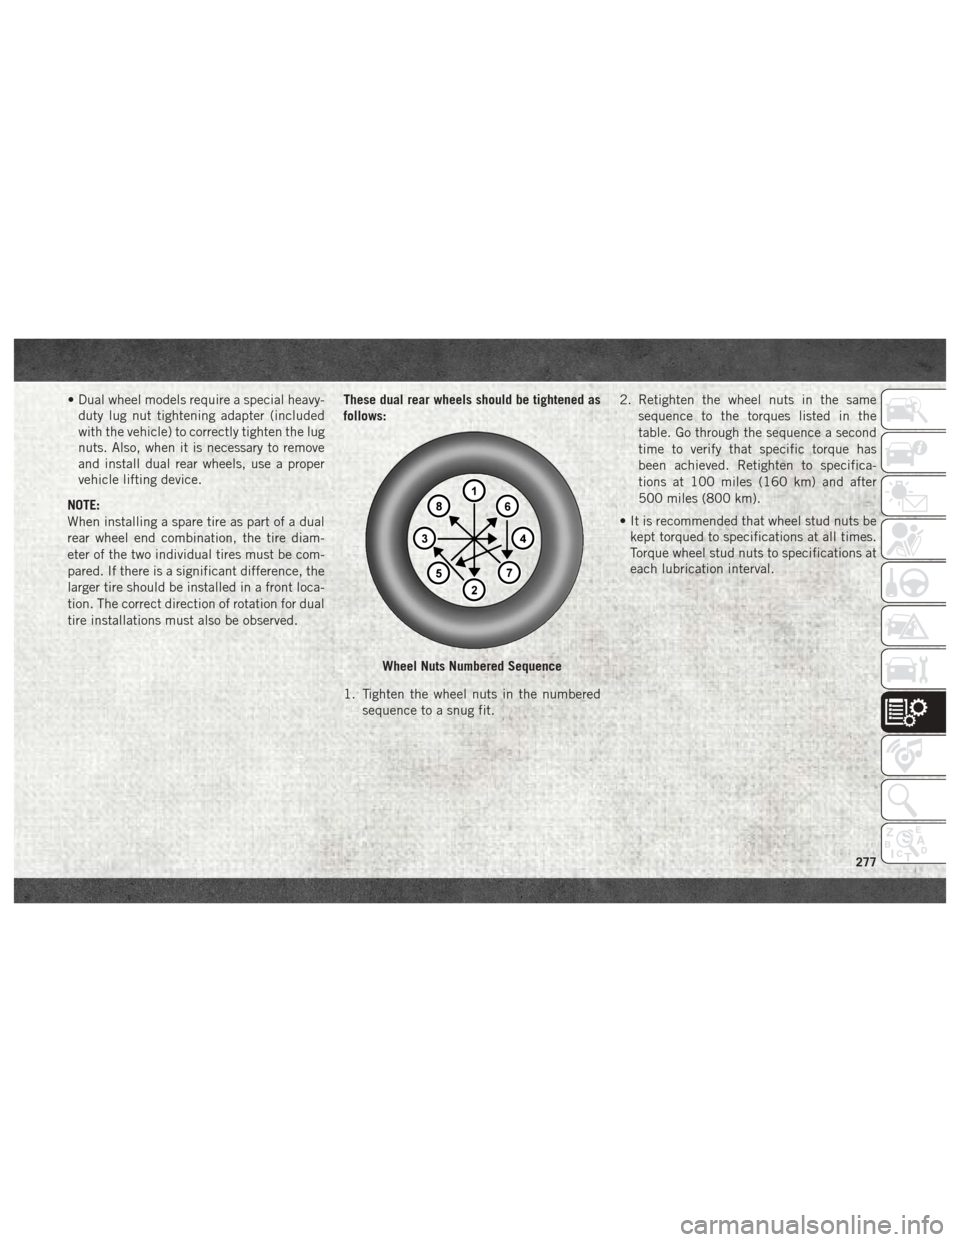
tire installations must also be observed. These dual rear wheels should be tightened as
follows:
1. Tighten the wheel nuts in the numbered
sequence to a snug fit. 2. Retighten the wheel nuts in the same
sequence to the torques listed in the
table. Go through the sequence a second
time to verify that specific torque has
been achieved. Retighten to specifica-
tions at 100 miles (160 km) and after
500 miles (800 km).
• It is recommended that wheel stud nuts be kept torqued to specifications at all times.
Torque wheel stud nuts to specifications at
each lubrication interval.
Wheel Nuts Numbered Sequence
277
Page 284 of 372
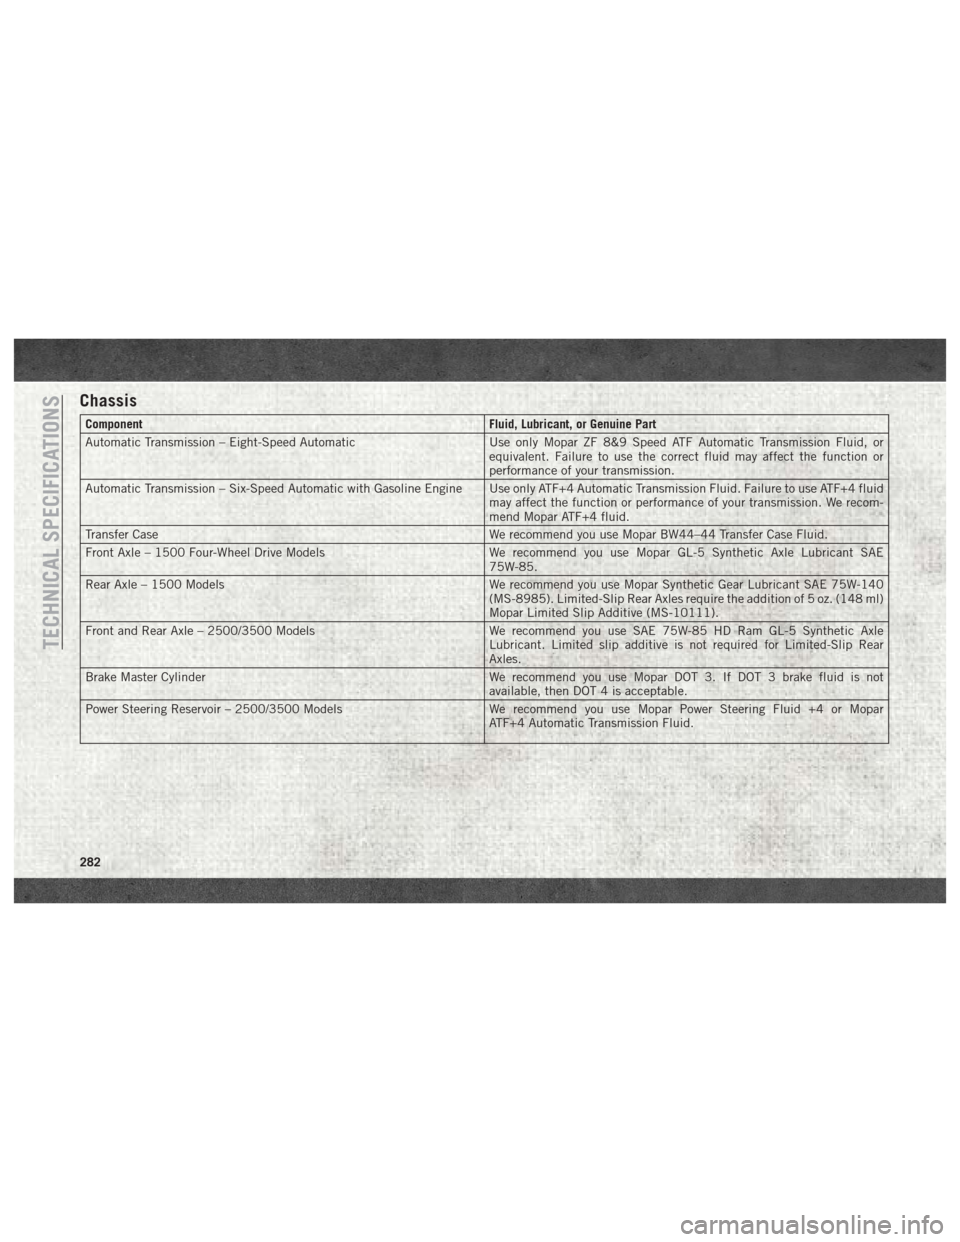
Chassis
ComponentFluid, Lubricant, or Genuine Part
Automatic Transmission – Eight-Speed Automatic Use only Mopar ZF 8&9 Speed ATF Automatic Transmission Fluid, or
equivalent. Failure to use the correct fluid may affect the function or
performance of your transmission.
Automatic Transmission – Six-Speed Automatic with Gasoline Engine Use only ATF+4 Automatic Transmission Fluid. Failure to use ATF+4 fluid may affect the function or performance of your transmission. We recom-
mend Mopar ATF+4 fluid.
Transfer Case We recommend you use Mopar BW44–44 Transfer Case Fluid.
Front Axle – 1500 Four-Wheel Drive Models We recommend you use Mopar GL-5 Synthetic Axle Lubricant SAE
75W-85.
Rear Axle – 1500 Models We recommend you use Mopar Synthetic Gear Lubricant SAE 75W-140
(MS-8985). Limited-Slip Rear Axles require the addition of 5 oz. (148 ml)
Mopar Limited Slip Additive (MS-10111).
Front and Rear Axle – 2500/3500 Models We recommend you use SAE 75W-85 HD Ram GL-5 Synthetic Axle
Lubricant. Limited slip additive is not required for Limited-Slip Rear
Axles.
Brake Master Cylinder We recommend you use Mopar DOT 3. If DOT 3 brake fluid is not
available, then DOT 4 is acceptable.
Power Steering Reservoir – 2500/3500 Models We recommend you use Mopar Power Steering Fluid +4 or Mopar
ATF+4 Automatic Transmission Fluid.
TECHNICAL SPECIFICATIONS
282
Page 286 of 372
CAUTION!
freeze) or any “globally compatible”
coolant (antifreeze). If a non-OAT engine
coolant (antifreeze) is introduced into
the cooling system in an emergency, the
cooling system will need to be drained,
flushed, and refilled with fresh OAT cool-
ant (conforming to MS.90032), by an
authorized dealer as soon as possible.
CAUTION!
• Do not use water alone or alcohol-basedengine coolant (antifreeze) products. Do
not use additional rust inhibitors or an-
tirust products, as they may not be com-
patible with the radiator engine coolant
and may plug the radiator.
• This vehicle has not been designed for
use with propylene glycol-based engine
CAUTION!
coolant (antifreeze). Use of propylene
glycol-based engine coolant (antifreeze)
is not recommended.
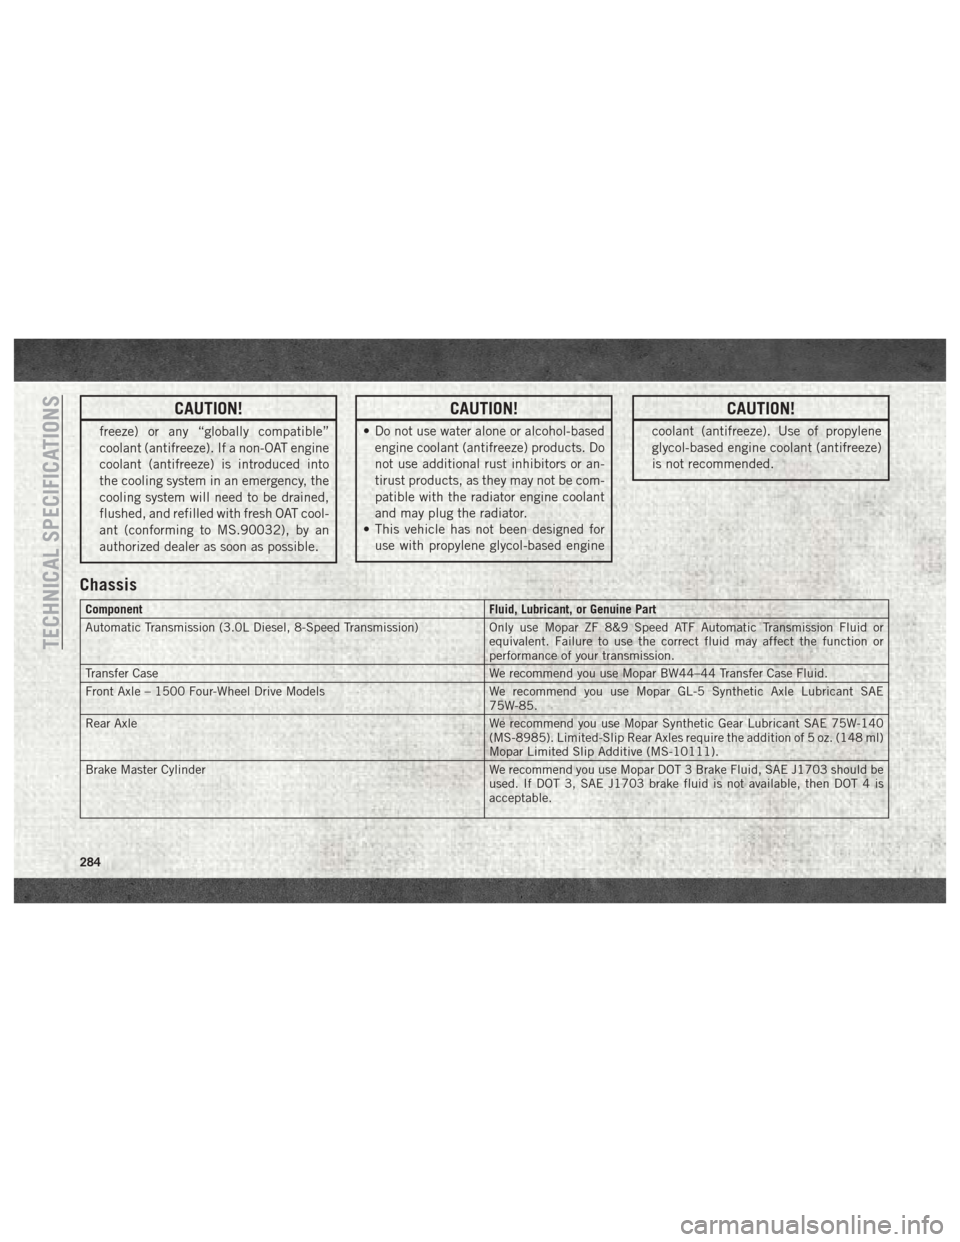
Chassis
Component Fluid, Lubricant, or Genuine Part
Automatic Transmission (3.0L Diesel, 8-Speed Transmission) Only use Mopar ZF 8&9 Speed ATF Automatic Transmission Fluid or
equivalent. Failure to use the correct fluid may affect the function or
performance of your transmission.
Transfer Case We recommend you use Mopar BW44–44 Transfer Case Fluid.
Front Axle – 1500 Four-Wheel Drive Models We recommend you use Mopar GL-5 Synthetic Axle Lubricant SAE
75W-85.
Rear Axle We recommend you use Mopar Synthetic Gear Lubricant SAE 75W-140
(MS-8985). Limited-Slip Rear Axles require the addition of 5 oz. (148 ml)
Mopar Limited Slip Additive (MS-10111).
Brake Master Cylinder We recommend you use Mopar DOT 3 Brake Fluid, SAE J1703 should be
used. If DOT 3, SAE J1703 brake fluid is not available, then DOT 4 is
acceptable.
TECHNICAL SPECIFICATIONS
284
Page 289 of 372
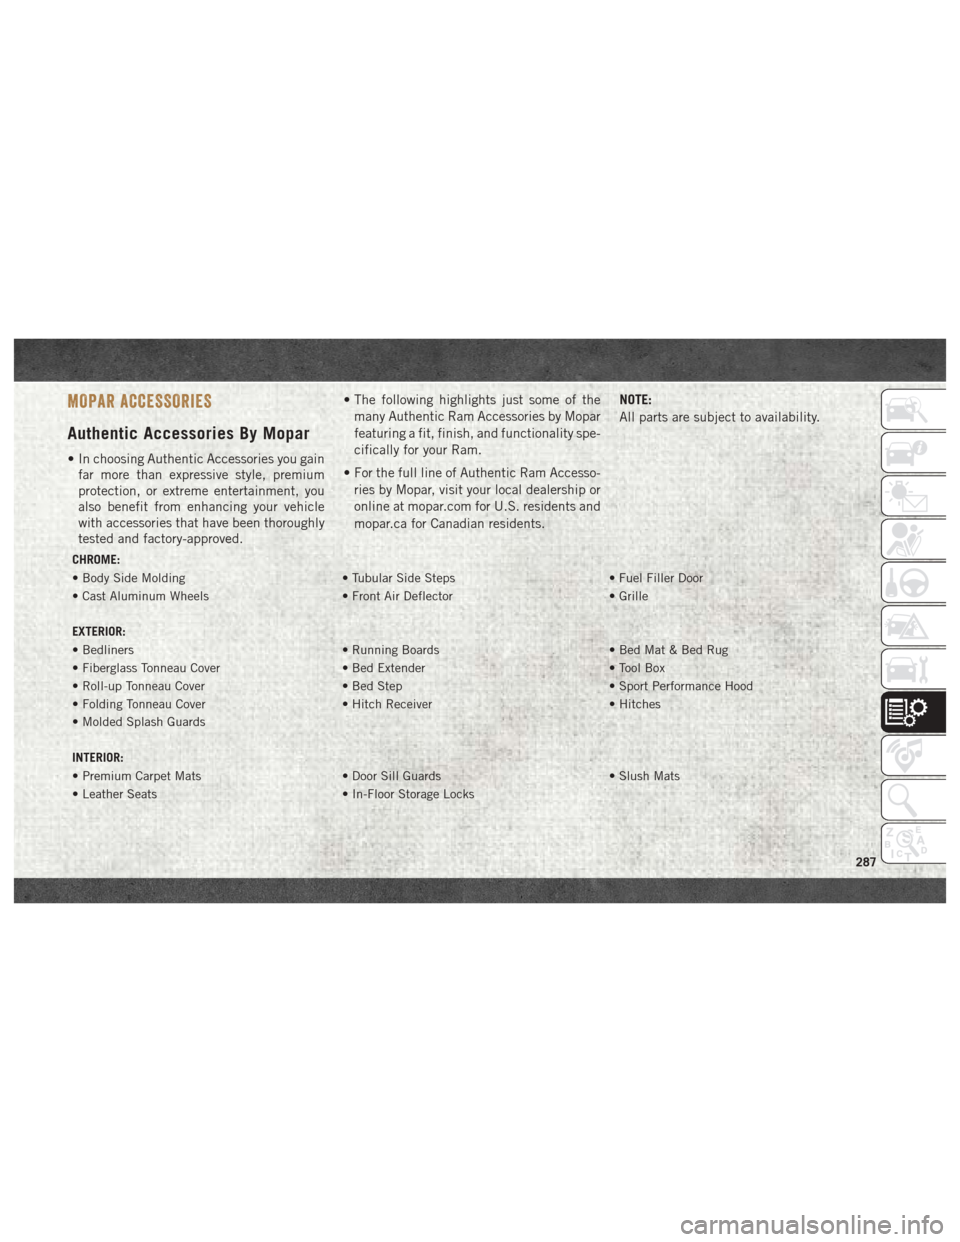
MOPAR ACCESSORIES
Authentic Accessories By Mopar
• In choosing Authentic Accessories you gainfar more than expressive style, premium
protection, or extreme entertainment, you
also benefit from enhancing your vehicle
with accessories that have been thoroughly
tested and factory-approved. • The following highlights just some of the
many Authentic Ram Accessories by Mopar
featuring a fit, finish, and functionality spe-
cifically for your Ram.
• For the full line of Authentic Ram Accesso- ries by Mopar, visit your local dealership or
online at mopar.com for U.S. residents and
mopar.ca for Canadian residents. NOTE:
All parts are subject to availability.
CHROME:
• Body Side Molding
• Tubular Side Steps• Fuel Filler Door
• Cast Aluminum Wheels • Front Air Deflector• Grille
EXTERIOR:
• Bedliners • Running Boards• Bed Mat & Bed Rug
• Fiberglass Tonneau Cover • Bed Extender• Tool Box
• Roll-up Tonneau Cover • Bed Step• Sport Performance Hood
• Folding Tonneau Cover • Hitch Receiver• Hitches
• Molded Splash Guards
INTERIOR:
• Premium Carpet Mats • Door Sill Guards• Slush Mats
• Leather Seats • In-Floor Storage Locks
287
Page 291 of 372
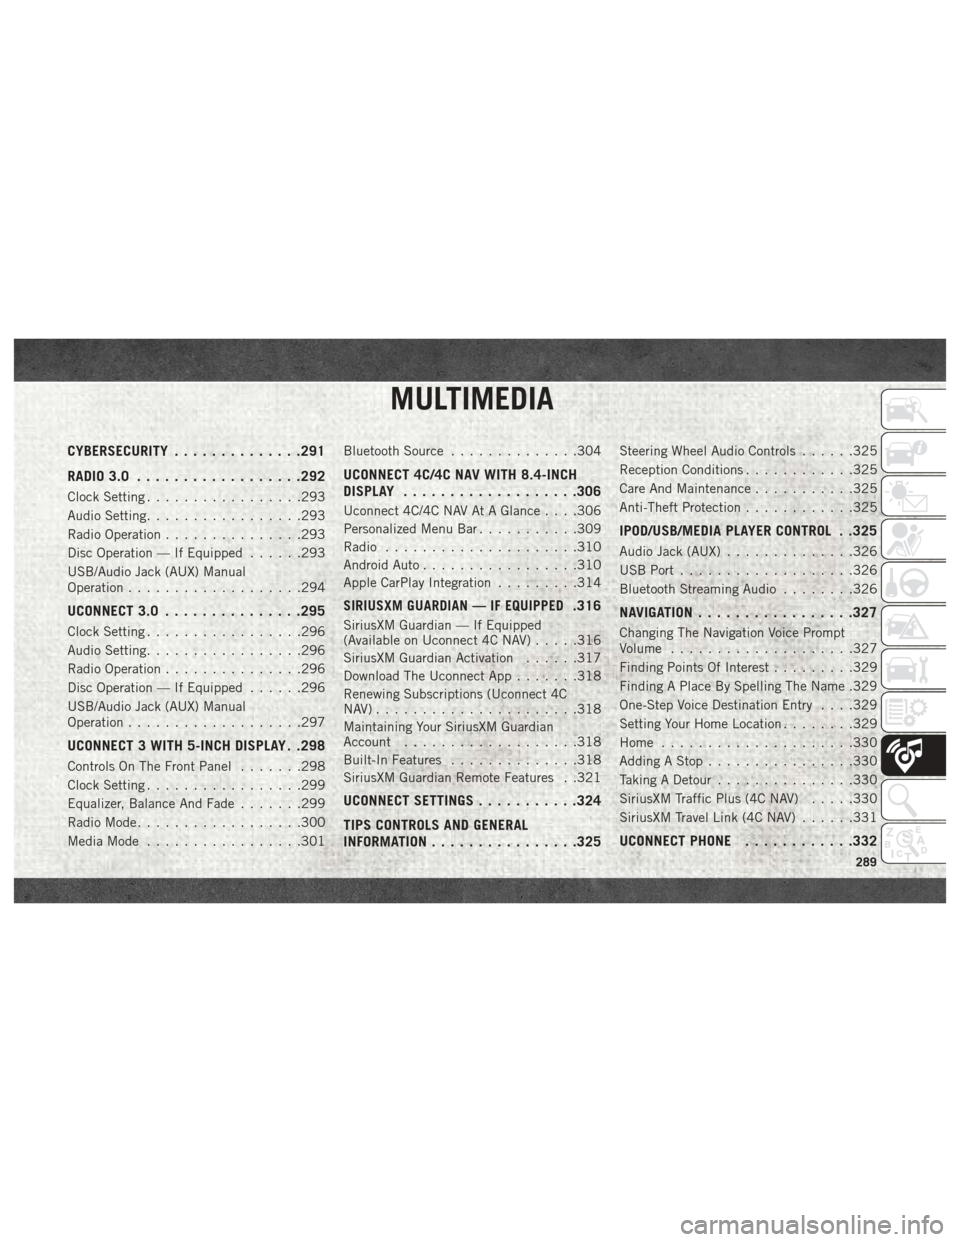
MULTIMEDIA
CYBERSECURITY..............291
RADIO 3.0 ................. .292
Clock Setting.................293
Audio Setting .................293
Radio Operation ...............293
Disc Operation — If Equipped ......293
USB/Audio Jack (AUX) Manual
Operation ...................294
UCONNECT 3.0 ...............295
Clock Setting.................296
Audio Setting .................296
Radio Operation ...............296
Disc Operation — If Equipped ......296
USB/Audio Jack (AUX) Manual
Operation ...................297
UCONNECT 3 WITH 5-INCH DISPLAY . .298
Controls On The Front Panel .......298
Clock Setting .................299
Equalizer, Balance And Fade .......299
Radio Mode ..................300
Media Mode .................301 Bluetooth Source
..............304
UCONNECT 4C/4C NAV WITH 8.4-INCH
DISPLAY.................. .306
Uconnect 4C/4C NAV At A Glance . . . .306
Personalized Menu Bar...........309
Radio .....................310
Android Auto .................310
Apple CarPlay Integration .........314
SIRIUSXM GUARDIAN — IF EQUIPPED.316
SiriusXM Guardian — If Equipped
(Available on Uconnect 4C NAV) .....316
SiriusXM Guardian Activation ......317
Download The Uconnect App .......318
Renewing Subscriptions (Uconnect 4C
NAV)......................318
Maintaining Your SiriusXM Guardian
Account ...................318
Built-In Features ..............318
SiriusXM Guardian Remote Features . .321
UCONNECT SETTINGS ...........324
TIPS CONTROLS AND GENERAL
INFORMATION ............... .325
Steering Wheel Audio Controls ......325
Reception Conditions ............325
Care And Maintenance ...........325
Anti-Theft Protection ............325
IPOD/USB/MEDIA PLAYER CONTROL . .325
Audio Jack (AUX)..............326
USB Port ...................326
Bluetooth Streaming Audio ........326
NAVIGATION................ .327
Changing The Navigation Voice Prompt
Volume....................327
Finding Points Of Interest .........329
Finding A Place By Spelling The Name .329
One-Step Voice Destination Entry . . . .329
Setting Your Home Location ........329
Home .....................330
Adding A Stop ................330
Taking A Detour ...............330
SiriusXM Traffic Plus (4C NAV) .....330
SiriusXM Travel Link (4C NAV) ......331
UCONNECT PHONE............332
MULTIMEDIA
289
Page 309 of 372
WARNING!
ALWAYS drive safely with your hands on
the wheel. You have full responsibility and
assume all risks related to the use of the
Uconnect features, SiriusXM Guardian
services, and applications in this vehicle.
Only use Uconnect features and SiriusXM
Guardian services when it is safe to do so.
Failure to do so may result in an accident
involving serious injury or death.
CAUTION!
Do NOT attach any object to the touch-
screen, doing so can result in damage to
the screen.
NOTE:
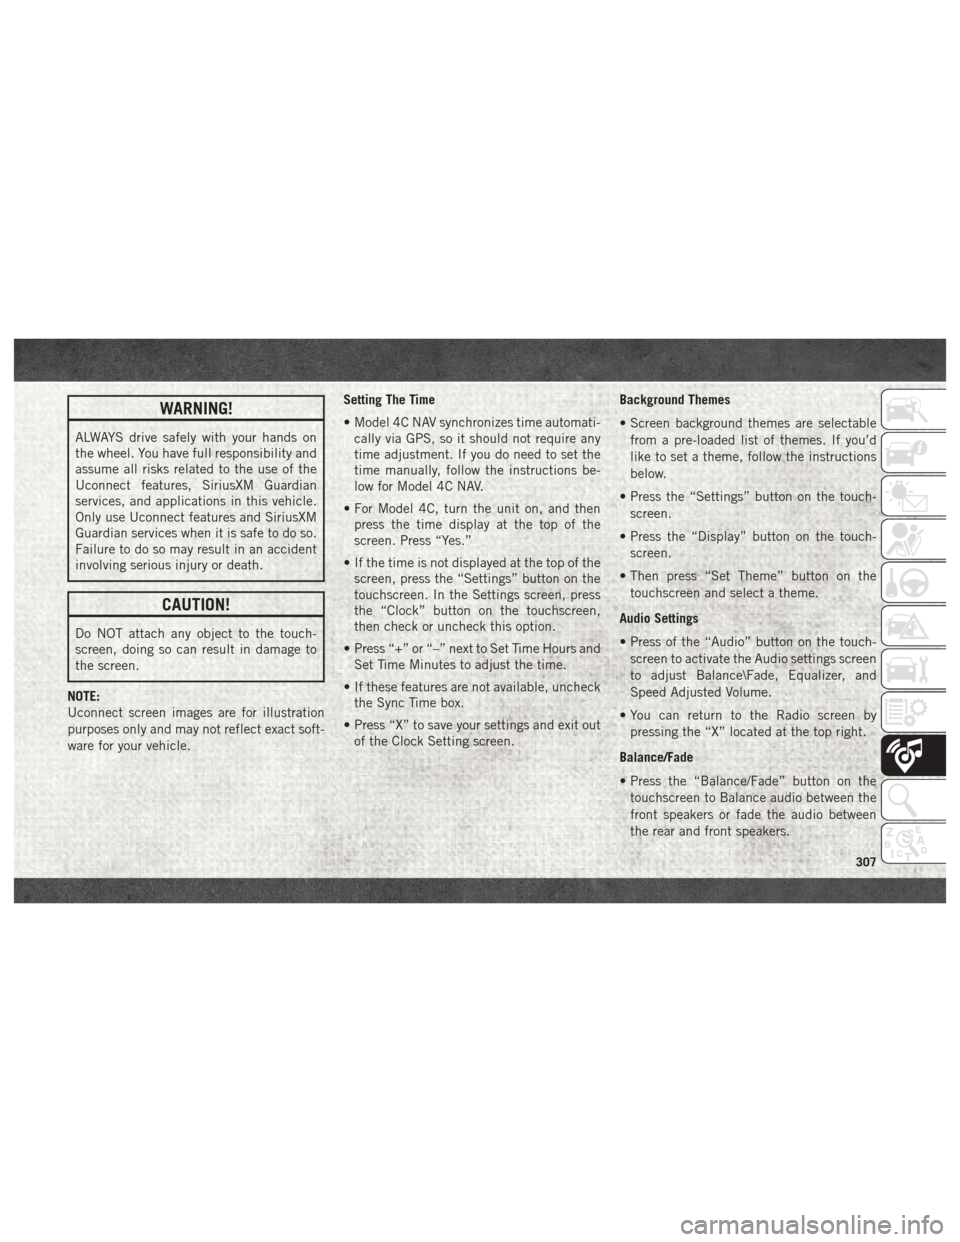
Uconnect screen images are for illustration
purposes only and may not reflect exact soft-
ware for your vehicle. Setting The Time
• Model 4C NAV synchronizes time automati-
cally via GPS, so it should not require any
time adjustment. If you do need to set the
time manually, follow the instructions be-
low for Model 4C NAV.
• For Model 4C, turn the unit on, and then press the time display at the top of the
screen. Press “Yes.”
• If the time is not displayed at the top of the screen, press the “Settings” button on the
touchscreen. In the Settings screen, press
the “Clock” button on the touchscreen,
then check or uncheck this option.
• Press “+” or “–” next to Set Time Hours and Set Time Minutes to adjust the time.
• If these features are not available, uncheck the Sync Time box.
• Press “X” to save your settings and exit out of the Clock Setting screen. Background Themes
• Screen background themes are selectable
from a pre-loaded list of themes. If you’d
like to set a theme, follow the instructions
below.
• Press the “Settings” button on the touch- screen.
• Press the “Display” button on the touch- screen.
• Then press “Set Theme” button on the touchscreen and select a theme.
Audio Settings
• Press of the “Audio” button on the touch- screen to activate the Audio settings screen
to adjust Balance\Fade, Equalizer, and
Speed Adjusted Volume.
• You can return to the Radio screen by pressing the “X” located at the top right.
Balance/Fade
• Press the “Balance/Fade” button on the touchscreen to Balance audio between the
front speakers or fade the audio between
the rear and front speakers.
307
Page 312 of 372
1. Press the “Apps” button to open the
App screen.
2. Press and hold, then drag the selected App to replace an existing shortcut in the
main menu bar.
The new app shortcut, that was dragged
down onto the main menu bar, will now
be an active App/shortcut.
NOTE:
This feature is only available if the vehicle is
in PARK.
Radio
WARNING!
ALWAYS drive safely with your hands on
the wheel. You have full responsibility and
assume all risks related to the use of the
Uconnect features, SiriusXM Guardian
services, and applications in this vehicle.
Only use Uconnect features and SiriusXM
Guardian services when it is safe to do so.
Failure to do so may result in an accident
involving serious injury or death. • To access the Radio mode, press the “Ra-
dio” button on the touchscreen.
Selecting Radio Stations
• Press the desired radio band (AM, FM or SXM) button on the touchscreen.
Seek Up/Seek Down
• Press the Seek up or down arrow buttons on the touchscreen for less than two seconds
to seek through radio stations.
• Press and hold either arrow button on the touchscreen for more than two seconds to
bypass stations without stopping. The radio
will stop at the next listenable station once
the arrow button on the touchscreen is
released.
Direct Tune
• Tune directly to a radio station by pressing the “Tune” button on the screen, and en-
tering the desired station number.
Store Radio Presets Manually
Your radio can store 36 total preset stations,
12 presets per band (AM, FM and SXM). They
are shown at the top of your radio screen. To see the 12 preset stations per band, press the
arrow button on the touchscreen at the top
right of the screen to toggle between the two
sets of six presets.
To store a radio preset manually, follow the
steps below:
1. Tune to the desired station.
2. Press and hold the desired numbered but-
ton on the touchscreen for more than two
seconds or until you hear a confirmation
beep.
HD Radio — If Equipped
• HD Radio (available on Uconnect 4C/4C NAV) operates similar to conventional radio
except it allows broadcasters to transmit a
high-quality digital signal.
• With an HD radio receiver, the listener is provided with a clear sound that enhances
the listening experience. HD radio can also
transmit data such as song title or artist.
Android Auto
Android Auto is a feature of your Uconnect
system, and your Android 5.0 Lollipop, or
higher, powered smartphone with a data
MULTIMEDIA
310
Page 313 of 372
plan, that allows you to project your smart-
phone and a number of its apps onto the
touchscreen radio display. Android Auto au-
tomatically brings you useful information,
and organizes it into simple cards that appear
just when they are needed. Android Auto can
be used with Google's best-in-class speech
technology, the steering wheel controls, the
knobs and buttons on your radio faceplate,
and the radio display’s touchscreen to control
many of your apps. To use Android Auto
follow the following procedure:
1. Download the Android Auto app from theGoogle Play store on your Android-
powered smartphone.
2. Connect your Android powered smart- phone to one of the media USB ports in
your vehicle. If the Android Auto app was
not downloaded, the first time you plug
your device in, the app will begin to
download. NOTE:
Be sure to use the factory-provided USB
cable that came with your phone, as after-
market cables may not work.
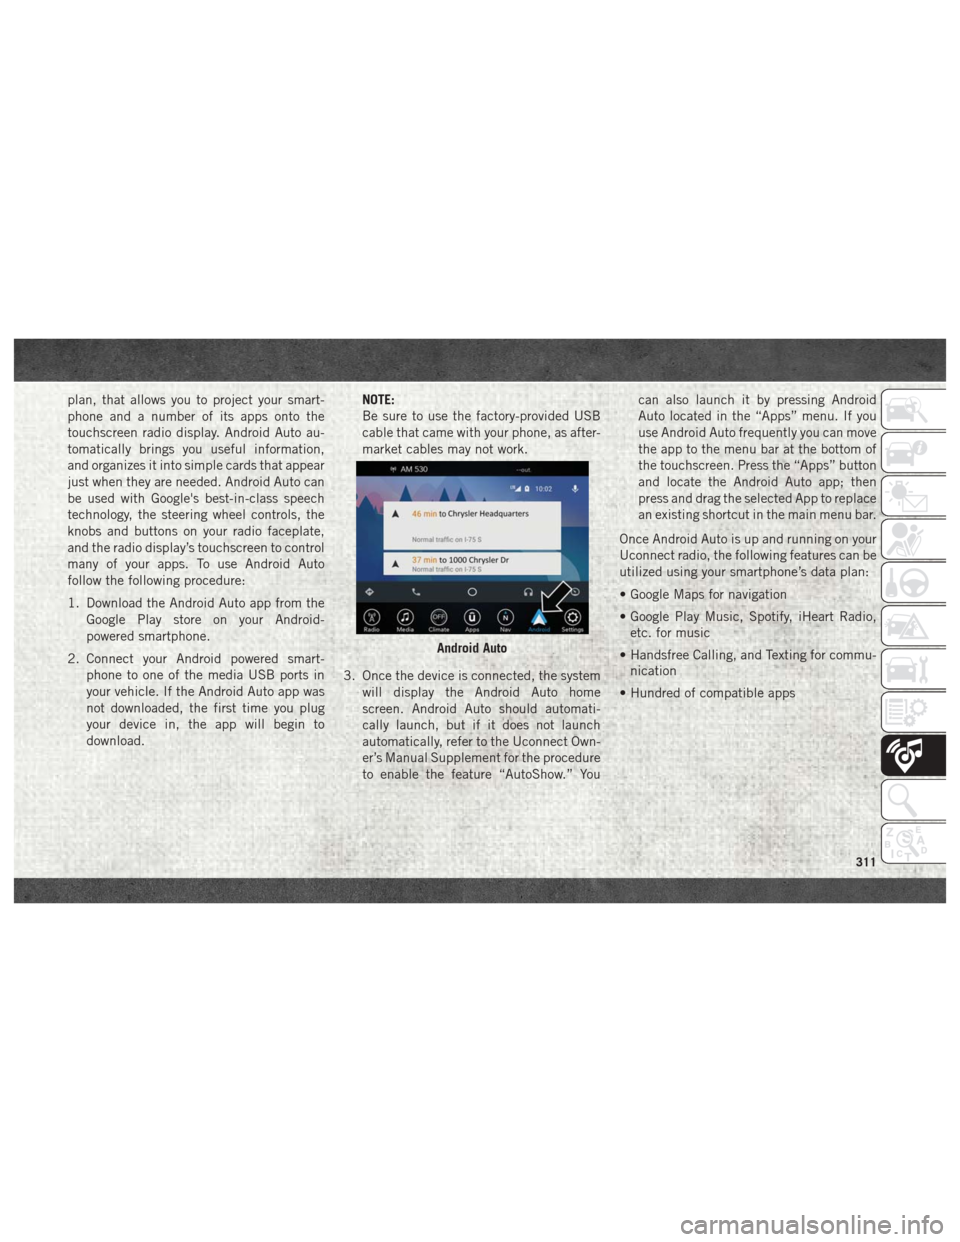
3. Once the device is connected, the system will display the Android Auto home
screen. Android Auto should automati-
cally launch, but if it does not launch
automatically, refer to the Uconnect Own-
er’s Manual Supplement for the procedure
to enable the feature “AutoShow.” You can also launch it by pressing Android
Auto located in the “Apps” menu. If you
use Android Auto frequently you can move
the app to the menu bar at the bottom of
the touchscreen. Press the “Apps” button
and locate the Android Auto app; then
press and drag the selected App to replace
an existing shortcut in the main menu bar.
Once Android Auto is up and running on your
Uconnect radio, the following features can be
utilized using your smartphone’s data plan:
• Google Maps for navigation
• Google Play Music, Spotify, iHeart Radio, etc. for music
• Handsfree Calling, and Texting for commu- nication
• Hundred of compatible apps
Android Auto
311
Page 314 of 372
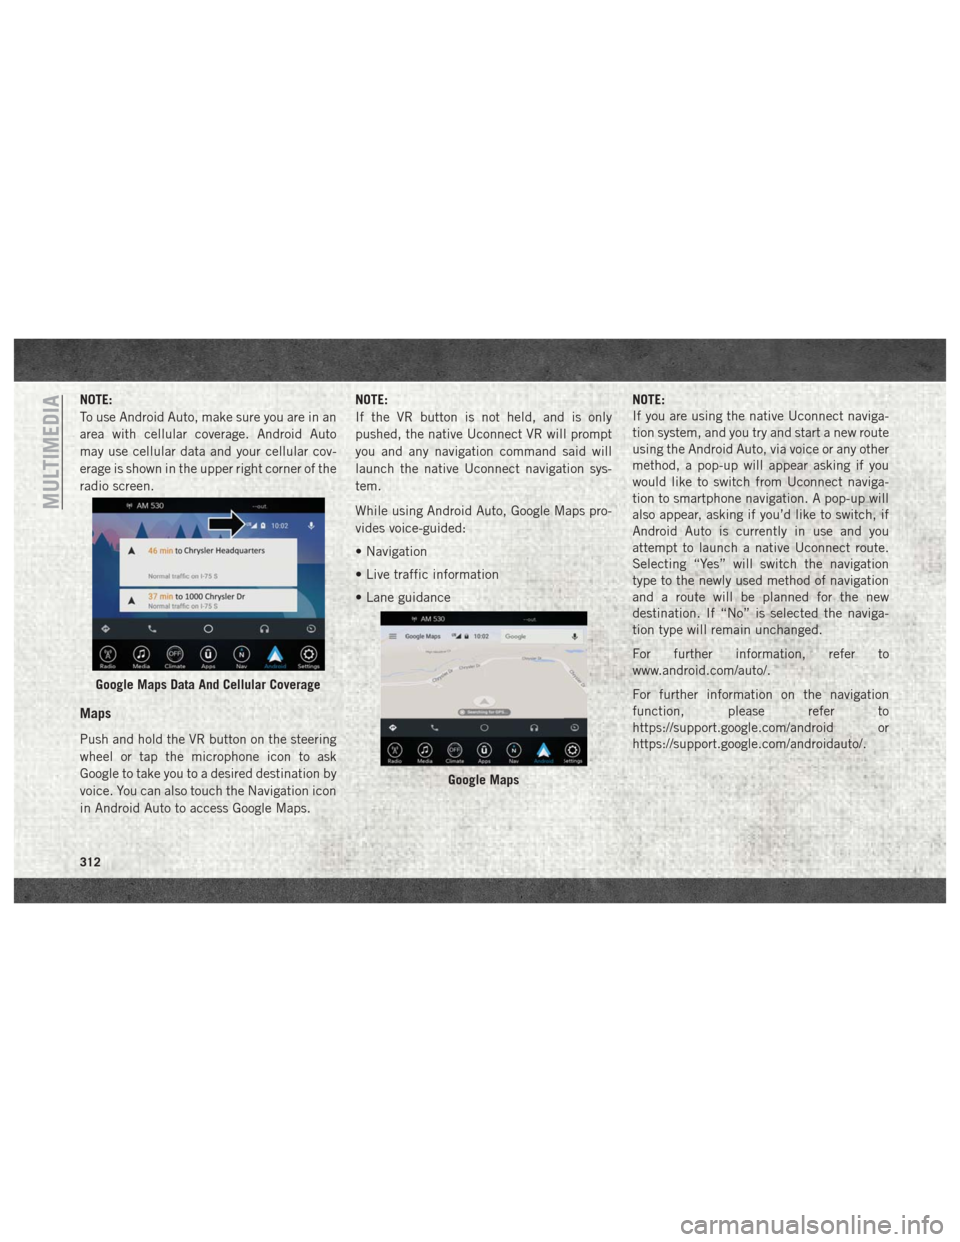
NOTE:
To use Android Auto, make sure you are in an
area with cellular coverage. Android Auto
may use cellular data and your cellular cov-
erage is shown in the upper right corner of the
radio screen.
Maps
Push and hold the VR button on the steering
wheel or tap the microphone icon to ask
Google to take you to a desired destination by
voice. You can also touch the Navigation icon
in Android Auto to access Google Maps.NOTE:
If the VR button is not held, and is only
pushed, the native Uconnect VR will prompt
you and any navigation command said will
launch the native Uconnect navigation sys-
tem.
While using Android Auto, Google Maps pro-
vides voice-guided:
• Navigation
• Live traffic information
• Lane guidance
NOTE:
If you are using the native Uconnect naviga-
tion system, and you try and start a new route
using the Android Auto, via voice or any other
method, a pop-up will appear asking if you
would like to switch from Uconnect naviga-
tion to smartphone navigation. A pop-up will
also appear, asking if you’d like to switch, if
Android Auto is currently in use and you
attempt to launch a native Uconnect route.
Selecting “Yes” will switch the navigation
type to the newly used method of navigation
and a route will be planned for the new
destination. If “No” is selected the naviga-
tion type will remain unchanged.
For further information, refer to
www.android.com/auto/.
For further information on the navigation
function, please refer to
https://support.google.com/android or
https://support.google.com/androidauto/.
Google Maps Data And Cellular Coverage
Google Maps
MULTIMEDIA
312
Page 315 of 372
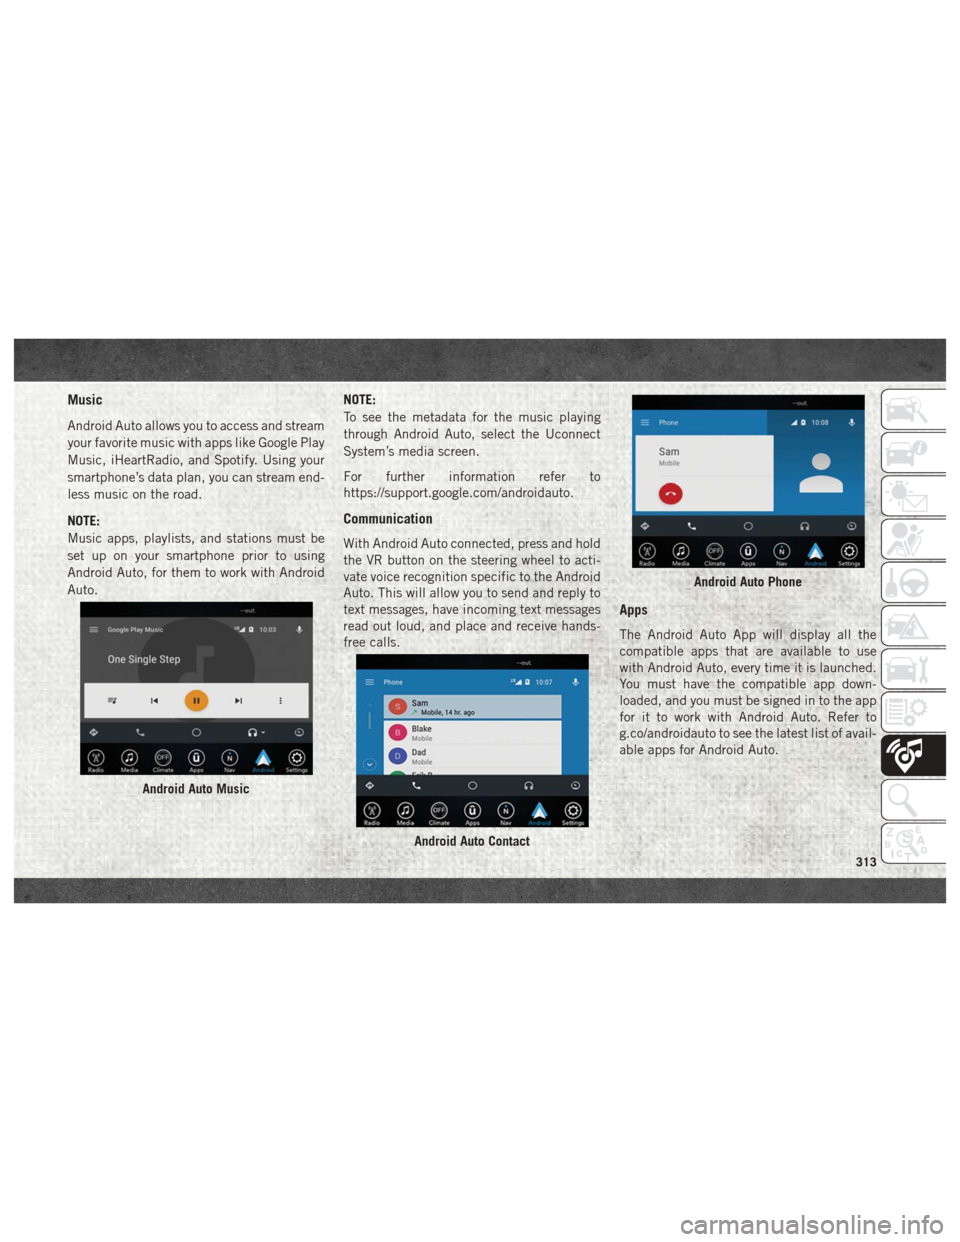
Music
Android Auto allows you to access and stream
your favorite music with apps like Google Play
Music, iHeartRadio, and Spotify. Using your
smartphone’s data plan, you can stream end-
less music on the road.
NOTE:
Music apps, playlists, and stations must be
set up on your smartphone prior to using
Android Auto, for them to work with Android
Auto.NOTE:
To see the metadata for the music playing
through Android Auto, select the Uconnect
System’s media screen.
For further information refer to
https://support.google.com/androidauto.
Communication
With Android Auto connected, press and hold
the VR button on the steering wheel to acti-
vate voice recognition specific to the Android
Auto. This will allow you to send and reply to
text messages, have incoming text messages
read out loud, and place and receive hands-
free calls.
Apps
The Android Auto App will display all the
compatible apps that are available to use
with Android Auto, every time it is launched.
You must have the compatible app down-
loaded, and you must be signed in to the app
for it to work with Android Auto. Refer to
g.co/androidauto to see the latest list of avail-
able apps for Android Auto.
Android Auto Music
Android Auto Contact
Android Auto Phone
313