bulb Ram 2500 2020 User Guide
[x] Cancel search | Manufacturer: RAM, Model Year: 2020, Model line: 2500, Model: Ram 2500 2020Pages: 553, PDF Size: 21.99 MB
Page 374 of 553
372IN CASE OF EMERGENCY
BULB REPLACEMENT
Replacement Bulbs
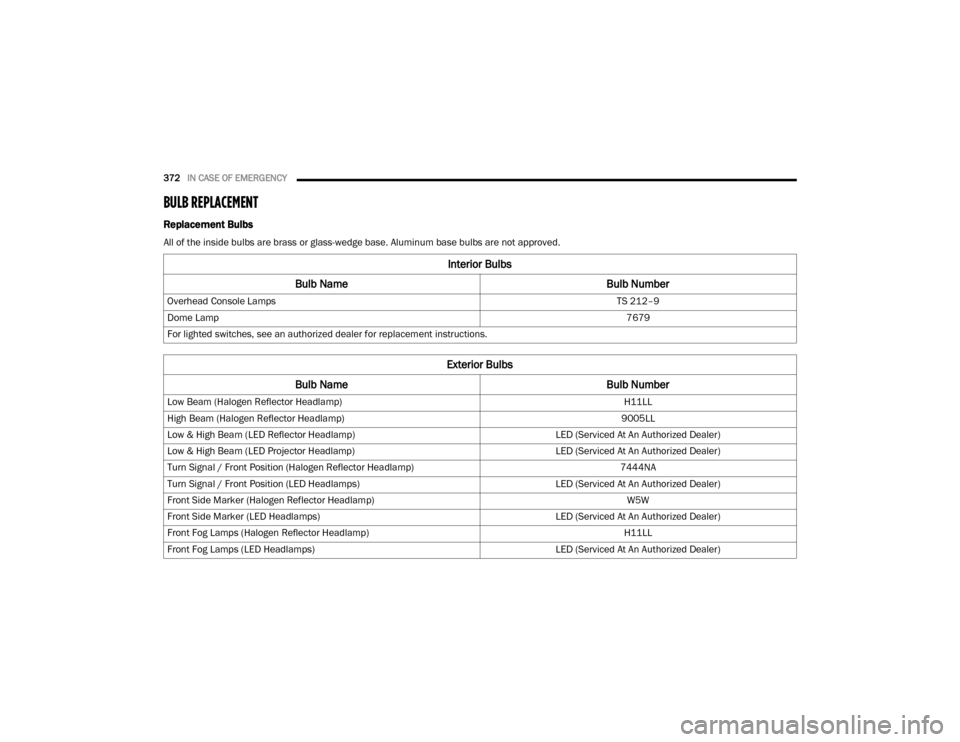
All of the inside bulbs are brass or glass-wedge base. Aluminum base bulbs are not approved.
Interior Bulbs
Bulb Name Bulb Number
Overhead Console Lamps TS 212–9
Dome Lamp 7679
For lighted switches, see an authorized dealer for replacement instructions.
Exterior Bulbs
Bulb Name Bulb Number
Low Beam (Halogen Reflector Headlamp) H11LL
High Beam (Halogen Reflector Headlamp) 9005LL
Low & High Beam (LED Reflector Headlamp) LED (Serviced At An Authorized Dealer)
Low & High Beam (LED Projector Headlamp) LED (Serviced At An Authorized Dealer)
Turn Signal / Front Position (Halogen Reflector Headlamp) 7444NA
Turn Signal / Front Position (LED Headlamps) LED (Serviced At An Authorized Dealer)
Front Side Marker (Halogen Reflector Headlamp) W5W
Front Side Marker (LED Headlamps) LED (Serviced At An Authorized Dealer)
Front Fog Lamps (Halogen Reflector Headlamp) H11LL
Front Fog Lamps (LED Headlamps) LED (Serviced At An Authorized Dealer)
20_DJD2_OM_EN_USC_t.book Page 372
Page 375 of 553
IN CASE OF EMERGENCY373
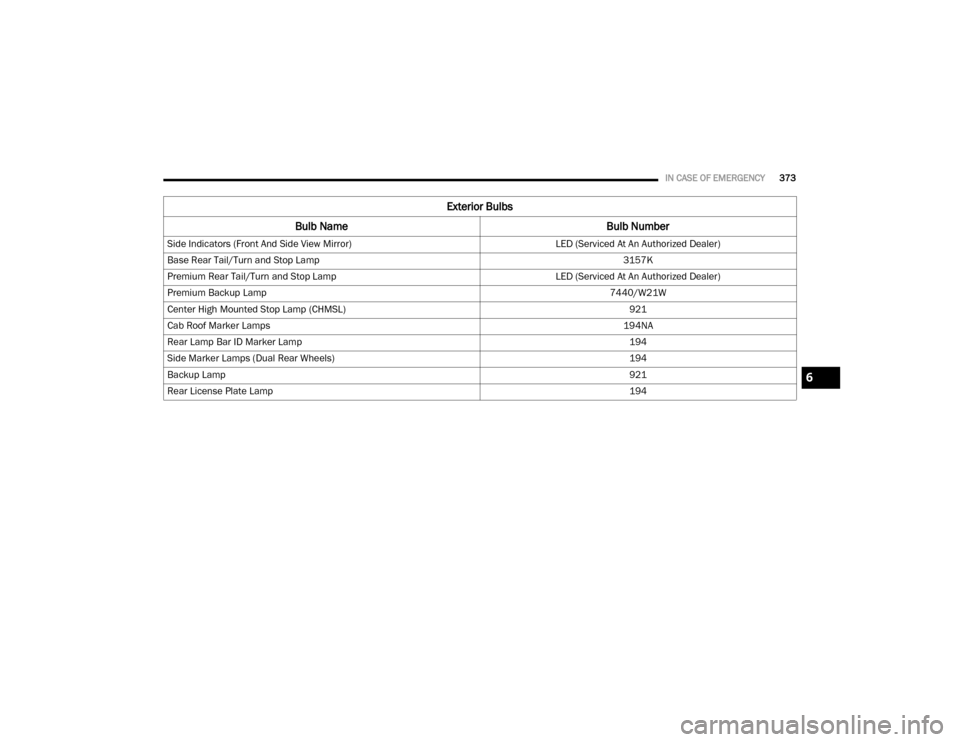
Side Indicators (Front And Side View Mirror) LED (Serviced At An Authorized Dealer)
Base Rear Tail/Turn and Stop Lamp 3157K
Premium Rear Tail/Turn and Stop Lamp LED (Serviced At An Authorized Dealer)
Premium Backup Lamp 7440/W21W
Center High Mounted Stop Lamp (CHMSL) 921
Cab Roof Marker Lamps 194NA
Rear Lamp Bar ID Marker Lamp 194
Side Marker Lamps (Dual Rear Wheels) 194
Backup Lamp 921
Rear License Plate Lamp 194
Exterior Bulbs
Bulb Name Bulb Number
6
20_DJD2_OM_EN_USC_t.book Page 373
Page 376 of 553
374IN CASE OF EMERGENCY
Replacing Exterior Bulbs
Base Quad: Low Beam Headlamp, High
Beam Headlamp, Front Park And Turn — If
Equipped
Low Beam
1. Open the hood.
2. Disconnect and isolate the negative battery
cable.
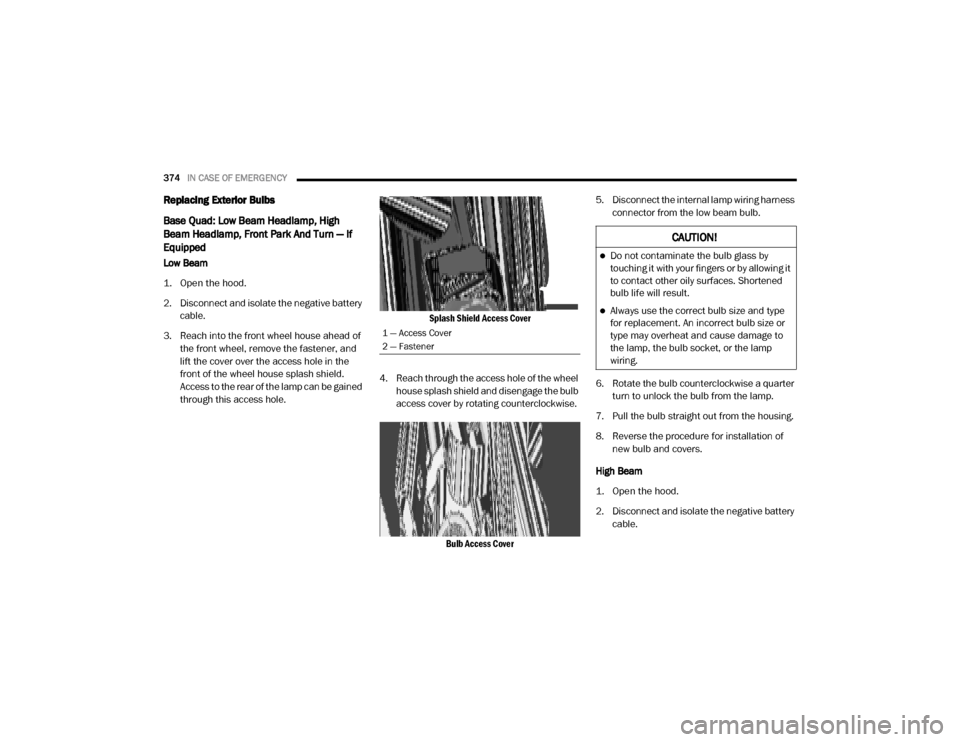
3. Reach into the front wheel house ahead of the front wheel, remove the fastener, and
lift the cover over the access hole in the
front of the wheel house splash shield.
Access to the rear of the lamp can be gained
through this access hole.
Splash Shield Access Cover
4. Reach through the access hole of the wheel house splash shield and disengage the bulb
access cover by rotating counterclockwise.
Bulb Access Cover
5. Disconnect the internal lamp wiring harness
connector from the low beam bulb.
6. Rotate the bulb counterclockwise a quarter turn to unlock the bulb from the lamp.
7. Pull the bulb straight out from the housing.
8. Reverse the procedure for installation of new bulb and covers.
High Beam
1. Open the hood.
2. Disconnect and isolate the negative battery cable.
1 — Access Cover
2 — Fastener
CAUTION!
Do not contaminate the bulb glass by
touching it with your fingers or by allowing it
to contact other oily surfaces. Shortened
bulb life will result.
Always use the correct bulb size and type
for replacement. An incorrect bulb size or
type may overheat and cause damage to
the lamp, the bulb socket, or the lamp
wiring.
20_DJD2_OM_EN_USC_t.book Page 374
Page 377 of 553
IN CASE OF EMERGENCY375
3. Look under the hood and behind the head -
lamp to find the high beam bulb access
cover.
4. Reach behind the headlamp and disengage the access cover by rotating counterclock -
wise.
5. Disconnect the internal lamp wiring harness connector from the high beam bulb.
6. Rotate the bulb counterclockwise a quarter turn to unlock the bulb from the lamp.
7. Pull the bulb straight out from the housing.
8. Reverse the procedure for installation of new bulb and covers. Front Park And Turn
1. Open the hood.
2. Disconnect and isolate the negative battery
cable.
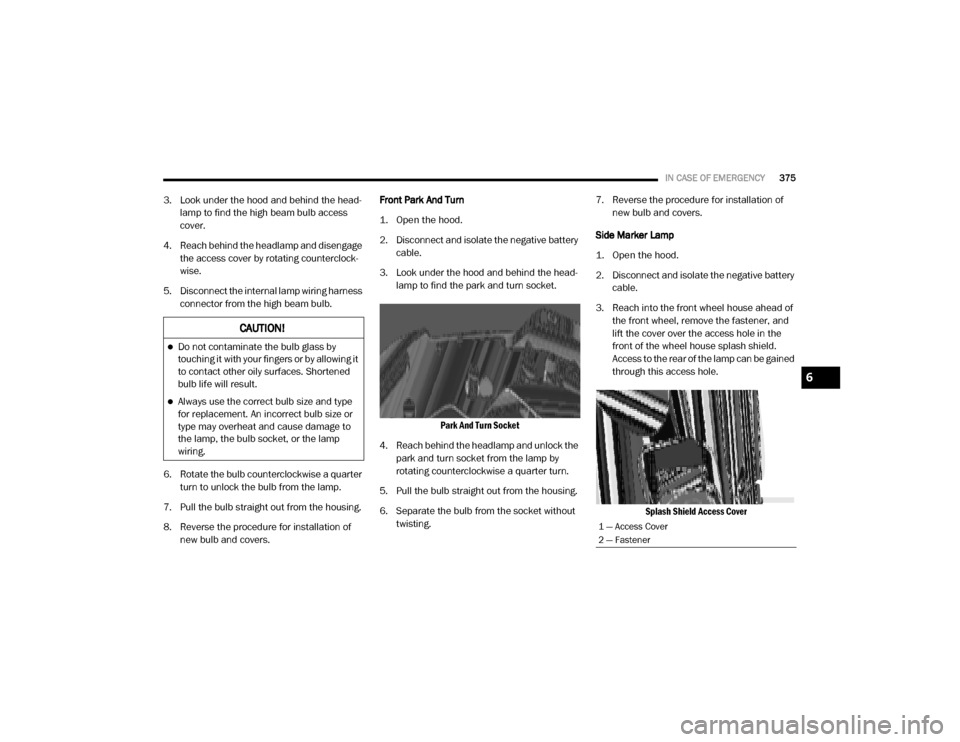
3. Look under the hood and behind the head -
lamp to find the park and turn socket.
Park And Turn Socket
4. Reach behind the headlamp and unlock the park and turn socket from the lamp by
rotating counterclockwise a quarter turn.
5. Pull the bulb straight out from the housing.
6. Separate the bulb from the socket without twisting. 7. Reverse the procedure for installation of
new bulb and covers.
Side Marker Lamp
1. Open the hood.
2. Disconnect and isolate the negative battery cable.
3. Reach into the front wheel house ahead of the front wheel, remove the fastener, and
lift the cover over the access hole in the
front of the wheel house splash shield.
Access to the rear of the lamp can be gained
through this access hole.
Splash Shield Access Cover
CAUTION!
Do not contaminate the bulb glass by
touching it with your fingers or by allowing it
to contact other oily surfaces. Shortened
bulb life will result.
Always use the correct bulb size and type
for replacement. An incorrect bulb size or
type may overheat and cause damage to
the lamp, the bulb socket, or the lamp
wiring.
1 — Access Cover
2 — Fastener
6
20_DJD2_OM_EN_USC_t.book Page 375
Page 378 of 553
376IN CASE OF EMERGENCY
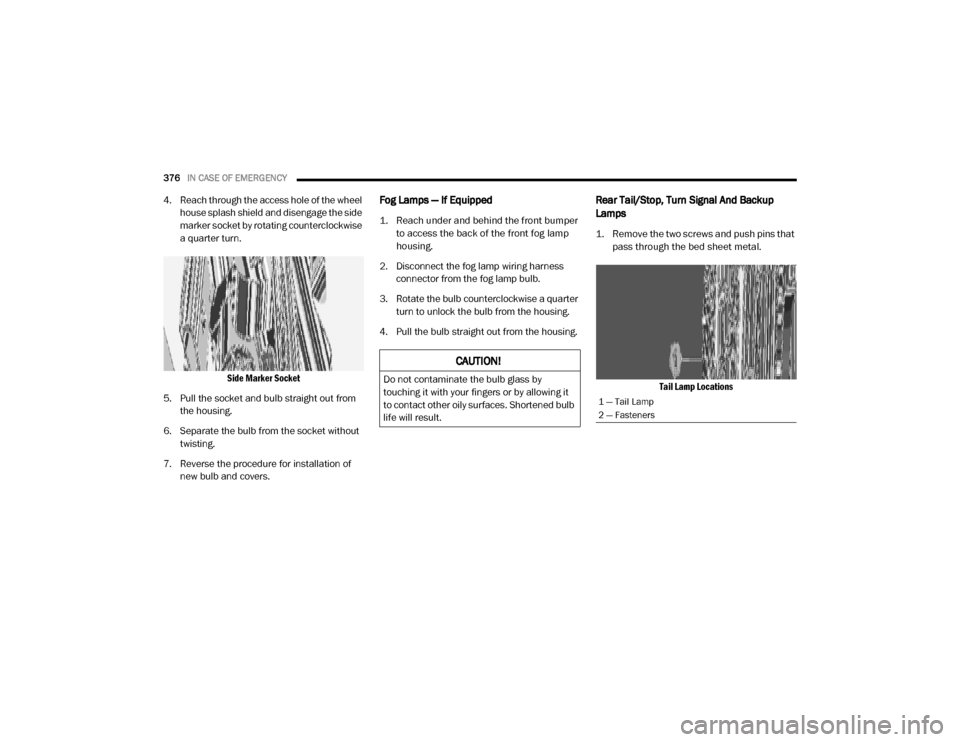
4. Reach through the access hole of the wheel
house splash shield and disengage the side
marker socket by rotating counterclockwise
a quarter turn.
Side Marker Socket
5. Pull the socket and bulb straight out from the housing.
6. Separate the bulb from the socket without twisting.
7. Reverse the procedure for installation of new bulb and covers.Fog Lamps — If Equipped
1. Reach under and behind the front bumper to access the back of the front fog lamp
housing.
2. Disconnect the fog lamp wiring harness connector from the fog lamp bulb.
3. Rotate the bulb counterclockwise a quarter turn to unlock the bulb from the housing.
4. Pull the bulb straight out from the housing.
Rear Tail/Stop, Turn Signal And Backup
Lamps
1. Remove the two screws and push pins that pass through the bed sheet metal.
Tail Lamp Locations
CAUTION!
Do not contaminate the bulb glass by
touching it with your fingers or by allowing it
to contact other oily surfaces. Shortened bulb
life will result.
1 — Tail Lamp
2 — Fasteners
20_DJD2_OM_EN_USC_t.book Page 376
Page 379 of 553

IN CASE OF EMERGENCY377
2. Pull the outboard side of the lamp rearward
far enough to unsnap the two receptacles
on the outboard side of the lamp housing
from the two plastic snap post retainers in
the outer box side panel.
Tail Lamp Removed
3. Disconnect the wiring harness connectors from the bulb socket.
4. Rotate the bulb socket counterclockwise a quarter turn to unlock it from the housing.
5. Pull the bulb straight out of the socket. 6. Reverse the procedure to install the bulb
and housing.
Center High Mounted Stop Lamp (CHMSL)
With Cargo Lamp
1. Remove the two screws holding the housing/lens to the body as shown.
CHMSL Mounting Screw Locations
2. Separate the connector holding the housing and wiring harness to the body.
CHMSL Connector Location
3. Turn the desired bulb socket a quarter turn and remove the socket and bulb from
housing.
4. Pull the desired bulb straight from the socket.
CHMSL Bulb And Socket
1 — Tail Lamp Housing
2 — Bulb Socket Locations
CAUTION!
Do not contaminate the bulb glass by
touching it with your fingers or by allowing it
to contact other oily surfaces. Shortened bulb
life will result.
6
20_DJD2_OM_EN_USC_t.book Page 377
Page 380 of 553

378IN CASE OF EMERGENCY
Outside Bulbs: Cargo Lamps
Inside Bulb: Center High Mounted Stop
Lamp
5. Reverse the procedure for installation of bulbs and housing.
Cab Top Clearance Lamps — If Equipped
1. Remove the screws from the top of the lamp.
Removing Rear Screw From Clearance Lamp
2. Rotate the bulb socket a quarter turn and
pull it from the lamp assembly.
Removing Bulb Socket From Clearance Lamp
3. Pull the bulb straight from it's socket and replace.
Removing The Bulb From The Bulb Socket
Rear Lamp Bar ID Marker (Dual Rear Wheels)
— If Equipped
1. Loosen the two screws and the housing to gain access to the bulb sockets.
Screw Locations
2. Turn the socket a quarter turn counterclock -
wise to access the bulb.
3. Pull the bulb straight out from the socket.
4. Reverse the procedure for installation of the bulbs and housing.
CAUTION!
Do not contaminate the bulb glass by
touching it with your fingers or by allowing it
to contact other oily surfaces. Shortened bulb
life will result.
20_DJD2_OM_EN_USC_t.book Page 378
Page 381 of 553

IN CASE OF EMERGENCY379
Side Marker Lamps (Dual Rear Wheels) — If
Equipped
Side Marker Lamp Locations
1. Push rearward on the side marker lamp
assembly.
2. Pull the entire assembly from the fender.
3. Turn the socket a quarter turn counterclock -
wise and remove from assembly to access
the bulb. 4. Pull the bulb straight out from socket.
5. Reverse the procedure for installation of the
bulbs and housing.
6
20_DJD2_OM_EN_USC_t.book Page 379
Page 543 of 553
541
Belts, Seat
..................................................... 209
Blind Spot Monitoring.................................... 153
Body Builders Guide........................................ 12
Body Mechanism Lubrication........................ 408
B-Pillar Location............................................. 426
Brake Assist System...................................... 145
Brake Control System.................................... 145Brake Fluid.......................................... 415, 454
Brake System...................................... 415, 444
Fluid Check............................................... 415Master Cylinder......................................... 415
Parking...................................................... 229
Warning Light............................................ 130
Brake/Transmission Interlock....................... 232
Bulb Replacement......................................... 372Bulbs, Light.......................................... 210, 372
C
Cab Top Clearance Lights
.............................. 378
Camera.......................................................... 302
Camera, AUX........................................ 304, 311
Camera, Rear...................................... 302, 305
Camper.......................................................... 100
Capacities, Antifreeze (Engine Coolant)......... 451Capacities, Fluid............................................ 451
Caps, Filler Oil (Engine)
...................................... 391, 397
Radiator (Coolant Pressure)...................... 413
Car Washes................................................... 440
Carbon Monoxide Warning.................. 208, 448
Cargo Light....................................................... 52
Cellular Phone.............................................. 527
Center High Mounted Stop Light................... 377
Center Seat Storage Compartment.................. 82
Charge Air Cooler.......................................... 415
Chart, Tire Sizing........................................... 423
Check Engine Light (Malfunction Indicator
Light)............................................................. 142
Checking Your Vehicle For Safety................. 208
Checks, Safety.............................................. 208Child Restraint.............................................. 190
Child RestraintsBooster Seats
........................................... 193
Child Seat Installation..................... 201, 202
How To Stow An unused ALR Seat Belt.... 200Infant And Child Restraints....................... 192
Locating The LATCH Anchorages.............. 198
Lower Anchors And Tethers For Children.. 195
Older Children And Child Restraints......... 193Seating Positions...................................... 194
Clean Air Gasoline......................................... 446
CleaningWheels
..................................................... 434
Climate Control................................................ 57
Automatic.................................................... 61
Manual........................................................ 57
Cold Weather Operation............................... 215
Compact Spare Tire...................................... 433
Contract, Service.......................................... 537
Cooling Pressure Cap (Radiator Cap)............ 413
Cooling System............................................. 411
Adding Coolant (Antifreeze)...................... 413
Coolant Level................................... 412, 414
Cooling Capacity....................................... 451
Disposal Of Used Coolant......................... 414
Drain, Flush, And Refill............................. 412
Inspection................................................. 414Points To Remember................................ 414
Pressure Cap............................................ 413
Radiator Cap............................................. 413Selection Of Coolant (Antifreeze)
............... 412, 451, 452, 454
Corrosion Protection..................................... 439
Cruise Control (Speed Control)............. 273, 275
Cruise Light................................................... 141Cupholders.......................................................87
Customer Assistance.................................... 536
Cybersecurity................................................ 458
D
Daytime Running Lights
...................................49
Dealer Service............................................... 396
Defroster, Rear Window...................................57
Defroster, Windshield............................ 57, 209Delay (Intermittent) Wipers..............................55
Diagnostic System, Onboard......................... 141
Diesel Exhaust Brake.................................... 230
Diesel Fuel.................................................... 448
Diesel Fuel Requirements............................. 448
Diesel Fuel System, Re-Priming.................... 407
11
20_DJD2_OM_EN_USC_t.book Page 541
Page 546 of 553
544
J
Jack Location
................................................. 342
Jump Starting................................................ 362
K
Key Fob Panic Alarm
................................................. 15
Programming Additional Key Fobs....... 17, 24
Key Fob Battery Service (Remote Keyless
Entry)
............................................................... 15Key Fob Programming (Remote Keyless
Entry)
............................................................... 17
Keyless Enter-N-Go........................28, 211, 216
Lock The Vehicle’s Doors....... 466, 483, 502
Passive Entry............................................... 28
Passive Entry Programming............. 483, 502
Keys................................................................. 14
Replacement............................................... 24
L
Lane Change And Turn Signals
........................ 52
Lane Change Assist......................................... 52
LaneSense.................................................... 299
Latches.......................................................... 210
Hood........................................................... 74
Lead Free Gasoline........................................ 446
Leaks, Fluid................................................... 210
Life Of Tires................................................... 431
Light Bulbs........................................... 210, 372
Lights............................................................ 210
Air Bag.................................... 130, 181, 209
Automatic High Beam.................................. 50
Brake Assist Warning............................... 148
Brake Warning.......................................... 130
Bulb Replacement.................................... 372
Cab Top Clearance................................... 378Cargo........................................................... 52
Center Mounted Stop............................... 377
Courtesy/Reading....................................... 54Cruise....................................................... 141
Daytime Running......................................... 49
Electronic Stability Program(ESP) Indicator
............................................... 131
Exterior...............................................49, 210Fog........................................................... 376
Four Wheel Drive Indicator....................... 250
Hazard Warning Flasher........................... 338
Headlights............................................ 49, 51High Beam................................................... 50
Hill Descent Control Indicator................... 149
Illuminated Entry......................................... 55
Interior.................................................. 53, 54
Lights On Reminder..................................... 52
Low Fuel................................................... 135
Malfunction Indicator (Check Engine)....... 133
Park.......................................................... 140
Passing........................................................ 51
Seat Belt Reminder.................................. 130
Security Alarm.......................................... 131
Service...................................................... 372
Side Marker.............................................. 379
Traction Control........................................ 148
Transfer Case........................................... 250
Turn Signals............52, 140, 210, 374, 376
Warning Instrument Cluster Descriptions
................................ 131, 140Limited-Slip Differential....................... 264, 418
Load Shed Battery Saver Mode..................... 128
Load Shed Battery Saver On......................... 128Load Shed Electrical Load Reduction........... 128
Load Shed Intelligent Battery Sensor............ 128
Loading Vehicle............................................. 317
Tires.......................................................... 426
LocksAutomatic Door............................................31
Child Protection...........................................31
Power Door..................................................27
Low Tire Pressure System............................. 163Lubrication, Body.......................................... 408
Lug Nuts/Bolts.............................................. 444
M
Maintenance
....................................................74Maintenance Free Battery............................ 395
Maintenance Plan......................................... 386
Maintenance Schedule............... 380, 384, 386
Malfunction Indicator Light (Check
Engine)
................................................. 133, 142
20_DJD2_OM_EN_USC_t.book Page 544