charging Ram 2500 2020 Owner's Manual
[x] Cancel search | Manufacturer: RAM, Model Year: 2020, Model line: 2500, Model: Ram 2500 2020Pages: 553, PDF Size: 21.99 MB
Page 5 of 553

3
Power Mirrors — If Equipped ...................... 45
Power Convex Mirror Switch —
If Equipped ................................................... 46 Trailer Towing Mirrors — If Equipped ......... 46
Heated Mirrors — If Equipped ..................... 47
Tilt Side Mirrors In Reverse —
If Equipped ................................................... 47 Power Folding Outside Mirrors For
Standard And Trailer Tow — If Equipped .... 47 Illuminated Vanity Mirror — If Equipped ..... 48
EXTERIOR LIGHTS.................................................49
Multifunction Lever ...................................... 49
Headlight Switch .......................................... 49
Daytime Running Lights (DRLs) —
If Equipped ................................................... 49 High/Low Beam Switch ............................... 50
Automatic High Beam Headlamp Control —
If Equipped ................................................... 50 Flash-To-Pass ............................................... 51
Automatic Headlights — If Equipped ......... 51
Directional LED Headlamp System — If
Equipped ...................................................... 51 Parking Lights And Panel Lights ................. 51
Headlights On With Wipers (Available With
Automatic Headlights Only) ......................... 51 Headlight Delay ............................................ 51
Lights-On Reminder ..................................... 52 Front Fog Lights — If Equipped .................. 52
Turn Signals ................................................ 52
Lane Change Assist — If Equipped ............. 52
Cargo Lights/Trailer Spotter Lights With
Bed Lights — If Equipped............................. 52 Battery Saver ............................................... 53
INTERIOR LIGHTS ................................................ 53
Courtesy Lights ............................................ 53
Illuminated Entry ......................................... 55
WINDSHIELD WIPERS AND WASHERS............. 55
Windshield Wipers ....................................... 55
Rain Sensing Wipers — If Equipped ........... 56
CLIMATE CONTROLS ........................................... 57
Manual Climate Control Overview .............. 57
Automatic Climate Control Overview .......... 61
Climate Control Functions........................... 68
Automatic Temperature Control (ATC) ....... 68
Operating Tips ............................................. 69
WINDOWS ............................................................ 70
Power Windows ........................................... 70
Wind Buffeting ............................................ 72
POWER SUNROOF — IF EQUIPPED .................... 72
Single Pane Power Sunroof —
If Equipped ................................................... 72
HOOD .................................................................... 74
To Open The Hood ...................................... 74
To Close The Hood ....................................... 75 TAILGATE ...............................................................75
Opening ........................................................ 75
Closing.......................................................... 75
Bed Step — If Equipped ............................... 75
GARAGE DOOR OPENER — IF EQUIPPED ..........76
Before You Begin Programming
HomeLink® .................................................. 77 Canadian/Gate Operator Programming..... 79
Using HomeLink®........................................ 80
Security ........................................................ 80
Troubleshooting Tips ................................... 80
General Information .................................... 81
INTERNAL EQUIPMENT ........................................82
Storage ......................................................... 82
Cupholders .................................................. 87
Electrical Power Outlets .............................. 88
Power Inverter — If Equipped ..................... 90
Wireless Charging Pad — If Equipped ....... 91
Overhead Sunglass Storage ....................... 92
PICKUP BOX .........................................................92
Cargo Camera — If Equipped ...................... 93
RAMBOX — IF EQUIPPED .....................................94
RamBox Integrated Box Side Storage
Bins............................................................... 95 RamBox Safety Warning ............................. 96
Bed Divider — If Equipped ........................... 96
Bed Rail Tie-Down System —
If Equipped .................................................. 98
20_DJD2_OM_EN_USC_t.book Page 3
Page 16 of 553
14GETTING TO KNOW YOUR VEHICLE
TIP:
When viewing a topic, tap the star icon to add it
to your Favorites, for easy access in the future.
KEYS
Key Fob
Your vehicle uses a keyless ignition system. The
ignition system consists of a key fob and a
START/STOP push button ignition system. The
Remote Keyless Entry (RKE) system consists of
a key fob and Keyless Enter-N-Go feature.
NOTE:
The key fob may not be found if it is located next
to a mobile phone, laptop or other electronic
device; these devices may block the key fob’s
wireless signal.
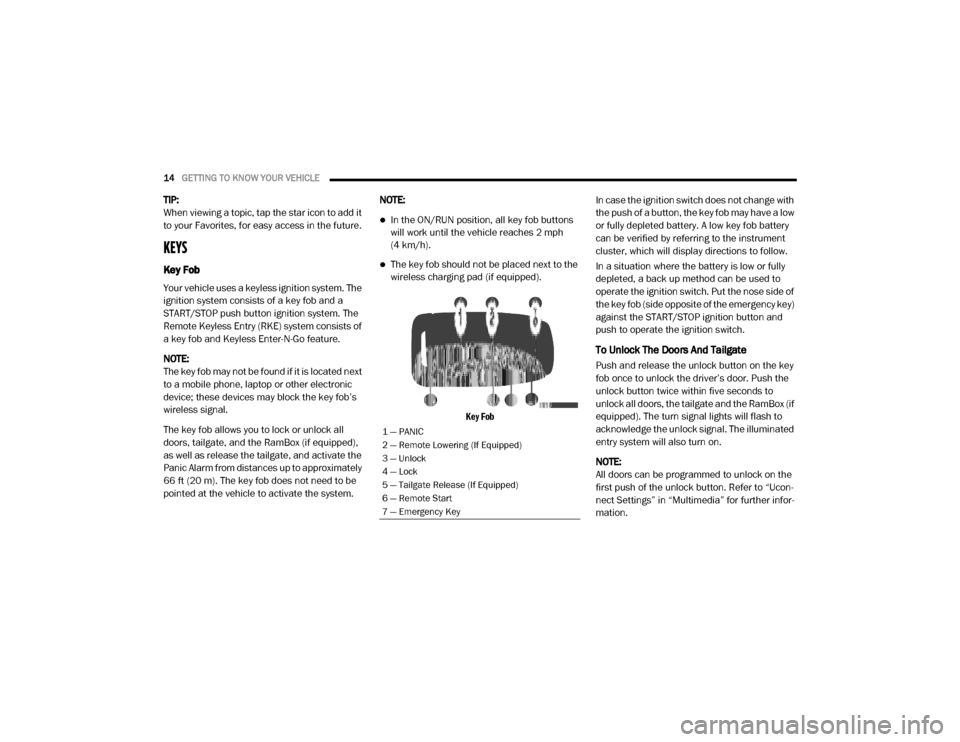
The key fob allows you to lock or unlock all
doors, tailgate, and the RamBox (if equipped),
as well as release the tailgate, and activate the
Panic Alarm from distances up to approximately
66 ft (20 m). The key fob does not need to be
pointed at the vehicle to activate the system. NOTE:
In the ON/RUN position, all key fob buttons
will work until the vehicle reaches 2 mph
(4 km/h).
The key fob should not be placed next to the
wireless charging pad (if equipped).
Key Fob
In case the ignition switch does not change with
the push of a button, the key fob may have a low
or fully depleted battery. A low key fob battery
can be verified by referring to the instrument
cluster, which will display directions to follow.
In a situation where the battery is low or fully
depleted, a back up method can be used to
operate the ignition switch. Put the nose side of
the key fob (side opposite of the emergency key)
against the START/STOP ignition button and
push to operate the ignition switch.
To Unlock The Doors And Tailgate
Push and release the unlock button on the key
fob once to unlock the driver’s door. Push the
unlock button twice within five seconds to
unlock all doors, the tailgate and the RamBox (if
equipped). The turn signal lights will flash to
acknowledge the unlock signal. The illuminated
entry system will also turn on.
NOTE:
All doors can be programmed to unlock on the
first push of the unlock button. Refer to “Ucon
-
nect Settings” in “Multimedia” for further infor -
mation.
1 — PANIC
2 — Remote Lowering (If Equipped)
3 — Unlock
4 — Lock
5 — Tailgate Release (If Equipped)
6 — Remote Start
7 — Emergency Key
20_DJD2_OM_EN_USC_t.book Page 14
Page 92 of 553
90GETTING TO KNOW YOUR VEHICLE
Power Inverter — If Equipped
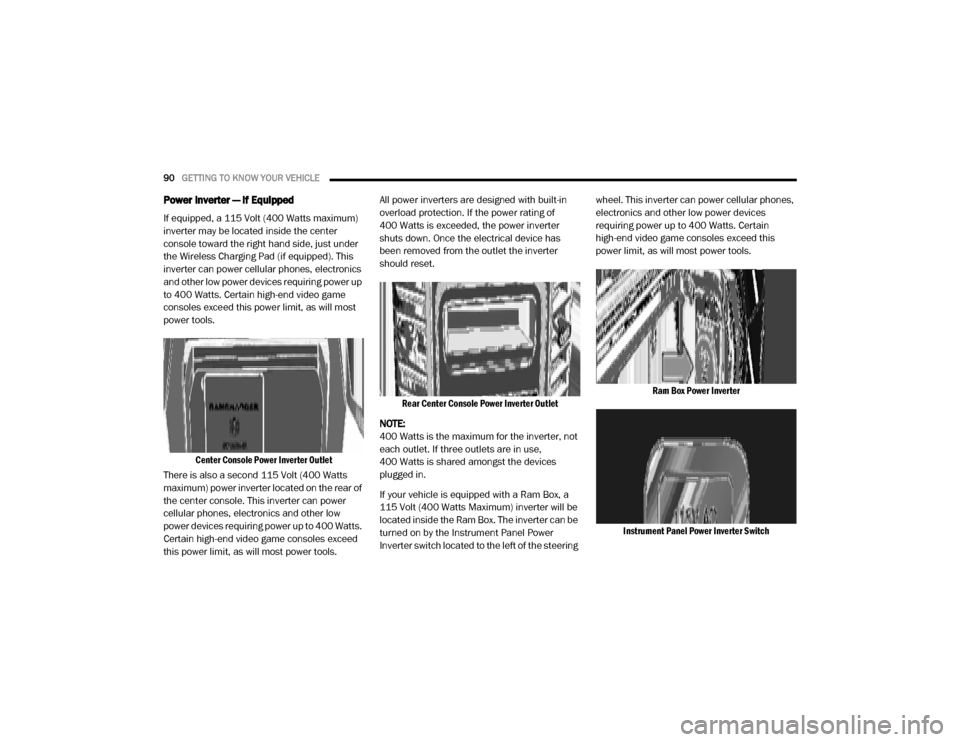
If equipped, a 115 Volt (400 Watts maximum)
inverter may be located inside the center
console toward the right hand side, just under
the Wireless Charging Pad (if equipped). This
inverter can power cellular phones, electronics
and other low power devices requiring power up
to 400 Watts. Certain high-end video game
consoles exceed this power limit, as will most
power tools.
Center Console Power Inverter Outlet
There is also a second 115 Volt (400 Watts
maximum) power inverter located on the rear of
the center console. This inverter can power
cellular phones, electronics and other low
power devices requiring power up to 400 Watts.
Certain high-end video game consoles exceed
this power limit, as will most power tools. All power inverters are designed with built-in
overload protection. If the power rating of
400 Watts is exceeded, the power inverter
shuts down. Once the electrical device has
been removed from the outlet the inverter
should reset.
Rear Center Console Power Inverter Outlet
NOTE:
400 Watts is the maximum for the inverter, not
each outlet. If three outlets are in use,
400 Watts is shared amongst the devices
plugged in.
If your vehicle is equipped with a Ram Box, a
115 Volt (400 Watts Maximum) inverter will be
located inside the Ram Box. The inverter can be
turned on by the Instrument Panel Power
Inverter switch located to the left of the steering wheel. This inverter can power cellular phones,
electronics and other low power devices
requiring power up to 400 Watts. Certain
high-end video game consoles exceed this
power limit, as will most power tools.
Ram Box Power Inverter
Instrument Panel Power Inverter Switch
20_DJD2_OM_EN_USC_t.book Page 90
Page 93 of 553
GETTING TO KNOW YOUR VEHICLE91
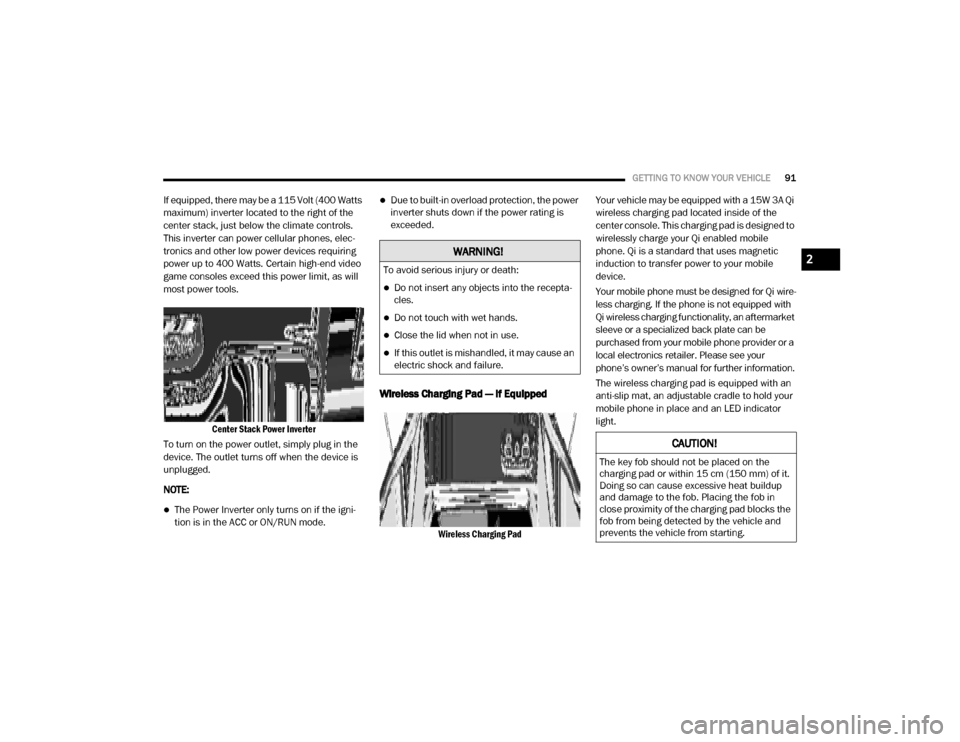
If equipped, there may be a 115 Volt (400 Watts
maximum) inverter located to the right of the
center stack, just below the climate controls.
This inverter can power cellular phones, elec -
tronics and other low power devices requiring
power up to 400 Watts. Certain high-end video
game consoles exceed this power limit, as will
most power tools.
Center Stack Power Inverter
To turn on the power outlet, simply plug in the
device. The outlet turns off when the device is
unplugged.
NOTE:
The Power Inverter only turns on if the igni -
tion is in the ACC or ON/RUN mode.
Due to built-in overload protection, the power
inverter shuts down if the power rating is
exceeded.
Wireless Charging Pad — If Equipped
Wireless Charging Pad
Your vehicle may be equipped with a 15W 3A Qi
wireless charging pad located inside of the
center console. This charging pad is designed to
wirelessly charge your Qi enabled mobile
phone. Qi is a standard that uses magnetic
induction to transfer power to your mobile
device.
Your mobile phone must be designed for Qi wire
-
less charging. If the phone is not equipped with
Qi wireless charging functionality, an aftermarket
sleeve or a specialized back plate can be
purchased from your mobile phone provider or a
local electronics retailer. Please see your
phone’s owner’s manual for further information.
The wireless charging pad is equipped with an
anti-slip mat, an adjustable cradle to hold your
mobile phone in place and an LED indicator
light.
WARNING!
To avoid serious injury or death:
Do not insert any objects into the recepta -
cles.
Do not touch with wet hands.
Close the lid when not in use.
If this outlet is mishandled, it may cause an
electric shock and failure.
CAUTION!
The key fob should not be placed on the
charging pad or within 15 cm (150 mm) of it.
Doing so can cause excessive heat buildup
and damage to the fob. Placing the fob in
close proximity of the charging pad blocks the
fob from being detected by the vehicle and
prevents the vehicle from starting.
2
20_DJD2_OM_EN_USC_t.book Page 91
Page 130 of 553
128GETTING TO KNOW YOUR INSTRUMENT PANEL
value where it stopped when a previous fault
was temporarily remedied, or at a minimum of
50 miles (80 km).
5 MPH Max Speed on Restart, Long Idle or
Refuel Service DEF See Dealer — This
message will continuously display when the
mileage counter reaches zero, and will be
accompanied by a periodic chime.
The vehicle will only be capable of a
maximum speed of 5 MPH upon the first of
the following conditions to occur:
If the vehicle is shutoff and restarted.
If the vehicle is idled for an extended
period of time, approximately one hour or
greater.
If the system detects that the level of fuel in the tank has increased.
5 MPH Max Speed Service DEF System See
Dealer — This message will continuously
display, and will be accompanied by a peri -
odic chime. Although the vehicle can be
started and placed in gear, the vehicle will
only operate at a maximum speed of 5 MPH.
Your vehicle will require towing, see an
authorized dealer for service. NOTE:
When this message is displayed, the engine can
still be started. However, the vehicle will only
operate at a maximum speed of 5 MPH.
Incorrect DEF Detected See Dealer
— This
message will display when the fault is initially
detected, each time the vehicle is started,
and periodically during driving. The message
will be accompanied by a single chime. We
recommend you drive to your nearest autho -
rized dealer and have your vehicle serviced
as soon as possible.
RAM Active Air System
Your vehicle is equipped with an advanced Ram
Active Air system that provides enhanced
performance, especially when towing under
demanding hot or high altitude conditions. If the
instrument cluster display displays the
message “Active Airbox Service Required See
Dealer”, vehicle performance may be reduced
until service is performed by an authorized RAM
dealer.
Battery Saver On/Battery Saver Mode
Message — Electrical Load Reduction
Actions — If Equipped
This vehicle is equipped with an Intelligent
Battery Sensor (IBS) to perform additional moni -
toring of the electrical system and status of the
vehicle battery.
In cases when the IBS detects charging system
failure, or the vehicle battery conditions are
deteriorating, electrical load reduction actions
will take place to extend the driving time and
distance of the vehicle. This is done by reducing
power to or turning off non-essential electrical
loads.
Load reduction is only active when the engine is
running. It will display a message if there is a
risk of battery depletion to the point where the
vehicle may stall due to lack of electrical supply,
or will not restart after the current drive cycle.
When load reduction is activated, the message
“Battery Saver On Some Systems May Have
Reduced Power” will appear in the instrument
cluster.
These messages indicate the vehicle battery
has a low state of charge and continues to lose
electrical charge at a rate that the charging
system cannot sustain.
20_DJD2_OM_EN_USC_t.book Page 128
Page 131 of 553
GETTING TO KNOW YOUR INSTRUMENT PANEL129
NOTE:
The charging system is independent from
load reduction. The charging system
performs a diagnostic on the charging
system continuously.
If the Battery Charge Warning Light is on it
may indicate a problem with the charging
system. Refer to “Warning Lights And
Messages” in “Getting To Know Your Instru-
ment Panel” for further information.
The electrical loads that may be switched off (if
equipped), and vehicle functions which can be
affected by load reduction:
Heated Seats/Vented Seats/Heated Wheel
Rear Defroster And Heated Mirrors
HVAC System
115 Volts AC Power Inverter System
Audio and Telematics System Loss of the battery charge may indicate one or
more of the following conditions:
The charging system cannot deliver enough
electrical power to the vehicle system
because the electrical loads are larger than
the capability of charging system. The
charging system is still functioning properly.
Turning on all possible vehicle electrical
loads (e.g. HVAC to max settings, exterior and
interior lights, overloaded power outlets
+12 Volts, 115 Volts AC, USB ports) during
certain driving conditions (city driving,
towing, frequent stopping).
Installing options like additional lights,
upfitter electrical accessories, audio
systems, alarms and similar devices.
Unusual driving cycles (short trips separated
by long parking periods).
The vehicle was parked for an extended
period of time (weeks, months).
The battery was recently replaced and was
not charged completely.
The battery was discharged by an electrical
load left on when the vehicle was parked.
The battery was used for an extended period
with the engine not running to supply radio,
lights, chargers, +12 Volts portable appli
-
ances like vacuum cleaners, game consoles
and similar devices.
What to do when an electrical load reduction
action message is present (“Battery Saver On”
or “Battery Saver Mode”)
During a trip:
Reduce power to unnecessary loads if
possible:
Turn off redundant lights (interior or exte -
rior).
Check what may be plugged in to power outlets +12 Volts, 115 Volts AC, USB
ports.
Check HVAC settings (blower, tempera -
ture).
Check the audio settings (volume).
3
20_DJD2_OM_EN_USC_t.book Page 129
Page 134 of 553
132GETTING TO KNOW YOUR INSTRUMENT PANEL
Battery Charge Warning Light
This warning light will illuminate when
the battery is not charging properly. If
it stays on while the engine is running,
there may be a malfunction with the
charging system. Contact an authorized dealer
as soon as possible.
This indicates a possible problem with the elec -
trical system or a related component.
Oil Pressure Warning Light
This warning light will illuminate to
indicate low engine oil pressure. If the
light turns on while driving, stop the
vehicle, shut off the engine as soon as
possible, and contact an authorized dealer. A
chime will sound when this light turns on.
Do not operate the vehicle until the cause is
corrected. This light does not indicate how
much oil is in the engine. The engine oil level
must be checked under the hood.
Oil Temperature Warning Light
This warning light will illuminate to
indicate the engine oil temperature is
high. If the light turns on while driving,
stop the vehicle and shut off the engine as soon as possible. Wait for oil
temperature to return to normal levels.
Electronic Throttle Control (ETC) Warning
Light
This warning light will illuminate to
indicate a problem with the Electronic
Throttle Control (ETC) system. If a
problem is detected while the vehicle
is running, the light will either stay on or flash
depending on the nature of the problem. Cycle
the ignition when the vehicle is safely and
completely stopped and the transmission is
placed in the PARK (P) position. The light should
turn off. If the light remains on with the vehicle
running, your vehicle will usually be drivable;
however, see an authorized dealer for service
as soon as possible.
NOTE:
This light may turn on if the accelerator and
brake pedals are pressed at the same time.
If the light continues to flash when the vehicle is
running, immediate service is required and you
may experience reduced performance, an
elevated/rough idle, or engine stall and your
vehicle may require towing. The light will come
on when the ignition is placed in the ON/RUN or ACC/ON/RUN position and remain on briefly as
a bulb check. If the light does not come on
during starting, have the system checked by an
authorized dealer.Trailer Brake Disconnected Warning Light
This warning light will illuminate when
the Trailer Brake has been discon
-
nected.
Refer to “Trailer Towing” in “Starting And Oper -
ating” for further information.
Transmission Temperature Warning Light — If
Equipped
This warning light will illuminate to
warn of a high transmission fluid
temperature. This may occur with
strenuous usage such as trailer
towing. If this light turns on, stop the vehicle and
run the engine at idle or slightly faster, with the
transmission in PARK (P) or NEUTRAL (N), until
the light turns off. Once the light turns off, you
may continue to drive normally.
20_DJD2_OM_EN_USC_t.book Page 132
Page 266 of 553
264STARTING AND OPERATING
Check threaded fasteners for looseness,
particularly on the chassis, drivetrain compo -
nents, steering, and suspension. Retighten
them, if required, and torque to the values
specified in the Service Manual.
Check for accumulations of plants or brush.
These things could be a fire hazard. They
might hide damage to fuel lines, brake hoses,
axle pinion seals, and propeller shafts.
After extended operation in mud, sand,
water, or similar dirty conditions, have the
radiator, fan, brake rotors, wheels, brake
linings, and axle yokes inspected and
cleaned as soon as possible.
If you experience unusual vibration after
driving in mud, slush or similar conditions,
check the wheels for impacted material.
Impacted material can cause a wheel imbal-
ance and freeing the wheels of it will correct
the situation.
LIMITED-SLIP DIFFERENTIAL
The limited-slip differential provides additional
traction on snow, ice, mud, sand and gravel,
particularly when there is a difference between
the traction characteristics of the surface under
the right and left rear wheels. During normal
driving and cornering, the limited-slip unit
performs similarly to a conventional differential.
On slippery surfaces, however, the differential
delivers more of the driving effort to the rear
wheel having the better traction.
The limited-slip differential is especially helpful
during slippery driving conditions. With both
rear wheels on a slippery surface, a slight appli -
cation of the accelerator will supply maximum
traction. When starting with only one rear wheel
on an excessively slippery surface, slight
momentary application of the parking brake
may be necessary to gain maximum traction. Care should be taken to avoid sudden accelera-
tions when both rear wheels are on a slippery
surface. This could cause both rear wheels to
spin, and allow the vehicle to slide sideways on
the crowned surface of a road or in a turn.
WINCH USAGE — POWER WAGON ONLY (IF
EQUIPPED)
Things To Know Before Using Your Winch
General Winch Information
Your vehicle is equipped with an electric vehicle
recovery winch. This winch uses the electrical
power from the vehicle charging system to
power a motor that winds the winch rope onto
the winch drum via planetary gear reduction. By
nature, a winch is capable of generating very
high forces and should be used with care. Do
WARNING!
Abrasive material in any part of the brakes
may cause excessive wear or unpredictable
braking. You might not have full braking
power when you need it to prevent a collision.
If you have been operating your vehicle in
dirty conditions, get your brakes checked and
cleaned as necessary.
WARNING!
On vehicles equipped with a limited-slip
differential never run the engine with one rear
wheel off the ground since the vehicle may
drive through the rear wheel remaining on the
ground. You could lose control of the vehicle.
20_DJD2_OM_EN_USC_t.book Page 264
Page 267 of 553

STARTING AND OPERATING265
not operate the winch without reading and
understanding the complete winch owner's
manual.
Tensioning The Winch Rope
The winch rope must be properly tensioned
before use. Follow the instructions below to
tension the rope:
1. Un-spool the rope leaving five wraps of
rope on the winch drum.
2. Attach the hook to a suitable anchor point.
3. Apply at least 1,000 lbs (454 kg) of tension to the rope while winding the rope. Always
use care to ensure the rope does not pile up
on one side of the drum and is neatly wound
onto the drum.
Low Voltage Interrupt
Your winch is equipped with a device that will
interrupt winch function if the vehicle charging
system voltage drops to a low level. The winch
will not power-in or out for 30 seconds if this
device is tripped. If the interrupt is tripped, the
vehicle should be operated at high idle for a few
minutes to allow the vehicle charging system to
recover before continuing to winch.
Understanding The Features Of Your Winch
Winch Components
1.
Motor:
The winch motor is powered by the
vehicle charging system.
2. Remote Socket: The remote socket (which
will be located on the bumper assembly)
allows the remote control to be attached to the control pack to allow the winch to func
-
tion.
3. Winch Drum With Integral Brake: The winch
drum allows the rope to be stored on the
winch and transmits force to the rope. The
winch is equipped with an integral brake
that will stop rotation of the winch drum if
the winch motor is stopped.
4. Synthetic Rope: The synthetic rope allows
the winch to be connected to an anchor to
provide a pulling force. This synthetic rope is
highly flexible, lightweight, and it floats.
5. Clutch Lever: The clutch lever allows the
winch drum to be disconnected from the
winch motor to allow the rope to be pulled
from the winch by hand.
6. Remote Control: The remote control
provides the interface between the winch
operator and the winch. The remote control
provides the ability to power the winch in,
out, and stop the winch. To operate the
winch, the toggle switch is pressed down to
power the winch in and up to power the
winch out. The winch will stop if the switch
is left in the neutral (center) position.
CAUTION!
Be certain the anchor will withstand the load
required to tension the winch rope.
CAUTION!
The winch rope must spool on the winch
drum in the direction indicated on the drum
rotation decal on the winch.
5
20_DJD2_OM_EN_USC_t.book Page 265
Page 365 of 553
IN CASE OF EMERGENCY363
Preparations For Jump Start
The battery in your vehicle is located in the front
of the engine compartment, behind the driver
side headlight assembly.
NOTE:
If you have a diesel engine, you may have two
batteries, however jump start off the driver
side battery.
The positive battery post may be covered with
a protective cap if equipped. Lift up on the
cap to gain access to the positive battery
post. Do not jump off fuses. Only jump
directly off positive post which has a positive
(+) symbol on or around the post.
Positive Battery Post
1. Apply the parking brake, shift the auto
-
matic transmission into PARK and turn the
ignition OFF.
2. Turn off the heater, radio, and all unneces -
sary electrical accessories.
3. If using another vehicle to jump start the battery, park the vehicle within the jumper
cables’ reach, apply the parking brake and
make sure the ignition is OFF.
Jump Starting Procedure
Connecting The Jumper Cables
WARNING!
Take care to avoid the radiator cooling fan
whenever the hood is raised. It can start
anytime the ignition switch is ON. You can
be injured by moving fan blades.
Remove any metal jewelry such as rings,
watch bands and bracelets that could
make an inadvertent electrical contact. You
could be seriously injured.
Batteries contain sulfuric acid that can
burn your skin or eyes and generate
hydrogen gas which is flammable and
explosive. Keep open flames or sparks
away from the battery.
WARNING!
Do not allow vehicles to touch each other as
this could establish a ground connection and
personal injury could result.
WARNING!
Failure to follow this jump starting procedure
could result in personal injury or property
damage due to battery explosion.
CAUTION!
Failure to follow these procedures could
result in damage to the charging system of
the booster vehicle or the discharged vehicle.
6
20_DJD2_OM_EN_USC_t.book Page 363