battery location Ram 3500 2018 User Guide
[x] Cancel search | Manufacturer: RAM, Model Year: 2018, Model line: 3500, Model: Ram 3500 2018Pages: 372, PDF Size: 7.1 MB
Page 57 of 372

2. This device must accept any interferencereceived, including interference that may
cause undesired operation.
NOTE:
Changes or modifications not expressly ap-
proved by the party responsible for compli-
ance could void the user’s authority to oper-
ate the equipment.
INTERNAL EQUIPMENT
Electrical Power Outlets
The auxiliary 12 Volt (13 Amp) power outlets
can provide power for in-cab accessories de-
signed for use with the standard “cigar
lighter” plug. The 12 Volt power outlets and
USB Port (Charge Only) have a cap attached
to the outlet indicating “12V DC,” together
with either a key symbol, battery symbol, or
USB symbol. A key symbol indicates that the key must be
in the ON/RUN or ACC positions for the outlet
to provide power. The battery symbol indi-
cates that the outlet is connected to the
battery, and can provide power at all times.
NOTE:
To ensure proper operation, a Mopar knob
and element must be used.
CAUTION!
• Do not exceed the maximum power of
160 Watts (13 Amps) at 12 Volts. If the
160 Watts (13 Amps) power rating is
exceeded, the fuse protecting the sys-
tem will need to be replaced.
• Power outlets are designed for accessory
plugs only. Do not insert any other object
in the power outlets as this will damage
the outlet and blow the fuse. Improper
use of the power outlet can cause dam-
age not covered by your New Vehicle
Limited Warranty. The auxiliary power outlets can be found in
the following locations:
• Lower left and lower right in the center of
the instrument panel – if equipped with a
column or a eight-speed electronic gear
selector.
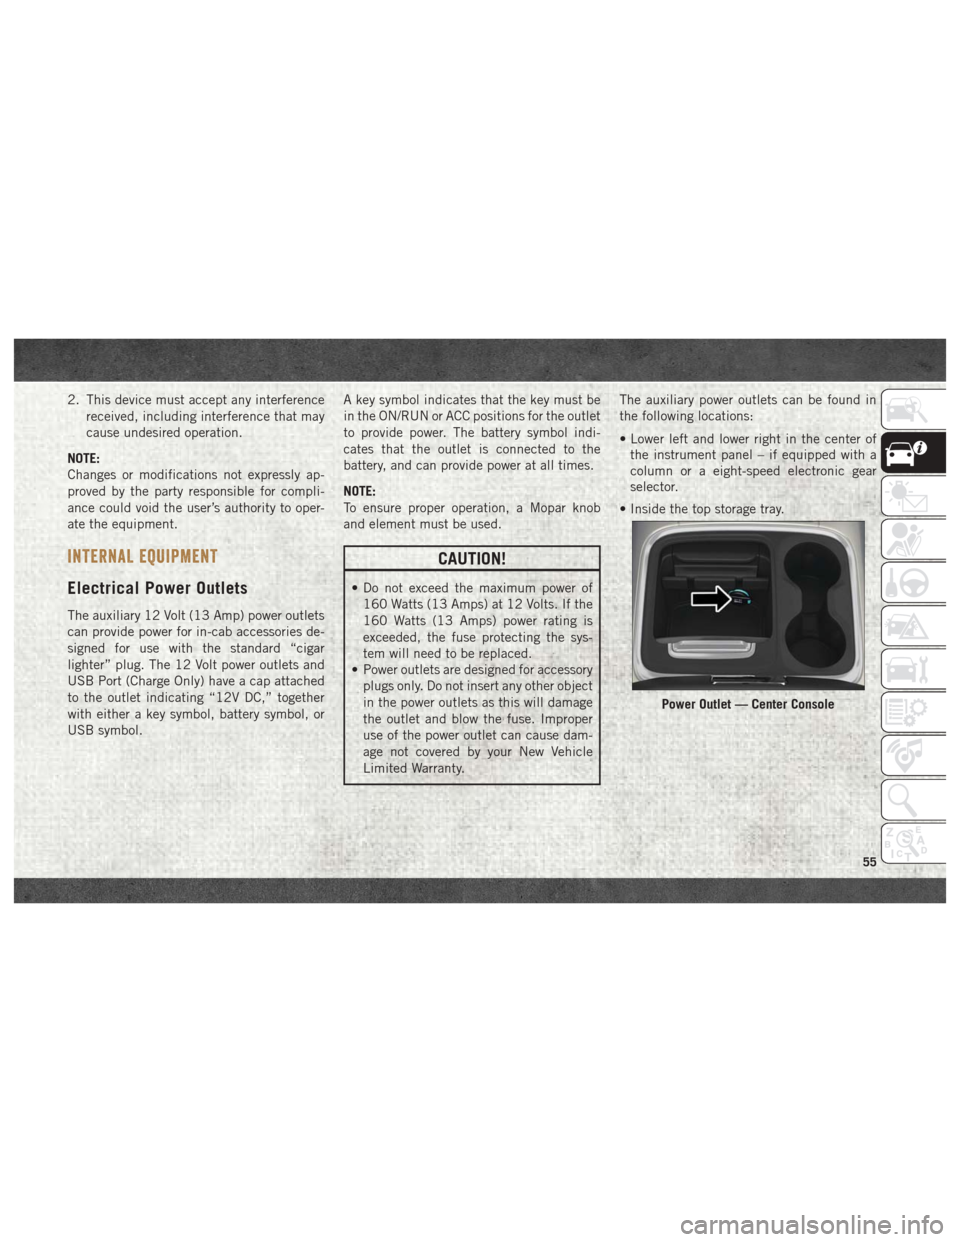
• Inside the top storage tray.
Power Outlet — Center Console
55
Page 220 of 372

the end of the lug wrench to pull the caps off.
The wheel skin can now be removed.
CAUTION!
• Use a pulling motion to remove the hubcap. Do not use a twisting motion when
removing the hub cap, damage to the
hub cap; finish may occur.
• The rear hub caps on the dual rear wheel
has two pull off notches. Make sure that
the hook of the jack handle driver is
located squarely in the cap notch before
attempting to pull off.
You must use the flat end of the lug wrench to
pull off the wheel skins. Locate the hub cap
pull notches (2 notches on each cap). Insert
the flat tip completely and using a back and
forth motion, loosen the wheel skin. Repeat
this procedure around the tire until the skin
pops off.
Replace the wheel skins first using a rubber
mallet. When replacing the hub caps, tilt the
cap retainer over the lug nut bolt circle and strike the high side down with a rubber mal-
let. Be sure that the hub caps and wheel
skins are firmly seated around the wheel.JUMP STARTING
If your vehicle has a discharged battery, it can
be jump started using a set of jumper cables
and a battery in another vehicle, or by using a
portable battery booster pack. Jump starting
can be dangerous if done improperly, so
please follow the procedures in this section
carefully.
WARNING!
Do not attempt jump starting if the battery
is frozen. It could rupture or explode and
cause personal injury.
CAUTION!
Do not use a portable battery booster pack
or any other booster source with a system
voltage greater than 12 Volts or damage to
the battery, starter motor, alternator or
electrical system may occur.NOTE:
When using a portable battery booster pack,
follow the manufacturer's operating instruc-
tions and precautions.
Preparations For Jump Start
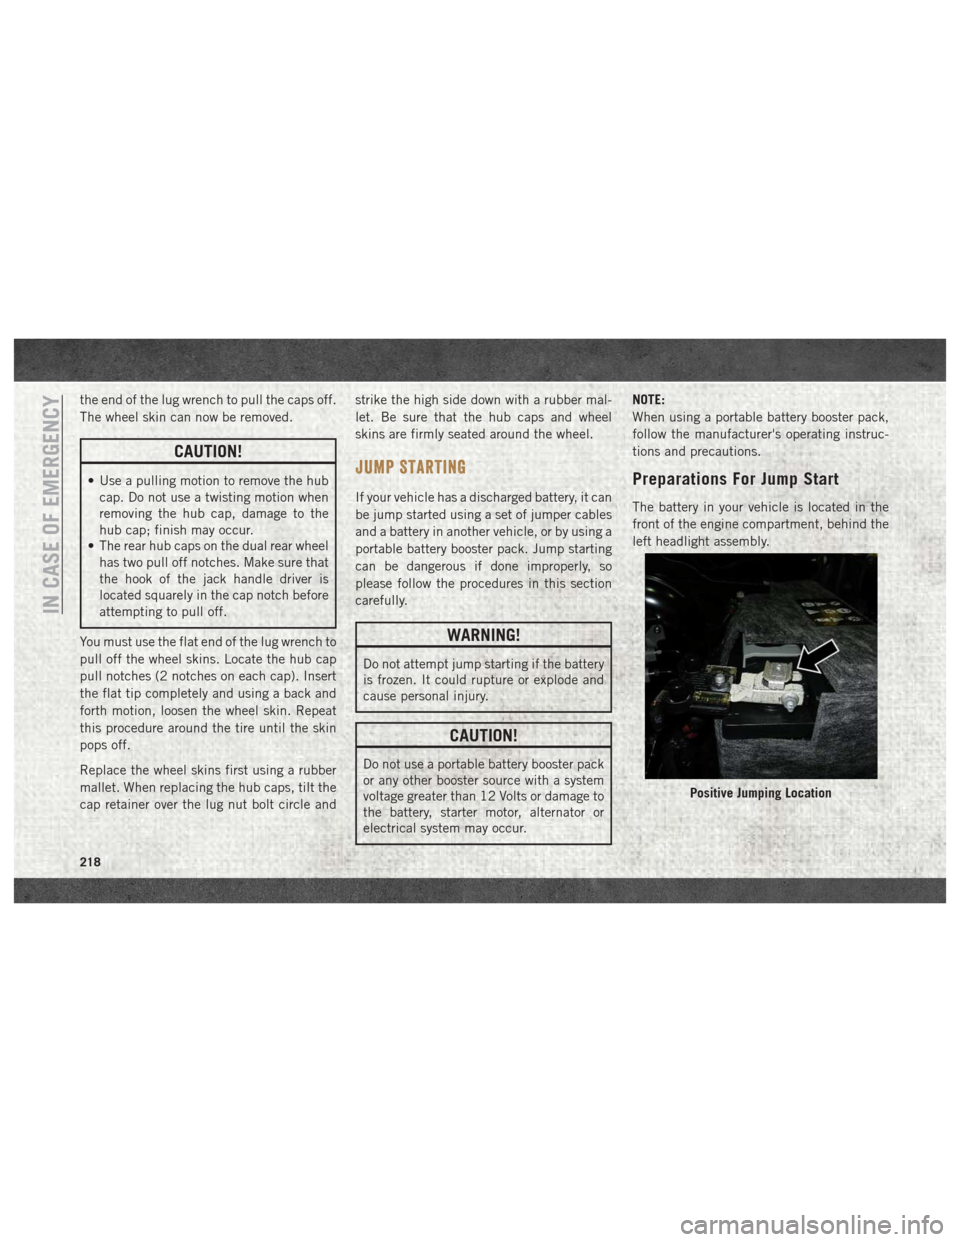
The battery in your vehicle is located in the
front of the engine compartment, behind the
left headlight assembly.
Positive Jumping Location
IN CASE OF EMERGENCY
218
Page 321 of 372

WARNING!
• ALWAYS obey traffic laws and pay atten-tion to the road. Some features are lim-
ited while the vehicle is in motion. Some
services, including SOS, will NOT work
without a subscription and an operable
network connection.
• Ignoring the rearview mirror light could
mean you may not have SOS Call service
if needed. If the rearview mirror light is
illuminated, have an authorized dealer
service the SOS Call system immedi-
ately.
• The Occupant Restraint Controller
(ORC) turns on the Air Bag Warning
Light on the instrument panel if a mal-
function is detected in any part of the
airbag system. If the Air Bag Warning
Light is illuminated, the air bag system
may not be working properly and the
SOS Call system may not send a signal to
a SOS Call operator if an air bag is
deployed. If the Air Bag Warning Light is
illuminated, have an authorized dealer
service your vehicle immediately.
WARNING!
• If anyone in the vehicle could be indanger (e.g., fire or smoke is visible,
dangerous road conditions or location),
do not wait for voice contact from a SOS
Call operator. All occupants should exit
the vehicle immediately and move to a
safe location.
• The SOS Call system is embedded into
the vehicle’s electrical system. Do not
add aftermarket electrical equipment to
the vehicle’s electrical system. This may
prevent your vehicle from sending a sig-
nal to initiate an emergency call. To
avoid interference that can cause the
SOS Call system to fail, never add after-
market equipment (e.g., two-way mobile
radio, CB radio, data recorder, etc.) to
your vehicle’s electrical system or
modify the antennas on your vehicle.
• IF YOUR VEHICLE LOSES BATTERY
POWER FOR ANY REASON (INCLUD-
ING DURING OR AFTER AN ACCI-
DENT), the Uconnect features, apps,
and SiriusXM Guardian services, among
others, will not operate. NOTE:
Your vehicle may be transmitting data as
authorized by the subscriber.
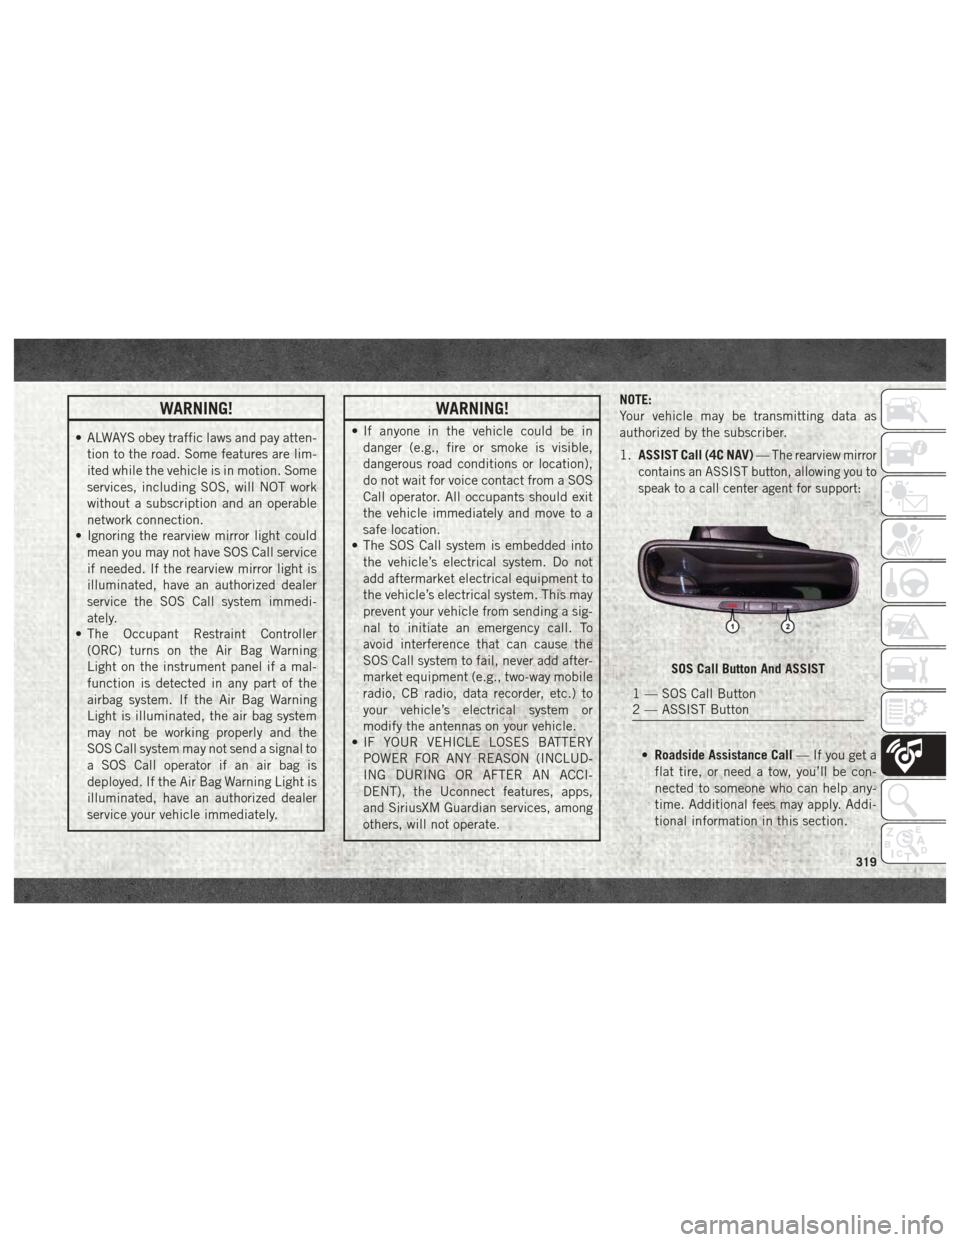
1.
ASSIST Call (4C NAV) —
The rearview mirror
contains an ASSIST button, allowing you to
speak to a call center agent for support:
• Roadside Assistance Call — If you get a
flat tire, or need a tow, you’ll be con-
nected to someone who can help any-
time. Additional fees may apply. Addi-
tional information in this section.
SOS Call Button And ASSIST
1 — SOS Call Button
2 — ASSIST Button
319
Page 359 of 372

Accessories..................287
Mopar ...................287
Adding Fuel ..........181, 182, 186
Additives, Fuel ................182
Adjustable Pedals ...............30
Air Bag Air Bag Operation ............106
Air Bag Warning Light .........104
Enhanced Accident Response .114, 227
Event Data Recorder (EDR) ......227
If A Deployment Occurs ........113
Knee Impact Bolsters .........107
Maintaining Your Air Bag System . .114
Transporting Pets ............133
Air Bag Light ...........76, 104, 135
Air Bag Maintenance ............114
Air Cleaner, Engine (Engine Air Cleaner Filter) ...........249, 252
Air Conditioning Filter ............48
Air Conditioning, Operating Tips ......48
Air Conditioning System ...........47
Air Filter ...................252
Air Pressure, Tires ..............265
Air Suspension ............170, 172
Alarm, Panic ..................15 Alarm (Security Alarm)
.........18, 77
Alarm System (Security Alarm) .......18
Antifreeze (Engine Coolant) ........278
Capacities ................279
Anti-Lock Warning Light ...........81
Audio Jack ..................325
Automatic Headlights ............33
Automatic High Beams ...........33
Automatic Temperature Control (ATC) . . .47
Automatic Transmission ..........156
Fluid Type .........282, 284, 286
Shifting ..............158, 160
Automatic Transmission Limp Home Mode ....................157
Axle Fluid ............282, 284, 286
Back-Up ...................179
Back-Up Camera ..............179
Battery .....................
77
Charging System Light .........77
Belts, Seat ..................134
Body Builders Guide ..............2
B-Pillar Location ..............261
Brake Fluid ..............282, 284 Brake System
Warning Light ...............76
Brake/Transmission Interlock .......156
Bulb Replacement .............202
Bulbs, Light ..............136, 202
Camera ....................179
Camera, Rear ................179
Capacities, Antifreeze (Engine Coolant) ..................279
Capacities, Fluid ...........278, 279
Caps, Filler Oil (Engine) ...............243
Carbon Monoxide Warning .........134
Cargo Light ...................34
Chart, Tire Sizing ..............258
Checking Your Vehicle For Safety . . . .134
Checks, Safety ................134
Child Restraint ................115
Child Restraints Booster Seats ..............118
Child Restraints .............115
Child Seat Installation .....126, 127
How To Stow An Unused ALR Seat
Belt ....................125
INDEX
357