wheel size Ram 4500 Chassis Cab 2018 User Guide
[x] Cancel search | Manufacturer: RAM, Model Year: 2018, Model line: 4500 Chassis Cab, Model: Ram 4500 Chassis Cab 2018Pages: 298, PDF Size: 5.88 MB
Page 67 of 298
— Tire Pressure Monitoring System
(TPMS) Warning Light
The warning light switches on and a message
is displayed to indicate that the tire pressure
is lower than the recommended value and/or
that slow pressure loss is occurring. In these
cases, optimal tire duration and fuel con-
sumption may not be guaranteed.
Should one or more tires be in the condition
mentioned above, the display will show the
indications corresponding to each tire in
sequence.
CAUTION!
Do not continue driving with one or more
flat tires as handling may be compro-
mised. Stop the vehicle, avoiding sharp
braking and steering. If a tire puncture
occurs, repair immediately using the dedi-
cated tire repair kit and contact your au-
thorized dealer as soon as possible.
Each tire, including the spare (if provided),
should be checked monthly when cold and
inflated to the inflation pressure recom-
mended by the vehicle manufacturer on the vehicle placard or tire inflation pressure la-
bel. (If your vehicle has tires of a different
size than the size indicated on the vehicle
placard or tire inflation pressure label, you
should determine the proper tire inflation
pressure for those tires.)
As an added safety feature, your vehicle has
been equipped with a tire pressure monitor-
ing system (TPMS) that illuminates a low tire
pressure telltale when one or more of your
tires is significantly under-inflated. Accord-
ingly, when the low tire pressure telltale illu-
minates, you should stop and check your tires
as soon as possible, and inflate them to the
proper pressure. Driving on a significantly
under-inflated tire causes the tire to overheat
and can lead to tire failure. Under-inflation
also reduces fuel efficiency and tire tread
life, and may affect the vehicle’s handling
and stopping ability.
Please note that the TPMS is not a substitute
for proper tire maintenance, and it is the
driver’s responsibility to maintain correct tire
pressure, even if under-inflation has not
reached the level to trigger illumination of the
TPMS low tire pressure telltale.Your vehicle has also been equipped with a
TPMS malfunction indicator to indicate when
the system is not operating properly. The
TPMS malfunction indicator is combined
with the low tire pressure telltale. When the
system detects a malfunction, the telltale will
flash for approximately one minute and then
remain continuously illuminated. This se-
quence will continue upon subsequent ve-
hicle start-ups as long as the malfunction
exists. When the malfunction indicator is
illuminated, the system may not be able to
detect or signal low tire pressure as intended.
TPMS malfunctions may occur for a variety of
reasons, including the installation of replace-
ment or alternate tires or wheels on the ve-
hicle that prevent the TPMS from functioning
properly. Always check the TPMS malfunc-
tion telltale after replacing one or more tires
or wheels on your vehicle to ensure that the
replacement or alternate tires and wheels
allow the TPMS to continue to function
properly.
65
Page 68 of 298
CAUTION!
The TPMS has been optimized for the
original equipment tires and wheels.
TPMS pressures and warning have been
established for the tire size equipped on
your vehicle. Undesirable system opera-
tion or sensor damage may result when
using replacement equipment that is not
of the same size, type, and/or style. After-
market wheels can cause sensor damage.
Using aftermarket tire sealants may cause
the Tire Pressure Monitoring System
(TPMS) sensor to become inoperable. Af-
ter using an aftermarket tire sealant it is
recommended that you take your vehicle
to your authorized dealer to have your
sensor function checked.
— Low Fuel Indicator Light
When the fuel level reaches approximately
3.0 gal (11.0 L) this light will turn on, and
remain on until fuel is added.
— Anti-Lock Brake (ABS) Warning
Light
This light monitors the Anti-Lock Brake Sys-
tem (ABS). The light will turn on when the
ignition is placed in the ON/RUN or ACC/ON/
RUN position and may stay on for as long as
four seconds.
If the ABS light remains on or turns on while
driving, then the Anti-Lock portion of the
brake system is not functioning and service is
required as soon as possible. However, the
conventional brake system will continue to
operate normally, assuming the Brake Warn-
ing Light is not also on.
If the ABS light does not turn on when the
ignition is placed in the ON/RUN or ACC/ON/
RUN position, have the brake system in-
spected by an authorized dealer.
— Low Coolant Level Warning Light
This telltale will turn on to indicate the ve-
hicle coolant level is low.
— Loose Fuel Filler Cap Warning Light
— If Equipped
This light will illuminate when the fuel filler
cap is loose. Properly close the filler cap to
disengage the light. If the light does not turn
off, please see your authorized dealer.
SERV4WD— Service 4WD Warning Light —
If Equipped
If the light stays on or comes on during
driving, it means that the 4WD system is not
functioning properly and that service is re-
quired. We recommend you drive to the near-
est service center and have the vehicle ser-
viced immediately.
— Transmission Temperature Warning
Light
This light indicates that the transmission
fluid temperature is running hot. This may
occur with severe usage, such as trailer tow-
ing. If this light turns on, safely pull over and
stop the vehicle. Then, shift the transmission
into PARK and run the engine at idle or
slightly higher until the light turns off.
GETTING TO KNOW YOUR INSTRUMENT PANEL
66
Page 75 of 298

CAUTION!
• The TPMS has been optimized for theoriginal equipment tires and wheels.
TPMS pressures and warning have been
established for the tire size equipped on
your vehicle. Undesirable system opera-
tion or sensor damage may result when
using replacement equipment that is not
of the same size, type, and/or style.
Aftermarket wheels can cause sensor
damage.
• Using aftermarket tire sealants may
cause the Tire Pressure Monitoring Sys-
tem (TPMS) sensor to become inoper-
able. After using an aftermarket tire
sealant it is recommended that you take
your vehicle to an authorized dealership
to have your sensor function checked.
• After inspecting or adjusting the tire
pressure always reinstall the valve stem
cap. This will prevent moisture and dirt
from entering the valve stem, which
could damage the TPMS sensor. NOTE:
• The TPMS is not intended to replace nor-
mal tire care and maintenance or to provide
warning of a tire failure or condition.
• The TPMS should not be used as a tire pressure gauge while adjusting your tire
pressure.
• Driving on a significantly under-inflated tire causes the tire to overheat and can lead to
tire failure. Under-inflation also reduces
fuel efficiency and tire tread life, and may
affect the vehicle’s handling and stopping
ability.
• The TPMS is not a substitute for proper tire maintenance, and it is the driver’s respon-
sibility to maintain correct tire pressure
using an accurate tire pressure gauge, even
if under-inflation has not reached the level
to trigger illumination of the TPM Telltale
Light.
• Seasonal temperature changes will affect tire pressure, and the TPMS will monitor
the actual tire pressure in the tire.
Premium System
The Tire Pressure Monitor System (TPMS)
uses wireless technology with wheel rim
mounted electronic sensors to monitor tire
pressure levels. Sensors, mounted to each
wheel as part of the valve stem, transmit tire
pressure readings to the receiver module.
NOTE:
It is particularly important for you to check
the tire pressure in all of the tires on your
vehicle monthly and to maintain the proper
pressure.
The TPMS consists of the following compo-
nents:
• Receiver module
• Four tire pressure monitoring sensors
• Various tire pressure monitoring systemmessages, which display in the instrument
cluster
• Tire pressure monitoring telltale light
Tire Pressure Monitoring Low Pressure Warnings
73
Page 77 of 298
• Signal interference due to electronic de-vices or driving next to facilities emitting
the same radio frequencies as the TPM
sensors.
• Installing aftermarket window tinting that contains materials that may block radio
wave signals.
• Accumulation of snow or ice around the wheels or wheel housings.
• Using tire chains on the vehicle.
• Using wheels/tires not equipped with TPM sensors.
A system fault may occur due to an incorrect
TPM sensor location condition. When a sys-
tem fault occurs due to an incorrect TPM
sensor location, the “Tire Pressure Monitor-
ing Telltale Light” will flash on and off for
75 seconds and then remain on solid. The
system fault will also sound a chime. In
addition, the instrument cluster will display a
“Tire Pressure Temporarily Unavailable”
message in place of the tire pressure display
screen. If the ignition switch is cycled, this
sequence will repeat, providing the system
fault still exists. If the system fault no longer
exists, the “Tire Pressure Monitoring Telltale Light” will no longer flash and the tire pres-
sure display screen will be displayed showing
the tire pressure values the correct locations.
Vehicles With Non Matching Full Size Spare Or
Compact Spare
• The non matching full size spare or com-
pact spare tire does not have a TPM sensor.
Therefore, the TPMS will not monitor the
pressure in the non matching full size spare
or compact spare tire.
• If you install the non matching full size spare or compact spare tire in place of a
road tire that has a pressure below the
low-pressure warning limit, upon the next
ignition switch cycle, the TPM Telltale
Light and a “LOW TIRE” message will re-
main ON and a chime will sound. In addi-
tion, the graphic in the instrument cluster
will still display a pressure value in a differ-
ent color.
• After driving the vehicle for up to 20 min- utes above 15 mph (24 km/h), the TPM
Telltale Light will flash on and off for
75 seconds and then remain on solid. In
addition, the instrument cluster will display a "SERVICE TPM SYSTEM" message for a
minimum of five seconds and then display
dashes (- -) in place of the pressure value.
• For each subsequent ignition switch cycle, a chime will sound, the TPM Telltale Light
will flash on and off for 75 seconds and
then remain on solid, and the instrument
cluster will display a "SERVICE TPM SYS-
TEM" message for a minimum of five sec-
onds and then display dashes (- -) in place
of the pressure value.
• Once you repair or replace the original road tire and reinstall it on the vehicle in place of
the non matching full size spare or compact
spare, the TPMS will update automatically.
In addition, the TPM Telltale Light will turn
OFF and the graphic in the instrument
cluster will display a new pressure value
instead of dashes (- -), as long as no tire
pressure is below the low-pressure warning
limit in any of the four active road tires. The
vehicle may need to be driven for up to
20 minutes above 15 mph (24 km/h) in
order for the TPMS to receive this
information.
75
Page 92 of 298
WARNING!
are designed to open only when the air
bags are inflating.
• Relying on the air bags alone could lead
to more severe injuries in a collision. The
air bags work with your seat belt to
restrain you properly. In some collisions,
air bags won’t deploy at all. Always wear
your seat belts even though you have air
bags.
Front Air Bag Operation
Front Air Bags are designed to provide addi-
tional protection by supplementing the seat
belts. Front air bags are not expected to
reduce the risk of injury in rear, side, or
rollover collisions. The front air bags will not
deploy in all frontal collisions, including
some that may produce substantial vehicle
damage — for example, some pole collisions,
truck underrides, and angle offset collisions.
On the other hand, depending on the type
and location of impact, front air bags may
deploy in crashes with little vehicle front-end
damage but that produce a severe initial
deceleration. Because air bag sensors measure vehicle
deceleration over time, vehicle speed and
damage by themselves are not good indica-
tors of whether or not an air bag should have
deployed.
Seat belts are necessary for your protection in
all collisions, and also are needed to help
keep you in position, away from an inflating
air bag.
When the ORC detects a collision requiring
the front air bags, it signals the inflator units.
A large quantity of non-toxic gas is generated
to inflate the front air bags.
The steering wheel hub trim cover and the
upper right side of the instrument panel
separate and fold out of the way as the air
bags inflate to their full size. The front air
bags fully inflate in less time than it takes to
blink your eyes. The front air bags then
quickly deflate while helping to restrain the
driver and front passenger.
Knee Impact Bolsters
The Knee Impact Bolsters help protect the
knees of the driver and front passenger, and
position the front occupants for improved
interaction with the front air bags.
WARNING!
• Do not drill, cut, or tamper with the knee
impact bolsters in any way.
• Do not mount any accessories to the
knee impact bolsters such as alarm
lights, stereos, citizen band radios, etc.
Supplemental Side Air Bags
Supplemental Seat-Mounted Side Air Bags
(SABs) — If Equipped
Your vehicle may be equipped with Supple-
mental Seat-Mounted Side Air Bags (SABs).
If your vehicle is equipped with Supplemen-
tal Seat-Mounted Side Air Bags (SABs),
please refer to the information below.
SAFETY
90
Page 95 of 298
WARNING!
in all collisions. They also help keep you in
position, away from an inflating Side Air
Bag. To get the best protection from the
Side Air Bags, occupants must wear their
seat belts properly and sit upright with
their backs against the seats. Children
must be properly restrained in a child re-
straint or booster seat that is appropriate
for the size of the child.
WARNING!
• Side Air Bags need room to inflate. Donot lean against the door or window. Sit
upright in the center of the seat.
• Being too close to the Side Air Bags
during deployment could cause you to
be severely injured or killed.
• Relying on the Side Air Bags alone could
lead to more severe injuries in a colli-
sion. The Side Air Bags work with your
seat belt to restrain you properly. In
some collisions, Side Air Bags won’t
deploy at all. Always wear your seat belt
even though you have Side Air Bags. NOTE:
Air bag covers may not be obvious in the
interior trim, but they will open during air bag
deployment.
Rollover Events (If Equipped With Rollover
Sensing)
Side Air Bags are designed to activate in
certain rollover events. The Occupant Re-
straint Controller (ORC) determines whether
the deployment of the Side Air Bags in a
particular rollover event is appropriate, based
on the severity and type of collision. Vehicle
damage by itself is not a good indicator of
whether or not Side Air Bags should have
deployed.
The Side Air Bags will not deploy in all
rollover events. The rollover sensing-system
determines if a rollover event may be in
progress and whether deployment is appro-
priate. A slower-developing event may deploy
the seat belt pretensioners on both sides of
the vehicle. A faster-developing event may
deploy the seat belt pretensioners as well as
the Side Air Bags on both sides of the vehicle.
The rollover sensing-system may also deploy the seat belt pretensioners, with or without
the Side Air Bags, on both sides of the vehicle
if the vehicle experiences a near rollover
event.
The SABICs may help reduce the risk of
partial or complete ejection of vehicle occu-
pants through side windows in certain roll-
over or side impact events.
Air Bag System Components
NOTE:
The Occupant Restraint Controller (ORC)
monitors the internal circuits and intercon-
necting wiring associated with electrical Air
Bag System Components listed below:
• Occupant Restraint Controller (ORC)
• Air Bag Warning Light
• Steering Wheel and Column
• Instrument Panel
• Knee Impact Bolsters
• Driver and Front Passenger Air Bags
• Seat Belt Buckle Switch
• Supplemental Side Air Bags — If Equipped
93
Page 203 of 298

Radial Ply Tires
WARNING!
Combining radial ply tires with other types
of tires on your vehicle will cause your
vehicle to handle poorly. The instability
could cause a collision. Always use radial
ply tires in sets of four. Never combine
them with other types of tires.
Tire Repair
If your tire becomes damaged, it may be
repaired if it meets the following criteria:
• The tire has not been driven on when flat.
• The damage is only on the tread section of your tire (sidewall damage is not repair-
able).
• The puncture is no greater thana¼ofan inch (6 mm).
Consult an authorized tire dealer for tire re-
pairs and additional information. Damaged Run Flat tires, or Run Flat tires that
have experienced a loss of pressure should be
replaced immediately with another Run Flat
tire of identical size and service description
(Load Index and Speed Symbol).
Run Flat Tires — If Equipped
Run Flat tires allow you the capability to drive
50 miles (80 km) at 50 mph (80 km/h) after
a rapid loss of inflation pressure. This rapid
loss of inflation is referred to as the Run Flat
mode. A Run Flat mode occurs when the tire
inflation pressure is of/or below 14 psi
(96 kPa). Once a Run Flat tire reaches the
run flat mode it has limited driving capabili-
ties and needs to be replaced immediately. A
Run Flat tire is not repairable.
It is not recommended driving a vehicle
loaded at full capacity or to tow a trailer while
a tire is in the run flat mode.
See the tire pressure monitoring section for
more information.
Tire Spinning
When stuck in mud, sand, snow, or ice con-
ditions, do not spin your vehicle's wheels
above 30 mph (48 km/h) or for longer than
30 seconds continuously without stopping.
Refer to “Freeing A Stuck Vehicle” in “In
Case Of Emergency” for further information.
WARNING!
Fast spinning tires can be dangerous.
Forces generated by excessive wheel
speeds may cause tire damage or failure. A
tire could explode and injure someone. Do
not spin your vehicle's wheels faster than
30 mph (48 km/h) for more than 30 sec-
onds continuously when you are stuck, and
do not let anyone near a spinning wheel,
no matter what the speed.
201
Page 204 of 298
Tread Wear Indicators
Tread wear indicators are in the original
equipment tires to help you in determining
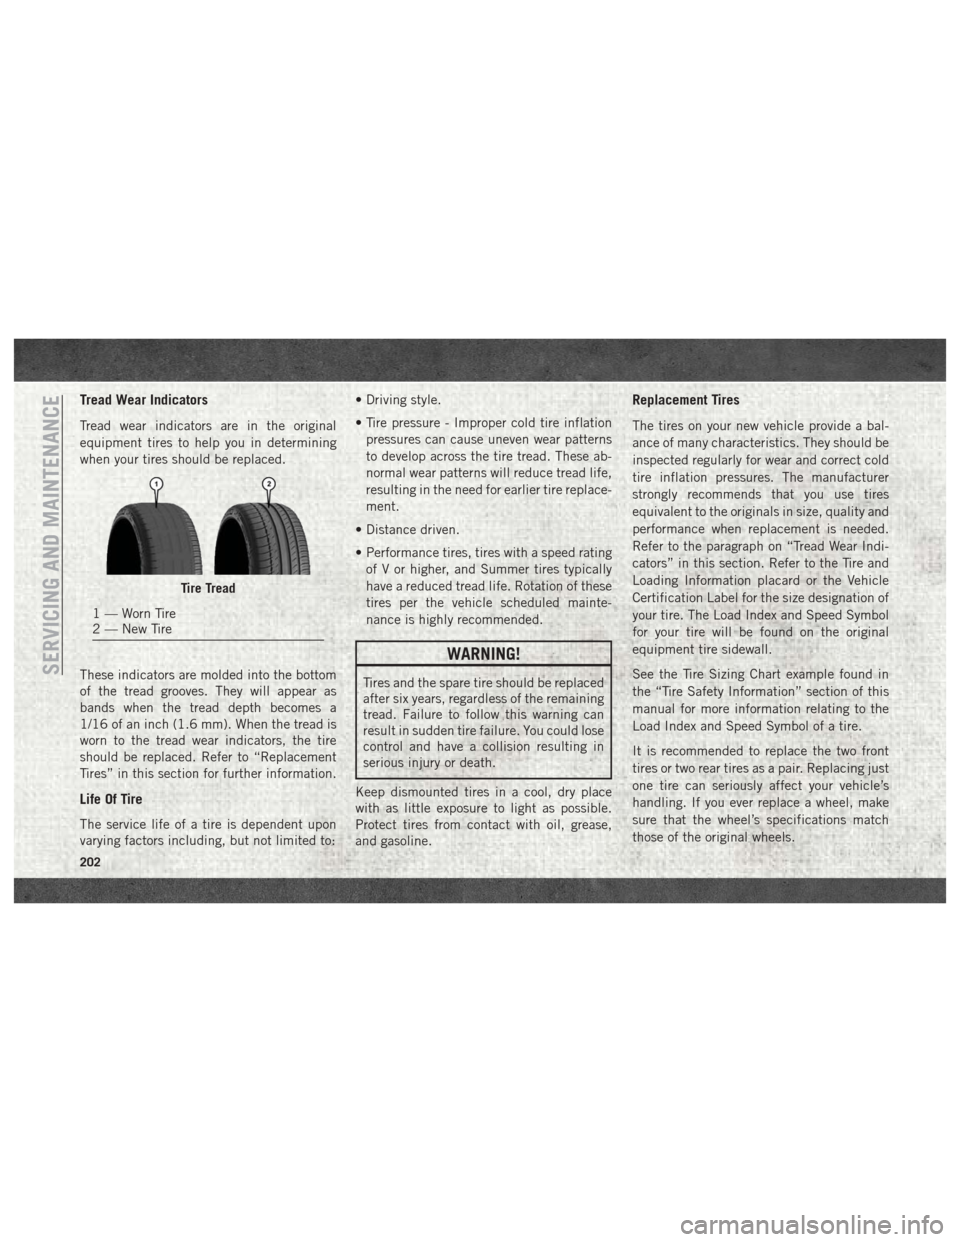
when your tires should be replaced.
These indicators are molded into the bottom
of the tread grooves. They will appear as
bands when the tread depth becomes a
1/16 of an inch (1.6 mm). When the tread is
worn to the tread wear indicators, the tire
should be replaced. Refer to “Replacement
Tires” in this section for further information.
Life Of Tire
The service life of a tire is dependent upon
varying factors including, but not limited to:• Driving style.
• Tire pressure - Improper cold tire inflation
pressures can cause uneven wear patterns
to develop across the tire tread. These ab-
normal wear patterns will reduce tread life,
resulting in the need for earlier tire replace-
ment.
• Distance driven.
• Performance tires, tires with a speed rating of V or higher, and Summer tires typically
have a reduced tread life. Rotation of these
tires per the vehicle scheduled mainte-
nance is highly recommended.
WARNING!
Tires and the spare tire should be replaced
after six years, regardless of the remaining
tread. Failure to follow this warning can
result in sudden tire failure. You could lose
control and have a collision resulting in
serious injury or death.
Keep dismounted tires in a cool, dry place
with as little exposure to light as possible.
Protect tires from contact with oil, grease,
and gasoline.
Replacement Tires
The tires on your new vehicle provide a bal-
ance of many characteristics. They should be
inspected regularly for wear and correct cold
tire inflation pressures. The manufacturer
strongly recommends that you use tires
equivalent to the originals in size, quality and
performance when replacement is needed.
Refer to the paragraph on “Tread Wear Indi-
cators” in this section. Refer to the Tire and
Loading Information placard or the Vehicle
Certification Label for the size designation of
your tire. The Load Index and Speed Symbol
for your tire will be found on the original
equipment tire sidewall.
See the Tire Sizing Chart example found in
the “Tire Safety Information” section of this
manual for more information relating to the
Load Index and Speed Symbol of a tire.
It is recommended to replace the two front
tires or two rear tires as a pair. Replacing just
one tire can seriously affect your vehicle’s
handling. If you ever replace a wheel, make
sure that the wheel’s specifications match
those of the original wheels.
Tire Tread
1 — Worn Tire
2 — New Tire
SERVICING AND MAINTENANCE
202
Page 205 of 298

It is recommended you contact your autho-
rized tire dealer or original equipment dealer
with any questions you may have on tire
specifications or capability. Failure to use
equivalent replacement tires may adversely
affect the safety, handling, and ride of your
vehicle.
WARNING!
• Do not use a tire, wheel size, load rating,or speed rating other than that specified
for your vehicle. Some combinations of
unapproved tires and wheels may
change suspension dimensions and per-
formance characteristics, resulting in
changes to steering, handling, and brak-
ing of your vehicle. This can cause un-
predictable handling and stress to steer-
ing and suspension components. You
could lose control and have a collision
resulting in serious injury or death. Use
only the tire and wheel sizes with load
ratings approved for your vehicle.
• Never use a tire with a smaller load index
or capacity, other than what was origi-
nally equipped on your vehicle. Using a
WARNING!
tire with a smaller load index could re-
sult in tire overloading and failure. You
could lose control and have a collision.
• Failure to equip your vehicle with tires
having adequate speed capability can
result in sudden tire failure and loss of
vehicle control.
CAUTION!
Replacing original tires with tires of a
different size may result in false speedom-
eter and odometer readings.
Tire Types
All Season Tires — If Equipped
All Season tires provide traction for all sea-
sons (Spring, Summer, Fall, and Winter).
Traction levels may vary between different all
season tires. All season tires can be identified
by the M+S, M&S, M/S or MS designation on
the tire sidewall. Use all season tires only in
sets of four; failure to do so may adversely
affect the safety and handling of your vehicle.
Summer Or Three Season Tires —
If Equipped
Summer tires provide traction in both wet
and dry conditions, and are not intended to
be driven in snow or on ice. If your vehicle is
equipped with Summer tires, be aware these
tires are not designed for Winter or cold
driving conditions. Install Winter tires on your
vehicle when ambient temperatures are less
than 40°F (5°C) or if roads are covered with
ice or snow. For more information, contact an
authorized dealer.
Summer tires do not contain the all season
designation or mountain/snowflake symbol
on the tire sidewall. Use Summer tires only in
sets of four; failure to do so may adversely
affect the safety and handling of your vehicle.
WARNING!
Do not use Summer tires in snow/ice con-
ditions. You could lose vehicle control,
resulting in severe injury or death. Driving
too fast for conditions also creates the
possibility of loss of vehicle control.
203
Page 206 of 298

Snow Tires
Some areas of the country require the use of
snow tires during the Winter. Snow tires can
be identified by a “mountain/snowflake”
symbol on the tire sidewall.If you need snow tires,
select tires equivalent
in size and type to the
original equipment
tires. Use snow tires
only in sets of four;
failure to do so may
adversely affect the
safety and handling of your vehicle.
Snow tires generally have lower speed ratings
than what was originally equipped with your
vehicle and should not be operated at sus-
tained speeds over 75 mph (120 km/h). For
speeds above 75 mph (120 km/h) refer to
original equipment or an authorized tire
dealer for recommended safe operating
speeds, loading and cold tire inflation pres-
sures. While studded tires improve performance on
ice, skid and traction capability on wet or dry
surfaces may be poorer than that of non-
studded tires. Some states prohibit studded
tires; therefore, local laws should be checked
before using these tire types.
Spare Tires — If Equipped
For vehicles equipped with Tire Service Kit
instead of a spare tire, please refer to “Tire
Service Kit” in “In Case Of Emergency” in
the Owner’s Manual at www.mopar.com/
en-us/care/owners-manual.html (U.S. Resi-
dents) or www.owners.mopar.ca (Canadian
Residents) for further information.
CAUTION!
Because of the reduced ground clearance,
do not take your vehicle through an auto-
matic car wash with a compact or limited
use temporary spare installed. Damage to
the vehicle may result.
Spare Tire Matching Original Equipped Tire
And Wheel — If Equipped
Your vehicle may be equipped with a spare
tire and wheel equivalent in look and func-
tion to the original equipment tire and wheel
found on the front or rear axle of your vehicle.
This spare tire may be used in the tire rota-
tion for your vehicle. If your vehicle has this
option, refer to an authorized tire dealer for
the recommended tire rotation pattern.
Compact Spare Tire — If Equipped
The compact spare is for temporary emer-
gency use only. You can identify if your ve-
hicle is equipped with a compact spare by
looking at the spare tire description on the
Tire and Loading Information Placard located
on the driver’s side door opening or on the
sidewall of the tire. Compact spare tire de-
scriptions begin with the letter “T” or “S”
preceding the size designation. Example:
T145/80D18 103M.
T,S=T
emporary Spare Tire
SERVICING AND MAINTENANCE
204