reset Ram 4500 Chassis Cab 2018 Owner's Manual
[x] Cancel search | Manufacturer: RAM, Model Year: 2018, Model line: 4500 Chassis Cab, Model: Ram 4500 Chassis Cab 2018Pages: 298, PDF Size: 5.88 MB
Page 233 of 298
Clock Setting
To start the clock setting procedure:
1. Push the MORE button on the faceplate.Next press the “Settings” button on the
touchscreen and then press the “Clock
and Date” button on the touchscreen.
2. Press the “Set Time” button on the touchscreen.
3. Press the “Up” or “Down” arrows to adjust the hours or minutes, next select the
“AM” or “PM” button on the touchscreen.
You can also select 12hr or 24hr format by
pressing the desired button on the
touchscreen.
4. Once the time is set press the “Done” button on the touchscreen to exit the time
screen.
NOTE:
In the Clock Setting Menu you can also select
the “Show Time Status” button on the touch-
screen, then select from “On” or “Off” to
display the time in the status bar.
Equalizer, Balance And Fade
1. Push the MORE button on the faceplate. Next press the “Settings” button on the
touchscreen.
2. Then scroll down and press the “Audio” button on the touchscreen to get to the
Audio menu.
3. The Audio Menu shows the following op- tions for you to customize your audio
settings.
Equalizer
Press the “Equalizer” button on the touch-
screen to adjust the Bass, Mid and Treble.
Use the “+” or “–” button on the touchscreen
to adjust the equalizer to your desired set-
tings. Press the “Back Arrow” button on the
touchscreen when done.
Balance/Fade
Press the “Balance/Fade” button on the
touchscreen to adjust the sound from the
speakers. Use the arrow button on the touch-
screen to adjust the sound level from the
front and rear or right and left side speakers. Press the Center “C” button on the touch-
screen to reset the balance and fade to the
factory setting. Press the “Back Arrow” but-
ton on the touchscreen when done.
Speed Adjusted Volume
Press the “Speed Adjusted Volume” button
on the touchscreen to select between OFF, 1,
2 or 3. This will decrease the radio volume
relative to a decrease in vehicle speed. Press
the “Back Arrow” button on the touchscreen
when done.
Loudness
Press the “Loudness” button on the touch-
screen to select the Loudness feature. When
this feature is activated it improves sound
quality at lower volumes.
Surround Sound
Press the “Surround Sound” button on the
touchscreen, select “On” or “Off” followed
by pressing the “Back Arrow” button on the
touchscreen. When this feature is activated,
it provides simulated surround sound mode.
231
Page 234 of 298
Radio Mode
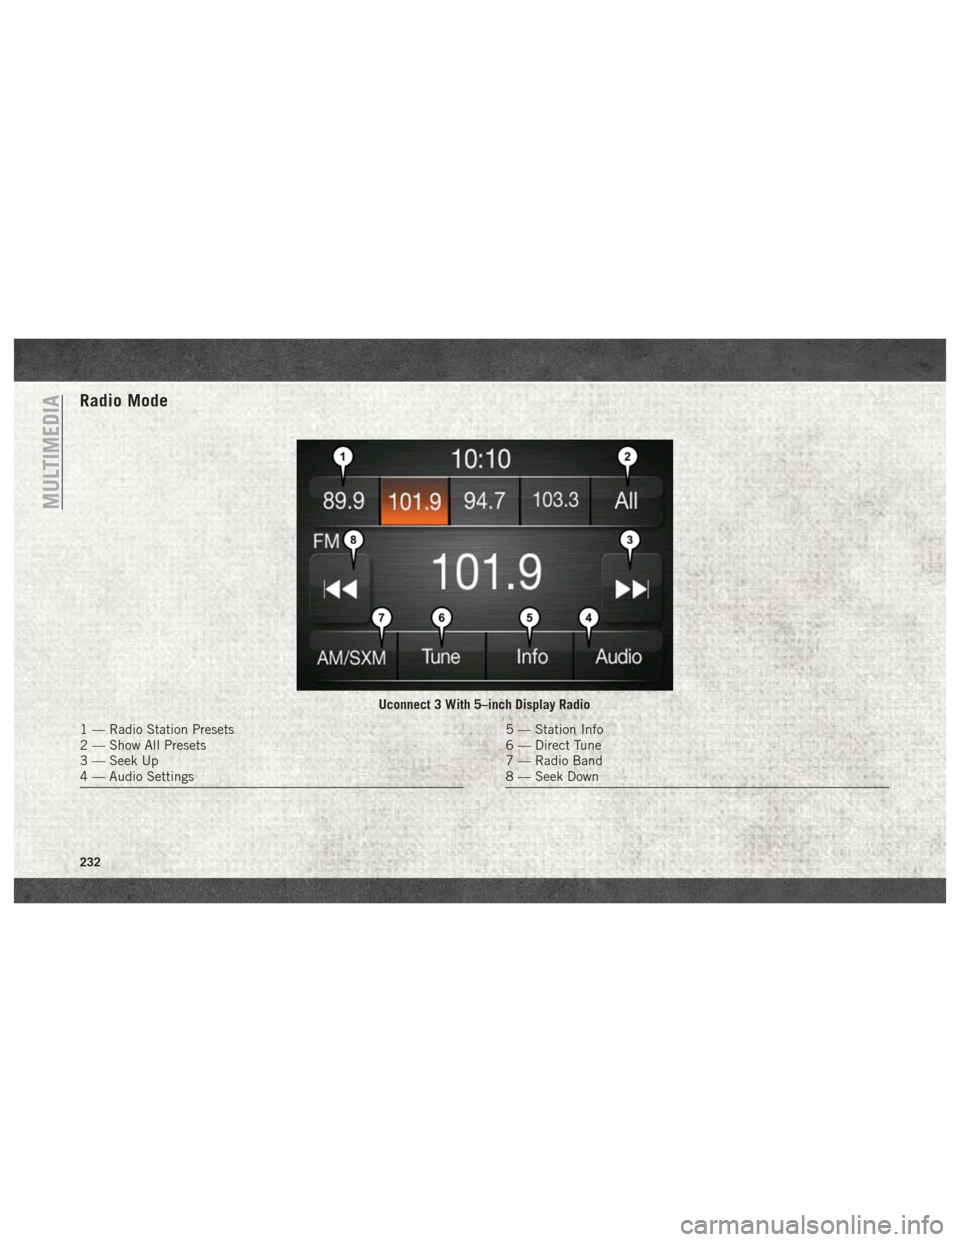
Uconnect 3 With 5–inch Display Radio
1 — Radio Station Presets
2 — Show All Presets
3 — Seek Up
4 — Audio Settings5 — Station Info
6 — Direct Tune
7 — Radio Band
8 — Seek Down
MULTIMEDIA
232
Page 235 of 298
Seek Previous/Next Buttons
Seek Up
Press and release the “Seek Up”button
on the touchscreen to tune the radio to the
next listenable station or channel.
During a Seek Up function, if the radio
reaches the starting station after passing
through the entire band two times, the radio
will stop at the station where it began.
Fast Seek Up
Press and hold the “Seek Up”button on
the touchscreen to advance the radio through
the available stations or channels at a faster
rate, the radio stops at the next available
station or channel when the button on the
touchscreen is released.
Seek Down
Press and release the “Seek Down”but-
ton on the touchscreen to tune the radio to
the next listenable station or channel.
During a Seek Down function, if the radio
reaches the starting station after passing
through the entire band two times, the radio
will stop at the station where it began. Fast Seek Down
Press and hold the “Seek Down”button
on the touchscreen to advance the radio
through the available stations or channel at a
faster rate, the radio stops at the next avail-
able station or channel when the button on
the touchscreen is released.
Store Radio Presets
The Radio stores up to 12 presets in each of
the Radio modes. There are four visible pre-
sets at the top of the radio screen. Pressing
the “All” button on the touchscreen on the
radio home screen will display all of the
preset stations for that mode.
To store a radio preset manually, follow the
steps below:
1. Tune to the desired station.
2. Press and hold the desired numbered but- ton on the touchscreen for more than two
seconds or until you hear a confirmation
beep.
Media Mode
Audio Source Selection
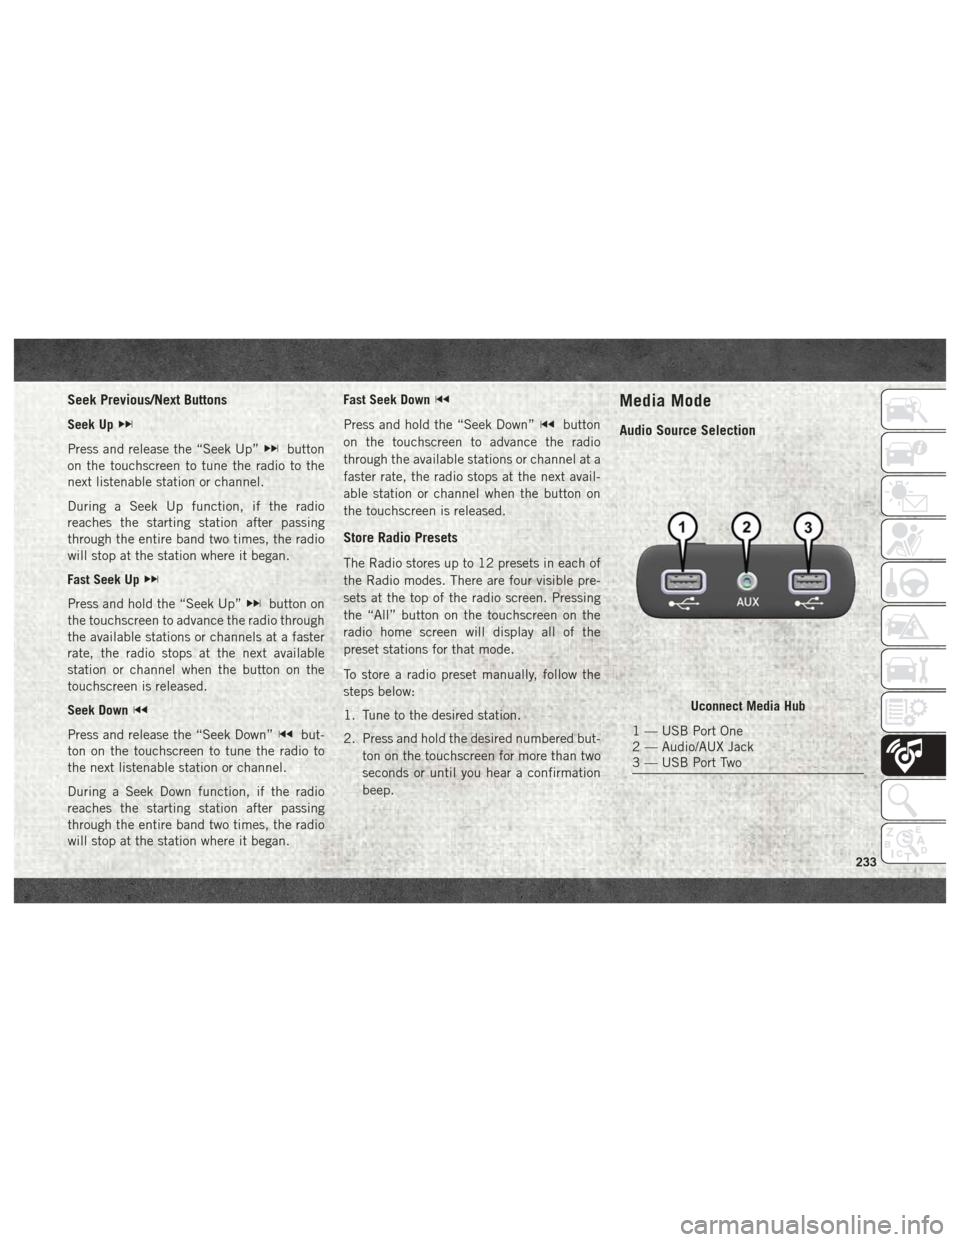
Uconnect Media Hub
1 — USB Port One
2 — Audio/AUX Jack
3 — USB Port Two
233
Page 244 of 298
1. Press the “Apps” button to open the
App screen.
2. Press and hold, then drag the selected App to replace an existing shortcut in the
main menu bar.
The new app shortcut, that was dragged
down onto the main menu bar, will now
be an active App/shortcut.
NOTE:
This feature is only available if the vehicle is
in PARK.
Radio
WARNING!
ALWAYS drive safely with your hands on
the wheel. You have full responsibility and
assume all risks related to the use of the
Uconnect features, SiriusXM Guardian
services, and applications in this vehicle.
Only use Uconnect features and SiriusXM
Guardian services when it is safe to do so.
Failure to do so may result in an accident
involving serious injury or death. • To access the Radio mode, press the “Ra-
dio” button on the touchscreen.
Selecting Radio Stations
• Press the desired radio band (AM, FM or SXM) button on the touchscreen.
Seek Up/Seek Down
• Press the Seek up or down arrow buttons on the touchscreen for less than two seconds
to seek through radio stations.
• Press and hold either arrow button on the touchscreen for more than two seconds to
bypass stations without stopping. The radio
will stop at the next listenable station once
the arrow button on the touchscreen is
released.
Direct Tune
• Tune directly to a radio station by pressing the “Tune” button on the screen, and en-
tering the desired station number. Store Radio Presets Manually
Your radio can store 36 total preset stations,
12 presets per band (AM, FM and SXM). They
are shown at the top of your radio screen. To
see the 12 preset stations per band, press the
arrow button on the touchscreen at the top
right of the screen to toggle between the two
sets of six presets.
To store a radio preset manually, follow the
steps below:
1. Tune to the desired station.
2. Press and hold the desired numbered but-
ton on the touchscreen for more than two
seconds or until you hear a confirmation
beep.
HD Radio — If Equipped
• HD Radio (available on Uconnect 4C/4C NAV) operates similar to conventional radio
except it allows broadcasters to transmit a
high-quality digital signal.
• With an HD radio receiver, the listener is provided with a clear sound that enhances
the listening experience. HD radio can also
transmit data such as song title or artist.
MULTIMEDIA
242
Page 274 of 298
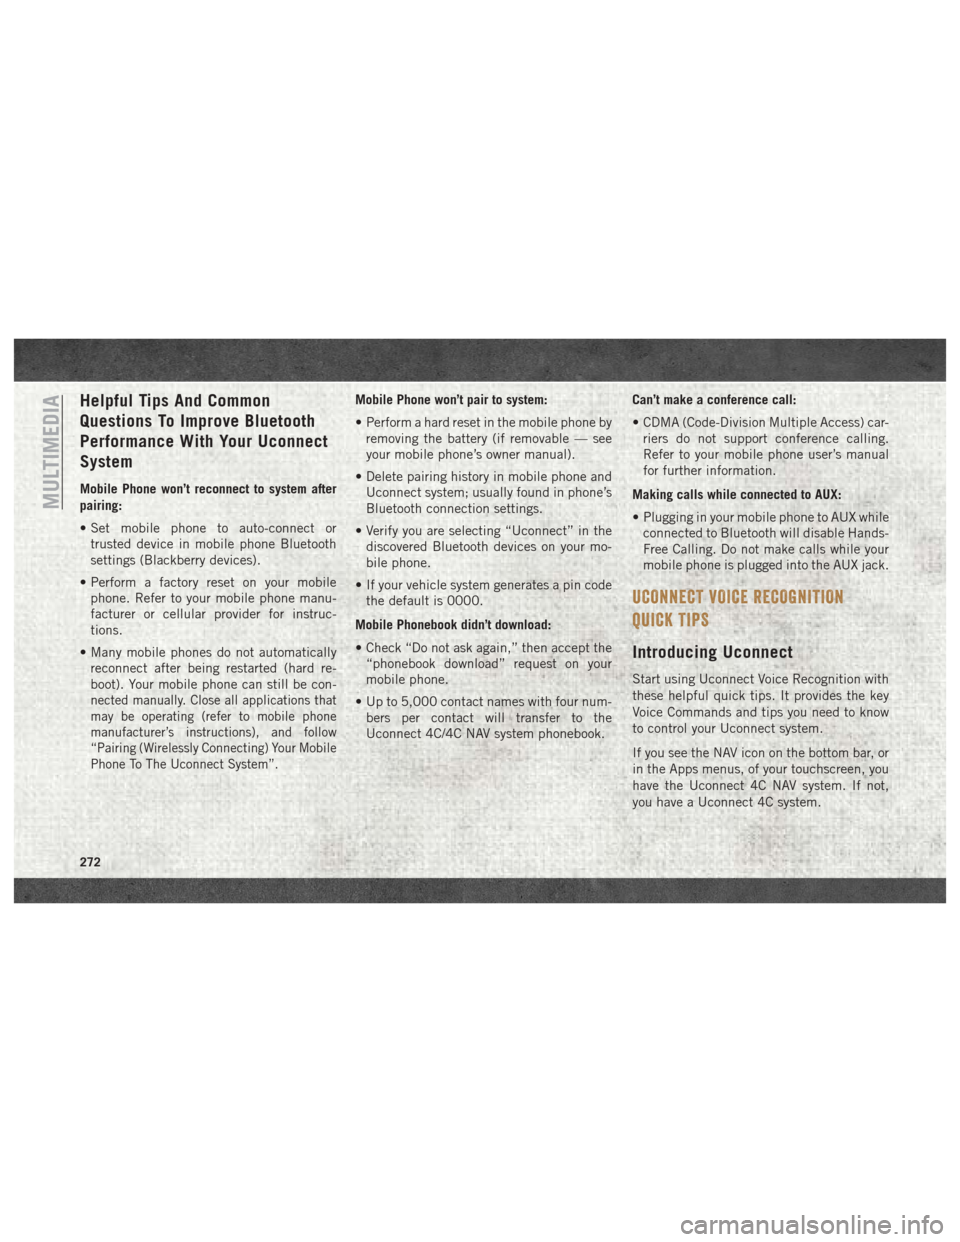
Helpful Tips And Common
Questions To Improve Bluetooth
Performance With Your Uconnect
System
Mobile Phone won’t reconnect to system after
pairing:
• Set mobile phone to auto-connect ortrusted device in mobile phone Bluetooth
settings (Blackberry devices).
• Perform a factory reset on your mobile phone. Refer to your mobile phone manu-
facturer or cellular provider for instruc-
tions.
• Many mobile phones do not automatically reconnect after being restarted (hard re-
boot). Your mobile phone can still be con-
nected manually. Close all applications that
may be operating (refer to mobile phone
manufacturer’s instructions), and follow
“Pairing (Wirelessly Connecting) Your Mobile
Phone To The Uconnect System”.
Mobile Phone won’t pair to system:
• Perform a hard reset in the mobile phone byremoving the battery (if removable — see
your mobile phone’s owner manual).
• Delete pairing history in mobile phone and Uconnect system; usually found in phone’s
Bluetooth connection settings.
• Verify you are selecting “Uconnect” in the discovered Bluetooth devices on your mo-
bile phone.
• If your vehicle system generates a pin code the default is 0000.
Mobile Phonebook didn’t download:
• Check “Do not ask again,” then accept the “phonebook download” request on your
mobile phone.
• Up to 5,000 contact names with four num- bers per contact will transfer to the
Uconnect 4C/4C NAV system phonebook. Can’t make a conference call:
• CDMA (Code-Division Multiple Access) car-
riers do not support conference calling.
Refer to your mobile phone user’s manual
for further information.
Making calls while connected to AUX:
• Plugging in your mobile phone to AUX while connected to Bluetooth will disable Hands-
Free Calling. Do not make calls while your
mobile phone is plugged into the AUX jack.
UCONNECT VOICE RECOGNITION
QUICK TIPS
Introducing Uconnect
Start using Uconnect Voice Recognition with
these helpful quick tips. It provides the key
Voice Commands and tips you need to know
to control your Uconnect system.
If you see the NAV icon on the bottom bar, or
in the Apps menus, of your touchscreen, you
have the Uconnect 4C NAV system. If not,
you have a Uconnect 4C system.
MULTIMEDIA
272
Page 294 of 298
Security Alarm..............63
Service ..................154
Tire Pressure Monitoring
(TPMS) ................65, 72
Turn Signal ..........34, 68, 118
Warning (Instrument
Cluster Description) ........63, 68
Loading Vehicle Tires ...................196
Low Tire Pressure System ..........72
Lug Nuts ............163, 210, 211
Maintenance Plan ..............180
Maintenance Schedule . . . .174, 178, 180
Malfunction Indicator Light (Check Engine) ...............63
Manual, Service ...............286
Memory Feature (Memory Seat) ......21
Memory Seat ..................21
Memory Seats And Radio ..........21
Mirrors .....................30
Memory ..................21
Monitor, Tire Pressure System .......72
Mopar .....................219
Mopar Accessories .............219
Multi-Function Control Lever ........32Navigation
...........259, 261, 262
Navigation System (Uconnect GPS) . . .136
New Vehicle Break-In Period .......127
Occupant Restraints ...........76, 77
Oil Change Indicator ............178
Oil, Engine ..............214, 216
Capacity .................213
Filter ................214, 216
Pressure Warning Light .........63
Oil Pressure Light ...............63
Onboard Diagnostic System .........69
Operating Precautions ............69
Overheating, Engine ............166
Owner's Manual (Operator Manual) . . .286
Panic Alarm ..................15
ParkSense System, Rear ..........136
Passive Entry .................19
Pedals, Adjustable ..............29
Perform Service Indicator, Reset .....179
Personalized Menu Bar ...........241
Pets ......................115
Phone,
Hands-Free (Uconnect) ......264
Phone (Pairing) ...............266
Phone (Uconnect) ..............264
Placard, Tire And Loading Information .196 Power
Distribution Center (Fuses) ......155
Outlet (Auxiliary
Electrical Outlet) ..........49, 51
Power Steering Fluid ............216
Pregnant Women And Seat Belts ......85
Radial Ply Tires ...............201
Radio Presets ........225, 228, 233, 242
Radio 3.0 ...................224
Radio Frequency General Information ......15, 17, 21
Radio Operation ...............232
Radio Screens ................238
Radio (Sound Systems) ..........232
Rain Sensitive Wiper System ........35
Rear ParkSense System ..........136
Rear Seat, Folding ..............21
Recreational Towing ............147
Shifting Into Transfer Case
Neutral (N) ...............148
Shifting Out Of Transfer Case
Neutral (N) ...............150
Release, Hood .................44
Reminder, Seat Belt .............78
Remote Keyless Entry ............15
INDEX
292
Page 295 of 298
Panic Alarm................15
Remote Starting Exit Remote Start Mode ........17
Replacement Tires .............202
Reporting Safety Defects ..........286
Resetting Perform Service Indicator . . .179
Restraint, Head ................26
Restraints, Child ...............96
Safety Checks Inside Vehicle .......116
Safety Checks Outside Vehicle ......117
Safety Defects, Reporting .........286
Safety, Exhaust Gas .............115
Safety Information, Tire ..........191
Safety Tips ..................115
Schedule, Maintenance ..........174
SD Card Port .................257
Seat Belt Adjustable Upper Shoulder
Belt Anchorage ..............81
Automatic Locking Retractor (ALR) . .85
Lap/Shoulder Belt Operation ......80
Lap/Shoulder Belt Untwisting .....81
Pregnant Women .............85
Seat Belt Extender ............84
Seat Belt Reminder ............78
Seat Belt Reminder ..............78 Seat Belts
................78, 116
Adjustable Shoulder Belt ........81
Adjustable Upper Shoulder
Anchorage .................81
Child Restraint ..............96
Extender ..................84
Front Seat ..............78, 80
Inspection ................116
Operating Instructions .........80
Pregnant Women .............85
Reminder .................61
Untwisting Procedure ..........81
Seats ......................21
Adjustment ................21
Easy Entry ..............21, 23
Heated ...................21
Memory ..................21
Rear Folding ...............21
Seatback Release ............21
Tilting ...................21
Vented ...................21
Ventilated .................21
Security Alarm ..............17,
63
Selection Of Coolant (Antifreeze) .............214, 216
Service Assistance .............284
Service Contract ...............285 Service Manuals
...............286
Shifting ....................128
Automatic Transmission ........129
Transfer Case, Shifting Into
Transfer Case Neutral (N) .......148
Transfer Case, Shifting Out Of
Transfer Case Neutral (N) .......150
Shift Lever Override .............167
Signals, Turn ............34, 68, 118
Sirius Satellite Radio Traffic & Weather ............262
Sirius Travel Link ..............263
SiriusXM Guardian .............248
Account ..................248
In Vehicle Features ...........250
Maintaining Your Account .......250
Registration ...............249
Remote Features ............253
Renewing Subscriptions ........250
Send&Go ................255
Vehicle Finder ..............255
Vehicle Health Alert ..........278
Snow Tires ..................204
Sound Systems (Radio) ........257, 259, 261, 262
Spare Tire ............204, 205, 206
Spark Plugs ..................214
293