reset Ram 5500 Chassis Cab 2012 Owner's Manual
[x] Cancel search | Manufacturer: RAM, Model Year: 2012, Model line: 5500 Chassis Cab, Model: Ram 5500 Chassis Cab 2012Pages: 508, PDF Size: 7.01 MB
Page 29 of 508
WARNING!
•Do not start or run an engine in a closed garage or
confined area. Exhaust gas contains Carbon Mon-
oxide (CO) which is odorless and colorless. Car-
bon Monoxide is poisonous and can cause serious
injury or death when inhaled.
•Keep Remote Keyless Entry (RKE) transmitters
away from children. Operation of the Remote Start
System, windows, door locks or other controls
could cause serious injury or death.
Remote Start Abort Message On Electronic Vehicle
Information Center (EVIC) — If Equipped
The following messages will display in the EVIC if the
vehicle fails to remote start or exits remote start prema-
turely:
•Remote Start Aborted — Door Ajar
•Remote Start Aborted — Hood Ajar
•Remote Start Aborted — Fuel Low
•Remote Start Aborted — System Fault
•Remote Start Disabled — Start Vehicle to Reset
The EVIC message stays active until the ignition is turned
to the ON/RUN position.
To Enter Remote Start Mode
Press and release the REMOTE START button
on the RKE transmitter twice within five sec-
onds. The parking lights will flash and the horn
will chirp twice (if programmed). Once the
vehicle has started, the engine will run for 15 minutes.
NOTE:
•If your power door locks were unlocked, Remote Start
will automatically lock the doors.
2
THINGS TO KNOW BEFORE STARTING YOUR VEHICLE 27
Page 39 of 508
To stop the window from going all the way down during
the Auto-Down operation, pull up on the switch briefly.
To open the window part way, press to the first detent
and release it when you want the window to stop.
Auto-Up Feature With Anti-Pinch Protection
(4-Door Models Driver And Front Passenger Door
Only) — If Equipped
Lift the window switch fully upward to the second
detent, release, and the window will go up automatically.
To stop the window from going all the way up during the
Auto Up operation, push down on the switch briefly.
To close the window part way, lift the window switch to
the first detent and release when you want the window to
stop.
NOTE:If the window runs into any obstacle during the
auto-closure, it will reverse direction and then go back
down. Remove the obstacle and use the window switchagain to close the window. Any impact due to rough road
conditions may trigger the auto reverse function unex-
pectedly during auto closure. If this happens, pull the
switch lightly to the first detent and hold to close the
window manually.
WARNING!
There is no anti-pinch protection when the window
is almost closed. Be sure to clear all objects from the
window before closing.
Auto-Up Reset
It may be necessary at some point in time to reactivate the
Auto-up/Auto-down feature. To do so, perform the
following steps:
1. Pull the window switch up to close the window
completely and continue to hold the switch up for an
additional two seconds after the window is closed.
2
THINGS TO KNOW BEFORE STARTING YOUR VEHICLE 37
Page 115 of 508
Things You Should Know About Your Uconnect™
Phone
Uconnect™ Phone Tutorial
To hear a brief tutorial of the system features, press the
button and say “Uconnect™ Tutorial.”
Voice Training
For users experiencing difficulty with the system recog-
nizing their voice commands or numbers, the Uconnect™
Phone Voice Training feature may be used. To enter this
training mode, follow one of the two following proce-
dures:
From outside the Uconnect™ Phone mode (e.g., from
radio mode):
•Press and hold thebutton for five seconds until
the session begins, or,
•Press thebutton and say the “Voice Training,
System Training, or Start Voice Training” command.You can either press the Uconnect™ Phone button to
restore the factory setting or repeat the words and
phrases when prompted by the Uconnect™ Phone. For
best results, the Voice Training session should be com-
pleted when the vehicle is parked with the engine
running, all windows closed, and the blower fan
switched off.
This procedure may be repeated with a new user. The
system will adapt to the last trained voice only.
Reset
•
press thebutton.
•After the “Ready” prompt, and the following beep, say
“Setup”, then “Reset”.
This will delete all phone pairing, phone book entries,
and other settings in all language modes. The System will
prompt you before resetting to factory settings.
3
UNDERSTANDING THE FEATURES OF YOUR VEHICLE 113
Page 118 of 508

SMS
Uconnect™ Phone can read or send new messages on
your phone.
Read Messages:
If you receive a new text message while your phone is
connected to Uconnect™ Phone, an announcement will
be made to notify you that you have a new text message.
If you wish to hear the new message:
•Press thebutton.
•After the “Ready” prompt and the following beep, say
“SMS Read” or “Read Messages.”
•Uconnect™ Phone will play the new text message for
you.
After reading a message, you can “Reply” or “Forward”
the message using Uconnect™ Phone.Send Messages:
You can send messages using Uconnect™ Phone. To send
a new message:
•Press thebutton.
•After the “Ready” prompt and the following beep, say
“SMS Send” or “Send Message.”
•You can either say the message you wish to send or say
“List Messages.” There are 20 preset messages.
To send a message, press the
button while the
system is listing the message and say “Send.”
Uconnect™ Phone will prompt you to say the name or
number of the person you wish to send the message to.
116 UNDERSTANDING THE FEATURES OF YOUR VEHICLE
Page 119 of 508

List of Preset Messages:
1. Yes
2. No
3. Where are you?
4. I need more direction.
5. L O L
6. Why
7. I love you
8. Call me
9. Call me later
10. Thanks11. See You in 15 minutes
12. I am on my way
13. I’ll be late
14. Are you there yet?
15. Where are we meeting?
16. Can this wait?
17. Bye for now
18. When can we meet
19. Send number to call
20. Start without me
3
UNDERSTANDING THE FEATURES OF YOUR VEHICLE 117
Page 144 of 508
The memory buttons 1 and 2 can be programmed to
recall the driver’s seat position, driver’s outside mirror
position, adjustable brake, accelerator pedals position
and radio station preset settings. Your Remote Keyless
Entry (RKE) transmitters can also be programmed to
recall the same positions when the UNLOCK button is
pressed.
NOTE:The power lumbar option is not programmable
with driver memory seats.
Your vehicle was delivered with two RKE transmitters.
One or both RKE transmitters can be linked to either
memory position. The memory system can accommodate
up to two RKE transmitters, each RKE transmitter linked
to either of the two memory positions.Setting Memory Positions And Linking RKE
Transmitter To Memory
NOTE:Each time the S (SET) button and a numbered
button 1 or 2 are pressed, you erase the memory settings
for that button and store a new one.
1. Insert the ignition key, and turn the ignition switch to
the ON/RUN position.
2. Press the driver door MEMORY button number 1 if
you are setting the memory for driver 1, or button
number 2 if you are setting the memory for driver 2. The
system will recall any stored settings. Wait for the system
to complete the memory recall before continuing to
Step 3.
3. Adjust the driver ’s seat, recliner, and driver ’s
sideview mirror to the desired positions.
4. Adjust the power adjustable pedals (if equipped) to
the desired positions.
142 UNDERSTANDING THE FEATURES OF YOUR VEHICLE
Page 145 of 508

5. Turn on the radio and set the radio station presets (up
to 12 AM and 12 FM stations can be set).
6. Turn the ignition switch to the OFF position and
remove the key.
7. Press and release the S (SET) button located on the
driver ’s door.
8. Within five seconds, press and release MEMORY
button 1 or 2 on the driver ’s door. The next step must be
performed within five seconds if you desire to also use a
RKE transmitter to recall memory positions.
9. Press and release the LOCK button on one of the RKE
transmitters.
10. Insert the ignition key, and turn the ignition switch to
the ON position.11. Select “Remote Linked to Memory” in the Electronic
Vehicle Information Center (EVIC) and enter “Yes”. Refer
to “Electronic Vehicle Information Center (EVIC)/
Customer-Programmable Features” in “Understanding
Your Instrument Panel” for further information.
12. Repeat the above steps to set the next memory
position, using the other numbered memory button, or to
link another RKE transmitter to memory.
Memory Position Recall
NOTE:The vehicle must be in PARK to recall memory
positions. If a recall is attempted when the vehicle is not
in PARK, a message will be displayed in the Electronic
Vehicle Information Center (EVIC).
To recall the memory settings for driver one, press
MEMORY button number 1 on the driver ’s door, or the
UNLOCK button on the RKE transmitter linked to
memory position 1.
3
UNDERSTANDING THE FEATURES OF YOUR VEHICLE 143
Page 163 of 508
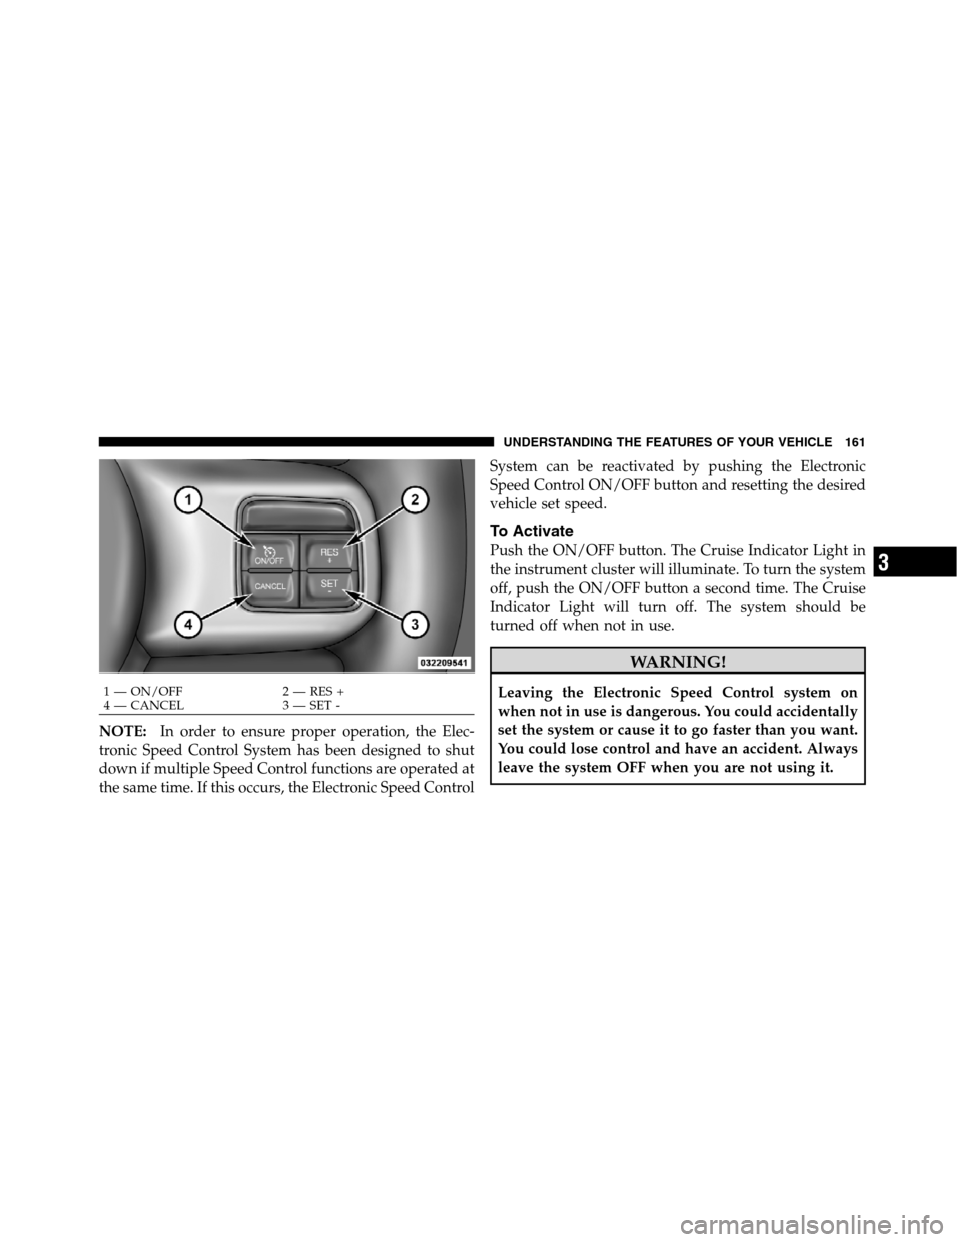
NOTE:In order to ensure proper operation, the Elec-
tronic Speed Control System has been designed to shut
down if multiple Speed Control functions are operated at
the same time. If this occurs, the Electronic Speed ControlSystem can be reactivated by pushing the Electronic
Speed Control ON/OFF button and resetting the desired
vehicle set speed.
To Activate
Push the ON/OFF button. The Cruise Indicator Light in
the instrument cluster will illuminate. To turn the system
off, push the ON/OFF button a second time. The Cruise
Indicator Light will turn off. The system should be
turned off when not in use.
WARNING!
Leaving the Electronic Speed Control system on
when not in use is dangerous. You could accidentally
set the system or cause it to go faster than you want.
You could lose control and have an accident. Always
leave the system OFF when you are not using it.1 — ON/OFF 2 — RES +
4 — CANCEL 3 — SET -
3
UNDERSTANDING THE FEATURES OF YOUR VEHICLE 161
Page 172 of 508
For vehicles equipped with a floor console the cuphold-
ers may be used.
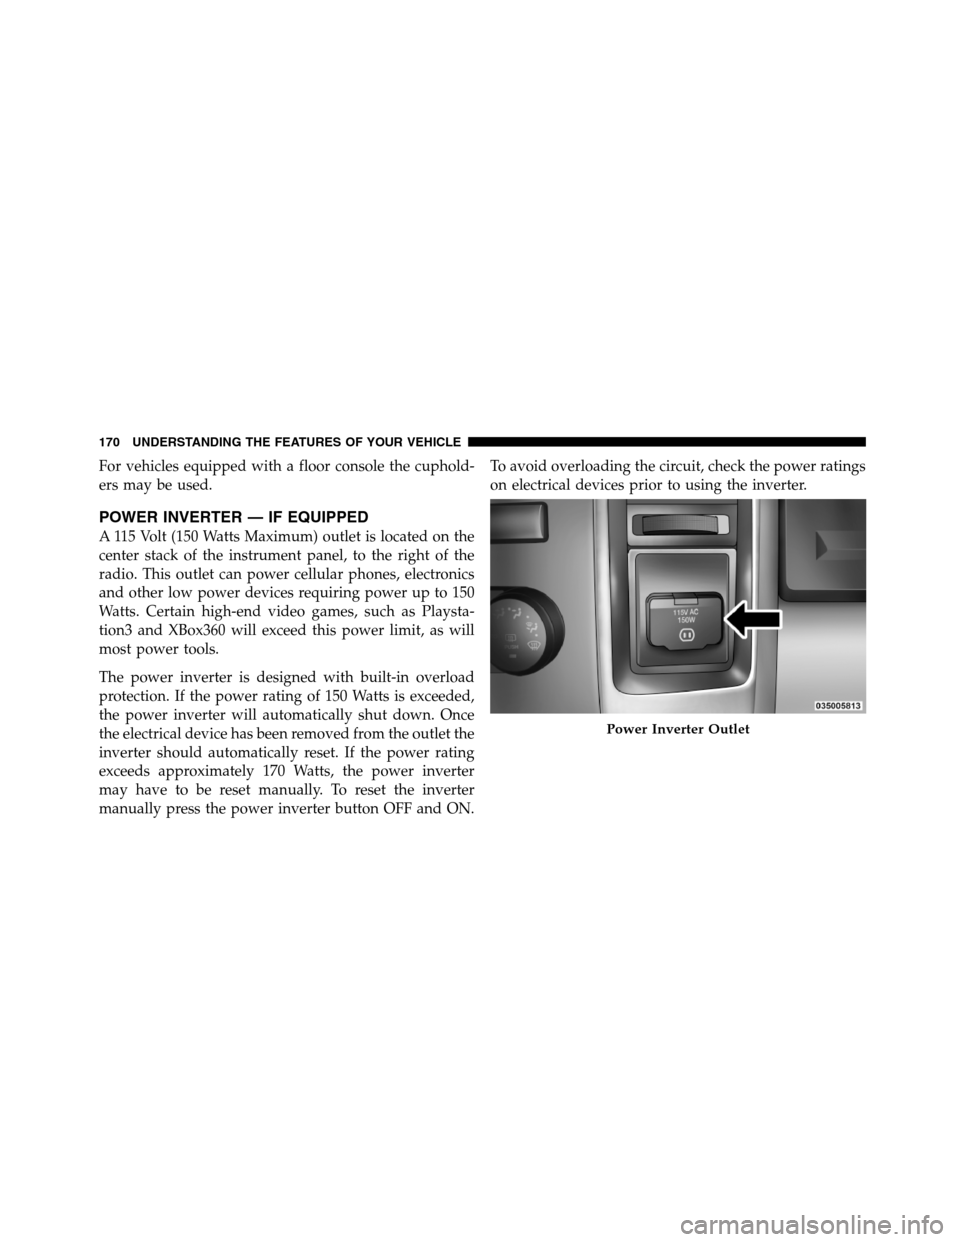
POWER INVERTER — IF EQUIPPED
A 115 Volt (150 Watts Maximum) outlet is located on the
center stack of the instrument panel, to the right of the
radio. This outlet can power cellular phones, electronics
and other low power devices requiring power up to 150
Watts. Certain high-end video games, such as Playsta-
tion3 and XBox360 will exceed this power limit, as will
most power tools.
The power inverter is designed with built-in overload
protection. If the power rating of 150 Watts is exceeded,
the power inverter will automatically shut down. Once
the electrical device has been removed from the outlet the
inverter should automatically reset. If the power rating
exceeds approximately 170 Watts, the power inverter
may have to be reset manually. To reset the inverter
manually press the power inverter button OFF and ON.To avoid overloading the circuit, check the power ratings
on electrical devices prior to using the inverter.
Power Inverter Outlet
170 UNDERSTANDING THE FEATURES OF YOUR VEHICLE
Page 195 of 508
9. SVC (Service) 4WD
The SVC 4WD light monitors the electric shift
four-wheel drive system. If the SVC 4WD light
stays on or comes on during driving, it means
that the four-wheel drive system is not func-
tioning properly and that service is required.
For vehicles equipped with a premium cluster this indi-
cator will display in the Electronic Vehicle Information
Center (EVIC). Refer to ”Electronic Vehicle Information
Center (EVIC) — If Equipped” for further information.
10. TOW/HAUL
The TOW HAUL button is located on the
center stack switch bank. This light will illumi-
nate when TOW HAUL mode is selected11. Vehicle Security Light — If Equipped
This light will flash at a fast rate for approxi-
mately 15 seconds, when the vehicle security
alarm is arming, and then will flash slowly
until the vehicle is disarmed.
12. Oil Pressure Gauge — If Equipped
The pointer should always indicate some oil pressure
when the engine is running. A continuous high or low
reading under normal driving conditions may indicate a
lubrication system malfunction. Immediate service
should be obtained from an authorized dealer.
13. Odometer/Trip Odometer Button
Press this button to toggle between the odometer and the
trip odometer display. Holding the button in resets the
trip odometer reading when in trip mode.
4
UNDERSTANDING YOUR INSTRUMENT PANEL 193