towing RAM CHASSIS CAB 2021 User Guide
[x] Cancel search | Manufacturer: RAM, Model Year: 2021, Model line: CHASSIS CAB, Model: RAM CHASSIS CAB 2021Pages: 463, PDF Size: 21.5 MB
Page 118 of 463

116GETTING TO KNOW YOUR INSTRUMENT PANEL
BLUE INDICATOR LIGHTS
High Beam Indicator Light
This indicator light will illuminate
to indicate that the high beam
headlights are on. With the low beams
activated, push the multifunction
lever forward (toward the front of the vehicle) to
turn on the high beams. Pull the multifunction
lever rearward (toward the rear of the vehicle) to
turn off the high beams. If the high beams are
off, pull the lever toward you for a temporary
high beam on, "flash to pass" scenario.
ONBOARD DIAGNOSTIC SYSTEM — OBD II
Your vehicle is equipped with a sophisticated
Onboard Diagnostic system called OBD II.
This system monitors the performance of the
emissions, engine, and transmission control
systems. When these systems are operating
properly, your vehicle will provide excellent
performance and fuel economy, as well as
engine emissions well within current
government regulations. If any of these systems require service, the OBD
II system will turn on the Malfunction Indicator
Light (MIL). It will also store diagnostic codes
and other information to assist your service
technician in making repairs. Although your
vehicle will usually be drivable and not need
towing, see an authorized dealer for service as
soon as possible.
ONBOARD DIAGNOSTIC SYSTEM
(OBD II) C
YBERSECURITY
Your vehicle is required to have an OBD II and a
connection port to allow access to information
related to the performance of your emissions
controls. Authorized service technicians may
need to access this information to assist with
the diagnosis and service of your vehicle and
emissions system Ú page 220.
CAUTION!
Prolonged driving with the MIL on could
cause further damage to the emission
control system. It could also affect fuel
economy and driveability. The vehicle must
be serviced before any emissions tests can
be performed.
If the MIL is flashing while the vehicle is
running, severe catalytic converter damage
and power loss will soon occur. Immediate
service is required.
WARNING!
ONLY an authorized service technician
should connect equipment to the OBD II
connection port in order to read the VIN,
diagnose, or service your vehicle.
If unauthorized equipment is connected to
the OBD II connection port, such as a
driver-behavior tracking device, it may:
Be possible that vehicle systems,
including safety related systems, could
be impaired or a loss of vehicle control
could occur that may result in an acci -
dent involving serious injury or death.
Access, or allow others to access, infor -
mation stored in your vehicle systems,
including personal information.
21_DPF_OM_EN_USC_t.book Page 116
Page 139 of 463

STARTING AND OPERATING137
NOTE:
A new engine may consume some oil during its
first few thousand miles (kilometers) of opera -
tion. This should be considered a normal part of
the break-in and not interpreted as a problem.
Please check your oil level with the engine oil
indicator often during the break in period. Add
oil as required.
ENGINE BREAK-IN RECOMMENDATIONS —
DIESEL ENGINE
The Cummins® Turbo Diesel engine does not
require a break-in period due to its construction.
Normal operation is allowed, providing the
following recommendations are followed:
Warm up the engine before placing it under
load.
Do not operate the engine at idle for
prolonged periods.
Use the appropriate transmission gear to
prevent engine lugging.
Observe vehicle oil pressure and tempera -
ture indicators.
Check the coolant and oil levels frequently.
Vary throttle position at highway speeds
when carrying or towing significant weight.
NOTE:
Light duty operation such as light trailer towing
or no load operation will extend the time before
the engine is at full efficiency. Reduced fuel
economy and power may be seen at this time.
For additional vehicle break-in requirements
Ú page 205.
Because of the construction of the Cummins®
Turbo Diesel engine, engine run-in is enhanced
by loaded operating conditions which allow the
engine parts to achieve final finish and fit during
the first 6,000 miles (10,000 km).
PARKING BRAKE
Before leaving the vehicle, make sure that the
parking brake is fully applied. Also, be certain to
leave the transmission in PARK.
The foot operated parking brake is located
below the lower left corner of the instrument
panel. To apply the parking brake, firmly push
the parking brake pedal fully. To release the
parking brake, pull the parking brake release
handle.
Parking Brake Release
CAUTION!
Never use Non-Detergent Oil or Straight
Mineral Oil in the engine or damage may result.
4
21_DPF_OM_EN_USC_t.book Page 137
Page 140 of 463

138STARTING AND OPERATING
When the parking brake is applied with the
ignition switch ON, the “Brake Warning Light” in
the instrument cluster will illuminate.
NOTE:
When the parking brake is applied and the
transmission is placed in gear, the “Brake
Warning Light” will flash. If vehicle speed is
detected, a chime will sound to alert the
driver. Fully release the parking brake before
attempting to move the vehicle.
This light only shows that the parking brake is
applied. It does not show the degree of brake
application.
When parking on a hill, it is important to turn the
front wheels toward the curb on a downhill
grade and away from the curb on an uphill
grade. Apply the parking brake before placing
the gear selector in PARK, otherwise the load on
the transmission locking mechanism may make
it difficult to move the gear selector out of PARK.
The parking brake should always be applied
whenever the driver is not in the vehicle.
DIESEL EXHAUST BRAKE
(ENGINE BRAKING)
The purpose of the exhaust brake (engine
braking) feature is to supply negative (braking)
torque from the engine. Typically, the engine
braking is used for, but not limited to, vehicle
towing applications where vehicle braking can
be achieved by the internal engine power,
thereby sparing the mechanical brakes of the
vehicle.
Benefits of the exhaust brake are:
Vehicle driving control.
Reduced brake fade.
Longer brake life.
Faster cab warm-up.
WARNING!
Never use the PARK position as a substi -
tute for the parking brake. Always apply the
parking brake fully when parked to guard
against vehicle movement and possible
injury or damage.
Never leave children alone in a vehicle,
or with access to an unlocked vehicle.
Leaving unattended children in a vehicle is
dangerous for a number of reasons. A child
or others could be seriously or fatally injured.
Do not leave the key fob in or near the
vehicle, or in a location accessible to chil -
dren, and do not leave a vehicle equipped
with Keyless Enter-N-Go in the ACC or
ON/RUN mode. A child could operate power
windows, other controls, or move the vehicle.
Be sure the parking brake is fully disen -
gaged before driving; failure to do so can
lead to brake failure and a collision.
Always fully apply the parking brake when
leaving your vehicle or it may roll and cause
damage or injury. Also, be certain to leave
the transmission in PARK. Failure to do so
may cause the vehicle to roll and cause
damage or injury.
CAUTION!
If the Brake System Warning Light remains on
with the parking brake released, a brake
system malfunction is indicated. Have the
brake system serviced by an authorized
dealer immediately.
21_DPF_OM_EN_USC_t.book Page 138
Page 146 of 463

144STARTING AND OPERATING
The following indicators should be used to
ensure that you have properly engaged the
transmission into the PARK position:
Look at the transmission gear position
display and verify that it indicates the PARK
position (P), and is not blinking.
With brake pedal released, verify that the
gear selector will not move out of PARK.
REVERSE (R)
This range is for moving the vehicle backward.
Shift into REVERSE only after the vehicle has
come to a complete stop.
NEUTRAL (N)
Use this range when the vehicle is standing for
prolonged periods with the engine running. Apply
the parking brake and shift the transmission into
PARK if you must exit the vehicle.
DRIVE (D)
This range should be used for most city and
highway driving. It provides the smoothest
upshifts and downshifts, and the best fuel
economy. The transmission automatically
upshifts through all forward gears.When frequent transmission shifting occurs
(such as when operating the vehicle under
heavy loading conditions, in hilly terrain,
traveling into strong head winds, or while towing
a heavy trailer), select TOW/HAUL mode or use
the Electronic Range Select (ERS) shift control
to select a lower gear range
Úpage 145. Under
these conditions, using a lower gear range will
improve performance and extend transmission
life by reducing excessive shifting and heat
build-up.
During extremely cold temperatures
(-22°F [-30°C] or below), transmission
operation may be modified depending on
engine and transmission temperature as
well as vehicle speed. Normal operation will
resume once the transmission temperature
has risen to a suitable level.
WARNING!
Do not coast in NEUTRAL and never turn off the
ignition to coast down a hill. These are unsafe
practices that limit your response to changing
traffic or road conditions. You might lose
control of the vehicle and have a collision.
CAUTION!
Towing the vehicle, coasting, or driving for any
other reason with the transmission in NEUTRAL
can cause severe transmission damage.
For Towing A Disabled Vehicle Ú page 350.
For Recreational Towing Ú page 215.
21_DPF_OM_EN_USC_t.book Page 144
Page 148 of 463

146STARTING AND OPERATING
ERS Control
To exit ERS mode, simply push and hold the
GEAR + switch until the gear limit display
disappears from the instrument cluster.
When to Use TOW/HAUL Mode
When driving in hilly areas, towing a trailer, carrying
a heavy load, etc., and frequent transmission
shifting occurs, push the TOW/HAUL switch to
activate TOW/HAUL mode. This will improve
performance and reduce the potential for
transmission overheating or failure due to
excessive shifting.
TOW/HAUL Switch
The “TOW/HAUL Indicator Light” will illuminate in
the instrument cluster to indicate that TOW/HAUL
mode has been activated. Pushing the switch a
second time restores normal operation. Normal
operation is always the default at engine start-up.
If TOW/HAUL mode is desired, the switch must be
pushed each time the engine is started.
SIX-SPEED AUTOMATIC
T
RANSMISSION — IF EQUIPPED
Chassis Cab models may use either the
AS66RC or AS69RC transmission (which are
equipped with a Power Take-Off (PTO) access
cover on the side of the transmission case).
The transmission gear position display
(located in the instrument cluster) indicates the
transmission gear range. The gear selector is
mounted on the right side of the steering column.
You must press the brake pedal to move the gear
selector out of PARK
Ú
page 141. Pull the gear
selector toward you when shifting into REVERSE
or PARK, or when shifting out of PARK.
1 — GEAR + Switch
2 — GEAR – Switch
WARNING!
Do not downshift for additional engine
braking on a slippery surface. The drive
wheels could lose their grip and the vehicle
could skid, causing a collision or personal
injury.
WARNING!
Do not use the TOW/HAUL feature when driving
in icy or slippery conditions. The increased
engine braking can cause the rear wheels to
slide, and the vehicle to swing around with the
possible loss of vehicle control, which may
cause an accident possibly resulting in
personal injury or death.
21_DPF_OM_EN_USC_t.book Page 146
Page 151 of 463
STARTING AND OPERATING149
REVERSE (R)
This range is for moving the vehicle backward.
Shift into REVERSE only after the vehicle has
come to a complete stop.
NEUTRAL (N)
Use this range when the vehicle is standing
for prolonged periods with the engine running.
The engine may be started in this range. Apply
the parking brake and shift the transmission
into PARK if you must exit the vehicle. DRIVE (D)
This range should be used for most city and
highway driving. It provides the smoothest
upshifts and downshifts, and the best fuel
economy. The transmission automatically
upshifts through all forward gears.
When frequent transmission shifting occurs
(such as when operating the vehicle under
heavy loading conditions, in hilly terrain,
traveling into strong head winds, or while towing
a heavy trailer), select TOW/HAUL mode or use
the Electronic Range Select (ERS) shift control
to select a lower gear range
Úpage 150. Under
these conditions, using a lower gear range will
improve performance and extend transmission
life by reducing excessive shifting and heat
buildup.
If the transmission temperature exceeds normal
operating limits, the powertrain controller will
modify the transmission shift schedule and
expand the range of torque converter clutch
engagement. This is done to prevent
transmission damage due to overheating.
If the transmission becomes extremely hot or is
in danger of overheating, the “Transmission
Temperature Warning Light” may illuminate and
the transmission may operate differently until
the transmission cools down.
NOTE:
Use caution when operating a heavily loaded
vehicle at low speeds (such as towing a trailer
up a steep grade, or in stop-and-go traffic)
during hot weather. In these conditions, torque
converter slip can impose a significant addi
-
tional heat load on the cooling system. Down -
shifting the transmission to the lowest possible
gear (when climbing a grade), or shifting to
NEUTRAL (when stopped in heavy traffic) can
help to reduce this excess heat generation.
During cold temperatures, transmission
operation may be modified depending on
engine and transmission temperature as well
as vehicle speed. This feature improves
warm-up time of the engine and transmission to
achieve maximum efficiency. Engagement of
the torque converter clutch is inhibited until the
transmission fluid is warm Ú page 151.
WARNING!
Do not coast in NEUTRAL and never turn off the
ignition to coast down a hill. These are unsafe
practices that limit your response to changing
traffic or road conditions. You might lose
control of the vehicle and have a collision.
CAUTION!
Towing the vehicle, coasting, or driving for any
other reason with the transmission in NEUTRAL
can cause severe transmission damage.
For Towing A Disabled Vehicle Ú page 350.
For Recreational Towing Ú page 215.
4
21_DPF_OM_EN_USC_t.book Page 149
Page 154 of 463
152STARTING AND OPERATING
If the vehicle has not been driven for several
days, the first few seconds of operation after
shifting the transmission into gear may seem
sluggish. This is due to the fluid partially
draining from the torque converter into the
transmission. This condition is normal and
will not cause damage to the transmission.
The torque converter will refill within
five seconds after starting the engine.
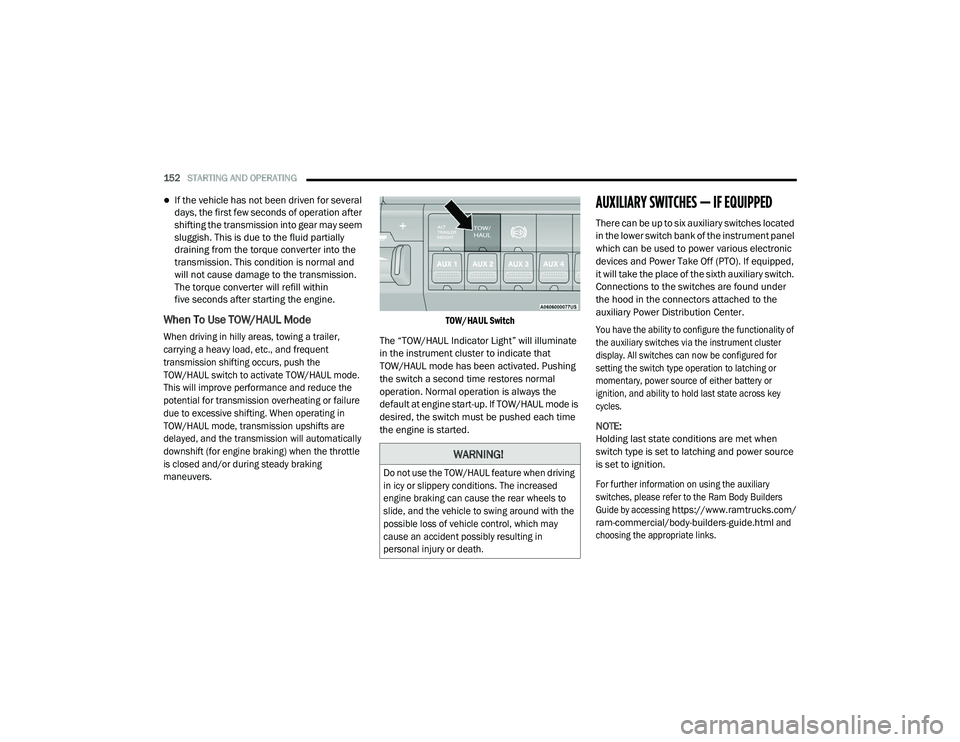
When To Use TOW/HAUL Mode
When driving in hilly areas, towing a trailer,
carrying a heavy load, etc., and frequent
transmission shifting occurs, push the
TOW/HAUL switch to activate TOW/HAUL mode.
This will improve performance and reduce the
potential for transmission overheating or failure
due to excessive shifting. When operating in
TOW/HAUL mode, transmission upshifts are
delayed, and the transmission will automatically
downshift (for engine braking) when the throttle
is closed and/or during steady braking
maneuvers. TOW/HAUL Switch
The “TOW/HAUL Indicator Light” will illuminate
in the instrument cluster to indicate that
TOW/HAUL mode has been activated. Pushing
the switch a second time restores normal
operation. Normal operation is always the
default at engine start-up. If TOW/HAUL mode is
desired, the switch must be pushed each time
the engine is started.
AUXILIARY SWITCHES — IF EQUIPPED
There can be up to six auxiliary switches located
in the lower switch bank of the instrument panel
which can be used to power various electronic
devices and Power Take Off (PTO). If equipped,
it will take the place of the sixth auxiliary switch.
Connections to the switches are found under
the hood in the connectors attached to the
auxiliary Power Distribution Center.
You have the ability to configure the functionality of
the auxiliary switches via the instrument cluster
display. All switches can now be configured for
setting the switch type operation to latching or
momentary, power source of either battery or
ignition, and ability to hold last state across key
cycles.
NOTE:
Holding last state conditions are met when
switch type is set to latching and power source
is set to ignition.
For further information on using the auxiliary
switches, please refer to the Ram Body Builders
Guide by accessing
https://www.ramtrucks.com/
ram-commercial/body-builders-guide.html
and
choosing the appropriate links.
WARNING!
Do not use the TOW/HAUL feature when driving
in icy or slippery conditions. The increased
engine braking can cause the rear wheels to
slide, and the vehicle to swing around with the
possible loss of vehicle control, which may
cause an accident possibly resulting in
personal injury or death.
21_DPF_OM_EN_USC_t.book Page 152
Page 155 of 463
STARTING AND OPERATING153
(Continued)
FOUR-WHEEL DRIVE OPERATION — IF
EQUIPPED
Four-wheel drive trucks are equipped with
either a manually shifted transfer case or an
electronically shifted transfer case.
ELECTRONICALLY SHIFTED TRANSFER
C
ASE (EIGHT SPEED TRANSMISSION) —
I
F EQUIPPED
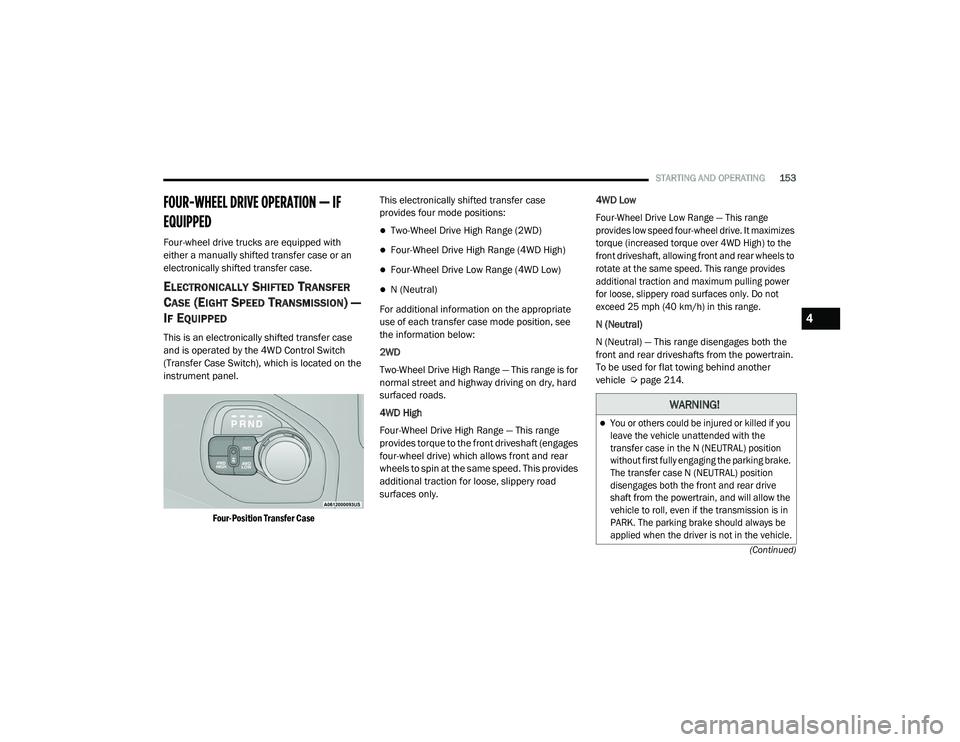
This is an electronically shifted transfer case
and is operated by the 4WD Control Switch
(Transfer Case Switch), which is located on the
instrument panel.
Four-Position Transfer Case
This electronically shifted transfer case
provides four mode positions:
Two-Wheel Drive High Range (2WD)
Four-Wheel Drive High Range (4WD High)
Four-Wheel Drive Low Range (4WD Low)
N (Neutral)
For additional information on the appropriate
use of each transfer case mode position, see
the information below:
2WD
Two-Wheel Drive High Range — This range is for
normal street and highway driving on dry, hard
surfaced roads.
4WD High
Four-Wheel Drive High Range — This range
provides torque to the front driveshaft (engages
four-wheel drive) which allows front and rear
wheels to spin at the same speed. This provides
additional traction for loose, slippery road
surfaces only. 4WD Low
Four-Wheel Drive Low Range — This range
provides low speed four-wheel drive. It maximizes
torque (increased torque over 4WD High) to the
front driveshaft, allowing front and rear wheels to
rotate at the same speed. This range provides
additional traction and maximum pulling power
for loose, slippery road surfaces only. Do not
exceed 25 mph (40 km/h) in this range.
N (Neutral)
N (Neutral) — This range disengages both the
front and rear driveshafts from the powertrain.
To be used for flat towing behind another
vehicle Ú
page 214.
WARNING!
You or others could be injured or killed if you
leave the vehicle unattended with the
transfer case in the N (NEUTRAL) position
without first fully engaging the parking brake.
The transfer case N (NEUTRAL) position
disengages both the front and rear drive
shaft from the powertrain, and will allow the
vehicle to roll, even if the transmission is in
PARK. The parking brake should always be
applied when the driver is not in the vehicle.
4
21_DPF_OM_EN_USC_t.book Page 153
Page 156 of 463
154STARTING AND OPERATING
This electronically shifted transfer case is
designed to be driven in the two-wheel drive
position (2WD) for normal street and highway
conditions on dry hard surfaced roads. Driving
the vehicle in two-wheel drive will have greater
fuel economy benefits as the front axle is not
engaged in two-wheel drive.
When additional traction is required, the
transfer case 4WD High and 4WD Low positions
can be used to maximize torque to the front
driveshaft, forcing the front and rear wheels to
rotate at the same speed. This is accomplished
by pushing the desired position on the
four-wheel drive control switch.
For specific shifting instructions Ú page 159.
The 4WD High and 4WD Low positions are
designed for loose, slippery road surfaces only.
Driving in the 4WD High and 4WD Low positions
on dry, hard surfaced roads may cause increased
tire wear and damage to the driveline
components.
NOTE:
The transfer case Neutral button is located in the
center of the four-wheel drive Control Switch and
is pushed by using a ballpoint pen or similar
object. The transfer case Neutral position is to be
used for recreational towing only
Ú
page 214.
Transfer Case Position Indicator Lights
The Transfer Case Position Indicator Lights
(4WD High and 4WD Low) are located in the
instrument cluster and indicate the current and
desired transfer case selection. When you
select a different transfer case position, the
indicator lights will do the following:
If All Of The Following Shift Conditions Are Met:
1. The current position indicator light will turn off.
2. The selected position indicator light will flash until the transfer case completes the
shift. 3. When the shift is complete, the indicator
light for the selected position will stop
flashing and remain on.
If One Or More Of The Following Shift Conditions
Are Not Met:
1. The indicator light for the current position will remain on.
2. The newly selected position indicator light will continue to flash.
3. The transfer case will not shift.
NOTE:
Before retrying a selection, make certain that all
the necessary requirements for selecting a new
transfer case position have been met. To retry
the selection, push the current position, wait
five seconds, and retry selection Ú page 159.
The “SVC 4WD Warning Light” monitors the
electronically shifted four-wheel drive system.
If this light remains on after engine start up or
illuminates during driving, it means that the
four-wheel drive system is not functioning
properly and that service is required.
The transmission may not engage PARK if
the vehicle is moving. Always bring the
vehicle to a complete stop before shifting to
PARK, and verify that the transmission gear
position indicator solidly indicates PARK (P)
without blinking. Ensure that the vehicle is
completely stopped, and the PARK position
is properly indicated, before exiting the
vehicle.
WARNING! (Continued)
21_DPF_OM_EN_USC_t.book Page 154
Page 159 of 463
STARTING AND OPERATING157
For additional information on the appropriate
use of each transfer case mode position, see
the information below:
2WD
Two-Wheel Drive High Range — This range is for
normal street and highway driving on dry, hard
surfaced roads.
4WD HIGH
Four-Wheel Drive High Range — This range
maximizes torque to the front driveshaft, forcing
the front and rear wheels to rotate at the same
speed. This range provides additional traction
for loose, slippery road surfaces only.
4WD LOW
Four-Wheel Drive Low Range — This range
provides low speed four-wheel drive.
It maximizes torque to the front driveshaft,
forcing the front and rear wheels to rotate at the
same speed. This range provides additional
traction and maximum pulling power for loose,
slippery road surfaces only. Do not exceed
25 mph (40 km/h). N (Neutral)
N (Neutral) — This range disengages both the
front and rear driveshafts from the powertrain.
To be used for flat towing behind another
vehicle Ú
page 214.
This electronically shifted transfer case is
designed to be driven in the two-wheel drive
position (2WD) for normal street and highway
conditions on dry, hard surfaced roads. When additional traction is required, the
transfer case 4WD High and 4WD Low positions
can be used to maximize torque to the front
driveshaft, forcing the front and rear wheels to
rotate at the same speed. This is accomplished
by rotating the four-wheel drive Control Switch
to the desired position.
For specific shifting instructions Ú
page 159.
The 4WD High and 4WD Low positions are
designed for loose, slippery road surfaces only.
Driving in the 4WD High and 4WD Low positions
on dry hard surfaced roads may cause increased
tire wear and damage to the driveline
components.
NOTE:
The transfer case NEUTRAL button is located on
the lower left hand corner of the four-wheel drive
Control Switch. The transfer case NEUTRAL posi -
tion is to be used for recreational towing only
Ú
page 214.
WARNING!
You or others could be injured or killed if you
leave the vehicle unattended with the transfer
case in the N (NEUTRAL) position without first
fully engaging the parking brake. The transfer
case N (NEUTRAL) position disengages both the
front and rear drive shafts from the powertrain
and will allow the vehicle to roll, even if the
transmission is in PARK. The parking brake
should always be applied when the driver is
not in the vehicle.
4
21_DPF_OM_EN_USC_t.book Page 157