ESP RAM CHASSIS CAB 2022 Owner's Manual
[x] Cancel search | Manufacturer: RAM, Model Year: 2022, Model line: CHASSIS CAB, Model: RAM CHASSIS CAB 2022Pages: 428, PDF Size: 20.18 MB
Page 162 of 428
160STARTING AND OPERATING
distance to the rear of the vehicle. These settings
can be adjusted within Uconnect Settings
Ú page 191.
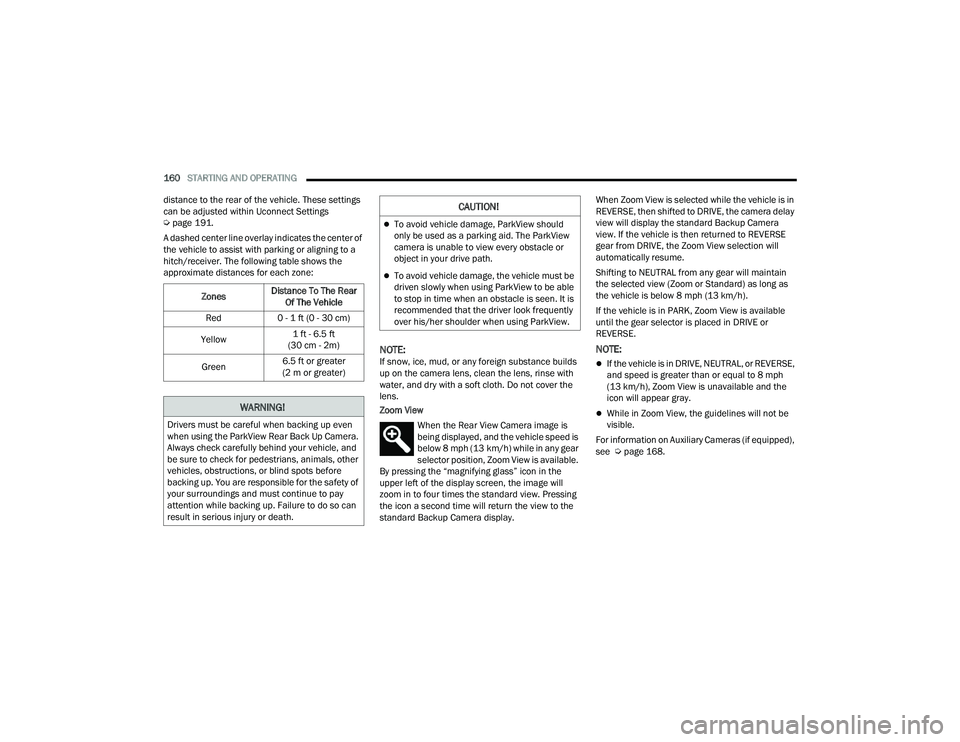
A dashed center line overlay indicates the center of
the vehicle to assist with parking or aligning to a
hitch/receiver. The following table shows the
approximate distances for each zone:
NOTE:If snow, ice, mud, or any foreign substance builds
up on the camera lens, clean the lens, rinse with
water, and dry with a soft cloth. Do not cover the
lens.
Zoom View When the Rear View Camera image is
being displayed, and the vehicle speed is
below 8 mph (13 km/h) while in any gear
selector position, Zoom View is available.
By pressing the “magnifying glass” icon in the
upper left of the display screen, the image will
zoom in to four times the standard view. Pressing
the icon a second time will return the view to the
standard Backup Camera display. When Zoom View is selected while the vehicle is in
REVERSE, then shifted to DRIVE, the camera delay
view will display the standard Backup Camera
view. If the vehicle is then returned to REVERSE
gear from DRIVE, the Zoom View selection will
automatically resume.
Shifting to NEUTRAL from any gear will maintain
the selected view (Zoom or Standard) as long as
the vehicle is below 8 mph (13 km/h).
If the vehicle is in PARK, Zoom View is available
until the gear selector is placed in DRIVE or
REVERSE.
NOTE:
If the vehicle is in DRIVE, NEUTRAL, or REVERSE,
and speed is greater than or equal to 8 mph
(13 km/h), Zoom View is unavailable and the
icon will appear gray.
While in Zoom View, the guidelines will not be
visible.
For information on Auxiliary Cameras (if equipped),
see Ú page 168.
Zones
Distance To The Rear
Of The Vehicle
Red 0 - 1 ft (0 - 30 cm)
Yellow 1 ft - 6.5 ft
(30 cm - 2m)
Green 6.5 ft or greater
(2 m or greater)WARNING!
Drivers must be careful when backing up even
when using the ParkView Rear Back Up Camera.
Always check carefully behind your vehicle, and
be sure to check for pedestrians, animals, other
vehicles, obstructions, or blind spots before
backing up. You are responsible for the safety of
your surroundings and must continue to pay
attention while backing up. Failure to do so can
result in serious injury or death.
CAUTION!
To avoid vehicle damage, ParkView should
only be used as a parking aid. The ParkView
camera is unable to view every obstacle or
object in your drive path.
To avoid vehicle damage, the vehicle must be
driven slowly when using ParkView to be able
to stop in time when an obstacle is seen. It is
recommended that the driver look frequently
over his/her shoulder when using ParkView.
22_DPF_OM_EN_USC_t.book Page 160
Page 163 of 428
STARTING AND OPERATING161
SURROUND VIEW CAMERA SYSTEM —
IF EQUIPPED
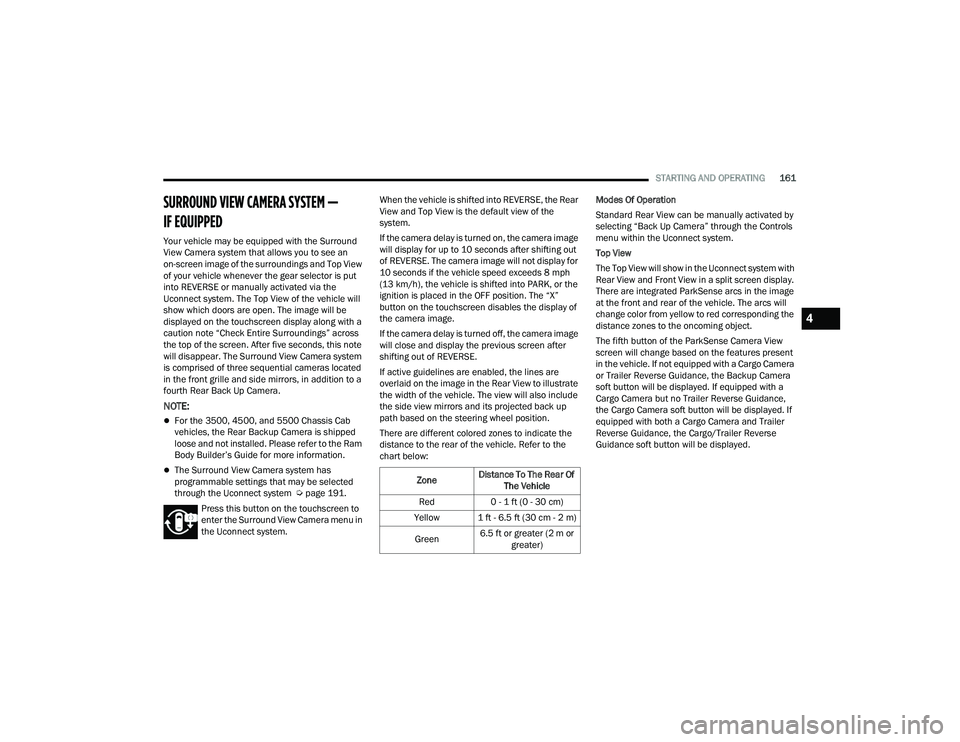
Your vehicle may be equipped with the Surround
View Camera system that allows you to see an
on-screen image of the surroundings and Top View
of your vehicle whenever the gear selector is put
into REVERSE or manually activated via the
Uconnect system. The Top View of the vehicle will
show which doors are open. The image will be
displayed on the touchscreen display along with a
caution note “Check Entire Surroundings” across
the top of the screen. After five seconds, this note
will disappear. The Surround View Camera system
is comprised of three sequential cameras located
in the front grille and side mirrors, in addition to a
fourth Rear Back Up Camera.
NOTE:
For the 3500, 4500, and 5500 Chassis Cab
vehicles, the Rear Backup Camera is shipped
loose and not installed. Please refer to the Ram
Body Builder’s Guide for more information.
The Surround View Camera system has
programmable settings that may be selected
through the Uconnect system Ú page 191.
Press this button on the touchscreen to
enter the Surround View Camera menu in
the Uconnect system. When the vehicle is shifted into REVERSE, the Rear
View and Top View is the default view of the
system.
If the camera delay is turned on, the camera image
will display for up to 10 seconds after shifting out
of REVERSE. The camera image will not display for
10 seconds if the vehicle speed exceeds 8 mph
(13 km/h), the vehicle is shifted into PARK, or the
ignition is placed in the OFF position. The “X”
button on the touchscreen disables the display of
the camera image.
If the camera delay is turned off, the camera image
will close and display the previous screen after
shifting out of REVERSE.
If active guidelines are enabled, the lines are
overlaid on the image in the Rear View to illustrate
the width of the vehicle. The view will also include
the side view mirrors and its projected back up
path based on the steering wheel position.
There are different colored zones to indicate the
distance to the rear of the vehicle. Refer to the
chart below:
Modes Of Operation
Standard Rear View can be manually activated by
selecting “Back Up Camera” through the Controls
menu within the Uconnect system.
Top View
The Top View will show in the Uconnect system with
Rear View and Front View in a split screen display.
There are integrated ParkSense arcs in the image
at the front and rear of the vehicle. The arcs will
change color from yellow to red corresponding the
distance zones to the oncoming object.
The fifth button of the ParkSense Camera View
screen will change based on the features present
in the vehicle. If not equipped with a Cargo Camera
or Trailer Reverse Guidance, the Backup Camera
soft button will be displayed. If equipped with a
Cargo Camera but no Trailer Reverse Guidance,
the Cargo Camera soft button will be displayed. If
equipped with both a Cargo Camera and Trailer
Reverse Guidance, the Cargo/Trailer Reverse
Guidance soft button will be displayed.Zone
Distance To The Rear Of
The Vehicle
Red 0 - 1 ft (0 - 30 cm)
Yellow 1 ft - 6.5 ft (30 cm - 2 m)
Green 6.5 ft or greater (2 m or
greater)
4
22_DPF_OM_EN_USC_t.book Page 161
Page 166 of 428
164STARTING AND OPERATING
NOTE:
If the vehicle is in DRIVE, NEUTRAL, or REVERSE,
and speed is greater than or equal to 8 mph
(13 km/h), Zoom View is unavailable and the
icon will appear gray.
While in Zoom View, the dynamic centerline will
not be visible.
Forward Facing Camera With Tire Lines —
If Equipped
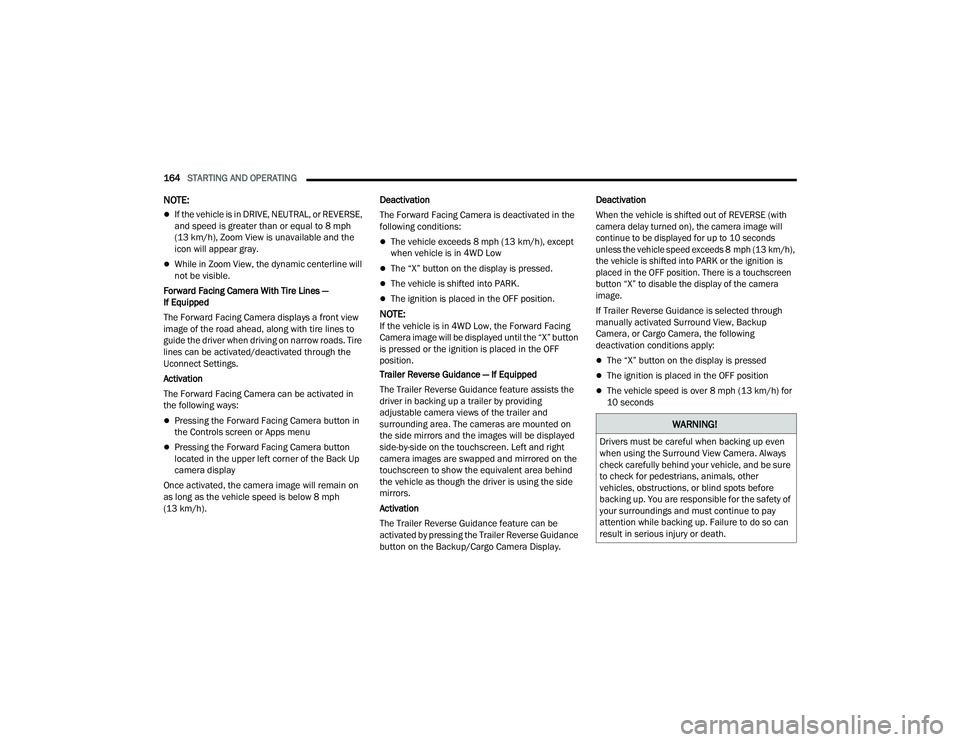
The Forward Facing Camera displays a front view
image of the road ahead, along with tire lines to
guide the driver when driving on narrow roads. Tire
lines can be activated/deactivated through the
Uconnect Settings.
Activation
The Forward Facing Camera can be activated in
the following ways:
Pressing the Forward Facing Camera button in
the Controls screen or Apps menu
Pressing the Forward Facing Camera button
located in the upper left corner of the Back Up
camera display
Once activated, the camera image will remain on
as long as the vehicle speed is below 8 mph
(13 km/h). Deactivation
The Forward Facing Camera is deactivated in the
following conditions:
The vehicle exceeds 8 mph (13 km/h), except
when vehicle is in 4WD Low
The “X” button on the display is pressed.
The vehicle is shifted into PARK.
The ignition is placed in the OFF position.
NOTE:If the vehicle is in 4WD Low, the Forward Facing
Camera image will be displayed until the “X” button
is pressed or the ignition is placed in the OFF
position.
Trailer Reverse Guidance — If Equipped
The Trailer Reverse Guidance feature assists the
driver in backing up a trailer by providing
adjustable camera views of the trailer and
surrounding area. The cameras are mounted on
the side mirrors and the images will be displayed
side-by-side on the touchscreen. Left and right
camera images are swapped and mirrored on the
touchscreen to show the equivalent area behind
the vehicle as though the driver is using the side
mirrors.
Activation
The Trailer Reverse Guidance feature can be
activated by pressing the Trailer Reverse Guidance
button on the Backup/Cargo Camera Display. Deactivation
When the vehicle is shifted out of REVERSE (with
camera delay turned on), the camera image will
continue to be displayed for up to 10 seconds
unless the vehicle speed exceeds 8 mph (13 km/h),
the vehicle is shifted into PARK or the ignition is
placed in the OFF position. There is a touchscreen
button “X” to disable the display of the camera
image.
If Trailer Reverse Guidance is selected through
manually activated Surround View, Backup
Camera, or Cargo Camera, the following
deactivation conditions apply:
The “X” button on the display is pressed
The ignition is placed in the OFF position
The vehicle speed is over 8 mph (13 km/h) for
10 seconds
WARNING!
Drivers must be careful when backing up even
when using the Surround View Camera. Always
check carefully behind your vehicle, and be sure
to check for pedestrians, animals, other
vehicles, obstructions, or blind spots before
backing up. You are responsible for the safety of
your surroundings and must continue to pay
attention while backing up. Failure to do so can
result in serious injury or death.
22_DPF_OM_EN_USC_t.book Page 164
Page 169 of 428
STARTING AND OPERATING167
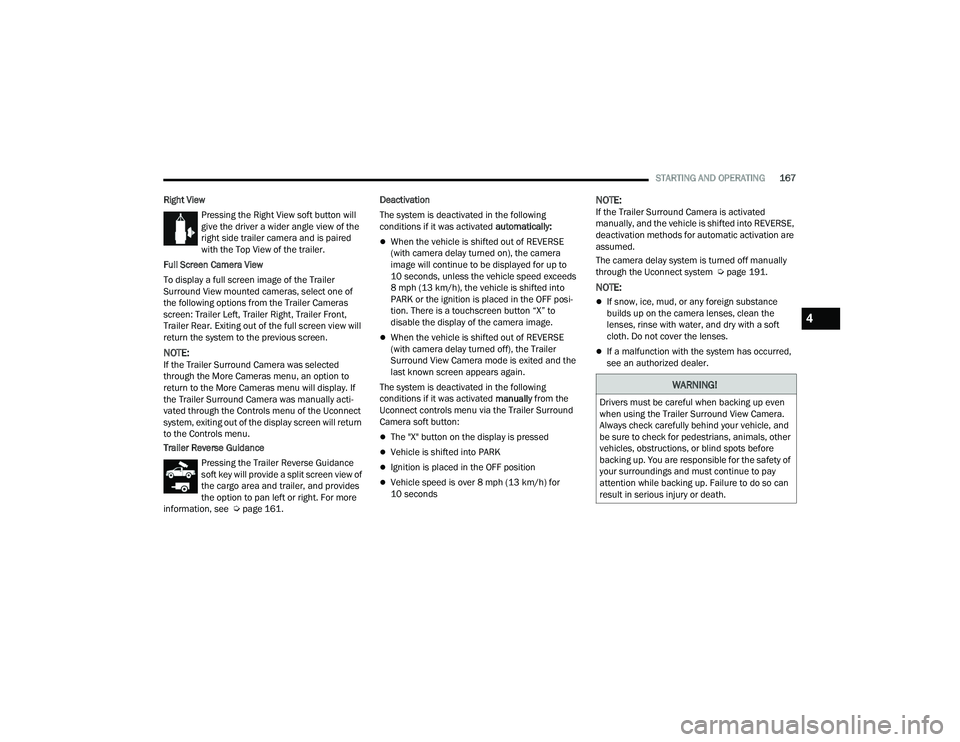
Right View Pressing the Right View soft button will
give the driver a wider angle view of the
right side trailer camera and is paired
with the Top View of the trailer.
Full Screen Camera View
To display a full screen image of the Trailer
Surround View mounted cameras, select one of
the following options from the Trailer Cameras
screen: Trailer Left, Trailer Right, Trailer Front,
Trailer Rear. Exiting out of the full screen view will
return the system to the previous screen.
NOTE:If the Trailer Surround Camera was selected
through the More Cameras menu, an option to
return to the More Cameras menu will display. If
the Trailer Surround Camera was manually acti-
vated through the Controls menu of the Uconnect
system, exiting out of the display screen will return
to the Controls menu.
Trailer Reverse Guidance Pressing the Trailer Reverse Guidance
soft key will provide a split screen view of
the cargo area and trailer, and provides
the option to pan left or right. For more
information, see Ú page 161. Deactivation
The system is deactivated in the following
conditions if it was activated
automatically:
When the vehicle is shifted out of REVERSE
(with camera delay turned on), the camera
image will continue to be displayed for up to
10 seconds, unless the vehicle speed exceeds
8 mph (13 km/h), the vehicle is shifted into
PARK or the ignition is placed in the OFF posi -
tion. There is a touchscreen button “X” to
disable the display of the camera image.
When the vehicle is shifted out of REVERSE
(with camera delay turned off), the Trailer
Surround View Camera mode is exited and the
last known screen appears again.
The system is deactivated in the following
conditions if it was activated manually from the
Uconnect controls menu via the Trailer Surround
Camera soft button:
The "X" button on the display is pressed
Vehicle is shifted into PARK
Ignition is placed in the OFF position
Vehicle speed is over 8 mph (13 km/h) for
10 seconds
NOTE:If the Trailer Surround Camera is activated
manually, and the vehicle is shifted into REVERSE,
deactivation methods for automatic activation are
assumed.
The camera delay system is turned off manually
through the Uconnect system Ú page 191.
NOTE:
If snow, ice, mud, or any foreign substance
builds up on the camera lenses, clean the
lenses, rinse with water, and dry with a soft
cloth. Do not cover the lenses.
If a malfunction with the system has occurred,
see an authorized dealer.
WARNING!
Drivers must be careful when backing up even
when using the Trailer Surround View Camera.
Always check carefully behind your vehicle, and
be sure to check for pedestrians, animals, other
vehicles, obstructions, or blind spots before
backing up. You are responsible for the safety of
your surroundings and must continue to pay
attention while backing up. Failure to do so can
result in serious injury or death.
4
22_DPF_OM_EN_USC_t.book Page 167
Page 174 of 428

172STARTING AND OPERATING
Stop filling the DEF tank immediately if DEF
splashes or wells back in the filler neck.
Reinstall cap onto DEF filler tube.
Filling The Def Tank In Cold Climates
Since DEF will begin to freeze at 12°F (-11°C),
your vehicle is equipped with an automatic DEF
heating system. This allows the DEF injection
system to operate properly at temperatures below
12°F (-11°C). If your vehicle is not in operation for
an extended period of time with temperatures
below 12°F (-11°C), the DEF in the tank may
freeze. If the tank is overfilled and freezes, it could
be damaged. Therefore, do not overfill the DEF
tank. Extra care should be taken when filling with
portable containers to avoid overfilling. Note the
level of the DEF gauge in your instrument cluster.
You may safely add a maximum of 2 gallons
(7.5 liters) of DEF from portable containers when
your DEF gauge is reading ½ full.
VEHICLE LOADING
GROSS VEHICLE WEIGHT RATING
(GVWR)
The GVWR is the total permissible weight of your
vehicle including driver, passengers, vehicle,
options and cargo. The label also specifies
maximum capacities of front and rear axle systems
(GAWR). Total load must be limited so GVWR and
front and rear GAWR are not exceeded.
PAYLOAD
The payload of a vehicle is defined as the allowable
load weight a truck can carry, including the weight
of the driver, all passengers, options and cargo.
GROSS AXLE WEIGHT RATING (GAWR)
The GAWR is the maximum permissible load on the
front and rear axles. The load must be distributed
in the cargo area so that the GAWR of each axle is
not exceeded. Each axle GAWR is determined by the components
in the system with the lowest load carrying capacity
(axle, springs, tires or wheels). Heavier axles or
suspension components sometimes specified by
purchasers for increased durability does not
necessarily increase the vehicle's GVWR.
TIRE SIZE
The tire size on the Vehicle Certification Label
represents the actual tire size on your vehicle.
Replacement tires must be equal to the load
capacity of this tire size.
RIM SIZE
This is the rim size that is appropriate for the tire
size listed.
INFLATION PRESSURE
This is the cold tire inflation pressure for your
vehicle for all loading conditions up to full GAWR.
CURB WEIGHT
The curb weight of a vehicle is defined as the total
weight of the vehicle with all fluids, including
vehicle fuel, at full capacity conditions, and with no
occupants or cargo loaded into the vehicle. The
front and rear curb weight values are determined
by weighing your vehicle on a commercial scale
before any occupants or cargo are added.
Never add anything other than DEF to the tank
– especially any form of hydrocarbon such as
diesel fuel, fuel system additives, gasoline, or
any other petroleum-based product. Even a very
small amount of these, less than 100 parts per
million or less than 1 oz. per 78 gallons
(295 liters) will contaminate the entire DEF
system and will require replacement. If owners
use a container, funnel or nozzle when refilling
the tank, it should either be new or one that has
only been used for adding DEF. Mopar®
provides an attachable nozzle with its DEF for
this purpose.
CAUTION!
22_DPF_OM_EN_USC_t.book Page 172
Page 194 of 428
192MULTIMEDIA
My Profile
When the My Profile button is pressed on the touchscreen, the system displays options related to the vehicle’s profiles.
NOTE:Depending on the vehicle’s options, feature settings may vary.
Setting Name Description
Language This setting will change the language of the Uconnect system and Instrument
Cluster Display. The available languages are English, Français, and Español.
Display Mode This setting will adjust the display for the radio to “Auto” or “Manual”.
“Manual” allows for more customization with the radio display.
Display Brightness Headlights On This setting will allow you to set the brightness when the headlights are on. To
access this setting, Display Mode must be set to “Manual”. The “+” setting will
increase the brightness; the “-” will decrease the brightness.
Display Brightness Headlights Off This setting will allow you to set the brightness when the headlights are off. To
access this setting, Display Mode must be set to “Manual”. The “+” setting will
increase the brightness; the “-” will decrease the brightness.
Set Theme This setting will allow you to change the display theme.
Units The available settings are “Speed” (MPH or km/h), “Distance” (mi or km),
“Fuel Consumption” (MPG [US], MPG [UK], L/100 km, or km/L), “Pressure”
(psi, kPa, or bar), “Temperature” (°C or °F), Power” (HP [US], Gal HP [UK], or
kW), and “Torque” (lb-ft or Nm) units of measurement independently.
Touchscreen Beep This setting will allow you to turn the touchscreen beep on or off.
Show Main Category Bar Labels This setting will allow the main category bar labels to be shown on or off.
Navigation Next Turn Pop-ups Displayed in Cluster This setting will display navigation prompts in the Instrument Cluster Display.
Phone Pop-ups Displayed In Cluster This setting will display smartphone notifications and messages in the
Instrument Cluster Display.
22_DPF_OM_EN_USC_t.book Page 192
Page 197 of 428
MULTIMEDIA195
Display
When the Display button is pressed on the touchscreen, the system will display the options related to the theme (if equipped), brightness, and color of the
touchscreen. The available settings are:
NOTE:Depending on the vehicle’s options, feature settings may vary.
Setting Name Description
Language This setting will change the language of the Uconnect system and Instrument
Cluster Display. The available languages are English, Français, and Español.
Display Mode This setting will allow you to set the brightness manually or have the system
set it automatically. The “Auto” setting has the system automatically adjust
the display brightness. The “Manual” setting will allow the user to adjust the
brightness of the display.
Display Brightness With Headlights ON/Brightness This setting will allow you to set the brightness when the headlights are on. To
access this setting, Display Mode must be set to Manual. The “+” setting will
increase the brightness; the “-” will decrease the brightness.
Display Brightness With Headlights OFF/Brightness This setting will allow you to set the brightness when the headlights are off. To
access this setting, Display Mode must be set to Manual. The “+” setting will
increase the brightness; the “-” will decrease the brightness.
Set Theme This setting will allow you to change the display theme.
Units The available settings are “Speed” (MPH or km/h), “Distance” (mi or km),
“Fuel Consumption” (MPG [US], MPG [UK], L/100 km, or km/L), “Pressure”
(psi, kPa, or bar), “Temperature” (°C or °F), Power” (HP [US], Gal HP [UK], or
kW), and “Torque” (lb-ft or Nm) units of measurement independently.
Keyboard This setting will change the keyboard type on the display. The selectable
keyboards are “ABCDEF Keyboard”, “QWERTY Keyboard”, and “AZERTY
Keyboard”.
5
22_DPF_OM_EN_USC_t.book Page 195
Page 202 of 428
200MULTIMEDIA
Voice
Navigation — If Equipped
When the Voice button is pressed on the touchscreen, the system displays the options related to the vehicle’s Voice Recognition feature.
NOTE:Depending on the vehicle’s options, feature settings may vary.
Setting Name Description
Voice Options This setting will allow you to change the system’s voice to either “Male” or
“Female”.
Wake Up Word This setting will allow you to set the system’s “Wake Up” word. The available
options are “Off”, “Hey, Uconnect”, and “Hey, Ram”.
Voice Barge-In This setting allows you to respond to a Voice Response before the statement
is completed by the system. The available options are “On” and “Off”.
Show Command List This setting will allow you to turn the Command List on or off. The “Always”
setting will always show the Command List. The “With Help” setting will show
the Command List and provide a brief description of what the command does.
The “Never” setting will turn the Command List off.
When the Navigation button is pressed on the touchscreen, the system displays options related to the vehicle’s built-in Navigation system. These settings can
change which icons display on the map, how “time to arrival is calculated”, and route types.
For more information on Navigation and settings, refer to your Uconnect Owner’s Manual Supplement.
22_DPF_OM_EN_USC_t.book Page 200
Page 215 of 428
MULTIMEDIA213
SAFETY AND GENERAL INFORMATION
Safety Guidelines
Please read this manual carefully before using the
system. It contains instructions on how to use the
system in a safe and effective manner.
Do NOT attach any object to the touchscreen.
Doing so can result in damage to the touchscreen.
Please read and follow these safety precautions.
Failure to do so may result in injury or property
damage.
Glance at the screen only when safe to do so. If
prolonged viewing of the screen is required,
park in a safe location and set the parking
brake.
Stop use immediately if a problem occurs.
Failure to do so may cause injury or damage to
the product. See an authorized dealer for repair.
Ensure the volume level of the system is set to a
level that still allows you to hear outside traffic
and emergency vehicles.
Safe Usage Of The Uconnect System
The Uconnect system is a sophisticated elec -
tronic device. Do not let young children use the
system.
Permanent hearing loss may occur if you play
your music or sound system at loud volumes.
Exercise caution when setting the volume on the
system.
Keep drinks, rain and other sources of moisture
away from the system. Besides damage to the
system, moisture can cause electric shocks as
with any electronic device.
NOTE:Many features of this system are speed
dependent. For your own safety, it is not possible to
use some of the touchscreen features while the
vehicle is in motion.
Care And Maintenance
Do not press the touchscreen with any hard or
sharp objects (pen, USB stick, jewelry, etc.),
which could scratch the surface.
Do not spray any liquid or chemicals directly on
the screen! Use a clean and dry microfiber lens
cleaning cloth in order to clean the touchscreen.
If necessary, use a lint-free cloth dampened
with a cleaning solution, such as isopropyl
alcohol or an isopropyl alcohol and water solu -
tion ratio of 50:50. Be sure to follow the solvent
manufacturer's precautions and directions
Ú page 412.
UCONNECT MODES
STEERING WHEEL AUDIO CONTROLS
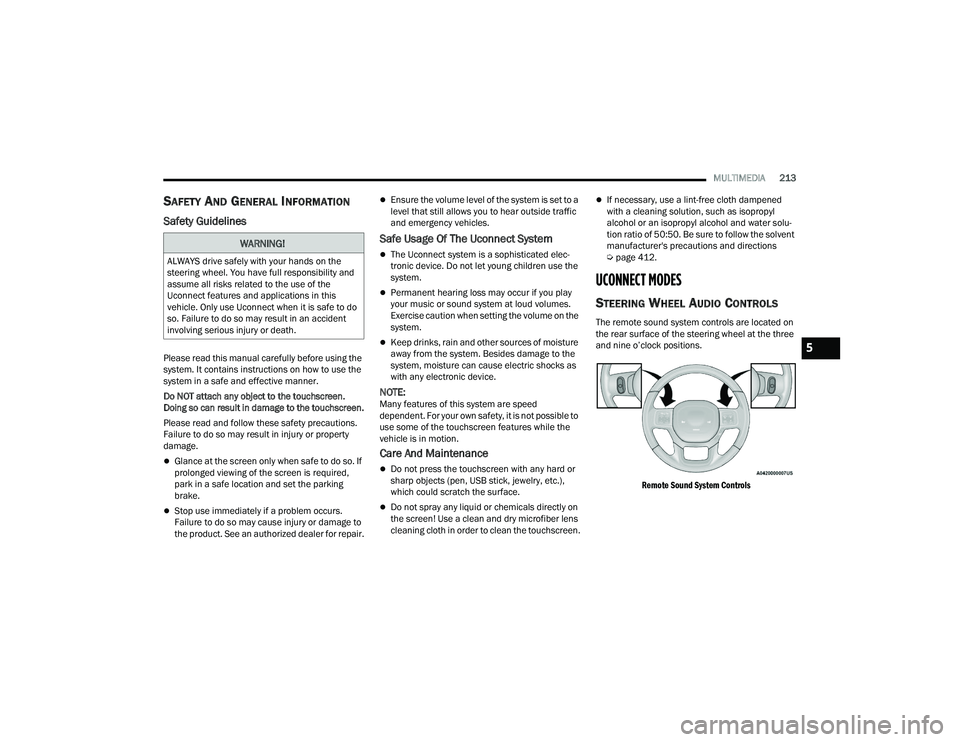
The remote sound system controls are located on
the rear surface of the steering wheel at the three
and nine o’clock positions.
Remote Sound System Controls
WARNING!
ALWAYS drive safely with your hands on the
steering wheel. You have full responsibility and
assume all risks related to the use of the
Uconnect features and applications in this
vehicle. Only use Uconnect when it is safe to do
so. Failure to do so may result in an accident
involving serious injury or death.
5
22_DPF_OM_EN_USC_t.book Page 213
Page 216 of 428
214MULTIMEDIA
The right-hand control is a rocker-type switch with
a push button in the center and controls the
volume and mode of the sound system. Pushing
the top of the rocker switch will increase the
volume, and pushing the bottom of the rocker
switch will decrease the volume.
Pushing the center button will make the radio
switch between the various modes available
(AM/FM/SXM or Media, etc.).
The left-hand control is a rocker-type switch with a
push button in the center. The function of the
left-hand control is different depending on which
mode you are in.
The following describes the left-hand control
operation in each mode:
Radio Operation
Pushing the top of the switch will Seek Up for the
next available station and pushing the bottom of
the switch will Seek Down for the next available
station.
The button located in the center of the left-hand
control will tune to the next preset station that you
have programmed in the radio presets.
Media Mode
Pushing the top of the switch skips to the next
track on the selected media (AUX/USB/
Bluetooth®). Pushing the switch up twice will go
forward two tracks. Pushing the bottom switch goes to the beginning of the current track, or the
beginning of the previous track if it is within eight
seconds after the current track begins to play.
Double pressing the bottom button switch will skip
to the previous track if it is after eight seconds into
the current track.
RADIO MODE
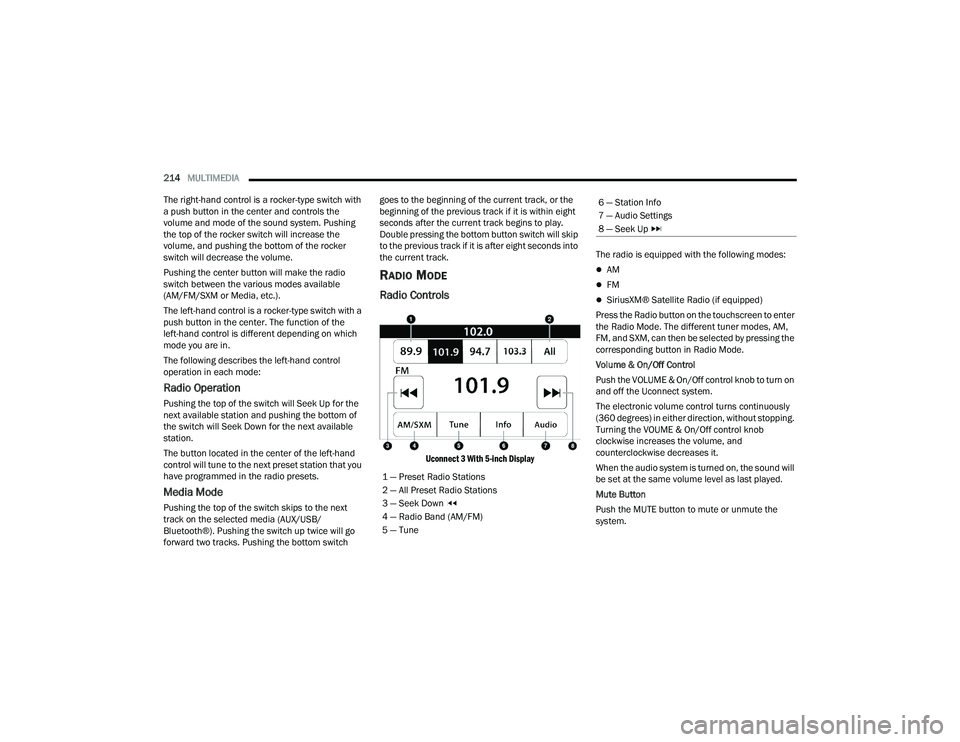
Radio Controls
Uconnect 3 With 5-inch Display
The radio is equipped with the following modes:
AM
FM
SiriusXM® Satellite Radio (if equipped)
Press the Radio button on the touchscreen to enter
the Radio Mode. The different tuner modes, AM,
FM, and SXM, can then be selected by pressing the
corresponding button in Radio Mode.
Volume & On/Off Control
Push the VOLUME & On/Off control knob to turn on
and off the Uconnect system.
The electronic volume control turns continuously
(360 degrees) in either direction, without stopping.
Turning the VOUME & On/Off control knob
clockwise increases the volume, and
counterclockwise decreases it.
When the audio system is turned on, the sound will
be set at the same volume level as last played.
Mute Button
Push the MUTE button to mute or unmute the
system.
1 — Preset Radio Stations
2 — All Preset Radio Stations
3 — Seek Down
4 — Radio Band (AM/FM)
5 — Tune
6 — Station Info
7 — Audio Settings
8 — Seek Up
22_DPF_OM_EN_USC_t.book Page 214