engine Ram ProMaster 2018 Quick Reference Guide
[x] Cancel search | Manufacturer: RAM, Model Year: 2018, Model line: ProMaster, Model: Ram ProMaster 2018Pages: 20, PDF Size: 2.18 MB
Page 8 of 20

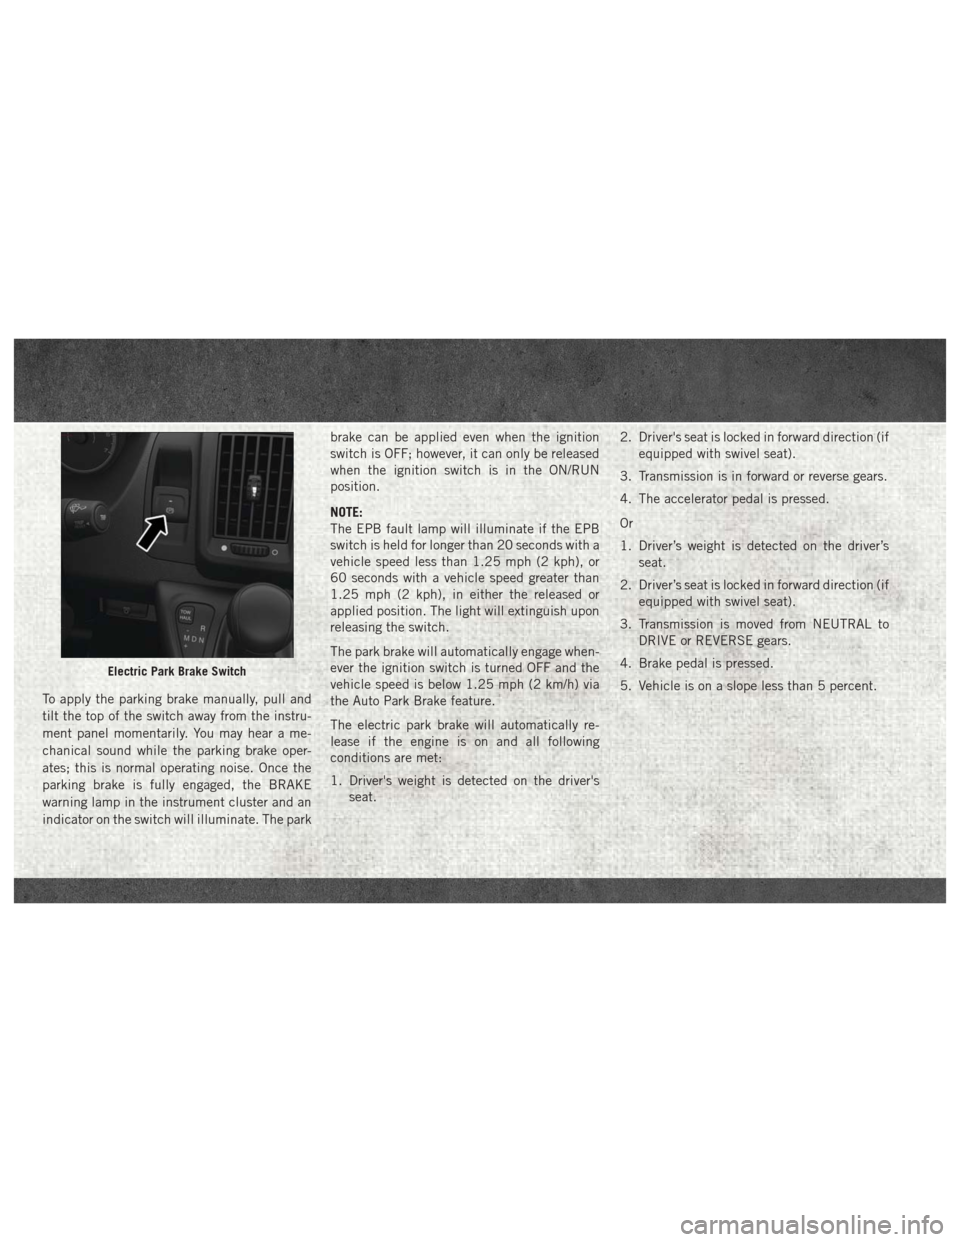
To apply the parking brake manually, pull and
tilt the top of the switch away from the instru-
ment panel momentarily. You may hear a me-
chanical sound while the parking brake oper-
ates; this is normal operating noise. Once the
parking brake is fully engaged, the BRAKE
warning lamp in the instrument cluster and an
indicator on the switch will illuminate. The parkbrake can be applied even when the ignition
switch is OFF; however, it can only be released
when the ignition switch is in the ON/RUN
position.
NOTE:
The EPB fault lamp will illuminate if the EPB
switch is held for longer than 20 seconds with a
vehicle speed less than 1.25 mph (2 kph), or
60 seconds with a vehicle speed greater than
1.25 mph (2 kph), in either the released or
applied position. The light will extinguish upon
releasing the switch.
The park brake will automatically engage when-
ever the ignition switch is turned OFF and the
vehicle speed is below 1.25 mph (2 km/h) via
the Auto Park Brake feature.
The electric park brake will automatically re-
lease if the engine is on and all following
conditions are met:
1. Driver's weight is detected on the driver's
seat. 2. Driver's seat is locked in forward direction (if
equipped with swivel seat).
3. Transmission is in forward or reverse gears.
4. The accelerator pedal is pressed.
Or
1. Driver’s weight is detected on the driver’s seat.
2. Driver’s seat is locked in forward direction (if equipped with swivel seat).
3. Transmission is moved from NEUTRAL to DRIVE or REVERSE gears.
4. Brake pedal is pressed.
5. Vehicle is on a slope less than 5 percent.
Electric Park Brake Switch
Page 10 of 20

Automated Manual Transmission
— Diesel Only
Your new vehicle is equipped with an energy
efficient Automated Manual Transmission
(AMT). This transmission is a Conventional Six-
Speed Manual Transmission with an electroni-
cally controlled hydraulic system that controls
the clutch and gear shifting.
In forward gears, this transmission offers two
modes of operation: Automatic (D) Mode –
where the electronic system controls the gear
shifts, and MANUAL (M) Mode – where the
driver controls the transmission shifting by tog-
gling the gear selector rearward or forward (+/-)
to upshift or downshift.As with any new technology, the transmission
has some unique characteristics that may be
unfamiliar. These include:
• The Automated Manual Transmission must
be in NEUTRAL (N) to start the vehicle.
Press and hold the brake pedal, then place
the gear selector in NEUTRAL (N), before
attempting to start the engine.
• To drive, press the brake pedal and start the engine, then move the gear selector from
NEUTRAL (N) to the desired position.
• The actual transmission gear range (R, N, D, 1, 2, 3, 4, 5 or 6) is displayed in the
instrument cluster display whenever the en-
gine is running.
• When the key is turned OFF, the transmis- sion remains in its previous gear position,
regardless of the gear selector position.
• When the key is turned ON (engine off), the instrument cluster display may indicate the
gear selector position rather than the actual
transmission gear position. • Engine torque is interrupted briefly during
the transmission upshifts, making these
shifts more abrupt than a typical automatic
transmission. This is normal.
• Although transmission shifting is performed automatically, the vehicle will not "creep"
when the brake pedal is released and may in
fact roll backward on an incline. Leaving
from a stop, the accelerator pedal must be
pressed to transmit driving torque to the
wheels.
• With the vehicle at a standstill and a gear engaged, keep the brake pedal pressed until
you decide to drive away. Then release the
brake and accelerate gradually.
• Do not use the accelerator to keep the ve- hicle at a standstill (for example, holding on
a hill); the clutch could be damaged by
overheating. Use the brake pedal instead
and operate the accelerator only when you
are ready to drive away.
Page 11 of 20

• Do not press the brake and accelerator ped-als at the same time. Use only one foot to
operate the brake and accelerator. When
starting on a hill, it may be helpful to engage
the parking brake to hold the vehicle, and
then release the parking brake as you accel-
erate from the stop.
• If the vehicle is moving, REVERSE engage- ment will only occur if the vehicle speed is
less than 2 mph (3 km/h). Otherwise, a
chime will sound, a "Shift not Allowed" mes-
sage will appear in the instrument cluster
display, and the transmission will shift to
NEUTRAL. Return the gear selector to NEU-
TRAL, bring the vehicle to a complete stop,
and then shift to REVERSE.
• During closed-throttle decelerations in MANUAL (M) mode, the transmission will
shift down through the gears automatically
(to prevent engine lugging), coming to first
gear at a stop. After a stop, the driver should
manually upshift (+) the transmission as the
vehicle is accelerated. • Very aggressive driving may result in some
clutch odor. A warning message will appear
in the instrument cluster display if cool
down actions are needed.
• Like a manual transmission, mechanical sounds may be heard under normal operat-
ing conditions. You may also notice a hy-
draulic pump running occasionally, even be-
fore starting the engine. This is normal and
will not damage the vehicle.
• Never leave your vehicle with the transmis- sion in NEUTRAL (N). Always place your
vehicle in gear when leaving the vehicle. It is
essential to wait until the gear engaged ap-
pears in the display before turning the en-
gine off and releasing the brake pedal. Al-
ways remember to set the parking brake
when leaving the vehicle. For further information, and applicable warn-
ings and cautions, please refer to the Diesel
Supplement at www.mopar.com/en-us/care/
owners-manual.html (U.S. Residents) or
www.owners.mopar.ca (Canadian Residents).
Interior Bulb Replacement
For proper interior bulb replacement proce-
dures, refer to “Bulb Replacement” in "In Case
Of Emergency” located in the Owner’s Manual
at
www.mopar.com/en-us/care/owners-manual.html
(U.S. Residents) or www.owners.mopar.ca (Ca-
nadian Residents).
Page 14 of 20

NOTE:
For further information, and applicable warn-
ings and cautions, please refer to the Owner’s
Manual at www.mopar.com/en-us/care/
owners-manual.html (U.S. Residents) or
www.owners.mopar.ca (Canadian Residents).
Jump Starting Procedures
The vehicle’s jump starting remote posts are
located under the hood, in the engine compart-
ment on the driver's side.
NOTE:
If access to the battery is needed, an access
panel on the driver’s side floor will allow for
battery access.
Retainer
Remote Battery Posts
1—Remote Positive(+)Jump Starting
Post
2 — Remote Negative (-)Jump Starting
Post
JUMP STARTING
Page 15 of 20

Connecting The Jumper Cables
1. Connect the positive(+)end of the jumper
cable to the remote positive (+)post of the
discharged vehicle.
NOTE:
The remote positive (+)post is located in the
engine compartment on the driver's side un-
der the cover of the Front Power Distribution
Center.
2. Connect the opposite end of the positive (+)
jumper cable to the positive (+)post of the
booster battery.
3. Connect the negative end (-)of the jumper
cable to the negative (-)post of the booster
battery.
4. Connect the opposite end of the negative (-)
jumper cable to the remote negative (-)post
of the discharged vehicle. NOTE:
The remote negative
(-)post is located in the
front of the engine compartment on the driv-
er's side.
5. Start the engine in the vehicle that has the booster battery. Let the engine idle a few
minutes and then start the engine in the
vehicle with the discharged battery.
6. Once the engine is started, disconnect the jumper cables in the reverse sequence:
Disconnecting The Jumper Cables
1. Disconnect the negative end (-)of the
jumper cable from the remote negative (-)
post of the vehicle with the discharged bat-
tery.
2. Disconnect the opposite end of the negative (-)jumper cable from the negative (-)post of
the booster battery.
3. Disconnect the positive end (+)of the
jumper cable from the positive (+)post of
the booster battery. 4. Disconnect the opposite end of the positive
(+) jumper cable from the remote positive
(+) post of the discharged vehicle.
5. Close the cover of the Front Power Distribu- tion Center.
NOTE:
If frequent jump starting is required to start
your vehicle, you should have the battery and
charging system inspected at your authorized
dealer. Use the provided remote battery posts
provide to prevent any damage to your vehicle.
For further information, and applicable warn-
ings and cautions, please refer to the Owner’s
Manual at
www.mopar.com/en-us/care/owners-manual.html
(U.S. Residents) or www.owners.mopar.ca (Ca-
nadian Residents).