navigation system RAM PROMASTER 2021 Owners Manual
[x] Cancel search | Manufacturer: RAM, Model Year: 2021, Model line: PROMASTER, Model: RAM PROMASTER 2021Pages: 288, PDF Size: 15.22 MB
Page 6 of 288
4
DRIVING TIPS ........................................................86 Driving On Slippery Surfaces ...................... 86
Driving Through Water ................................ 86
MULTIMEDIA
UCONNECT SYSTEMS ..........................................88
CYBERSECURITY ..................................................88UCONNECT SETTINGS ..........................................89 Uconnect 3/3 NAV Settings ........................ 90
UCONNECT INTRODUCTION.................................98
Identifying Your Radio ................................. 98
Safety And General Information ...............100
UCONNECT MODES ........................................... 101
Radio Mode ................................................101
Media Mode ...............................................109Phone Mode ..............................................112
NAVIGATION MODE — IF EQUIPPED ................ 124
Operating Navigation Mode —
If Equipped .................................................124
STEERING WHEEL AUDIO CONTROLS ........... 146
Radio Operation .........................................146
Player Operation ........................................146
RAM TELEMATICS - IF EQUIPPED .................... 146
Ram Telematics General Information ......147
RADIO OPERATION AND MOBILE PHONES ... 148
Regulatory And Safety Information........... 148
SAFETY
SAFETY FEATURES .............................................149Anti-Lock Brake System (ABS) .................. 149Electronic Brake Control (EBC) System ... 150
AUXILIARY DRIVING SYSTEMS.........................155
Blind Spot Monitoring (BSM) —
If Equipped ................................................ 155 Forward Collision Warning (FCW) With
Mitigation — If Equipped............................ 159 Tire Pressure Monitoring
System (TPMS) ........................................... 161
OCCUPANT RESTRAINT SYSTEMS .................. 164
Occupant Restraint Systems Features .... 164
Important Safety Precautions ................... 164
Seat Belt Systems ..................................... 165
Supplemental Restraint
Systems (SRS)............................................ 172 Child Restraints ......................................... 181
SAFETY TIPS ...................................................... 186
Transporting Passengers .......................... 186Transporting Pets ..................................... 187
Safety Checks You Should Make Inside
The Vehicle ................................................ 187 Periodic Safety Checks You Should
Make Outside The Vehicle ........................ 188 Exhaust Gas ............................................... 189Carbon Monoxide Warnings ...................... 189
IN CASE OF EMERGENCY
HAZARD WARNING FLASHERS ....................... 190
JACKING AND TIRE CHANGING ....................... 190 Preparations For Jacking .......................... 191
Jack Location ............................................. 191
Spare Tire Removal ................................... 193
Jacking Instructions................................... 194
Wheel Covers ............................................. 197
TIRE SERVICE KIT — IF EQUIPPED ................... 197
Tire Service Kit Storage............................. 198
Tire Service Kit Components And
Operation ................................................... 198 Tire Service Kit Usage Precautions .......... 198Sealing A Tire With Tire Service Kit .......... 200
JUMP STARTING ................................................ 203
Preparations For Jump Start ..................... 203
Jump Starting Procedure .......................... 204
Battery Location ........................................ 206
IF YOUR ENGINE OVERHEATS ......................... 206
GEAR SELECTOR OVERRIDE ........................... 207
FREEING A STUCK VEHICLE ............................ 208
TOWING A DISABLED VEHICLE ........................ 209
Automatic Transmission............................ 210
ENHANCED ACCIDENT RESPONSE
SYSTEM (EARS).................................................. 210
EVENT DATA RECORDER (EDR) ....................... 210
21_VF_OM_EN_USC_t.book Page 4
Page 24 of 288
22GETTING TO KNOW YOUR VEHICLE
UCONNECT VOICE RECOGNITION
INTRODUCING VOICE RECOGNITION
Start using Uconnect Voice Recognition with
these helpful quick tips. It provides the key Voice
Commands and tips you need to know to control
your vehicle’s Voice Recognition (VR) system.
Uconnect 3
BASIC VOICE COMMANDS
The basic Voice Commands below can be given
at any point while using your Uconnect system.
Push the VR button . After the beep, say:
“Cancel ” to stop a current voice session.
“Help ” to hear a list of suggested Voice
Commands.
“ Repeat ” to listen to the system prompts
again.
Notice the visual cues that inform you of your
Voice Recognition system’s status.
GET STARTED
The VR button is used to activate /deactivate
your Voice Recognition system.
Helpful hints for using Voice Recognition:
Reduce background noise. Wind noise and
passenger conversations are examples of
noise that may impact recognition.
Speak clearly at a normal pace and volume
while facing straight ahead.
Each time you give a Voice Command, first
push the VR button, wait until after the beep,
then say your Voice Command.
You can interrupt the help message or
system prompts by pushing the VR button
and saying a Voice Command from the
current category.
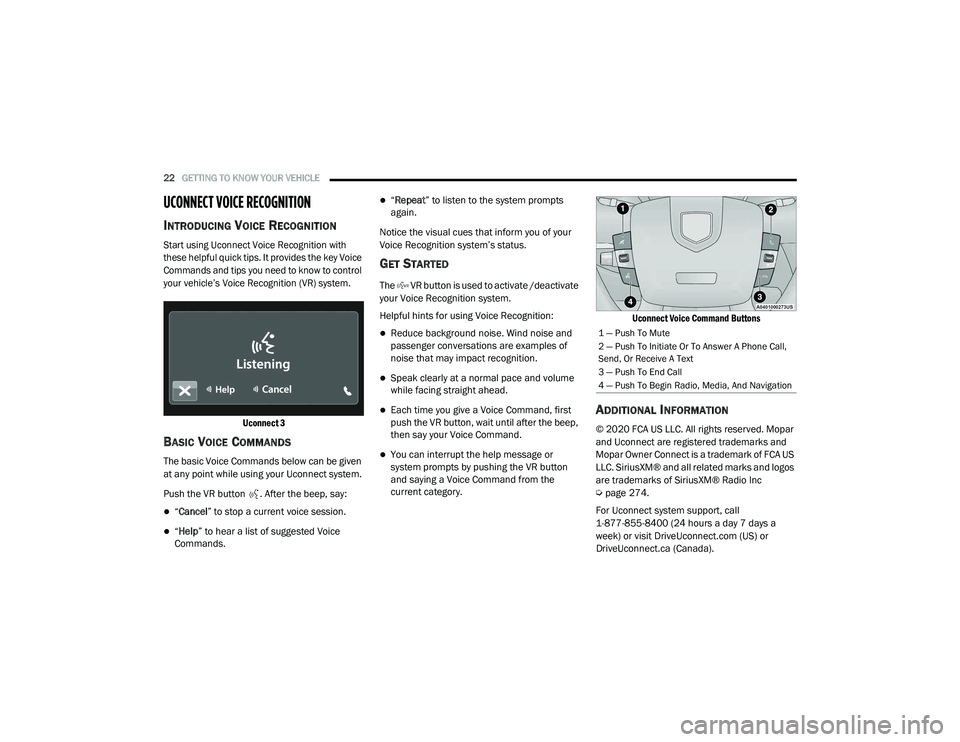
Uconnect Voice Command Buttons
ADDITIONAL INFORMATION
© 2020 FCA US LLC. All rights reserved. Mopar
and Uconnect are registered trademarks and
Mopar Owner Connect is a trademark of FCA US
LLC. SiriusXM® and all related marks and logos
are trademarks of SiriusXM® Radio Inc
Ú
page 274.
For Uconnect system support, call
1-877-855-8400 (24 hours a day 7 days a
week) or visit DriveUconnect.com (US) or DriveUconnect.ca (Canada).
1 — Push To Mute
2 — Push To Initiate Or To Answer A Phone Call,
Send, Or Receive A Text
3 — Push To End Call
4 — Push To Begin Radio, Media, And Navigation
21_VF_OM_EN_USC_t.book Page 22
Page 94 of 288
92MULTIMEDIA
Units
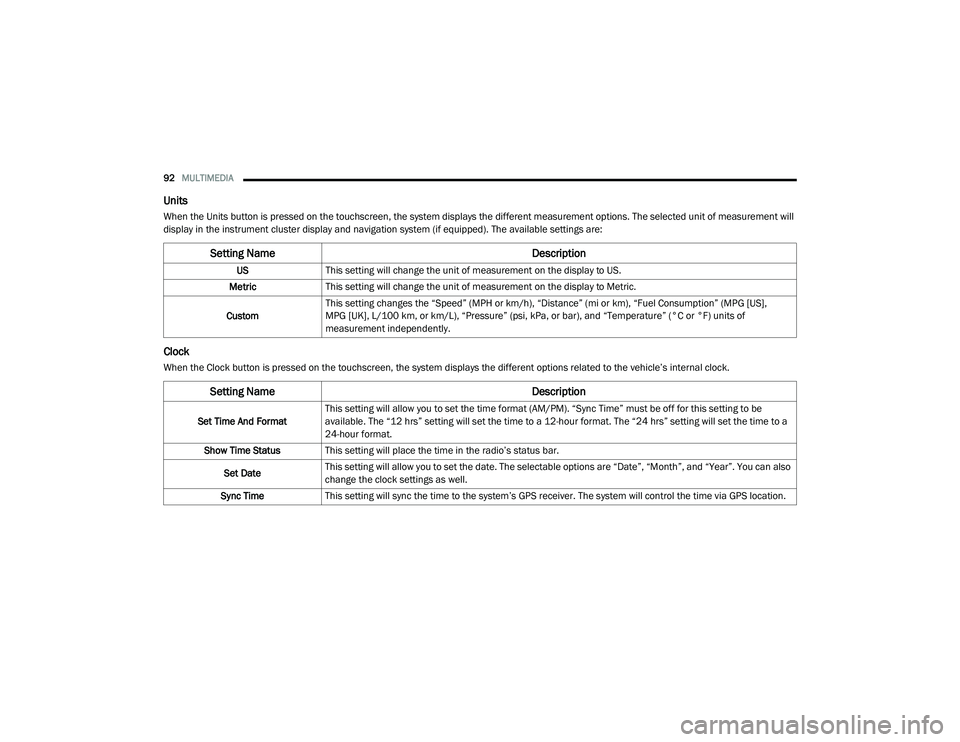
When the Units button is pressed on the touchscreen, the system displays the different measurement options. The selected unit of measurement will
display in the instrument cluster display and navigation system (if equipped). The available settings are:
Clock
When the Clock button is pressed on the touchscreen, the system displays the different options related to the vehicle’s internal clock.
Setting Name Description
USThis setting will change the unit of measurement on the display to US.
Metric This setting will change the unit of measurement on the display to Metric.
Custom This setting changes the “Speed” (MPH or km/h), “Distance” (mi or km), “Fuel Consumption” (MPG [US],
MPG [UK], L/100 km, or km/L), “Pressure” (psi, kPa, or bar), and “Temperature” (°C or °F) units of
measurement independently.
Setting Name
Description
Set Time And FormatThis setting will allow you to set the time format (AM/PM). “Sync Time” must be off for this setting to be
available. The “12 hrs” setting will set the time to a 12-hour format. The “24 hrs” setting will set the time to a
24-hour format.
Show Time Status This setting will place the time in the radio’s status bar.
Set Date This setting will allow you to set the date. The selectable options are “Date”, “Month”, and “Year”. You can also
change the clock settings as well.
Sync Time This setting will sync the time to the system’s GPS receiver. The system will control the time via GPS location.
21_VF_OM_EN_USC_t.book Page 92
Page 101 of 288
MULTIMEDIA99
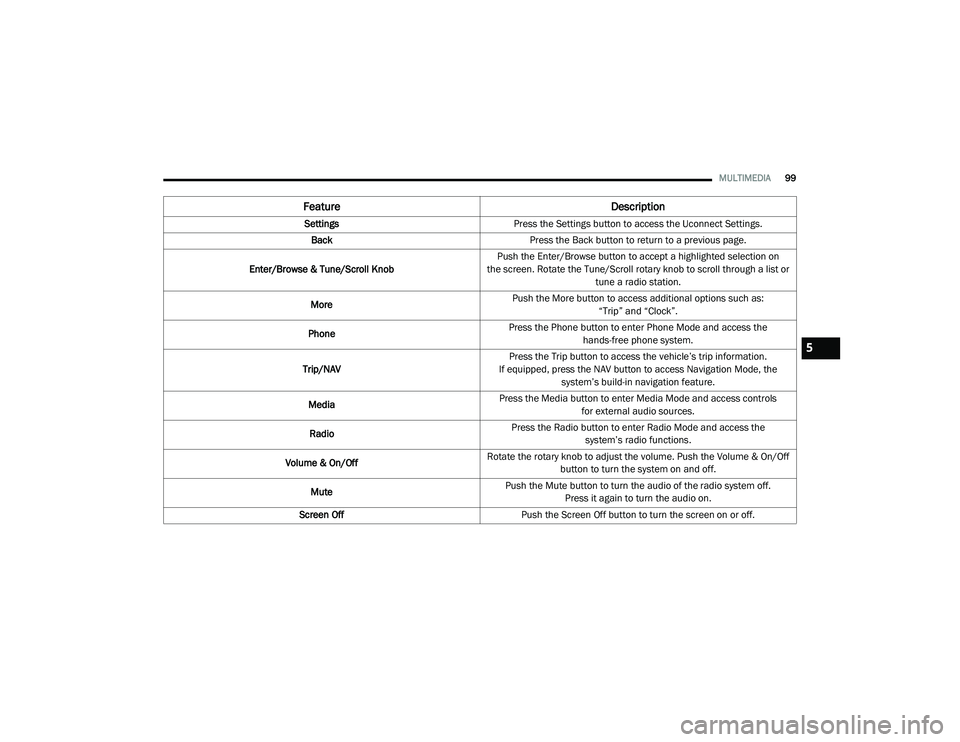
Feature Description
SettingsPress the Settings button to access the Uconnect Settings.
Back Press the Back button to return to a previous page.
Enter/Browse & Tune/Scroll Knob Push the Enter/Browse button to accept a highlighted selection on
the screen. Rotate the Tune/Scroll rotary knob to scroll through a list or tune a radio station.
More Push the More button to access additional options such as:
“Trip” and “Clock”.
Phone Press the Phone button to enter Phone Mode and access the
hands-free phone system.
Trip/NAV Press the Trip button to access the vehicle’s trip information.
If equipped, press the NAV button to access Navigation Mode, the system’s build-in navigation feature.
Media Press the Media button to enter Media Mode and access controls
for external audio sources.
Radio Press the Radio button to enter Radio Mode and access the
system’s radio functions.
Volume & On/Off Rotate the rotary knob to adjust the volume. Push the Volume & On/Off
button to turn the system on and off.
Mute Push the Mute button to turn the audio of the radio system off.
Press it again to turn the audio on.
Screen Off Push the Screen Off button to turn the screen on or off.
5
21_VF_OM_EN_USC_t.book Page 99
Page 126 of 288
124MULTIMEDIA
To enable Siri, push and hold, then release the
Uconnect Voice Recognition (VR) button on the
steering wheel. After you hear a double beep,
you can ask Siri to play podcasts and music, get
directions, read text messages, and many other
useful requests.
Bluetooth® Communication Link
Mobile phones may lose connection to the
Uconnect Phone. When this happens, the
connection can generally be re-established by
restarting the mobile phone. Your mobile phone
is recommended to remain in Bluetooth® ON
mode.
Power-Up
After switching the ignition key from OFF to
either the ON/RUN or ACC position, or after a
language change, you must wait at least
15 seconds prior to using the system
Úpage 274.NAVIGATION MODE — IF EQUIPPED
OPERATING NAVIGATION MODE — IF
E
QUIPPED
Planning A Route
Using the search bar provides a wide range of
ways to find places and then navigate to them.
You can search for your destination in different
ways:
A specific address
A partial address
A type of place
A zip code
A city to navigate to a city center
A Point of Interest (POI) near your current
location
Latitude and longitude coordinates Using Search
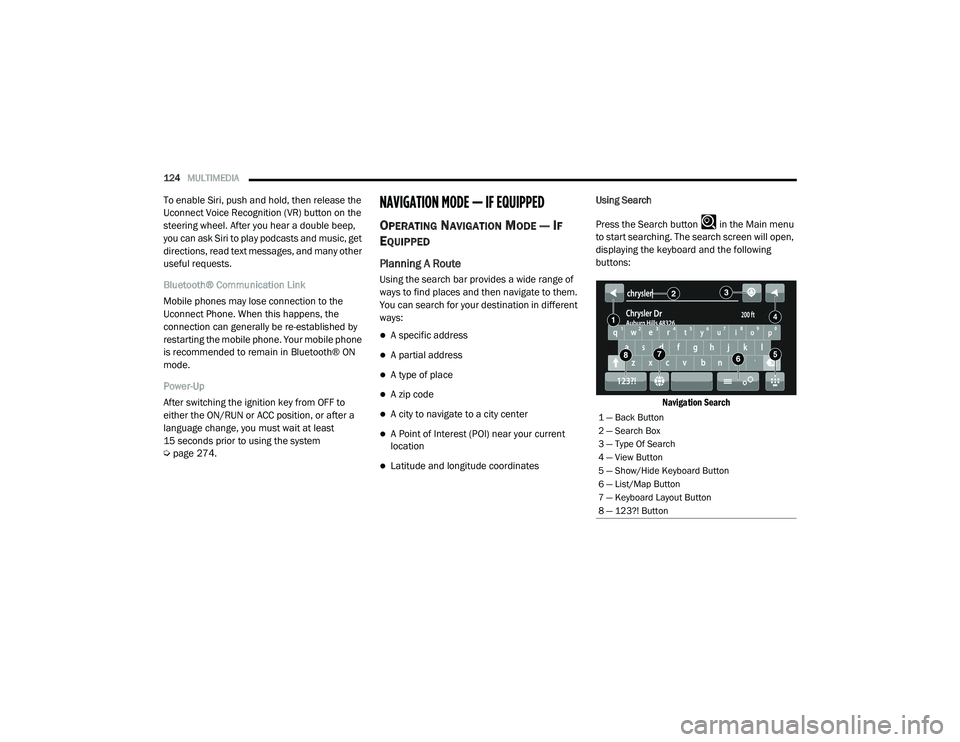
Press the Search button in the Main menu
to start searching. The search screen will open,
displaying the keyboard and the following
buttons:
Navigation Search
1 — Back Button
2 — Search Box
3 — Type Of Search
4 — View Button
5 — Show/Hide Keyboard Button
6 — List/Map Button
7 — Keyboard Layout Button
8 — 123?! Button
21_VF_OM_EN_USC_t.book Page 124
Page 136 of 288
134MULTIMEDIA
Voice Command — If Equipped
About Voice command
Instead of pressing the touchscreen to control
your navigation system, you can use your voice
to control navigation.
For example, to switch to 2D view, you can say
“2D view”.
To view a list of available commands, press the
“Help” button in the Main menu and then press
“What can I say?”. Using Voice Control
The following example shows how to use voice
control to plan a journey to your Home address:
1. Push the Voice Recognition button on
the steering wheel to turn on the
microphone.
A screen will pop-up with examples of com -
mands.
NOTE:
Press the Help button in the Main menu then
press “What can I say?” to see a full list of
commands. 2. When you hear a beep, say a command of
your choice. For example, you can say
“Navigate home”.
NOTE:
For accurate results, speak normally without
trying to articulate words in an unnatural way. If
there is excessive road noise, for example, you
may need to speak directly into the microphone.
3. If the command is correct, say “Yes”.
NOTE:
If the command is incorrect, say “No” and
repeat the command after you hear the prompt
and tone again. Your navigation system plans a
route from your current location to your destina-
tion. To stop your navigation system from
listening out for further commands, say
“Cancel”.WARNING!
ALWAYS drive safely with your hands on the
wheel. You have full responsibility and
assume all risks related to the use of the
Uconnect features and applications in this
vehicle. Only use Uconnect when it is safe to
do so. Failure to do so may result in an
accident involving serious injury or death.
21_VF_OM_EN_USC_t.book Page 134
Page 137 of 288
MULTIMEDIA135
Guidance View
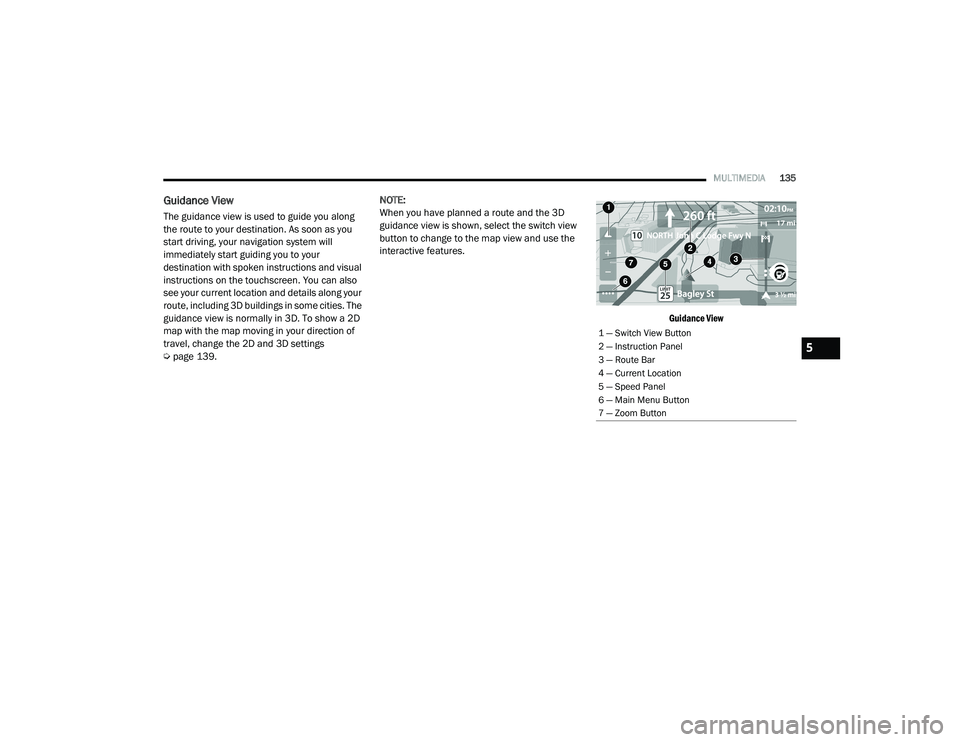
The guidance view is used to guide you along
the route to your destination. As soon as you
start driving, your navigation system will
immediately start guiding you to your
destination with spoken instructions and visual
instructions on the touchscreen. You can also
see your current location and details along your
route, including 3D buildings in some cities. The
guidance view is normally in 3D. To show a 2D
map with the map moving in your direction of
travel, change the 2D and 3D settings
Úpage 139. NOTE:
When you have planned a route and the 3D
guidance view is shown, select the switch view
button to change to the map view and use the
interactive features.
Guidance View
1 — Switch View Button
2 — Instruction Panel
3 — Route Bar
4 — Current Location
5 — Speed Panel
6 — Main Menu Button
7 — Zoom Button
5
21_VF_OM_EN_USC_t.book Page 135
Page 139 of 288
MULTIMEDIA137
Advanced Lane Guidance
NOTE:
Lane guidance is not available for all intersec -
tions or in all countries.
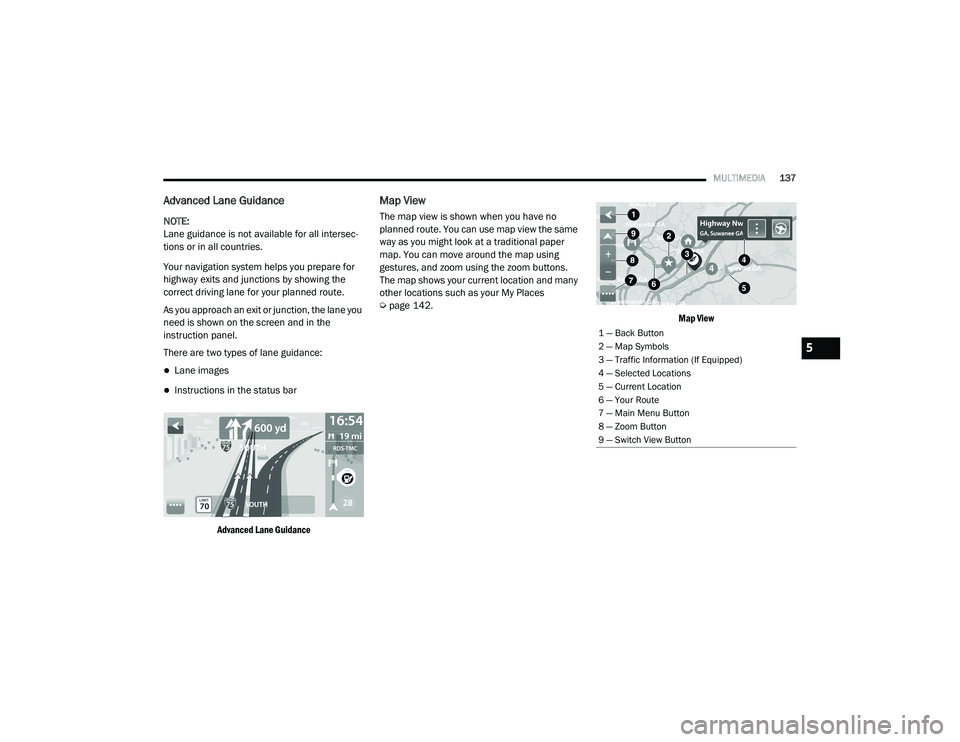
Your navigation system helps you prepare for
highway exits and junctions by showing the
correct driving lane for your planned route.
As you approach an exit or junction, the lane you
need is shown on the screen and in the
instruction panel.
There are two types of lane guidance:
Lane images
Instructions in the status bar
Advanced Lane Guidance
Map View
The map view is shown when you have no
planned route. You can use map view the same
way as you might look at a traditional paper
map. You can move around the map using
gestures, and zoom using the zoom buttons.
The map shows your current location and many
other locations such as your My Places
Úpage 142.
Map View
1 — Back Button
2 — Map Symbols
3 — Traffic Information (If Equipped)
4 — Selected Locations
5 — Current Location
6 — Your Route
7 — Main Menu Button
8 — Zoom Button
9 — Switch View Button
5
21_VF_OM_EN_USC_t.book Page 137
Page 141 of 288
MULTIMEDIA139
Voices
About Voices
Your navigation system uses sound for some or
all of the following:
Driving directions
Warnings that you set
By selecting “Settings” in the main menu, then
selecting “Voices,” you can change the settings
for how voice instructions are given. Instruction
settings include the following:
Read Early Instructions Out Loud : This setting
allows to you to hear early instructions. For
example, an early instruction could be, “After
two miles, take the exit right”.
Read Road Numbers Out Loud (if equipped):
Use this setting to control whether road
numbers are read out loud as part of naviga -
tion instructions.
Read Road Sign Information Out Loud (if
equipped): Use this setting to control whether
road sign information is read out loud as part
of navigation instructions.
Read Street Names Out Loud (if equipped):
Use this setting to control whether street
names are read out loud as part of navigation
instructions.
Read Foreign Street Names Out Loud (if
equipped): Use this setting to control whether
foreign street names are read out loud as
part of navigation instructions.
Changing The Volume Level
To change the volume of your navigation
system, use the Volume knob on the radio when
an instruction is being given.
Settings
About Settings You can change the way your
navigation system looks and behaves.
Most of the settings on your system
can be accessed by pressing the
Settings button in the Main Menu. Appearance
To change how your navigation screen looks,
select “Appearance” in the settings menu. From
here, you can change these features:
Switch To Night Colors When Dark
: Select
this setting to make your system automati -
cally switch to night colors when it gets dark.
Automatic Zoom : Select “Automatic Zoom” to
change how your system zooms in guidance
view when you approach a turn or intersec -
tion. Zooming in can make the turn or inter -
section easier to drive. The following options
are available:
Zoom in to next turn
Based on road type
None
5
21_VF_OM_EN_USC_t.book Page 139
Page 142 of 288
140MULTIMEDIA
Arrival Information
In the settings menu, select “Arrival
Information” to change the following settings:
Show Remaining Distance : Select this setting
to show the remaining distance left to travel
in the arrival information panel during navi -
gation.
Show Remaining Time : Select this setting to
show the remaining time left to travel in the
arrival information panel during navigation.
Switch Between Distance And Time Automat -
ically : Select this setting to control the auto -
matic switching between remaining distance
and remaining time in the arrival information
panel.
Show On Route
In the settings menu, select “Show On Route” to
see any of the following options in the route bar:
Parking : Select this setting to see parking lots
on your route.
Gas Stations: Select this setting to see gas
stations on your route.
Stops : Select this setting to see stops on your
route. Show Previews Of Highway Exits
Select this setting to control the full screen
preview when you approach highway exits.
Automatic Map View Switching
Automatic changing of views is on by default.
For example, when an alternative route is being
suggested, the map will automatically switch to
map view, and when you start driving, your map
will automatically switch to guidance view. You
can turn this feature off by selecting “Automatic
Map View Switching” in the settings.
Automatic Zoom
Select this setting to control the full screen
preview when you approach highway exits.
Guidance View Style
Select this setting to choose between 3D and
2D versions of the guidance view. Both the 2D
and 3D guidance views move in your direction
of travel.
In 3D guidance view, you can choose to use the
3D car icon or an arrowhead as the current
location indicator. By default, the 3D guidance
view shows the 3D car icon.
Voices Setting
Select this setting to change how instructions
are read out loud Ú
page 139.
Route Planning
Select this setting to control how your system
plans routes. The following options are
available:
Always Take the Fastest Route
You can choose whether you would like the
navigation system to always default to the
fastest route.
Ask Me So I Can Choose
You can choose whether you would like the
navigation system to allow you to pick the
route to the destination.
Don’t Ask me
You can choose whether you would like the
navigation system to select the route to the
destination.
21_VF_OM_EN_USC_t.book Page 140