window RAM PROMASTER 2022 Owners Manual
[x] Cancel search | Manufacturer: RAM, Model Year: 2022, Model line: PROMASTER, Model: RAM PROMASTER 2022Pages: 268, PDF Size: 13.26 MB
Page 5 of 268
3
INTERIOR STORAGE AND EQUIPMENT ............... 43 Storage..............................................................43
USB Control — If Equipped ..............................44
Power Outlets ...................................................45
Power Inverter — If Equipped...........................46
Auxiliary Switches — If Equipped .....................47
Wireless Charging Pad —
If Equipped .......................................................47
WINDOWS ............................................................. 48
Power Windows ...............................................48
Window Bar Grates — If Equipped...................49
Wind Buffeting .................................................49
HOOD....................................................................... 49
Opening .............................................................49
Closing...............................................................50
CARGO AREA FEATURES ...................................... 50
GETTING TO KNOW YOUR
INSTRUMENT PANEL
BASE / MIDLINE INSTRUMENT CLUSTER........... 51
Base / Midline Instrument Cluster
Descriptions ......................................................52
INSTRUMENT CLUSTER......................................... 53
Instrument Cluster Descriptions .....................54
INSTRUMENT CLUSTER DISPLAY ........................ 55
Location And Controls ......................................55
Change Engine Oil — If Equipped ....................56
Main Menu........................................................56
Vehicle Settings ................................................58 WARNING LIGHTS AND MESSAGES ....................59
Red Warning Lights ..........................................59
Yellow Warning Lights ......................................61
Yellow Indicator Lights .....................................65
Green Indicator Lights .....................................65
Blue Indicator Lights ........................................66
White Indicator Lights ......................................66
ONBOARD DIAGNOSTIC SYSTEM — OBD II ........ 67
Onboard Diagnostic System
(OBD II) Cybersecurity ......................................68
EMISSIONS INSPECTION AND MAINTENANCE
PROGRAMS.............................................................68
STARTING AND OPERATING
STARTING THE ENGINE ........................................69
Automatic Transmission ..................................69
Normal Starting ................................................69
Tip Start Feature .............................................69
Cold Weather Operation
(Below –22°F Or −30°C) ...............................69
Extended Park Starting ....................................69
If Engine Fails To Start .....................................70
After Starting ....................................................70
ENGINE BLOCK HEATER — IF EQUIPPED ...........70
ENGINE BREAK-IN RECOMMENDATIONS ..........70
PARKING BRAKE ....................................................71
Electric Park Brake (EPB) ................................71 AUTOMATIC TRANSMISSION .............................. 73
Ignition Park Interlock (Keyless Vehicle) ........ 74
Brake/Transmission Shift Interlock (BTSI)
System ............................................................. 74
9-Speed Automatic Transmission ................... 74
POWER STEERING ................................................ 78
ACTIVE SPEED LIMITER — IF EQUIPPED ............ 79
Activation .......................................................... 79
Exceeding The Set Speed ................................ 79
Deactivation ..................................................... 79
INTELLIGENT SPEED ASSIST (ISA) —
IF EQUIPPED ........................................................... 79
Activation .......................................................... 80
Exceeding The Set Speed ................................ 80
Deactivation ..................................................... 80
CRUISE CONTROL SYSTEMS — IF EQUIPPED ... 80
Cruise Control .................................................. 80
Adaptive Cruise Control (ACC) ......................... 82
TRAFFIC SIGN ASSIST SYSTEM —
IF EQUIPPED ........................................................... 91
Activation/Deactivation ................................... 91
Traffic Sign Assist Modes ................................ 91
Indications On The Display .............................. 91
ACTIVE DRIVING ASSIST SYSTEM —
IF EQUIPPED ........................................................... 92
Operation .......................................................... 92
Turning Active Driving Assist On Or Off ........... 93
Indications On The Display .............................. 94
22_VF_OM_EN_USC_t.book Page 3
Page 19 of 268
GETTING TO KNOW YOUR VEHICLE17
(Continued)
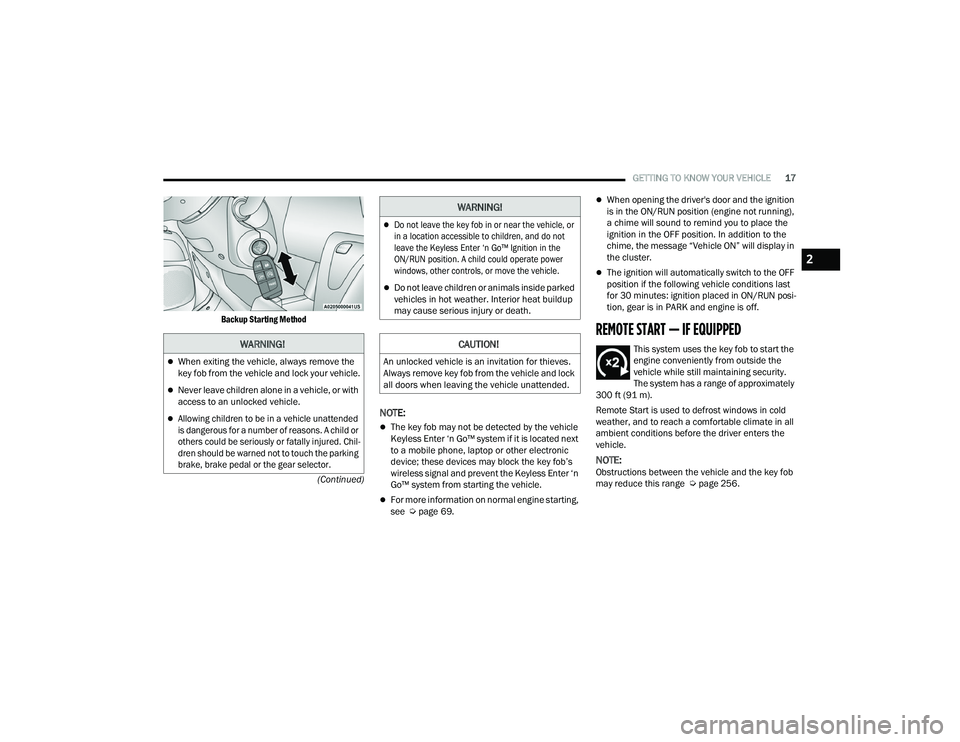
Backup Starting Method
NOTE:
The key fob may not be detected by the vehicle
Keyless Enter ‘n Go™ system if it is located next
to a mobile phone, laptop or other electronic
device; these devices may block the key fob’s
wireless signal and prevent the Keyless Enter ‘n
Go™ system from starting the vehicle.
For more information on normal engine starting,
see Ú
page 69.
When opening the driver's door and the ignition
is in the ON/RUN position (engine not running),
a chime will sound to remind you to place the
ignition in the OFF position. In addition to the
chime, the message “Vehicle ON” will display in
the cluster.
The ignition will automatically switch to the OFF
position if the following vehicle conditions last
for 30 minutes: ignition placed in ON/RUN posi -
tion, gear is in PARK and engine is off.
REMOTE START — IF EQUIPPED
This system uses the key fob to start the
engine conveniently from outside the
vehicle while still maintaining security.
The system has a range of approximately
300 ft (91 m).
Remote Start is used to defrost windows in cold
weather, and to reach a comfortable climate in all
ambient conditions before the driver enters the
vehicle.
NOTE:Obstructions between the vehicle and the key fob
may reduce this range Ú page 256.
WARNING!
When exiting the vehicle, always remove the
key fob from the vehicle and lock your vehicle.
Never leave children alone in a vehicle, or with
access to an unlocked vehicle.
Allowing children to be in a vehicle unattended
is dangerous for a number of reasons. A child or
others could be seriously or fatally injured. Chil -
dren should be warned not to touch the parking
brake, brake pedal or the gear selector.
Do not leave the key fob in or near the vehicle, or
in a location accessible to children, and do not
leave the Keyless Enter ‘n Go™ Ignition in the
ON/RUN position. A child could operate power
windows, other controls, or move the vehicle.
Do not leave children or animals inside parked
vehicles in hot weather. Interior heat buildup
may cause serious injury or death.
CAUTION!
An unlocked vehicle is an invitation for thieves.
Always remove key fob from the vehicle and lock
all doors when leaving the vehicle unattended.
WARNING!
2
22_VF_OM_EN_USC_t.book Page 17
Page 20 of 268
18GETTING TO KNOW YOUR VEHICLE
HOW TO USE REMOTE START
Push and release the Remote Start button on the
key fob twice within five seconds. The vehicle
doors will lock, the parking lights will flash, and the
horn will chirp twice (if programmed). Then, the
engine will start, and the vehicle will remain in the
Remote Start mode for a 15 minute cycle.
Pushing the Remote Start button a third time shuts
the engine off.
NOTE:
With Remote Start, the engine will only run for
15 minutes.
Remote Start can only be used twice.
If an engine fault is present or fuel level is low,
the vehicle will start and then shut down in
10 seconds.
The park lights will turn on and remain on during
Remote Start mode.
For security, power window is disabled when the
vehicle is in the Remote Start mode.
The ignition must be placed in the ON/RUN posi -
tion before the Remote Start sequence can be
repeated for a third cycle.
All of the following conditions must be met before
the engine will Remote Start:
Gear selector in PARK
Doors closed
Hood closed
Rear cargo doors closed
Hazard switch off
Brake switch inactive (brake pedal not pressed)
Battery at an acceptable charge level
PANIC button not pushed
Fuel meets minimum requirement
System not disabled from previous Remote
Start event
Vehicle Security system not active
Malfunction Indicator Light (MIL) is not illuminated
Ignition in OFF position
TO EXIT REMOTE START MODE
To drive the vehicle after starting the Remote Start
system, push and release the START/STOP ignition
button while pressing the brake pedal prior to the
end of the 15 minute cycle.
The Remote Start system will turn the engine off if the
Remote Start button on the key fob is pushed again, or
if the engine is allowed to run for the entire 15 minute
cycle. Once the ignition is placed in the ON/RUN
position, the climate controls will resume the previously
set operations (temperature, blower control, etc.).
NOTE:To avoid unintentional shutdowns, the system will
disable for two seconds after receiving a valid
Remote Start request.
WARNING!
Do not start or run an engine in a closed garage
or confined area. Exhaust gas contains Carbon
Monoxide (CO) which is odorless and colorless.
Carbon Monoxide is poisonous and can cause
serious injury or death when inhaled.
Keep key fobs away from children. Operation
of the Remote Start system, windows, door
locks or other controls could cause serious
injury or death.
WARNING!
Do not start or run an engine in a closed garage or
confined area. Exhaust gas contains Carbon
Monoxide (CO) which is odorless and colorless.
Carbon Monoxide is poisonous and can cause
serious injury or death when inhaled.
Keep key fobs away from children. Operation
of the Remote Start system, windows, door
locks or other controls could cause serious
injury or death.
22_VF_OM_EN_USC_t.book Page 18
Page 23 of 268
GETTING TO KNOW YOUR VEHICLE21
To unlock the front doors, pull the inside door
handle to the detent.
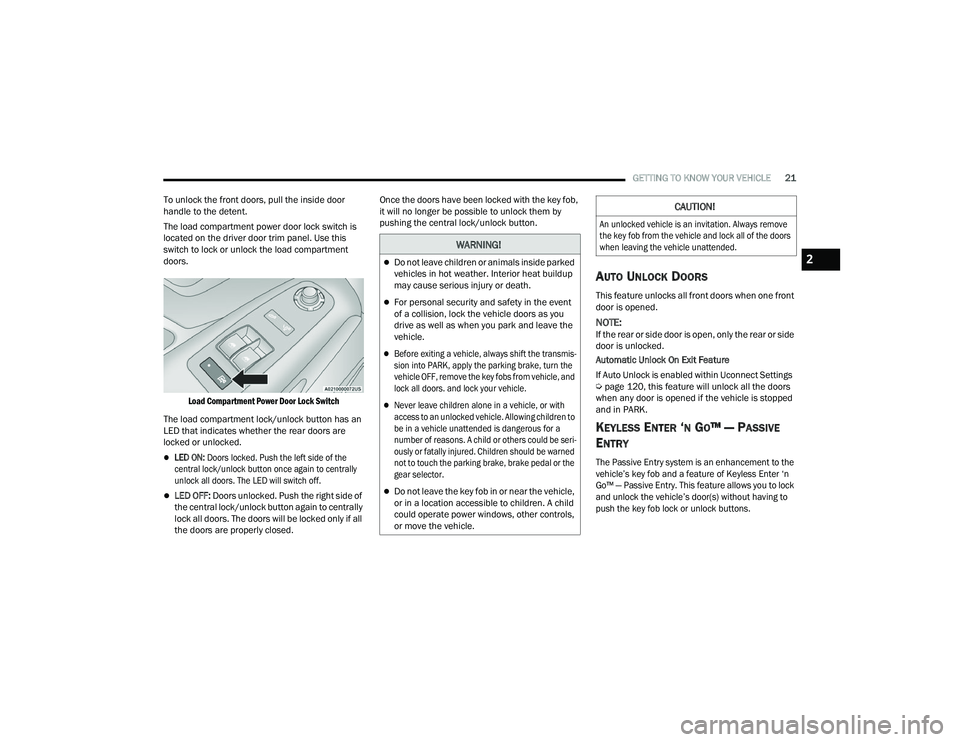
The load compartment power door lock switch is
located on the driver door trim panel. Use this
switch to lock or unlock the load compartment
doors.
Load Compartment Power Door Lock Switch
The load compartment lock/unlock button has an
LED that indicates whether the rear doors are
locked or unlocked.
LED ON: Doors locked. Push the left side of the
central lock/unlock button once again to centrally
unlock all doors. The LED will switch off.
LED OFF: Doors unlocked. Push the right side of
the central lock/unlock button again to centrally
lock all doors. The doors will be locked only if all
the doors are properly closed. Once the doors have been locked with the key fob,
it will no longer be possible to unlock them by
pushing the central lock/unlock button.
AUTO UNLOCK DOORS
This feature unlocks all front doors when one front
door is opened.
NOTE:If the rear or side door is open, only the rear or side
door is unlocked.
Automatic Unlock On Exit Feature
If Auto Unlock is enabled within Uconnect Settings
Ú
page 120, this feature will unlock all the doors
when any door is opened if the vehicle is stopped
and in PARK.
KEYLESS ENTER ‘N GO™ — PASSIVE
E
NTRY
The Passive Entry system is an enhancement to the
vehicle’s key fob and a feature of Keyless Enter ‘n
Go™ — Passive Entry. This feature allows you to lock
and unlock the vehicle’s door(s) without having to
push the key fob lock or unlock buttons.
WARNING!
Do not leave children or animals inside parked
vehicles in hot weather. Interior heat buildup
may cause serious injury or death.
For personal security and safety in the event
of a collision, lock the vehicle doors as you
drive as well as when you park and leave the
vehicle.
Before exiting a vehicle, always shift the transmis -
sion into PARK, apply the parking brake, turn the
vehicle OFF, remove the key fobs from vehicle, and
lock all doors. and lock your vehicle.
Never leave children alone in a vehicle, or with
access to an unlocked vehicle. Allowing children to
be in a vehicle unattended is dangerous for a
number of reasons. A child or others could be seri -
ously or fatally injured. Children should be warned
not to touch the parking brake, brake pedal or the
gear selector.
Do not leave the key fob in or near the vehicle,
or in a location accessible to children. A child
could operate power windows, other controls,
or move the vehicle.
CAUTION!
An unlocked vehicle is an invitation. Always remove
the key fob from the vehicle and lock all of the doors
when leaving the vehicle unattended.
2
22_VF_OM_EN_USC_t.book Page 21
Page 31 of 268
GETTING TO KNOW YOUR VEHICLE29
GET STARTED
The VR button is used to activate/deactivate
your Voice Recognition system. You can also use
the system’s “Wake Up” word to activate voice
recognition. The “Wake Up” word can be set
through the Uconnect Settings Úpage 120.
Helpful hints for using Voice Recognition:
Reduce background noise. Wind noise and
passenger conversations are examples of noise
that may impact recognition.
Speak clearly at a normal pace and volume
while facing straight ahead.
Each time you give a Voice Command, first push the
VR button, wait until after the beep, then say your
Voice Command. Also, you can say the vehicle
“Wake Up” word to issue a Voice Command.
The available “Wake Up” words are “Hey Uconnect”
and “Hey Ram”.
You can interrupt the help message or system
prompts by pushing the VR button and saying a
Voice Command from the current category.
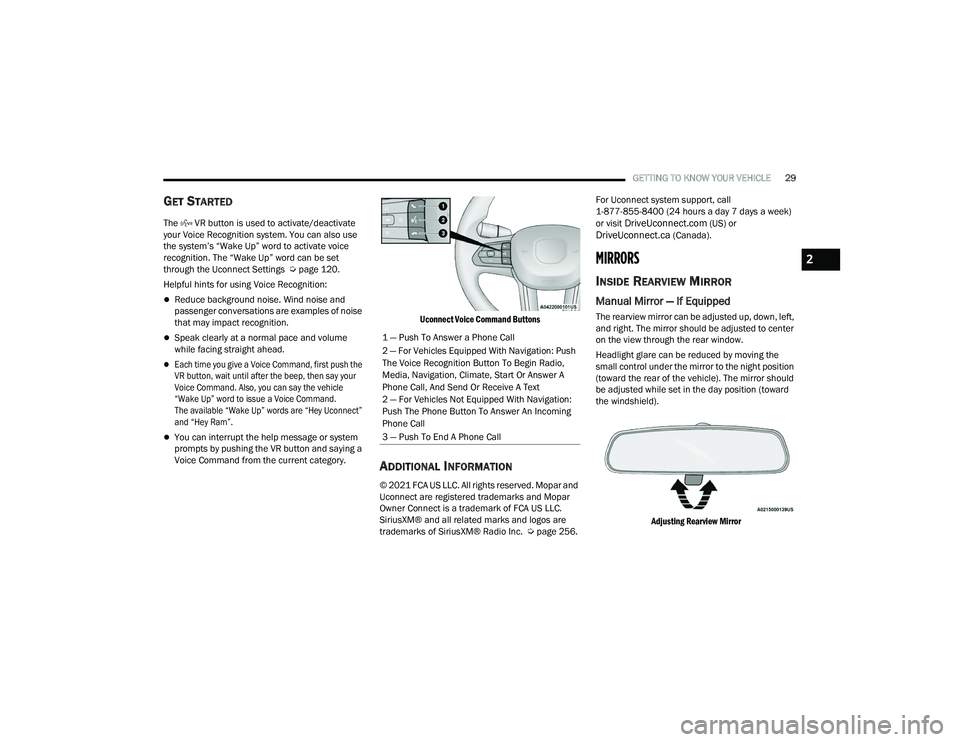
Uconnect Voice Command Buttons
ADDITIONAL INFORMATION
© 2021 FCA US LLC. All rights reserved. Mopar and
Uconnect are registered trademarks and Mopar
Owner Connect is a trademark of FCA US LLC.
SiriusXM® and all related marks and logos are
trademarks of SiriusXM® Radio Inc. Ú
page 256.For Uconnect system support, call
1-877-855-8400 (24 hours a day 7 days a week)
or visit
DriveUconnect.com (US) or DriveUconnect.ca (Canada).
MIRRORS
INSIDE REARVIEW MIRROR
Manual Mirror — If Equipped
The rearview mirror can be adjusted up, down, left,
and right. The mirror should be adjusted to center
on the view through the rear window.
Headlight glare can be reduced by moving the
small control under the mirror to the night position
(toward the rear of the vehicle). The mirror should
be adjusted while set in the day position (toward
the windshield).
Adjusting Rearview Mirror
1 — Push To Answer a Phone Call
2 — For Vehicles Equipped With Navigation: Push
The Voice Recognition Button To Begin Radio,
Media, Navigation, Climate, Start Or Answer A
Phone Call, And Send Or Receive A Text
2 — For Vehicles Not Equipped With Navigation:
Push The Phone Button To Answer An Incoming
Phone Call
3 — Push To End A Phone Call
2
22_VF_OM_EN_USC_t.book Page 29
Page 34 of 268
32GETTING TO KNOW YOUR VEHICLE
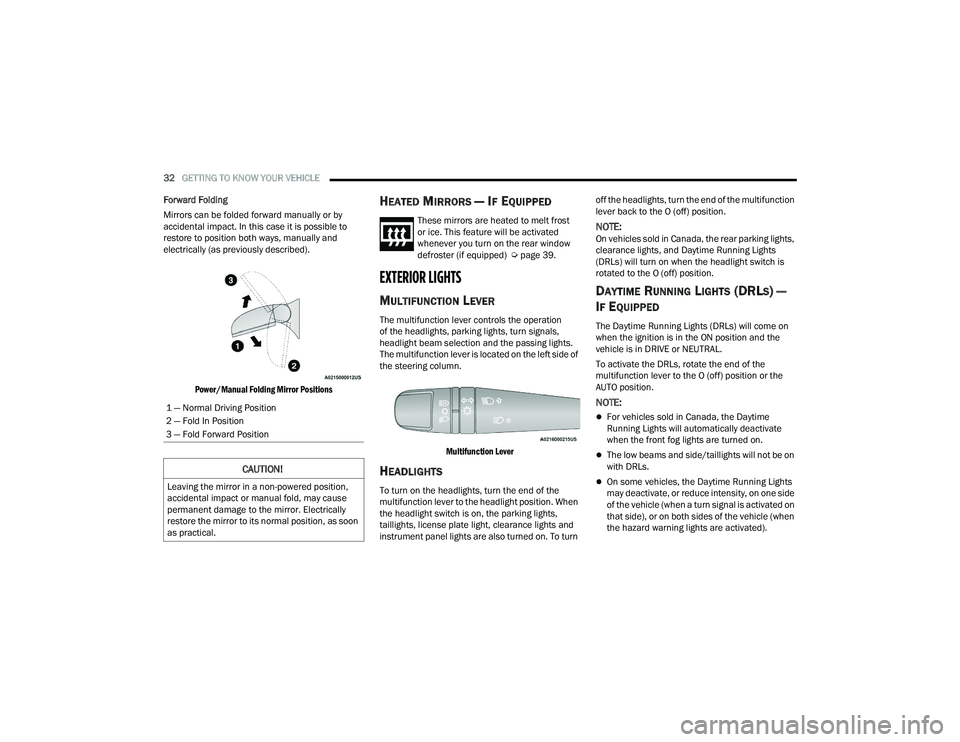
Forward Folding
Mirrors can be folded forward manually or by
accidental impact. In this case it is possible to
restore to position both ways, manually and
electrically (as previously described).
Power/Manual Folding Mirror Positions
HEATED MIRRORS — IF EQUIPPED
These mirrors are heated to melt frost
or ice. This feature will be activated
whenever you turn on the rear window
defroster (if equipped) Ú page 39.
EXTERIOR LIGHTS
MULTIFUNCTION LEVER
The multifunction lever controls the operation
of the headlights, parking lights, turn signals,
headlight beam selection and the passing lights.
The multifunction lever is located on the left side of
the steering column.
Multifunction Lever
HEADLIGHTS
To turn on the headlights, turn the end of the
multifunction lever to the headlight position. When
the headlight switch is on, the parking lights,
taillights, license plate light, clearance lights and
instrument panel lights are also turned on. To turn off the headlights, turn the end of the multifunction
lever back to the O (off) position.
NOTE:On vehicles sold in Canada, the rear parking lights,
clearance lights, and Daytime Running Lights
(DRLs) will turn on when the headlight switch is
rotated to the O (off) position.
DAYTIME RUNNING LIGHTS (DRLS) —
I
F EQUIPPED
The Daytime Running Lights (DRLs) will come on
when the ignition is in the ON position and the
vehicle is in DRIVE or NEUTRAL.
To activate the DRLs, rotate the end of the
multifunction lever to the O (off) position or the
AUTO position.
NOTE:
For vehicles sold in Canada, the Daytime
Running Lights will automatically deactivate
when the front fog lights are turned on.
The low beams and side/taillights will not be on
with DRLs.
On some vehicles, the Daytime Running Lights
may deactivate, or reduce intensity, on one side
of the vehicle (when a turn signal is activated on
that side), or on both sides of the vehicle (when
the hazard warning lights are activated).
1 — Normal Driving Position
2 — Fold In Position
3 — Fold Forward Position
CAUTION!
Leaving the mirror in a non-powered position,
accidental impact or manual fold, may cause
permanent damage to the mirror. Electrically
restore the mirror to its normal position, as soon
as practical.
22_VF_OM_EN_USC_t.book Page 32
Page 42 of 268
40GETTING TO KNOW YOUR VEHICLE
MAX A/C Button — If Equipped
Press and release the MAX A/C button on
the touchscreen to change the current
setting to the coldest output of air.
The MAX A/C indicator illuminates when
MAX A/C is on. Pressing the button again will cause
the MAX A/C operation to exit.
A/C Button — If Equipped
Push the A/C button to engage the Air
Conditioning (A/C). The A/C indicator
illuminates when A/C is on.
NOTE:
For Manual Climate Controls, if the system is in
Mix, Floor or Defrost mode, the A/C can be
turned off, but the A/C system could remain
active to prevent fogging of the windows.
If fog or mist appears on the windshield or side
glass, select Defrost mode, and increase blower
speed if needed.
If your air conditioning performance seems
lower than expected, check the front of the A/C
condenser (located in front of the radiator), for
an accumulation of dirt or insects. Clean with a
gentle water spray from the front of the radiator
and through the condenser.
Recirculation Button
Press and release this button to change the
system between recirculation mode and
outside air mode. The Recirculation indicator
and the A/C indicator illuminate when the
Recirculation button is pressed. Recirculation can be
used when outside conditions such as smoke, odors,
dust, or high humidity are present. Recirculation can be
used in all modes except for Defrost. Recirculation may
be unavailable if conditions exist that could create
fogging on the inside of the windshield. The A/C can be
deselected manually without disturbing the mode
control selection. Continuous use of the Recirculation
mode may make the inside air stuffy and window
fogging may occur. Extended use of this mode is not
recommended. Recirculation mode may automatically
adjust to optimize customer experience for warming,
cooling, dehumidification, etc.
On systems with Manual Climate Controls, if equipped,
the Recirculation mode is not allowed in Defrost mode
to improve window clearing operation. Recirculation
is disabled automatically if this mode is selected.
Attempting to use Recirculation while in this mode
causes the LED in the control button to blink and then
turns off.
MAX Defrost Button
Push the MAX Defrost button to change
the current airflow setting to Defrost
mode. The indicator illuminates when
this feature is on. Max defrost set
maximum temperature setting for best windshield
and side window defrosting and defogging. If MAX
Defrost mode is turned off, the Climate Control
system will return to the previous setting. Air
comes from the windshield and side window
demist outlets.
Rear Defrost Button — If Equipped
Push and release the Rear Defrost
Control button to turn on the rear window
defroster and the heated outside mirrors
(if equipped). The Rear Defrost indicator
illuminates when the rear window defroster is on.
The rear window defroster automatically turns off
after 10 minutes the first time it is activated after
the first key cycle. If the key cycle is engaged again,
the rear window defroster will automatically turn
off 5 minutes after it is activated.
22_VF_OM_EN_USC_t.book Page 40
Page 43 of 268
GETTING TO KNOW YOUR VEHICLE41
Temperature Control
Temperature Control regulates the temperature of
the air forced through the climate system.
The temperature increases as you press
the red arrow button on the faceplate.
The temperature decreases as you press
the blue arrow button on the faceplate. You can also adjust the temperature using the
sliding temperature bar on the touchscreen.
Slide the bar upward into the red to increase the
temperature, and slide it downward into the blue to
decrease the temperature.
Blower Control
Blower Control regulates the amount of
air forced through the climate system.
There are seven blower speeds available.
The blower speed increases as you press
the up arrow above the blower control symbol.
The blower speed decreases as you press the
down arrow below the blower control symbol.
You can also adjust the blower speed on the
touchscreen by selecting a speed on the blower bar.
Mode Control
Select Mode by pressing one of the Mode
buttons on the touchscreen, or the faceplate,
to change the airflow distribution mode.
Pushing this button will cycle through the five
mode combinations in order: Face, Face/Feet, Feet,
Windshield/Feet, Windshield. The cycle will repeat if
the button is continually pushed.
NOTE:The distribution modes on the climate control
screen will also illuminate when a selection is
made using the button on the instrument panel.
Panel Mode
Air comes from the outlets in the instrument
panel. Each of these outlets can be
individually adjusted to direct the flow of air.
The air vents out of the center outlets and
outboard outlets can be moved up and down or side to
side to regulate airflow direction. Move the vent to the
furthermost sides to close the vent.
Bi-Level Mode
Air comes from the instrument panel
outlets and floor outlets. A slight amount
of air is directed through the defrost and
side window demister outlets.
NOTE:Bi-Level mode is designed under comfort condi -
tions to provide cooler air out of the panel outlets
and warmer air from the floor outlets.
Floor Mode
Air comes from the floor outlets. A slight
amount of air is directed through the defrost
and side window demister outlets.
CAUTION!
Failure to follow these cautions can cause
damage to the heating elements:
Use care when washing the inside of the rear
window. Do not use abrasive window cleaners
on the interior surface of the window. Use a
soft cloth and a mild washing solution, wiping
parallel to the heating elements. Labels can
be peeled off after soaking with warm water.
Do not use scrapers, sharp instruments, or
abrasive window cleaners on the interior
surface of the window.
Keep all objects a safe distance from the window.
2
22_VF_OM_EN_USC_t.book Page 41
Page 44 of 268
42GETTING TO KNOW YOUR VEHICLE
Defrost Mode
Air comes from the windshield and side
window demist outlets. When the defrost
button is selected, the blower level may
increase. Use Defrost mode with maximum
temperature settings for best windshield and side
window defrosting and defogging. When toggling the
front defrost mode button, the Climate Control system
will return to the previous setting.
Mix Mode
Air is directed through the floor, defrost,
and side window demister outlets.
This setting works best in cold or snowy
conditions that require extra heat to the
windshield. This setting is good for maintaining
comfort while reducing moisture on the
windshield.
Climate Control OFF Button
Press and release this button to turn the
Climate Control ON/OFF.
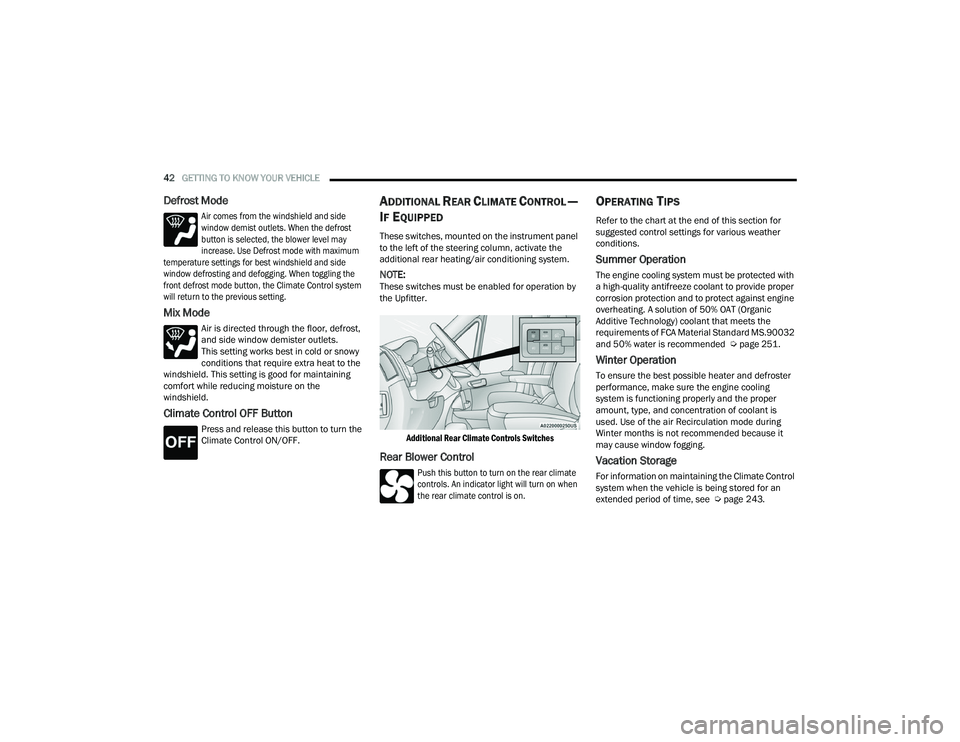
ADDITIONAL REAR CLIMATE CONTROL —
I
F EQUIPPED
These switches, mounted on the instrument panel
to the left of the steering column, activate the
additional rear heating/air conditioning system.
NOTE:These switches must be enabled for operation by
the Upfitter.
Additional Rear Climate Controls Switches
Rear Blower Control
Push this button to turn on the rear climate
controls. An indicator light will turn on when
the rear climate control is on.
OPERATING TIPS
Refer to the chart at the end of this section for
suggested control settings for various weather
conditions.
Summer Operation
The engine cooling system must be protected with
a high-quality antifreeze coolant to provide proper
corrosion protection and to protect against engine
overheating. A solution of 50% OAT (Organic
Additive Technology) coolant that meets the
requirements of FCA Material Standard MS.90032
and 50% water is recommended Ú page 251.
Winter Operation
To ensure the best possible heater and defroster
performance, make sure the engine cooling
system is functioning properly and the proper
amount, type, and concentration of coolant is
used. Use of the air Recirculation mode during
Winter months is not recommended because it
may cause window fogging.
Vacation Storage
For information on maintaining the Climate Control
system when the vehicle is being stored for an
extended period of time, see Úpage 243.
22_VF_OM_EN_USC_t.book Page 42
Page 45 of 268
GETTING TO KNOW YOUR VEHICLE43
Window Fogging
Vehicle windows tend to fog on the inside in mild, rainy,
and/or humid weather. To clear the windows, select
Defrost or Mix mode and increase the front blower
speed. Do not use the Recirculation mode without A/C
for long periods, as fogging may occur.
Outside Air Intake
Make sure the air intake, located directly in front of the
windshield, is free of obstructions such as leaves.
Leaves collected in the air intake may reduce airflow,
and if they enter the plenum, they could plug the water
drains. In Winter months, make sure the air intake is
clear of ice, slush, and snow.
Cabin Air Filter
The Climate Control system filters out dust and
pollen from the air. Contact an authorized dealer to
service your cabin air filter, and to have it replaced
when needed.
Operating Tips ChartINTERIOR STORAGE AND EQUIPMENT
STORAGE
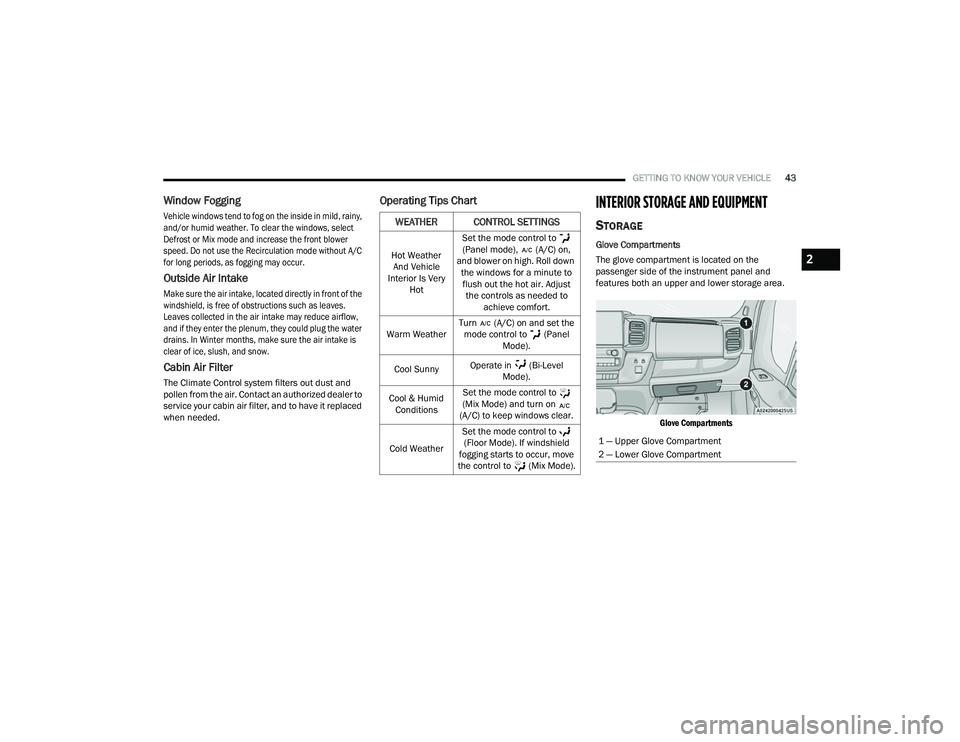
Glove Compartments
The glove compartment is located on the
passenger side of the instrument panel and
features both an upper and lower storage area.
Glove Compartments
WEATHER CONTROL SETTINGS
Hot Weather And Vehicle
Interior Is Very Hot Set the mode control to
(Panel mode), (A/C) on,
and blower on high. Roll down the windows for a minute to flush out the hot air. Adjust the controls as needed to achieve comfort.
Warm Weather Turn (A/C) on and set the
mode control to (Panel Mode).
Cool Sunny Operate in (Bi-Level
Mode).
Cool & Humid Conditions Set the mode control to
(Mix Mode) and turn on
(A/C) to keep windows clear.
Cold Weather Set the mode control to
(Floor Mode). If windshield
fogging starts to occur, move
the control to (Mix Mode).
1 — Upper Glove Compartment
2 — Lower Glove Compartment
2
22_VF_OM_EN_USC_t.book Page 43