buttons RAM PROMASTER CITY 2022 Owners Manual
[x] Cancel search | Manufacturer: RAM, Model Year: 2022, Model line: PROMASTER CITY, Model: RAM PROMASTER CITY 2022Pages: 260, PDF Size: 8.45 MB
Page 23 of 260
GETTING TO KNOW YOUR VEHICLE21
UCONNECT VOICE RECOGNITION
INTRODUCING VOICE RECOGNITION
Start using Uconnect Voice Recognition with these
helpful quick tips. It provides the key Voice
Commands and tips you need to know to control
your vehicle’s Voice Recognition (VR) system.
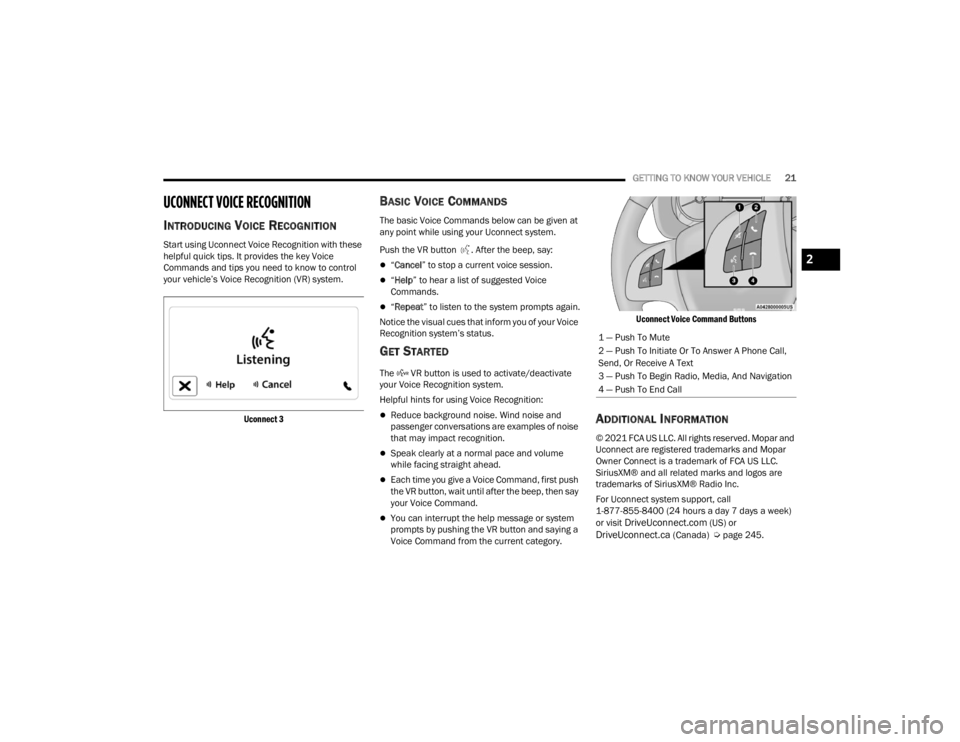
Uconnect 3
BASIC VOICE COMMANDS
The basic Voice Commands below can be given at
any point while using your Uconnect system.
Push the VR button . After the beep, say:
“Cancel ” to stop a current voice session.
“Help ” to hear a list of suggested Voice
Commands.
“ Repeat ” to listen to the system prompts again.
Notice the visual cues that inform you of your Voice
Recognition system’s status.
GET STARTED
The VR button is used to activate/deactivate
your Voice Recognition system.
Helpful hints for using Voice Recognition:
Reduce background noise. Wind noise and
passenger conversations are examples of noise
that may impact recognition.
Speak clearly at a normal pace and volume
while facing straight ahead.
Each time you give a Voice Command, first push
the VR button, wait until after the beep, then say
your Voice Command.
You can interrupt the help message or system
prompts by pushing the VR button and saying a
Voice Command from the current category.
Uconnect Voice Command Buttons
ADDITIONAL INFORMATION
© 2021 FCA US LLC. All rights reserved. Mopar and
Uconnect are registered trademarks and Mopar
Owner Connect is a trademark of FCA US LLC.
SiriusXM® and all related marks and logos are
trademarks of SiriusXM® Radio Inc.
For Uconnect system support, call
1-877-855-8400 (24 hours a day 7 days a week)
or visit
DriveUconnect.com (US) or DriveUconnect.ca (Canada) Ú
page 245.
1 — Push To Mute
2 — Push To Initiate Or To Answer A Phone Call,
Send, Or Receive A Text
3 — Push To Begin Radio, Media, And Navigation
4 — Push To End Call
2
22_VM_OM_EN_USC_t.book Page 21
Page 43 of 260
GETTING TO KNOW YOUR INSTRUMENT PANEL41
The menu items described below are an example
of what can be found in the vehicle's menu:
Dimmer
Speed Beep
Trip A / B (options are selectable through the
steering wheel stalk)
Buzzer Volume
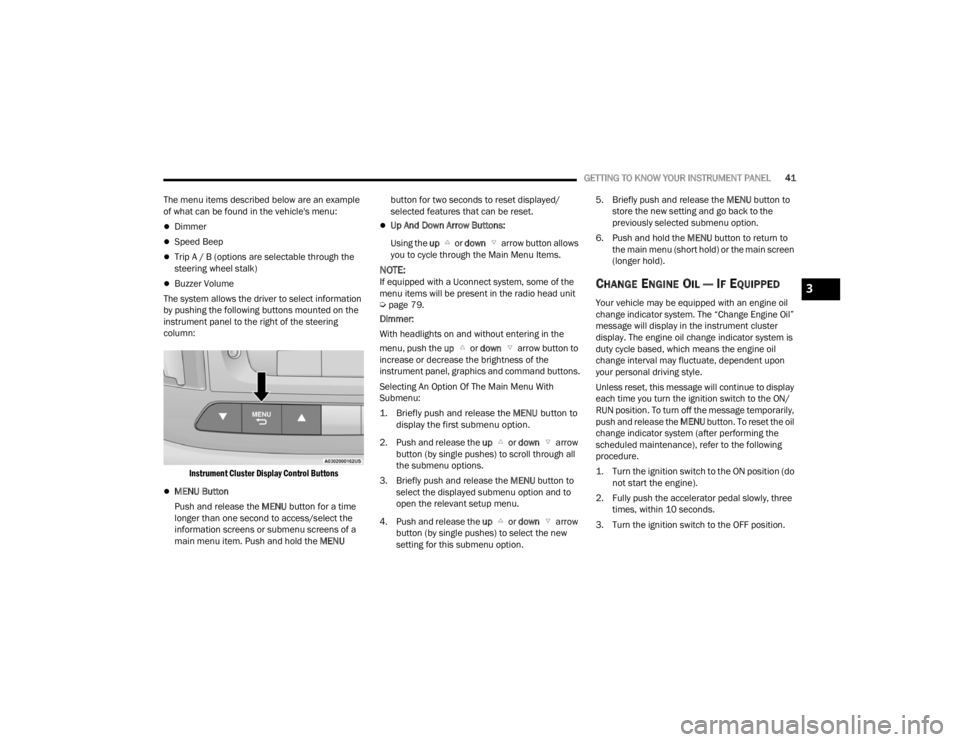
The system allows the driver to select information
by pushing the following buttons mounted on the
instrument panel to the right of the steering
column:
Instrument Cluster Display Control Buttons
MENU Button
Push and release the MENU button for a time
longer than one second to access/select the
information screens or submenu screens of a
main menu item. Push and hold the MENU button for two seconds to reset displayed/
selected features that can be reset.
Up And Down Arrow Buttons:
Using the up or down arrow button allows
you to cycle through the Main Menu Items.
NOTE:If equipped with a Uconnect system, some of the
menu items will be present in the radio head unit
Ú page 79.
Dimmer:
With headlights on and without entering in the
menu, push the up or down arrow button to
increase or decrease the brightness of the
instrument panel, graphics and command buttons.
Selecting An Option Of The Main Menu With
Submenu:
1. Briefly push and release the
MENU
button to
display the first submenu option.
2. Push and release the up or down arrow
button (by single pushes) to scroll through all
the submenu options.
3. Briefly push and release the MENU button to
select the displayed submenu option and to
open the relevant setup menu.
4. Push and release the up or down arrow
button (by single pushes) to select the new
setting for this submenu option. 5. Briefly push and release the MENU
button to
store the new setting and go back to the
previously selected submenu option.
6. Push and hold the MENU button to return to
the main menu (short hold) or the main screen
(longer hold).CHANGE ENGINE OIL — IF EQUIPPED
Your vehicle may be equipped with an engine oil
change indicator system. The “Change Engine Oil”
message will display in the instrument cluster
display. The engine oil change indicator system is
duty cycle based, which means the engine oil
change interval may fluctuate, dependent upon
your personal driving style.
Unless reset, this message will continue to display
each time you turn the ignition switch to the ON/
RUN position. To turn off the message temporarily,
push and release the MENU button. To reset the oil
change indicator system (after performing the
scheduled maintenance), refer to the following
procedure.
1. Turn the ignition switch to the ON position (do not start the engine).
2. Fully push the accelerator pedal slowly, three times, within 10 seconds.
3. Turn the ignition switch to the OFF position.
3
22_VM_OM_EN_USC_t.book Page 41
Page 62 of 260
60STARTING AND OPERATING
NOTE:To select the proper gear position for maximum
deceleration (engine braking), move the gear
selector into the ERS position, then simply press
and hold it forward “-”. The transmission will shift
to the range from which the vehicle can best be
slowed down.
POWER STEERING
The standard power steering system provides
increased vehicle response and ease of
maneuverability. The system will provide
mechanical steering capability if power assist is
lost.
If for some reason the power assist is interrupted,
it will still be possible to steer your vehicle. Under
these conditions, you will observe a substantial
increase in steering effort, especially at very low
vehicle speeds and during parking maneuvers.
NOTE:
Increased noise levels at the end of the steering
wheel travel are considered normal and do not
indicate that there is a problem with the power
steering system.
Upon initial start-up in cold weather, the power
steering pump may make noise for a short
amount of time. This is due to the cold, thick
fluid in the steering system. This noise should
be considered normal, and it does not in any
way damage the steering system.
POWER STEERING FLUID CHECK
Checking the power steering fluid level at a defined
service interval is not required. The fluid should
only be checked if a leak is suspected, abnormal
noises are apparent, and/or the system is not
functioning as anticipated. Coordinate inspection
efforts through an authorized dealer. If necessary, add fluid to restore to the proper
indicated level. With a clean cloth, wipe any spilled
fluid from all surfaces Ú
page 241.CRUISE CONTROL — IF EQUIPPED
When engaged, the Cruise Control takes over
accelerator operations at speeds greater than
25 mph (40 km/h).
The Cruise Control buttons are located on the right
side of the steering wheel.
WARNING!
Do not downshift for additional engine braking
on a slippery surface. The drive wheels could
lose their grip and the vehicle could skid,
causing a collision or personal injury.
CAUTION!
Prolonged operation of the steering system at
the end of the steering wheel travel will increase
the steering fluid temperature and it should be
avoided when possible. Damage to the power
steering pump may occur.
WARNING!
Fluid level should be checked on a level surface
and with the engine off to prevent injury from
moving parts and to ensure accurate fluid level
reading. Do not overfill. Use only the
manufacturer recommended power steering
fluid.
CAUTION!
Do not use chemical flushes in your power
steering system as the chemicals can damage
your power steering components. Such damage
is not covered by the New Vehicle Limited
Warranty.
22_VM_OM_EN_USC_t.book Page 60
Page 63 of 260
STARTING AND OPERATING61
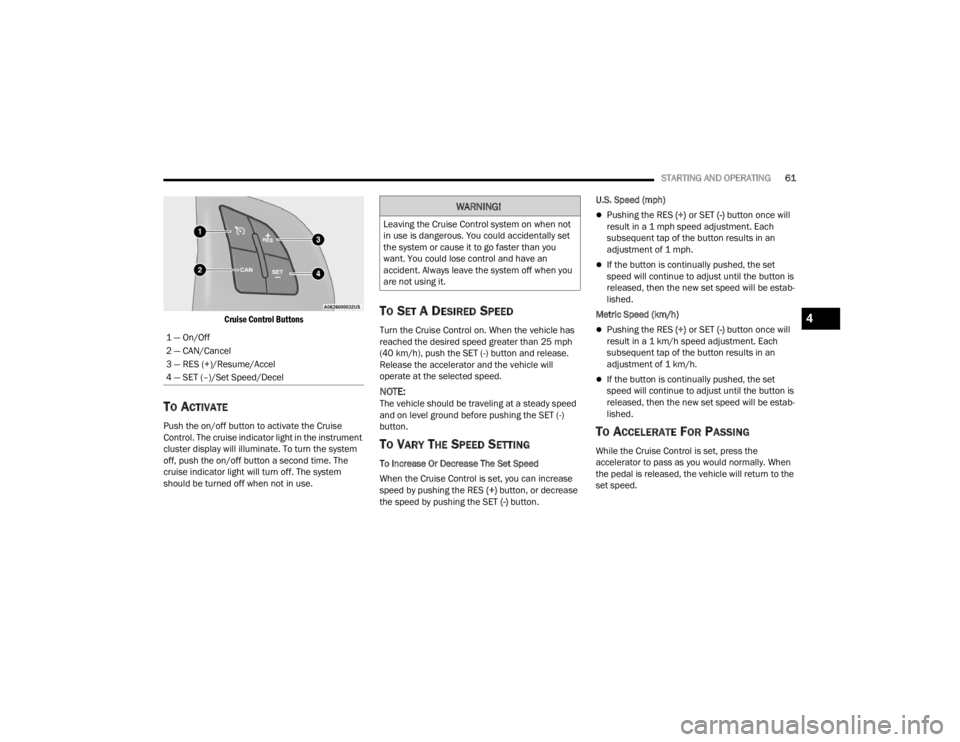
Cruise Control Buttons
TO ACTIVATE
Push the on/off button to activate the Cruise
Control. The cruise indicator light in the instrument
cluster display will illuminate. To turn the system
off, push the on/off button a second time. The
cruise indicator light will turn off. The system
should be turned off when not in use.
TO SET A DESIRED SPEED
Turn the Cruise Control on. When the vehicle has
reached the desired speed greater than 25 mph
(40 km/h), push the SET (-) button and release.
Release the accelerator and the vehicle will
operate at the selected speed.
NOTE:The vehicle should be traveling at a steady speed
and on level ground before pushing the SET (-)
button.
TO VARY THE SPEED SETTING
To Increase Or Decrease The Set Speed
When the Cruise Control is set, you can increase
speed by pushing the RES (+) button, or decrease
the speed by pushing the SET (-) button. U.S. Speed (mph)
Pushing the RES
(+) or SET (-) button once will
result in a 1 mph speed adjustment. Each
subsequent tap of the button results in an
adjustment of 1 mph.
If the button is continually pushed, the set
speed will continue to adjust until the button is
released, then the new set speed will be estab -
lished.
Metric Speed (km/h)
Pushing the RES (+) or SET (-) button once will
result in a 1 km/h speed adjustment. Each
subsequent tap of the button results in an
adjustment of 1 km/h.
If the button is continually pushed, the set
speed will continue to adjust until the button is
released, then the new set speed will be estab -
lished.
TO ACCELERATE FOR PASSING
While the Cruise Control is set, press the
accelerator to pass as you would normally. When
the pedal is released, the vehicle will return to the
set speed.
1 — On/Off
2 — CAN/Cancel
3 — RES (+)/Resume/Accel
4 — SET (–)/Set Speed/Decel
WARNING!
Leaving the Cruise Control system on when not
in use is dangerous. You could accidentally set
the system or cause it to go faster than you
want. You could lose control and have an
accident. Always leave the system off when you
are not using it.
4
22_VM_OM_EN_USC_t.book Page 61
Page 81 of 260
MULTIMEDIA79
UCONNECT SETTINGS
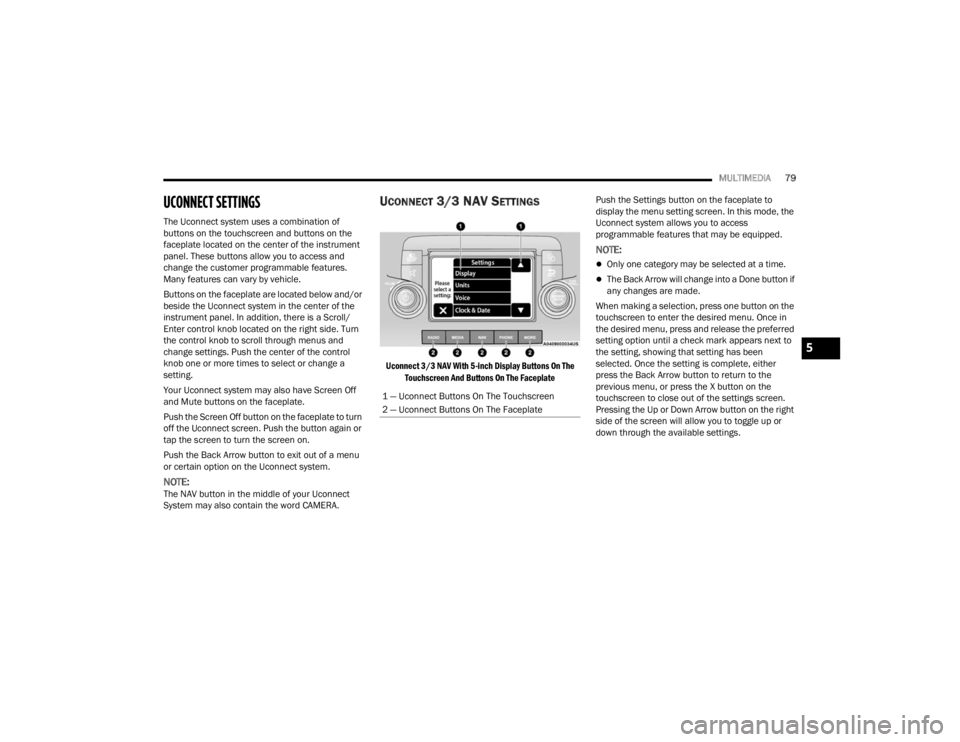
The Uconnect system uses a combination of
buttons on the touchscreen and buttons on the
faceplate located on the center of the instrument
panel. These buttons allow you to access and
change the customer programmable features.
Many features can vary by vehicle.
Buttons on the faceplate are located below and/or
beside the Uconnect system in the center of the
instrument panel. In addition, there is a Scroll/
Enter control knob located on the right side. Turn
the control knob to scroll through menus and
change settings. Push the center of the control
knob one or more times to select or change a
setting.
Your Uconnect system may also have Screen Off
and Mute buttons on the faceplate.
Push the Screen Off button on the faceplate to turn
off the Uconnect screen. Push the button again or
tap the screen to turn the screen on.
Push the Back Arrow button to exit out of a menu
or certain option on the Uconnect system.
NOTE:The NAV button in the middle of your Uconnect
System may also contain the word CAMERA.
UCONNECT 3/3 NAV SETTINGS
Uconnect 3/3 NAV With 5-inch Display Buttons On The
Touchscreen And Buttons On The Faceplate
Push the Settings button on the faceplate to
display the menu setting screen. In this mode, the
Uconnect system allows you to access
programmable features that may be equipped.
NOTE:
Only one category may be selected at a time.
The Back Arrow will change into a Done button if
any changes are made.
When making a selection, press one button on the
touchscreen to enter the desired menu. Once in
the desired menu, press and release the preferred
setting option until a check mark appears next to
the setting, showing that setting has been
selected. Once the setting is complete, either
press the Back Arrow button to return to the
previous menu, or press the X button on the
touchscreen to close out of the settings screen.
Pressing the Up or Down Arrow button on the right
side of the screen will allow you to toggle up or
down through the available settings.
1 — Uconnect Buttons On The Touchscreen
2 — Uconnect Buttons On The Faceplate
5
22_VM_OM_EN_USC_t.book Page 79
Page 93 of 260
MULTIMEDIA91
UCONNECT MODES
RADIO MODE
Operating Radio Mode
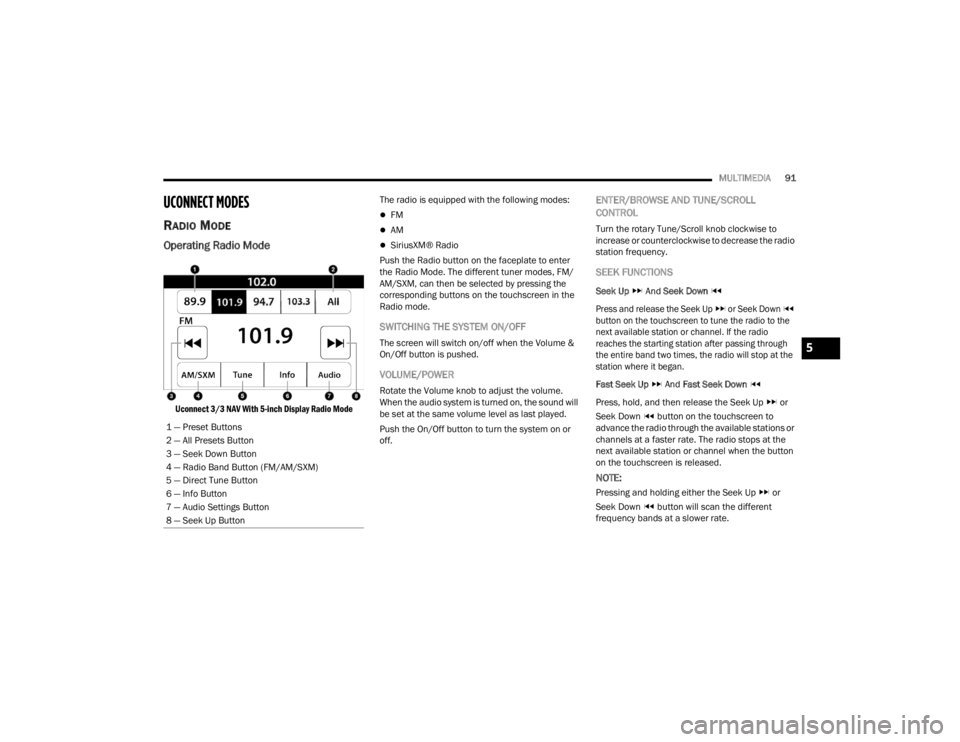
Uconnect 3/3 NAV With 5-inch Display Radio Mode
The radio is equipped with the following modes:
FM
AM
SiriusXM® Radio
Push the Radio button on the faceplate to enter
the Radio Mode. The different tuner modes, FM/
AM/SXM, can then be selected by pressing the
corresponding buttons on the touchscreen in the
Radio mode.
SWITCHING THE SYSTEM ON/OFF
The screen will switch on/off when the Volume &
On/Off button is pushed.
VOLUME/POWER
Rotate the Volume knob to adjust the volume.
When the audio system is turned on, the sound will
be set at the same volume level as last played.
Push the On/Off button to turn the system on or
off.
ENTER/BROWSE AND TUNE/SCROLL
CONTROL
Turn the rotary Tune/Scroll knob clockwise to
increase or counterclockwise to decrease the radio
station frequency.
SEEK FUNCTIONS
Seek Up And Seek Down
Press and release the Seek Up or Seek Down
button on the touchscreen to tune the radio to the
next available station or channel. If the radio
reaches the starting station after passing through
the entire band two times, the radio will stop at the
station where it began.
Fast Seek Up And Fast Seek Down
Press, hold, and then release the Seek Up or
Seek Down button on the touchscreen to
advance the radio through the available stations or
channels at a faster rate. The radio stops at the
next available station or channel when the button
on the touchscreen is released.
NOTE:
Pressing and holding either the Seek Up or
Seek Down button will scan the different
frequency bands at a slower rate.
1 — Preset Buttons
2 — All Presets Button
3 — Seek Down Button
4 — Radio Band Button (FM/AM/SXM)
5 — Direct Tune Button
6 — Info Button
7 — Audio Settings Button
8 — Seek Up Button
5
22_VM_OM_EN_USC_t.book Page 91
Page 94 of 260
92MULTIMEDIA
DIRECT TUNE
Press the Tune button located at the bottom of the
radio screen to directly tune to a desired radio
station or channel.
Press the available number button on the
touchscreen to begin selecting a desired station.
Once a number has been entered, any numbers
that are no longer possible (stations that cannot be
reached) will become deactivated/grayed out.
INFO
Press the Info button to display the current track
information. Press the X button to cancel this
feature.
SETTING THE PRESETS
The Presets are available for all Radio Modes, and
are activated by pressing any of the four Preset
buttons, located at the top of the screen.
When you are receiving a station that you wish to
commit into memory, press and hold the desired
numbered button for more that two seconds or
until you hear a confirmation beep.
The Radio stores up to 12 presets in each of the
Radio modes. Four presets are visible at the top of
the radio screen.
Pressing the All button on the radio home screen
will display all of the preset stations for that mode.
SIRIUSXM® SATELLITE RADIO MODE
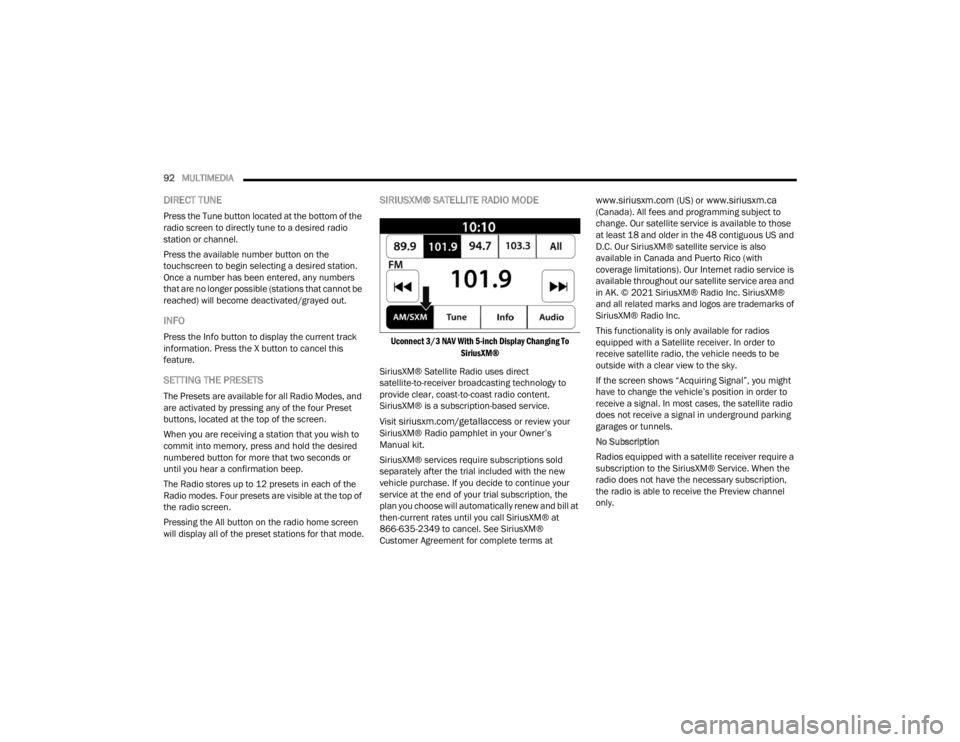
Uconnect 3/3 NAV With 5-inch Display Changing To
SiriusXM®
SiriusXM® Satellite Radio uses direct
satellite-to-receiver broadcasting technology to
provide clear, coast-to-coast radio content.
SiriusXM® is a subscription-based service.
Visit
siriusxm.com/getallaccess or review your
SiriusXM® Radio pamphlet in your Owner’s
Manual kit.
SiriusXM® services require subscriptions sold
separately after the trial included with the new
vehicle purchase. If you decide to continue your
service at the end of your trial subscription, the
plan you choose will automatically renew and bill at
then-current rates until you call SiriusXM® at
866-635-2349 to cancel. See SiriusXM®
Customer Agreement for complete terms at
www.siriusxm.com (US) or www.siriusxm.ca
(Canada). All fees and programming subject to
change. Our satellite service is available to those
at least 18 and older in the 48 contiguous US and
D.C. Our SiriusXM® satellite service is also
available in Canada and Puerto Rico (with
coverage limitations). Our Internet radio service is
available throughout our satellite service area and
in AK. © 2021 SiriusXM® Radio Inc. SiriusXM®
and all related marks and logos are trademarks of
SiriusXM® Radio Inc.
This functionality is only available for radios
equipped with a Satellite receiver. In order to
receive satellite radio, the vehicle needs to be
outside with a clear view to the sky.
If the screen shows “Acquiring Signal”, you might
have to change the vehicle’s position in order to
receive a signal. In most cases, the satellite radio
does not receive a signal in underground parking
garages or tunnels.
No Subscription
Radios equipped with a satellite receiver require a
subscription to the SiriusXM® Service. When the
radio does not have the necessary subscription,
the radio is able to receive the Preview channel
only.
22_VM_OM_EN_USC_t.book Page 92
Page 95 of 260
MULTIMEDIA93
Acquiring SiriusXM® Subscription
To activate the SiriusXM® Satellite Radio
subscription, US visit
www.UconnectPhone.com
or call: 1-800-643-2112
Canada visit
www.UconnectPhone.com or call:
1-800-465-2001 (English)or 1-800-387-9983
(French)
NOTE:You will need to provide the SiriusXM® ID (RID)
located at the bottom of the Channel 0 screen.
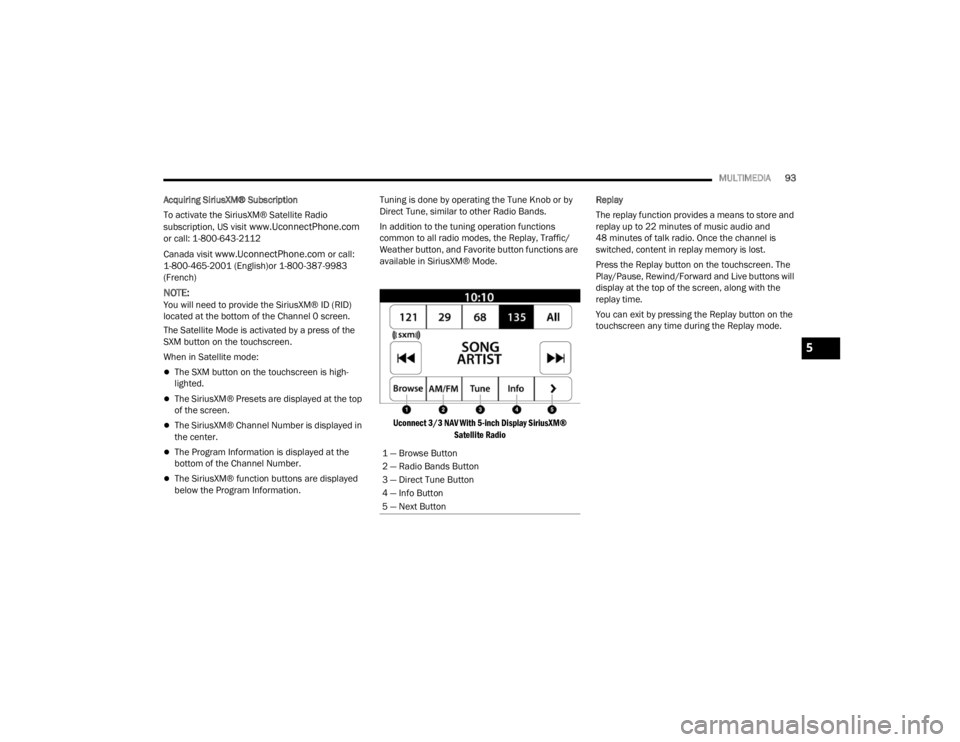
The Satellite Mode is activated by a press of the
SXM button on the touchscreen.
When in Satellite mode:
The SXM button on the touchscreen is high -
lighted.
The SiriusXM® Presets are displayed at the top
of the screen.
The SiriusXM® Channel Number is displayed in
the center.
The Program Information is displayed at the
bottom of the Channel Number.
The SiriusXM® function buttons are displayed
below the Program Information. Tuning is done by operating the Tune Knob or by
Direct Tune, similar to other Radio Bands.
In addition to the tuning operation functions
common to all radio modes, the Replay, Traffic/
Weather button, and Favorite button functions are
available in SiriusXM® Mode.
Uconnect 3/3 NAV With 5-inch Display SiriusXM® Satellite Radio
Replay
The replay function provides a means to store and
replay up to 22 minutes of music audio and
48 minutes of talk radio. Once the channel is
switched, content in replay memory is lost.
Press the Replay button on the touchscreen. The
Play/Pause, Rewind/Forward and Live buttons will
display at the top of the screen, along with the
replay time.
You can exit by pressing the Replay button on the
touchscreen any time during the Replay mode.
1 — Browse Button
2 — Radio Bands Button
3 — Direct Tune Button
4 — Info Button
5 — Next Button
5
22_VM_OM_EN_USC_t.book Page 93
Page 99 of 260
MULTIMEDIA97
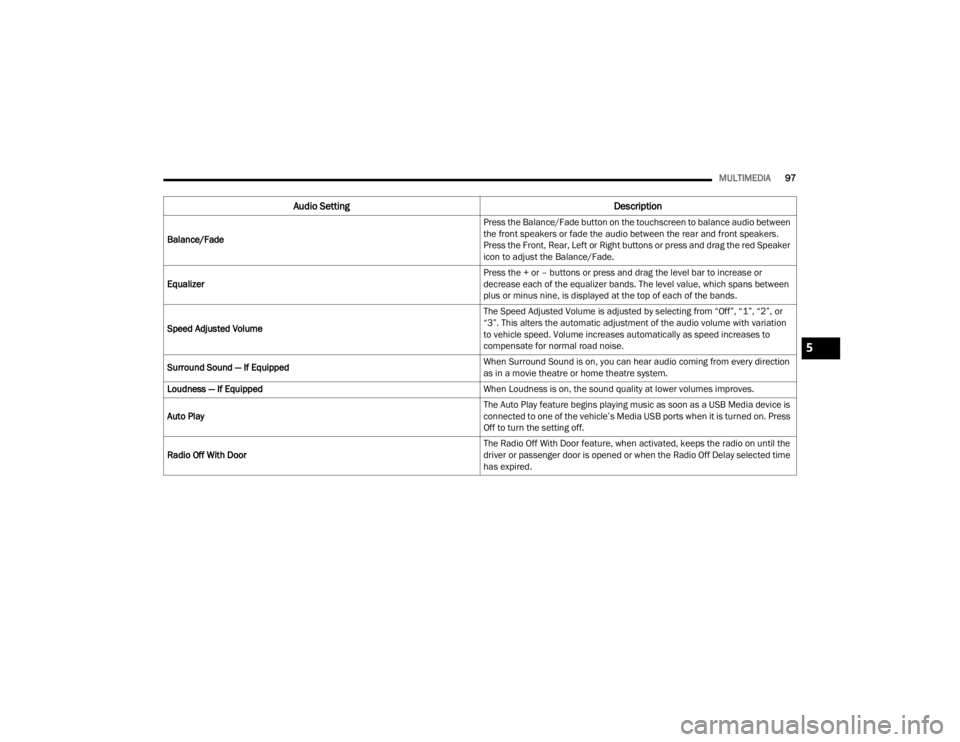
Audio Setting Description
Balance/Fade Press the Balance/Fade button on the touchscreen to balance audio between
the front speakers or fade the audio between the rear and front speakers.
Press the Front, Rear, Left or Right buttons or press and drag the red Speaker
icon to adjust the Balance/Fade.
Equalizer Press the + or – buttons or press and drag the level bar to increase or
decrease each of the equalizer bands. The level value, which spans between
plus or minus nine, is displayed at the top of each of the bands.
Speed Adjusted Volume The Speed Adjusted Volume is adjusted by selecting from “Off”, “1”, “2”, or
“3”. This alters the automatic adjustment of the audio volume with variation
to vehicle speed. Volume increases automatically as speed increases to
compensate for normal road noise.
Surround Sound — If Equipped When Surround Sound is on, you can hear audio coming from every direction
as in a movie theatre or home theatre system.
Loudness — If Equipped When Loudness is on, the sound quality at lower volumes improves.
Auto Play The Auto Play feature begins playing music as soon as a USB Media device is
connected to one of the vehicle’s Media USB ports when it is turned on. Press
Off to turn the setting off.
Radio Off With Door The Radio Off With Door feature, when activated, keeps the radio on until the
driver or passenger door is opened or when the Radio Off Delay selected time
has expired.
5
22_VM_OM_EN_USC_t.book Page 97
Page 106 of 260
104MULTIMEDIA
CONNECTING TO A PARTICULAR MOBILE
PHONE OR AUDIO DEVICE AFTER PAIRING
Uconnect Phone will automatically connect to the
highest priority paired phone and/or Audio Device
within range. If you need to choose a particular
phone or audio device follow these steps:
1. Press the
Settings
button on the faceplate.
2. Press the Paired Phones/Audio Sources buttons.
3. Press to select the particular phone or the particular audio device. A pop-up menu will
appear; press “Connect Phone”.
4. Press the X to exit out of the Settings screen.
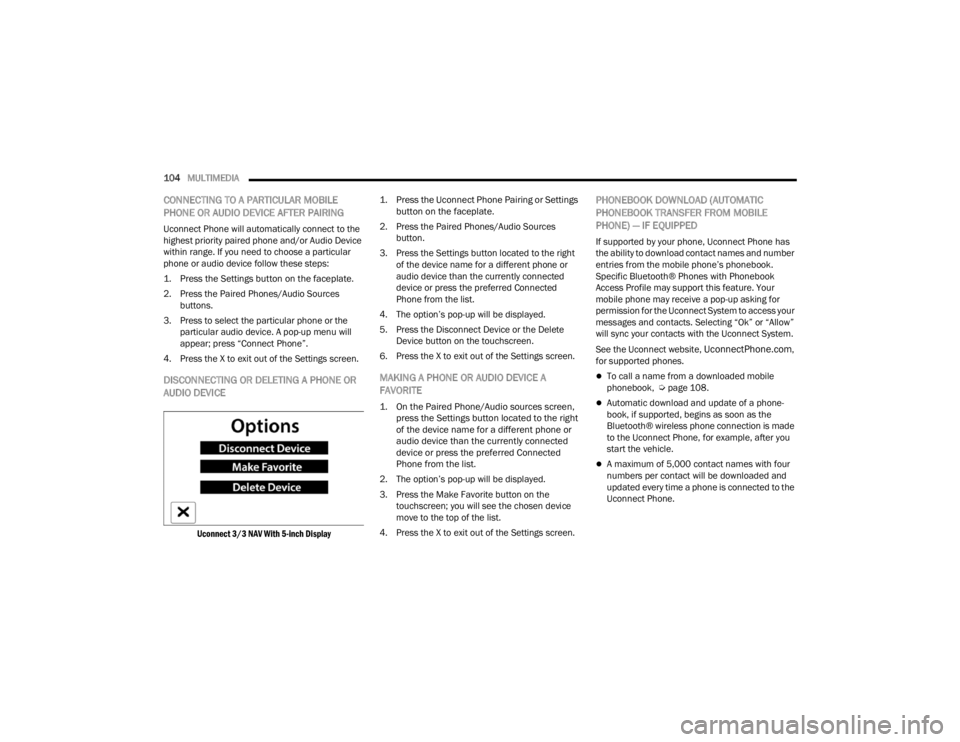
DISCONNECTING OR DELETING A PHONE OR
AUDIO DEVICE
Uconnect 3/3 NAV With 5-inch Display
1. Press the Uconnect Phone Pairing or Settings
button on the faceplate.
2. Press the Paired Phones/Audio Sources button.
3. Press the Settings button located to the right of the device name for a different phone or
audio device than the currently connected
device or press the preferred Connected
Phone from the list.
4. The option’s pop-up will be displayed.
5. Press the Disconnect Device or the Delete Device button on the touchscreen.
6. Press the X to exit out of the Settings screen.
MAKING A PHONE OR AUDIO DEVICE A
FAVORITE
1. On the Paired Phone/Audio sources screen, press the Settings button located to the right
of the device name for a different phone or
audio device than the currently connected
device or press the preferred Connected
Phone from the list.
2. The option’s pop-up will be displayed.
3. Press the Make Favorite button on the touchscreen; you will see the chosen device
move to the top of the list.
4. Press the X to exit out of the Settings screen.
PHONEBOOK DOWNLOAD (AUTOMATIC
PHONEBOOK TRANSFER FROM MOBILE
PHONE) — IF EQUIPPED
If supported by your phone, Uconnect Phone has
the ability to download contact names and number
entries from the mobile phone’s phonebook.
Specific Bluetooth® Phones with Phonebook
Access Profile may support this feature. Your
mobile phone may receive a pop-up asking for
permission for the Uconnect System to access your
messages and contacts. Selecting “Ok” or “Allow”
will sync your contacts with the Uconnect System.
See the Uconnect website,
UconnectPhone.com,
for supported phones.
To call a name from a downloaded mobile
phonebook, Ú page 108.
Automatic download and update of a phone -
book, if supported, begins as soon as the
Bluetooth® wireless phone connection is made
to the Uconnect Phone, for example, after you
start the vehicle.
A maximum of 5,000 contact names with four
numbers per contact will be downloaded and
updated every time a phone is connected to the
Uconnect Phone.
22_VM_OM_EN_USC_t.book Page 104