bluetooth RENAULT ALASKAN 2017 Owners Manual
[x] Cancel search | Manufacturer: RENAULT, Model Year: 2017, Model line: ALASKAN, Model: RENAULT ALASKAN 2017Pages: 340, PDF Size: 6.93 MB
Page 4 of 340
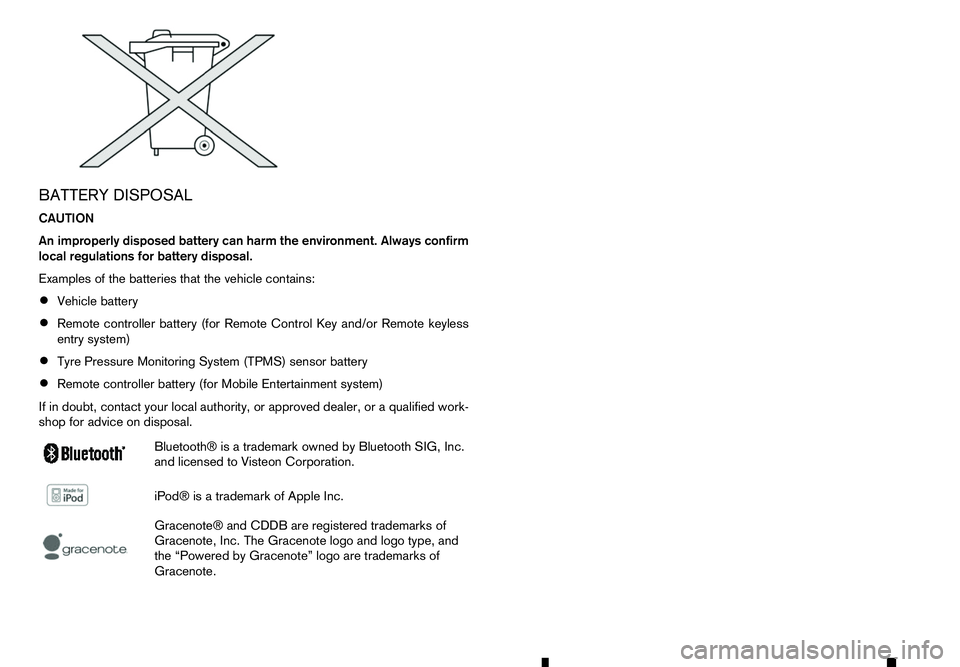
BATTERY DISPOSAL
CAUTION
An improperly disposed battery can harm the environment. Always confirm
local regulations for battery disposal.
Examples of the batteries that the vehicle contains:
• Vehicle battery
• Remote controller battery (for Remote Control Key and/or Remote keyless
entry system)
• Tyre Pressure Monitoring System (TPMS) sensor battery
• Remote controller battery (for Mobile Entertainment system)
If in doubt, contact your local authority, or approved dealer, or aqualified work-
shop for advice on disposal.
m Bluetooth®
is
at rademark owned by Bluetooth SIG, Inc.
and licensed to Visteon Corporation.
m iPod®
is
at rademark of Apple Inc.
m Gracenote®
and CDDB are registered trademarks of
Gracenote, Inc. The Gracenote logo and logo type, and
the “Powered by Gracenote” logo are trademarks of
Gracenote.
Page 132 of 340
4
Display screen, heater and air conditioner,
and audio system Display screen, heater and air conditioner,
and audio system
Safety precautions ................................................... 4-2
Centre multi-function control panel (models with
navigation system) ................................................... 4-2 How to use touch screen display ........................ 4-3
How to use brightness control/display on·off
button ................................................................. 4-3
How to use
How to use BACK button ................................... 4-4
Vehicle information and settings (models with
navigation system) ................................................... 4-4 How to use INFO button..................................... 4-4
How to use
Reversing Camera (where fitted).............................. 4-7 How to read the displayed lines .......................... 4-8
Difference between predictive and actual
distances ............................................................ 4-8
How to adjust the screen .................................... 4-10
Operating tips..................................................... 4-10
360° Camera (where fitted) ..................................... 4-11 Operation ........................................................... 4-14
Guide lines ......................................................... 4-15
Difference between predictive and actual
distances ............................................................ 4-17
How to adjust the screen view ............................ 4-19
Operating tips..................................................... 4-19
Vents ....................................................................... 4-20
Centre vents ....................................................... 4-20
Side vents .......................................................... 4-20
Rear vents (where fitted) ..................................... 4-20
Heater and air conditioner ........................................ 4-21 Operating tips (models with automatic air
conditioner) ........................................................ 4-22
Manual air conditioner and heater (Type A) ......... 4-23
Manual air conditioner and heater (Type B) ......... 4-26
Automatic air conditioner .................................... 4-28
Servicing air conditioner ..................................... 4-30
Audio system (where fitted)...................................... 4-31 Audio operation precautions ............................... 4-31
Antenna .............................................................. 4-35
USB (Universal Serial Bus) connection port ........ 4-35
AUX (Auxiliary) input jack .................................... 4-36
CD/USB memory care and cleaning ................... 4-36
FM AM radio with compact disc (CD) player
(Type A) .................................................................. 4-37 Audio main operation .......................................... 4-38
Radio operation .................................................. 4-38
SETUP button .................................................... 4-39
Compact Disc (CD) operation ............................ 4-41
AUX (Auxiliary) socket......................................... 4-43
USB (Universal Serial Bus) connection port
(where fitted) ...................................................... 4-43
iPod player operation (where fitted)..................... 4-45
Bluetooth® operation.......................................... 4-46
FM-AM radio with compact disc (CD) player
(Type B) .................................................................. 4-52 Audio main operation .......................................... 4-52
Touchscreen Navigation (where fitted) ..................... 4-57
Steering wheel switch for audio control (where
fitted) ....................................................................... 4-58
Audio control ...................................................... 4-58
Page 133 of 340

Phone control buttons ......................................... 4-58
Bluetooth® Hands-Free Phone System (without
navigation system and colour display)....................... 4-59 Bluetooth® mobile phone feature ........................ 4-59
Hands-free telephone control .............................. 4-61Steering wheel switches (where fitted)................ 4-64
Bluetooth® Hands-Free Phone System (with
navigation system) ................................................... 4-65 Regulatory information ........................................ 4-65 Control buttons and microphone ......................... 4-66
Pairing procedure ............................................... 4-66
Phonebook ......................................................... 4-67
Making
acall ...................................................... 4-67
Receiving acall................................................... 4-67
During acall ....................................................... 4-67
Ending acall ....................................................... 4-67
Bluetooth® settings ............................................ 4-67
Telephone setup ................................................. 4-68
Page 137 of 340
![RENAULT ALASKAN 2017 Owners Manual –[
Software Licenses]
• [Navigation]
• [Telephone
&Bluetooth]
• [Traffic Messages]
• [Radio]
[Audio] settings
Audio settings can be adjusted from the audio setup
screen.
This item is availab RENAULT ALASKAN 2017 Owners Manual –[
Software Licenses]
• [Navigation]
• [Telephone
&Bluetooth]
• [Traffic Messages]
• [Radio]
[Audio] settings
Audio settings can be adjusted from the audio setup
screen.
This item is availab](/img/7/58394/w960_58394-136.png)
–[
Software Licenses]
• [Navigation]
• [Telephone
&Bluetooth]
• [Traffic Messages]
• [Radio]
[Audio] settings
Audio settings can be adjusted from the audio setup
screen.
This item is available only when the audio system is
turned on.
1. Push the
2. Touch the [Audio] key.
3. Select the item you wish to adjust.
[Bass]/[Treble]/[Balance]/[Fade]:
Touch the adjustment bar next to the corresponding
keys on the display to adjust the tone quality and
speaker balance.
The levels of these features can also be adjusted
with the
[Speed Sensitive Vol.]:
Speed sensitive volume function increases the vol-
ume of the audio system as the speed of the vehicle
increases. Choose the desired effect level from 0
(OFF) to 5. The higher the setting, the more the vol-
ume increases in relation to vehicle speed. [AUX Level]:
This feature controls the volume level of incoming
sound when an auxiliary device is connected to the
system. Select the level from [Quiet], [Medium], and
[Loud].
[System settings]
Various system settings can be adjusted from the
system settings.
1. Push the
2. Select the [System] key.
3. Select the item you wish to adjust.
[Display]:
Select the corresponding keys to adjust the set-
tings.
• [Brightness]:
Adjusts the brightness of the display.
• [Display Mode]:
Adjusts to fit the level of lighting in the vehicle.
Touch the [Display Mode] key to cycle through
options of the mode ([Day], [Night] and [Auto]).
• [Scroll Direction]:
Adjusts the direction of the menu scroll. Choose
either the up arrow or down arrow. [Clock]:
Select the corresponding keys to adjust the set-
tings.
• [Time Format]:
The time format setting can be selected from 12
hour and 24 hour formats.
• [Date Format]:
The day, month and year display can be selected
from five formats.
• [Clock Mode]:
Select the clock mode from [Manual], [Time
Zone] and [Auto].
When [Manual] is selected, you can set the clock
mode manually with the [Set Clock Manually]
key.
Select [Auto] to automatically maintain the time
using GPS.
• [Set Clock Manually]:
Mode (AM/PM) (where fitted), Hours, Minutes,
Day, Month and Year can be set manually if
“Manual” is selected in the Clock Mode setting.
• [Daylight Savings Time]:
Turns the daylight savings time ON or OFF.
• [Time Zone]:
Select the applicable time zone from the list.
Display screen, heater and air conditioner, and audio system 4-5
Page 138 of 340
![RENAULT ALASKAN 2017 Owners Manual [Language]:
Select
alanguage to be displayed on the screen.
[Camera Settings] (where fitted):
See “How to adjust the screen” later in this section
for details.
[Temperature Unit]:
Select the tempe RENAULT ALASKAN 2017 Owners Manual [Language]:
Select
alanguage to be displayed on the screen.
[Camera Settings] (where fitted):
See “How to adjust the screen” later in this section
for details.
[Temperature Unit]:
Select the tempe](/img/7/58394/w960_58394-137.png)
[Language]:
Select
alanguage to be displayed on the screen.
[Camera Settings] (where fitted):
See “How to adjust the screen” later in this section
for details.
[Temperature Unit]:
Select the temperature unit from °C and °F.
[Touch Click]:
Turns the touch screen click feature on or off. When
turned on, aclick sound will be heard every time a
key on the screen is touched.
[Beep Tones]:
Turns the beep tones feature on or off. When turned
on, abeep sound will be heard as apop-up mes-
sage appears on the screen.
[Factory Settings]:
Select this key to return all settings to default.
[Software Licenses] (where fitted):
Select this key to view software licence information.
[System Software Version:]:
This key shows the current software version num-
ber.
[Navigation] settings
Navigation settings can be changed. See Naviga-
tion System Owner’s Manual for details. [Telephone
&Bluetooth] settings
Telephone &Bluetooth settings can be changed.
See “Bluetooth® Hands-Free Phone System (with
navigation system)” later in this section for details.
[Traffic Messages] settings
Traffic information guidance, announcement and
warning settings can be adjusted.
Traffic Announcement (TA) information can be re-
ceived only in areas where the service is available.
[Radio] settings
[RDS Reg]:
RDS messages can be turned ON or OFF. When
this item is turned ON, the received RDS informa-
tion will be shown on the audio screen.
RDS information can be received only in areas
where the service is available.
[Traffic Announcement]:
Traffic Announcement (TA) related messages can
be turned ON or OFF. When this item is turned ON,
the received traffic announcement information will
be tuned to automatically when received.
Traffic Announcement (TA) information can be re-
ceived only in areas where the service is available.
4-6 Display screen, heater and air conditioner, and audio system
Page 165 of 340

•
Audiobooks may not play in the same order as
they appear on an iPod.
• Large video files cause slow responses in an
iPod. The vehicle centre display may momen-
tarily black out, but will soon recover.
• If an iPod automatically selects large video files
while in the shuffle mode, the vehicle centre dis-
play may momentarily black out, but will soon
recover.
Bluetooth® audio player (where fitted)
• Some Bluetooth® audio devices may not be
used with this system. For detailed information
about Bluetooth® audio devices that are avail-
able for use with this system, contact an ap-
proved dealer or qualified workshop.
• Before using
aBluetooth® audio system, the ini-
tial registration process for the audio device is
necessary.
• Operation of the Bluetooth® audio system may
vary depending on the audio device that is con-
nected. Confirm the operation procedure before
use.
• The playback of Bluetooth® audio will be paused
under the following conditions. The playback will
be resumed after the following conditions are
completed.
–w
hile using ahands-free phone
–w hile checking aconnection with amobile
phone •
The in-vehicle antenna for Bluetooth® communi-
cation is built in the system. Do not place the
Bluetooth® audio device in an area surrounded
by metal, far away from the system or in
anarrow
space where the device closely contacts the
body or the seat. Otherwise, sound degradation
or connection interference may occur.
• While
aBluetooth® audio device is connected
through the Bluetooth® wireless connection, the
battery power of the device may discharge
quicker than usual.
• This system is compatible with the Bluetooth®
AV profile (A2DP and AVRCP).
m Bluetooth®
is
at rademark
owned by Bluetooth SIG, Inc.,
and licensed to Visteon Cor-
poration and Robert Bosch
GmbH.
Compact Disc (CD)/USB device with
MP3/WMA/AAC (where fitted)
Terms:
• MP3
—MP3 is short for Moving Pictures Ex-
perts Group Audio Layer 3. MP3 is the most well
known compressed digital audio file format. This
format allows for near “CD quality” sound, but at
af raction of the size of normal audio files. MP3
conversion of an audio track from CD can re-
duce the file size by approximately 10:1 ratio
(Sampling: 44.1 kHz, Bit rate: 128 kbps) with
virtually no perceptible loss in quality. MP3 com- pression removes the redundant and irrelevant
parts of
asound signal that the human ear
doesn’t hear.
• WMA
—Windows Media Audio (WMA) is a
compressed audio format created by Microsoft
as an alternative to MP3. The WMA codec offers
greater file compression than the MP3 codec,
enabling storage of more digital audio tracks in
the same amount of space when compared to
MP3s at the same level of quality.
• AAC (where fitted)
—Advanced Audio Coding
(AAC) is acompressed audio format. AAC of-
fers greater file compression than MP3 and en-
ables music file creation and storage at the same
quality as MP3.
• Bit rate
—Bit rate denotes the number of bits
per second used by adigital music files. The size
and quality of acompressed digital audio file is
determined by the bit rate used when encoding
the file.
• Sampling frequency
—Sampling frequency is
the rate at which the samples of asignal are con-
verted from analog to digital (A/D conversion)
per second.
• Multisession
—Multisession is one of the meth-
ods for writing data to media. Writing data once
to the media is called asingle session, and writ-
ing more than once is called amultisession.
Display screen, heater and air conditioner, and audio system 4-33
Page 169 of 340
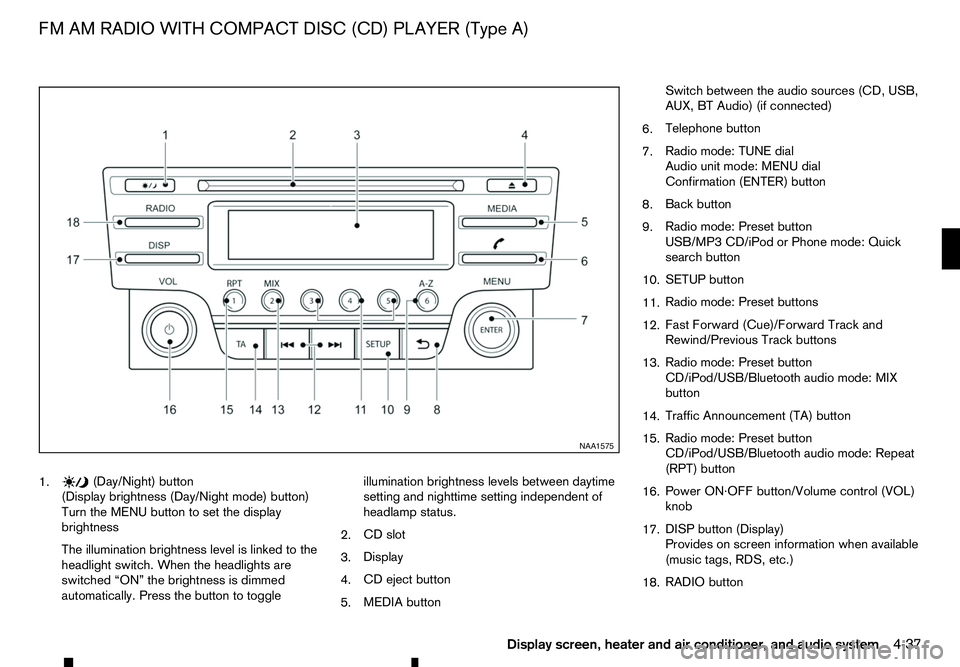
1. (Day/Night) button
(Display brightness (Day/Night mode) button)
Turn the MENU button to set the display
brightness
The illumination brightness level is linked to the
headlight switch. When the headlights are
switched “ON” the brightness is dimmed
automatically. Press the button to toggle illumination brightness levels between daytime
setting and nighttime setting independent of
headlamp status.
2. CD slot
3. Display
4. CD eject button
5. MEDIA button Switch between the audio sources (CD, USB,
AUX, BT Audio) (if connected)
6. Telephone button
7. Radio mode: TUNE dial
Audio unit mode: MENU dial
Confirmation (ENTER) button
8. Back button
9. Radio mode: Preset button
USB/MP3 CD/iPod or Phone mode: Quick
search button
10. SETUP button
11. Radio mode: Preset buttons
12. Fast Forward (Cue)/Forward Track and
Rewind/Previous Track buttons
13. Radio mode: Preset button
CD/iPod/USB/Bluetooth audio mode: MIX
button
14. Traffic Announcement (TA) button
15. Radio mode: Preset button
CD/iPod/USB/Bluetooth audio mode: Repeat
(RPT) button
16. Power ON·OFF button/Volume control (VOL)
knob
17. DISP button (Display)
Provides on screen information when available
(music tags, RDS, etc.)
18. RADIO button NAA1575
FM AM RADIO WITH COMPACT DISC (CD) PLAYER (Type A)
Display screen, heater and air conditioner, and audio system4-37
Page 170 of 340
AUDIO MAIN OPERATION
The audio unit operates when the ignition switch is
in ACC or ON position.
m Power
ON/OFF button
Press the button to switch on the audio unit. If
the audio unit was switched off using the ignition
switch, it can also be switched on with the ignition
switch. The source that was playing immediately
before the unit was switched off will resume playing
and the volume will be set to the previous volume
level.
The audio unit can be switched off by pressing ,
or by turning the ignition switch to the “OFF” or
LOCK position. Volume (VOL) level control
Turn the
adjust the volume level.
The audio unit is equipped with aspeed control vol-
ume function, this means that the audio system au-
tomatically adjusts the volume level in relation to
vehicle speed. For details, see “[Speed Volume]
menu” later in this section.
RADIO OPERATION
When the (power ON/OFF) button is pressed,
the audio unit will switch on with the last received
radio station, if the audio unit was previously
switched off in radio mode. The radio is able to receive multiple kinds of audio
transmissions:
–FM
–D
AB (Digital Audio Broadcasting) indicated as
DR (where fitted)
–AM
Radio band select buttons
Press the
transmission source as follows:
FM1 →FM2 →DR1 →DR2 →AM →FM1
When
come on at the last received radio station. If audio is
already playing using one of the other input sources
(iPod, Bluetooth, CD, USB, AUX-in) pressing the
mode and the last received radio station will be se-
lected.
Setting preset stations
Auto populating the [FM List]: When the
1.5 seconds the six stations with the strongest sig-
nals are stored in the preset (1 to 6) buttons of the
band. During the search, anotification message
[Updating FM List] appears in the display and the
sound is muted until the operation is complete. Once
completed, the radio reverts to the previously se-
lected radio station. Manual tuning
When adjusting the broadcasting station frequency
manually access the [FM List] and turn the
Page 177 of 340
Track details:
Al ong press on the ➄
button will turn the
display into adetailed overview and after afew sec-
onds it returns to the main display, or press ➄
briefly.
iPod PLAYER OPERATION
(where fitted)
Connecting iPod
Open the console lid and connect the iPod cable to
the USB connector. The battery of the iPod will be
charged during the connection to the vehicle. The
display will show the notification message [iPod
reading the data.
If the audio system has been turned off while the
iPod was playing, pressing will start the iPod
operation. During the connection, the iPod can only be operated with the audio controls.
*i Pod and iPhone are trademarks of Apple Inc., reg-
istered in the U.S. and other countries. WARNING
Do not connect, disconnect or operate the USB
device while driving. Doing so can be adistrac-
tion. If distracted you could lose control of your
vehicle and cause an accident or serious injury.
CAUTION
• Do not force the iPod cable into the USB port.
Inserting the iPod cable tilted or upside- down into the port may damage the port. Make sure
that the iPod cable is connected correctly into
the USB port.
• Do not locate objects near the iPod cable to
prevent the objects from leaning on the iPod
cable and the port. Pressure from the objects
may damage the iPod cable and the port.
Refer to your device manufacturer’s owners manual
regarding the proper use and care of the device.
Compatibility:
NOTE
• At the time of publication, this audio system
was tested with the latest iPod players/iPhone
available. Due to the frequent update of con-
sumer devices like MP3 players, RENAULT
cannot guarantee that all new iPod players/
iPhone launched will be compatible with this
audio system.
• Some iPod operations may not be available
with this system.
• Make sure that the iPod/iPhone is updated
with the latest firmware.
• iPod Shuffle and iPod mini cannot be used
with this system.
• Full functionality of iPhone USB and Bluetooth
Audio may not be available to the user if the
same device is connected by USB and Blue-
tooth simultaneously. MEDIA
button
To operate the iPod press
peatedly until [iPod
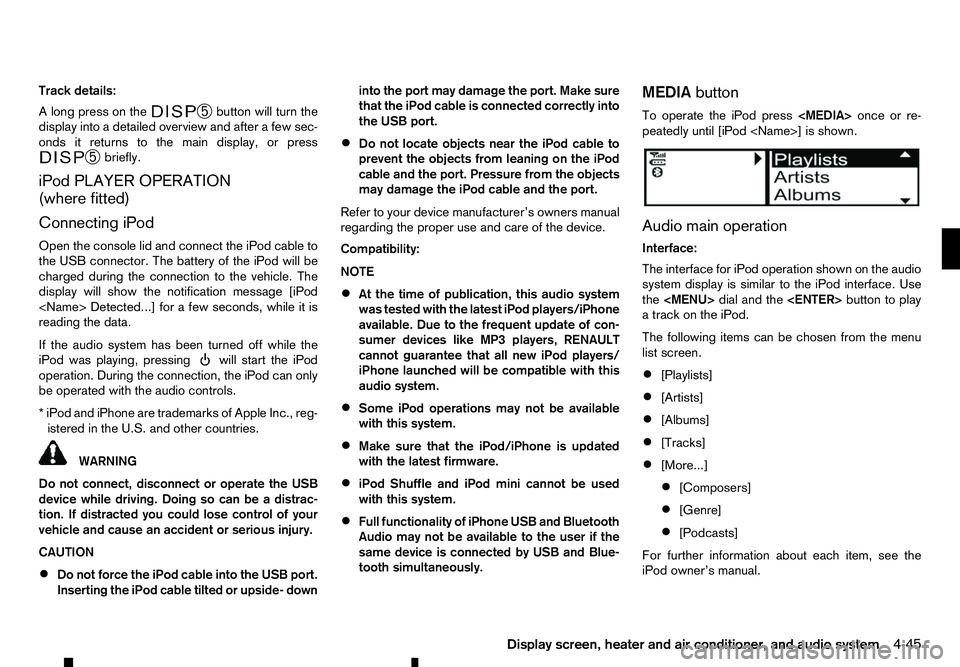
Audio main operation
Interface:
The interface for iPod operation shown on the audio
system display is similar to the iPod interface. Use
the
Page 178 of 340
The following operations are identical to the audio
main operation of the Compact Disc (CD) opera-
tion. For details, see “Compact Disc (CD)
operation” earlier in this section.
• List view
• ,
•
MIX (Random play)
• RPT (Repeat track)
• Folder browsing button
➄
While atrack with recorded music information tags
(ID3–tags) is being played, the title of the played
track is displayed. If the tags are not provided then
an otification message is displayed.
When the ➄
button is pressed repeatedly,
further information about the track can be displayed
along with the track title as follows:
Track time →Artist name →Album title →Track
time
Track details:
Al ong press on the ➄
button, the screen
displays the song title, artist name, and album title.
After afew seconds it returns to the main display or
press ➄
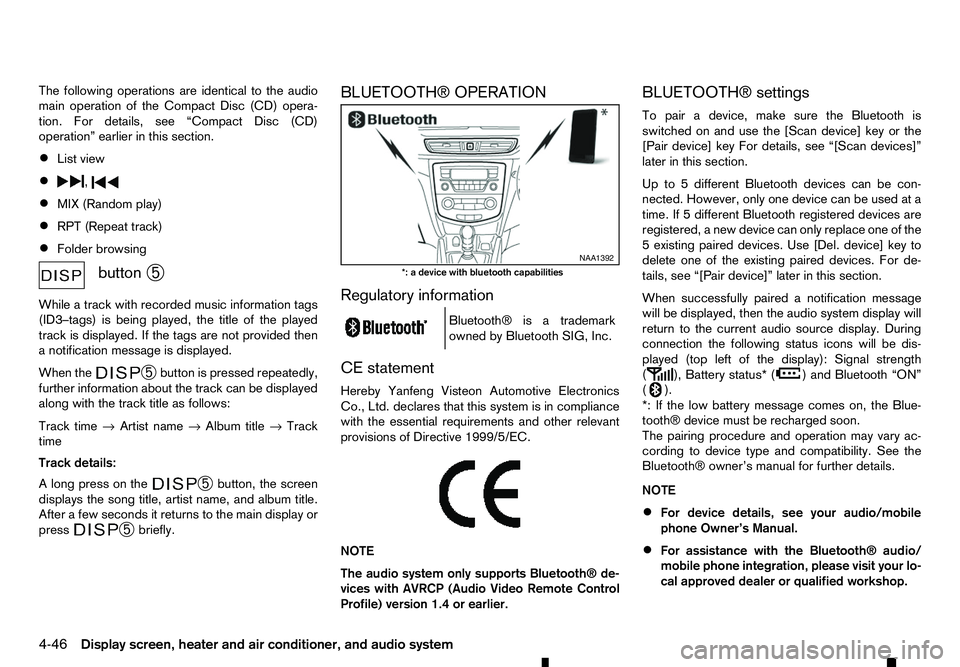
briefly. BLUETOOTH® OPERATION
Regulatory information
m Bluetooth®
is
at rademark
owned by Bluetooth SIG, Inc.
CE statement
Hereby Yanfeng Visteon Automotive Electronics
Co., Ltd. declares that this system is in compliance
with the essential requirements and other relevant
provisions of Directive 1999/5/EC.
m NOTE
The
audio system only supports Bluetooth® de-
vices with AVRCP (Audio Video Remote Control
Profile) version 1.4 or earlier. BLUETOOTH® settings
To pair
adevice, make sure the Bluetooth is
switched on and use the [Scan device] key or the
[Pair device] key For details, see “[Scan devices]”
later in this section.
Up to 5different Bluetooth devices can be con-
nected. However, only one device can be used at a
time. If 5different Bluetooth registered devices are
registered, anew device can only replace one of the
5e xisting paired devices. Use [Del. device] key to
delete one of the existing paired devices. For de-
tails, see “[Pair device]” later in this section.
When successfully paired anotification message
will be displayed, then the audio system display will
return to the current audio source display. During
connection the following status icons will be dis-
played (top left of the display): Signal strength
( ), Battery status* (
)a
nd Bluetooth “ON”
( ).
*: If the low battery message comes on, the Blue-
tooth® device must be recharged soon.
The pairing procedure and operation may vary ac-
cording to device type and compatibility. See the
Bluetooth® owner’s manual for further details.
NOTE
• For device details, see your audio/mobile
phone Owner’s Manual.
• For assistance with the Bluetooth® audio/
mobile phone integration, please visit your lo-
cal approved dealer or qualified workshop. NAA1392
*: ad evice with bluetooth capabilities
4-46 Display screen, heater and air conditioner, and audio system