stop start RENAULT ALASKAN 2017 Owners Manual
[x] Cancel search | Manufacturer: RENAULT, Model Year: 2017, Model line: ALASKAN, Model: RENAULT ALASKAN 2017Pages: 340, PDF Size: 6.93 MB
Page 65 of 340
WARNING
If the 4WD mode indicator (see “Four-Wheel Drive
(4WD) warning light (4WD model)” later in this
section) is OFF or the ATP warning light is ON,
this indicates that the automatic transmission P
(Park) position will not function and could result
in the vehicle moving unexpectedly, causing seri-
ous personal injury or property damage. Always
set the parking brake. Brake warning light
WARNING
• If the brake fluid level is below the minimum
mark on the brake fluid reservoir, do not drive
the vehicle until the brake system has been
checked by an approved dealer or qualified
workshop.
• Even if you judge it to be safe, have your ve-
hicle towed because driving it could be dan-
gerous.
• Depressing the brake pedal without the en-
gine running and/or with
alow brake fluid
level could increase the stopping distance and
require greater pedal travel distance and ef-
fort.
The brake warning light indicates the parking brake
system operation, alow brake fluid level of the brake
system and an Anti-lock Braking System (ABS) mal-
function. Parking brake warning indicator:
When the ignition switch is placed in the ON posi-
tion, the brake warning light illuminates. When the
engine is started and the parking brake is released,
the brake warning light turns off.
If the parking brake is not fully released, the brake
warning light remains on. Be sure that the brake
warning light has turned off before driving. (See
“Parking brake” in the “3. Pre-driving checks and
adjustments” section.)
Low brake fluid warning indicator:
If the brake warning light illuminates while the en-
gine is running, or while driving, and the parking
brake is released, it may indicate the brake fluid
level is low.
When the brake warning light illuminates while driv-
ing, stop the vehicle safely as soon as possible.
Stop the engine and check the brake fluid level. If
the brake fluid level is at the minimum mark, add
brake fluid as necessary. (See “Brake fluid” in the
“8. Maintenance and do-it-yourself” section.)
If the brake fluid level is sufficient, have the brake
system checked by an approved dealer or qualified
workshop promptly.
Anti-lock Braking System (ABS) warning
indicator (where fitted):
When the parking brake is released and the brake
fluid level is sufficient, if both the brake warning light
and the Anti-lock Braking System (ABS) warning
light illuminate, it may indicate the ABS is not func-
tioning properly. Have the brake system checked, and if necessary repaired, by an approved dealer or
qualified workshop promptly. (See “Brake system”
in the “5. Starting and driving” section.) Charge warning light
When the ignition switch is in the ON position, the
charge warning light illuminates. After starting the
engine, the charge warning light turns off. This indi-
cates that the charging system is operational.
If the charge warning light illuminates while the en-
gine is running, or while driving, it may indicate that
the charging system is not functioning properly and
may need servicing.
When the charge warning light illuminates while driv-
ing, stop the vehicle safely as soon as possible.
Stop the engine and check the alternator belt. If the
alternator belt is loose, broken or missing, contact
an approved dealer or qualified workshop promptly.
(See “Drive belt” in the “8. Maintenance and
do-it-yourself” section.)
If the alternator belt appears to be functioning cor-
rectly but the charge warning light remains illumi-
nated, have the charging system checked by an
approved dealer or qualified workshop promptly.
CAUTION
Do not continue driving if the alternator belt is
loose, broken or missing.
Instruments and controls 2-7
Page 66 of 340
Diesel Particulate Filter (DPF)
warning light (where fitted)
When the DPF warning light illuminates, it indicates
that particulate matter is accumulated to the speci- fied amount of the limit in the filter and the filter
needs to regenerate. For filter regeneration details,
see “Diesel Particulate Filter (DPF) (where fitted)” in
the “5. Starting and driving” section.
CAUTION
If you continue driving with the DPF warning light
on without performing the filter regeneration, this
will lead to particulate matter overload in the fil-
ter.
If this occurs, then the Malfunction Indicator Light
(MIL) will turn on. The performance of the engine
might be limited to protect the DPF system. See
an approved dealer or qualified workshop to per-
form the service regeneration. Door open warning light
When the ignition switch is in the ON position, the
door open warning light illuminates if any of the doors
are open or not closed securely. Electronic Stability Programme
(ESP) warning light (where fitted)
When the ignition switch is in the ON position, the
Electronic Stability Programme (ESP) warning light illuminates and then turns off. The warning light blinks when the ESP system is
operating.
When the warning light blinks while driving, the driv-
ing condition is slippery and the vehicle’s traction
limit is about to be exceeded.
If the ESP warning light illuminates while the engine
is running or while driving, it may indicate that the
ESP system is not functioning properly and may
need servicing. Have the system checked, and if
necessary repaired, by an approved dealer or quali-
fied workshop promptly. If amalfunction occurs, the
ESP function is turned off, but the vehicle is still driv-
able. (See “Electronic Stability Programme (ESP)
system (where fitted)” in the “5. Starting and driving”
section.) Engine oil pressure warning light
When the ignition switch is in the ON position, the
engine oil pressure warning light illuminates. After
starting the engine, the engine oil pressure warning
light turns off. This indicates that the oil pressure
sensors in the engine are operational.
If the engine oil pressure warning light illuminates or
blinks while the engine is running, it may indicate
that the engine oil pressure is low.
Stop the vehicle safely as soon as possible. Stop
the engine immediately and call an approved dealer
or qualified workshop. CAUTION
• Running the engine with the engine oil pres-
sure warning light illuminated could cause se-
rious damage to the engine.
• The engine oil pressure warning light is not
designed to indicate
alow oil level. The oil
level should be checked using the dipstick.
(See “Checking engine oil level” in the
“8. Maintenance and do-it-yourself” section.) Engine temperature warning
light (red/blue) (where fitted)
High temperature indicator light (Red):
The red warning light comes on when the engine
overheats. WARNING
If the high temperature warning light illuminates
while the engine is running, it may indicate the
engine temperature is extremely high. Stop the
vehicle safely as soon as possible. If the vehicle
is overheated, continuing vehicle operation may
seriously damage the engine.
• If the engine coolant temperature warning
light (RED) comes on while driving, stop the
vehicle as soon as possible and contact an
approved dealer or qualified workshop.
• When towing
atrailer or driving uphill, reduce
the vehicle speed as soon as safely possible
to decrease the engine coolant temperature.
2-8 Instruments and controls
Page 67 of 340
•
If the engine overheats, continued operation
of the vehicle may seriously damage the en- gine. See “If your vehicle overheats” in the
“6. In case of emergency” section for immedi-
ate required action.
Low temperature indicator light (Blue):
When the ignition switch is placed in the ON posi-
tion, the engine temperature warning light (blue)
comes on. After afew seconds, it should go out and
remain off while the engine is running. Four-Wheel Drive (4WD)
warning light (4WD model)
When the ignition switch is in the ON position, the
Four-Wheel Drive (4WD) warning light illuminates.
After starting the engine, the 4WD warning light
turns off.
If the 4WD system malfunctions or the revolution or
radius of the front and the rear wheel differs, the
warning light will either remain illuminated or blink.
(See “Four-Wheel Drive (4WD) (where fitted)” in
the “5. Starting and driving” section.)
CAUTION
• If the 4WD warning light illuminates or blinks
while driving, reduce the vehicle speed and
have your vehicle checked by an approved
dealer or qualified workshop as soon as pos-
sible. •
If the Four-Wheel Drive (4WD) warning light
turns on when driving on dry hard surface
roads:
–i
nthe 4H position, shift the 4WD mode
switch to 2WD.
–i nthe 4LO position, stop the vehicle and
shift the transmission lever to the N(Neu-
tral) position with the brake pedal
depressed and shift the 4WD mode switch
to 2WD.
If the warning light is still on after the above opera-
tions, have your vehicle checked by an approved
dealer or qualified workshop as soon as possible. Active Emergency Braking
system warning light
(where fitted)
This light illuminates when the Active Emergency
Braking system is set to OFF on the lower display.
If the light illuminates when the Active Emergency
Braking system is ON, it may indicate that the sys-
tem is unavailable. See “Active Emergency Braking
system (where fitted)” in the “5. Starting and driving”
section for more details.
Disabling the ESP system with the Electronic Stabil-
ity Programme (ESP) OFF switch causes the Active
Emergency Braking system to become unavailable.
This is not amalfunction.
For models without colour display:
The warning light blinks when the Active Emergency
Braking system is operating. Low fuel warning light
The low fuel warning light illuminates when the fuel
level in the tank is getting low. Refuel as soon as it
is convenient, preferably before the fuel gauge
reaches the empty (0) position.
There will be asmall reserve of fuel remaining in
the tank when the fuel gauge reaches the empty (0) position. Low tyre pressure warning light
(where fitted)
Your vehicle is equipped with aTyre Pressure Moni-
toring System (TPMS) (where fitted) that monitors
the tyre pressure of all tyres except the spare.
The low tyre pressure warning light warns of low
tyre pressure or indicates that the TPMS is not func-
tioning properly.
After the ignition switch is placed in the ON posi-
tion, this light illuminates for about 1second and
turns off.
Low tyre pressure warning:
If the vehicle is being driven with low tyre pressure,
the warning light will illuminate. Alow tyre pressure
warning (e.g., [Low tyre pressure]) also appears in
the vehicle information display.
Instruments and controls 2-9
Page 68 of 340
When the low tyre pressure warning light illuminates,
you should stop and adjust the tyre pressure of all 4
tyres to the recommended COLD tyre pressure
shown on the tyre placard located on the driver side
centre pillar see “Tyre placard” in the “9. Technical information” section. The low tyre pressure warning
light does not automatically turn off when the tyre pressure is adjusted. After the tyre is inflated to the
recommended pressure, the vehicle must be driven
at speeds above 25 km/h (16 MPH) to activate the
TPMS and turn off the low tyre pressure warning light. Use atyre pressure gauge to check the tyre
pressure.
The low tyre pressure (e.g., [Low tyre pressure])
warning appears each time the ignition switch is
placed in the ON position as long as the low tyre
pressure warning light remains illuminated.
For additional information, see “Vehicle information
display” later in this section and “Tyre Pressure
Monitoring System (TPMS) (where fitted)” later in
this section.
TPMS resetting must be also performed after atyre
or aw heel is replaced, or the tyres are rotated.
Depending on achange in the outside temperature,
the low tyre pressure warning light may illuminate
even if the tyre pressure has been adjusted prop-
erly. Adjust the tyre pressure to the recommended
COLD tyre pressure again when the tyres are cold,
and reset the TPMS. If the low tyre pressure warning light still continues
to illuminate after the resetting operation, it may indi-
cate that the TPMS is not functioning properly. Have
the system checked by an approved dealer or quali-
fied workshop.
For additional information, see “Tyre Pressure Moni-
toring System (TPMS) (where fitted)” in the “5. Start-
ing and driving” section and “Vehicle information
display” later in this section.
TPMS malfunction:
If the TPMS is not functioning properly, the low tyre
pressure warning light will flash for approximately 1
minute when the ignition switch is placed in the ON
position. The light will remain on after
1minute. Have
the system checked by an approved dealer or quali-
fied workshop. The low tyre pressure warning does
not appear if the low tyre pressure warning light illu-
minates to indicate aTPMS malfunction.
For additional information, see “Tyre Pressure Moni-
toring System (TPMS) (where fitted)” in the “5. Start-
ing and driving” section. WARNING
• Radio waves could adversely affect electric
medical equipment. Those who use apace-
maker should contact the electric medical
equipment manufacturer for the possible in-
fluences before use. •
If the light does not illuminate with the igni-
tion switch pushed ON, have the vehicle
checked by an approved dealer or qualified
workshop as soon as possible.
• If the low tyre pressure warning light illumi-
nates while driving, avoid sudden steering
manoeuvres or abrupt braking, reduce vehicle
speed, pull off the road to
asafe location and
stop the vehicle as soon as possible. Driving
with under-inflated tyres may permanently
damage the tyres and increase the likelihood
of tyre failure. Serious vehicle damage could
occur and may lead to an accident and could
result in serious personal injury. Check the
tyre pressure for all four tyres. Adjust the tyre
pressure to the recommended COLD tyre
pressure shown on the tyre placard, located
on the driver side centre pillar, to turn the low
tyre pressure warning light off. If the light still
illuminates while driving after adjusting the
tyre pressure, atyre may be flat. If you have a
flat tyre, repair it with the emergency tyre
puncture repair kit (where fitted) or replace it
with aspare tyre (where fitted) as soon as
possible.
• After adjusting the tyre pressure, be sure to
reset the TPMS. Unless the resetting is per-
formed, the TPMS will not warn of the low tyre
pressure correctly.
2-10 Instruments and controls
Page 72 of 340
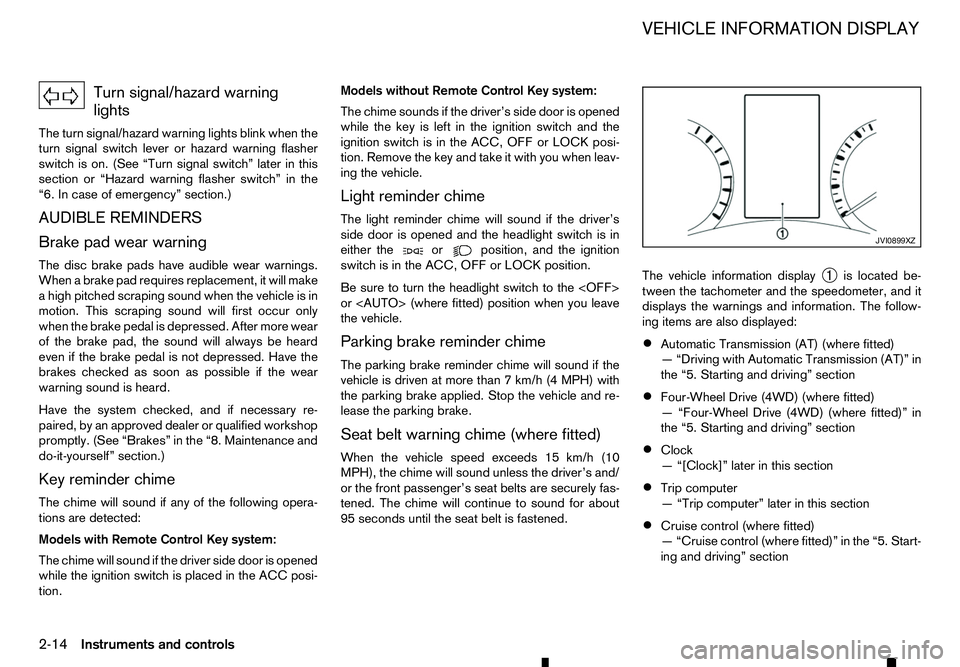
Turn signal/hazard warning
lights
The turn signal/hazard warning lights blink when the
turn signal switch lever or hazard warning flasher
switch is on. (See “Turn signal switch” later in this
section or “Hazard warning flasher switch” in the
“6. In case of emergency” section.)
AUDIBLE REMINDERS
Brake pad wear warning The disc brake pads have audible wear warnings.
When abrake pad requires replacement, it will make
ah igh pitched scraping sound when the vehicle is in
motion. This scraping sound will first occur only
when the brake pedal is depressed. After more wear
of the brake pad, the sound will always be heard
even if the brake pedal is not depressed. Have the
brakes checked as soon as possible if the wear
warning sound is heard.
Have the system checked, and if necessary re-
paired, by an approved dealer or qualified workshop
promptly. (See “Brakes” in the “8. Maintenance and
do-it-yourself” section.)
Key reminder chime
The chime will sound if any of the following opera-
tions are detected:
Models with Remote Control Key system:
The chime will sound if the driver side door is opened
while the ignition switch is placed in the ACC posi-
tion. Models without Remote Control Key system:
The chime sounds if the driver’s side door is opened
while the key is left in the ignition switch and the
ignition switch is in the ACC, OFF or LOCK posi-
tion. Remove the key and take it with you when leav-
ing the vehicle.
Light reminder chime
The light reminder chime will sound if the driver’s
side door is opened and the headlight switch is in
either the or position, and the ignition
switch is in the ACC, OFF or LOCK position.
Be sure to turn the headlight switch to the
or
the vehicle.
Parking brake reminder chime
The parking brake reminder chime will sound if the
vehicle is driven at more than 7km/h (4 MPH) with
the parking brake applied. Stop the vehicle and re-
lease the parking brake.
Seat belt warning chime (where fitted)
When the vehicle speed exceeds 15 km/h (10
MPH), the chime will sound unless the driver’s and/
or the front passenger’s seat belts are securely fas-
tened. The chime will continue to sound for about
95 seconds until the seat belt is fastened. The vehicle information display
➀is located be-
tween the tachometer and the speedometer, and it
displays the warnings and information. The follow-
ing items are also displayed:
• Automatic Transmission (AT) (where fitted)
—“
Driving with Automatic Transmission (AT)” in
the “5. Starting and driving” section
• Four-Wheel Drive (4WD) (where fitted)
—“
Four-Wheel Drive (4WD) (where fitted)” in
the “5. Starting and driving” section
• Clock
—“
[Clock]” later in this section
• Trip computer
—“
Trip computer” later in this section
• Cruise control (where fitted)
—“
Cruise control (where fitted)” in the “5. Start-
ing and driving” section JVI0899XZ
VEHICLE INFORMATION DISPLAY
2-14 Instruments and controls
Page 84 of 340
4. No Key Detected warning
(where fitted)
This warning appears when the door is closed with
the Remote Control Key left outside the vehicle and
the ignition switch in the ONposition. Make sure
that the Remote Control Key is inside the vehicle.
See “Remote Control Key system (where fitted)” in
the “3. Pre-driving checks and adjustments” section
for more details.
5. Key reminder warning (where fitted)
This warning appears if the driver’s side door is
opened while the key is left in the ignition switch and
ignition switch is in the ACC,OFForLOCK position.
Remove the key and take it with you when leaving
the vehicle.
6. Shift to Park warning (where fitted for
AT models)
This warning appears when the ignition switch is
pushed to stop the engine with the shift lever in any
position except the P(Park) position.
If this warning appears, move the shift lever to the P
(Park) position or push the ignition switch to the ON
position.
An inside warning chime will also sound. (See
“Shifting” in the “5. Starting and driving” section.) 7. Push ignition to OFF warning (where
fitted for AT models)
This warning appears when the shift lever is moved
to the
P(Park) position with the ignition switch in the
ACC position after the Shift to Park warning ap-
pears.
To push the ignition switch to the OFFposition, per-
form the following procedure:
Shift to Park warning →(Move the shift lever to P)
→ PUSH warning →(Push the ignition switch →
ignition switch position is turned to ON)→PUSH
warning →(Push the ignition switch →ignition
switch position is turned to OFF)
8. Key Battery low warning
(where fitted)
This warning appears when the Remote Control Key
battery is running out of power.
If this warning appears, replace the battery with a
new one. (See “Remote Control Key battery
replacement” in the “8. Maintenance and
do-it-yourself” section.)
9. Engine start operation for Remote
Control Key system indicator
(where fitted)
This indicator appears when the Remote Control
Key battery is running out of power and when the
Remote Control Key system and vehicle are not
communicating normally. If this indicator appears, touch the ignition switch
with the Remote Control Key while depressing the
brake pedal. (See “Remote Control Key battery
discharge” in the “5. Starting and driving” section.)
10. Key ID Incorrect warning
(where fitted)
This warning appears when the ignition switch is
placed from the LOCKposition and the Remote
Control Key cannot be recognised by the system.
You cannot start the engine with an unregistered
key. Use the registered Remote Control Key.
See “Remote Control Key system (where fitted)” in
the “3. Pre-driving checks and adjustments” sec-
tion.
11. Release Parking Brake warning
This warning appears when the vehicle speed is
above 7km/h (4 MPH) and the parking brake is
applied. Stop the vehicle and release the parking
brake.
12. Low fuel warning
This warning appears when the fuel level in the tank
is getting low. Refuel as soon as it is convenient,
preferably before the fuel gauge reaches the empty
(0) position.
There will be asmall reserve of fuel remaining in
the tank when the fuel gauge reaches the empty
(0) position.
2-26 Instruments and controls
Page 85 of 340
13. Door open warning
This warning appears if any of the doors are open or
not closed securely. The vehicle icon indicates
which door is open on the display. Make sure that all
of the doors are closed.
14. Second row seat belt warning
(where fitted)
This second row seat belt warning appears after the
ignition switch is placed in the ON position. If any of
the second row seat passenger seat belts is not fas-
tened, achime will sound and the seat icon illumi-
nates in red to show which seat belt is not fastened.
The seat icon illuminates in red until the correspond-
ing second row seat passenger’s seat belt is fas-
tened. The warning will automatically turn off after approximately 35 seconds.
For more details and precautions on seat belt us-
age, see “Seat belts” in the “1. Safety —seats, seat
belts and supplemental restraint system” section.
15. 4WD mode indicator (where fitted)
This indicator shows the drive mode of the 4WD
system.
See “Four-Wheel Drive (4WD) (where fitted)” in the
“5. Starting and driving” section for details. 16. Low washer fluid warning
(where fitted)
This warning appears when the washer tank fluid is
at
alow level. Add washer fluid as necessary. (See
“Window washer fluid” in the “8. Maintenance and
do-it-yourself” section.)
17. Key System Error warning
(where fitted)
This warning appears if there is amalfunction in the
Remote Control Key system.
If this warning appears while the engine is stopped,
the engine cannot be started. If this warning ap-
pears while the engine is running, the vehicle can be
driven. However, contact an approved dealer or
qualified workshop for repair as soon as possible.
18. Oil Level Low indicator
(where fitted)
If the low level indicator is displayed, the engine oil
level is low. If the low level indicator is displayed, check the level using the engine oil dipstick. (See
“Checking engine oil level” in the “8. Maintenance
and do-it-yourself” section.)
CAUTION
The oil level should be checked regularly using
the engine oil dipstick. Operating with an insuffi-
cient amount of oil can damage the engine and such damage is not covered by the warranty. 19. Oil level sensor warning
(where fitted)
If the oil level sensor warning is displayed, the en-
gine oil level sensor may be malfunctioning. Contact
an approved dealer or qualified workshop immedi-
ately.
20. Low Oil Pressure Stop vehicle
warning (where fitted)
This warning appears if low engine oil pressure is
detected. If the warning appears during normal driv-
ing, pull off the road in
asafe area, stop the engine
immediately and call an approved dealer or qualified
workshop.
The low oil pressure warning is not designed to indi-
cate alow oil level. Use the dipstick to check the oil
level. (See “Checking engine oil level” in the
“8. Maintenance and do-it-yourself” section.)
CAUTION
Running the engine with the engine oil pressure
warning displayed could cause serious damage
to the engine.
21. 4WD Error warning (where fitted)
This warning appears when the four wheel drive
(4WD) system is not functioning properly while the
engine is running. Reduce vehicle speed and have
your vehicle checked by an approved dealer or quali-
fied workshop. See “Four-Wheel Drive (4WD)
(where fitted)” in the “5. Starting and driving” sec-
tion.
Instruments and controls 2-27
Page 120 of 340
How to activate system (where fitted)
1. Close all windows.
The system can be armed even if the windows
are open.
2. Place the ignition switch in the OFF position.
3. Carry the integrated key fob or the Remote Con- trol Key with you and get out of the vehicle.
4. Close and lock all doors. The doors can be locked with the integrated key fob, the Remote
Control Key, door handle request switch (where
fitted), power door lock switch or mechanical
key.
5. Confirm that the security indicator light comes on. The security indicator light glows for about
30 seconds and then blinks. The system is now
activated. If, during this 30 second time period,
the door is unlocked or the ignition switch is
placed in the ACC or ON position, the system
will not activate.
Even when the driver and/or passengers are in
the vehicle, the system will activate with all doors
locked with the ignition switch in the LOCK posi-
tion. When pushing the ignition switch to the ACC
or ON position, the system will be released.
Theft warning system operation
The vehicle security system will give the following
alarm:
• The hazard indicator blinks and the horn sounds
intermittently. •
The alarm automatically turns off after approxi-
mately 30 seconds. However, the alarm reacti-
vates if the vehicle is tampered with again.
The alarm is activated by:
• Unlocking the door without using the integrated
key fob, the Remote Control Key, the door handle
request switch (where fitted) or the mechanical
key. (Even if the door is opened by releasing the
door inside lock knob, the alarm will activate.)
How to stop alarm
• The alarm will stop only by unlocking
adoor by
pushing the UNLOCK button on the Remote
Control Key.
• The alarm will not stop if the ignition switch is
placed in the ACC or ON position.
ANTI-THEFT SYSTEM (ATS)
The Anti-Theft System (ATS) will not allow the en-
gine to start without the use of the registered ATS
key.
If the engine does not start using the registered ATS
key, it may be due to interference caused by:
• Another ATS key.
• Automated toll road device.
• Automated payment device.
• Other devices that transmit similar signals. Start the engine using the following procedure:
1. Remove any items that may be causing the inter-
ference away from the ATS key.
2. Leave the ignition switch in the ON position for approximately 5seconds.
3. Place the ignition switch in the OFF or LOCK position, and wait approximately 10 seconds.
4. Repeat steps 2and 3again.
5. Start the engine.
6. Repeat the steps above until all possible interfer- ences are eliminated.
If this procedure allows the engine to start,
RENAULT recommends placing the registered ATS
key separate from other devices to avoid interfer-
ence.
If ATS is malfunctioning, this light will remain on
while the ignition switch is in the ON position.
If the light remains on and/or the engine does
not start, contact an approved dealer or qualified
workshop for ATS service as soon as possible.
Be sure to bring all Remote Control Keys that you
have when visiting an approved dealer for ser-
vice.
3-16 Pre-driving checks and adjustments
Page 170 of 340
AUDIO MAIN OPERATION
The audio unit operates when the ignition switch is
in ACC or ON position.
m Power
ON/OFF button
Press the button to switch on the audio unit. If
the audio unit was switched off using the ignition
switch, it can also be switched on with the ignition
switch. The source that was playing immediately
before the unit was switched off will resume playing
and the volume will be set to the previous volume
level.
The audio unit can be switched off by pressing ,
or by turning the ignition switch to the “OFF” or
LOCK position. Volume (VOL) level control
Turn the
adjust the volume level.
The audio unit is equipped with aspeed control vol-
ume function, this means that the audio system au-
tomatically adjusts the volume level in relation to
vehicle speed. For details, see “[Speed Volume]
menu” later in this section.
RADIO OPERATION
When the (power ON/OFF) button is pressed,
the audio unit will switch on with the last received
radio station, if the audio unit was previously
switched off in radio mode. The radio is able to receive multiple kinds of audio
transmissions:
–FM
–D
AB (Digital Audio Broadcasting) indicated as
DR (where fitted)
–AM
Radio band select buttons
Press the
transmission source as follows:
FM1 →FM2 →DR1 →DR2 →AM →FM1
When
come on at the last received radio station. If audio is
already playing using one of the other input sources
(iPod, Bluetooth, CD, USB, AUX-in) pressing the
mode and the last received radio station will be se-
lected.
Setting preset stations
Auto populating the [FM List]: When the
1.5 seconds the six stations with the strongest sig-
nals are stored in the preset (1 to 6) buttons of the
band. During the search, anotification message
[Updating FM List] appears in the display and the
sound is muted until the operation is complete. Once
completed, the radio reverts to the previously se-
lected radio station. Manual tuning
When adjusting the broadcasting station frequency
manually access the [FM List] and turn the
Page 185 of 340
Radio band select button:
Push the
follows:
AM →DAB →FM →AM
If another audio source is playing when the FM·AM
button is pushed, the audio source playing will auto-
matically be turned off and the last radio station
played will begin playing.
Radio tuning:
When in radio mode, the radio can be tuned using
the touch screen. To bring up the visual tuner, touch
the [Tune] key on the lower part of the screen. A
screen appears with abar running from low fre-
quencies on the left to high frequencies on the right.
One of the following operations can be used for tun-
ing.
• Touching the bar on the screen
• Touching [ ]/[ ]o nt
he screen
• Turning the
To return to the regular radio display screen, touch
the [OK] key.
Station List:
When in FM or DAB (where fitted) mode, touch [FM
List] or [DAB List] to display the station lists. Seek/Track buttons:
When in radio mode, push the Seek/Track buttons
to tune from low to high or high to low frequencies
and to stop at the next broadcasting station. Station memory keys:
Up to six stations can be stored for AM band, and
up to twelve stations can be stored for each of the
other bands.
1. Choose the radio band using the
ton.
2. Tune to the desired station using manual or seek tuning. Touch and hold any of the desired station
memory keys until abeep sound is heard.
For FM and DAB (where fitted), touch the [7-12]
key to display the 7-12memory keys.
3. The channel indicator will then come on and the sound will resume. Programming is now com-
plete.
DAB operation:
In the DAB mode, the following operation keys and
information are available.
• DAB List:
Touch to display the available station list.
• TA:
Touch this key to turn on and off the TA (Traffic
Announcement) mode. When turned on,
received TA will interrupt the audio source that is
playing. •
Extra chan.:
The [Extra chan.] key will allow access to extra
stations transmitted within the group of the cur-
rently selected station. If extra stations are not
available within the group, the key will not oper-
ate.
• Radio text:
Radio text is shown on the DAB main screen
underneath the DAB station name. This displays
radio programme and song information as deter-
mined by the DAB station.
EAS in EAS test (displayed on the screen as aPTY
name) is an abbreviation of Emergency Alert Sys-
tem.
Occasionally, in areas of poor DAB signal strength,
the full station name in the DAB List and DAB main
screen might be distorted. In this situation it may still
be possible to listen to the particular radio station, at
ar educed level of sound quality, but this is not al-
ways possible. This may also be shown in the ve-
hicle information display.
CD player operation
Loading disc:
Insert aCDi nto the slot with the label side facing
up. The CD will be guided automatically into the slot
and will start playing. If the radio is already playing,
it will automatically turn off, and the CD will start
playing.
Display screen, heater and air conditioner, and audio system 4-53