rim RENAULT MEGANE 2017 4.G Owners Manual
[x] Cancel search | Manufacturer: RENAULT, Model Year: 2017, Model line: MEGANE, Model: RENAULT MEGANE 2017 4.GPages: 346, PDF Size: 7.04 MB
Page 106 of 346
1.100
WINDSCREEN WASH/WIPE (6/6)
Note:
To ensure the headlight washers ope-
rate correctly in winter, remove snow
from the jet trims and de-ice the jet
trims using an aerosol de-icer.
You are recommended to regularly
remove dirt encrusted on the headlight
glass.
When the minimum windscreen washer
fluid level is reached, the headlight
washer system may be deprimed.
Fill the windscreen washer fluid and
then activate the windscreen washer,
with the engine running, to reprime
the system.
Headlight washers
Headlights on
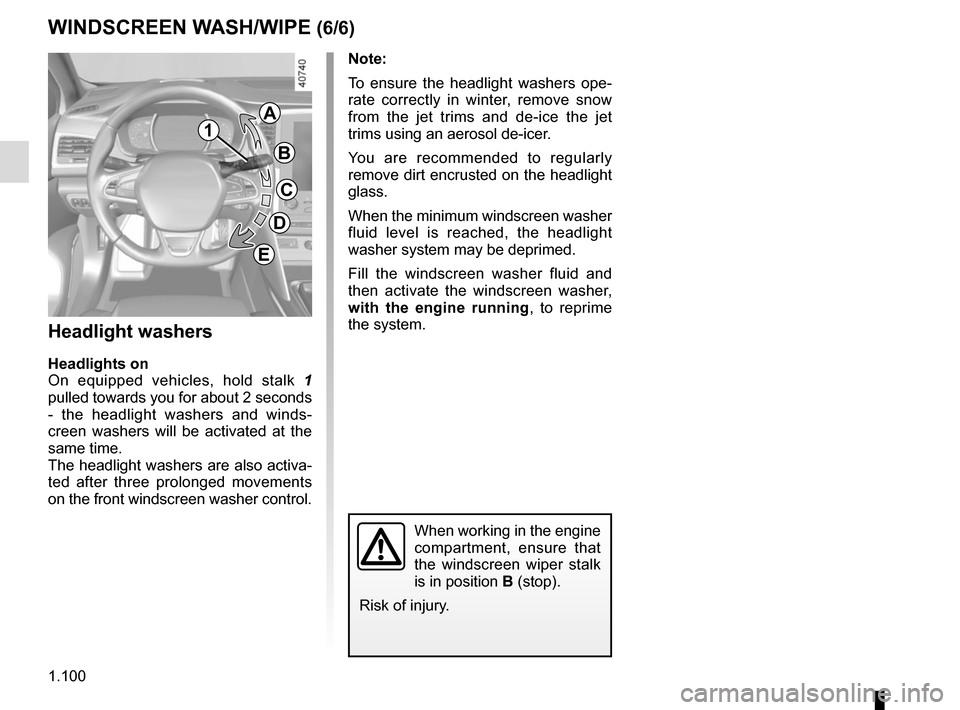
On equipped vehicles, hold stalk 1
pulled towards you for about 2 seconds
- the headlight washers and winds-
creen washers will be activated at the
same time.
The headlight washers are also activa-
ted after three prolonged movements
on the front windscreen washer control.
When working in the engine
compartment, ensure that
the windscreen wiper stalk
is in position B (stop).
Risk of injury.
1
A
B
C
D
E
Page 111 of 346
1.105
Persistent smell of
fuel
If you notice a persistent
smell of fuel you should:
– stop the vehicle as soon as traf- fic conditions allow and switch off
the ignition;
– switch on the hazard warning lights and ask your passengers
to leave the vehicle and to keep
away from traffic;
– contact an approved Dealer.
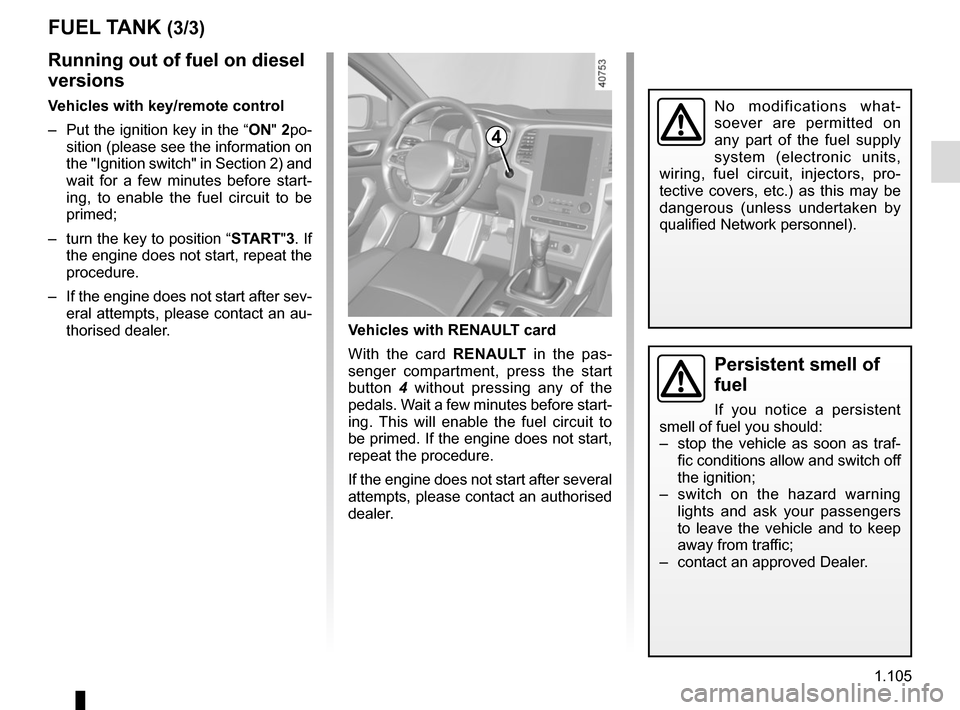
Vehicles with RENAULT card
With the card RENAULT in the pas-
senger compartment, press the start
button 4 without pressing any of the
pedals. Wait a few minutes before start-
ing. This will enable the fuel circuit to
be primed. If the engine does not start,
repeat the procedure.
If the engine does not start after several
attempts, please contact an authorised
dealer.
No modifications what-
soever are permitted on
any part of the fuel supply
system (electronic units,
wiring, fuel circuit, injectors, pro-
tective covers, etc.) as this may be
dangerous (unless undertaken by
qualified Network personnel).
4
FUEL TANK (3/3)
Running out of fuel on diesel
versions
Vehicles with key/remote control
– Put the ignition key in the “ON" 2po-
sition (please see the information on
the "Ignition switch" in Section 2) and
wait for a few minutes before start-
ing, to enable the fuel circuit to be
primed;
– turn the key to position “START"3. If the engine does not start, repeat the
procedure.
– If the engine does not start after sev- eral attempts, please contact an au-
thorised dealer.
Page 127 of 346
2.15
SPECIAL FEATURES OF DIESEL VERSIONS
Diesel engine speed
Diesel engines are fitted with an injec-
tion pump which prevents the engine
speed being exceeded irrespective of
the gear selected.
If the message “Check antipollution
system” is displayed along with warn-
ing lights
Ä and ©, consult an
authorised dealer immediately.
When driving, depending on the fuel
grade used, it is possible that white
smoke may be emitted.
This is due to the exhaust particle filter
being cleaned automatically, and does
not affect the way the vehicle runs.
Running out of fuel
If the tank has been completely
drained, the system must be reprimed
after the tank is refilled: see information
on the “fuel tank” in section 1 before re-
starting the engine.
Do not park the vehicle or
run the engine in locations
where combustible sub-
stances or materials such
as grass or leaves can come into
contact with the hot exhaust system.
Precautions to be taken in
winter
To avoid any faults in icy weather:
– ensure that the battery is always fully charged,
– always keep the diesel tank rela- tively full to avoid water vapour con-
densing in it and accumulating at the
bottom of the tank.
Page 135 of 346
2.23
Driving advice, Eco-driving
Behaviour
– Drive carefully for the first few miles until the engine reaches its normal
operating temperature, rather than
let it warm up while the vehicle is sta-
tionary.
– Speed is expensive.
– Dynamic driving with a lot of frequent acceleration and braking is expen-
sive on fuel in comparison to the time
saved.
– Do not overrev the engine in the in-termediate gears.
You should always use the highest gear possible.
– Avoid sudden acceleration.
– Brake as little as possible. If you an- ticipate an obstacle or bend in ad-
vance, you may then simply release
the accelerator pedal.
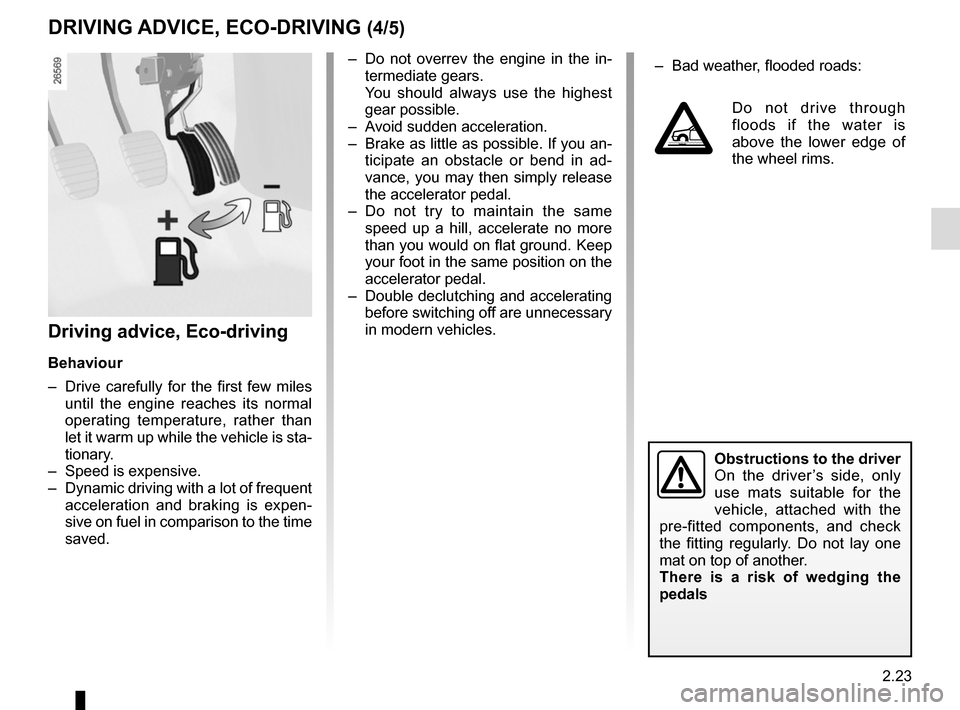
– Do not try to maintain the same speed up a hill, accelerate no more
than you would on flat ground. Keep
your foot in the same position on the
accelerator pedal.
– Double declutching and accelerating before switching off are unnecessary
in modern vehicles.
Obstructions to the driver
On the driver’s side, only
use mats suitable for the
vehicle, attached with the
pre-fitted components, and check
the fitting regularly. Do not lay one
mat on top of another.
There is a risk of wedging the
pedals
DRIVING ADVICE, ECO-DRIVING (4/5)
– Bad weather, flooded roads:
Do not drive through
floods if the water is
above the lower edge of
the wheel rims.
Page 136 of 346
2.24
DRIVING ADVICE, ECO-DRIVING (5/5)
Advice on use
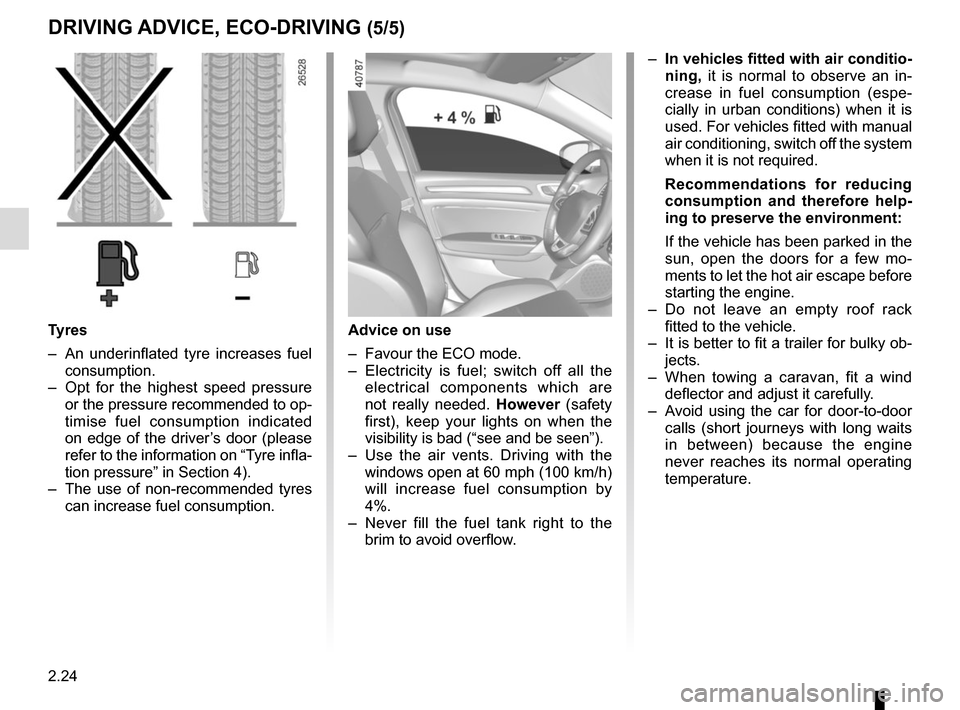
– Favour the ECO mode.
– Electricity is fuel; switch off all the electrical components which are
not really needed. However (safety
first), keep your lights on when the
visibility is bad (“see and be seen”).
– Use the air vents. Driving with the windows open at 60 mph (100 km/h)
will increase fuel consumption by
4%.
– Never fill the fuel tank right to the brim to avoid overflow.
– In vehicles fitted with air conditio-
ning, it is normal to observe an in-
crease in fuel consumption (espe-
cially in urban conditions) when it is
used. For vehicles fitted with manual
air conditioning, switch off the system
when it is not required.
Recommendations for reducing
consumption and therefore help-
ing to preserve the environment:
If the vehicle has been parked in the
sun, open the doors for a few mo-
ments to let the hot air escape before
starting the engine.
– Do not leave an empty roof rack fitted to the vehicle.
– It is better to fit a trailer for bulky ob- jects.
– When towing a caravan, fit a wind deflector and adjust it carefully.
– Avoid using the car for door-to-door calls (short journeys with long waits
in between) because the engine
never reaches its normal operating
temperature.
Tyres
– An underinflated tyre increases fuel consumption.
– Opt for the highest speed pressure or the pressure recommended to op-
timise fuel consumption indicated
on edge of the driver’s door (please
refer to the information on “Tyre infla-
tion pressure” in Section 4).
– The use of non-recommended tyres can increase fuel consumption.
Page 186 of 346
2.74
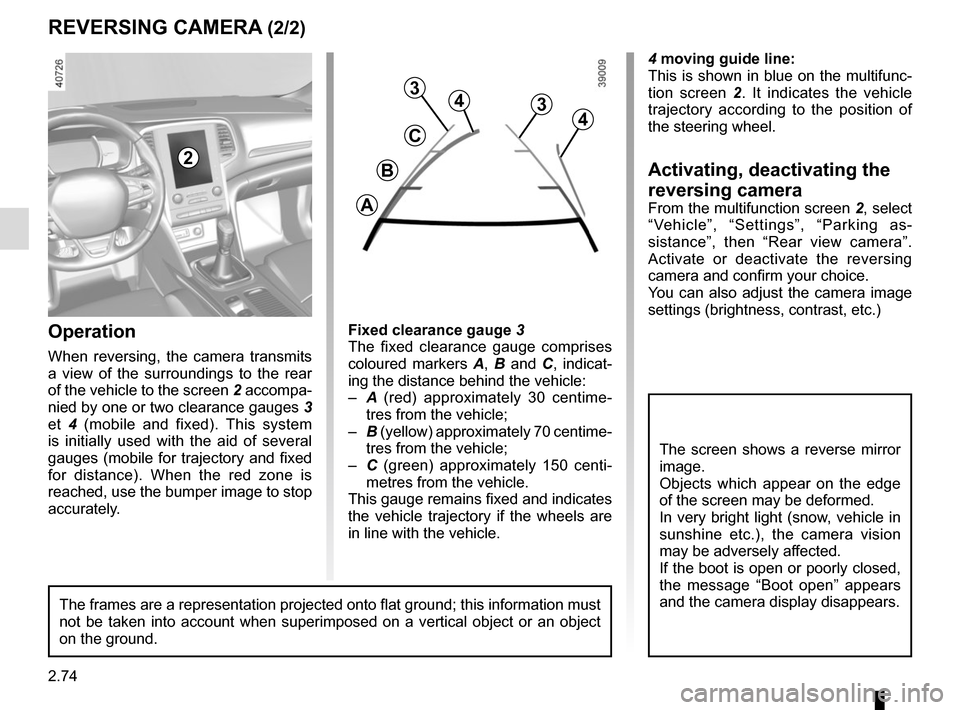
4 moving guide line:
This is shown in blue on the multifunc-
tion screen 2. It indicates the vehicle
trajectory according to the position of
the steering wheel.
Activating, deactivating the
reversing camera
From the multifunction screen 2, select
“Vehicle”, “Settings”, “Parking as-
sistance”, then “Rear view camera”.
Activate or deactivate the reversing
camera and confirm your choice.
You can also adjust the camera image
settings (brightness, contrast, etc.)
REVERSING CAMERA (2/2)
C
B
A
43
2
The screen shows a reverse mirror
image.
Objects which appear on the edge
of the screen may be deformed.
In very bright light (snow, vehicle in
sunshine etc.), the camera vision
may be adversely affected.
If the boot is open or poorly closed,
the message “Boot open” appears
and the camera display disappears.
3
4
Fixed clearance gauge 3
The fixed clearance gauge comprises
coloured markers A, B and C , indicat-
ing the distance behind the vehicle:
– A (red) approximately 30 centime-
tres from the vehicle;
– B (yellow) approximately 70 centime-
tres from the vehicle;
– C (green) approximately 150 centi-
metres from the vehicle.
This gauge remains fixed and indicates
the vehicle trajectory if the wheels are
in line with the vehicle.Operation
When reversing, the camera transmits
a view of the surroundings to the rear
of the vehicle to the screen 2 accompa-
nied by one or two clearance gauges 3
et 4 (mobile and fixed). This system
is initially used with the aid of several
gauges (mobile for trajectory and fixed
for distance). When the red zone is
reached, use the bumper image to stop
accurately.
The frames are a representation projected onto flat ground; this informa\
tion must
not be taken into account when superimposed on a vertical object or an o\
bject
on the ground.
Page 253 of 346
4.1
Section 4: Maintenance
Bonnet . . . . . . . . . . . . . . . . . . . . . . . . . . . . . . . . . . . . \
. . . . . . . . . . . . . . . . . . . . . . . . . . . . . . . . . . . . 4.2
Engine oil level: general information . . . . . . . . . . . . . . . . . . . . . . . . . . . . . . . . . . . .\
. . . . . . . . . . . . . 4.4
Engine oil level: topping up/filling . . . . . . . . . . . . . . . . . . . . . . . . . . . . . . . . . . . .\
. . . . . . . . . . . . . . . 4.5
Oil change . . . . . . . . . . . . . . . . . . . . . . . . . . . . . . . . . . . . \
. . . . . . . . . . . . . . . . . . . . . . . . . . . . . . . . . 4.7
Levels: . . . . . . . . . . . . . . . . . . . . . . . . . . . . . . . . . . . . \
. . . . . . . . . . . . . . . . . . . . . . . . . . . . . . . . . . . . 4.8engine coolant . . . . . . . . . . . . . . . . . . . . . . . . . . . . . . . . . . . .\
. . . . . . . . . . . . . . . . . . . . . . . . 4.8
brake fluid . . . . . . . . . . . . . . . . . . . . . . . . . . . . . . . . . . . . \
. . . . . . . . . . . . . . . . . . . . . . . . . . . . 4.9
windscreen washer reservoir . . . . . . . . . . . . . . . . . . . . . . . . . . . . . . . . . . . . \
. . . . . . . . . . . . . 4.10
Filters . . . . . . . . . . . . . . . . . . . . . . . . . . . . . . . . . . . . \
. . . . . . . . . . . . . . . . . . . . . . . . . . . . . . . . . . . . . 4.10
Battery . . . . . . . . . . . . . . . . . . . . . . . . . . . . . . . . . . . . \
. . . . . . . . . . . . . . . . . . . . . . . . . . . . . . . . . . . . 4.11
Tyre Pressure . . . . . . . . . . . . . . . . . . . . . . . . . . . . . . . . . . . .\
. . . . . . . . . . . . . . . . . . . . . . . . . . . . . . 4.13
Bodywork maintenance . . . . . . . . . . . . . . . . . . . . . . . . . . . . . . . . . . . . \
. . . . . . . . . . . . . . . . . . . . . . . 4.15
Interior trim maintenance . . . . . . . . . . . . . . . . . . . . . . . . . . . . . . . . . . . . \
. . . . . . . . . . . . . . . . . . . . . . 4.17
Page 262 of 346
4.10
LEVELS (3/3)/FILTERS
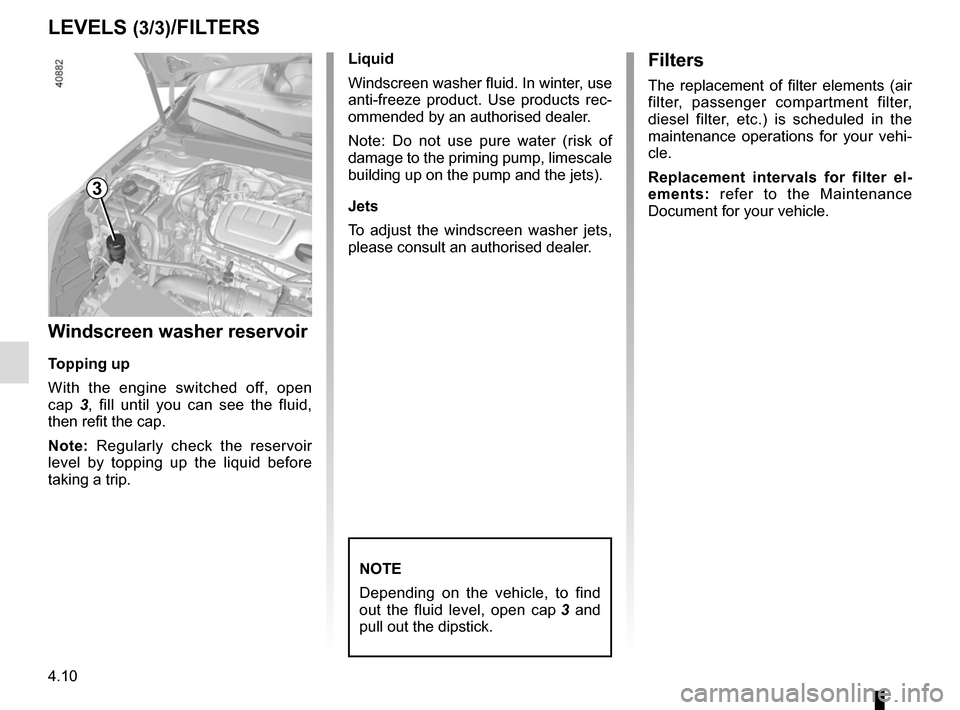
Windscreen washer reservoir
Topping up
With the engine switched off, open
cap 3, fill until you can see the fluid,
then refit the cap.
Note: Regularly check the reservoir
level by topping up the liquid before
taking a trip. Liquid
Windscreen washer fluid. In winter, use
anti-freeze product. Use products rec-
ommended by an authorised dealer.
Note: Do not use pure water (risk of
damage to the priming pump, limescale
building up on the pump and the jets).
Jets
To adjust the windscreen washer jets,
please consult an authorised dealer.
NOTE
Depending on the vehicle, to find
out the fluid level, open cap
3 and
pull out the dipstick.
Filters
The replacement of filter elements (air
filter, passenger compartment filter,
diesel filter, etc.) is scheduled in the
maintenance operations for your vehi-
cle.
Replacement intervals for filter el-
ements: refer to the Maintenance
Document for your vehicle.
3
Page 267 of 346
4.15
BODYWORK MAINTENANCE (1/2)
You should
Wash your car frequently, with the
engine off, with cleaning products rec-
ommended by the manufacturer (never
use abrasive products). Rinse thor-
oughly beforehand with a jet:
– spots of tree resin and industrial
grime;
– mud in the wheel arches and under-
neath the body which forms damp
patches;
– bird droppings , which cause a
chemical reaction with the paint that
rapidly discolours paintwork and
may even cause the paint to peel
off;
wash the vehicle immediately to
remove these marks since it is im-
possible to remove them by polish-
ing;
– salt, particularly in the wheel arches
and underneath the body after driv-
ing in areas where the roads have
been gritted.
Remove any plant matter (resin, leaves,
etc.) from the vehicle regularly.
What you should not doDo not degrease or clean mechani-
cal components (e.g. the engine com-
partment), underneath the body, parts
with hinges (e.g. inside the doors) and
painted plastic external fittings (e.g.
bumpers) using high-pressure clean-
ing equipment or by spraying on prod-
ucts not approved by our Technical
Department. Doing this could give rise
to corrosion or operational faults.
Wash the vehicle in bright sunlight or
freezing temperatures.
Do not scrape off mud or dirt without
pre-wetting.
Allow dirt to accumulate on the exterior.
Allow rust to form following minor im-
pacts.
Do not use solvents not approved by
our Technical Department to remove
stains as this could damage the paint-
work.
Do not drive in snow or muddy condi-
tions without washing the vehicle, par-
ticularly under the wheel arches and
body.
A well-maintained vehicle will last
longer. It is therefore recommended to
maintain the exterior of the vehicle reg-
ularly.
Your vehicle has been treated with very
effective anti-corrosion products. It is
nevertheless subject to various outside
influences.
Corrosive agents in the atmosphere
–
atmospheric pollution (built-up and
industrial areas),
– saline atmospheres (near the sea,
particularly in hot weather),
– seasonal and damp weather condi-
tions (e.g. road salt in winter, water
from road cleaners, etc.).
Minor impacts
Abrasive action
Dust and sand in the air, mud, road grit
thrown up by other vehicles, etc.
You should take a number of minor pre-
cautions in order to safeguard your ve-
hicle against such risks.
Page 269 of 346
4.17
Glass instrument panel(e.g.: instrument panel, clock, exterior
temperature display, radio display, mul-
timedia or multifunction display etc.)
Use a soft cloth (or cotton wool).
If this does not clean them properly,
use a soft cloth (or cotton wool) slightly
moistened with soapy water and then
wipe clean with another soft damp cloth
or cotton wool.
Finally, carefully dry off with a soft dry
cloth.
Do not use products containing alco-
hol and/or spray fluids on the area.
Seat belts
These must be kept clean.
Use products selected by our Technical
Department (Approved outlets) or
warm, soapy water and a sponge and
wipe with a dry cloth.
Detergents or dyes must not be used
under any circumstances.
INTERIOR TRIM MAINTENANCE (1/2)
Textiles (seats, door trim, etc)
Vacuum-clean the textiles regularly.
Liquid stain
Use soapy water.
Dab lightly (never rub) with a soft cloth,
rinse and remove the excess.
Solid or pasty stain
Carefully remove the excess solid or
pasty material immediately with a
spatula (working from the edges to the
centre to avoid spreading the stain).
Clean as for a liquid stain.
Special instructions for sweets or
chewing gum
Put an ice cube on the stain to solidify
it, then proceed as for a solid stain.
A well-maintained vehicle will last
longer. It is therefore recommended to
maintain the interior of the vehicle regu-
larly.
A stain should always be dealt with
swiftly.
Whatever type of stain is on the trim,
use
cold (or warm) soapy water with
natural soap.
Detergents (washing-up liquid, pow-
dered products, alcohol-based prod-
ucts) should not be used.
Use a soft cloth.
Rinse and soak up the excess.
For further recommendations for
maintaining the interior, and/or for
any unsatisfactory results, please
see an authorised dealer.