sensor RENAULT SCENIC 2011 J95 / 3.G Engine And Peripherals EDC16 Owner's Guide
[x] Cancel search | Manufacturer: RENAULT, Model Year: 2011, Model line: SCENIC, Model: RENAULT SCENIC 2011 J95 / 3.GPages: 365, PDF Size: 2.11 MB
Page 52 of 365

13B-52
MR-372-J84-13B200$252.mif
V13
DIESEL INJECTION
Fault finding – Interpretation of faults
EDC16
Program No.: C1
Vdiag no.: 18, 1C, 20,
50, 58, 5C
13B
DF013
PRESENT
OR
STOREDSENSOR SUPPLY VOLTAGE NO. 3
1.DEF: Sensor reference voltage too low
2DEF: Sensor reference voltage too high
NOTESConditions for applying the fault finding procedure to stored faults:
The fault is declared present after carrying out a road test or after several attempts at
starting the engine.
Special notes:
If the fault is present:
– the EGR function is inhibited,
– the engine stops,
– the level 2 warning light is lit,
– the OBD warning light illuminates after three consecutive driving cycles (start the
engine + 5 seconds + switch off the ignition and wait 1 minute).
Use bornier Elé.1681 or Elé.1590 for any operation on the injection computer
connectors.
WARNING
This fault may appear if the wiring harness has been damaged.
Follow the procedure described in the Wiring Check in the Introduction.
This check enables the condition and the conformity of the engine wiring harness to be checked.
AFTER REPAIRDeal with any faults.
Carry out a road test followed by another check with the diagnostic tool.
EDC16_V50_DF013/EDC16_V58_DF013/EDC16_V5C_DF013/EDC16_V18_DF013/EDC16_V1C_DF013/EDC16_V20_DF013
Page 53 of 365
13B-53
MR-372-J84-13B200$252.mif
V13
DIESEL INJECTION
Fault finding – Interpretation of faults
EDC16
Program No.: C1
Vdiag no.: 18, 1C, 20,
50, 58, 5C
13B
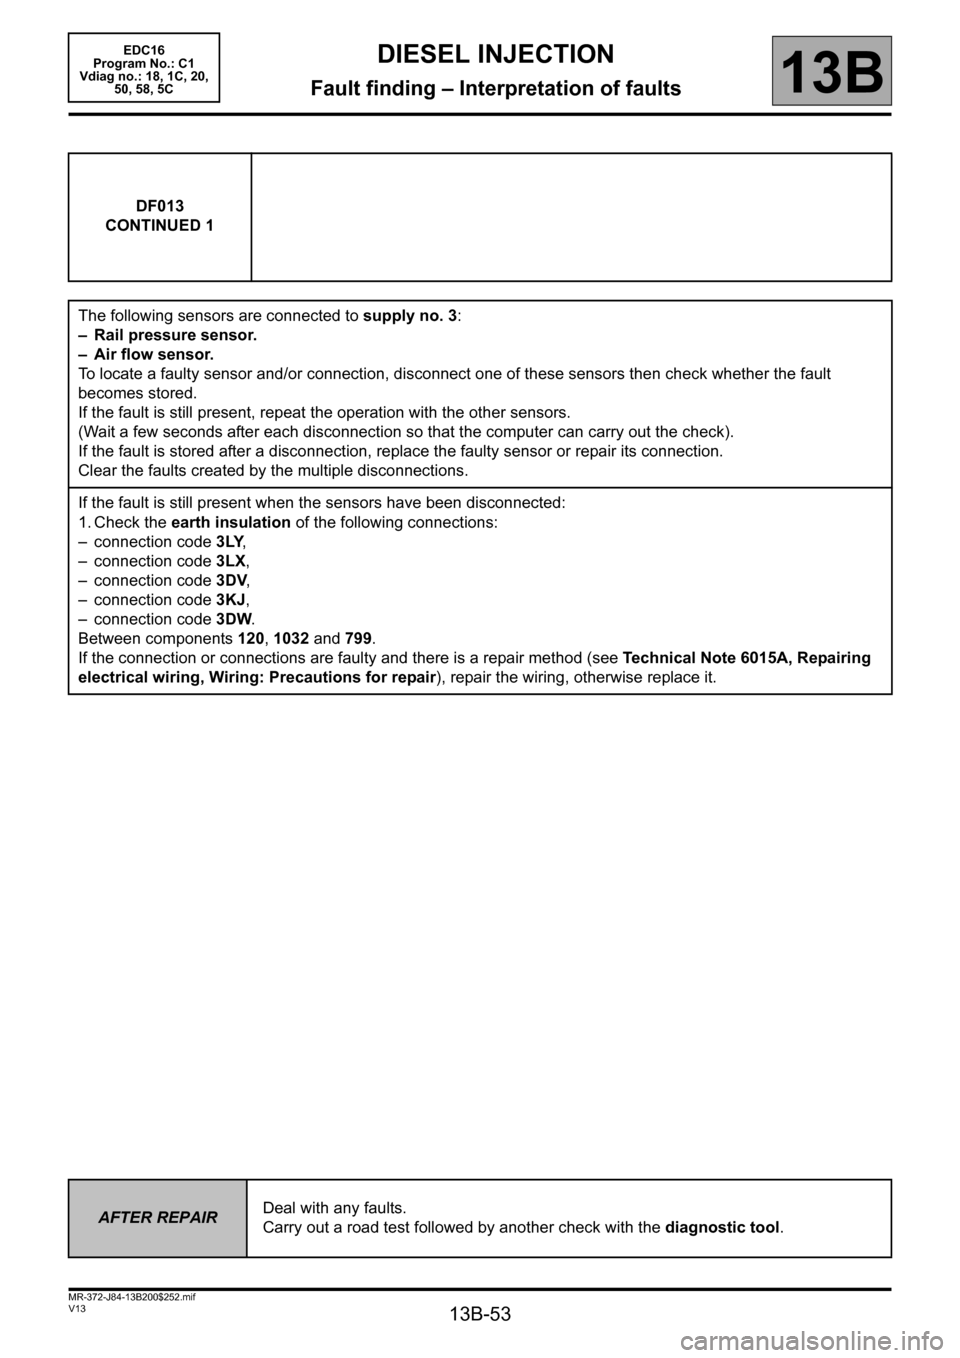
DF013
CONTINUED 1
The following sensors are connected to supply no. 3:
– Rail pressure sensor.
– Air flow sensor.
To locate a faulty sensor and/or connection, disconnect one of these sensors then check whether the fault
becomes stored.
If the fault is still present, repeat the operation with the other sensors.
(Wait a few seconds after each disconnection so that the computer can carry out the check).
If the fault is stored after a disconnection, replace the faulty sensor or repair its connection.
Clear the faults created by the multiple disconnections.
If the fault is still present when the sensors have been disconnected:
1. Check the earth insulation of the following connections:
– connection code 3LY,
– connection code 3LX,
– connection code3DV,
– connection code 3KJ,
– connection code 3DW.
Between components 120, 1032 and 799.
If the connection or connections are faulty and there is a repair method (see Technical Note 6015A, Repairing
electrical wiring, Wiring: Precautions for repair), repair the wiring, otherwise replace it.
AFTER REPAIRDeal with any faults.
Carry out a road test followed by another check with the diagnostic tool.
Page 54 of 365
13B-54
MR-372-J84-13B200$252.mif
V13
DIESEL INJECTION
Fault finding – Interpretation of faults
EDC16
Program No.: C1
Vdiag no.: 18, 1C, 20,
50, 58, 5C
13B
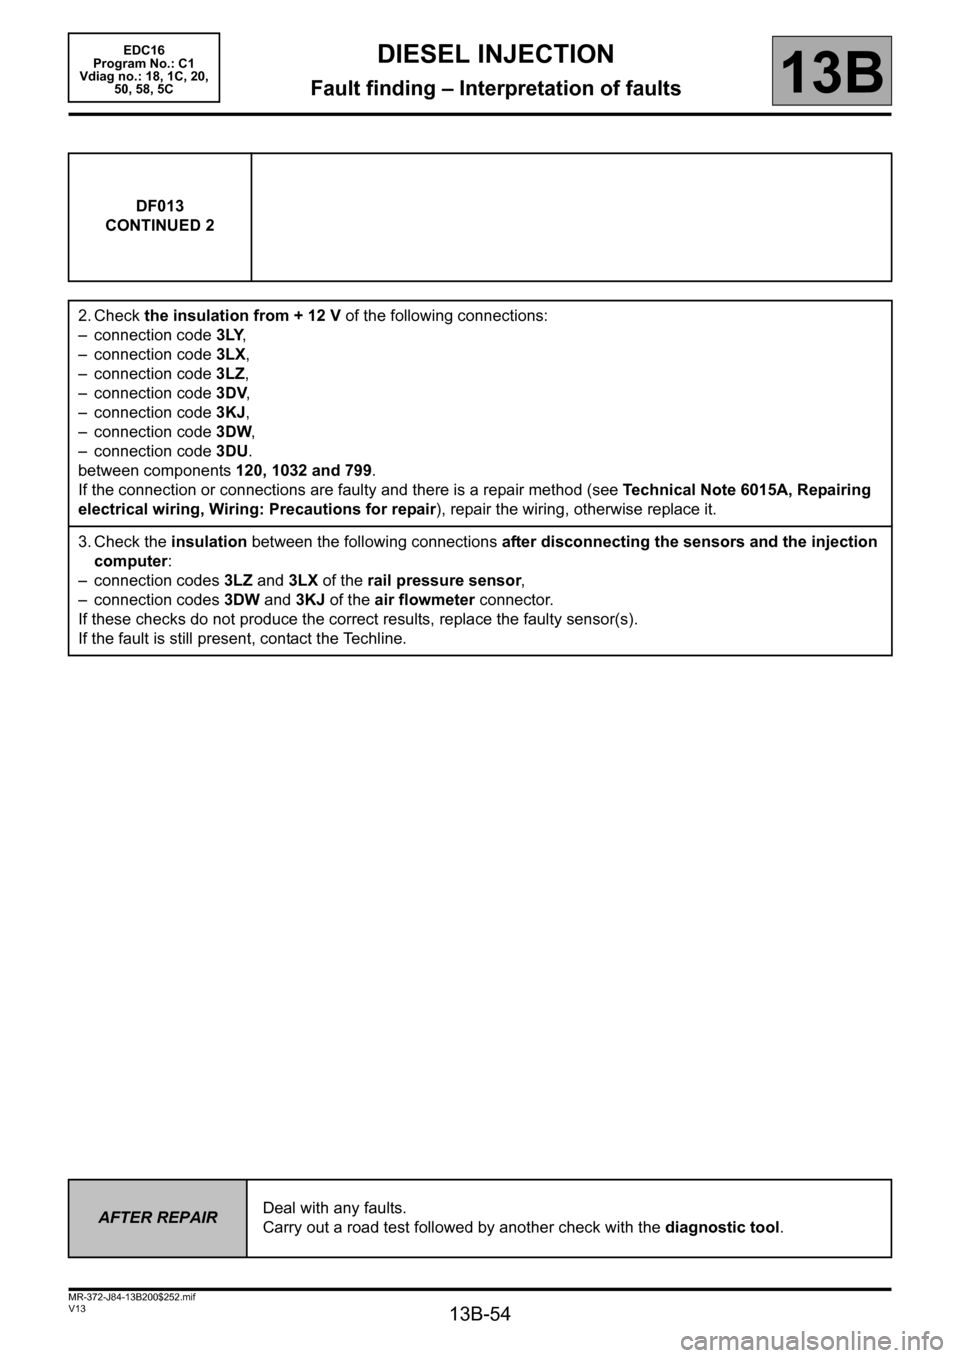
DF013
CONTINUED 2
2. Check the insulation from + 12 V of the following connections:
– connection code 3LY,
– connection code 3LX,
– connection code 3LZ,
– connection code3DV,
– connection code 3KJ,
– connection code3DW,
– connection code 3DU.
between components 120, 1032 and 799.
If the connection or connections are faulty and there is a repair method (see Technical Note 6015A, Repairing
electrical wiring, Wiring: Precautions for repair), repair the wiring, otherwise replace it.
3. Check the insulation between the following connections after disconnecting the sensors and the injection
computer:
– connection codes 3LZ and 3LX of the rail pressure sensor,
– connection codes 3DW and 3KJ of the air flowmeter connector.
If these checks do not produce the correct results, replace the faulty sensor(s).
If the fault is still present, contact the Techline.
AFTER REPAIRDeal with any faults.
Carry out a road test followed by another check with the diagnostic tool.
Page 66 of 365
13B-66
MR-372-J84-13B200$288.mif
V13
DIESEL INJECTION
Fault finding – Interpretation of faults
EDC16
Program No.: C1
Vdiag no.: 18, 1C, 20,
50, 58, 5C
13B
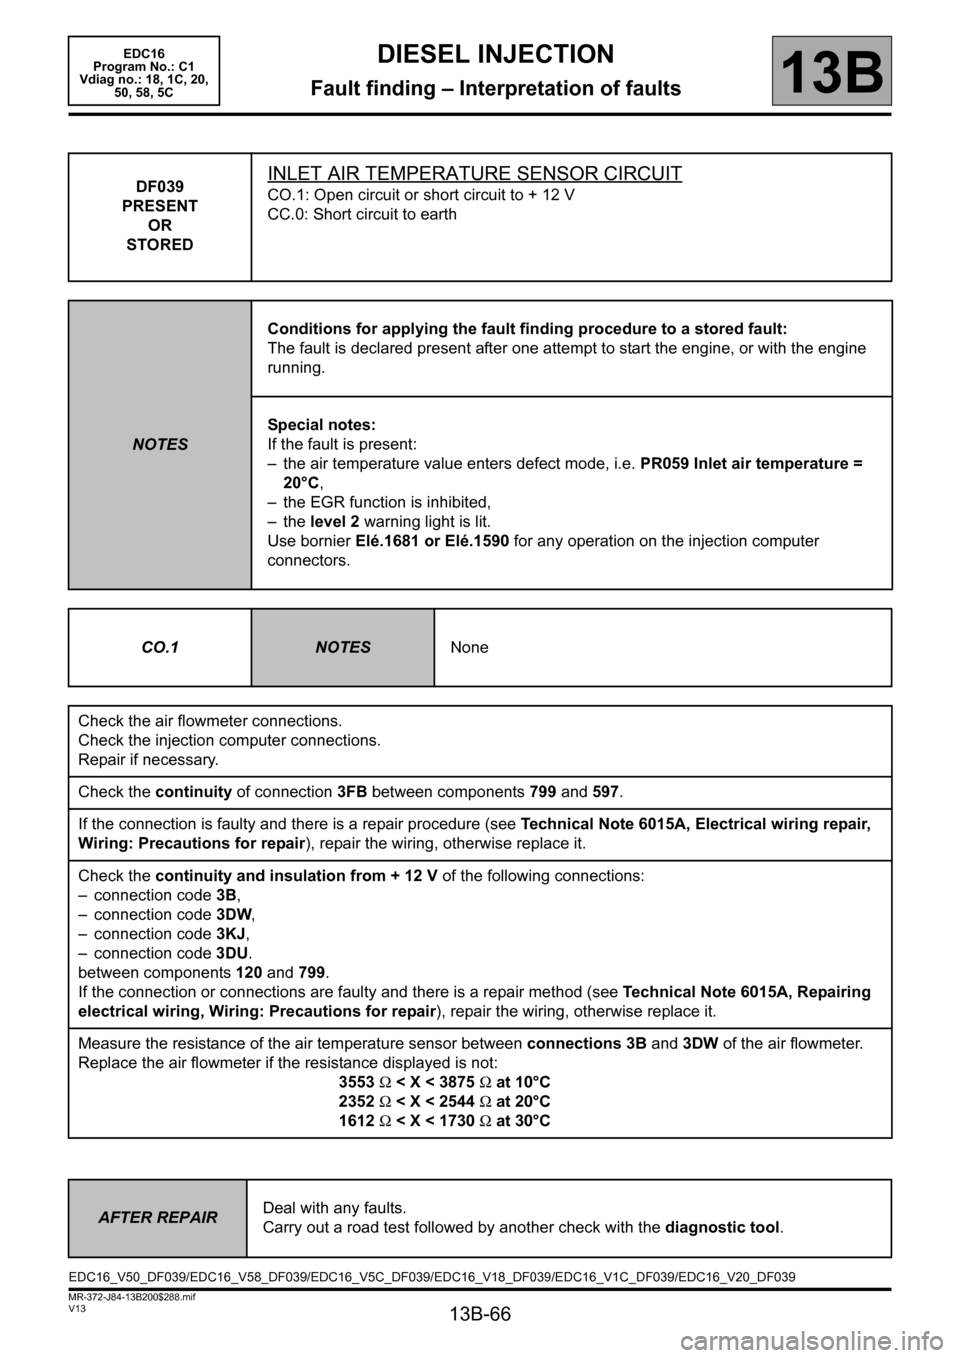
DF039
PRESENT
OR
STOREDINLET AIR TEMPERATURE SENSOR CIRCUIT
CO.1: Open circuit or short circuit to + 12 V
CC.0: Short circuit to earth
NOTESConditions for applying the fault finding procedure to a stored fault:
The fault is declared present after one attempt to start the engine, or with the engine
running.
Special notes:
If the fault is present:
– the air temperature value enters defect mode, i.e. PR059 Inlet air temperature =
20°C,
– the EGR function is inhibited,
– the level 2 warning light is lit.
Use bornier Elé.1681 or Elé.1590 for any operation on the injection computer
connectors.
CO.1
NOTESNone
Check the air flowmeter connections.
Check the injection computer connections.
Repair if necessary.
Check the continuity of connection 3FB between components 799 and 597.
If the connection is faulty and there is a repair procedure (see Technical Note 6015A, Electrical wiring repair,
Wiring: Precautions for repair), repair the wiring, otherwise replace it.
Check the continuity and insulation from + 12 V of the following connections:
– connection code 3B,
– connection code3DW,
– connection code 3KJ,
– connection code 3DU.
between components 120 and 799.
If the connection or connections are faulty and there is a repair method (see Technical Note 6015A, Repairing
electrical wiring, Wiring: Precautions for repair), repair the wiring, otherwise replace it.
Measure the resistance of the air temperature sensor between connections 3B and 3DW of the air flowmeter.
Replace the air flowmeter if the resistance displayed is not:
3553 Ω < X < 3875 Ω at 10°C
2352 Ω < X < 2544 Ω at 20°C
1612 Ω < X < 1730 Ω at 30°C
AFTER REPAIRDeal with any faults.
Carry out a road test followed by another check with the diagnostic tool.
EDC16_V50_DF039/EDC16_V58_DF039/EDC16_V5C_DF039/EDC16_V18_DF039/EDC16_V1C_DF039/EDC16_V20_DF039
Page 67 of 365
13B-67
MR-372-J84-13B200$288.mif
V13
DIESEL INJECTION
Fault finding – Interpretation of faults
EDC16
Program No.: C1
Vdiag no.: 18, 1C, 20,
50, 58, 5C
13B
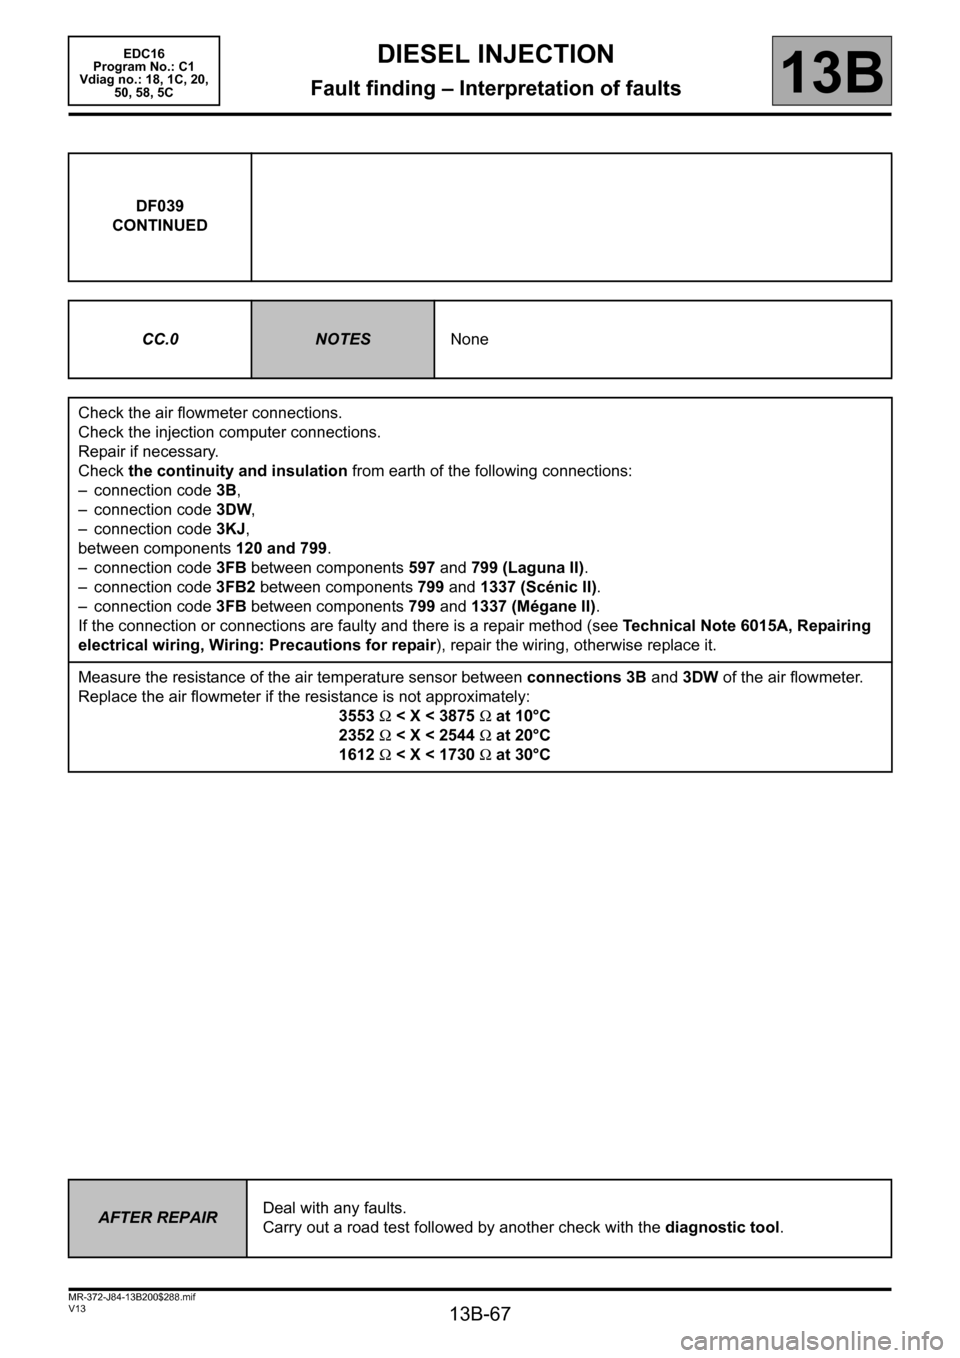
DF039
CONTINUED
CC.0
NOTESNone
Check the air flowmeter connections.
Check the injection computer connections.
Repair if necessary.
Check the continuity and insulation from earth of the following connections:
– connection code 3B,
– connection code3DW,
– connection code 3KJ,
between components 120 and 799.
– connection code 3FB between components 597 and 799 (Laguna II).
– connection code 3FB2 between components 799 and 1337 (Scénic II).
– connection code 3FB between components 799 and 1337 (Mégane II).
If the connection or connections are faulty and there is a repair method (see Technical Note 6015A, Repairing
electrical wiring, Wiring: Precautions for repair), repair the wiring, otherwise replace it.
Measure the resistance of the air temperature sensor between connections 3B and 3DW of the air flowmeter.
Replace the air flowmeter if the resistance is not approximately:
3553 Ω < X < 3875 Ω at 10°C
2352 Ω < X < 2544 Ω at 20°C
1612 Ω < X < 1730 Ω at 30°C
AFTER REPAIRDeal with any faults.
Carry out a road test followed by another check with the diagnostic tool.
Page 75 of 365
13B-75
MR-372-J84-13B200$288.mif
V13
13B
DIESEL INJECTION
Fault finding – Interpretation of faults
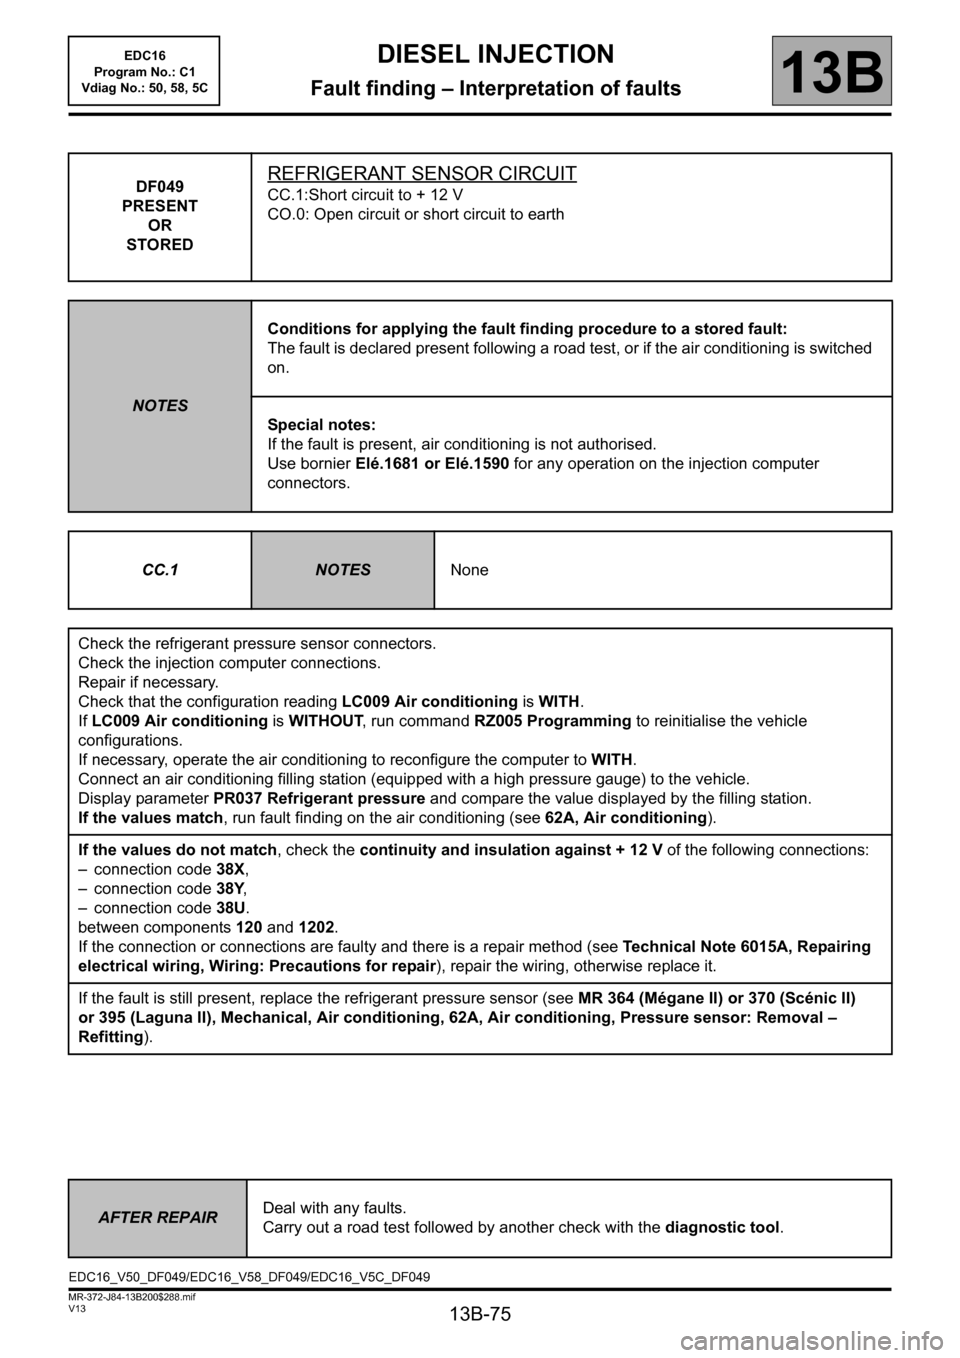
DF049
PRESENT
OR
STOREDREFRIGERANT SENSOR CIRCUIT
CC.1:Short circuit to + 12 V
CO.0: Open circuit or short circuit to earth
NOTESConditions for applying the fault finding procedure to a stored fault:
The fault is declared present following a road test, or if the air conditioning is switched
on.
Special notes:
If the fault is present, air conditioning is not authorised.
Use bornier Elé.1681 or Elé.1590 for any operation on the injection computer
connectors.
CC.1
NOTESNone
Check the refrigerant pressure sensor connectors.
Check the injection computer connections.
Repair if necessary.
Check that the configuration reading LC009 Air conditioning is WITH.
If LC009 Air conditioning is WITHOUT, run command RZ005 Programming to reinitialise the vehicle
configurations.
If necessary, operate the air conditioning to reconfigure the computer to WITH.
Connect an air conditioning filling station (equipped with a high pressure gauge) to the vehicle.
Display parameter PR037 Refrigerant pressure and compare the value displayed by the filling station.
If the values match, run fault finding on the air conditioning (see 62A, Air conditioning).
If the values do not match, check the continuity and insulation against + 12 V of the following connections:
– connection code 38X,
– connection code 38Y,
– connection code 38U.
between components 120 and 1202.
If the connection or connections are faulty and there is a repair method (see Technical Note 6015A, Repairing
electrical wiring, Wiring: Precautions for repair), repair the wiring, otherwise replace it.
If the fault is still present, replace the refrigerant pressure sensor (see MR 364 (Mégane II) or 370 (Scénic II)
or 395 (Laguna II), Mechanical, Air conditioning, 62A, Air conditioning, Pressure sensor: Removal –
Refitting).
AFTER REPAIRDeal with any faults.
Carry out a road test followed by another check with the diagnostic tool.
EDC16_V50_DF049/EDC16_V58_DF049/EDC16_V5C_DF049EDC16
Program No.: C1
Vdiag No.: 50, 58, 5C
Page 76 of 365
13B-76
MR-372-J84-13B200$288.mif
V13
DIESEL INJECTION
Fault finding – Interpretation of faults
EDC16
Program No.: C1
Vdiag No.: 50, 58, 5C
13B
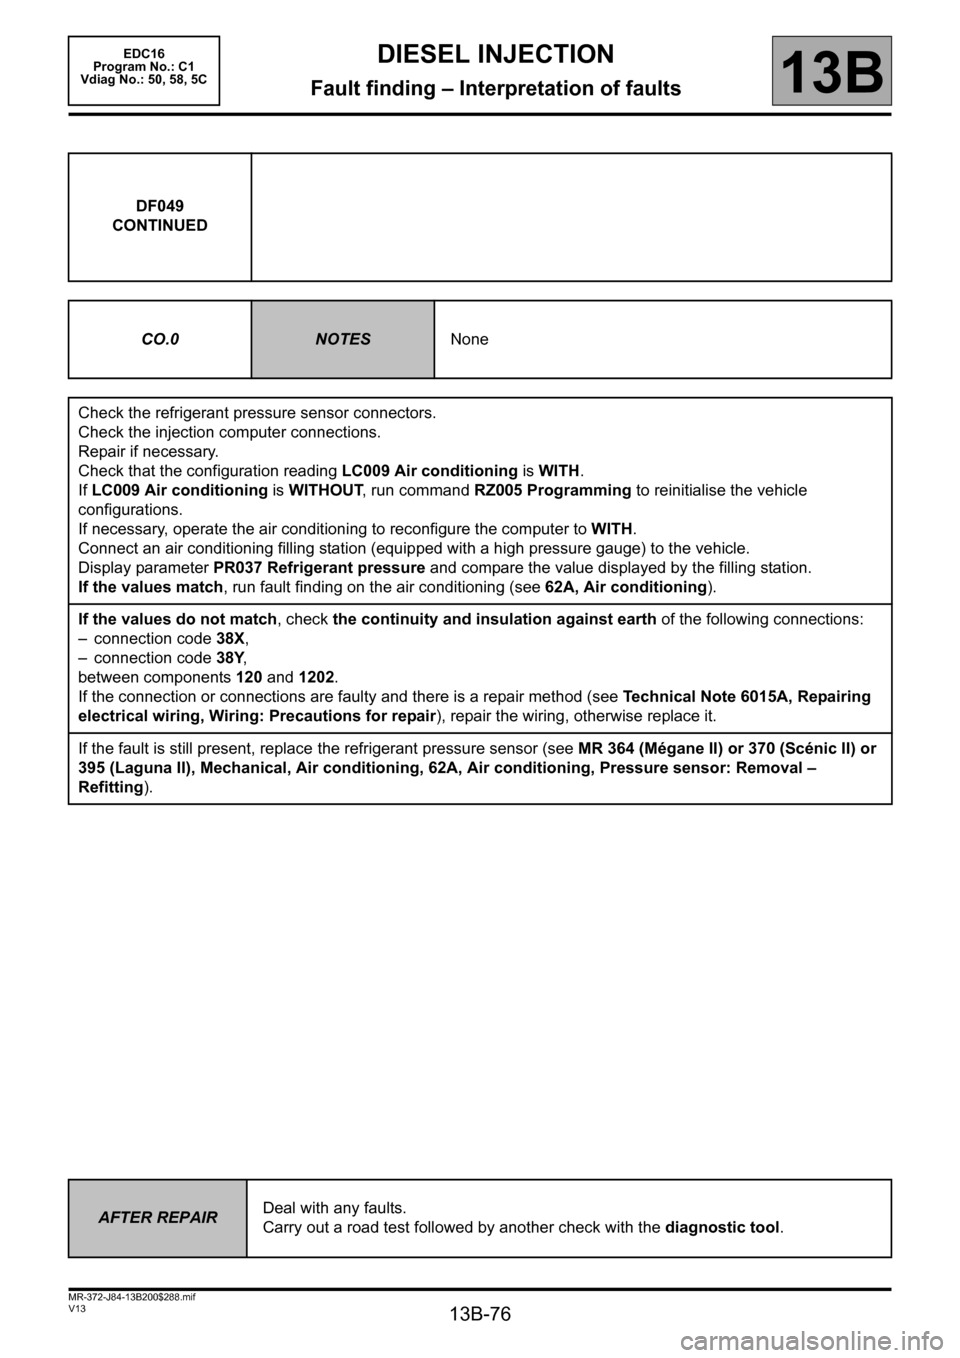
DF049
CONTINUED
CO.0
NOTESNone
Check the refrigerant pressure sensor connectors.
Check the injection computer connections.
Repair if necessary.
Check that the configuration reading LC009 Air conditioning is WITH.
If LC009 Air conditioning is WITHOUT, run command RZ005 Programming to reinitialise the vehicle
configurations.
If necessary, operate the air conditioning to reconfigure the computer to WITH.
Connect an air conditioning filling station (equipped with a high pressure gauge) to the vehicle.
Display parameter PR037 Refrigerant pressure and compare the value displayed by the filling station.
If the values match, run fault finding on the air conditioning (see 62A, Air conditioning).
If the values do not match, check the continuity and insulation against earth of the following connections:
– connection code 38X,
– connection code 38Y,
between components 120 and 1202.
If the connection or connections are faulty and there is a repair method (see Technical Note 6015A, Repairing
electrical wiring, Wiring: Precautions for repair), repair the wiring, otherwise replace it.
If the fault is still present, replace the refrigerant pressure sensor (see MR 364 (Mégane II) or 370 (Scénic II) or
395 (Laguna II), Mechanical, Air conditioning, 62A, Air conditioning, Pressure sensor: Removal –
Refitting).
AFTER REPAIRDeal with any faults.
Carry out a road test followed by another check with the diagnostic tool.
Page 81 of 365
13B-81
MR-372-J84-13B200$288.mif
V13
DIESEL INJECTION
Fault finding – Interpretation of faults
EDC16
Program No.: C1
Vdiag no.: 18, 1C, 20,
50, 58, 5C
13B
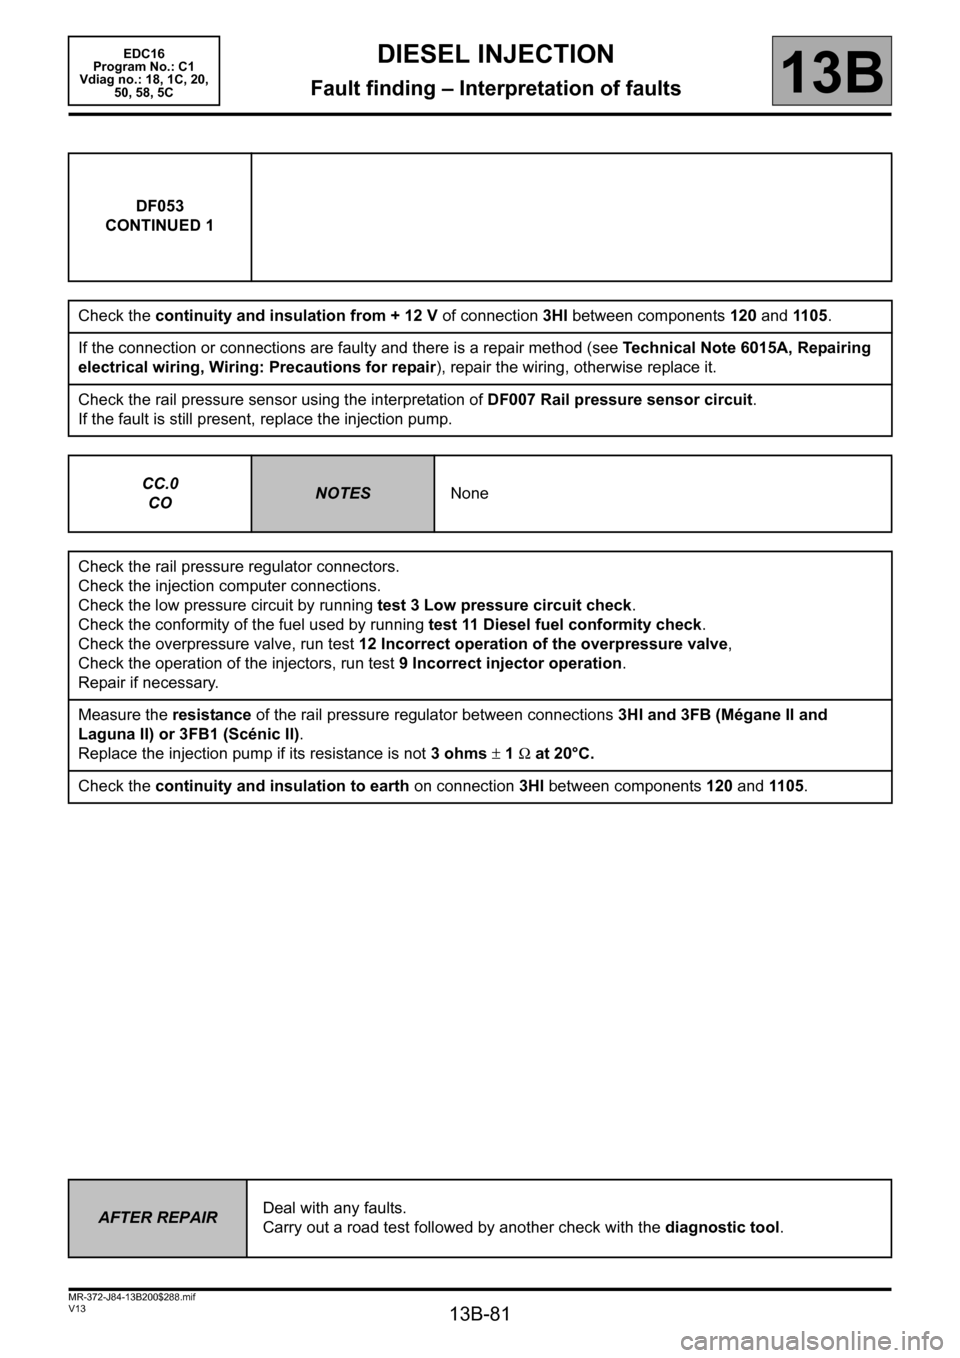
DF053
CONTINUED 1
Check the continuity and insulation from + 12 V of connection 3HI between components 120 and 1105.
If the connection or connections are faulty and there is a repair method (see Technical Note 6015A, Repairing
electrical wiring, Wiring: Precautions for repair), repair the wiring, otherwise replace it.
Check the rail pressure sensor using the interpretation of DF007 Rail pressure sensor circuit.
If the fault is still present, replace the injection pump.
CC.0
CO
NOTESNone
Check the rail pressure regulator connectors.
Check the injection computer connections.
Check the low pressure circuit by running test 3 Low pressure circuit check.
Check the conformity of the fuel used by running test 11 Diesel fuel conformity check.
Check the overpressure valve, run test 12 Incorrect operation of the overpressure valve,
Check the operation of the injectors, run test 9 Incorrect injector operation.
Repair if necessary.
Measure the resistance of the rail pressure regulator between connections 3HI and 3FB (Mégane II and
Laguna II) or 3FB1 (Scénic II).
Replace the injection pump if its resistance is not 3 ohms ± 1 Ω at 20°C.
Check the continuity and insulation to earth on connection 3HI between components 120 and 110 5.
AFTER REPAIRDeal with any faults.
Carry out a road test followed by another check with the diagnostic tool.
Page 82 of 365
13B-82
MR-372-J84-13B200$288.mif
V13
DIESEL INJECTION
Fault finding – Interpretation of faults
EDC16
Program No.: C1
Vdiag no.: 18, 1C, 20,
50, 58, 5C
13B
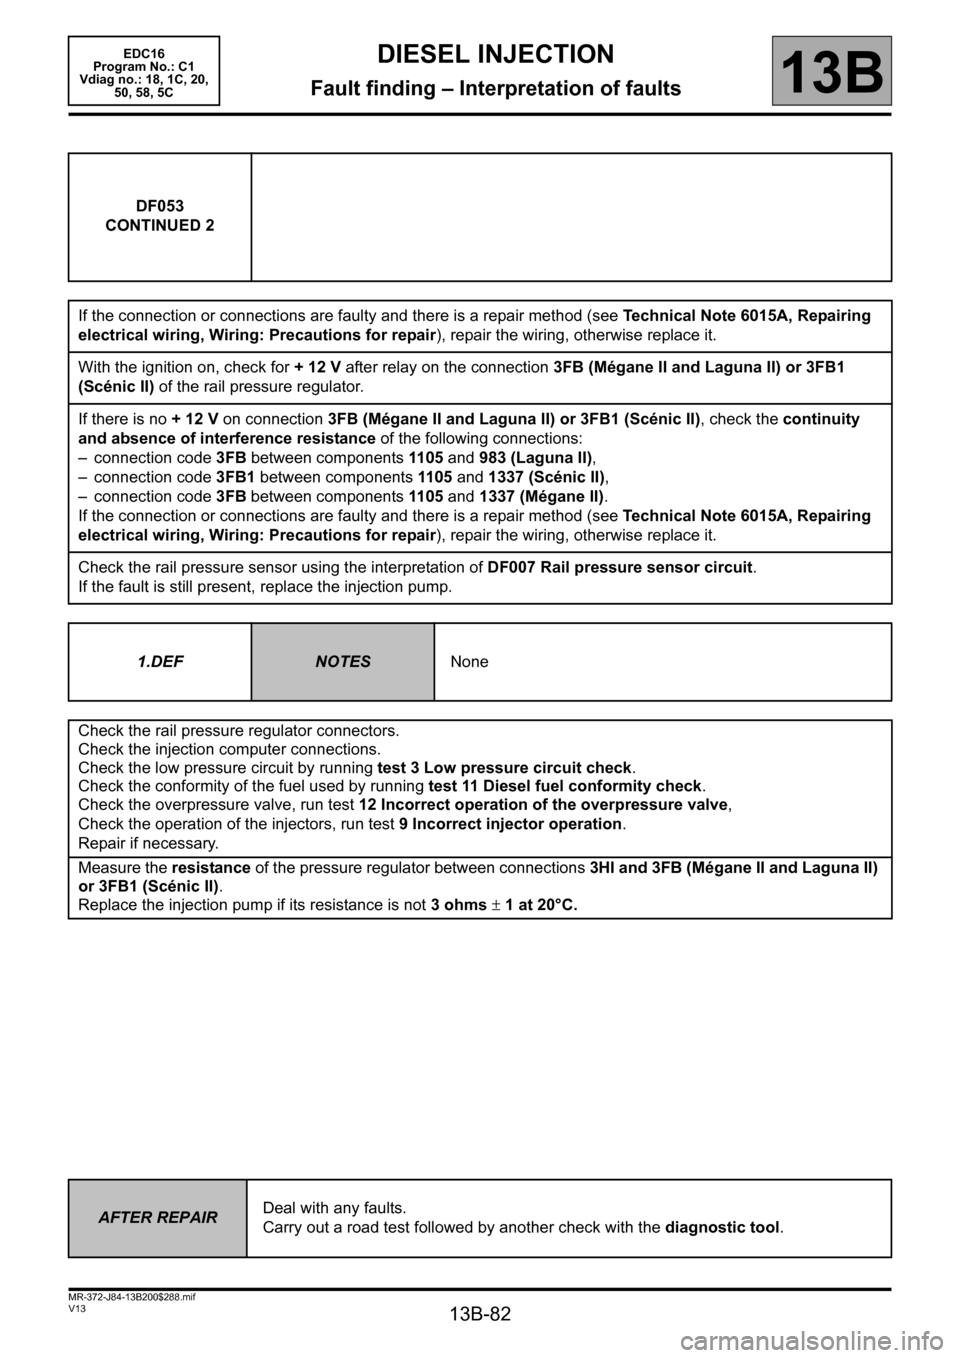
DF053
CONTINUED 2
If the connection or connections are faulty and there is a repair method (see Technical Note 6015A, Repairing
electrical wiring, Wiring: Precautions for repair), repair the wiring, otherwise replace it.
With the ignition on, check for + 12 V after relay on the connection 3FB (Mégane II and Laguna II) or 3FB1
(Scénic II) of the rail pressure regulator.
If there is no + 12 V on connection 3FB (Mégane II and Laguna II) or 3FB1 (Scénic II), check the continuity
and absence of interference resistance of the following connections:
– connection code 3FB between components 11 05 and 983 (Laguna II),
– connection code 3FB1 between components 110 5 and 1337 (Scénic II),
– connection code 3FB between components 11 05 and 1337 (Mégane II).
If the connection or connections are faulty and there is a repair method (see Technical Note 6015A, Repairing
electrical wiring, Wiring: Precautions for repair), repair the wiring, otherwise replace it.
Check the rail pressure sensor using the interpretation of DF007 Rail pressure sensor circuit.
If the fault is still present, replace the injection pump.
1.DEF
NOTESNone
Check the rail pressure regulator connectors.
Check the injection computer connections.
Check the low pressure circuit by running test 3 Low pressure circuit check.
Check the conformity of the fuel used by running test 11 Diesel fuel conformity check.
Check the overpressure valve, run test 12 Incorrect operation of the overpressure valve,
Check the operation of the injectors, run test 9 Incorrect injector operation.
Repair if necessary.
Measure the resistance of the pressure regulator between connections 3HI and 3FB (Mégane II and Laguna II)
or 3FB1 (Scénic II).
Replace the injection pump if its resistance is not 3 ohms ± 1 at 20°C.
AFTER REPAIRDeal with any faults.
Carry out a road test followed by another check with the diagnostic tool.
Page 83 of 365
13B-83
MR-372-J84-13B200$288.mif
V13
DIESEL INJECTION
Fault finding – Interpretation of faults
EDC16
Program No.: C1
Vdiag no.: 18, 1C, 20,
50, 58, 5C
13B
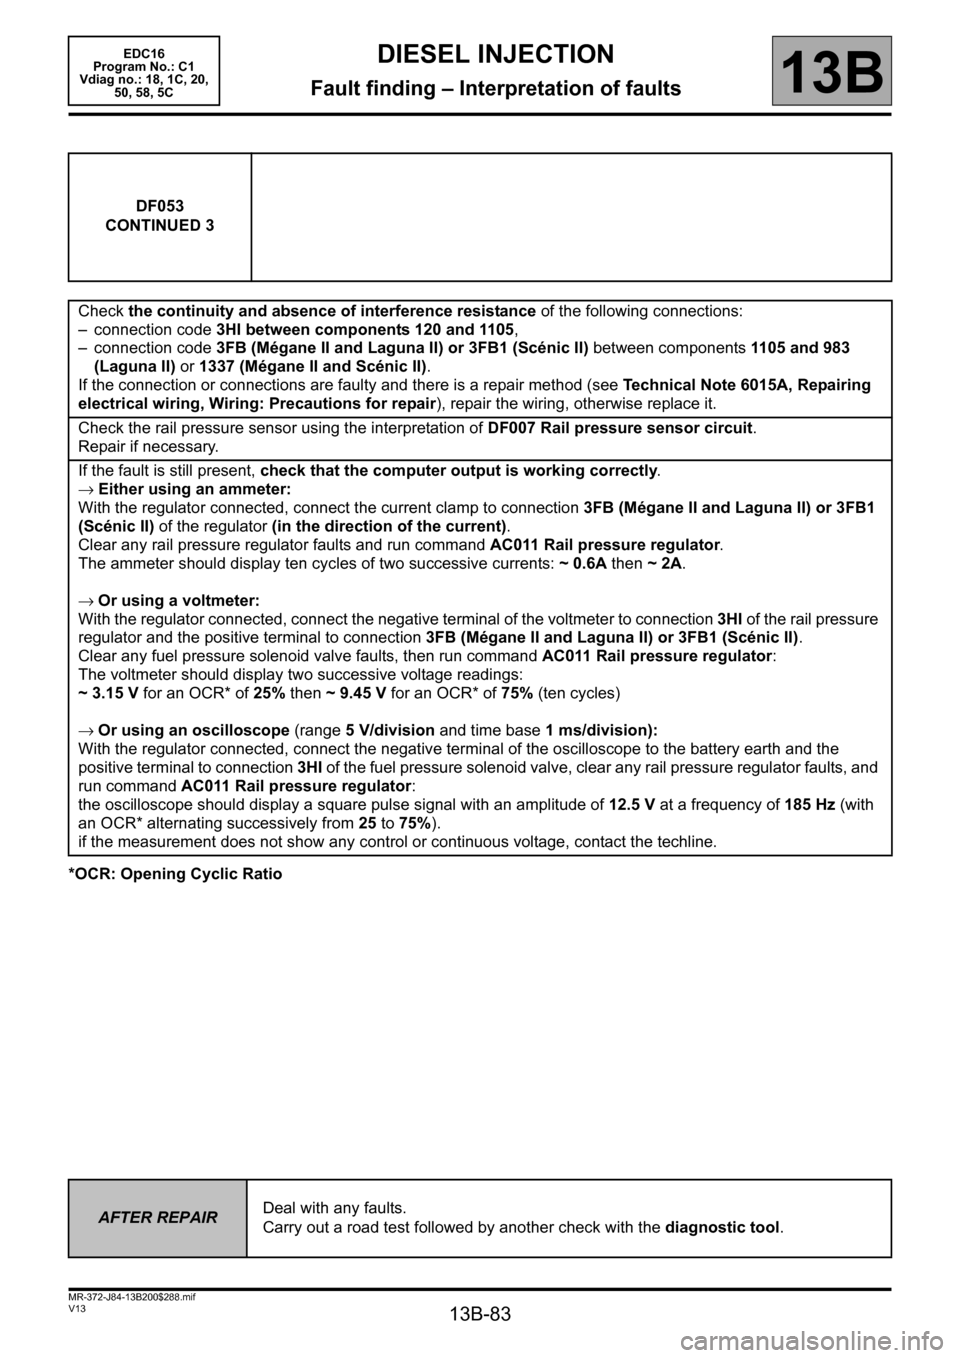
*OCR: Opening Cyclic RatioDF053
CONTINUED 3
Check the continuity and absence of interference resistance of the following connections:
– connection code 3HI between components 120 and 1105,
– connection code 3FB (Mégane II and Laguna II) or 3FB1 (Scénic II) between components 1105 and 983
(Laguna II) or 1337 (Mégane II and Scénic II).
If the connection or connections are faulty and there is a repair method (see Technical Note 6015A, Repairing
electrical wiring, Wiring: Precautions for repair), repair the wiring, otherwise replace it.
Check the rail pressure sensor using the interpretation of DF007 Rail pressure sensor circuit.
Repair if necessary.
If the fault is still present, check that the computer output is working correctly.
→Either using an ammeter:
With the regulator connected, connect the current clamp to connection 3FB (Mégane II and Laguna II) or 3FB1
(Scénic II) of the regulator (in the direction of the current).
Clear any rail pressure regulator faults and run command AC011 Rail pressure regulator.
The ammeter should display ten cycles of two successive currents: ~ 0.6A then ~ 2A.
→Or using a voltmeter:
With the regulator connected, connect the negative terminal of the voltmeter to connection 3HI of the rail pressure
regulator and the positive terminal to connection 3FB (Mégane II and Laguna II) or 3FB1 (Scénic II).
Clear any fuel pressure solenoid valve faults, then run command AC011 Rail pressure regulator:
The voltmeter should display two successive voltage readings:
~3.15V for an OCR* of 25% then ~9.45V for an OCR* of 75% (ten cycles)
→Or using an oscilloscope (range 5 V/division and time base 1 ms/division):
With the regulator connected, connect the negative terminal of the oscilloscope to the battery earth and the
positive terminal to connection 3HI of the fuel pressure solenoid valve, clear any rail pressure regulator faults, and
run command AC011 Rail pressure regulator:
the oscilloscope should display a square pulse signal with an amplitude of 12.5 V at a frequency of 185 Hz (with
an OCR* alternating successively from 25 to 75%).
if the measurement does not show any control or continuous voltage, contact the techline.
AFTER REPAIRDeal with any faults.
Carry out a road test followed by another check with the diagnostic tool.