THERMO PLUNGER RENAULT SCENIC 2012 J95 / 3.G Engine And Peripherals EDC16CP33 Owner's Manual
[x] Cancel search | Manufacturer: RENAULT, Model Year: 2012, Model line: SCENIC, Model: RENAULT SCENIC 2012 J95 / 3.GPages: 510, PDF Size: 2.98 MB
Page 101 of 510
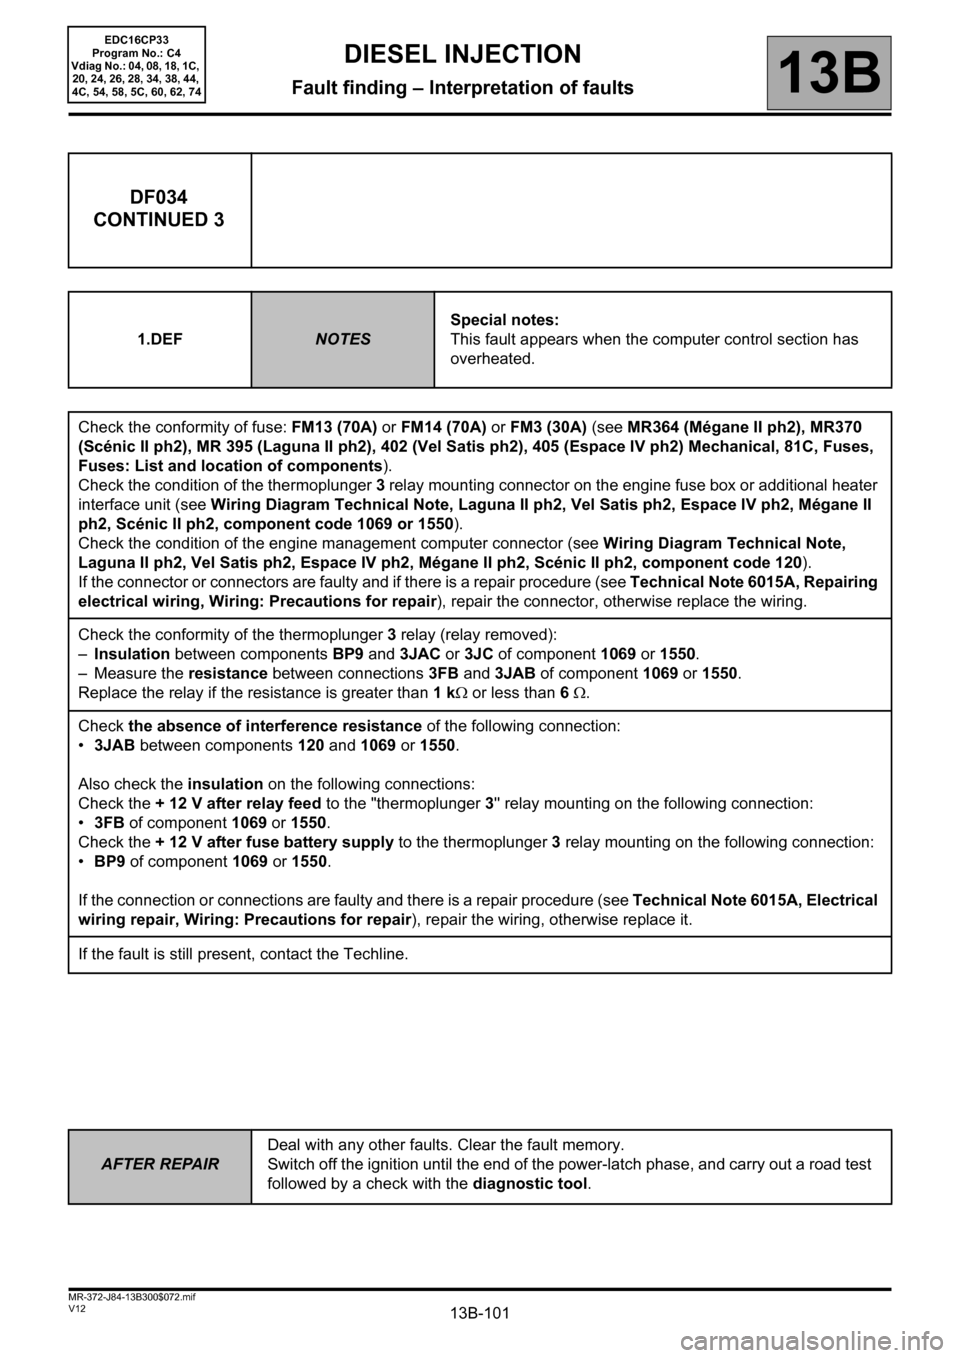
13B-101
AFTER REPAIRDeal with any other faults. Clear the fault memory.
Switch off the ignition until the end of the power-latch phase, and carry out a road test
followed by a check with the diagnostic tool.
V12 MR-372-J84-13B300$072.mif
DIESEL INJECTION
Fault finding – Interpretation of faults13B
EDC16CP33
Program No.: C4
Vdiag No.: 04, 08, 18, 1C,
20, 24, 26, 28, 34, 38, 44,
4C, 54, 58, 5C, 60, 62, 74
DF034
CONTINUED 3
1.DEFNOTESSpecial notes:
This fault appears when the computer control section has
overheated.
Check the conformity of fuse: FM13 (70A) or FM14 (70A) or FM3 (30A) (see MR364 (Mégane II ph2), MR370
(Scénic II ph2), MR 395 (Laguna II ph2), 402 (Vel Satis ph2), 405 (Espace IV ph2) Mechanical, 81C, Fuses,
Fuses: List and location of components).
Check the condition of the thermoplunger 3 relay mounting connector on the engine fuse box or additional heater
interface unit (see Wiring Diagram Technical Note, Laguna II ph2, Vel Satis ph2, Espace IV ph2, Mégane II
ph2, Scénic II ph2, component code 1069 or 1550).
Check the condition of the engine management computer connector (see Wiring Diagram Technical Note,
Laguna II ph2, Vel Satis ph2, Espace IV ph2, Mégane II ph2, Scénic II ph2, component code 120).
If the connector or connectors are faulty and if there is a repair procedure (see Technical Note 6015A, Repairing
electrical wiring, Wiring: Precautions for repair), repair the connector, otherwise replace the wiring.
Check the conformity of the thermoplunger 3 relay (relay removed):
–Insulation between components BP9 and 3JAC or 3JC of component 1069 or 1550.
– Measure the resistance between connections 3FB and 3JAB of component 1069 or 1550.
Replace the relay if the resistance is greater than 1 kΩ or less than 6 Ω.
Check the absence of interference resistance of the following connection:
•3JAB between components 120 and 1069 or 1550.
Also check the insulation on the following connections:
Check the + 12 V after relay feed to the "thermoplunger 3'' relay mounting on the following connection:
•3FB of component 1069 or
1550.
Check the + 12 V after fuse battery supply to the thermoplunger 3 relay mounting on the following connection:
•BP9 of component 1069 or 1550.
If the connection or connections are faulty and there is a repair procedure (see Technical Note 6015A, Electrical
wiring repair, Wiring: Precautions for repair), repair the wiring, otherwise replace it.
If the fault is still present, contact the Techline.
Page 255 of 510
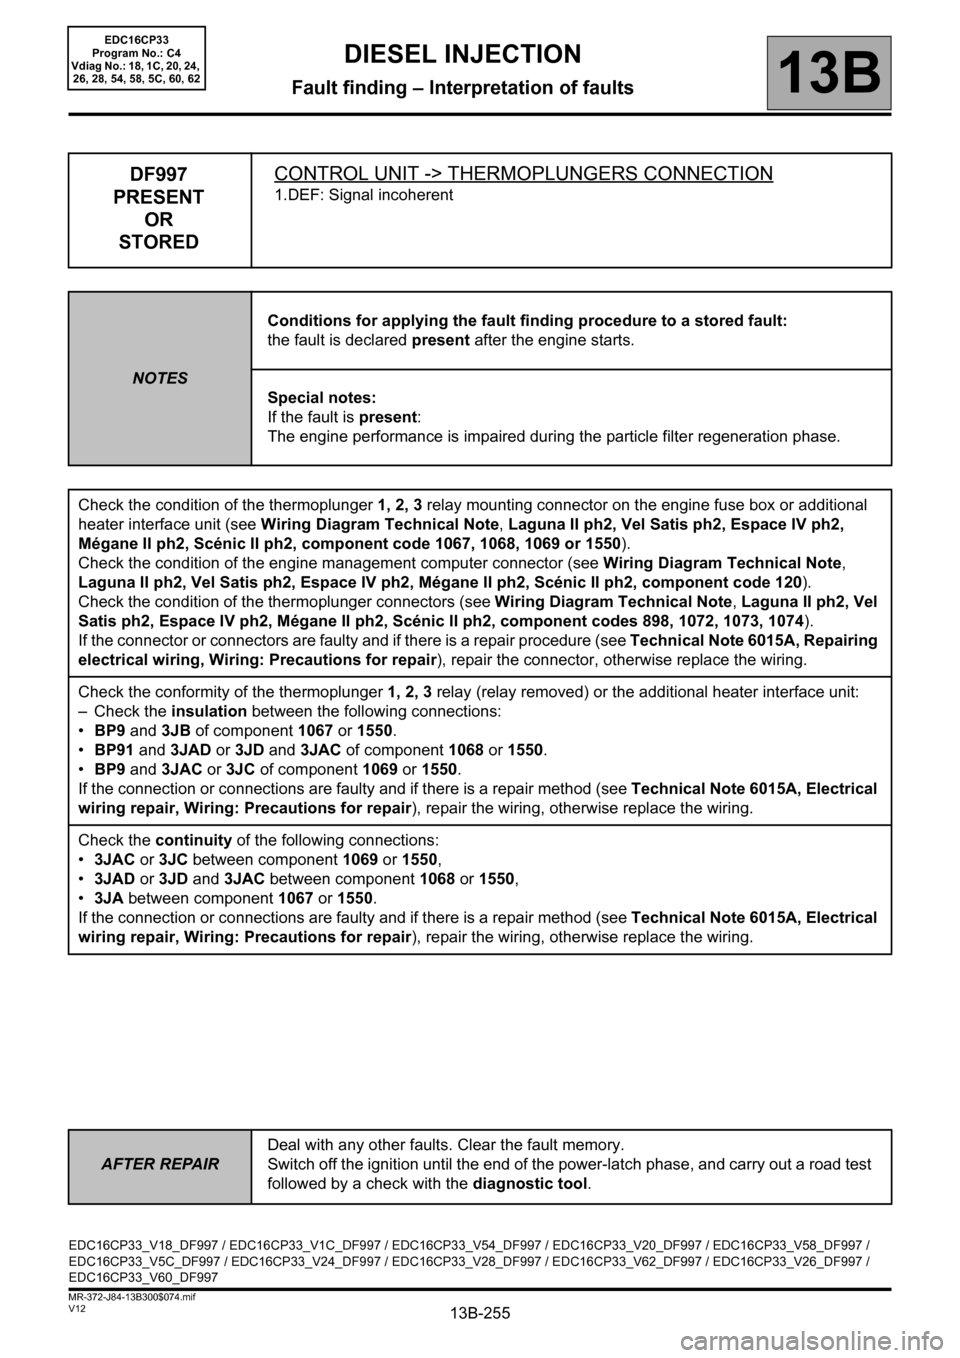
13B-255
AFTER REPAIRDeal with any other faults. Clear the fault memory.
Switch off the ignition until the end of the power-latch phase, and carry out a road test
followed by a check with the diagnostic tool.
V12 MR-372-J84-13B300$074.mif
DIESEL INJECTION
Fault finding – Interpretation of faults13B
DF997
PRESENT
OR
STOREDCONTROL UNIT -> THERMOPLUNGERS CONNECTION
1.DEF: Signal incoherent
NOTESConditions for applying the fault finding procedure to a stored fault:
the fault is declared present after the engine starts.
Special notes:
If the fault is present:
The engine performance is impaired during the particle filter regeneration phase.
Check the condition of the thermoplunger 1, 2, 3 relay mounting connector on the engine fuse box or additional
heater interface unit (see Wiring Diagram Technical Note, Laguna II ph2, Vel Satis ph2, Espace IV ph2,
Mégane II ph2, Scénic II ph2, component code 1067, 1068, 1069 or 1550).
Check the condition of the engine management computer connector (see Wiring Diagram Technical Note,
Laguna II ph2, Vel Satis ph2, Espace IV ph2, Mégane II ph2, Scénic II ph2, component code 120).
Check the condition of the thermoplunger connectors (see Wiring Diagram Technical Note, Laguna II ph2, Vel
Satis ph2, Espace IV ph2, Mégane II ph2, Scénic II ph2, component codes 898, 1072, 1073, 1074).
If the connector or connectors are faulty and if there is a repair procedure (see Technical Note 6015A, Repairing
electrical wiring, Wiring: Precautions for repair), repair the connector, otherwise replace the wiring.
Check the conformity of the thermoplunger 1, 2, 3 relay (relay removed) or the additional heater interface unit:
– Check the insulation between the following connections:
•BP9 and 3JB of component 1067 or 1550.
•BP91 and 3JAD or 3JD and 3JAC of component 1068 or 1550.
•BP9 and 3JAC or 3JC of component 1069 or 1550.
If the connection or connections are faulty and if there is a repair method (see Technical Note 6015A, Electrical
wiring repair, Wiring: Precautions for repair), repair the wiring, otherwise replace the wiring.
Check the continuity of the following connections:
•3JAC or 3JC between component
1069 or 1550,
•3JAD or 3JD and 3JAC between component 1068 or 1550,
•3JA between component 1067 or 1550.
If the connection or connections are faulty and if there is a repair method (see Technical Note 6015A, Electrical
wiring repair, Wiring: Precautions for repair), repair the wiring, otherwise replace the wiring.
EDC16CP33_V18_DF997 / EDC16CP33_V1C_DF997 / EDC16CP33_V54_DF997 / EDC16CP33_V20_DF997 / EDC16CP33_V58_DF997 /
EDC16CP33_V5C_DF997 / EDC16CP33_V24_DF997 / EDC16CP33_V28_DF997 / EDC16CP33_V62_DF997 / EDC16CP33_V26_DF997 /
EDC16CP33_V60_DF997
EDC16CP33
Program No.: C4
Vdiag No.: 18, 1C, 20, 24,
26, 28, 54, 58, 5C, 60, 62
Page 256 of 510
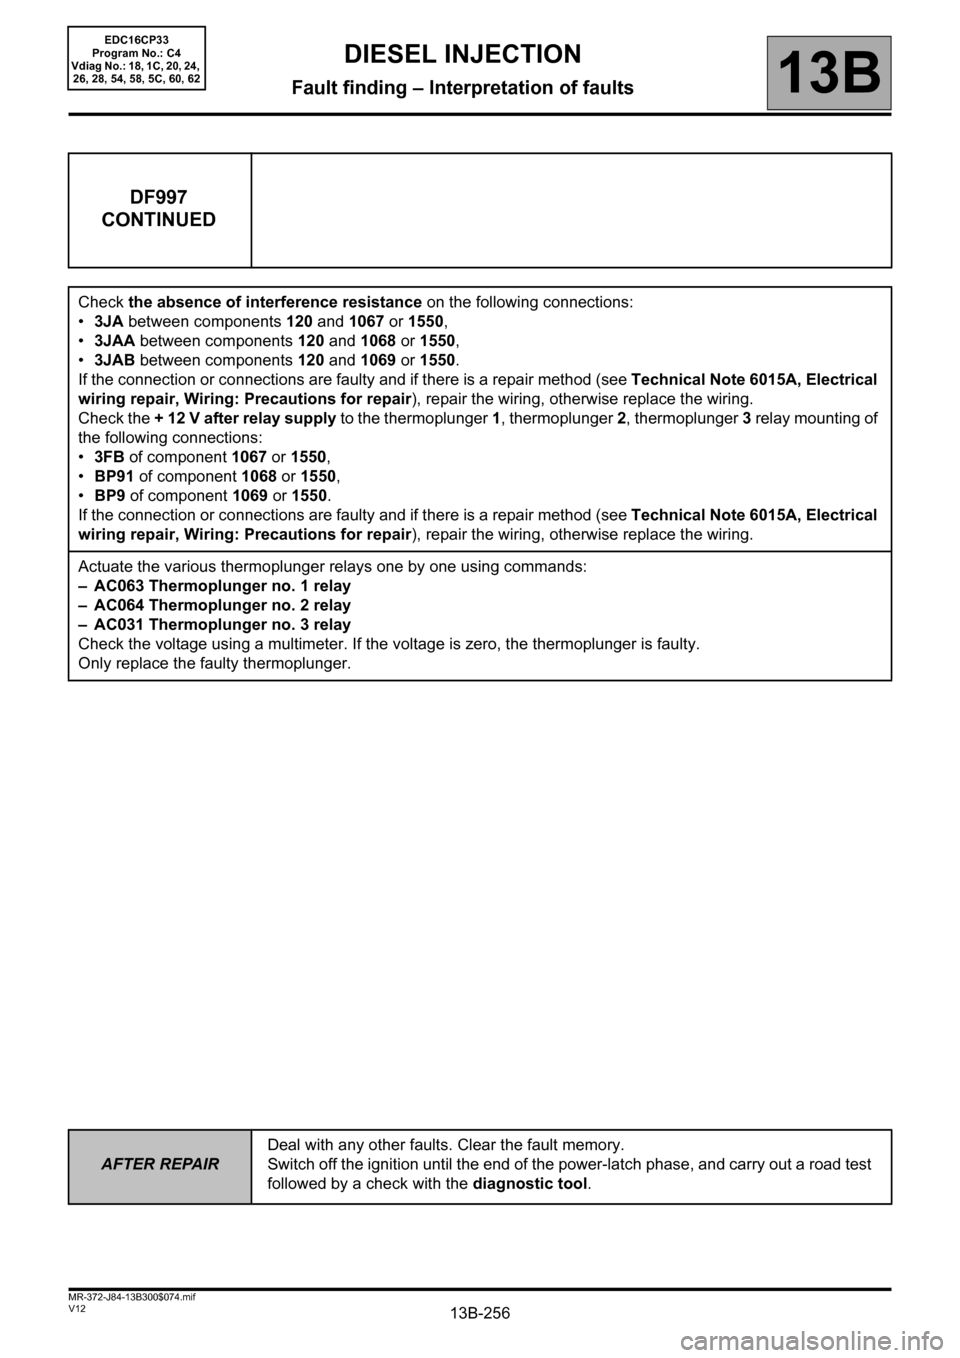
13B-256
AFTER REPAIRDeal with any other faults. Clear the fault memory.
Switch off the ignition until the end of the power-latch phase, and carry out a road test
followed by a check with the diagnostic tool.
V12 MR-372-J84-13B300$074.mif
DIESEL INJECTION
Fault finding – Interpretation of faults13B
DF997
CONTINUED
Check the absence of interference resistance on the following connections:
•3JA between components 120 and 1067 or 1550,
•3JAA between components 120 and 1068 or 1550,
•3JAB between components 120 and 1069 or 1550.
If the connection or connections are faulty and if there is a repair method (see Technical Note 6015A, Electrical
wiring repair, Wiring: Precautions for repair), repair the wiring, otherwise replace the wiring.
Check the + 12 V after relay supply to the thermoplunger 1, thermoplunger 2, thermoplunger 3 relay mounting of
the following connections:
•3FB of component 1067 or 1550,
•BP91 of component 1068 or 1550,
•BP9 of component 1069 or 1550.
If the connection or connections are faulty and if there is a repair method (see Technical Note 6015A, Electrical
wiring repair, Wiring: Precautions for repair), repair the wiring, otherwise replace the wiring.
Actuate the various thermoplunger relays one by one using commands:
– AC063 Thermoplunger no. 1 relay
– AC064 Thermoplunger no. 2 relay
– AC031 Thermoplunger no. 3 relay
Check the voltage using a multimeter. If the voltage is zero, the thermoplunger is faulty.
Only replace the faulty thermoplunger.
EDC16CP33
Program No.: C4
Vdiag No.: 18, 1C, 20, 24,
26, 28, 54, 58, 5C, 60, 62
Page 262 of 510
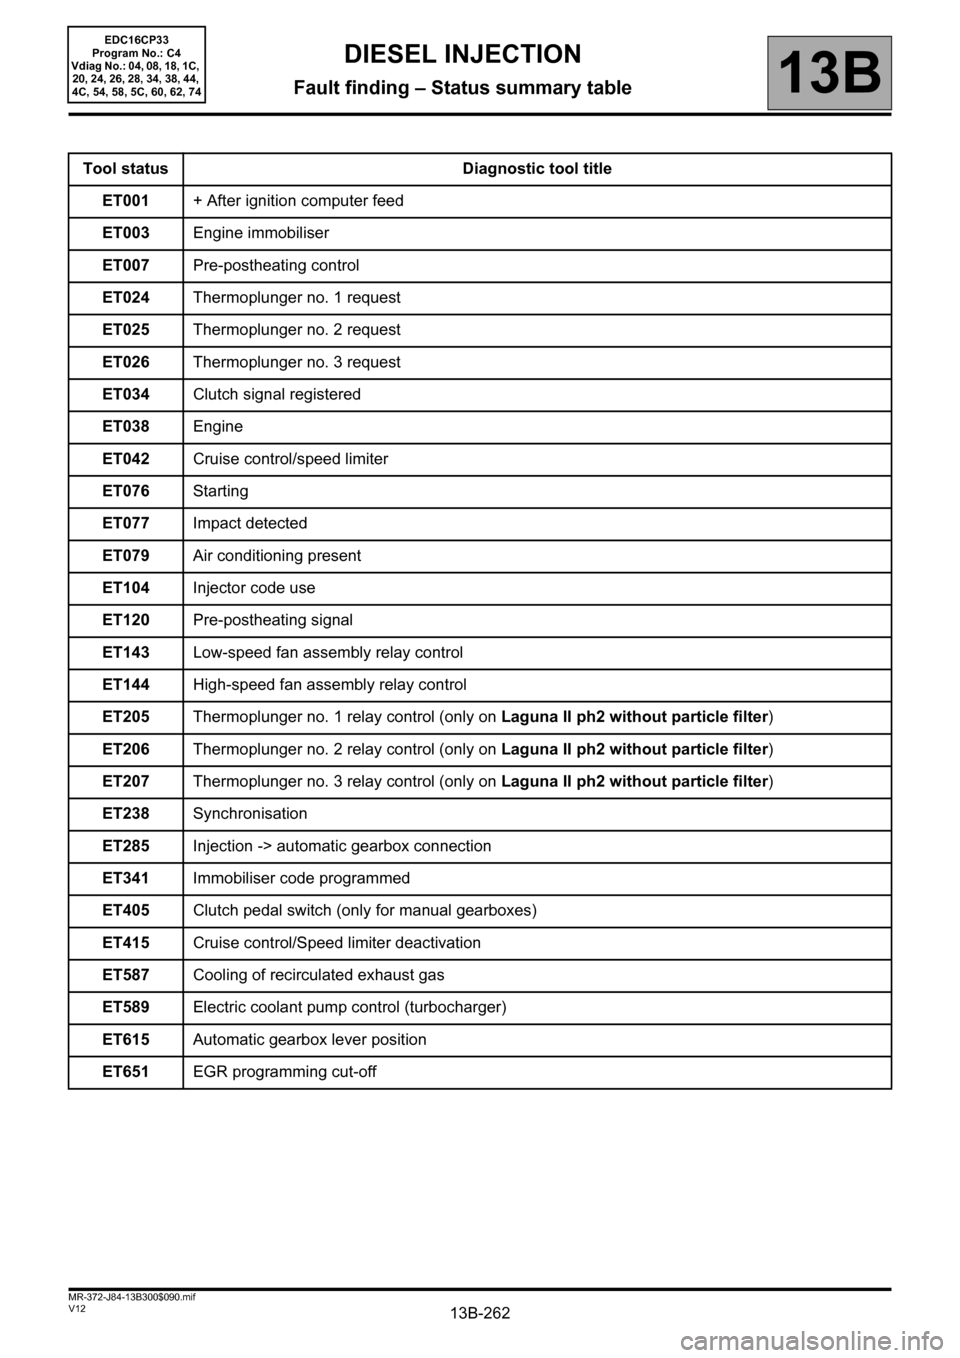
13B-262V12 MR-372-J84-13B300$090.mif
13B
EDC16CP33
Program No.: C4
Vdiag No.: 04, 08, 18, 1C,
20, 24, 26, 28, 34, 38, 44,
4C, 54, 58, 5C, 60, 62, 74
Tool status Diagnostic tool title
ET001+ After ignition computer feed
ET003Engine immobiliser
ET007Pre-postheating control
ET024Thermoplunger no. 1 request
ET025Thermoplunger no. 2 request
ET026Thermoplunger no. 3 request
ET034Clutch signal registered
ET038Engine
ET042Cruise control/speed limiter
ET076Starting
ET077Impact detected
ET079Air conditioning present
ET104Injector code use
ET120Pre-postheating signal
ET143Low-speed fan assembly relay control
ET144High-speed fan assembly relay control
ET205Thermoplunger no. 1 relay control (only on Laguna II ph2 without particle filter)
ET206Thermoplunger no. 2 relay control (only on Laguna II ph2 without particle filter)
ET207Thermoplunger no. 3 relay control (only on Laguna II ph2 without particle filter)
ET238Synchronisation
ET285Injection -> automatic gearbox connection
ET341Immobiliser code programmed
ET405Clutch pedal switch (only for manual gearboxes)
ET415Cruise control/Speed limiter deactivation
ET587Cooling of recirculated exhaust gas
ET589Electric coolant pump control (turbocharger)
ET615Automatic gearbox lever position
ET651EGR programming cut-off
DIESEL INJECTION
Fault finding – Status summary table
Page 269 of 510
13B-269V12 MR-372-J84-13B300$101.mif
DIESEL INJECTION
Fault finding – Interpretation of statuses13B
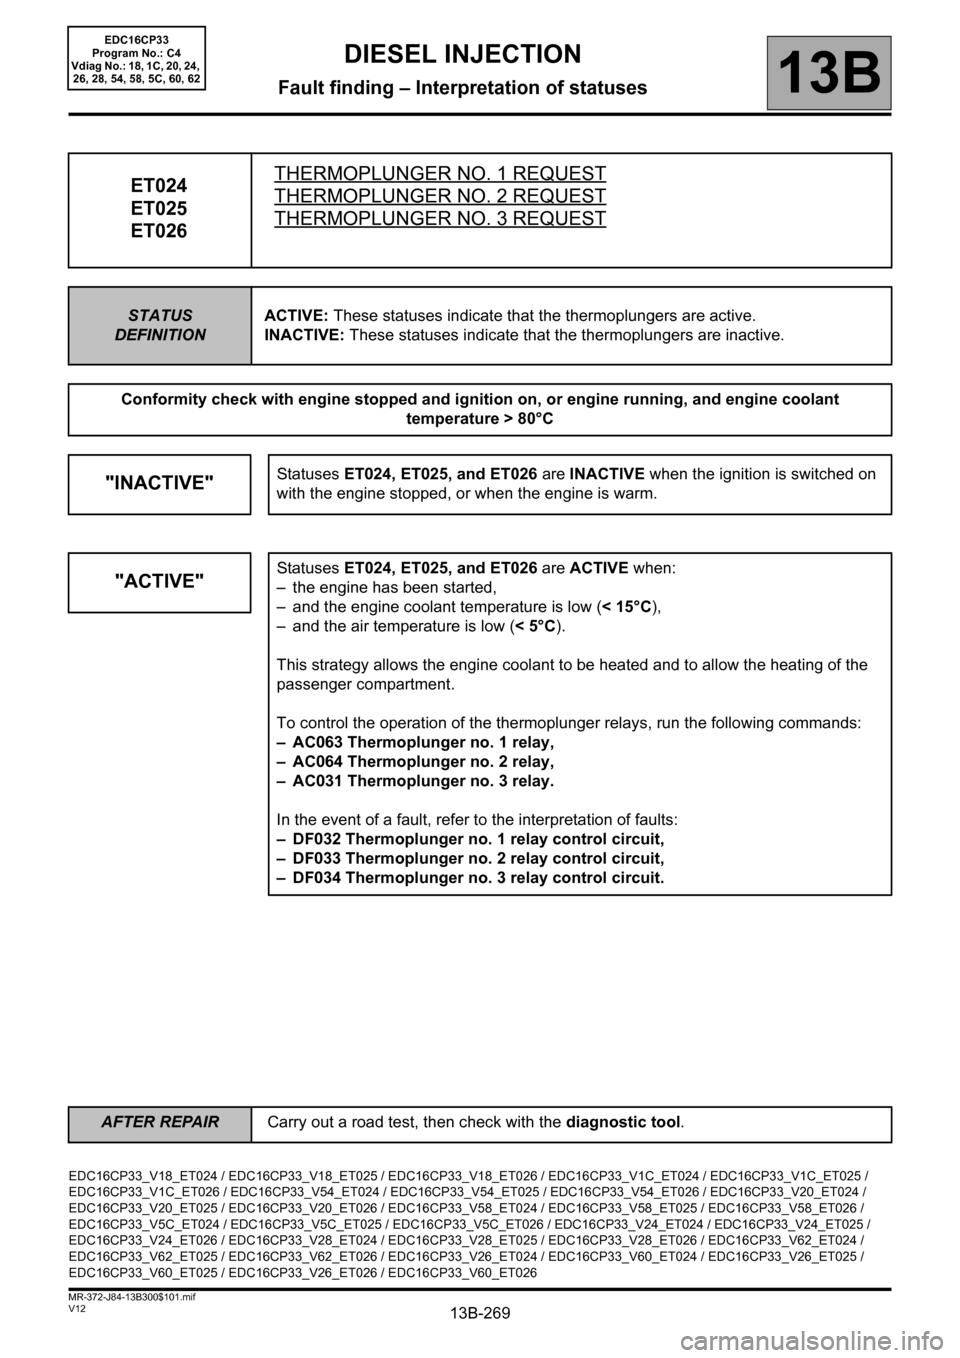
ET024
ET025
ET026THERMOPLUNGER NO. 1 REQUESTTHERMOPLUNGER NO. 2 REQUEST
THERMOPLUNGER NO. 3 REQUEST
STATUS
DEFINITIONACTIVE: These statuses indicate that the thermoplungers are active.
INACTIVE: These statuses indicate that the thermoplungers are inactive.
Conformity check with engine stopped and ignition on, or engine running, and engine coolant
temperature > 80°C
"INACTIVE"Statuses ET024, ET025, and ET026 are INACTIVE when the ignition is switched on
with the engine stopped, or when the engine is warm.
"ACTIVE"Statuses ET024, ET025, and ET026 are ACTIVE when:
– the engine has been started,
– and the engine coolant temperature is low (< 15°C),
– and the air temperature is low (< 5°C).
This strategy allows the engine coolant to be heated and to allow the heating of the
passenger compartment.
To control the operation of the thermoplunger relays, run the following commands:
– AC063 Thermoplunger no. 1 relay,
– AC064 Thermoplunger no. 2 relay,
– AC031 Thermoplunger no. 3 relay.
In the event of a fault, refer to the interpretation of faults:
– DF032 Thermoplunger no. 1 relay control circuit,
– DF033 Thermoplunger no. 2 relay control circuit,
– DF034 Thermoplunger no. 3 relay control circuit.
EDC16CP33_V18_ET024 / EDC16CP33_V18_ET025 / EDC16CP33_V18_ET026 / EDC16CP33_V1C_ET024 / EDC16CP33_V1C_ET025 /
EDC16CP33_V1C_ET026 / EDC16CP33_V54_ET024 / EDC16CP33_V54_ET025 / EDC16CP33_V54_ET026 / EDC16CP33_V20_ET024 /
EDC16CP33_V20_ET025 / EDC16CP33_V20_ET026 / EDC16CP33_V58_ET024 / EDC16CP33_V58_ET025 / EDC16CP33_V58_ET026 /
EDC16CP33_V5C_ET024 / EDC16CP33_V5C_ET025 / EDC16CP33_V5C_ET026 / EDC16CP33_V24_ET024 / EDC16CP33_V24_ET025 /
EDC16CP33_V24_ET026 / EDC16CP33_V28_ET024 / EDC16CP33_V28_ET025 / EDC16CP33_V28_ET026 / EDC16CP33_V62_ET024 /
EDC16CP33_V62_ET025 / EDC16CP33_V62_ET026 / EDC16CP33_V26_ET024 / EDC16CP33_V60_ET024 / EDC16CP33_V26_ET025 /
EDC16CP33_V60_ET025 / EDC16CP33_V26_ET026 / EDC16CP33_V60_ET026
AFTER REPAIRCarry out a road test, then check with the diagnostic tool.
EDC16CP33
Program No.: C4
Vdiag No.: 18, 1C, 20, 24,
26, 28, 54, 58, 5C, 60, 62
Page 292 of 510
13B-292V12 MR-372-J84-13B300$101.mif
DIESEL INJECTION
Fault finding – Interpretation of statuses13B
Only for Laguna II ph2 without a particle filter
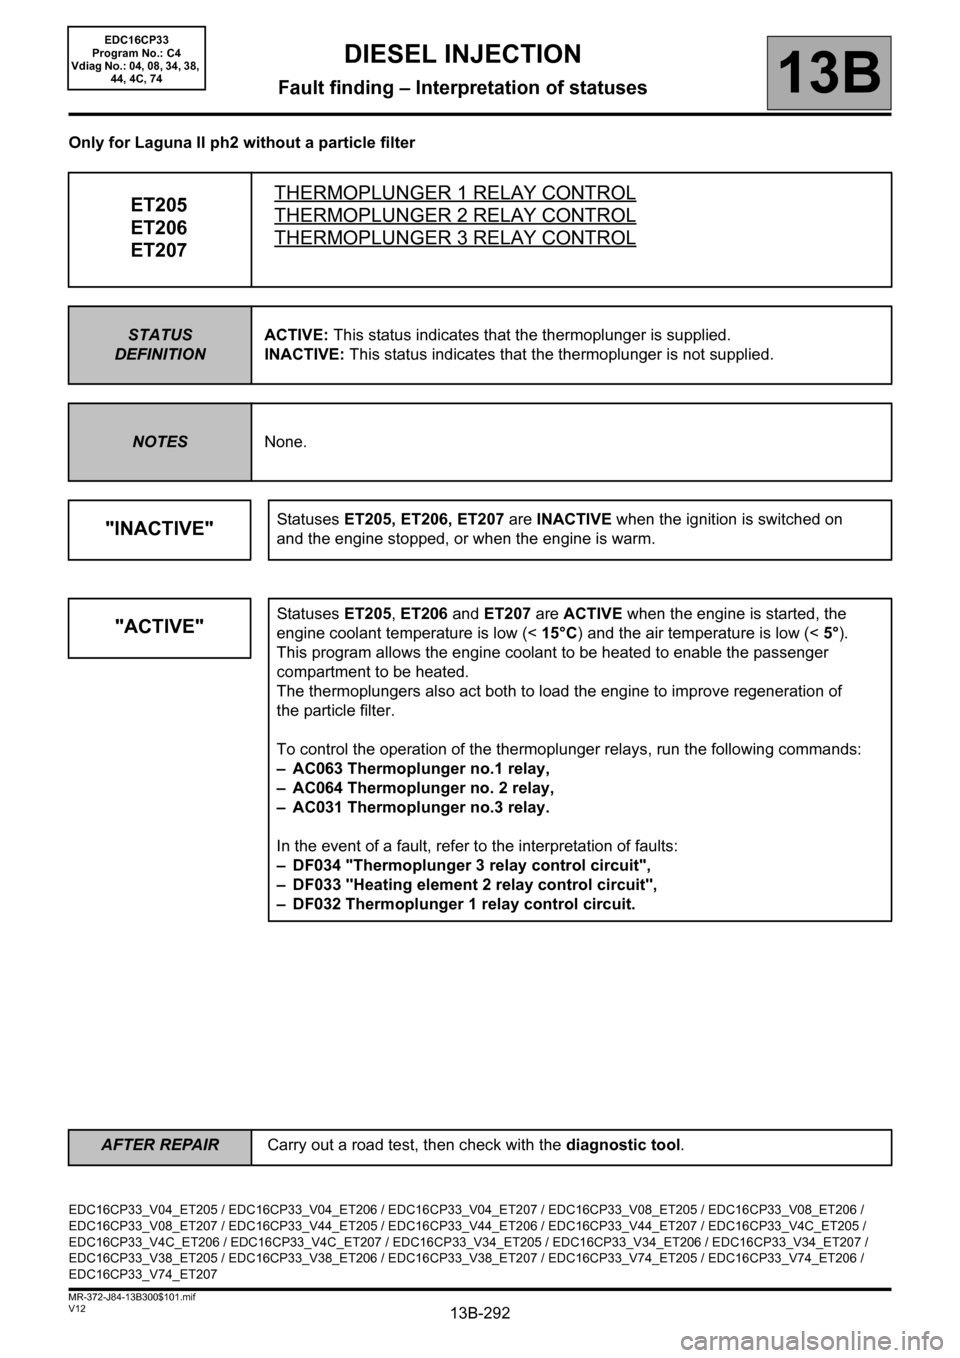
ET205
ET206
ET207THERMOPLUNGER 1 RELAY CONTROLTHERMOPLUNGER 2 RELAY CONTROL
THERMOPLUNGER 3 RELAY CONTROL
STATUS
DEFINITIONACTIVE: This status indicates that the thermoplunger is supplied.
INACTIVE: This status indicates that the thermoplunger is not supplied.
NOTESNone.
"INACTIVE"Statuses ET205, ET206, ET207 are INACTIVE when the ignition is switched on
and the engine stopped, or when the engine is warm.
"ACTIVE"Statuses ET205, ET206 and ET207 are ACTIVE when the engine is started, the
engine coolant temperature is low (<15°C) and the air temperature is low (<5°).
This program allows the engine coolant to be heated to enable the passenger
compartment to be heated.
The thermoplungers also act both to load the engine to improve regeneration of
the particle filter.
To control the operation of the thermoplunger relays, run the following commands:
– AC063 Thermoplunger no.1 relay,
– AC064 Thermoplunger no. 2 relay,
– AC031 Thermoplunger no.3 relay.
In the event of a fault, refer to the interpretation of faults:
– DF034 "Thermoplunger 3 relay control circuit",
– DF033 "Heating element 2 relay control circuit",
– DF032 Thermoplunger 1 relay control circuit.
EDC16CP33_V04_ET205 / EDC16CP33_V04_ET206 / EDC16CP33_V04_ET207 / EDC16CP33_V08_ET205 / EDC16CP33_V08_ET206 /
EDC16CP33_V08_ET207 / EDC16CP33_V44_ET205 / EDC16CP33_V44_ET206 / EDC16CP33_V44_ET207 / EDC16CP33_V4C_ET205 /
EDC16CP33_V4C_ET206 / EDC16CP33_V4C_ET207 / EDC16CP33_V34_ET205 / EDC16CP33_V34_ET206 / EDC16CP33_V34_ET207 /
EDC16CP33_V38_ET205 / EDC16CP33_V38_ET206 / EDC16CP33_V38_ET207 / EDC16CP33_V74_ET205 / EDC16CP33_V74_ET206 /
EDC16CP33_V74_ET207
AFTER REPAIRCarry out a road test, then check with the diagnostic tool.
EDC16CP33
Program No.: C4
Vdiag No.: 04, 08, 34, 38,
44, 4C, 74
Page 422 of 510
13B-422V12 MR-372-J84-13B300$140.mif
13B
EDC16CP33
Program No.: C4
Vdiag No.: 04, 08, 18, 1C,
20, 24, 26, 28, 34, 38, 44,
4C, 54, 58, 5C, 60, 62, 74
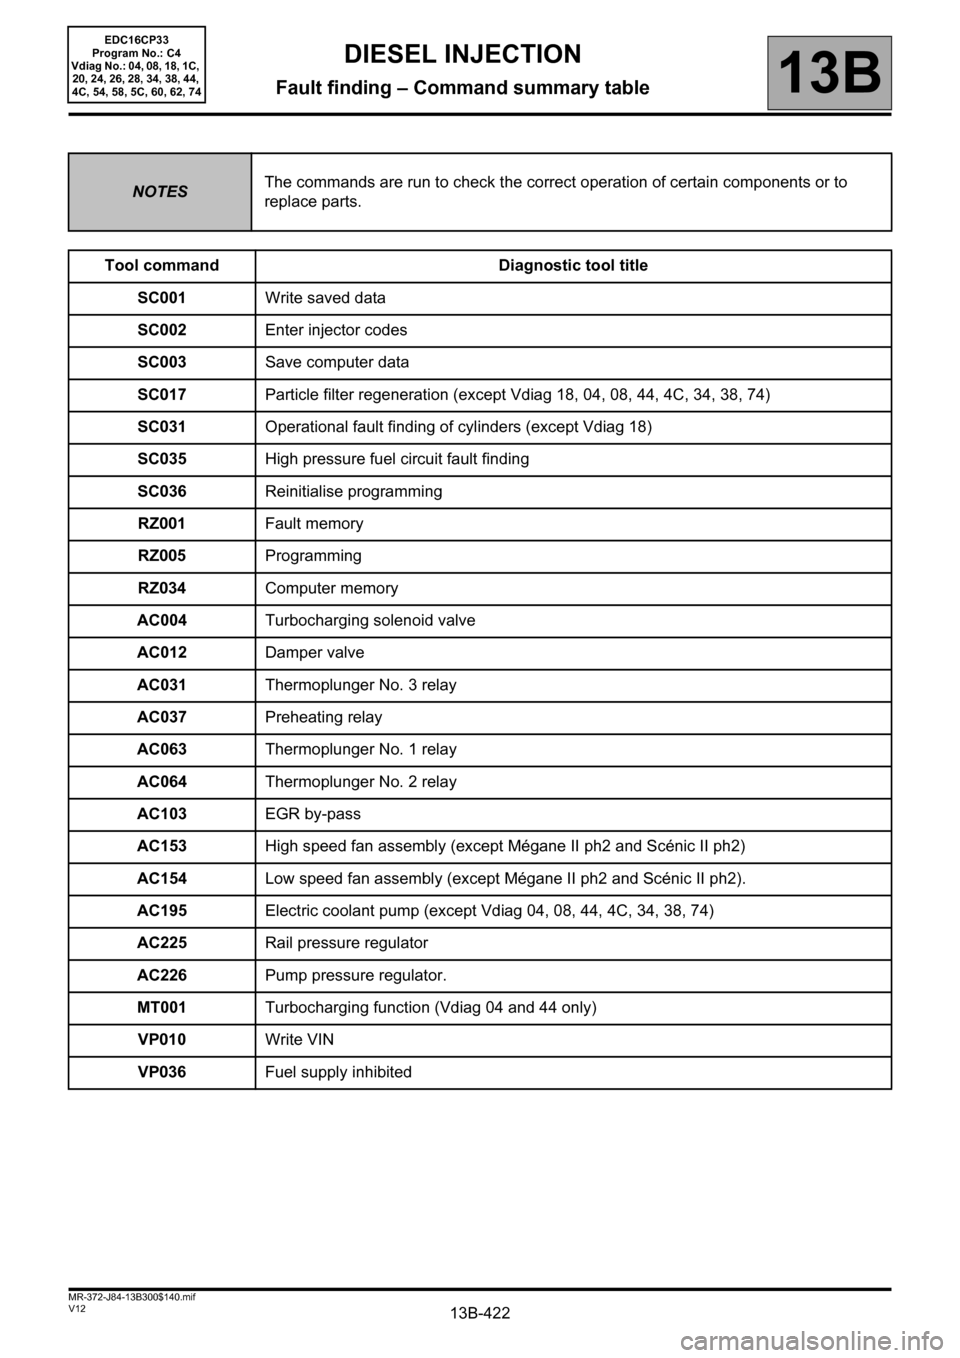
NOTESThe commands are run to check the correct operation of certain components or to
replace parts.
Tool command Diagnostic tool title
SC001Write saved data
SC002Enter injector codes
SC003Save computer data
SC017Particle filter regeneration (except Vdiag 18, 04, 08, 44, 4C, 34, 38, 74)
SC031Operational fault finding of cylinders (except Vdiag 18)
SC035High pressure fuel circuit fault finding
SC036Reinitialise programming
RZ001Fault memory
RZ005Programming
RZ034Computer memory
AC004Turbocharging solenoid valve
AC012Damper valve
AC031Thermoplunger No. 3 relay
AC037Preheating relay
AC063Thermoplunger No. 1 relay
AC064Thermoplunger No. 2 relay
AC103EGR by-pass
AC153High speed fan assembly (except Mégane II ph2 and Scénic II ph2)
AC154Low speed fan assembly (except Mégane II ph2 and Scénic II ph2).
AC195Electric coolant pump (except Vdiag 04, 08, 44, 4C, 34, 38, 74)
AC225Rail pressure regulator
AC226Pump pressure regulator.
MT001Turbocharging function (Vdiag 04 and 44 only)
VP010Write VIN
VP036Fuel supply inhibited
DIESEL INJECTION
Fault finding – Command summary table
Page 442 of 510
13B-442V12 MR-372-J84-13B300$150.mif
DIESEL INJECTION
Fault finding – Interpretation of commands13B
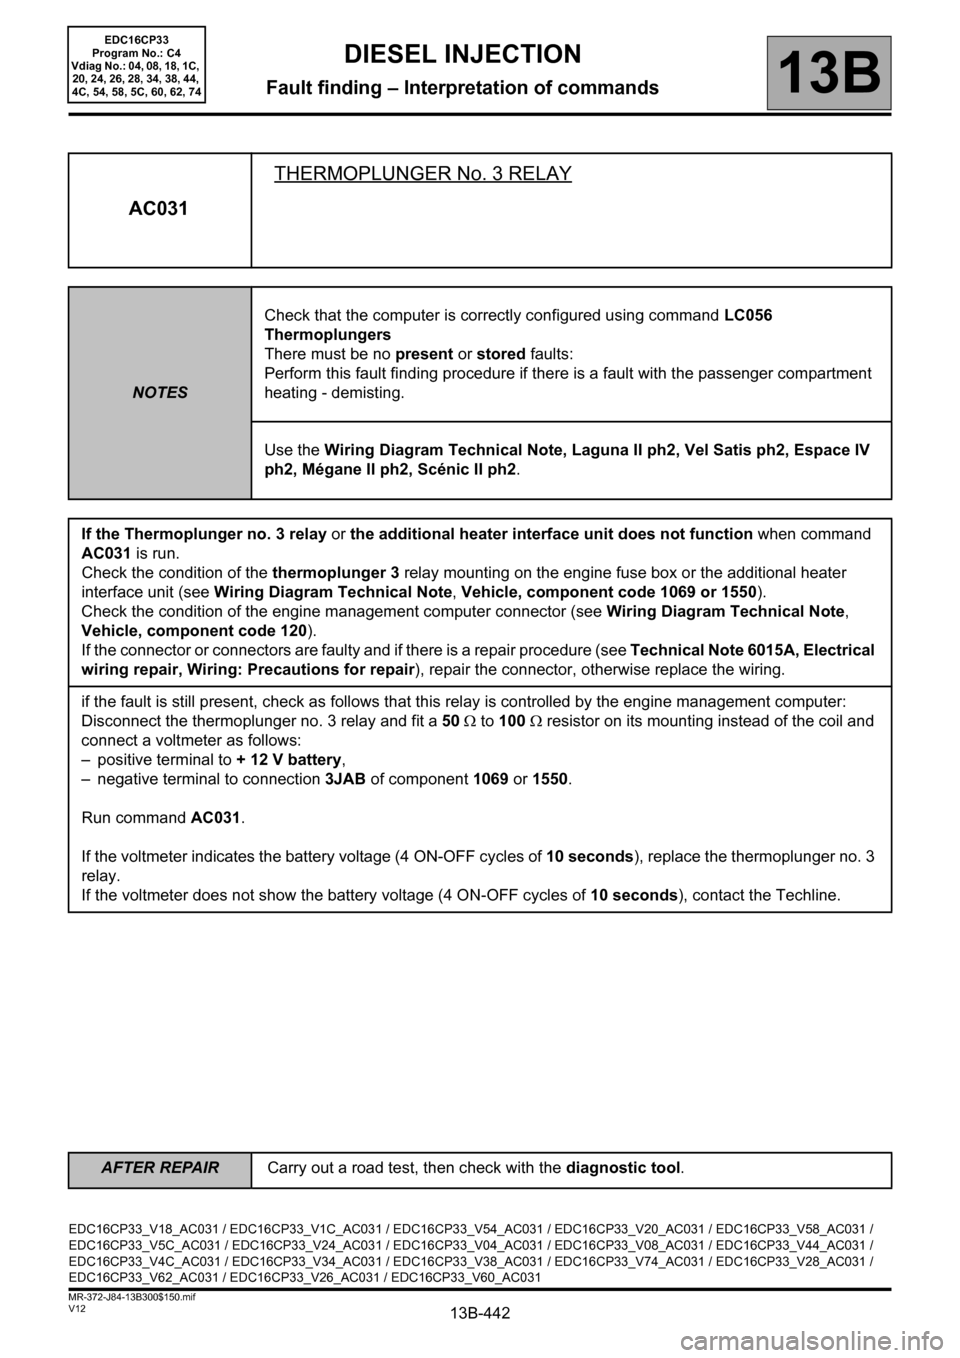
AC031THERMOPLUNGER No. 3 RELAY
NOTESCheck that the computer is correctly configured using command LC056
Thermoplungers
There must be no present or stored faults:
Perform this fault finding procedure if there is a fault with the passenger compartment
heating - demisting.
Use the Wiring Diagram Technical Note, Laguna II ph2, Vel Satis ph2, Espace IV
ph2, Mégane II ph2, Scénic II ph2.
If the Thermoplunger no. 3 relay or the additional heater interface unit does not function when command
AC031 is run.
Check the condition of the thermoplunger 3 relay mounting on the engine fuse box or the additional heater
interface unit (see Wiring Diagram Technical Note, Vehicle, component code 1069 or 1550).
Check the condition of the engine management computer connector (see Wiring Diagram Technical Note,
Vehicle, component code 120).
If the connector or connectors are faulty and if there is a repair procedure (see Technical Note 6015A, Electrical
wiring repair, Wiring: Precautions for repair), repair the connector, otherwise replace the wiring.
if the fault is still present, check as follows that this relay is controlled by the engine management computer:
Disconnect the thermoplunger no. 3 relay and fit a 50 Ω to 100Ω resistor on its mounting instead of the coil and
connect a voltmeter as follows:
– positive terminal to + 12 V battery,
– negative terminal to connection 3JAB of component 1069 or 1550.
Run command AC031.
If the voltmeter indicates the battery voltage (4 ON-OFF cycles of 10 seconds), replace the thermoplunger no. 3
relay.
If the voltmeter does not show the battery voltage (4 ON-OFF cycles of 10 seconds), contact the Techline.
EDC16CP33_V18_AC031 / EDC16CP33_V1C_AC031 / EDC16CP33_V54_AC031 / EDC16CP33_V20_AC031 / EDC16CP33_V58_AC031 /
EDC16CP33_V5C_AC031 / EDC16CP33_V24_AC031 / EDC16CP33_V04_AC031 / EDC16CP33_V08_AC031 / EDC16CP33_V44_AC031 /
EDC16CP33_V4C_AC031 / EDC16CP33_V34_AC031 / EDC16CP33_V38_AC031 / EDC16CP33_V74_AC031 / EDC16CP33_V28_AC031 /
EDC16CP33_V62_AC031 / EDC16CP33_V26_AC031 / EDC16CP33_V60_AC031
EDC16CP33
Program No.: C4
Vdiag No.: 04, 08, 18, 1C,
20, 24, 26, 28, 34, 38, 44,
4C, 54, 58, 5C, 60, 62, 74
AFTER REPAIRCarry out a road test, then check with the diagnostic tool.
Page 443 of 510
13B-443V12 MR-372-J84-13B300$150.mif
DIESEL INJECTION
Fault finding – Interpretation of commands13B
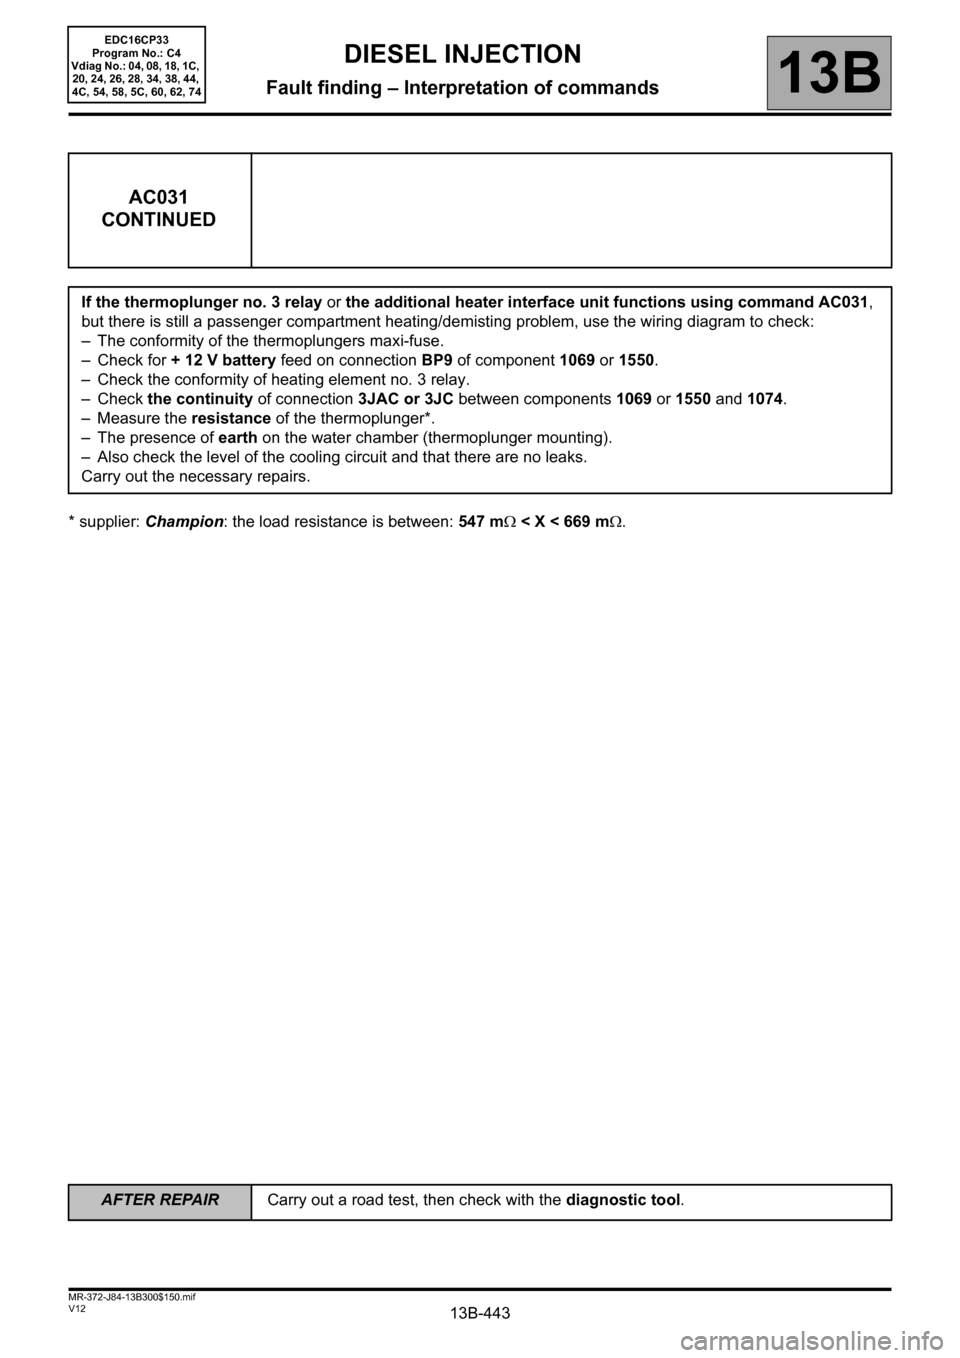
* supplier: Champion: the load resistance is between: 547 mΩ < X < 669 mΩ.
AC031
CONTINUED
If the thermoplunger no. 3 relay or the additional heater interface unit functions using command AC031,
but there is still a passenger compartment heating/demisting problem, use the wiring diagram to check:
– The conformity of the thermoplungers maxi-fuse.
– Check for + 12 V battery feed on connection BP9 of component 1069 or 1550.
– Check the conformity of heating element no. 3 relay.
– Check the continuity of connection 3JAC or 3JC between components 1069 or 1550 and 1074.
– Measure the resistance of the thermoplunger*.
– The presence of earth on the water chamber (thermoplunger mounting).
– Also check the level of the cooling circuit and that there are no leaks.
Carry out the necessary repairs.
EDC16CP33
Program No.: C4
Vdiag No.: 04, 08, 18, 1C,
20, 24, 26, 28, 34, 38, 44,
4C, 54, 58, 5C, 60, 62, 74
AFTER REPAIRCarry out a road test, then check with the diagnostic tool.
Page 446 of 510
13B-446V12 MR-372-J84-13B300$150.mif
DIESEL INJECTION
Fault finding – Interpretation of commands13B
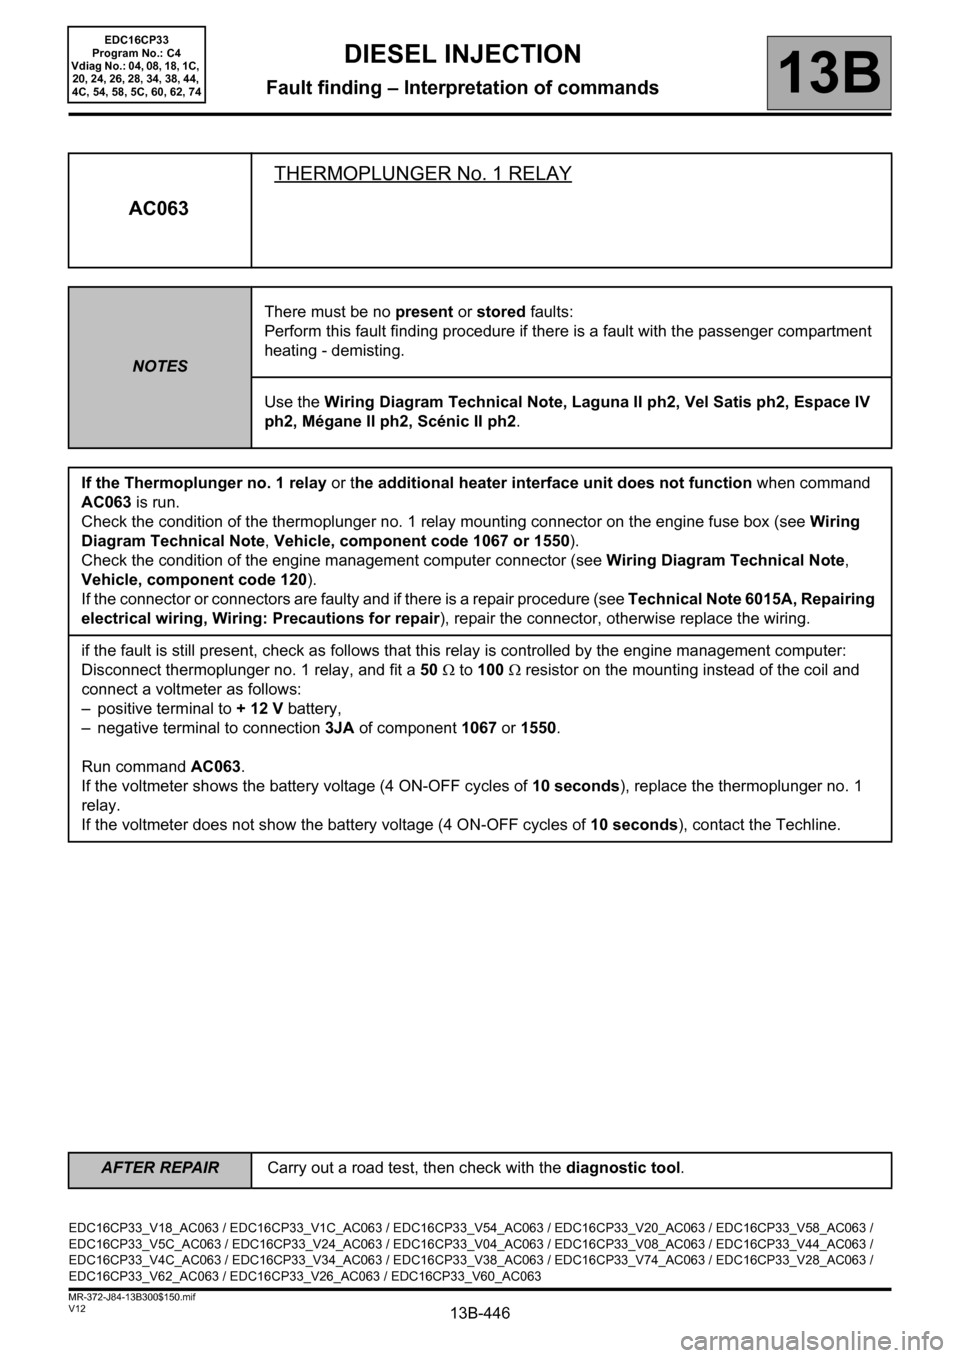
AC063THERMOPLUNGER No. 1 RELAY
NOTESThere must be no present or stored faults:
Perform this fault finding procedure if there is a fault with the passenger compartment
heating - demisting.
Use the Wiring Diagram Technical Note, Laguna II ph2, Vel Satis ph2, Espace IV
ph2, Mégane II ph2, Scénic II ph2.
If the Thermoplunger no. 1 relay or the additional heater interface unit does not function when command
AC063 is run.
Check the condition of the thermoplunger no. 1 relay mounting connector on the engine fuse box (see Wiring
Diagram Technical Note, Vehicle, component code 1067 or 1550).
Check the condition of the engine management computer connector (see Wiring Diagram Technical Note,
Vehicle, component code 120).
If the connector or connectors are faulty and if there is a repair procedure (see Technical Note 6015A, Repairing
electrical wiring, Wiring: Precautions for repair), repair the connector, otherwise replace the wiring.
if the fault is still present, check as follows that this relay is controlled by the engine management computer:
Disconnect thermoplunger no. 1 relay, and fit a 50 Ω to 100 Ω resistor on the mounting instead of the coil and
connect a voltmeter as follows:
– positive terminal to + 12 V battery,
– negative terminal to connection 3JA of component 1067 or 1550.
Run command AC063.
If the voltmeter shows the battery voltage (4 ON-OFF cycles of 10 seconds), replace the thermoplunger no. 1
relay.
If the voltmeter does not show the battery voltage (4 ON-OFF cycles of 10 seconds), contact the Techline.
EDC16CP33_V18_AC063 / EDC16CP33_V1C_AC063 / EDC16CP33_V54_AC063 / EDC16CP33_V20_AC063 / EDC16CP33_V58_AC063 /
EDC16CP33_V5C_AC063 / EDC16CP33_V24_AC063 / EDC16CP33_V04_AC063 / EDC16CP33_V08_AC063 / EDC16CP33_V44_AC063 /
EDC16CP33_V4C_AC063 / EDC16CP33_V34_AC063 / EDC16CP33_V38_AC063 / EDC16CP33_V74_AC063 / EDC16CP33_V28_AC063 /
EDC16CP33_V62_AC063 / EDC16CP33_V26_AC063 / EDC16CP33_V60_AC063
EDC16CP33
Program No.: C4
Vdiag No.: 04, 08, 18, 1C,
20, 24, 26, 28, 34, 38, 44,
4C, 54, 58, 5C, 60, 62, 74
AFTER REPAIRCarry out a road test, then check with the diagnostic tool.