stop start RENAULT TWINGO 2016 3.G Owner's Guide
[x] Cancel search | Manufacturer: RENAULT, Model Year: 2016, Model line: TWINGO, Model: RENAULT TWINGO 2016 3.GPages: 216, PDF Size: 7.15 MB
Page 142 of 216
4.2
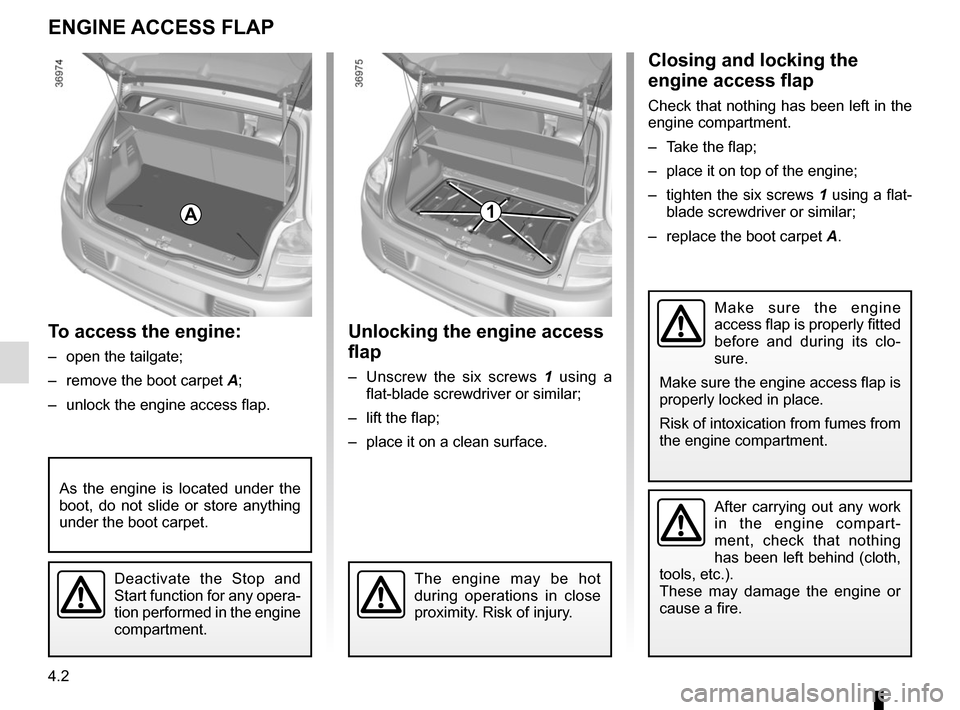
To access the engine:
– open the tailgate;
– remove the boot carpet A;
– unlock the engine access flap.
ENGINE ACCESS FLAP
Unlocking the engine access
flap
– Unscrew the six screws 1 using a
flat-blade screwdriver or similar;
– lift the flap;
– place it on a clean surface.
Closing and locking the
engine access flap
Check that nothing has been left in the
engine compartment.
– Take the flap;
– place it on top of the engine;
– tighten the six screws 1 using a flat- blade screwdriver or similar;
– replace the boot carpet A.
After carrying out any work
in the engine compart-
ment, check that nothing
has been left behind (cloth,
tools, etc.).
These may damage the engine or
cause a fire.
Make sure the engine
access flap is properly fitted
before and during its clo-
sure.
Make sure the engine access flap is
properly locked in place.
Risk of intoxication from fumes from
the engine compartment.
1A
Deactivate the Stop and
Start function for any opera-
tion performed in the engine
compartment.The engine may be hot
during operations in close
proximity. Risk of injury.
As the engine is located under the
boot, do not slide or store anything
under the boot carpet.
Page 143 of 216
4.3
Reading the oil levelThe oil level should be read with the ve-
hicle on level ground, after the engine
has been switched off for some time.
The dipstick must be used to read
the exact oil level and ensure that
the maximum level is not exceeded
(risk of engine damage). Refer to the
following pages.
It is normal for an engine to use oil for
lubrication and cooling of moving parts
and it is normal to top up the level be-
tween oil changes.
However, contact your approved
Dealer if more than 0.5 litres is being
consumed every 600 miles (1,000 km)
after the running in period.
Oil change frequency: check the oil
level from time to time and certainly
before any long journey to avoid the
risk of damaging your engine.
ENGINE OIL LEVEL: general information
A
B
C
In order to prevent splashback, it is
recommended that a funnel be used
when topping up/filling with oil.
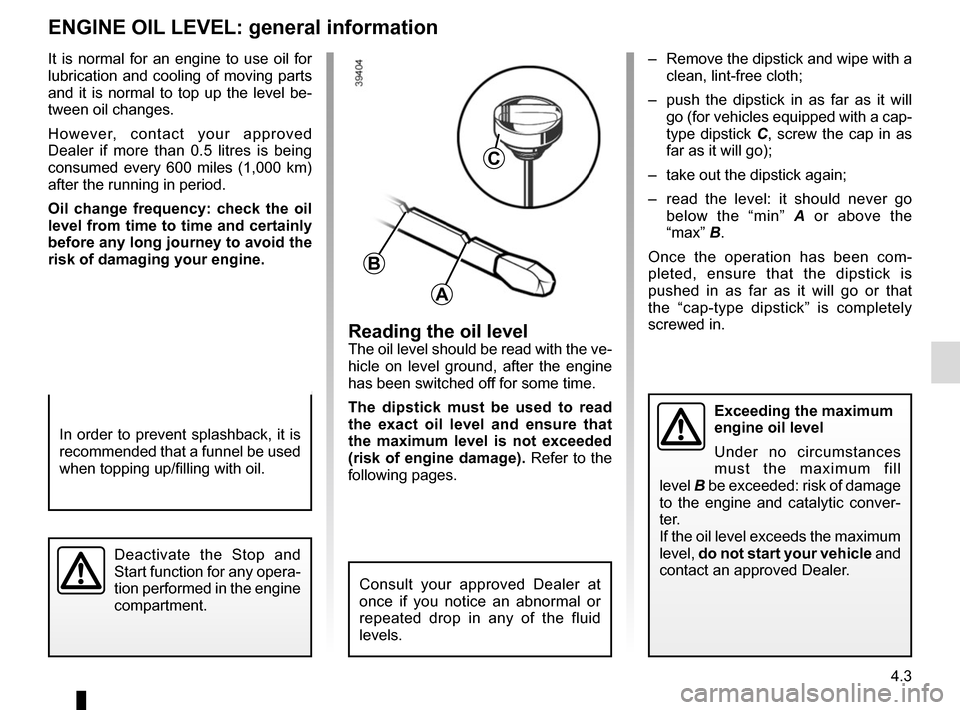
– Remove the dipstick and wipe with a
clean, lint-free cloth;
– push the dipstick in as far as it will go (for vehicles equipped with a cap-
type dipstick C, screw the cap in as
far as it will go);
– take out the dipstick again;
– read the level: it should never go below the “min” A or above the
“max” B.
Once the operation has been com-
pleted, ensure that the dipstick is
pushed in as far as it will go or that
the “cap-type dipstick” is completely
screwed in.
Deactivate the Stop and
Start function for any opera-
tion performed in the engine
compartment.
Consult your approved Dealer at
once if you notice an abnormal or
repeated drop in any of the fluid
levels.
Exceeding the maximum
engine oil level
Under no circumstances
must the maximum fill
level B be exceeded: risk of damage
to the engine and catalytic conver-
ter.
If the oil level exceeds the maximum
level, do not start your vehicle and
contact an approved Dealer.
Page 145 of 216
4.5
ENGINE OIL LEVEL: topping up, filling (2/2)OIL CHANGE
Never run the engine in an
enclosed space as exhaust
gases are poisonous.
Engine oil change: if you
are changing the oil when
the engine is hot, be careful
not to scald yourself if the
oil overflows.
Filling: take care when
topping up the oil that
no oil drips onto engine
components - risk of fire.
Remember to refit the cap securely
as there is a risk of fire if oil splashes
onto hot engine components.
The engine may be hot
when carrying out opera-
tions in close proximity. In
addition, the engine cooling
fan can come on at any moment.
Risk of injury.
Consult your approved dealer at
once if you notice an abnormal or
repeated drop in any of the fluid
levels.
Deactivate the Stop and
Start function for any opera-
tion performed in the engine
compartment.
Oil changeService interval: refer to the
Maintenance Service Booklet for your
vehicle.
Oil change capacity
Please refer to the maintenance docu-
ment for your vehicle, or contact an au-
thorised dealer.
Always check the engine oil level using
the dipstick, as explained previously (it
should never fall below the minimum
level, or be over the maximum level on
the dipstick).
Engine oil gradeRefer to the Maintenance Service
Booklet for your vehicle.
Page 162 of 216
5.4
TYRE INFLATION KIT (3/4)
If a minimum pressure of 1.8 bar is
not reached after 15 minutes, repair
is not possible; do not drive the vehi-
cle but contact an approved dealer.
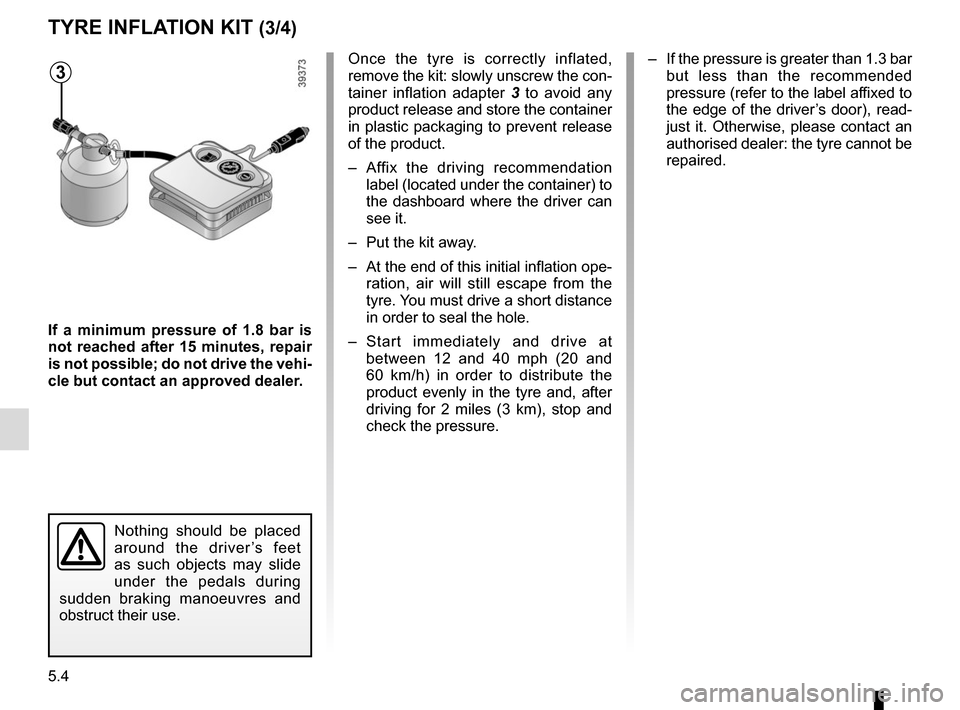
Once the tyre is correctly inflated,
remove the kit: slowly unscrew the con-
tainer inflation adapter 3 to avoid any
product release and store the container
in plastic packaging to prevent release
of the product.
– Affix the driving recommendation label (located under the container) to
the dashboard where the driver can
see it.
– Put the kit away.
– At the end of this initial inflation ope- ration, air will still escape from the
tyre. You must drive a short distance
in order to seal the hole.
– Start immediately and drive at between 12 and 40 mph (20 and
60 km/h) in order to distribute the
product evenly in the tyre and, after
driving for 2 miles (3 km), stop and
check the pressure.
Nothing should be placed
around the driver’s feet
as such objects may slide
under the pedals during
sudden braking manoeuvres and
obstruct their use.
3– If the pressure is greater than 1.3 bar but less than the recommended
pressure (refer to the label affixed to
the edge of the driver’s door), read-
just it. Otherwise, please contact an
authorised dealer: the tyre cannot be
repaired.
Page 183 of 216
5.25
TOWING: breakdown recovery (1/2)
Towing a vehicle with an
automatic gearbox
With the engine switched off, the trans-
mission is no longer lubricated. It is
preferable to tow this type of vehicle on
a trailer or tow it with the rear wheels off
the ground.
Under exceptional circumstances, you
may tow the vehicle with all four wheels
on the ground, only going forward, with
the gear lever in the neutral N position,
and for a distance not exceeding
30 miles (50 km).
If the gear lever cannot be put into the
N position, please consult an autho-
rised dealer.1
2
Before any towing, put the gears into
neutral (neutral position for vehicles
equipped with a manual gearbox or N
position for vehicles equipped with an
automatic gearbox).
Unlock the steering column; the igni-
tion key must be in “ M” position (ig-
nition) to enable signalling (“Stop”
lights, hazard warning lights, etc.).
Always switch on the lights when
driving at night.
Release the parking brake.
It is also essential to observe the towing
regulations imposed by current legisla-
tion in your country. Please contact an
authorised dealer.
When the engine is
stopped, steering and brak-
ing assistance are not op-
erational.
Do not remove the key from
the ignition when the vehi-
cle is being towed.
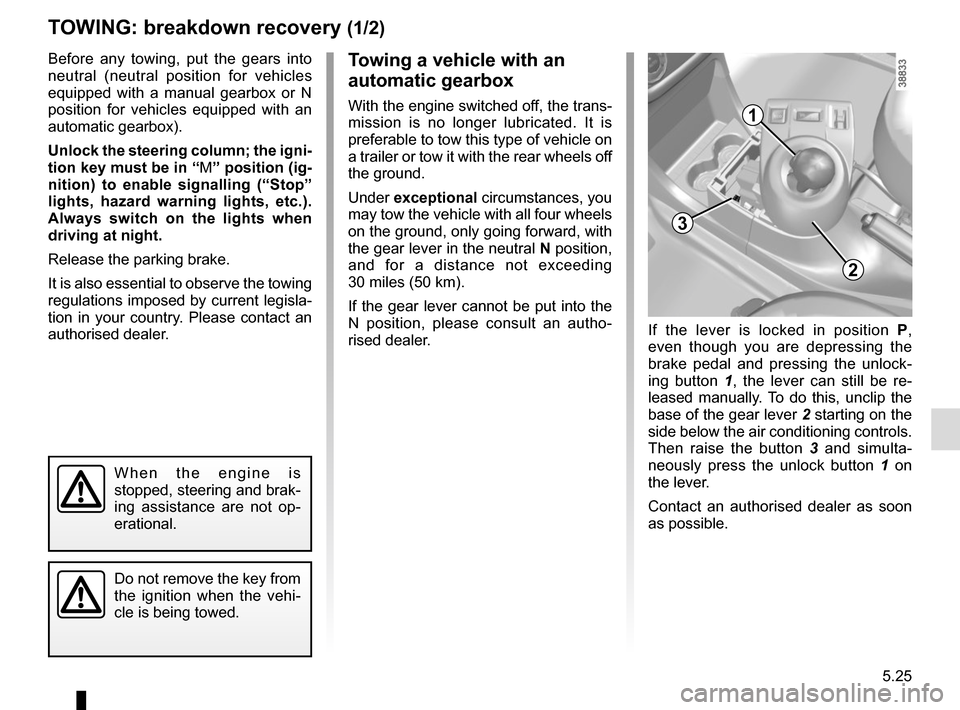
3
If the lever is locked in position P ,
even though you are depressing the
brake pedal and pressing the unlock-
ing button 1 , the lever can still be re-
leased manually. To do this, unclip the
base of the gear lever 2 starting on the
side below the air conditioning controls.
Then raise the button 3 and simulta-
neously press the unlock button 1 on
the lever.
Contact an authorised dealer as soon
as possible.
Page 185 of 216
5.27
OPERATING FAULTS (1/6)
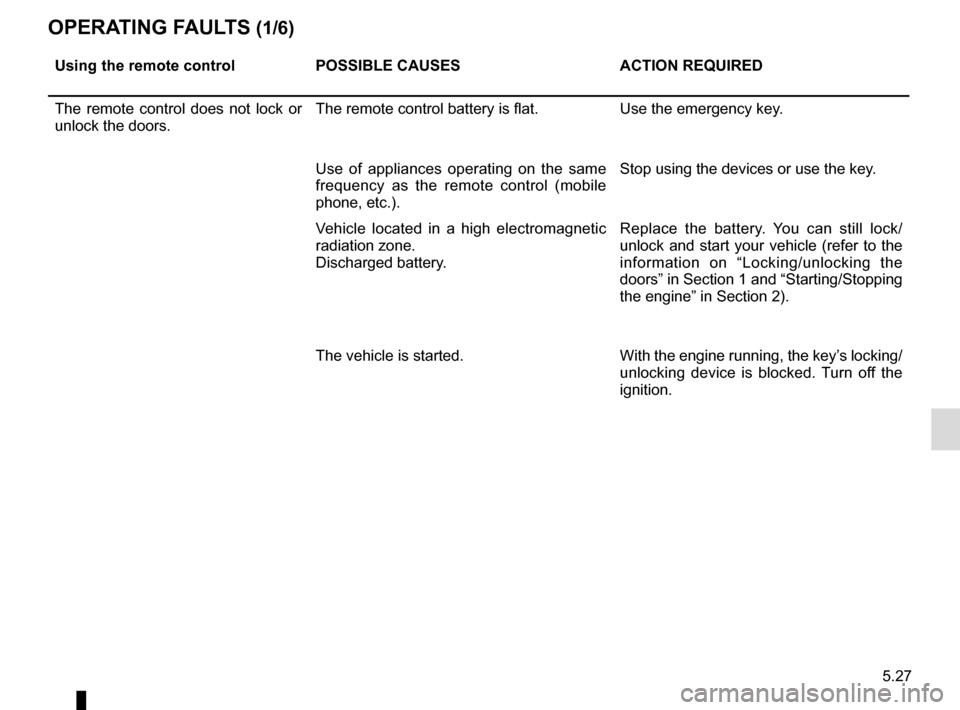
Using the remote controlPOSSIBLE CAUSES ACTION REQUIRED
The remote control does not lock or
unlock the doors. The remote control battery is flat.
Use the emergency key.
Use of appliances operating on the same
frequency as the remote control (mobile
phone, etc.). Stop using the devices or use the key.
Vehicle located in a high electromagnetic
radiation zone.
Discharged battery. Replace the battery. You can still lock/
unlock and start your vehicle (refer to the
information on “Locking/unlocking the
doors” in Section 1 and “Starting/Stopping
the engine” in Section 2).
The vehicle is started. With the engine running, the key’s locking/
unlocking device is blocked. Turn off the
ignition.
Page 186 of 216
5.28
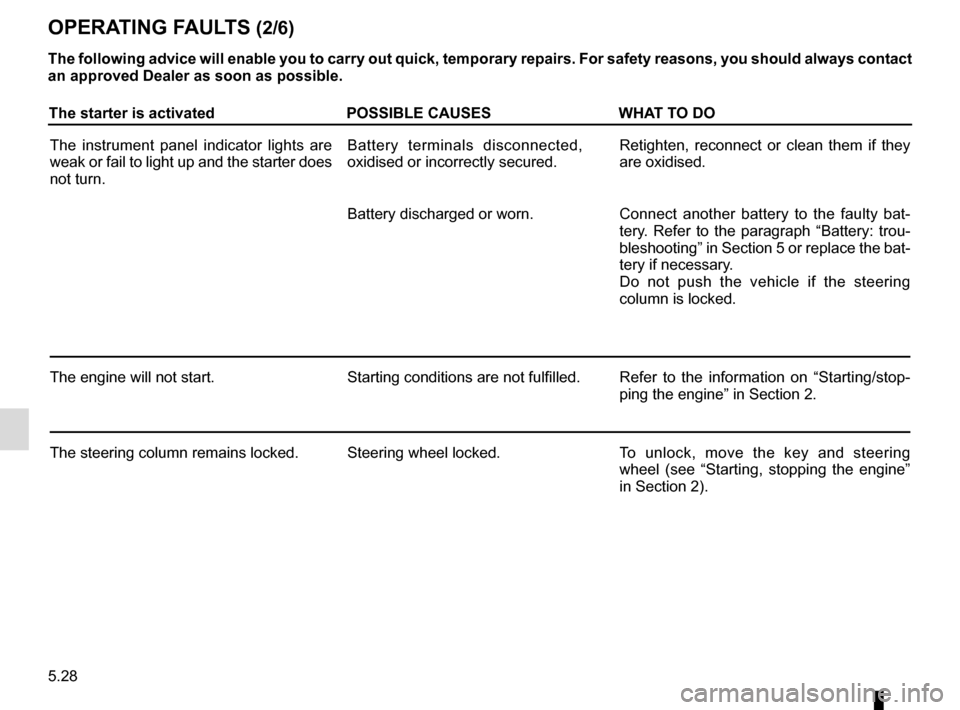
The starter is activatedPOSSIBLE CAUSESWHAT TO DO
The instrument panel indicator lights are
weak or fail to light up and the starter does
not turn. Battery terminals disconnected,
oxidised or incorrectly secured.
Retighten, reconnect or clean them if they
are oxidised.
Battery discharged or worn. Connect another battery to the faulty bat-
tery. Refer to the paragraph “Battery: trou-
bleshooting” in Section 5 or replace the bat-
tery if necessary.
Do not push the vehicle if the steering
column is locked.
The engine will not start. Starting conditions are not fulfilled.Refer to the information on “Starting/stop-
ping the engine” in Section 2.
The steering column remains locked. Steering wheel locked. To unlock, move the key and steering
wheel (see “Starting, stopping the engine”
in Section 2).
OPERATING FAULTS (2/6)
The following advice will enable you to carry out quick, temporary repai\
rs. For safety reasons, you should always contact
an approved Dealer as soon as possible.
Page 212 of 216
7.4
ALPHABETICAL INDEX (4/5)
rear bench seat.........................................................\
......... 3.22
rear lightsnumber plate lights ...................................................... 5.12
rear seats..............................................................\
............. 1.14 functions ..............................................................\
........ 3.22
rear view camera .................................................... 2.34 – 2.35
rear view mirrors ................................................................ 1.39
remote control door locking batteries ..............................................................\
......... 5.18
remote control door locking unit ................................1.2 → 1.4
RENAULT ANTI-INTRUDER DEVICE (RAID) ................... 1.10
replacement parts ................................................................ 6.7
reverse gear selecting ....................................................2.9, 2.36 → 2.38
reversing sensor ..................................................... 2.32 – 2.33
roof bars ........................................................................\
.... 3.27
roof rack roof bars ....................................................................... 3.27
running in ........................................................................\
..... 2.2
S
seat belt pretensioners front seat belt ...................................................1.15 → 1.18
seat belts .............................................1.12 → 1.18, 1.21, 1.48
service sheets..........................................................\
6.8 → 6.13
side indicator lights changing bulbs ............................................................. 5.13
side protection devices ...................................................... 1.20
signals and lights ...................................................1.58 → 1.63
speakers location ...............................................................\
......... 5.21
special features of petrol vehicles ....................................... 2.8
speed limiter .................................................1.47, 2.25 → 2.27
starting the engine .....................................................2.2 → 2.7
steering wheel adjustment .............................................................\
...... 1.22 Stop & Start ......................................................1.47, 2.4
→ 2.7
Stop & Start function..................................................2.4 → 2.7
stopping the engine ............................................................. 2.3
storage compartment.............................................3.16 → 3.19
storage compartments ...........................................3.16 → 3.19
sun visor ........................................................................\
.... 3.19
sunroof.................................................................\
.............. 3.14
switching on the vehicle ignition ................................. 2.2 – 2.3
T
tailgate ........................................................... 3.23, 3.25 – 3.26
tanks and reservoirs brake fluid ...................................................................... 4.9
coolant ................................................................\
........... 4.8
tanks and reservoirs: windscreen washer ...................................................... 4.10
technical specifications ..............................................6.4 → 6.7
telephone ..............................................................\
............. 3.28
temperature regulation ............................................ 3.7 → 3.11
towing breakdown ........................................................ 5.25 – 5.26
towing a caravan ................................................................. 6.6
towing hitch............................................................\
............ 5.26
towing rings ....................................................................... 3.26
towing weights ..................................................................... 6.6
transporting children ..........................1.23 – 1.24, 1.26 → 1.36
transporting objects in the luggage compartment ........................................ 3.26
on the roof ...................................................................... 6.6
trip computer and warning system... 1.44 → 1.48, 1.50 → 1.55
tyre inflation kit......................................................\
.....5.2 → 5.5
tyre pressure...............................2.16 → 2.18, 4.12 – 4.13, 5.7
tyre pressure loss warning.....................................2.16 → 2.18
tyre pressures ......................................................... 4.12 – 4.13
tyres ........................ 2.13, 2.16 → 2.18, 4.12 – 4.13, 5.6 → 5.8