Interior light RENAULT TWINGO 2016 3.G Owners Manual
[x] Cancel search | Manufacturer: RENAULT, Model Year: 2016, Model line: TWINGO, Model: RENAULT TWINGO 2016 3.GPages: 216, PDF Size: 7.15 MB
Page 11 of 216
1.5
DEADLOCKING
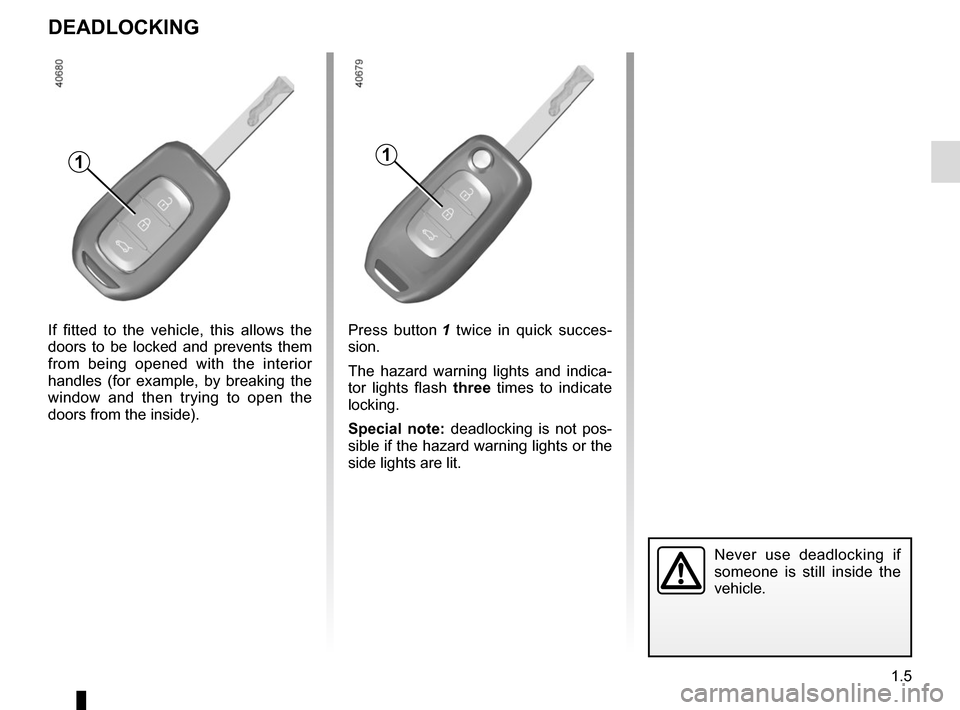
1
Never use deadlocking if
someone is still inside the
vehicle.
If fitted to the vehicle, this allows the
doors to be locked and prevents them
from being opened with the interior
handles (for example, by breaking the
window and then trying to open the
doors from the inside).Press button 1 twice in quick succes-
sion.
The hazard warning lights and indica-
tor lights flash three times to indicate
locking.
Special note: deadlocking is not pos-
sible if the hazard warning lights or the
side lights are lit.
1
Page 15 of 216
1.9
LOCKING/UNLOCKING THE DOORS (2/2)
Door and tailgate status
indicator
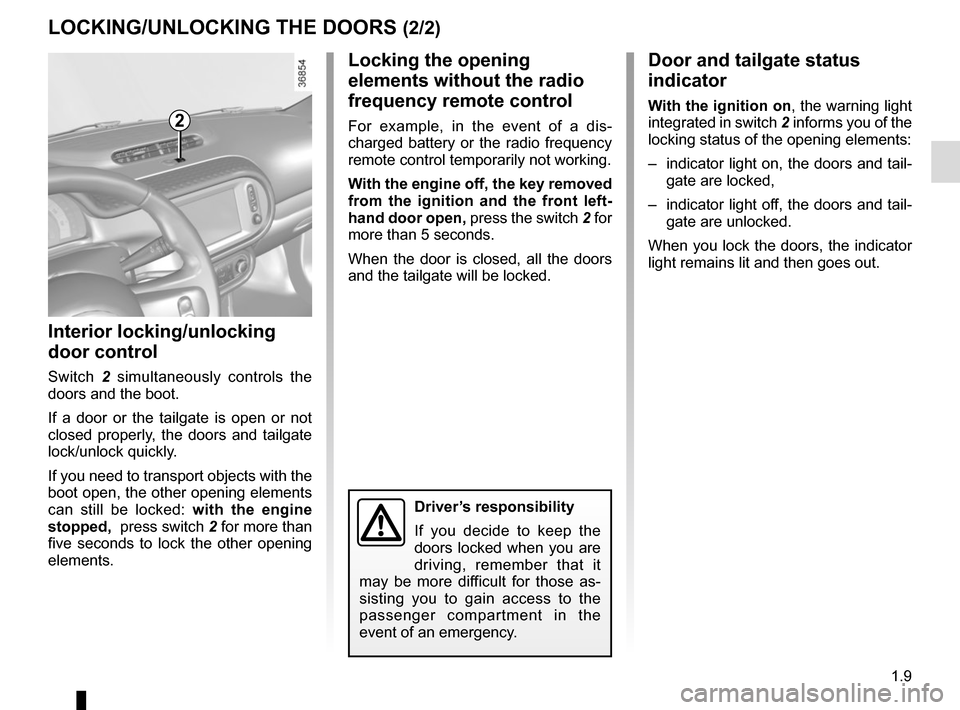
With the ignition on, the warning light
integrated in switch 2 informs you of the
locking status of the opening elements:
– indicator light on, the doors and tail- gate are locked,
– indicator light off, the doors and tail- gate are unlocked.
When you lock the doors, the indicator
light remains lit and then goes out.
Locking the opening
elements without the radio
frequency remote control
For example, in the event of a dis-
charged battery or the radio frequency
remote control temporarily not working.
With the engine off, the key removed
from the ignition and the front left-
hand door open, press the switch 2 for
more than 5 seconds.
When the door is closed, all the doors
and the tailgate will be locked.
Interior locking/unlocking
door control
Switch 2 simultaneously controls the
doors and the boot.
If a door or the tailgate is open or not
closed properly, the doors and tailgate
lock/unlock quickly.
If you need to transport objects with the
boot open, the other opening elements
can still be locked: with the engine
stopped, press switch 2 for more than
five seconds to lock the other opening
elements.
2
Driver’s responsibility
If you decide to keep the
doors locked when you are
driving, remember that it
may be more difficult for those as-
sisting you to gain access to the
passenger compartment in the
event of an emergency.
Page 45 of 216

1.39
Door mirrors with manual
adjustment
To adjust the door mirror, move
switch 2.
Door mirrors with electrical
adjustment
With the ignition on, turn the button 3:
– position C to adjust the left-hand
door mirror;
– position E to adjust the right-hand
door mirror.
D is the inactive position.
Heated door mirrorsWith the engine running, mirror de-
icing is activated simultaneously with
rear screen de-icing/demisting.
Interior rear view mirrorIts position can be adjusted. For night
driving, to avoid being dazzled by the
headlights of the car behind you, flip the
small lever 1 located behind the rear
view mirror.
REAR VIEW MIRRORS
For safety reasons, carry
out any adjustments when
the vehicle is not being
driven.
12
The driver’s door mirror may have two clearly defined zones. Zone B
shows what can normally be seen in an ordinary rear view mirror. Zone A
increases rear side visibility.
Objects in the mirror are closer than they appear.
AB
3CD
E
AB
Page 80 of 216
2.6
FUNCTION STOP AND START (3/4)
Conditions preventing the
standby of the engine
Certain conditions prevent the system
from using the engine standby function,
including when:
– reverse gear is engaged;
– the bonnet is not locked;
– the outdoor temperature is too low or too high (less than around 0 °C or
higher than around 30 °C);
– the battery is not sufficiently charged;
– the difference between the vehicle interior temperature and the auto-
matic climate control instruction is
too high;
– for vehicles with automatic gear- boxes, the gradient is steeper than
approximately 5%;
– the “Clear View” function is activated (please see “Automatic Climate
Control” in Section 3); – the engine temperature is too low;
– the emission control system is being
regenerated;
or
– ...
Warning light
 is displayed on the
instrument panel. This notifies you that
engine standby is not available.
Deactivate the Stop and
Start function when per-
forming any operations in
the engine compartment.
Special feature of the automatic
engine re-start
Under certain conditions, the engine
can restart on its own in order to guar-
antee your safety and comfort.
This can occur especially when:
– the outdoor temperature is too low or too high (less than around 0 °C or
higher than around 30 °C);
– the “Clear View” function is activated (please see “Automatic Climate
Control” in Section 3);
– the battery is not sufficiently charged;
– the vehicle speed is above 3 mph (5 km/h) (downhill slope, etc.); ;
– repeated pressing on the brake pedal or braking system require-
ment;
– ...
Special note: for some of these
conditions, automatic restarting of
the engine is deactivated if a front
door or the tailgate is open.
Page 113 of 216
3.1
Section 3: Your comfort
Air Vents . . . . . . . . . . . . . . . . . . . . . . . . . . . . . . . . . . . .\
. . . . . . . . . . . . . . . . . . . . . . . . . . . . . . . . . . 3.2
Manual air conditioning, heating system . . . . . . . . . . . . . . . . . . . . . . . . . . . . . . . . . . . . \
. . . . . . . . . . 3.4
Automatic climate control . . . . . . . . . . . . . . . . . . . . . . . . . . . . . . . . . . . .\
. . . . . . . . . . . . . . . . . . . . . 3.7
Air conditioning: information and advice on use . . . . . . . . . . . . . . . . . . . . . . . . . . . . . . . . . . . .\
. . . . 3.11
Electric windows . . . . . . . . . . . . . . . . . . . . . . . . . . . . . . . . . . . .\
. . . . . . . . . . . . . . . . . . . . . . . . . . . . 3.12
Sunroof . . . . . . . . . . . . . . . . . . . . . . . . . . . . . . . . . . . .\
. . . . . . . . . . . . . . . . . . . . . . . . . . . . . . . . . . . 3.14
Interior lighting . . . . . . . . . . . . . . . . . . . . . . . . . . . . . . . . . . . . \
. . . . . . . . . . . . . . . . . . . . . . . . . . . . . . 3.15
Passenger compartment storage/fittings . . . . . . . . . . . . . . . . . . . . . . . . . . . . . . . . . . . . \
. . . . . . . . . . 3.16
Ashtray, cigarette lighter, accessories socket . . . . . . . . . . . . . . . . . . . . . . . . . . . . . . . . . . . .\
. . . . . . 3.20
Rear headrests . . . . . . . . . . . . . . . . . . . . . . . . . . . . . . . . . . . .\
. . . . . . . . . . . . . . . . . . . . . . . . . . . . . 3.21
Rear bench seat . . . . . . . . . . . . . . . . . . . . . . . . . . . . . . . . . . . .\
. . . . . . . . . . . . . . . . . . . . . . . . . . . . 3.22
Luggage compartment. . . . . . . . . . . . . . . . . . . . . . . . . . .\
. . . . . . . . . . . . . . . . . . . . . . . . . . . . . . . . . 3.23
Luggage cover . . . . . . . . . . . . . . . . . . . . . . . . . . . . . . . . . . . . \
. . . . . . . . . . . . . . . . . . . . . . . . . . . . . . 3.24
Boot storage . . . . . . . . . . . . . . . . . . . . . . . . . . . . . . . . . . . .\
. . . . . . . . . . . . . . . . . . . . . . . . . . . . . . . 3.25
Transporting objects in the luggage compartment . . . . . . . . . . . . . . . . . . . . . . . . . . . . . . . . . . . .\
. . 3.26
Roof bars . . . . . . . . . . . . . . . . . . . . . . . . . . . . . . . . . . . . \
. . . . . . . . . . . . . . . . . . . . . . . . . . . . . . . . . . 3.27
Spoiler . . . . . . . . . . . . . . . . . . . . . . . . . . . . . . . . . . . . \
. . . . . . . . . . . . . . . . . . . . . . . . . . . . . . . . . . . . 3.27
Multimedia equipment . . . . . . . . . . . . . . . . . . . . . . . . . . . . . . . . . . . . \
. . . . . . . . . . . . . . . . . . . . . . . . 3.28
Page 127 of 216
3.15
Unlocking and opening the doors or
tailgate switches on the timed cour-
tesy lights and lights.
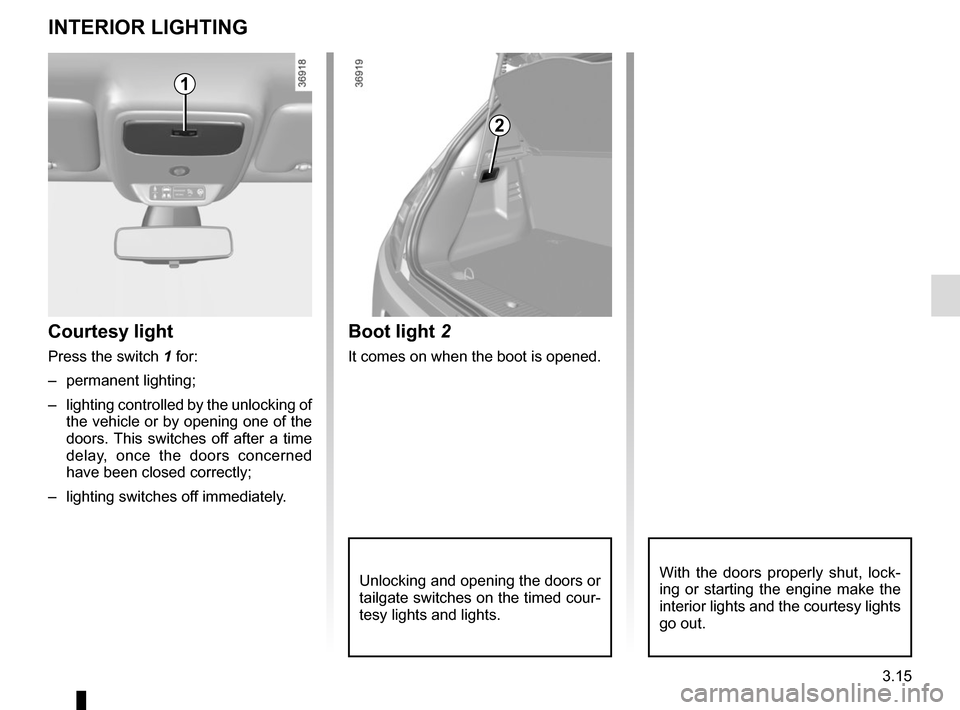
Boot light 2
It comes on when the boot is opened.
Courtesy light
Press the switch 1 for:
– permanent lighting;
– lighting controlled by the unlocking of
the vehicle or by opening one of the
doors. This switches off after a time
delay, once the doors concerned
have been closed correctly;
– lighting switches off immediately.
INTERIOR LIGHTING
1
2
With the doors properly shut, lock-
ing or starting the engine make the
interior lights and the courtesy lights
go out.
Page 156 of 216
4.16
Glass instrument panel(e.g.: instrument panel, clock, exterior
temperature display, radio display, mul-
timedia or multifunction display etc.)
Use a soft cloth (or cotton wool).
If this does not clean them properly,
use a soft cloth (or cotton wool) slightly
moistened with soapy water and then
wipe clean with another soft damp cloth
or cotton wool.
Finally, carefully dry off with a soft dry
cloth.
Do not use products containing alco-
hol and/or spray fluids on the area.
Seat belts
These must be kept clean.
Use products selected by our Technical
Department (Approved outlets) or
warm, soapy water and a sponge and
wipe with a dry cloth.
Detergents or dyes must not be used
under any circumstances.
INTERIOR TRIM MAINTENANCE (1/2)
Textiles (seats, door trim, etc)
Vacuum-clean the textiles regularly.
Liquid stain
Use soapy water.
Dab lightly (never rub) with a soft cloth,
rinse and remove the excess.
Solid or pasty stain
Carefully remove the excess solid or
pasty material immediately with a
spatula (working from the edges to the
centre to avoid spreading the stain).
Clean as for a liquid stain.
Special instructions for sweets or
chewing gum
Put an ice cube on the stain to solidify
it, then proceed as for a solid stain.
A well-maintained vehicle will last
longer. It is therefore recommended to
maintain the interior of the vehicle regu-
larly.
A stain should always be dealt with
swiftly.
Whatever type of stain is on the trim,
use
cold (or warm) soapy water with
natural soap.
Detergents (washing-up liquid, pow-
dered products, alcohol-based prod-
ucts) should not be used.
Use a soft cloth.
Rinse and soak up the excess.
For further recommendations for
maintaining the interior, and/or for
any unsatisfactory results, please
see an authorised dealer.
Page 159 of 216
5.1
Section 5: Practical advice
Tyre inflation kit . . . . . . . . . . . . . . . . . . . . . . . . . . . \
. . . . . . . . . . . . . . . . . . . . . . . . . . . . . . . . . . . . . . 5.2
Tyres (tyre and wheel safety, use in winter) . . . . . . . . . . . . . . . . . . . . . . . . . . . . . . . . . . . .\
. . . . . . . 5.6
Headlights (changing bulbs) . . . . . . . . . . . . . . . . . . . . . . . . . . . . . . . . . . . .\
. . . . . . . . . . . . . . . . . . . 5.9
Rear lights and side lights (changing bulbs) . . . . . . . . . . . . . . . . . . . . . . . . . . . . . . . . . . . .\
. . . . . . . 5.11
Interior lighting (changing bulbs) . . . . . . . . . . . . . . . . . . . . . . . . . . . . . . . . . . . . \
. . . . . . . . . . . . . . . . 5.14
Fuses . . . . . . . . . . . . . . . . . . . . . . . . . . . . . . . . . . . . \
. . . . . . . . . . . . . . . . . . . . . . . . . . . . . . . . . . . . . 5.15
Radio frequency remote control: batteries. . . . . . . . . . . . . . . . . . . . . . . . . . . . . . . . . . . . \
. . . . . . . . . 5.18
Battery . . . . . . . . . . . . . . . . . . . . . . . . . . . . . . . . . . . . \
. . . . . . . . . . . . . . . . . . . . . . . . . . . . . . . . . . . . 5.19
Fitting a radio . . . . . . . . . . . . . . . . . . . . . . . . . . . . . . . . . . . . \
. . . . . . . . . . . . . . . . . . . . . . . . . . . . . . . 5.21
Accessories . . . . . . . . . . . . . . . . . . . . . . . . . . . . . . . . . . . . \
. . . . . . . . . . . . . . . . . . . . . . . . . . . . . . . . 5.22
Wipers (replacing blades) . . . . . . . . . . . . . . . . . . . . . . . . . . . . . . . . . . . .\
. . . . . . . . . . . . . . . . . . . . . 5.23
Towing . . . . . . . . . . . . . . . . . . . . . . . . . . . . . . . . . . . . \
. . . . . . . . . . . . . . . . . . . . . . . . . . . . . . . . . . . . 5.25
Tow eye . . . . . . . . . . . . . . . . . . . . . . . . . . . . . . . . . . . . \
. . . . . . . . . . . . . . . . . . . . . . . . . . . . . . . . . . . 5.26
Operating faults . . . . . . . . . . . . . . . . . . . . . . . . . . . . . . . . . . . . \
. . . . . . . . . . . . . . . . . . . . . . . . . . . . . 5.27
Page 172 of 216
5.14
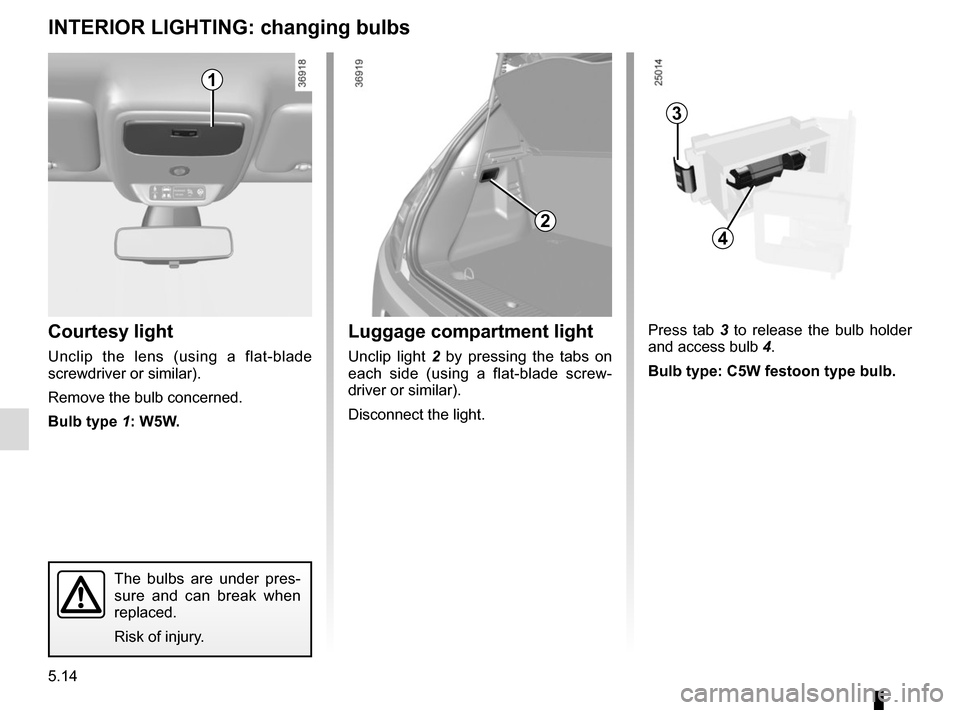
Courtesy light
Unclip the lens (using a flat-blade
screwdriver or similar).
Remove the bulb concerned.
Bulb type 1: W5W.
INTERIOR LIGHTING: changing bulbs
The bulbs are under pres-
sure and can break when
replaced.
Risk of injury.
Press tab 3 to release the bulb holder
and access bulb 4.
Bulb type: C5W festoon type bulb.Luggage compartment light
Unclip light 2 by pressing the tabs on
each side (using a flat-blade screw-
driver or similar).
Disconnect the light.
2
3
4
1
Page 211 of 216
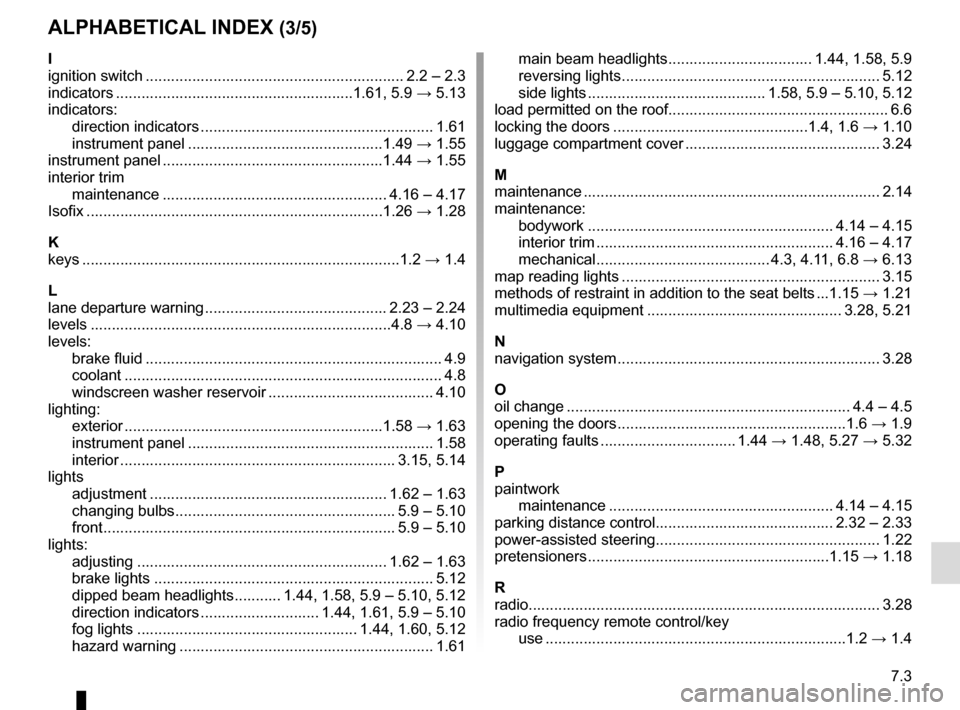
7.3
ALPHABETICAL INDEX (3/5)
I
ignition switch ............................................................. 2.2 – 2.3
indicators ........................................................1.61,\
5.9 → 5.13
indicators: direction indicators ....................................................... 1.61
instrument panel ..............................................1.49 → 1.55
instrument panel ....................................................1.44 → 1.55
interior trim maintenance ..................................................... 4.16 – 4.17
Isofix .................................................................\
.....1.26 → 1.28
K
keys ...................................................................\
........1.2 → 1.4
L
lane departure warning ........................................... 2.23 – 2.24
levels .................................................................\
......4.8 → 4.10
levels: brake fluid ...................................................................... 4.9
coolant ................................................................\
........... 4.8
windscreen washer reservoir ....................................... 4.10
lighting: exterior .............................................................1.\
58 → 1.63
instrument panel .......................................................... 1.58
interior ...............................................................\
.. 3.15, 5.14
lights adjustment ........................................................ 1.62 – 1.63
changing bulbs .................................................... 5.9 – 5.10
front ..................................................................... 5.9 – 5.10
lights: adjusting ........................................................... 1.62 – 1.63
brake lights .................................................................. 5.12
dipped beam headlights ........... 1.44, 1.58, 5.9 – 5.10, 5.12
direction indicators ............................ 1.44, 1.61, 5.9 – 5.10
fog lights .................................................... 1.44, 1.60, 5.12
hazard warning ............................................................ 1.61 main beam headlights .................................. 1.44, 1.58, 5.9
reversing lights ............................................................. 5.12
side lights .......................................... 1.58, 5.9 – 5.10, 5.12
load permitted on the roof..............................................\
...... 6.6
locking the doors ..............................................1.4, 1.6 → 1.10
luggage compartment cover .............................................. 3.24
M
maintenance ............................................................\
.......... 2.14
maintenance: bodywork .......................................................... 4.14 – 4.15
interior trim ........................................................ 4.16 – 4.17
mechanical ......................................... 4.3, 4.11, 6.8 → 6.13
map reading lights ............................................................. 3.15
methods of restraint in addition to the seat belts ...1.15 → 1.21
multimedia equipment .............................................. 3.28, 5.21
N
navigation system .............................................................. 3.28
O
oil change ................................................................... 4.4 – 4.5
opening the doors ......................................................1.6 → 1.9
operating faults ................................ 1.44 → 1.48, 5.27 → 5.32
P
paintwork maintenance ..................................................... 4.14 – 4.15
parking distance control.......................................... 2.32 – 2.33
power-assisted steering.................................................\
.... 1.22
pretensioners .........................................................1\
.15 → 1.18
R
radio...................................................................\
................ 3.28
radio frequency remote control/key use ....................................................................\
...1.2 → 1.4