clutch RENAULT TWINGO RS 2009 2.G Engine And Peripherals User Guide
[x] Cancel search | Manufacturer: RENAULT, Model Year: 2009, Model line: TWINGO RS, Model: RENAULT TWINGO RS 2009 2.GPages: 652
Page 103 of 652
10A-97
ENGINE AND CYLINDER BLOCK ASSEMBLY
Engine - gearbox assembly: Removal - Refitting
K4M
10A
aRemove using the (Mot. 1448) :
-the clip (6) from the top hose on the water cham-
ber,
-the clip (7) from each heater matrix hose.
aDisconnect:
-the top hose on the water chamber,
-the heater matrix hoses.aUnclip:
-the gearbox controls (8) on the gear selectors,
-the gearbox controls on the cable sleeve stops at
(9) ,
-the hydraulic clutch control pipe on the gearbox at
(10) .
aDisconnect the hydraulic clutch control pipe from the
gearbox by pressing on the clip (11) .
aFit blanking plugs on the hydraulic clutch control
pipe openings and on the opening of the clutch
thrust bearing.
131763
132346131761
121410
Page 109 of 652
10A-103
ENGINE AND CYLINDER BLOCK ASSEMBLY
Engine - gearbox assembly: Removal - Refitting
K4M
10A
-the rubber pad mounting from the suspended en-
gine mounting on the gearbox.
aRemove the right-hand suspended engine mounting
(see 19D, Engine mounting, Right-hand sus-
pended engine mounting: Removal - Refitting,
page 19D-13) .
aLift the vehicle to remove the "engine and gearbox"
assembly.
REFITTING
I - REFITTING PREPARATION OPERATION
aFor standard engine replacement (see Standard re-
placement) (Technical Note 6023A, 10A, Engine
and peripherals).
II - REFITTING OPERATION
aPosition the "engine and gearbox" assembly in the
body.
aRefit the right-hand suspended engine mounting
(see 19D, Engine mounting, Right-hand sus-
pended engine mounting: Removal - Refitting,
page 19D-13) .
aRefit the rubber pad mounting from the suspended
engine mounting on the gearbox.
aTorque tighten the rubber pad mounting bolts for
the suspended engine mounting on the gearbox
(21 N.m).
aRefit the suspended engine mounting rubber pad.
aTorque tighten:
-the bolts of the suspended mounting rubber
pad (62 N.m),
-the suspended engine mounting shaft nut (62
N.m).
III - FINAL OPERATION
aRemove the.
aRemove the blanking plugs.
aConnect:
-the union of the brake servo vacuum pipe,
-the « compressor - condenser » connecting pipe,-the « compressor - intermediate pipe » connecting
pipe,
-the pressure sensor connector,
aConnect the hose on the coolant pump inlet pipe.
aFit the hose clip on the coolant pump inlet pipe using
the (Mot. 1448).
aRefit the earth nuts.
aClip:
-the relay plates on the engine compartment con-
nection unit,
-the fuse holders.
aConnect the fuses.
aRefit the engine compartment connection unit on the
body.
aConnect the connector to the engine compartment
connection unit.
aRefit the engine compartment connection unit cover.
aClip:
-the wiring on the engine cooling fan assembly,
-the cooling radiator top and bottom hoses on the
engine cooling fan assembly.
aConnect:
-the engine cooling fan assembly resistor connec-
tor,
-the engine cooling fan assembly connector.
aRemove the blanking plug from the fuel supply pipe
opening and the injector rail fuel opening.
aReconnect the fuel supply pipe.
aClip the fuel supply pipe in place.
aConnect:
-the fuel vapour absorber bleed solenoid valve con-
nector,
-the fuel vapour absorber bleed solenoid valve pipe.
aFit the gearbox control cables.
aClip the manual gearbox control cables onto:
-the gear selectors,
-the cable sleeve stops.
aRemove the blanking plug from the hydraulic clutch
control pipe opening and the opening of the clutch
thrust bearing.
aConnect the hydraulic clutch control pipe.
aClip the hydraulic clutch control pipe on the gearbox. Note:
Check no component obstructs the movement of
the body around the engine - gearbox assembly.
Page 110 of 652
10A-104
ENGINE AND CYLINDER BLOCK ASSEMBLY
Engine - gearbox assembly: Removal - Refitting
K4M
10A
aConnect:
-the top hose on the water chamber,
-the hoses on the heater matrix.
aUsing the (Mot. 1448), fit:
-the clip on the top hose on the water chamber,
-the clip on each hose on the heater matrix.
aRefit the catalytic converter (see 19B, Exhaust,
Catalytic converter: Removal - Refitting, page
19B-12) .
aRefit:
-the differential output seal (see Differential output
seal: Removal - Refitting) (21A, Manual gear-
box),
-the front right-hand wheel driveshaft (see Front
right-hand driveshaft: Removal - Refitting)
(29A, Driveshafts),
-the front left-hand wheel driveshaft (see Front left-
hand driveshaft: Removal - Refitting) (29A,
Driveshafts),
-the radiator mounting cross member (see Radiator
mounting cross member: Removal - Refitting)
(41A, Front lower structure),
-the front axle subframe (see Front axle subframe:
Removal - Refitting) (31A, Front axle compo-
nents),
-the strap of the « engine cooling radiator -
condenser » assembly on the front upper cross
member,
-the engine tie-bar (see 19D, Engine mounting,
Lower engine tie-bar: Removal - Refitting, page
19D-18) ,
-the front bumper (see Front bumper: Removal -
Refitting) (55A, Exterior protection),
-the front wheel arch liners (see Front wheel arch
liner: Removal - Refitting) (55A, Exterior protec-
tion),
-the front wheels (see Wheel: Removal - Refitting)
(35A, Wheels and tyres),
-the battery tray (see Battery tray: Removal - Re-
fitting) (80A, Battery),
-the fuel injection computer (see 17B, Petrol injec-
tion, Petrol injection computer: Removal - Refit-
ting, page 17B-20) .
aRefit the battery (see Battery: Removal - Refitting)
(80A, Battery).
aRefit the air filter unit (see 12A, Fuel mixture, Air fil-
ter unit: Removal - Refitting, page 12A-13) .aRefill:
-the gearbox (see Manual gearbox oils: Draining -
Filling) (21A, Manual gearbox),
-and bleed the cooling system (see 19A, Cooling,
Cooling system: Draining - Refilling, page 19A-
9) ,
-the engine if necessary (see 10A, Engine and cyl-
inder block assembly, Engine oil: Draining - Re-
filling, page 10A-22) ,
-the refrigerant circuit using a refrigerant charging
station (see Refrigerant circuit: Draining - Fill-
ing) (62A, Air conditioning).
aBleed the clutch circuit (see Clutch circuit: Bleed)
(37A, Mechanical component controls).
aRefit the engine undertray.
Page 113 of 652
10A-107
ENGINE AND CYLINDER BLOCK ASSEMBLY
Flywheel: Removal - Refitting
D4F – D7F – K9K
10A
REMOVAL
I - REFITTING PREPARATIONS OPERATION
aPosition the vehicle on a two-post lift (see Vehicle:
Towing and lifting) (MR 411, 02A, Lifting equip-
ment).
aDisconnect the battery (see Battery: Removal - Re-
fitting) (MR 411, 80A, Battery).
aRemove:
-the gearbox (see Manual gearbox: Removal - Re-
fitting) ,
-the clutch plate and pressure plate (see Pressure
plate - Disc: Removal - Refitting) .II - OPERATION FOR REMOVAL OF PART
CONCERNED
aLock the engine using tool (Mot. 582-01) (1) .
aRemove:
-the flywheel bolts,
-the flywheel,
-tool (Mot. 582-01). Special tooling required
Mot. 582-01Flywheel locking tool.
Tightening torquesm
D4F, D7F flywheel bolts18 Nm + 110˚ ±± ± ±
10˚
K9K flywheel bolts70 Nm
109158
Page 115 of 652

10A-109
ENGINE AND CYLINDER BLOCK ASSEMBLY
Flywheel: Removal - Refitting
D4F – D7F – K9K
10A
Tightening order
aObserve the tightening order.
aTorque and angle tighten, in order, the D4F, D7F fly-
wheel bolts (18 Nm + 110˚ ±± ± ±
10˚).
aTighten to torque and in order the K9K flywheel
bolts (70 Nm).
aRemove tool (Mot. 582-01).
III - FINAL OPERATION.
aRefit:
-the clutch plate and pressure plate (see Pressure
plate - Disc: Removal - Refitting) ,
-the gearbox (see Manual gearbox: Removal - Re-
fitting) .
aConnect the battery (see Battery: Removal - Refit-
ting) (MR 411, 80A, Battery).
23326
D4F – D7F
K9K
Page 116 of 652
10A-110
ENGINE AND CYLINDER BLOCK ASSEMBLY
Flywheel: Removal - Refitting
K4M
10A
REMOVAL
I - REMOVAL PREPARATION OPERATION
aPosition the vehicle on a two-post lift (see Vehicle:
Towing and lifting) (02A, Lifting equipment).
aRemove:
-the engine undertray,
-the battery (see Battery: Removal - Refitting)
(80A, Battery),
-the air filter unit (see 12A, Fuel mixture, Air filter
unit: Removal - Refitting, page 12A-13) ,
-the petrol injection computer (see 17B, Petrol in-
jection, Petrol injection computer: Removal -
Refitting, page 17B-20) ,
-the battery tray (see Battery tray: Removal - Re-
fitting) (80A, Battery),
-the front wheels (see Wheel: Removal - Refitting)
(35A, Wheels and tyres),
-the front wheel arch liners (see Front wheel arch
liner: Removal - Refitting) (55A, Exterior protec-
tion),
-the front bumper (see Front bumper: Removal -
Refitting) (55A, Exterior protection).
aDrain:
-the gearbox (see Manual gearbox oils: Draining -
Filling) (21A, Manual gearbox),
-the engine cooling system (see 19A, Cooling,
Cooling system: Draining - Refilling, page 19A-
9) ,
-the refrigerant circuit using a refrigerant charging
station (see Refrigerant circuit: Draining - Fill-
ing) (62A, Air conditioning).aRemove:
-the lower engine tie-bar (see 19D, Engine mount-
ing, Lower engine tie-bar: Removal - Refitting,
page 19D-18) ,
-the front axle subframe (see Front axle subframe:
Removal - Refitting) (31A, Front axle compo-
nents),
-the front left-hand wheel driveshaft (see Front left-
hand driveshaft: Removal - Refitting) (29A,
Driveshafts),
-the front right-hand wheel driveshaft (see Front
right-hand driveshaft: Removal - Refitting)
(29A, Driveshafts),
-the differential output seals (see Differential out-
put seal: Removal - Refitting) (21A, Manual gear-
box),
-the « engine - gearbox » assembly (see 10A, En-
gine and cylinder block assembly, Engine -
gearbox assembly: Removal - Refitting, page
10A-74) (21A, Manual gearbox),
-the manual gearbox (see Manual gearbox: Re-
moval - Refitting) ,
-the « pressure plate - disc » assembly (see Pres-
sure plate - Disc: Removal - Refitting) (20A,
Clutch).
II - REMOVAL OPERATION
aRemove:
-the flywheel bolts,
-the (Mot. 1677) (1) , Special tooling required
Mot. 1677Flywheel locking tool.
Equipment required
refrigerant charging station
Tightening torquesm
flywheel bolts70 N.m
109158
Page 117 of 652
10A-111
ENGINE AND CYLINDER BLOCK ASSEMBLY
Flywheel: Removal - Refitting
K4M
10A
-the flywheel.
REFITTING
I - REFITTING PREPARATION OPERATION
aUse SURFACE CLEANER (see Vehicle: Parts
and consumables for the repair) (04B, Consuma-
bles - Products) to clean and degrease:
-the flywheel bearing face if reusing,
-the crankshaft bearing face.
aAlways replace the flywheel bolts.
II - REFITTING OPERATION
aFit the flywheel.
aFit the new flywheel bolts without tightening them.
aPosition the (Mot. 1677).
aTighten to torque and in order the flywheel bolts
(70 N.m).
III - FINAL OPERATION
aRefit:
-the « pressure plate - disc » assembly (see Pres-
sure plate - Disc: Removal - Refitting) (20A,
Clutch),
-the manual gearbox (see Manual gearbox: Re-
moval - Refitting) (21A, Manual gearbox).-the « engine and gearbox » assembly (see 10A,
Engine and cylinder block assembly, Engine -
gearbox assembly: Removal - Refitting, page
10A-74) ,
-the differential output seals (see Differential out-
put seal: Removal - Refitting) (21A, Manual gear-
box),
-the front right-hand wheel driveshaft (see Front
right-hand driveshaft: Removal - Refitting)
(29A, Driveshafts),
-the front left-hand wheel driveshaft (see Front left-
hand driveshaft: Removal - Refitting) (29A,
Driveshafts),
-the front axle subframe (see Front axle subframe:
Removal - Refitting) (31A, Front axle compo-
nents),
-the lower engine tie-bar (see 19D, Engine mount-
ing, Lower engine tie-bar: Removal - Refitting,
page 19D-18) ,
-the front bumper (see Front bumper: Removal -
Refitting) (55A, Exterior protection),
-the front wheel arch liners (see Front wheel arch
liner: Removal - Refitting) (55A, Exterior protec-
tion),
-the front wheels (see Wheel: Removal - Refitting)
(35A, Wheels and tyres),
-the battery tray (see Battery tray: Removal - Re-
fitting) (80A, Battery),
-the petrol injection computer (see 17B, Petrol in-
jection, Petrol injection computer: Removal -
Refitting, page 17B-20) ,
-the air filter unit (see 12A, Fuel mixture, Air filter
unit: Removal - Refitting, page 12A-13) ,
-the battery (see Battery: Removal - Refitting)
(80A, Battery).
aPerform the following operations:
-fill and bleed the cooling system (see 19A, Cool-
ing, Cooling system: Draining - Refilling, page
19A-9) ,
-fill the gearbox (see Manual gearbox oils: Drain-
ing - Filling) (21A, Manual gearbox).
-fill the refrigerant circuit using a refrigerant charg-
ing station (see Refrigerant circuit: Draining -
Filling) (62A, Air conditioning).
aRefit the engine undertray.
109158
Page 414 of 652
13B-53
DIESEL INJECTION
Accelerometer: Removal - Refitting
K9K
13B
REMOVAL
I - REMOVAL PREPARATION OPERATION
aRemove the front engine cover.
aRemove:
-the dipstick,
-the oil level dipstick nut (1) ,
-the oil level dipstick guide.
aPlug the oil level dipstick guide inlet opening on the
cylinder block.
aDisconnect the following connectors :
-the heater plugs,
-the injectors,
-the flow actuator,-the diesel temperature sensor.
aDetach the channel at (2) .
aMove the wiring away from the channel.
aRemove:
-the nut (3) from the channel,
-the neck. Special tooling required
Emb. 1797Socket (24 mm) for removal -
refitting of the clutch master
cylinder
Equipment required
Diagnostic tool
Tightening torquesm
accelerometer20 N.m
114527
121419
Page 498 of 652
17B-23
PETROL INJECTION
Pinking sensor: Removal - Refitting
K4M
17B
REMOVAL
I - REMOVAL PREPARATION OPERATION
aRemove:
-the dipstick,
-the dipstick guide bolts (1) .
aMove aside the dipstick guide.aRemove:
-the alternator strut bolts (2) ,
-the alternator strut.
II - REMOVAL OPERATION
aDisconnect the pinking sensor connector (3) .
aRemove the pinking sensor using the tool (Emb.
1797). Special tooling required
Emb. 1797Socket (24 mm) for removal -
refitting of the clutch master
cylinder
Tightening torquesm
pinking sensor20 N.m
alter nator strut bolts25 N.m
132368
132363
132374
Page 638 of 652
19D-8
ENGINE MOUNTING
Left-hand suspended engine mounting: Removal - Refitting
K9K
19D
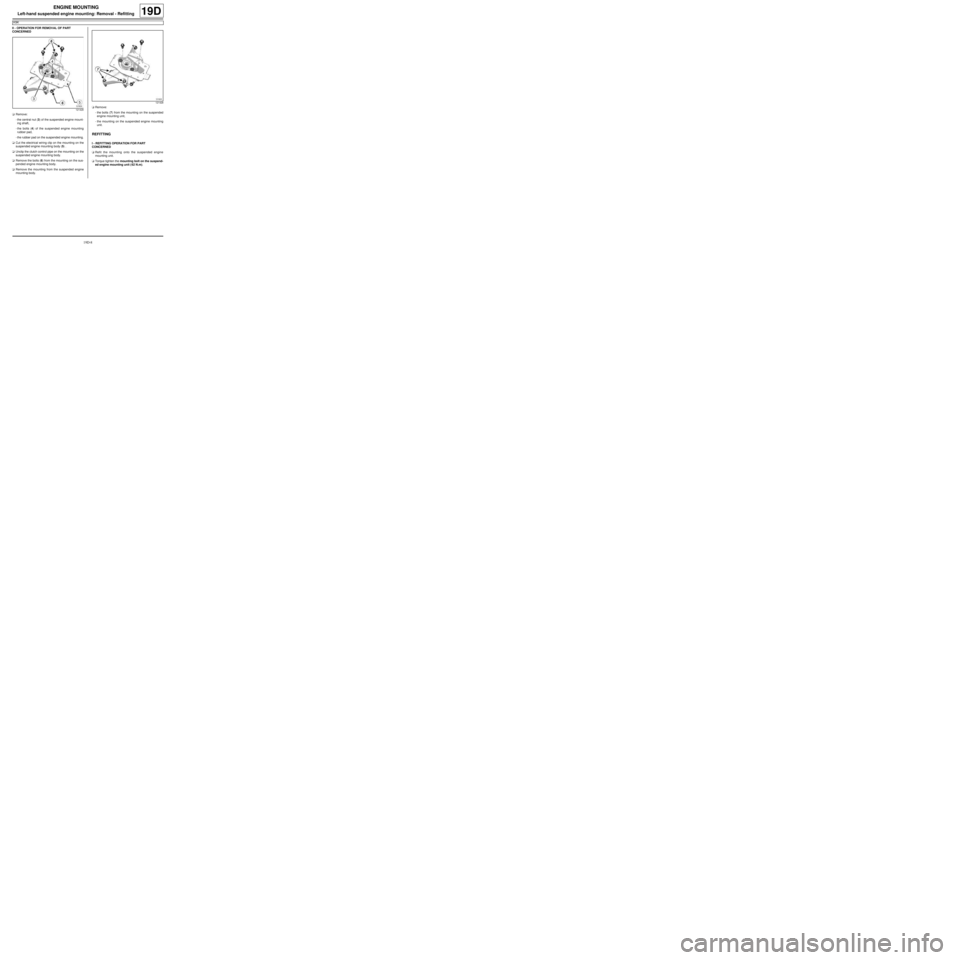
II - OPERATION FOR REMOVAL OF PART
CONCERNED
aRemove:
-the central nut (3) of the suspended engine mount-
ing shaft,
-the bolts (4) of the suspended engine mounting
rubber pad,
-the rubber pad on the suspended engine mounting.
aCut the electrical wiring clip on the mounting on the
suspended engine mounting body (5) .
aUnclip the clutch control pipe on the mounting on the
suspended engine mounting body.
aRemove the bolts (6) from the mounting on the sus-
pended engine mounting body.
aRemove the mounting from the suspended engine
mounting body.aRemove:
-the bolts (7) from the mounting on the suspended
engine mounting unit,
-the mounting on the suspended engine mounting
unit.
REFITTING
I - REFITTING OPERATION FOR PART
CONCERNED
aRefit the mounting onto the suspended engine
mounting unit.
aTorque tighten the mounting bolt on the suspend-
ed engine mounting unit ( 62 N.m).
121428
121428