exhaust RENAULT TWINGO RS 2009 2.G Engine And Peripherals Workshop Manual
[x] Cancel search | Manufacturer: RENAULT, Model Year: 2009, Model line: TWINGO RS, Model: RENAULT TWINGO RS 2009 2.GPages: 652
Page 2 of 652
© Renault s.a.s 2007 "The repair procedures given by the manufacturer in this document are based on the
technical specifications current when it was prepared.
The procedures may be modified as a result of changes introduced by the manufacturer in
the production of the various component units and accessories from which the vehicles are
constructed".All rights reserved by Renault.
Copying or translating, in part or in full, of this document or use of the service part reference
numbering system is forbidden without the prior written authority of Renault.
NOVEMBER 2009 EDITION ANGLAISE
X44
19ACOOLING
19BEXHAUST
19CTANK
19DENGINE MOUNTING
Page 4 of 652
Contents
Air resonator : Removal -
Refitting 12A-19
Throttle valve: Removal -
Refitting 12A-20
Throttle valve: Cleaning 12A-26
Air flowmeter: Removal -
Refitting 12A-28
Inlet distributor: Removal -
Refitting 12A-29
Injector holder shim:
Removal - Refitting 12A-45
Exhaust manifold: Removal -
Refitting 12A-48
12B TURBOCHARGING
Turbocharging: Precautions
for the repair 12B-1
Turbocharger: Removal -
Refitting 12B-4
Turbocharger oil pipe:
Removal - Refitting 12B-12
Intercooler : Removal -
Refitting 12B-18
13A FUEL SUPPLY
Diesel supply circuit:
Operating diagram 13A-1
Manual pr iming pump:
Removal - Refitting 13A-2
Fuel filter : Removal -
Refitting 13A-4
Electric diesel fuel heater:
Removal - Refitting 13A-7
Fuel circuit: Operating
diagram 13A-8 12A FUEL MIXTUREFuel pressure: Check 13A-9
Fuel flow: Check 13A-14
13B DIESEL INJECTION
Diesel injection: Precautions
for the repair 13B-1
Diesel injection: List and
location of components 13B-8
Diesel injection computer:
Removal - Refitting 13B-13
Camshaft position sensor:
Removal - Refitting 13B-14
Crankshaft position sensor:
Removal - Refitting 13B-15
High pressure pump:
Removal - Refitting 13B-16
Flow actuator: Removal -
Refitting 13B-26
Venturi: Removal - Refitting 13B-31
High pressure pipe: Check 13B-34
High pressure pipe between
pump and rail: Removal -
Refitting 13B-35
High pressure pipe between
rail and injector: Removal -
Refitting 13B-39
Injector rail: Removal -
Refitting 13B-43
Rail pressure sensor:
Removal - Refitting 13B-48
Fuel temperature sensor:
Removal - Refitting 13B-49
Injector leak flow: Check 13B-51
Accelerometer : Removal -
Refitting 13B-53 13A FUEL SUPPLY
Page 5 of 652
Contents
13C PREHEATING
Pre-postheating unit:
Removal - Refitting 13C-1
Heater plugs: Removal -
Refitting 13C-2
14A ANTIPOLLUTION
Oil vapour rebreathing
circuit: Descriptions 14A-1
Fuel vapour recirculation
circuit: Operating diagram 14A-2
Fuel vapour recirculation
circuit: Check 14A-3
Fuel vapour absorber:
Removal - Refitting 14A-4
Fuel vapour absorber: Check 14A-7
Fuel vapour absorber bleed
solenoid valve: Removal -
Refitting 14A-8
Exhaust gas recirculation
solenoid valve: Removal -
Refitting 14A-10
Exhaust gas cooler: Removal
- Refitting 14A-11
Exhaust gas recirculation
assembly: Removal -
Refitting 14A-15
Exhaust gas recirculation
rigid pipe: Removal -
Refitting 14A-19
16A STARTING - CHARGING
Alternator: Removal -
Refitting 16A-1
Star ter: Removal - Refitting 16A-10
Alternator pulley: Removal -
Refitting 16A-1717A IGNITION
Coils: Removal - Refitting 17A-1
Plugs: Removal - Refitting 17A-12
17B PETROL INJECTION
Petrol injection: List and
location of components 17B-1
Oxygen sensors: Removal -
Refitting 17B-13
Petrol injection computer:
Removal - Refitting 17B-20
Pinking sensor: Removal -
Refitting 17B-23
Crankshaft position sensor:
Removal - Refitting 17B-25
Injector rail - Injectors:
Removal - Refitting 17B-27
19A COOLING
Engine cooling system:
Specifications 19A-1
Engine cooling system:
Check 19A-2
Engine cooling circuit: List
and location of components 19A-4
Engine cooling system:
Operating diagram 19A-5
Cooling system: Draining -
Refilling 19A-9
Cooling radiator: Removal -
Refitting 19A-12
Coolant pump: Removal -
Refitting 19A-24
Thermostat: Removal -
Refitting 19A-34
Water chamber: Removal -
Refitting 19A-40
Page 6 of 652
Contents
Engine cooling fan assembly:
Removal - Refitting 19A-51
Coolant pump inlet pipe:
Removal - Refitting 19A-58
Expansion bottle: Removal -
Refitting 19A-64
Coolant temperature sensor:
Removal - Refitting 19A-66
19B EXHAUST
Exhaust: List and location of
components 19B-1
Exhaust: Precautions for the
repair 19B-8
Catalytic converter: Removal
- Refitting 19B-12
Expansion chamber :
Removal - Refitting 19B-23
Intermediate pipe: Removal -
Refitting 19B-28
Silencer : Removal - Refitting 19B-31
19C TANK
Fuel tank: Draining 19C-1
Fuel tank: Removal -
Refitting 19C-4
Filler neck: Removal -
Refitting 19C-11
Fuel level sensor module:
Removal - Refitting 19C-13 19A COOLING
19D ENGINE MOUNTING
Suspended engine
mounting: Tightening torque 19D-1
Left-hand suspended engine
mounting: Removal -
Refitting 19D-4
Right-hand suspended
engine mounting: Removal -
Refitting 19D-13
Lower engine tie-bar:
Removal - Refitting 19D-18
Page 50 of 652
10A-44
ENGINE AND CYLINDER BLOCK ASSEMBLY
Conrod bearing shell: Removal - Refitting
K9K
10A
aTilt the engine oil sump forwards in order to access
the oil pump bolts.
aTorque tighten the oil pump bolts (25 N.m) using
the torque wrench PROSTEEL, part number 77 11
226 888 starting with the 13 mm bolt.
a
aRefit the engine oil sump bolts.
aTorque tighten in order the engine oil sump bolts
(see 10A, Engine and cylinder block assembly,
Lower cover: Removal - Refitting, page 10A-6) .
aRefit the catalytic converter upstream stay (see 19B,
Exhaust, Catalytic converter: Removal - Refit-
ting, page 19B-12) .
aConnect the connector to the oil level sensor.
aRefit the relay bearing of the front right-hand wheel
driveshaft (see Front right-hand driveshaft: Re-
moval - Refitting) .
aRefit the front axle subframe (see Front axle sub-
frame: Removal - Refitting) (31A, Front axle com-
ponents).
aRemove the safety strap(s) from the radiator.
aRefit the lower engine tie-bar (see 19D, Engine
mounting, Lower engine tie-bar: Removal - Refit-
ting, page 19D-18) .aDisconnect the crankshaft position sensor (4) to pre-
vent the engine from starting.
aRefit the oil filter (see 10A, Engine and cylinder
block assembly, Oil filter: Removal - Refitting,
page 10A-29)
aFill up the engine oil (see 10A, Engine and cylinder
block assembly, Engine oil: Draining - Refilling,
page 10A-22) .
aStart the engine using the starter until the engine oil
warning light goes out.
aConnect the crankshaft position sensor.
aRefit the engine undertray.
aClear the present faults using the Diagnostic tool.
140918
Note:
Check that the engine oil sump seal is definitely
in place before tightening the engine oil sump
bolts.
123824
Page 80 of 652
10A-74
ENGINE AND CYLINDER BLOCK ASSEMBLY
Engine - gearbox assembly: Removal - Refitting
D4F or D7F
10A
REMOVAL
I - REMOVAL PREPARATION OPERATION
aPosition the vehicle on a two-post lift (see Vehicle:
Towing and lifting) (02A, Lifting equipment).
aRemove:
-the battery (see ) (80A, Battery),
-the battery tray (see Battery tray: Removal - Re-
fitting) (80A, Battery),
-the injection computer (see 17B, Petrol injection,
Petrol injection computer: Removal - Refitting,
page 17B-20) ,
-the computer mounting bolts,
-the computer mounting nuts,
-the computer mounting,
-the front wheels (see Wheel: Removal - Refitting)
(35A, Wheels and tyres),
-the front wheel arch liners (see Front wheel arch
liner: Removal - Refitting) (55A, Exterior protec-
tion).
-the front bumper (see Front bumper: Removal -
Refitting) (55A, Exterior protection),
-the engine compartment connection unit cover
bolts,
-the cover of the engine compartment connection
unit. Special tooling required
Tav. 476Ball joint extractor.
Ms. 583Pipe clamps .
Mot. 1379Engine suppor t tool for cylin-
der head oper ations.
Mot. 1390Suppor t for removal - refitting
of engine - gearbox assembly
Tav. 1233-01Tooling for carrying out opera-
tions on the axle subframe.
Equipment required
flywheel immobiliser
Tightening torquesm
front subframe bolts62 N.m
rear subframe bolts105 N.m
subframe rear tie rod
inner bolts21 N.m
subframe rear tie rod
outer bolts90 N.m
engine tie-bar bolts on
the gearbox105 N.m
engine tie-bar bolt on
the subframe105 N.m
exhaust downpipe bolts9 N.m
shock absorber base
lower bolts105 N.m
calliper mounting bolts105 N.m
lower guide pin bolts34 N.m
track rod end nuts37 N.m
tie rod upper bolts21 N.m
tie rod lower bolts62 N.m
universal joint24 N.m
IMPORTANT
To prevent the vehicle from falling, lash it to the
vehicle lift using a strap.
Page 85 of 652
10A-79
ENGINE AND CYLINDER BLOCK ASSEMBLY
Engine - gearbox assembly: Removal - Refitting
D4F or D7F
10A
aRemove the bolts (14) from the exhaust downpipe.
aUndo the intermediate pipe clip.
aMove the clip to one side.
aRemove the exhaust downpipe.
aRemove the catalytic converter (see 19B, Exhaust,
Catalytic converter: Removal - Refitting, page
19B-12) .aRemove the clutch control cable on the manual
gearbox.
aRemove:
-the bolts (15) from the heat shield,
-the heat shield.
aDetach the gear control linkage from:
-the control lever on the gearbox,
-the gear lever.
aRemove the gear control linkage. D4F, and 780 or 782
108817
D4F, and 772 – D7F
JB1 or JH1
120774
Page 89 of 652
10A-83
ENGINE AND CYLINDER BLOCK ASSEMBLY
Engine - gearbox assembly: Removal - Refitting
D4F or D7F
10A
aTorque tighten:
-the front subframe bolts (62 N.m),
-the rear subframe bolts (105 N.m),
-the subframe rear tie rod inner bolts (21 N.m),
-the subframe rear tie rod outer bolts (90 N.m),
-the engine tie-bar bolts on the gearbox (105
N.m),
-the engine tie-bar bolt on the subframe (105
N.m).
aRefit the control cables onto the gearbox.
aRemove the blanking plugs from the openings.
aClip the clutch pipe onto the gearbox.
aConnect the clutch slave cylinder.
aRemove the hose clamp (Ms. 583).
aBleed the clutch circuit (see Clutch circuit: Bleed) .
aRefit the gear control linkage.
aAttach the gear control linkage to:
-the gear lever,
-the control lever on the gearbox.
aRefit:
-the heat shield,
-the heat shield bolts.
aRefit the clutch control cable on the manual gearbox.
aRefit the catalytic converter (see 19B, Exhaust,
Catalytic converter: Removal - Refitting, page
19B-12) .aRefit the exhaust downpipe.
aFit the clip.
aTighten the intermediate pipe clip.
aRefit the exhaust downpipe bolts.
aTorque tighten the exhaust downpipe bolts (9
N.m).
aRefit:
-the shock absorber base lower bolts,
-the ABS sensors,
-the ABS sensor bolts (if fitted to the vehicle),
-the brake callipers,
-the calliper mounting bolts,
-the brake pads,
-the lower guide pin bolts,
-track rod ends,
-the track rod end nuts,
-the tie rod upper bolts.
aTorque tighten:
-the shock absorber base lower bolts (105 N.m ),
-the calliper mounting bolts (105 N.m),
-the lower guide pin bolts (34 N.m),
-the track rod end nuts (37 N.m),
-the tie rod upper bolts (21 N.m),
-the tie rod lower bolts (62 N.m).
aClip the electrical wiring on to the cross member.
aFit the steering box universal joint.
aRefit the universal joint bolt.
aTorque tighten the universal joint (24 N.m).
aRemove the flywheel immobiliser.
aClip the fuel pipe on to the upper timing cover.
aConnect the fuel supply pipe union.
aConnect the air conditioning pressostat connector. JH3
JB1 or JH1
D4F, and 772 – D7F
D4F, and 780 or 782
AIR CONDITIONING
Page 93 of 652
10A-87
ENGINE AND CYLINDER BLOCK ASSEMBLY
Engine - gearbox assembly: Removal - Refitting
K9K
10A
-the front bumper (see Front bumper: Removal -
Refitting) (55A, Exterior protection).
aDrain:
-the gearbox (see Sequential gearbox oil: Drain-
ing - Filling) (21A, Manual gearbox),
-the engine cooling system (see 19A, Cooling,
Cooling system: Draining - Refilling, page 19A-
9) ,
-the engine, if necessary (see 10A, Engine and
cylinder block assembly, Engine oil: Draining -
Refilling, page 10A-22) ,
-the refrigerant circuit using a refrigerant charging
station (see Refrigerant circuit: Draining - Fill-
ing) (62A, Air conditioning) (if fitted).
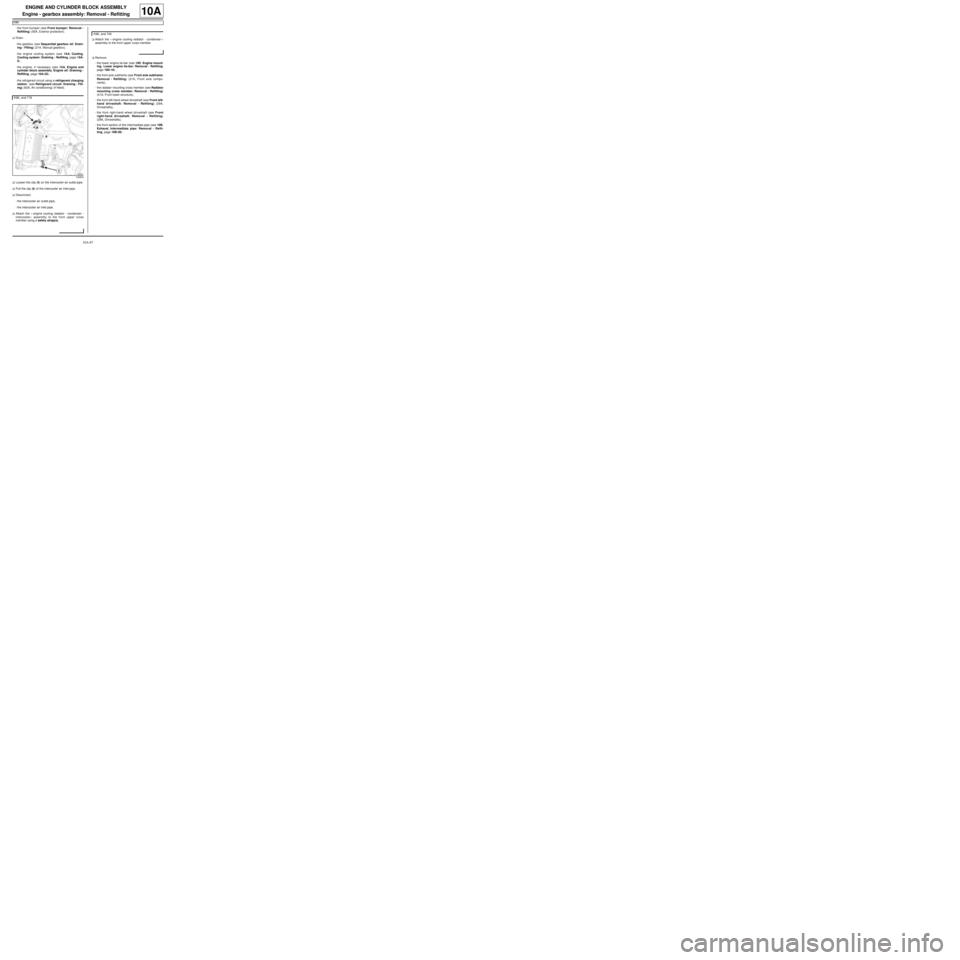
aLoosen the clip (5) on the intercooler air outlet pipe.
aPull the clip (6) of the intercooler air inlet pipe.
aDisconnect:
-the intercooler air outlet pipe,
-the intercooler air inlet pipe.
aAttach the « engine cooling radiator - condenser -
intercooler » assembly to the front upper cross
member using a safety strap(s).aAttach the « engine cooling radiator - condenser »
assembly to the front upper cross member.
aRemove:
-the lower engine tie-bar (see 19D, Engine mount-
ing, Lower engine tie-bar: Removal - Refitting,
page 19D-18) ,
-the front axle subframe (see Front axle subframe:
Removal - Refitting) (31A, Front axle compo-
nents),
-the radiator mounting cross member (see Radiator
mounting cross member: Removal - Refitting)
(41A, Front lower structure),
-the front left-hand wheel driveshaft (see Front left-
hand driveshaft: Removal - Refitting) (29A,
Driveshafts),
-the front right-hand wheel driveshaft (see Front
right-hand driveshaft: Removal - Refitting)
(29A, Driveshafts),
-the front section of the intermediate pipe (see 19B,
Exhaust, Intermediate pipe: Removal - Refit-
ting, page 19B-28) . K9K, and 718
122830
K9K, and 740
Page 99 of 652
10A-93
ENGINE AND CYLINDER BLOCK ASSEMBLY
Engine - gearbox assembly: Removal - Refitting
K9K
10A
II - FINAL OPERATION
aRemove the.
aLubricate the seals using recommended air condi-
tioning oil to make fitting easier.
aRefit:
-the connecting pipes to the compressor,
-the connecting pipe union bolts on the compressor,
-the bolt for the connecting pipe mounting on the
compressor.
aConnect:
-the pressostat connector,
-the hose to the coolant pump inlet pipe using the
tool (Mot. 1448).
aFit:
-the hose clip on the coolant pump inlet pipe using
the tool (Mot. 1448),
-the earth on the front left-hand wing.
aRefit the earth nut on the front left-hand wing.
aClip:
-the engine compartment connection unit relay
plates,
-the fuse holders.
aRefit the fuses.
aConnect the preheating unit connector.
aRefit the earth nut on the front left-hand side mem-
ber.
aFit the engine compartment connection unit.
aRefit the engine compartment connection unit
mountings on the body.
aConnect the black connector.
aClip on the black connector.
aRefit:
-the engine compartment connection unit cover,
-a new clip on the battery mounting to hold the elec-
trical wiring.
aConnect the wiring connectors to the fan assembly.aClip the fan assembly wiring.
aRemove the blanking plugs.
aConnect the high pressure pump inlet pipe.
aClip on the fuel supply pipe.
aConnect the high pressure pump return pipe.
aClip on the fuel return pipe.
aRemove the blanking plugs on the clutch hydraulic
control and on the control pipe.
aConnect the clutch hydraulic control to the gearbox.
aClip:
-the clutch control hydraulic pipe on the gearbox,
-the gearbox controls on the cable sleeve stops,
-the gearbox controls on the gear selectors.
aConnect:
-the hoses to the heater radiator,
-the top hose to the water chamber.
aFit:
-the hose clips on the heater radiator using the tool
(Mot. 1448),
-the clip for the top hose on the water chamber us-
ing the tool (Mot. 1448).
aRefit:
-the front section of the intermediate pipe (see 19B,
Exhaust, Intermediate pipe: Removal - Refit-
ting, page 19B-28) ,
-the front right-hand wheel driveshaft (see Front
right-hand driveshaft: Removal - Refitting)
(29A, Driveshafts),
-the front left-hand wheel driveshaft (see Front left-
hand driveshaft: Removal - Refitting) (29A,
Driveshafts),
-the radiator mounting cross member (see Radiator
mounting cross member: Removal - Refitting)
(41A, Front lower structure),
-the front axle subframe (see Front axle subframe:
Removal - Refitting) (31A, Front axle compo-
nents),
-the engine tie-bar (see 19D, Engine mounting,
Lower engine tie-bar: Removal - Refitting, page
19D-18) . WARNING
To prevent any leaks, check that the seal and the
surface of the pipe are in good condition. The
seal and the surface must be clean and scratch
free.