ESP RENAULT ZOE 2017 1.G User Guide
[x] Cancel search | Manufacturer: RENAULT, Model Year: 2017, Model line: ZOE, Model: RENAULT ZOE 2017 1.GPages: 220, PDF Size: 4.07 MB
Page 51 of 220
1.45
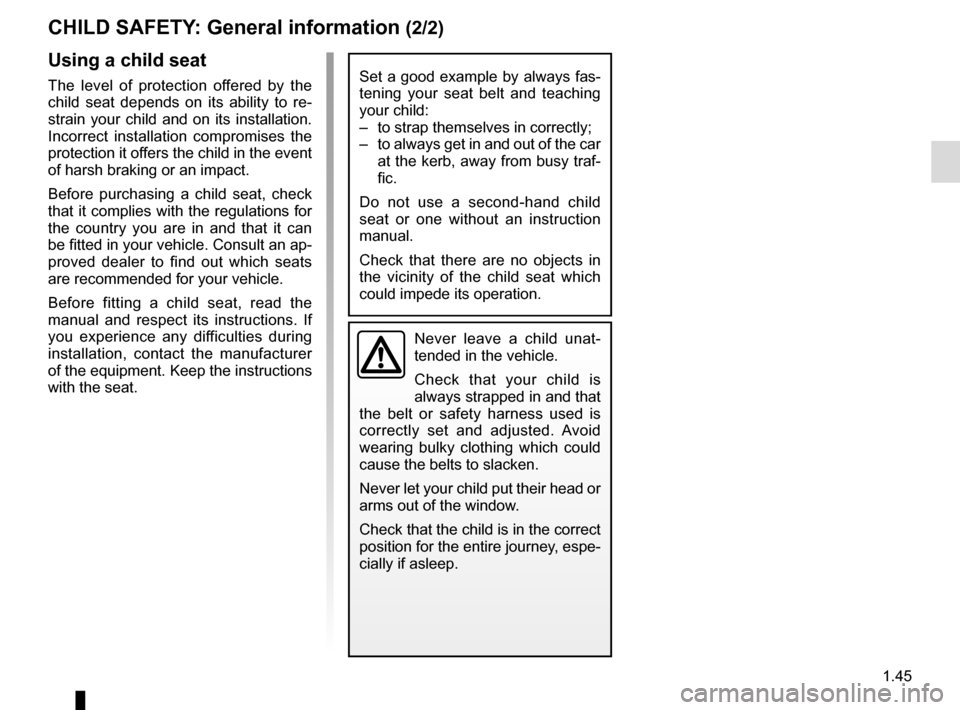
CHILD SAFETY: General information (2/2)
Using a child seat
The level of protection offered by the
child seat depends on its ability to re-
strain your child and on its installation.
Incorrect installation compromises the
protection it offers the child in the event
of harsh braking or an impact.
Before purchasing a child seat, check
that it complies with the regulations for
the country you are in and that it can
be fitted in your vehicle. Consult an ap-
proved dealer to find out which seats
are recommended for your vehicle.
Before fitting a child seat, read the
manual and respect its instructions. If
you experience any difficulties during
installation, contact the manufacturer
of the equipment. Keep the instructions
with the seat.Set a good example by always fas-
tening your seat belt and teaching
your child:
– to strap themselves in correctly;
– to always get in and out of the car at the kerb, away from busy traf-
fic.
Do not use a second-hand child
seat or one without an instruction
manual.
Check that there are no objects in
the vicinity of the child seat which
could impede its operation.
Never leave a child unat-
tended in the vehicle.
Check that your child is
always strapped in and that
the belt or safety harness used is
correctly set and adjusted. Avoid
wearing bulky clothing which could
cause the belts to slacken.
Never let your child put their head or
arms out of the window.
Check that the child is in the correct
position for the entire journey, espe-
cially if asleep.
Page 58 of 220

1.52
CHILD SAFETY: fitting a child seat (4/6)
The table below summarises the information already shown on the diagram \
on the previous page, to ensure the regula-
tions in force are respected.
Type of child seatWeight of
the child Seat sizeFront passenger
seat (5) (1) Rear side seats Rear centre seat
Carrycot fitted across the
vehicle
Group 0 < 10 kg F, G X U - IL (2) U (2)
Rear-facing shell seat
Group 0 or 0+ < 10 kg and
< 13 kg
E U - IL U - IL (3) U (3)
rear-facing seat
Group 0+ and 1 < 13 kg and 9 to
18 kg
C, D U - IL U - IL (3) U (3)
Forward-facing seat
Group 1 9 to 18 kg A, B, B1 IUF - IL U - IUF - IL (4) U (4)
Booster seat
Group 2 and 3 15 to 25 kg and
22 to 36 kg
- X U (4) U (4)
X = Seat not suitable for fitting child seats. U = Seat which allows a child seat with “Universal” approval to be ins\
talled using a seat belt; check that it can be fitted.
IUF/IL = On equipped vehicles, seat which allows an approved “Universal/semi-u\
niversal” or vehicle specific” child seat to be at-
tached using the ISOFIX system; check that it can be fitted.
(1) raise the seat to the maximum and position it as far back as possi\
ble, tilting the seatback slightly (approximately 25°).
(2) A carrycot can be installed across the vehicle and will take up at least \
two seats. Position the child with his or her feet nea rest
the door.
(3) Move the front seat as far forward as possible to install a rear-facing \
child seat, then move back the seat in front as far as it will
go, although without allowing it to come into contact with the child sea\
t.
(4) Forward-facing child seat; position the seatback of the child seat in co\
ntact with the seatback of the vehicle seat. Adjust the
headrest, or remove it if necessary. Do not push the front seat more than halfway back on its runners and do not recline the
seatback more than 25°.
(5) RISK OF DEATH OR SERIOUS INJURY: before installing a child seat on the front passenger seat, check that \
the
air bag has been deactivated (refer to “Child safety: front passenge\
r air bag deactivation/activation” Section 1).
Page 60 of 220
1.54
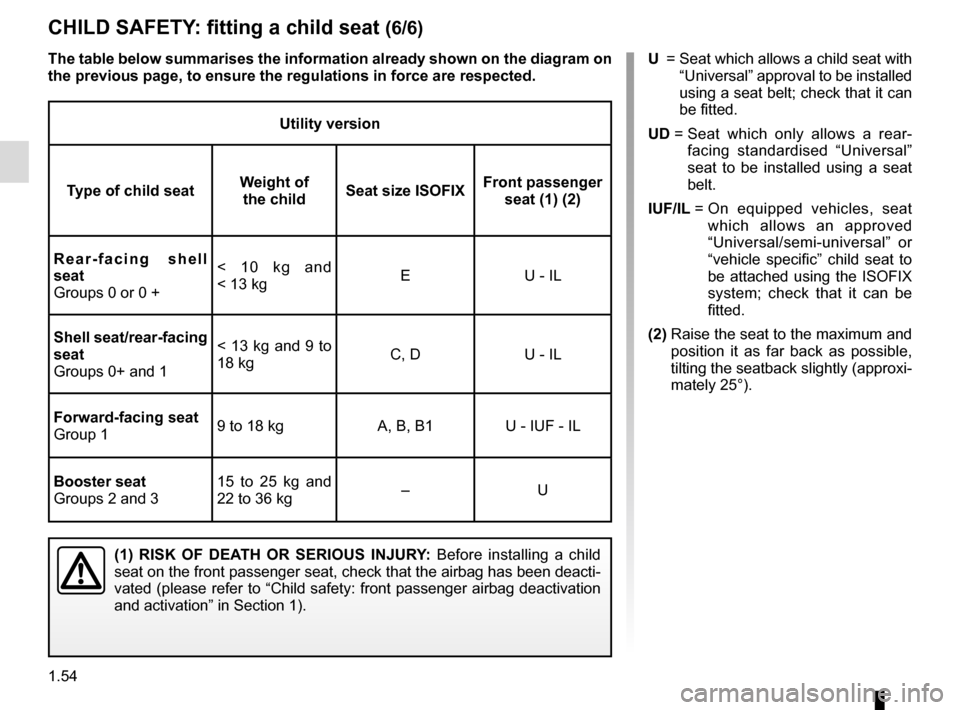
Utility version
Type of child seat Weight of
the child Seat size ISOFIX Front passenger
seat (1) (2)
Rear-facing shell
seat
Groups 0 or 0 + < 10 kg and
< 13 kg
E
U - IL
Shell seat/rear-facing
seat
Groups 0+ and 1 < 13 kg and 9 to
18 kg
C, D
U - IL
Forward-facing seat
Group 1 9 to 18 kg
A, B, B1 U - IUF - IL
Booster seat
Groups 2 and 3 15 to 25 kg and
22 to 36 kg
–U
(1) RISK OF DEATH OR SERIOUS INJURY:
Before installing a child
seat on the front passenger seat, check that the airbag has been deacti-\
vated (please refer to “Child safety: front passenger airbag deactiv\
ation
and activation” in Section 1).
The table below summarises the information already shown on the diagram \
on
the previous page, to ensure the regulations in force are respected. U
= Seat which allows a child seat with
“Universal” approval to be installed
using a seat belt; check that it can
be fitted.
UD = Seat which only allows a rear-
facing standardised “Universal”
seat to be installed using a seat
belt.
IUF/IL = On equipped vehicles, seat
which allows an approved
“Universal/semi-universal” or
“vehicle specific” child seat to
be attached using the ISOFIX
system; check that it can be
fitted.
(2) Raise the seat to the maximum and
position it as far back as possible,
tilting the seatback slightly (approxi-
mately 25°).
CHILD SAFETY: fitting a child seat (6/6)
Page 86 of 220
1.80
PEDESTRIAN HORN
Electric vehicles are particularly quiet.
This system enables you to warn
people of your presence – especially
pedestrians and cyclists.
The system is activated automatically
when the engine is started. The sound
triggers when the vehicle speed is be-
tween 1 and 20 mph.
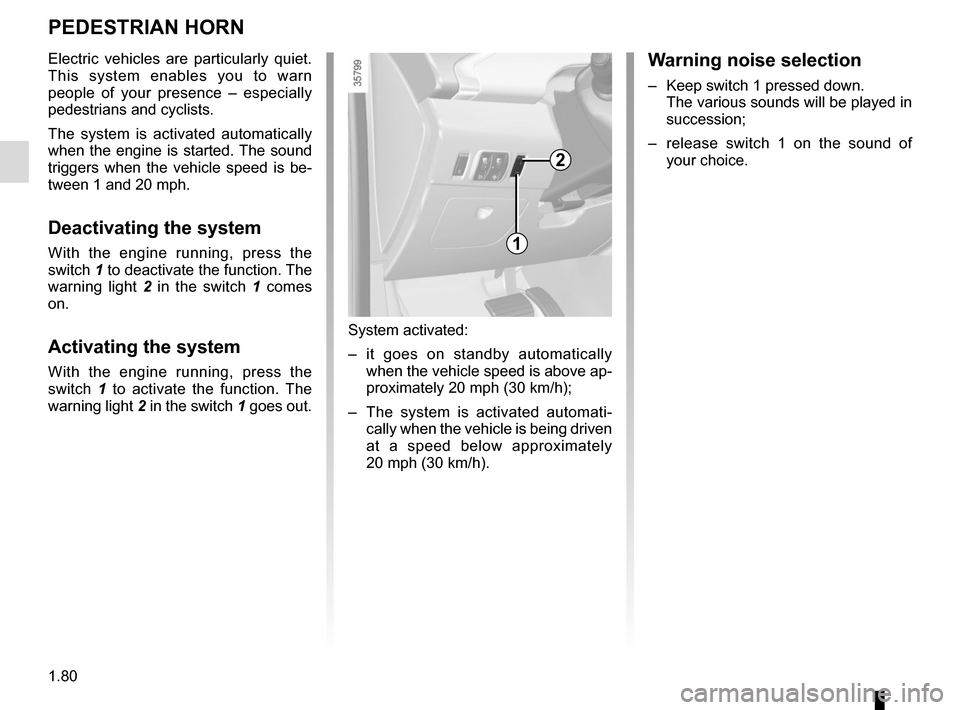
Deactivating the system
With the engine running, press the
switch 1 to deactivate the function. The
warning light 2 in the switch 1 comes
on.
Activating the system
With the engine running, press the
switch 1 to activate the function. The
warning light 2 in the switch 1 goes out.
System activated:
– it goes on standby automatically
when the vehicle speed is above ap-
proximately 20 mph (30 km/h);
– The system is activated automati- cally when the vehicle is being driven
at a speed below approximately
20 mph (30 km/h).
2
Warning noise selection
– Keep switch 1 pressed down. The various sounds will be played in
succession;
– release switch 1 on the sound of your choice.
1
Page 92 of 220
1.86
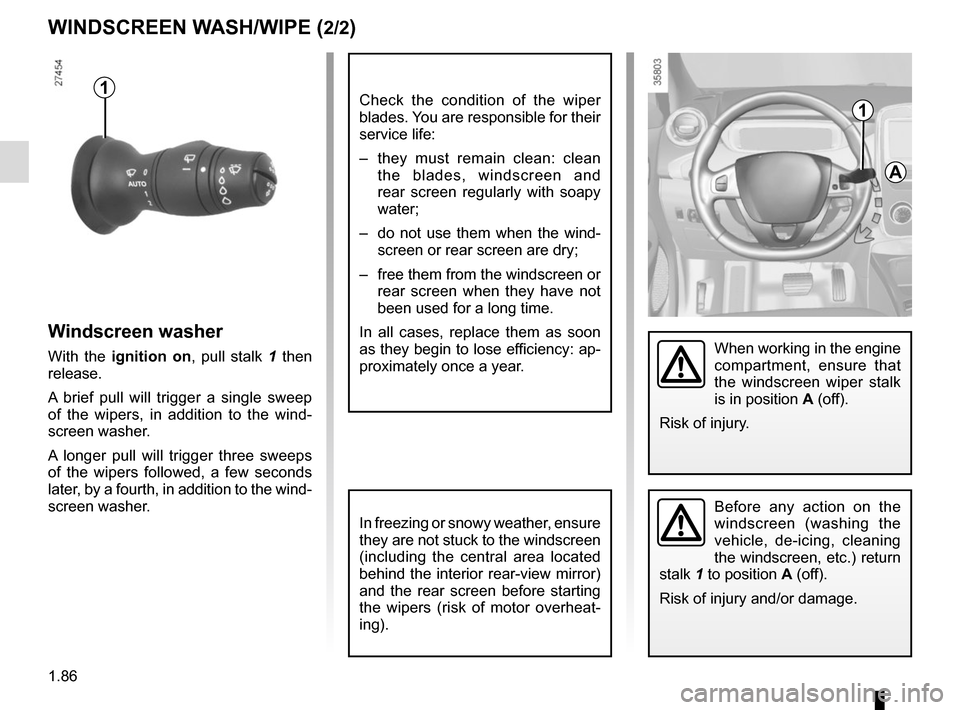
Windscreen washer
With the ignition on, pull stalk 1 then
release.
A brief pull will trigger a single sweep
of the wipers, in addition to the wind-
screen washer.
A longer pull will trigger three sweeps
of the wipers followed, a few seconds
later, by a fourth, in addition to the wind-
screen washer.
WINDSCREEN WASH/WIPE (2/2)
In freezing or snowy weather, ensure
they are not stuck to the windscreen
(including the central area located
behind the interior rear-view mirror)
and the rear screen before starting
the wipers (risk of motor overheat-
ing).
1
A
When working in the engine
compartment, ensure that
the windscreen wiper stalk
is in position A (off).
Risk of injury.
Before any action on the
windscreen (washing the
vehicle, de-icing, cleaning
the windscreen, etc.) return
stalk 1 to position A (off).
Risk of injury and/or damage.
1Check the condition of the wiper
blades. You are responsible for their
service life:
– they must remain clean: clean the blades, windscreen and
rear screen regularly with soapy
water;
– do not use them when the wind- screen or rear screen are dry;
– free them from the windscreen or rear screen when they have not
been used for a long time.
In all cases, replace them as soon
as they begin to lose efficiency: ap-
proximately once a year.
Page 93 of 220
1.87
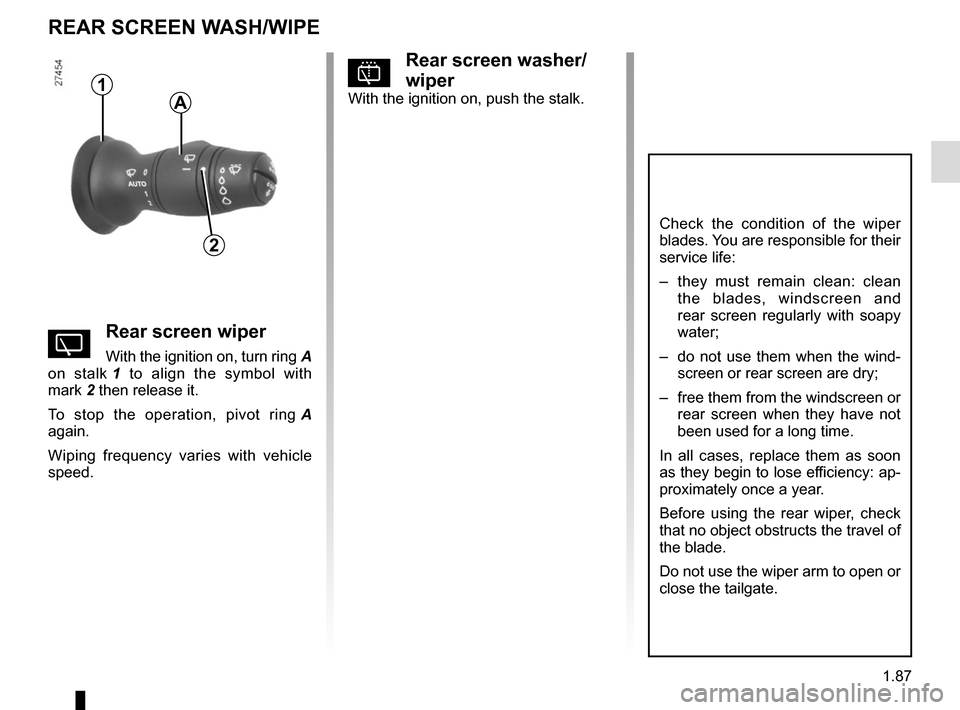
REAR SCREEN WASH/WIPE
1
2
Check the condition of the wiper
blades. You are responsible for their
service life:
– they must remain clean: clean the blades, windscreen and
rear screen regularly with soapy
water;
– do not use them when the wind- screen or rear screen are dry;
– free them from the windscreen or rear screen when they have not
been used for a long time.
In all cases, replace them as soon
as they begin to lose efficiency: ap-
proximately once a year.
Before using the rear wiper, check
that no object obstructs the travel of
the blade.
Do not use the wiper arm to open or
close the tailgate.
pRear screen washer/
wiper
With the ignition on, push the stalk.
YRear screen wiper
With the ignition on, turn ring A
on stalk 1 to align the symbol with
mark 2 then release it.
To stop the operation, pivot ring A
again.
Wiping frequency varies with vehicle
speed.
A
Page 97 of 220
2.3
Driver’s responsibility
when parking or stopping
the vehicle
Never leave an animal,
child or adult who is not self-suffi-
cient alone in your vehicle, even for
a short time.
They may pose a risk to themselves
or to others by starting the engine,
activating equipment such as the
electric windows or locking the
doors, for example.
Also, in hot and/or sunny weather,
please remember that the tempera-
ture inside the passenger compart-
ment increases very quickly.
RISK OF DEATH OR SERIOUS
INJURY.
Operating faults
In certain cases, the hands-free
RENAULT card may not work:
– the card battery RENAULT is drai- ned, flat 12 V battery, etc.
– near to appliances operating on the same frequency as the card (moni-
tor, mobile phone, video game, etc.);
– vehicle located in a high electroma- gnetic radiation zone.
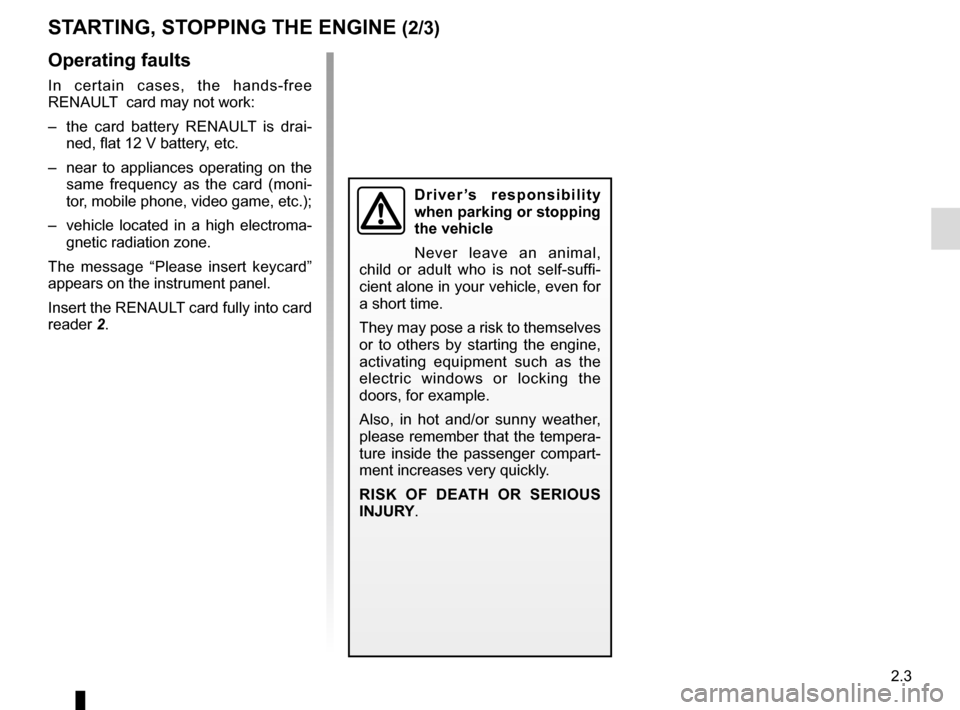
The message “Please insert keycard”
appears on the instrument panel.
Insert the RENAULT card fully into card
reader 2.
STARTING, STOPPING THE ENGINE (2/3)
Page 98 of 220
2.4
Conditions for stopping the
engine
The vehicle must be stationary, with the
lever positioned to N or P.
STARTING, STOPPING THE ENGINE (3/3)
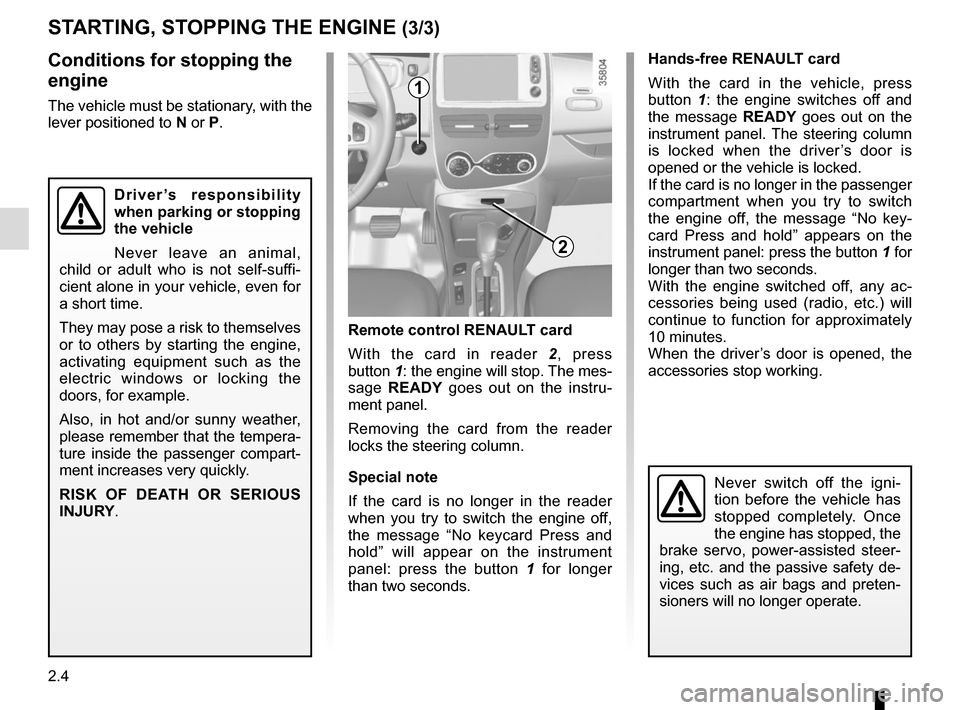
Hands-free RENAULT card
With the card in the vehicle, press
button 1: the engine switches off and
the message READY goes out on the
instrument panel. The steering column
is locked when the driver’s door is
opened or the vehicle is locked.
If the card is no longer in the passenger
compartment when you try to switch
the engine off, the message “No key-
card Press and hold” appears on the
instrument panel: press the button 1 for
longer than two seconds.
With the engine switched off, any ac-
cessories being used (radio, etc.) will
continue to function for approximately
10 minutes.
When the driver’s door is opened, the
accessories stop working.
Remote control RENAULT card
With the card in reader 2 , press
button 1: the engine will stop. The mes-
sage READY goes out on the instru-
ment panel.
Removing the card from the reader
locks the steering column.
Special note
If the card is no longer in the reader
when you try to switch the engine off,
the message “No keycard Press and
hold” will appear on the instrument
panel: press the button 1 for longer
than two seconds.
1
2
Never switch off the igni-
tion before the vehicle has
stopped completely. Once
the engine has stopped, the
brake servo, power-assisted steer-
ing, etc. and the passive safety de-
vices such as air bags and preten-
sioners will no longer operate.
Driver’s responsibility
when parking or stopping
the vehicle
Never leave an animal,
child or adult who is not self-suffi-
cient alone in your vehicle, even for
a short time.
They may pose a risk to themselves
or to others by starting the engine,
activating equipment such as the
electric windows or locking the
doors, for example.
Also, in hot and/or sunny weather,
please remember that the tempera-
ture inside the passenger compart-
ment increases very quickly.
RISK OF DEATH OR SERIOUS
INJURY.
Page 106 of 220
2.12
ENVIRONMENT
Please make your own
contribution towards
protecting the environment
too.
– Worn parts replaced in the course of routine vehicle maintenance (sec-
ondary 12 V battery, batteries, etc.)
must be disposed of through special-
ist organisations.
– At the end of the vehicle’s service life, it should be sent to approved
centres to ensure that it is recycled.
– In all cases, comply with local legis- lation.
Recycling
Your vehicle is 85% recyclable and
95% recoverable.
To achieve these objectives, many of
the vehicle components have been de-
signed to enable them to be recycled.
The materials and structures have
been carefully designed to allow these
components to be easily removed and
reprocessed by specialist companies.
In order to preserve raw material re-
sources, this vehicle incorporates nu-
merous parts made from recycled plas-
tics or renewable materials (vegetable
or animal-derived materials such as
cotton or wool).
Your vehicle has been designed with
respect for the environment in mind for
its entire service life: during production,
use and at the end of its life.
This commitment is illustrated by the
Renault eco² group signature.
Manufacture
Your vehicle has been manufactured at
an industrial site which uses a progress
policy to reduce environmental impacts
on rivers and natural areas (reduc-
tion of water and energy consumption,
visual and noise pollution, atmospheric
emissions and waste water, sorting and
reusing waste).
Page 107 of 220
2.13
TYRE PRESSURE LOSS WARNING (1/3)
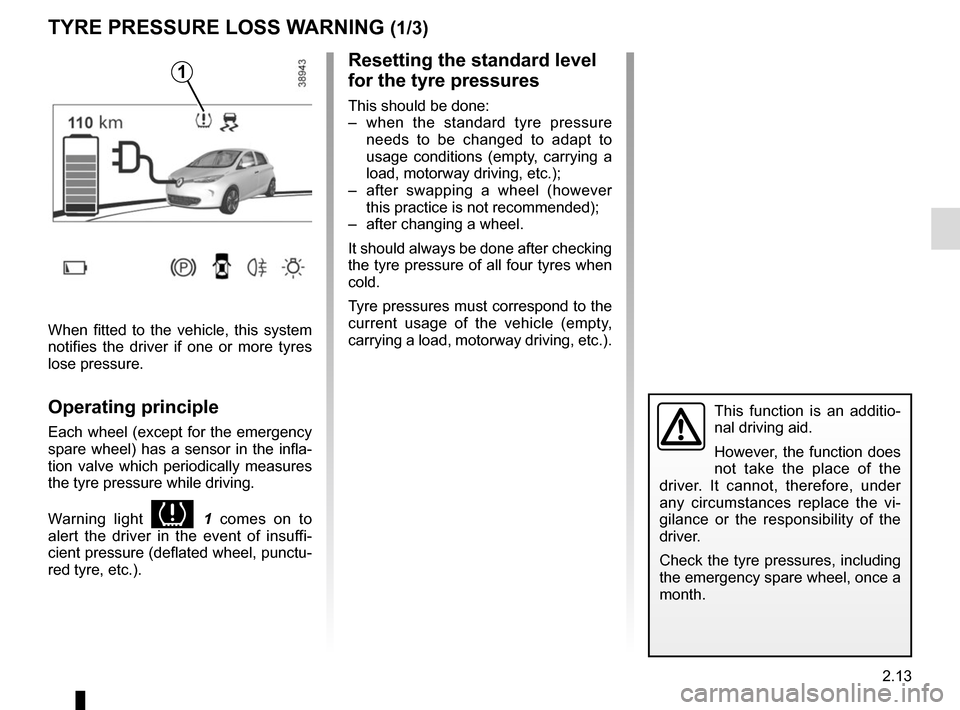
1
When fitted to the vehicle, this system
notifies the driver if one or more tyres
lose pressure.
Operating principle
Each wheel (except for the emergency
spare wheel) has a sensor in the infla-
tion valve which periodically measures
the tyre pressure while driving.
Warning light
1 comes on to
alert the driver in the event of insuffi-
cient pressure (deflated wheel, punctu-
red tyre, etc.).
Resetting the standard level
for the tyre pressures
This should be done:
– when the standard tyre pressure needs to be changed to adapt to
usage conditions (empty, carrying a
load, motorway driving, etc.);
– after swapping a wheel (however this practice is not recommended);
– after changing a wheel.
It should always be done after checking
the tyre pressure of all four tyres when
cold.
Tyre pressures must correspond to the
current usage of the vehicle (empty,
carrying a load, motorway driving, etc.).
This function is an additio-
nal driving aid.
However, the function does
not take the place of the
driver. It cannot, therefore, under
any circumstances replace the vi-
gilance or the responsibility of the
driver.
Check the tyre pressures, including
the emergency spare wheel, once a
month.