ESP RENAULT ZOE 2017 1.G Owner's Manual
[x] Cancel search | Manufacturer: RENAULT, Model Year: 2017, Model line: ZOE, Model: RENAULT ZOE 2017 1.GPages: 220, PDF Size: 4.07 MB
Page 110 of 220
2.16
ABS (anti-lock braking
system)
Under heavy braking, the ABS prevents
the wheels from locking, allowing the
stopping distance to be managed and
keeping control of the vehicle.
Under these circumstances, the vehi-
cle can be steered to avoid an obstacle
whilst braking. In addition, this system
can increase stopping distances, parti-
cularly on roads with low surface grip
(wet ground etc.).
You will feel a pulsation through the
brake pedal each time the system is
activated. The ABS does not in any way
improve the vehicle’s physical perfor-
mance relating to the road surface and
roadholding. It is still essential to follow
the rules of good driving practice (such
as driving at a safe distance from the
vehicle in front etc.).
These include:
– the ABS
(anti-lock braking
system);
– the electronic stability program
ESC with understeer control and
traction control;
– emergency braking assistance with (depending on the vehicle)
braking anticipation;
– regenerative braking system.
In an emergency, apply firm and
continuous pressure to the brake
pedal. There is no need to pump
it repeatedly. The ABS will modu-
late the force applied in the braking
system.
These functions are an ad-
ditional aid in the event of
critical driving conditions,
enabling the vehicle beha-
viour to be adapted to suit the dri-
ving conditions.
However, the functions do not take
the place of the driver. They do
not increase the vehicle’s limits
and should not encourage you
to drive more quickly. Therefore,
they can under no circumstances
replace the vigilance or responsibi-
lity of the driver when manoeuvring
the vehicle (the driver must always
be ready for sudden incidents which
may occur when driving).
Your braking systems
are partially operational.
However, it is dangerous
to brake suddenly and
it is essential to stop immediately,
as soon as traffic conditions allow.
Contact an approved dealer.
Operating faults
–
© and x lit up on the in-
strument panel, (depending on the
vehicle) alongside messages “Check
ABS”, “Check braking system” and
“Check ESC”: ABS, ESC and emer-
gency brake assist are deactivated.
Braking is always enabled;
–
x, D, © and û lit
up on the instrument panel alongside
the message “Braking system fault”:
this indicates a fault in the braking
system.
In both cases, please consult an
Authorised Dealer.
DRIVER CORRECTION DEVICES/AIDS (1/5)
Page 118 of 220
2.24
CRUISE CONTROL (1/4)
The cruise control function helps you to
maintain your driving speed at a speed
that you choose, called the cruising
speed.
This cruising speed may be set at any
speed above 20 mph (30 km/h).
The cruise control function
is in no way linked to the
braking system.
This function is an addi-
tional driving aid. The func-
tion does not take the place
of the driver. Therefore, it
can under no circumstances replace
the driver’s responsibility to respect
speed limits and to be vigilant (the
driver must always be ready to
brake). Cruise control must not be
used in heavy traffic, on winding or
slippery roads (black ice, aquaplan-
ing, gravel) and during bad weather
(fog, rain, side winds etc.).
There is a risk of accidents.
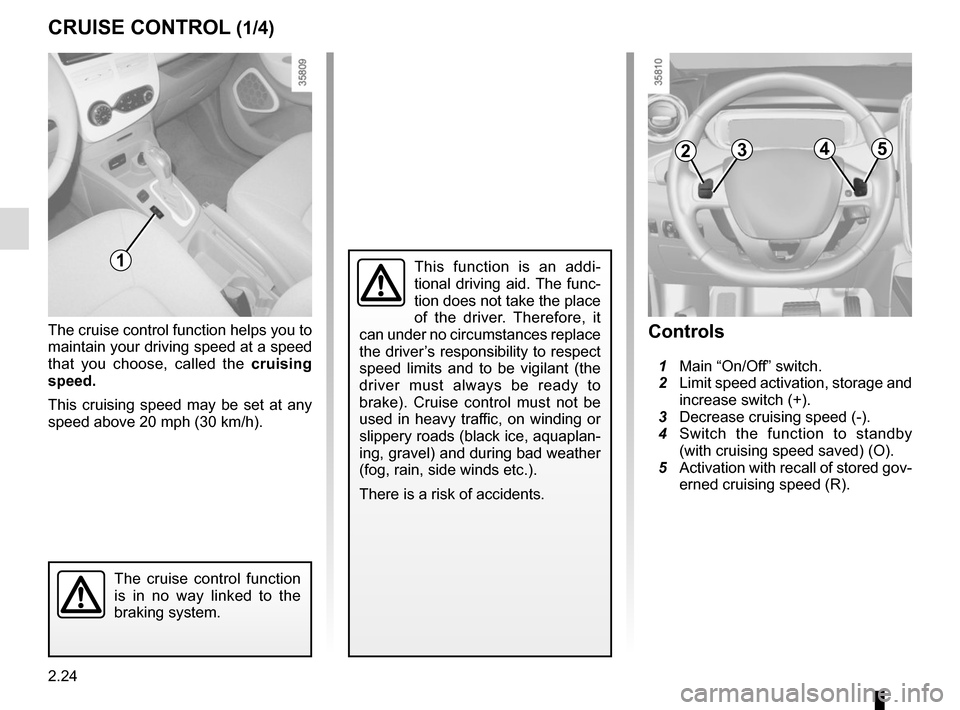
Controls
1 Main “On/Off” switch.
2 Limit speed activation, storage and
increase switch (+).
3 Decrease cruising speed (-).
4 Switch the function to standby
(with cruising speed saved) (O).
5 Activation with recall of stored gov-
erned cruising speed (R).
2354
1
Page 122 of 220
2.28
PARKING DISTANCE CONTROL (1/2)
Operating principle
Ultrasonic detectors, installed in the
rear bumper (depending on the vehi-
cle), measure the distance between the
vehicle and an obstacle whilst revers-
ing.
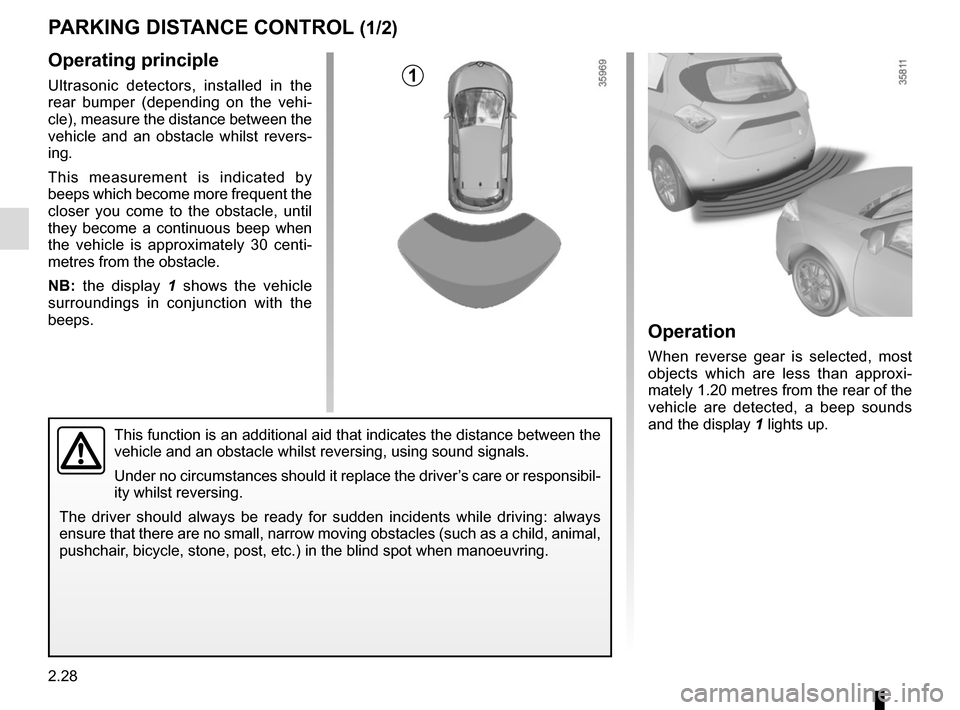
This measurement is indicated by
beeps which become more frequent the
closer you come to the obstacle, until
they become a continuous beep when
the vehicle is approximately 30 centi-
metres from the obstacle.
NB: the display 1 shows the vehicle
surroundings in conjunction with the
beeps.
This function is an additional aid that indicates the distance between t\
he
vehicle and an obstacle whilst reversing, using sound signals.
Under no circumstances should it replace the driver’s care or responsibil-
ity whilst reversing.
The driver should always be ready for sudden incidents while driving: al\
ways
ensure that there are no small, narrow moving obstacles (such as a chil\
d, animal,
pushchair, bicycle, stone, post, etc.) in the blind spot when manoeuvring.
Operation
When reverse gear is selected, most
objects which are less than approxi-
mately 1.20 metres from the rear of the
vehicle are detected, a beep sounds
and the display 1 lights up.
1
Page 125 of 220
2.31
REVERSING CAMERA (2/2)
This function is an additional aid. It cannot, therefore, under any circ\
um-
stances replace the vigilance or the responsibility of the driver.
The driver should always be ready for sudden incidents while driving:
always ensure that there are no small, narrow moving obstacles (such
as a child, animal, pushchair, bicycle, stone, post, etc.) in the blind spot when
manoeuvring.
The screen shows a reverse image.
The frames are a representation
projected onto flat ground; this in-
formation must not be taken into
account when superimposed on a
vertical object or an object on the
ground.
Objects which appear on the edge
of the screen may be deformed.
In very bright light (snow, vehicle in
sunshine etc.), the camera vision
may be adversely affected.
If the boot is open or poorly closed,
the message “Boot open” appears
and the camera display disappears.
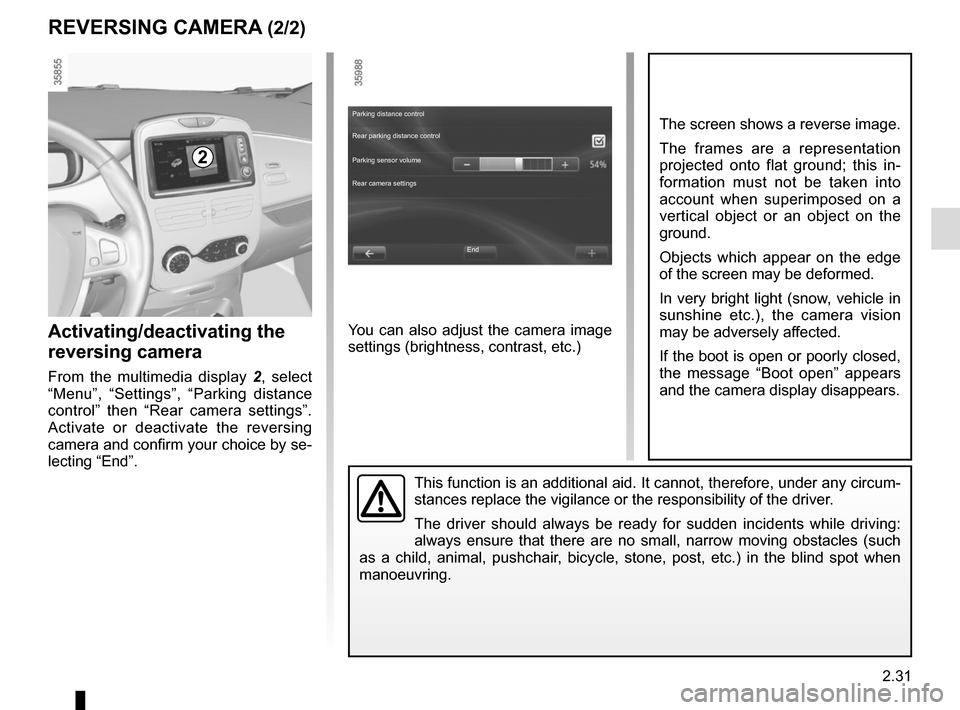
Activating/deactivating the
reversing camera
From the multimedia display 2 , select
“Menu”, “Settings”, “Parking distance
control” then “Rear camera settings”.
Activate or deactivate the reversing
camera and confirm your choice by se-
lecting “End”.
2
You can also adjust the camera image
settings (brightness, contrast, etc.)
End
Parking distance control
Rear parking distance control
Parking sensor volume
Rear camera settings
Page 134 of 220
3.8
AIR CONDITIONING: remote activation
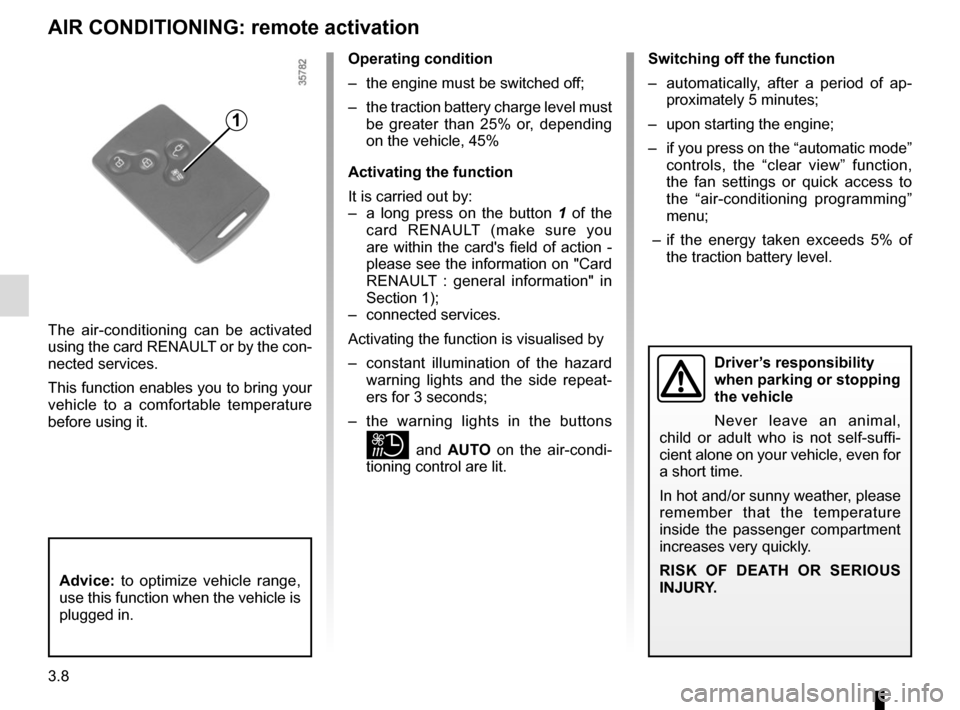
The air-conditioning can be activated
using the card RENAULT or by the con-
nected services.
This function enables you to bring your
vehicle to a comfortable temperature
before using it.
1
Operating condition
– the engine must be switched off;
– the traction battery charge level must be greater than 25% or, depending
on the vehicle, 45%
Activating the function
It is carried out by:
– a long press on the button 1 of the
card RENAULT (make sure you
are within the card's field of action -
please see the information on "Card
RENAULT : general information" in
Section 1);
– connected services.
Activating the function is visualised by
– constant illumination of the hazard warning lights and the side repeat-
ers for 3 seconds;
– the warning lights in the buttons
and AUTO on the air-condi-
tioning control are lit. Switching off the function
– automatically, after a period of ap-
proximately 5 minutes;
– upon starting the engine;
– if you press on the “automatic mode” controls, the “clear view” function,
the fan settings or quick access to
the “air-conditioning programming”
menu;
– if the energy taken exceeds 5% of the traction battery level.
Driver’s responsibility
when parking or stopping
the vehicle
Never leave an animal,
child or adult who is not self-suffi-
cient alone on your vehicle, even for
a short time.
In hot and/or sunny weather, please
remember that the temperature
inside the passenger compartment
increases very quickly.
RISK OF DEATH OR SERIOUS
INJURY.
Advice: to optimize vehicle range,
use this function when the vehicle is
plugged in.
Page 135 of 220
3.9
AIR CONDITIONING: programming (1/4)
Adjusting the programming
With the vehicle connected to a power
source, this function enables:
– a comfortable temperature prior to using the vehicle;
– optimisation of the vehicle range.
The programmable air-conditioning
is triggered the hour before the pro-
grammed hour in order to reach a com-
fortable temperature.
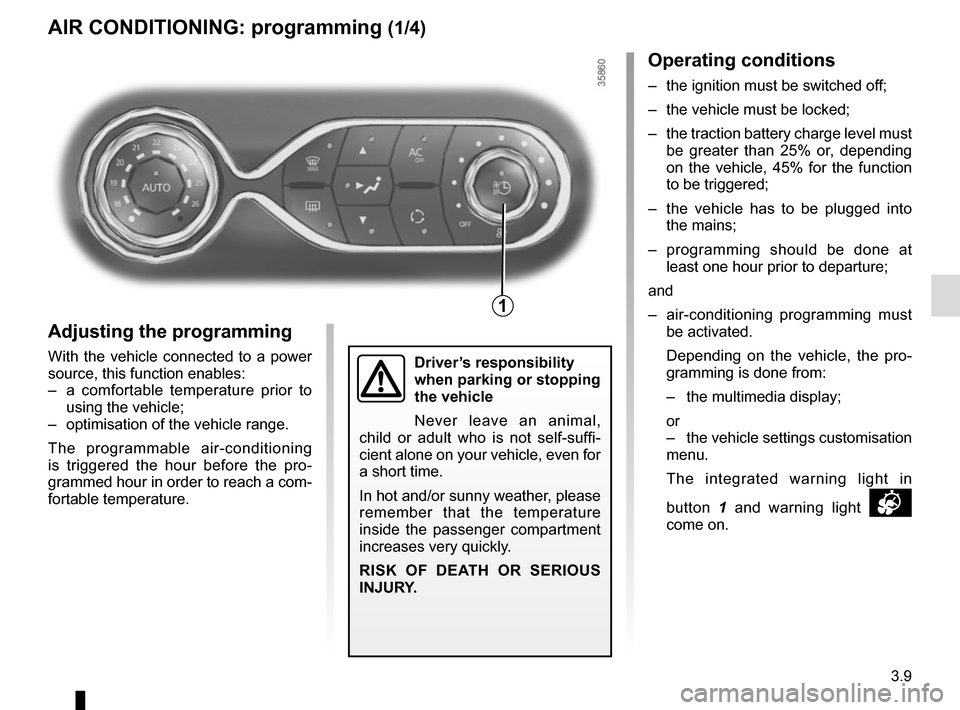
1
Driver’s responsibility
when parking or stopping
the vehicle
Never leave an animal,
child or adult who is not self-suffi-
cient alone on your vehicle, even for
a short time.
In hot and/or sunny weather, please
remember that the temperature
inside the passenger compartment
increases very quickly.
RISK OF DEATH OR SERIOUS
INJURY.
Operating conditions
– the ignition must be switched off;
– the vehicle must be locked;
– the traction battery charge level must be greater than 25% or, depending
on the vehicle, 45% for the function
to be triggered;
– the vehicle has to be plugged into the mains;
– programming should be done at least one hour prior to departure;
and
– air-conditioning programming must be activated.
Depending on the vehicle, the pro- gramming is done from:
– the multimedia display;
or
– the vehicle settings customisation menu.
The integrated warning light in
button 1 and warning light
come on.
Page 138 of 220

3.12
Stopping the programmed air
conditioning
The air conditioning stops automati-
cally around ten minutes after the set
end time.
However, the function can be deacti-
vated if:
– the charging socket is disconnected;
– the “Remote Activation” function is activated – please see the informa-
tion on “Air conditioning: remote acti-
vation” in Section 2;
– the traction battery charging level is lower than 15% or, depending on the
vehicle, 30%Driver’s responsibility
when parking or stopping
the vehicle
Never leave an animal,
child or adult who is not self-suffi-
cient alone on your vehicle, even for
a short time.
In hot and/or sunny weather, please
remember that the temperature
inside the passenger compartment
increases very quickly.
RISK OF DEATH OR SERIOUS
INJURY.
AIR CONDITIONING: programming (4/4)
Connected services
The air conditioning can also be acti-
vated using the connected services.
For more information regarding the op-
erating conditions, please contact an
authorised dealer.
“Programme” activation
– With the ignition switched on and the air-conditioning operating (please
refer to the information on “Automatic
air-conditioning” in Section 3);
– press the button 1.
The function is triggered one hour prior
to the programmed time to reach a
comfortable temperature.
The warning lights integrated in the
button 1, the AUTO button 2 and the
warning light
on the instrument
panel are lit up.
12
Page 142 of 220
3.16
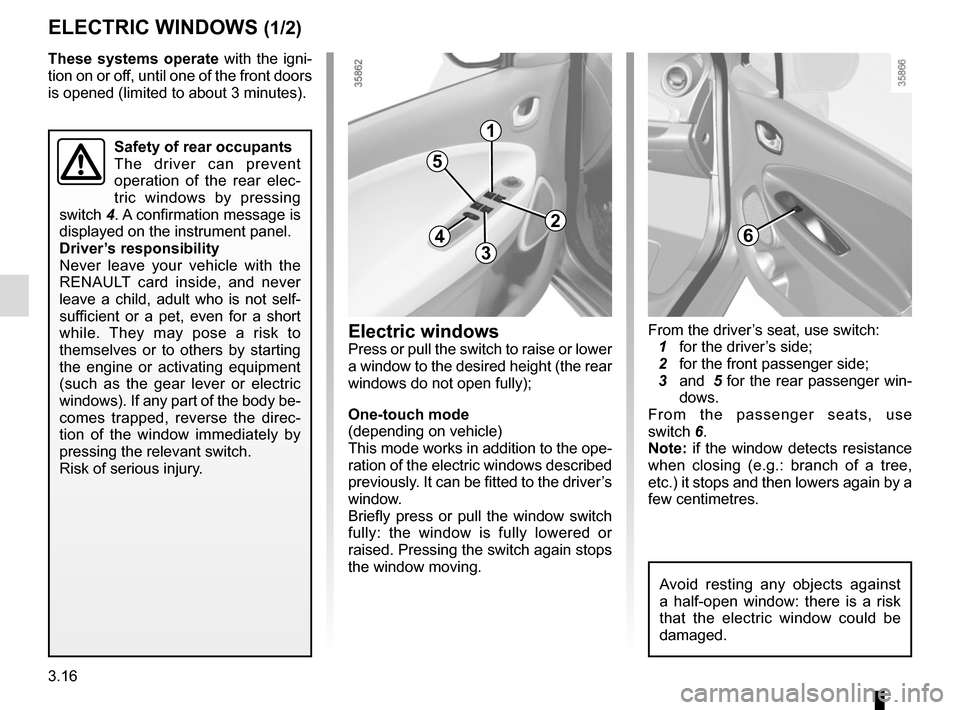
Safety of rear occupants
The driver can prevent
operation of the rear elec-
tric windows by pressing
switch 4. A confirmation message is
displayed on the instrument panel.
Driver’s responsibility
Never leave your vehicle with the
RENAULT card inside, and never
leave a child, adult who is not self-
sufficient or a pet, even for a short
while. They may pose a risk to
themselves or to others by starting
the engine or activating equipment
(such as the gear lever or electric
windows). If any part of the body be-
comes trapped, reverse the direc-
tion of the window immediately by
pressing the relevant switch.
Risk of serious injury.
ELECTRIC WINDOWS (1/2)
These systems operate with the igni-
tion on or off, until one of the front doors
is opened (limited to about 3 minutes).
From the driver’s seat, use switch:
1 for the driver’s side;
2 for the front passenger side;
3 and 5 for the rear passenger win-
dows.
From the passenger seats, use
switch 6.
Note: if the window detects resistance
when closing (e.g.: branch of a tree,
etc.) it stops and then lowers again by a
few centimetres.Electric windowsPress or pull the switch to raise or lower
a window to the desired height (the rear
windows do not open fully);
One-touch mode
(depending on vehicle)
This mode works in addition to the ope-
ration of the electric windows described
previously. It can be fitted to the driver’s
window.
Briefly press or pull the window switch
fully: the window is fully lowered or
raised. Pressing the switch again stops
the window moving.
1
2
34
5
6
Avoid resting any objects against
a half-open window: there is a risk
that the electric window could be
damaged.
Page 151 of 220
3.25
Do not place any objects,
especially heavy or hard
objects, on the parcel shelf.
These may pose a risk to
the vehicle occupants if the driver
has to brake suddenly or if the vehi-
cle is involved in an accident.
Rear parcel shelf
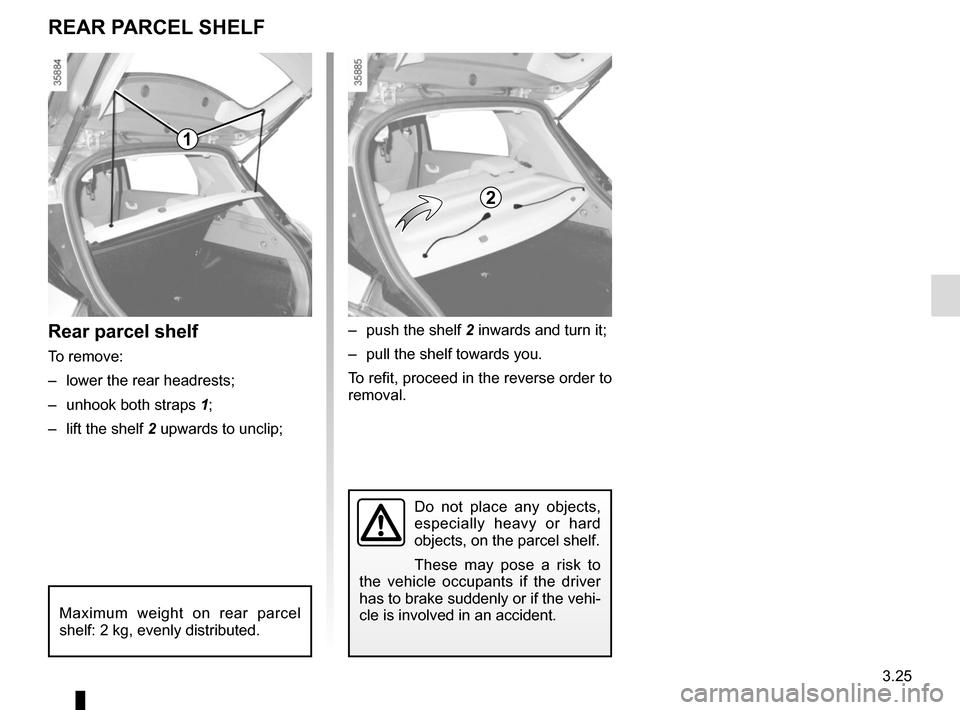
To remove:
– lower the rear headrests;
– unhook both straps 1;
– lift the shelf 2 upwards to unclip;
REAR PARCEL SHELF
Maximum weight on rear parcel
shelf: 2 kg, evenly distributed.
1
2
– push the shelf 2 inwards and turn it;
– pull the shelf towards you.
To refit, proceed in the reverse order to
removal.
Page 152 of 220
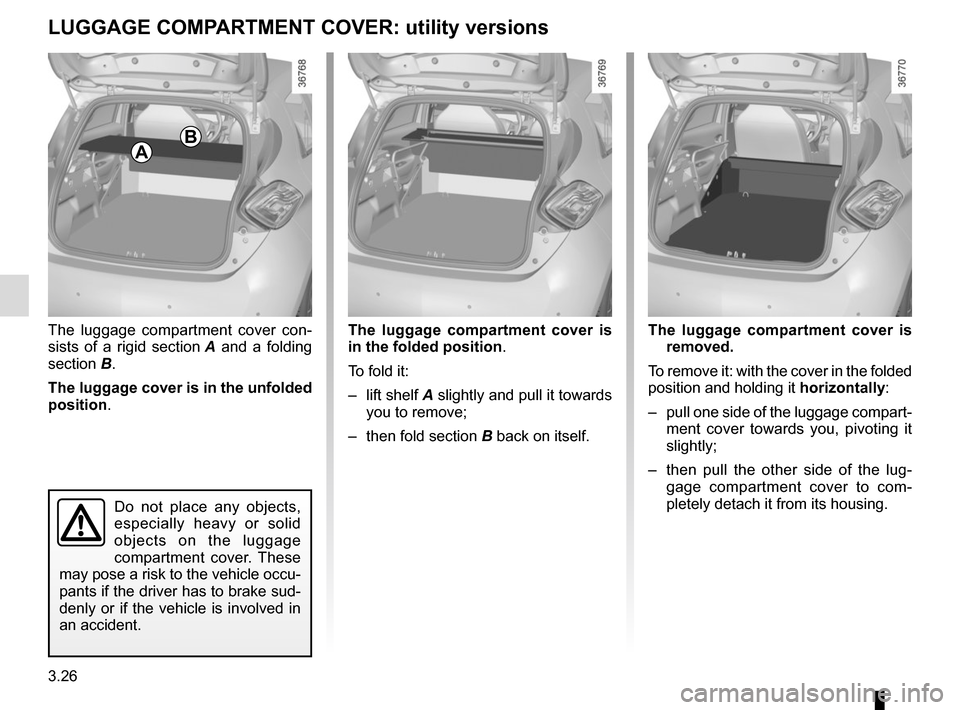
3.26
The luggage compartment cover con-
sists of a rigid section A and a folding
section B.
The luggage cover is in the unfolded
position . The luggage compartment cover is
removed.
To remove it: with the cover in the folded
position and holding it horizontally:
– pull one side of the luggage compart- ment cover towards you, pivoting it
slightly;
– then pull the other side of the lug- gage compartment cover to com-
pletely detach it from its housing.
LUGGAGE COMPARTMENT COVER: utility versions
Do not place any objects,
especially heavy or solid
objects on the luggage
compartment cover. These
may pose a risk to the vehicle occu-
pants if the driver has to brake sud-
denly or if the vehicle is involved in
an accident.
The luggage compartment cover is
in the folded position .
To fold it:
– lift shelf A slightly and pull it towards
you to remove;
– then fold section B back on itself.
AB