eco RENAULT ZOE 2017 1.G Repair Manual
[x] Cancel search | Manufacturer: RENAULT, Model Year: 2017, Model line: ZOE, Model: RENAULT ZOE 2017 1.GPages: 220, PDF Size: 4.07 MB
Page 163 of 220
4.7
SECONDARY 12 V BATTERY (2/2)Breakdown recovery
To avoid damaging your vehicle, do
not recharge the secondary 12 V
battery using:
– an external battery charger;
– a battery from another vehicle.
Please contact an Authorised
Dealer.
Do not disconnect the sec-
ondary 12 V battery.
Risk of serious burns or
electric shocks.
Do not use your electric vehicle to
restart the 12 volt battery in another
vehicle. The 12 volt electric power of
an electric vehicle is not enough to
perform such an operation.
Risk of damage to vehicle
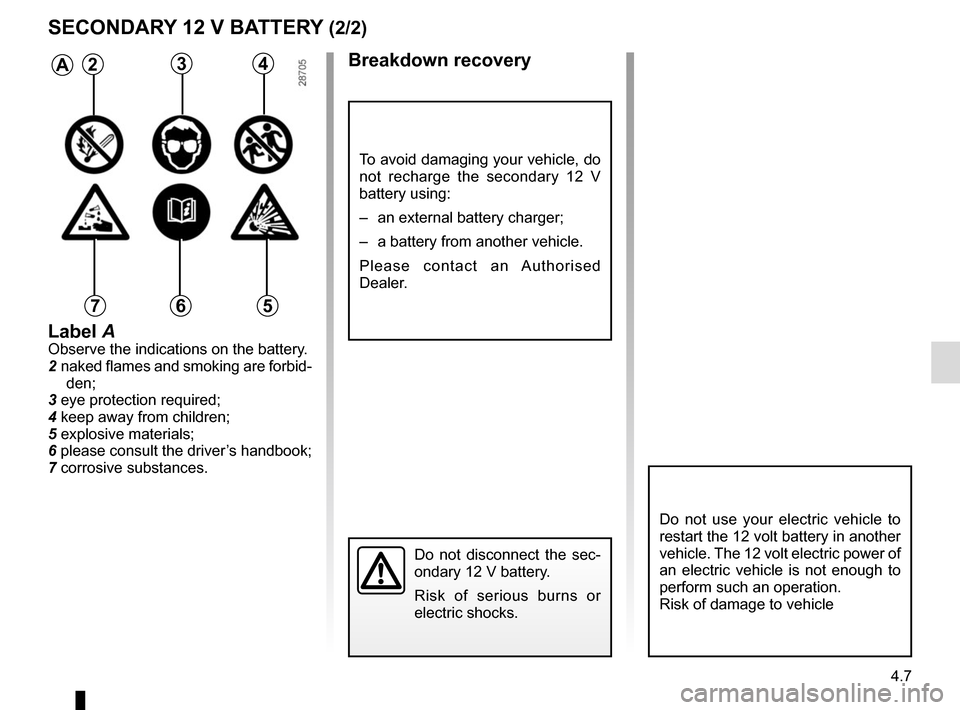
A234
567
Label AObserve the indications on the battery.
2 naked flames and smoking are forbid-
den;
3 eye protection required;
4 keep away from children;
5 explosive materials;
6 please consult the driver’s handbook;
7 corrosive substances.
Page 164 of 220
4.8
TYRE PRESSURE
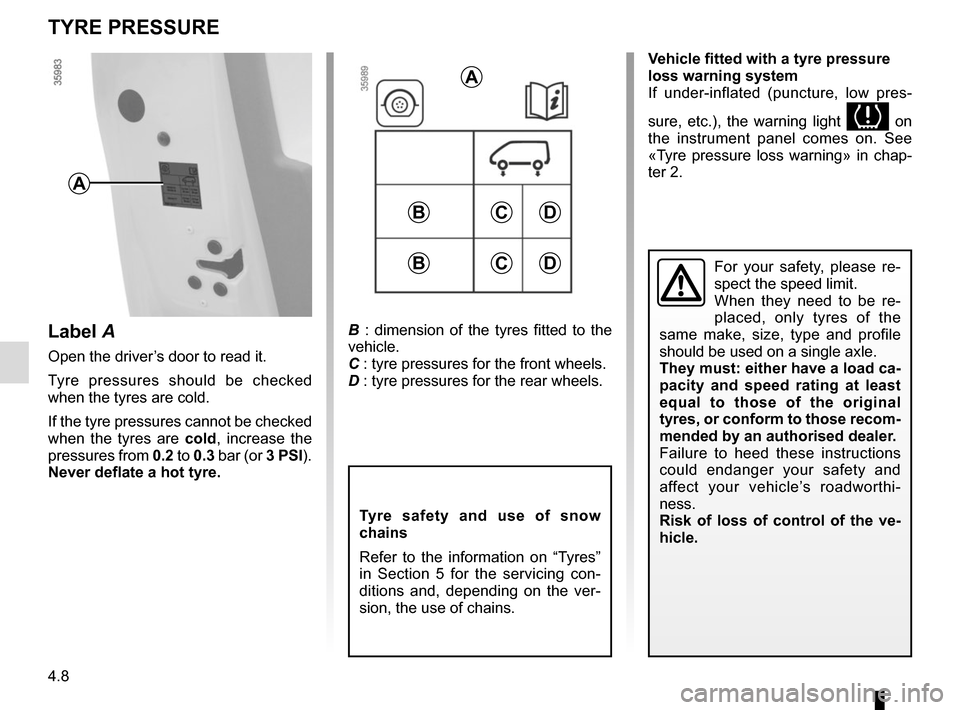
B : dimension of the tyres fitted to the
vehicle.
C : tyre pressures for the front wheels.
D : tyre pressures for the rear wheels.
Tyre safety and use of snow
chains
Refer to the information on “Tyres”
in Section 5 for the servicing con-
ditions and, depending on the ver-
sion, the use of chains.
CD
A
A
For your safety, please re-
spect the speed limit.
When they need to be re-
placed, only tyres of the
same make, size, type and profile
should be used on a single axle.
They must: either have a load ca-
pacity and speed rating at least
equal to those of the original
tyres, or conform to those recom-
mended by an authorised dealer.
Failure to heed these instructions
could endanger your safety and
affect your vehicle’s roadworthi-
ness.
Risk of loss of control of the ve-
hicle.
Label A
Open the driver’s door to read it.
Tyre pressures should be checked
when the tyres are cold.
If the tyre pressures cannot be checked
when the tyres are cold, increase the
pressures from 0.2 to 0.3 bar (or 3 PSI).
Never deflate a hot tyre.
B
CDB
Vehicle fitted with a tyre pressure
loss warning system
If under-inflated (puncture, low pres-
sure, etc.), the warning light
on
the instrument panel comes on. See
«Tyre pressure loss warning» in chap-
ter 2.
Page 165 of 220
4.9
BODYWORK MAINTENANCE (1/2)
What you should not doDo not degrease or clean mechani-
cal components (e.g. the engine com-
partment), underneath the body, parts
with hinges (e.g. inside the doors) and
painted plastic external fittings (e.g.
bumpers) using high-pressure clean-
ing equipment or by spraying on prod-
ucts not approved by our Technical
Department. Doing this could give rise
to corrosion or operational faults.
Wash the vehicle in bright sunlight or
freezing temperatures.
Do not scrape off mud or dirt without
pre-wetting.
Allow dirt to accumulate on the exterior.
Allow rust to form following minor im-
pacts.
Do not use solvents not approved by
our Technical Department to remove
stains as this could damage the paint-
work.
Do not drive in snow or muddy condi-
tions without washing the vehicle, par-
ticularly under the wheel arches and
body.
A well-maintained vehicle will last
longer. It is therefore recommended to
maintain the exterior of the vehicle reg-
ularly.
Your vehicle has been treated with very
effective anti-corrosion products. It is
nevertheless subject to various outside
influences.
Corrosive agents in the atmosphere
–
atmospheric pollution (built-up and
industrial areas),
– saline atmospheres (near the sea,
particularly in hot weather),
– seasonal and damp weather condi-
tions (e.g. road salt in winter, water
from road cleaners, etc.).
Minor impacts
Abrasive action
Dust and sand in the air, mud, road grit
thrown up by other vehicles, etc.
You should take a number of minor pre-
cautions in order to safeguard your ve-
hicle against such risks.You should
Wash your car frequently, with the
engine off , with cleaning products rec-
ommended by the manufacturer (never
use abrasive products). Rinse thor-
oughly beforehand with a jet:
– spots of tree resin and industrial
grime;
– mud in the wheel arches and under-
neath the body which forms damp
patches;
– bird droppings , which cause a
chemical reaction with the paint that
rapidly discolours paintwork and
may even cause the paint to peel
off;
wash the vehicle immediately to
remove these marks since it is im-
possible to remove them by polish-
ing;
– salt, particularly in the wheel arches
and underneath the body after driv-
ing in areas where the roads have
been gritted.
Withdraw the vegetable falls (resin, film
etc.) from the vehicle regularly.
Page 167 of 220
4.11
Glass instrument panel(e.g.: instrument panel, clock, exterior
temperature display, radio display, mul-
timedia or multifunction display etc.)
Use a soft cloth (or cotton wool).
If this does not clean them properly,
use a soft cloth (or cotton wool) slightly
moistened with soapy water and then
wipe clean with another soft damp cloth
or cotton wool.
Finally, carefully dry off with a soft dry
cloth.
Do not use products containing alco-
hol and/or spray fluids on the area.
Seat belts
These must be kept clean.
Use products selected by our Technical
Department (Approved outlets) or
warm, soapy water and a sponge and
wipe with a dry cloth.
Detergents or dyes must not be used
under any circumstances.
INTERIOR TRIM MAINTENANCE (1/2)
Textiles (seats, door trim, etc)
Vacuum-clean the textiles regularly.
Liquid stain
Use soapy water.
Dab lightly (never rub) with a soft cloth,
rinse and remove the excess.
Solid or pasty stain
Carefully remove the excess solid or
pasty material immediately with a
spatula (working from the edges to the
centre to avoid spreading the stain).
Clean as for a liquid stain.
Special instructions for sweets or
chewing gum
Put an ice cube on the stain to solidify
it, then proceed as for a solid stain.
A well-maintained vehicle will last
longer. It is therefore recommended to
maintain the interior of the vehicle regu-
larly.
A stain should always be dealt with
swiftly.
Whatever type of stain is on the trim,
use
cold (or warm) soapy water with
natural soap.
Detergents (washing-up liquid, pow-
dered products, alcohol-based prod-
ucts) should not be used.
Use a soft cloth.
Rinse and soak up the excess.
For further recommendations for
maintaining the interior, and/or for
any unsatisfactory results, please
see an authorised dealer.
Page 168 of 220
4.12
You are strongly recom-
mended not to use high-
pressure or spray cleaning
equipment inside the pas-
senger compartment: use of such
equipment could impair the correct
functioning of the electrical or elec-
tronic components in the vehicle, or
have other detrimental effects.
INTERIOR TRIM MAINTENANCE (2/2)
You should not:
You are strongly advised not to po-
sition objects such as deodorants,
scents, etc. near air vents, as this could
damage your dashboard trim.
Removal/replacing removable
equipment originally fitted in
the vehicle
If you need to remove equipment in
order to clean the passenger com-
partment (for example, mats), always
ensure that they are correctly refitted
and are the right way around (the driv-
er’s mat should be fitted on the driver’s
side, etc.) and fit them with the compo-
nents supplied with the equipment (for
example, the driver mat should always
be fixed using the pre-fitted mounting
components).
With the vehicle stationary, always
ensure that nothing will impede driving
(anything obstructing the pedals, heel
wedged by the mat etc.).
Page 172 of 220
5.4
TYRE PRESSURE KIT (2/3)
Depending on the vehicle, in the event
of a puncture, use the kit located in the
boot or underneath the luggage com-
partment carpet.
Vehicle fitted with a tyre pressure
loss warning system
If under-inflated (puncture, low pres-
sure, etc.), the warning light
lights up on the instrument panel. See
“Tyre pressure loss warning” in
Section 2.
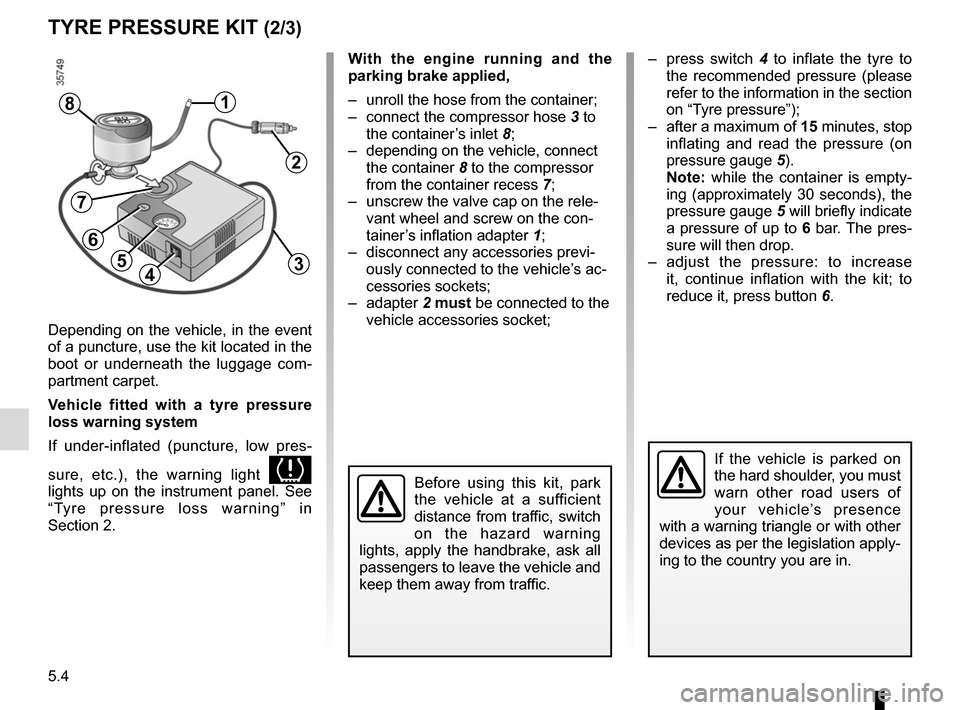
With the engine running and the
parking brake applied,
– unroll the hose from the container;
– connect the compressor hose 3 to
the container’s inlet 8;
– depending on the vehicle, connect the container 8 to the compressor
from the container recess 7;
– unscrew the valve cap on the rele- vant wheel and screw on the con-
tainer’s inflation adapter 1;
– disconnect any accessories previ- ously connected to the vehicle’s ac-
cessories sockets;
– adapter 2 must be connected to the
vehicle accessories socket;
45
1
Before using this kit, park
the vehicle at a sufficient
distance from traffic, switch
on the hazard warning
lights, apply the handbrake, ask all
passengers to leave the vehicle and
keep them away from traffic.
8
If the vehicle is parked on
the hard shoulder, you must
warn other road users of
your vehicle’s presence
with a warning triangle or with other
devices as per the legislation apply-
ing to the country you are in.
– press switch 4 to inflate the tyre to
the recommended pressure (please
refer to the information in the section
on “Tyre pressure”);
– after a maximum of 15 minutes, stop inflating and read the pressure (on
pressure gauge 5).
Note: while the container is empty-
ing (approximately 30 seconds), the
pressure gauge 5 will briefly indicate
a pressure of up to 6 bar. The pres-
sure will then drop.
– adjust the pressure: to increase it, continue inflation with the kit; to
reduce it, press button 6.
2
3
7
6
Page 173 of 220
5.5
TYRE PRESSURE KIT (3/3)
If a minimum pressure of 1.8 bar is
not reached after 15 minutes, repair
is not possible; do not drive the ve-
hicle but contact an approved dealer.
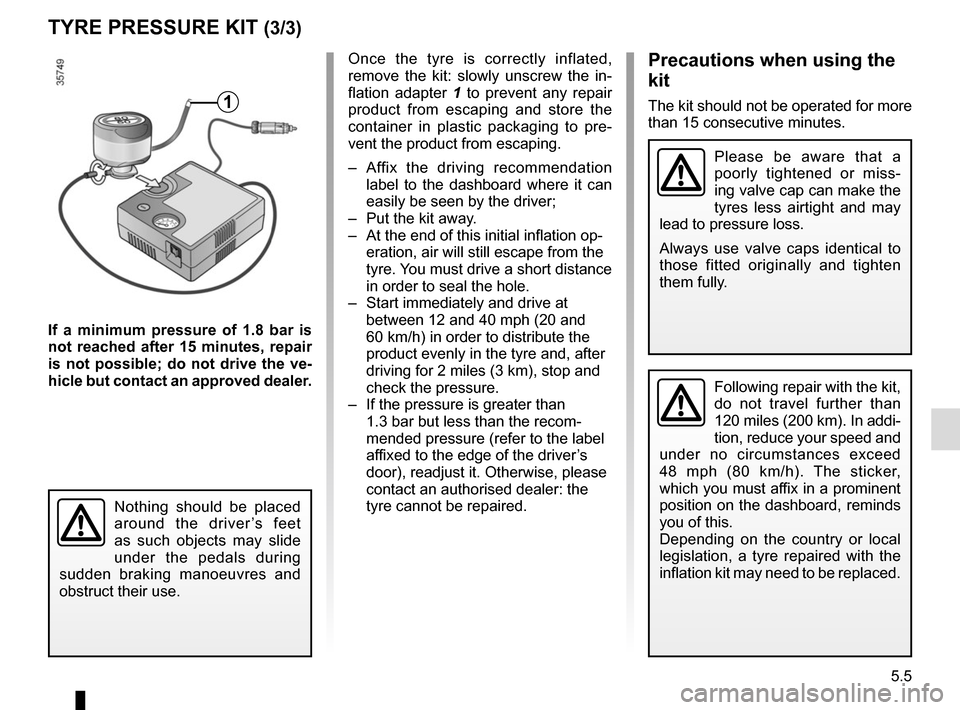
Once the tyre is correctly inflated,
remove the kit: slowly unscrew the in-
flation adapter 1 to prevent any repair
product from escaping and store the
container in plastic packaging to pre-
vent the product from escaping.
– Affix the driving recommendation label to the dashboard where it can
easily be seen by the driver;
– Put the kit away.
– At the end of this initial inflation op- eration, air will still escape from the
tyre. You must drive a short distance
in order to seal the hole.
– Start immediately and drive at between 12 and 40 mph (20 and
60 km/h) in order to distribute the
product evenly in the tyre and, after
driving for 2 miles (3 km), stop and
check the pressure.
– If the pressure is greater than 1.3 bar but less than the recom-
mended pressure (refer to the label
affixed to the edge of the driver’s
door), readjust it. Otherwise, please
contact an authorised dealer: the
tyre cannot be repaired.Precautions when using the
kit
The kit should not be operated for more
than 15 consecutive minutes.
Nothing should be placed
around the driver’s feet
as such objects may slide
under the pedals during
sudden braking manoeuvres and
obstruct their use.
1
Please be aware that a
poorly tightened or miss-
ing valve cap can make the
tyres less airtight and may
lead to pressure loss.
Always use valve caps identical to
those fitted originally and tighten
them fully.
Following repair with the kit,
do not travel further than
120 miles (200 km). In addi-
tion, reduce your speed and
under no circumstances exceed
48 mph (80 km/h). The sticker,
which you must affix in a prominent
position on the dashboard, reminds
you of this.
Depending on the country or local
legislation, a tyre repaired with the
inflation kit may need to be replaced.
Page 174 of 220
5.6
TYRES (1/3)
Maintaining the tyres
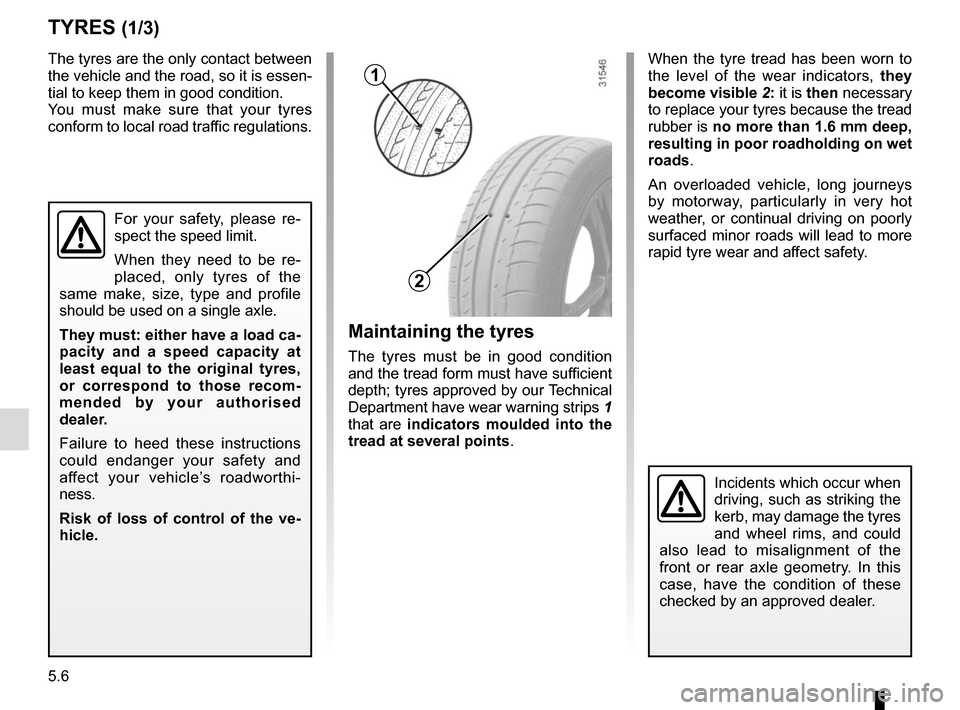
The tyres must be in good condition
and the tread form must have sufficient
depth; tyres approved by our Technical
Department have wear warning strips 1
that are indicators moulded into the
tread at several points.
The tyres are the only contact between
the vehicle and the road, so it is essen-
tial to keep them in good condition.
You must make sure that your tyres
conform to local road traffic regulations.
When the tyre tread has been worn to
the level of the wear indicators,
they
become visible 2: it is then necessary
to replace your tyres because the tread
rubber is no more than 1.6 mm deep,
resulting in poor roadholding on wet
roads.
An overloaded vehicle, long journeys
by motorway, particularly in very hot
weather, or continual driving on poorly
surfaced minor roads will lead to more
rapid tyre wear and affect safety.
For your safety, please re-
spect the speed limit.
When they need to be re-
placed, only tyres of the
same make, size, type and profile
should be used on a single axle.
They must: either have a load ca-
pacity and a speed capacity at
least equal to the original tyres,
or correspond to those recom-
mended by your authorised
dealer.
Failure to heed these instructions
could endanger your safety and
affect your vehicle’s roadworthi-
ness.
Risk of loss of control of the ve-
hicle.
Incidents which occur when
driving, such as striking the
kerb, may damage the tyres
and wheel rims, and could
also lead to misalignment of the
front or rear axle geometry. In this
case, have the condition of these
checked by an approved dealer.
2
1
Page 176 of 220
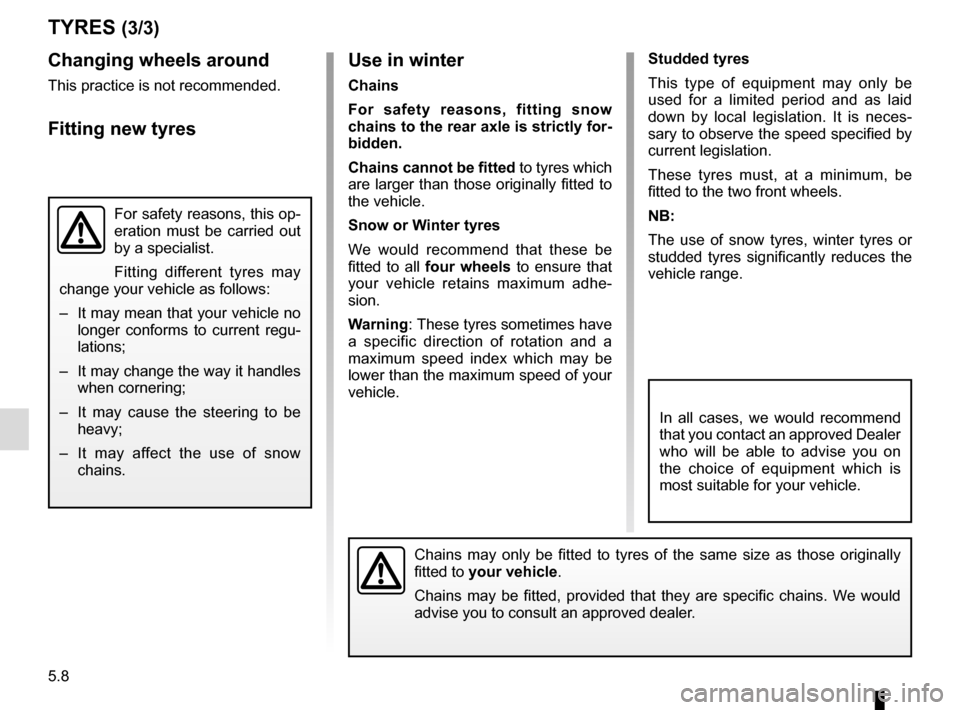
5.8
Studded tyres
This type of equipment may only be
used for a limited period and as laid
down by local legislation. It is neces-
sary to observe the speed specified by
current legislation.
These tyres must, at a minimum, be
fitted to the two front wheels.
NB:
The use of snow tyres, winter tyres or
studded tyres significantly reduces the
vehicle range.
TYRES (3/3)
Changing wheels around
This practice is not recommended.
Fitting new tyres
For safety reasons, this op-
eration must be carried out
by a specialist.
Fitting different tyres may
change your vehicle as follows:
– It may mean that your vehicle no longer conforms to current regu-
lations;
– It may change the way it handles when cornering;
– It may cause the steering to be heavy;
– It may affect the use of snow chains.
Use in winter
Chains
For safety reasons, fitting snow
chains to the rear axle is strictly for-
bidden.
Chains cannot be fitted to tyres which
are larger than those originally fitted to
the vehicle.
Snow or Winter tyres
We would recommend that these be
fitted to all four wheels to ensure that
your vehicle retains maximum adhe-
sion.
Warning : These tyres sometimes have
a specific direction of rotation and a
maximum speed index which may be
lower than the maximum speed of your
vehicle.
In all cases, we would recommend
that you contact an approved Dealer
who will be able to advise you on
the choice of equipment which is
most suitable for your vehicle.
Chains may only be fitted to tyres of the same size as those originally
fitted to your vehicle.
Chains may be fitted, provided that they are specific chains. We would
advise you to consult an approved dealer.
Page 185 of 220

5.17
ACCESSORIES
Electrical and electronic accessories
Before installing this type of accessory (particularly for transmitters\
/receivers: frequency bandwidth, power level, po-
sition of the aerial, etc.), make sure it is compatible with your vehic\
le. You can get advice from an authorised dealer.
Connect accessories with a maximum power of 120 Watts only. Fire hazard. When several accessory sockets are
used at the same time, the total power of the connected accessories must\
not exceed 180 watts.
No work may be carried out on the vehicle’s electrical or radio circuits, except by approved Dealers: an incorrect\
ly connected
system may result in damage being caused to the electrical equipment and\
/or the components connected to it.
If the vehicle is fitted with any aftermarket electrical equipment, make\
sure that the installation is correctly protected by a fuse.
Establish the rating and position of this fuse.
Using the diagnostic socket
The use of electronic accessories on the diagnostic socket may cause ser\
ious disturbance to the vehicle’s electronic systems.
For your safety we recommend that you use only electronic accessories ap\
proved by the manufacturer, consult an Approved
Dealer. Serious accident risk.
Use of transmission/receiving devices (telephones, CB equipment etc.).\
Telephones and CB equipment with integrated aerials may cause interferenc\
e to the electronic systems originally fitted to the
vehicle: it is advisable only to use equipment with an external aerial. \
Furthermore, we remind you of the need to conform
to the legislation in force concerning the use of such equipment.
Fitting after-market accessories
If you wish to install accessories on the vehicle: please contact an aut\
horised dealer. Also, to ensure the correct operation o f
your vehicle, and to avoid any risk to your safety, we recommend that you use only accessories specifically designed for y\
our
vehicle, which are the only accessories for which the manufacturer will \
provide a warranty.
If you are using an anti-theft device, only attach it to the brake pedal\
.
Obstructions to the driver
On the driver’s side, only use mats suitable for the vehicle, attached with the pre-fi\
tted components, and check the fitting re gu-
larly. Do not lay one mat on top of another. There is a risk of wedging the pedals