eco RENAULT ZOE 2017 1.G Workshop Manual
[x] Cancel search | Manufacturer: RENAULT, Model Year: 2017, Model line: ZOE, Model: RENAULT ZOE 2017 1.GPages: 220, PDF Size: 4.07 MB
Page 123 of 220
2.29
PARKING DISTANCE CONTROL (2/2)
In the event of an impact to
the underside of the vehicle
(e.g.: striking a post, raised
kerb or other street furni-
ture), this may result in damage to
the vehicle (e.g.: twisted axle), the
electrical circuit or the traction bat-
tery.
To avoid any risk of accident, have
your vehicle checked by an ap-
proved dealer.
Operating faults
Depending on the vehicle, when the
system detects an operating fault, the
message “check parking distance con-
trol” appears on the instrument panel,
accompanied by the warning light
© and a beep lasting approxi-
mately 5 seconds. Please contact an
authorised dealer.
Special featuresMake sure that the ultrasonic sensors
are not obscured (by dirt, mud, snow
etc.).
Adjusting the parking
distance control volume
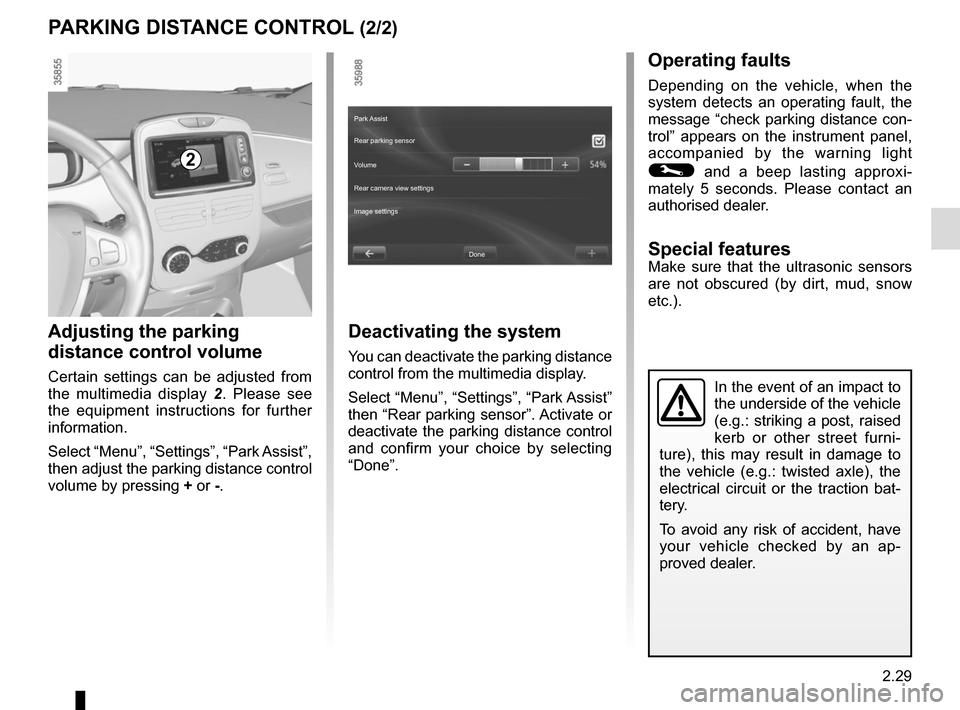
Certain settings can be adjusted from
the multimedia display 2. Please see
the equipment instructions for further
information.
Select “Menu”, “Settings”, “Park Assist”,
then adjust the parking distance control
volume by pressing + or -.
2
Deactivating the system
You can deactivate the parking distance
control from the multimedia display.
Select “Menu”, “Settings”, “Park Assist”
then “Rear parking sensor”. Activate or
deactivate the parking distance control
and confirm your choice by selecting
“Done”.
Done
Park Assist
Rear parking sensor
Volume
Image settings Rear camera view settings
Page 132 of 220
3.6
AUTOMATIC AIR-CONDITIONING (3/4)
Adjusting the ventilation
speed
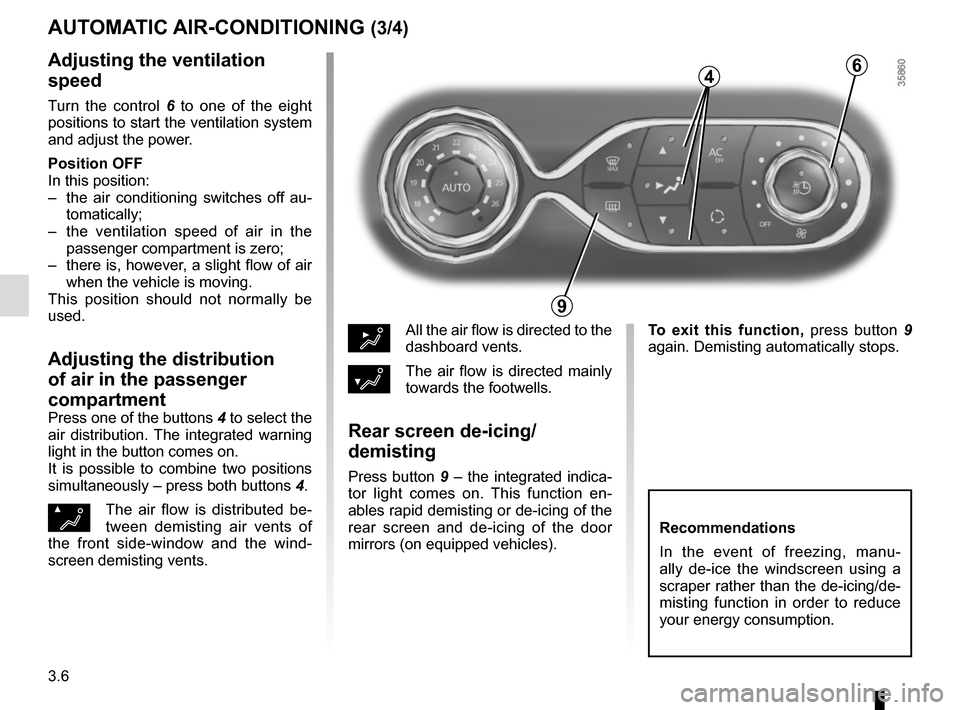
Turn the control 6 to one of the eight
positions to start the ventilation system
and adjust the power.
Position OFF
In this position:
– the air conditioning switches off au- tomatically;
– the ventilation speed of air in the passenger compartment is zero;
– there is, however, a slight flow of air when the vehicle is moving.
This position should not normally be
used.
Adjusting the distribution
of air in the passenger
compartment
Press one of the buttons 4 to select the
air distribution. The integrated warning
light in the button comes on.
It is possible to combine two positions
simultaneously – press both buttons 4.
ØThe air flow is distributed be-
tween demisting air vents of
the front side-window and the wind-
screen demisting vents.
½All the air flow is directed to the
dashboard vents.
¿The air flow is directed mainly
towards the footwells.
Rear screen de-icing/
demisting
Press button 9 – the integrated indica-
tor light comes on. This function en-
ables rapid demisting or de-icing of the
rear screen and de-icing of the door
mirrors (on equipped vehicles).
9
6
Recommendations
In the event of freezing, manu-
ally de-ice the windscreen using a
scraper rather than the de-icing/de-
misting function in order to reduce
your energy consumption.
To exit this function, press button 9
again. Demisting automatically stops.
4
Page 134 of 220
3.8
AIR CONDITIONING: remote activation
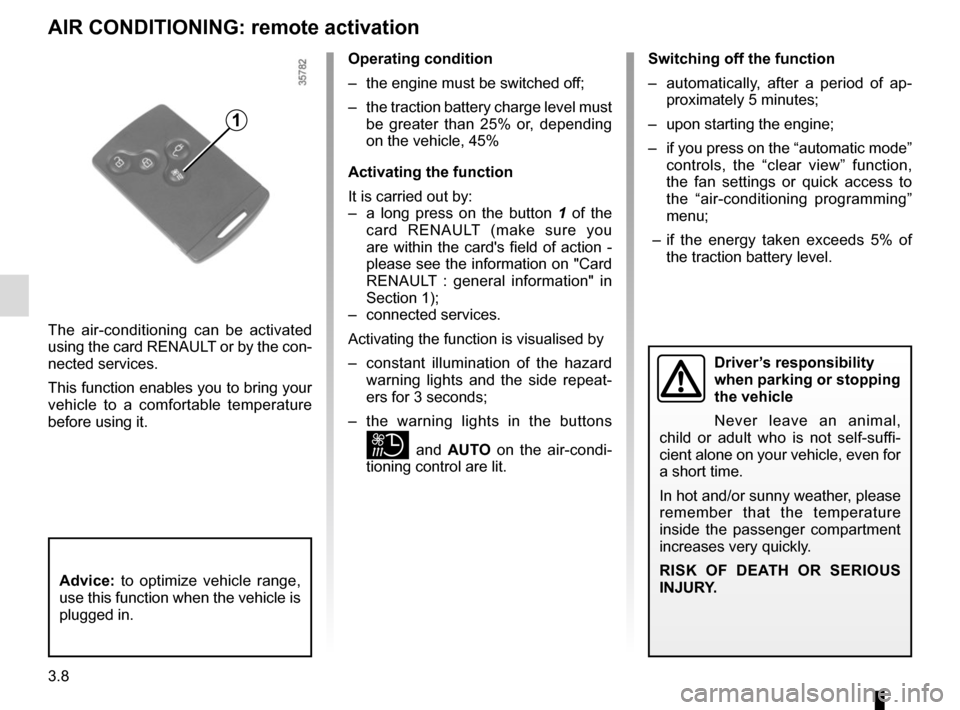
The air-conditioning can be activated
using the card RENAULT or by the con-
nected services.
This function enables you to bring your
vehicle to a comfortable temperature
before using it.
1
Operating condition
– the engine must be switched off;
– the traction battery charge level must be greater than 25% or, depending
on the vehicle, 45%
Activating the function
It is carried out by:
– a long press on the button 1 of the
card RENAULT (make sure you
are within the card's field of action -
please see the information on "Card
RENAULT : general information" in
Section 1);
– connected services.
Activating the function is visualised by
– constant illumination of the hazard warning lights and the side repeat-
ers for 3 seconds;
– the warning lights in the buttons
and AUTO on the air-condi-
tioning control are lit. Switching off the function
– automatically, after a period of ap-
proximately 5 minutes;
– upon starting the engine;
– if you press on the “automatic mode” controls, the “clear view” function,
the fan settings or quick access to
the “air-conditioning programming”
menu;
– if the energy taken exceeds 5% of the traction battery level.
Driver’s responsibility
when parking or stopping
the vehicle
Never leave an animal,
child or adult who is not self-suffi-
cient alone on your vehicle, even for
a short time.
In hot and/or sunny weather, please
remember that the temperature
inside the passenger compartment
increases very quickly.
RISK OF DEATH OR SERIOUS
INJURY.
Advice: to optimize vehicle range,
use this function when the vehicle is
plugged in.
Page 139 of 220
3.13
1
2
FRAGRANCE DIFFUSER.
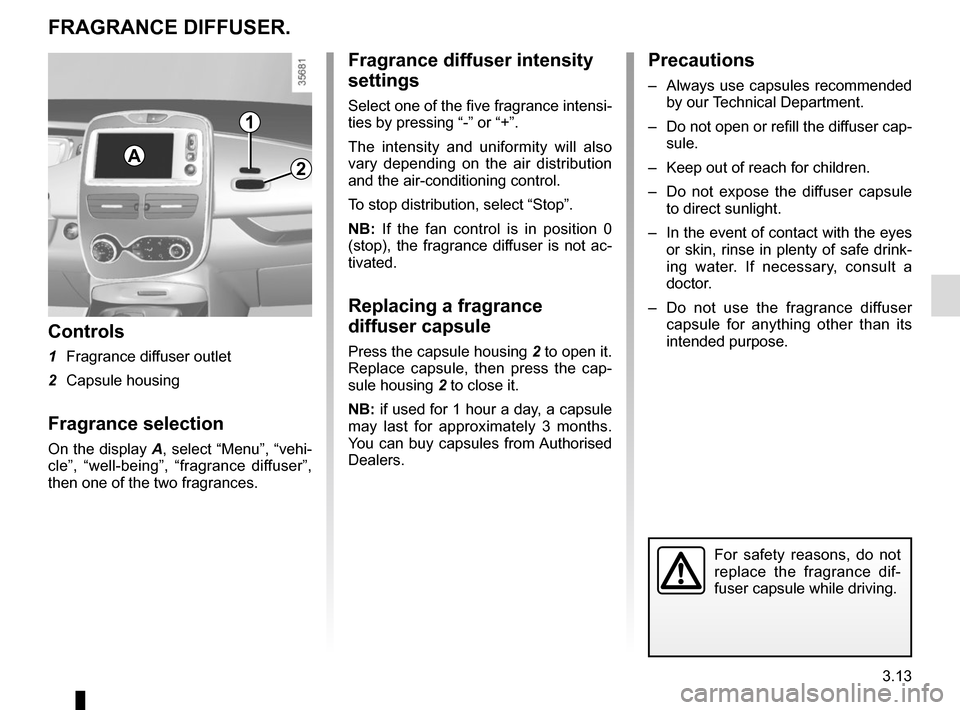
Controls
1 Fragrance diffuser outlet
2 Capsule housing
Fragrance selection
On the display A, select “Menu”, “vehi-
cle”, “well-being”, “fragrance diffuser”,
then one of the two fragrances.
Fragrance diffuser intensity
settings
Select one of the five fragrance intensi-
ties by pressing “-” or “+”.
The intensity and uniformity will also
vary depending on the air distribution
and the air-conditioning control.
To stop distribution, select “Stop”.
NB: If the fan control is in position 0
(stop), the fragrance diffuser is not ac-
tivated.
Replacing a fragrance
diffuser capsule
Press the capsule housing 2 to open it.
Replace capsule, then press the cap-
sule housing 2 to close it.
NB: if used for 1 hour a day, a capsule
may last for approximately 3 months.
You can buy capsules from Authorised
Dealers.
Precautions
– Always use capsules recommended by our Technical Department.
– Do not open or refill the diffuser cap- sule.
– Keep out of reach for children.
– Do not expose the diffuser capsule to direct sunlight.
– In the event of contact with the eyes or skin, rinse in plenty of safe drink-
ing water. If necessary, consult a
doctor.
– Do not use the fragrance diffuser capsule for anything other than its
intended purpose.
For safety reasons, do not
replace the fragrance dif-
fuser capsule while driving.
A
Page 140 of 220
3.14
AIR IONIZER
Selecting the operating mode
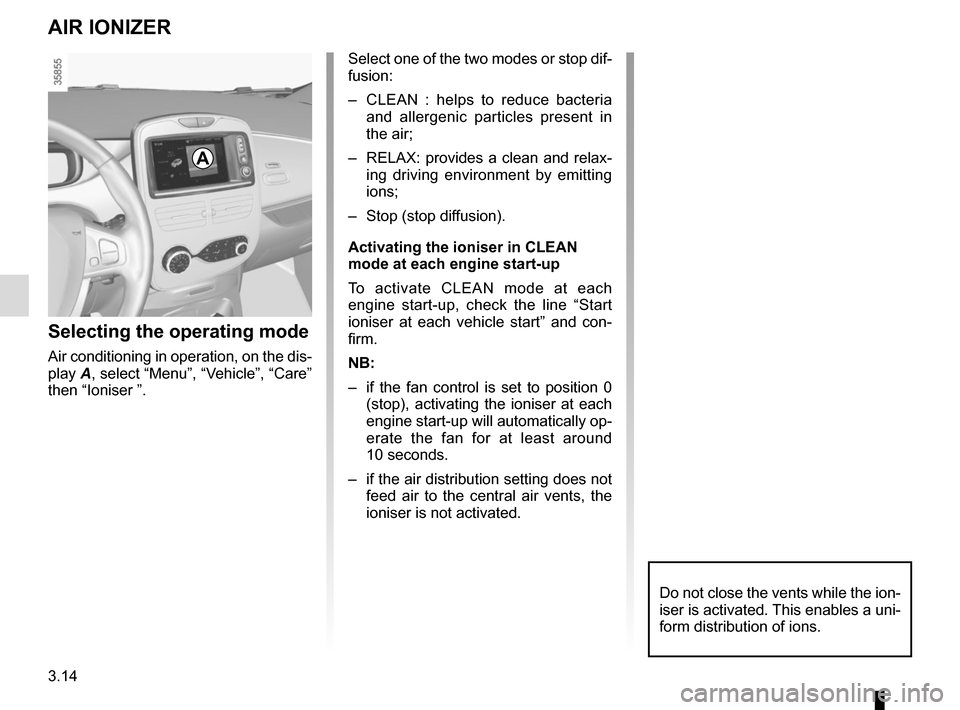
Air conditioning in operation, on the dis-
play A, select “Menu”, “Vehicle”, “Care”
then “Ioniser ”.
Select one of the two modes or stop dif-
fusion:
– CLEAN : helps to reduce bacteria and allergenic particles present in
the air;
– RELAX: provides a clean and relax- ing driving environment by emitting
ions;
– Stop (stop diffusion).
Activating the ioniser in CLEAN
mode at each engine start-up
To activate CLEAN mode at each
engine start-up, check the line “Start
ioniser at each vehicle start” and con-
firm.
NB:
– if the fan control is set to position 0 (stop), activating the ioniser at each
engine start-up will automatically op-
erate the fan for at least around
10 seconds.
– if the air distribution setting does not feed air to the central air vents, the
ioniser is not activated.
Do not close the vents while the ion-
iser is activated. This enables a uni-
form distribution of ions.
A
Page 141 of 220
3.15
AIR CONDITIONING: information and advice on use
Do not open the refriger-
ant fluid circuit. The fluid
may damage eyes or skin.
Advice on use
In some situations, (air conditioning
off, air recirculation activated, ventila-
tion speed at zero or low, etc.) you may
notice that condensation starts to form
on the windows and windscreen.
If there is condensation, use the “Clear
View” function to remove it, then use
the air conditioning in automatic mode
to stop it forming again.
Maintenance
Refer to the Maintenance Document
for your vehicle for the inspection fre-
quency.
Range
It is normal to notice an increase in
energy usage when the air conditioning
is operating.
Recommendations to limit energy
consumption and maintain the
range of the vehicle:
Drive with the air vents open and the
windows closed.
If the vehicle has been parked in the
sun, open the doors for a few moments
to let the hot air escape before starting
the engine.
Favour:
– before departure, the use of the air- conditioning programming or remote
activation. Please refer to the infor-
mation on “Air-conditioning: pro-
gramming” and “Air-conditioning:
remote activation” in Section 2);
– during your journeys, using ECO mode. Please see information about
“ECO mode function” in Section 2.
Operating faults
As a general rule, contact your ap-
proved dealer in the event of an oper-
ating fault.
– Reduction in de-icing, demisting
or air conditioning performance.
This may be caused by the passen-
ger compartment filter cartridge be-
coming clogged.
– No hot or cold air is being pro-
duced. Check that the controls are
set correctly and that the fuses are
sound. Otherwise, switch off the
system.
Presence of water under the
vehicle.
After prolonged use of the air condi-
tioning system, it is normal for water
to be present under the vehicle. This is
caused by condensation.
Page 143 of 220
3.17
ELECTRIC WINDOWS (2/2)/MANUAL WINDOW WINDERS
Operating faults
If a fault occurs when closing a window,
the system switches to normal mode:
lift the switch concerned as many times
as necessary until the window is fully
closed, release it. Press the switch
again (still on the closing side) for ap-
proximately one second to reset the
system.
If necessary, contact an approved
Dealer.
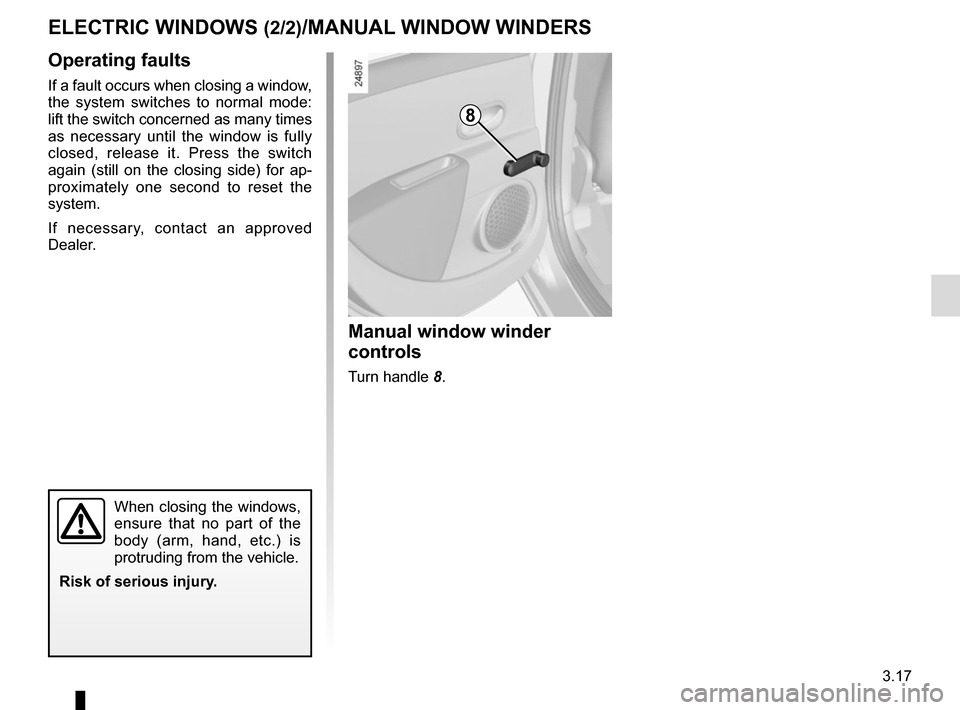
Manual window winder
controls
Turn handle 8.
8
When closing the windows,
ensure that no part of the
body (arm, hand, etc.) is
protruding from the vehicle.
Risk of serious injury.
Page 157 of 220

4.1
Section 4: Maintenance
Bonnet . . . . . . . . . . . . . . . . . . . . . . . . . . . . . . . . . . . . \
. . . . . . . . . . . . . . . . . . . . . . . . . . . . . . . . . . . . 4.2
Levels . . . . . . . . . . . . . . . . . . . . . . . . . . . . . . . . . . . .\
. . . . . . . . . . . . . . . . . . . . . . . . . . . . . . . . . . . . 4.4Coolant . . . . . . . . . . . . . . . . . . . . . . . . . . . . . . . . . . . . \
. . . . . . . . . . . . . . . . . . . . . . . . . . . . . . 4.4
Brake fluid . . . . . . . . . . . . . . . . . . . . . . . . . . . . . . . . . . . .\
. . . . . . . . . . . . . . . . . . . . . . . . . . . 4.5
windscreen washer reservoir . . . . . . . . . . . . . . . . . . . . . . . . . . . . . . . . . . . . \
. . . . . . . . . . . . . 4.5
Secondary 12V battery . . . . . . . . . . . . . . . . . . . . . . . . . . . . . . . . . . . .\
. . . . . . . . . . . . . . . . . . . . . . . 4.6
Tyre Pressure . . . . . . . . . . . . . . . . . . . . . . . . . . . . . . . . . . . .\
. . . . . . . . . . . . . . . . . . . . . . . . . . . . . . 4.8
Bodywork maintenance . . . . . . . . . . . . . . . . . . . . . . . . . . . . . . . . . . . . \
. . . . . . . . . . . . . . . . . . . . . . . 4.9
Interior trim maintenance . . . . . . . . . . . . . . . . . . . . . . . . . . . . . . . . . . . . \
. . . . . . . . . . . . . . . . . . . . . . 4.11
Page 161 of 220
4.5
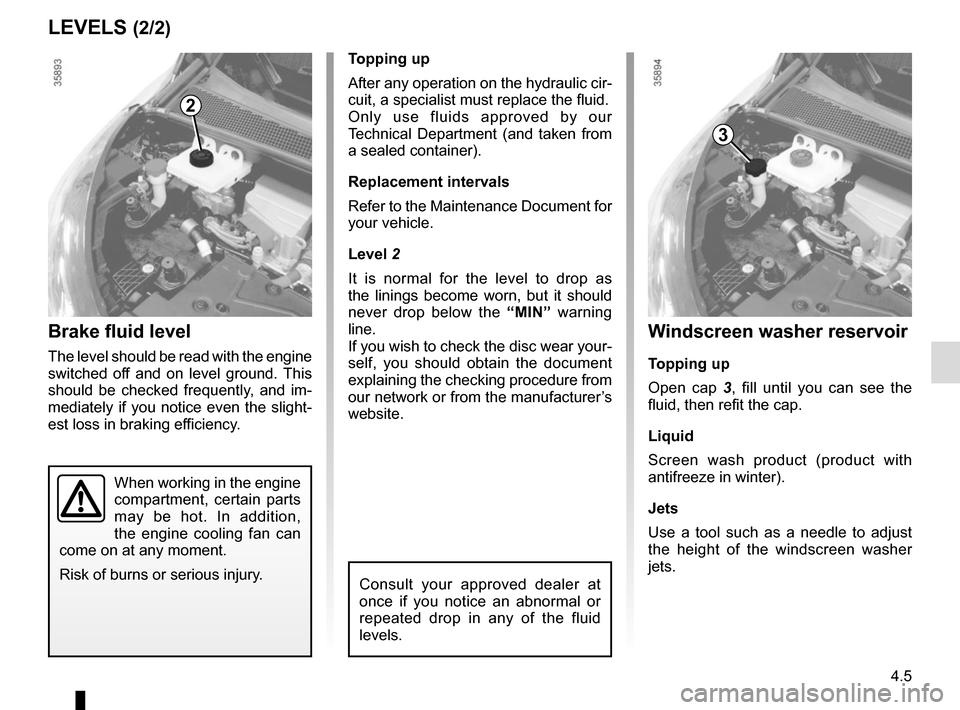
Windscreen washer reservoir
Topping up
Open cap 3, fill until you can see the
fluid, then refit the cap.
Liquid
Screen wash product (product with
antifreeze in winter).
Jets
Use a tool such as a needle to adjust
the height of the windscreen washer
jets.
3
2
Brake fluid level
The level should be read with the engine
switched off and on level ground. This
should be checked frequently, and im-
mediately if you notice even the slight-
est loss in braking efficiency.
Consult your approved dealer at
once if you notice an abnormal or
repeated drop in any of the fluid
levels.
Topping up
After any operation on the hydraulic cir-
cuit, a specialist must replace the fluid.
Only use fluids approved by our
Technical Department (and taken from
a sealed container).
Replacement intervals
Refer to the Maintenance Document for
your vehicle.
Level 2
It is normal for the level to drop as
the linings become worn, but it should
never drop below the “MIN” warning
line.
If you wish to check the disc wear your-
self, you should obtain the document
explaining the checking procedure from
our network or from the manufacturer’s
website.
LEVELS (2/2)
When working in the engine
compartment, certain parts
may be hot. In addition,
the engine cooling fan can
come on at any moment.
Risk of burns or serious injury.
Page 162 of 220
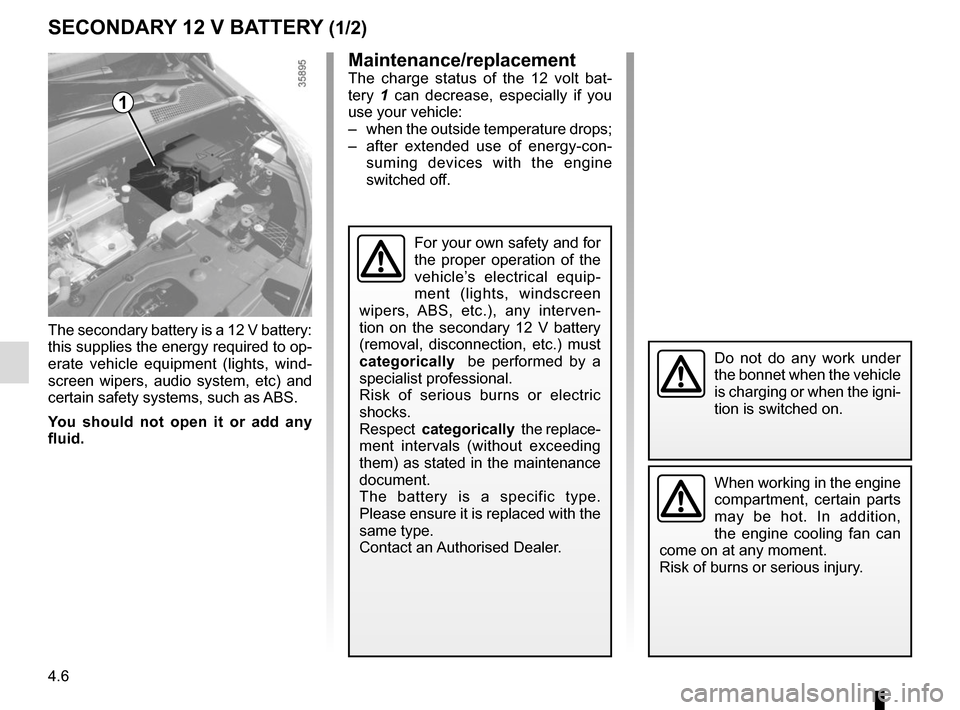
4.6
The secondary battery is a 12 V battery:
this supplies the energy required to op-
erate vehicle equipment (lights, wind-
screen wipers, audio system, etc) and
certain safety systems, such as ABS.
You should not open it or add any
fluid.
SECONDARY 12 V BATTERY (1/2)
1
When working in the engine
compartment, certain parts
may be hot. In addition,
the engine cooling fan can
come on at any moment.
Risk of burns or serious injury.
Do not do any work under
the bonnet when the vehicle
is charging or when the igni-
tion is switched on.
For your own safety and for
the proper operation of the
vehicle’s electrical equip-
ment (lights, windscreen
wipers, ABS, etc.), any interven-
tion on the secondary 12 V battery
(removal, disconnection, etc.) must
categorically be performed by a
specialist professional.
Risk of serious burns or electric
shocks.
Respect categorically the replace-
ment intervals (without exceeding
them) as stated in the maintenance
document.
The battery is a specific type.
Please ensure it is replaced with the
same type.
Contact an Authorised Dealer.
Maintenance/replacementThe charge status of the 12 volt bat-
tery 1 can decrease, especially if you
use your vehicle:
– when the outside temperature drops;
– after extended use of energy-con- suming devices with the engine
switched off.