Engine SAAB 9-3 2002 Owner's Manual
[x] Cancel search | Manufacturer: SAAB, Model Year: 2002, Model line: 9-3, Model: SAAB 9-3 2002Pages: 256, PDF Size: 11.55 MB
Page 72 of 256

72 Instruments and controlsCalculating the requisite average speed:
1 Press to select DIST.
2 Hold the SET button for two seconds.
3 Set the distance to be covered using
or .
4 Press SET to store settings.
5 Press to select ARRIV.
6 Hold the SET button for two seconds.
7 Set the desired arrival time using or
.
8 Press SET to display the average speed
you need to maintain to arrive at the
desired time.
At the beginning of a journey, the SPD Ø
and ARRIV functions will display current
values. If values are set during the journey,
the new values will be displayed after a
delay of about 10 seconds.Resetting values
To reset the values, press CLR for at least
four seconds.
The following functions will be reset
simultaneously:
Estimated range on remaining fuel
(function based on a fuel consumption of
28 mpg)
Average fuel consumption
Average speed
Arrival time (function based on current
speed)
Programmed values for DIST, ALARM and
SPD Ø will not be reset (see the respective
function).
CHECK messages When the engine is started, CHECKING will
appear on the display for about four sec-
onds, while the SID checks are being per-
formed.
When a CHECK message is generated
while the car is being driven, a chime will
sound, INFO DISPL will illuminate on the
main instrument panel, and the message
will appear on the SID. The number of mes-
sages that can be displayed by the SID
varies with the specification of the car.
If more than one CHECK message has
been generated, the
+ symbol will appear to
the left of the text on the display. The mes-
sages appear in order of priority.
If a new fault occurs while another message
is being displayed, the message relating to
the new one will appear for 10 seconds,
after which the display will return to the ear-
lier one.
Press CLR once to acknowledge a mes-
sage, whereupon it will be cleared from the
display. It will not be displayed again before
the ignition has been switched off and then
on again.
ProCarManuals.com
Page 73 of 256

73 Instruments and controls
The following CHECK messages may be
displayed: 1) This message will be displayed approximately
600 miles (1,000 km) before the next sched-
uled service is due, or when 365 days have
elapsed since the last service. The message
should be cleared at the time of that service
(see the Saab Warranties & Service Record
Booklet).
This message can also be deleted by first
briefly pressing the CLR button, then depress-
ing it a second time for at least eight seconds
until "SERVICE" appears on the display and a
chime sounds. The message can only be
deleted when it is shown on the SID.
Night panelTo improve night-driving conditions inside
the car, the Night Panel mode can be
selected. In this mode, the amount of infor-
mation displayed is reduced, and only the
most important instruments and displays
will be illuminated.
When the Night Panel button is pressed,
only the speedometer will be illuminated (up
to the 87-mph or 140-km/h graduation), all
the other instruments illumination will be
extinguished and their needles moved to
zero. Both the SID and the ACC displays will
be extinguished and the backlighting for
switches and other controls will be dimmed.
Note: All indicator and warning lights,
together with the display of CHECK mes-
sages, will operate as normal. The following conditions will wake up the
respective displays in the Night-Panel
mode:
Setting of the Audio System, SID or ACC
(display comes on for ten seconds).
CHECK message generated in the SID.
High engine revs cause the rev counter to
be illuminated until the engine speed has
fallen again.
If the quantity of fuel remaining falls below
4 gallons (15 liters), the fuel gauge will be
illuminated.
If the engine temperature rises above nor-
mal, the temperature gauge will be illumi-
nated.
If the speed of the car exceeds 84 mph
(135 km/h), the entire speedometer will
be illuminated.
In cars with automatic transmission, if the
selector lever is moved from D to position
3, 2 or 1, the selector indication on the
main instrument panel will be illuminated.
To restore the displays and lighting to the
normal mode, press the Night-Panel button. Display shows: See
page
BRAKE LIGHT FAILURE 202
FRONT LIGHT FAILURE 200
REAR LIGHT FAILURE 202
FOG LIGHT FAILURE 203
WASHER FLUID LEVEL LOW 199
TIGHTEN FUEL FILLER CAP 151
FILL COOLANT FLUID 192
KEY NOT ACCEPTED 45
REPLACE KEY BATTERY 45
SERVICE THEFT ALARM 45
TRANSMISSION OVERHEATING 159
TIME FOR SERVICE
1)
230
ProCarManuals.com
Page 75 of 256
75 Instruments and controls
SwitchesThe parking lights and daytime running
lights come on automatically when the igni-
tion switch is in the ON position.
Note to owners in the U.S.: If you do not
want Daytime Running Lights, this feature
can be disconnected: switch off the engine
and remove fuse No. 15 (see page 208).
Note to owners in Canada: Daytime Run-
ning Lights must not be disconnected as
they are a Canadian Federal legal require-
ment.
The parking lights can be switched on
regardless of the position of the ignition
switch. Do not use parking lights when driv-
ing.
Note:
The lighting switch must be in parking or
headlight position to operate the rear fog
light (see page 77).The headlights come on when the ignition
switch is in the OFF, ON or START posi-
tions. Note that they go off again when the
ignition switch is turned to LOCK.
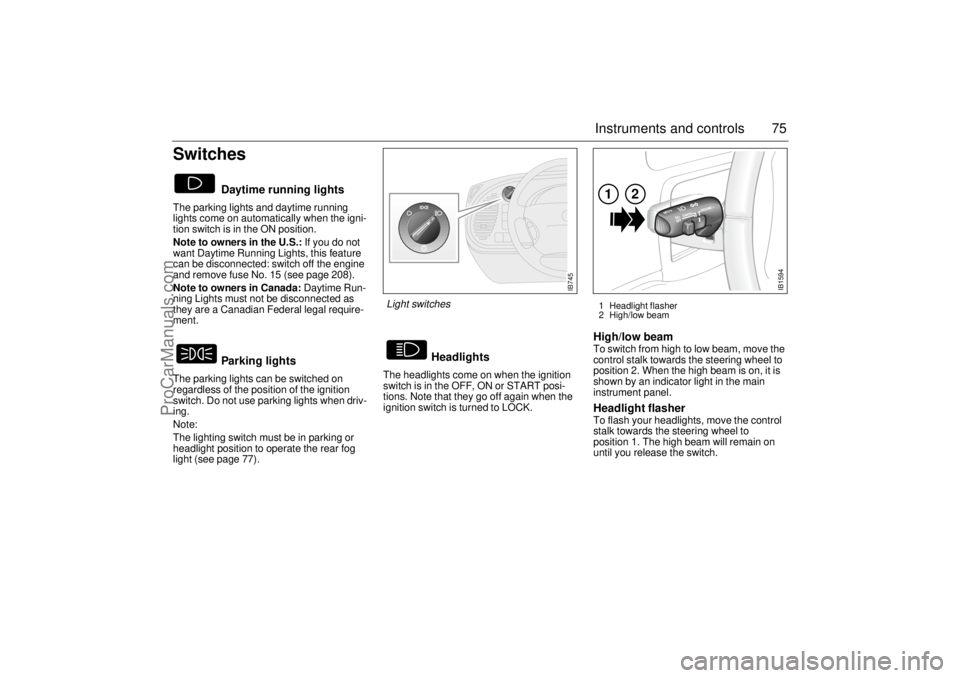
High/low beam To switch from high to low beam, move the
control stalk towards the steering wheel to
position 2. When the high beam is on, it is
shown by an indicator light in the main
instrument panel.Headlight flasher To flash your headlights, move the control
stalk towards the steering wheel to
position 1. The high beam will remain on
until you release the switch.
Daytime running lights
Parking lights
Headlights
IB745
Light switches
1 Headlight flasher
2 High/low beam
IB1594
12
ProCarManuals.com
Page 77 of 256
77 Instruments and controls
Back-UpThe back-up lights come on automatically
when reverse gear is engaged or selected
with the ignition switched on.
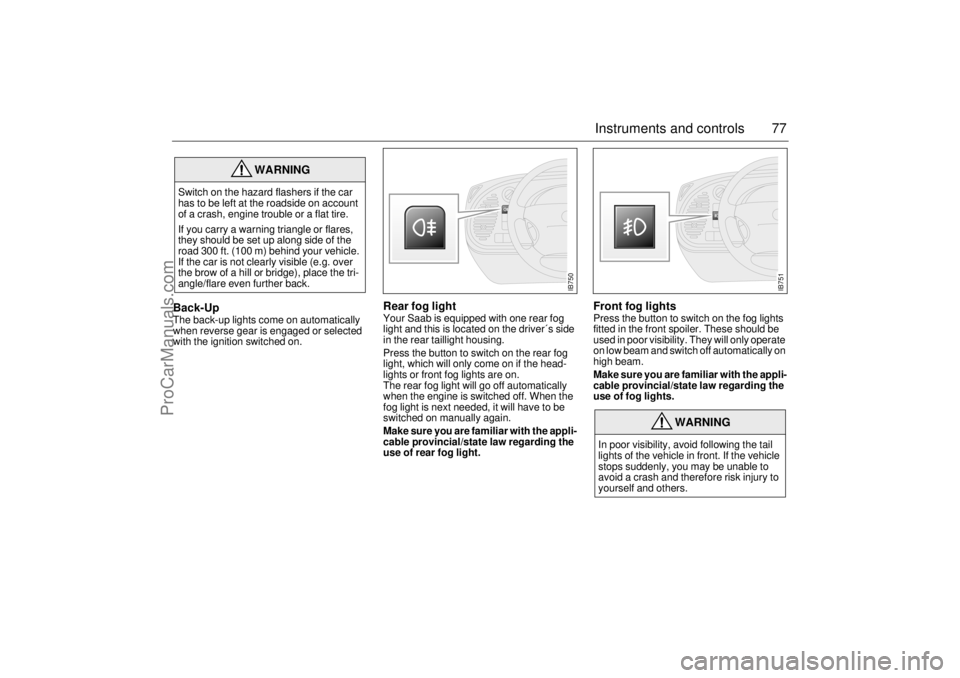
Rear fog lightYour Saab is equipped with one rear fog
light and this is located on the driver´s side
in the rear taillight housing.
Press the button to switch on the rear fog
light, which will only come on if the head-
lights or front fog lights are on.
The rear fog light will go off automatically
when the engine is switched off. When the
fog light is next needed, it will have to be
switched on manually again.
Make sure you are familiar with the appli-
cable provincial/state law regarding the
use of rear fog light.
Front fog lightsPress the button to switch on the fog lights
fitted in the front spoiler. These should be
used in poor visibility. They will only operate
on low beam and switch off automatically on
high beam.
Make sure you are familiar with the appli-
cable provincial/state law regarding the
use of fog lights.
WARNING
Switch on the hazard flashers if the car
has to be left at the roadside on account
of a crash, engine trouble or a flat tire.
If you carry a warning triangle or flares,
they should be set up along side of the
road 300 ft. (100 m) behind your vehicle.
If the car is not clearly visible (e.g. over
the brow of a hill or bridge), place the tri-
angle/flare even further back.
WARNING
In poor visibility, avoid following the tail
lights of the vehicle in front. If the vehicle
stops suddenly, you may be unable to
avoid a crash and therefore risk injury to
yourself and others.
IB750
IB751
ProCarManuals.com
Page 83 of 256

83 Instruments and controls
The button is located on the climate-control
panel. An LED in the button is lit as long as
heating is on.
Switch off the heating as soon as the rear
window is clear. It will go off automatically
after about 10 minutes.
If the battery voltage is lower than 12 V the
heating will be switched off earlier so that
the battery can get the benefit of the alterna-
tor charge.
Avoid placing sharp objects on the rear
parcel shelf; the heater elements may suffer
damage if such objects touch the rear win-
dow. Do not switch the heating on until you
have started the engine.
Recommended settings in
severe cold On starting with a cold engine, set the fan
switch to position 2 and select defrost to
heat the cabin and defrost the windshield as
quickly as possible.
When the engine is warm enough for the
reading of the temperature gauge to start
rising, fan setting 3 may be chosen. Once
the windshield is clear, the air-distribution
control should be shifted two steps to the
left.
The warm-up time of the engine depends on
the kind of driving. Town driving in high gear
with a low RPM requires a longer warm-up
time than highway driving with a higher
RPM.
Do not use position 4 on the fan switch, as
this is mainly intended to provide rapid cool-
ing in hot weather.
Fault diagnosis and care of A/C sys-
tem, see page 226. Electrically heated rear
window/external mirrors
ProCarManuals.com
Page 89 of 256
89 Instruments and controls
Starting in cold weather: The automatic
climate control system selects the defroster
position, max. heating and low fan speed to
begin with.
As the engine temperature rises, the fan
speed is increased and air is routed towards
the floor.
As the temperature inside the car nears the
selected value, both the fan speed and the
heat will be decreased to a level determined
by the system.
Starting in hot weather: The automatic cli-
mate control system selects air to the panel
vents and high fan speed. Recirculation is
switched on about 30 seconds after starting
if the selected cabin temperature is mark-
edly lower than the actual temperature.
Unless the ECON button has been
depressed, the A/C compressor is always
switched on at outside temperatures above
32°F (0°C) in order to cool and dehumidify
the incoming air, unless the ECON button
has been depressed.
As the temperature inside the car nears the
selected value, the fan speed will be
decreased to a value determined by the
system.
Action to be taken in special types of
weather Normally, misting and icing problems on the
windows do not occur other than in extreme
situations, e.g. when you are driving in
heavy rain or severe cold in combination
with high air humidity or when those travel-
ling in the car are sweaty and wet. If you
have trouble with misting or icing in such
cases we suggest the following counter-
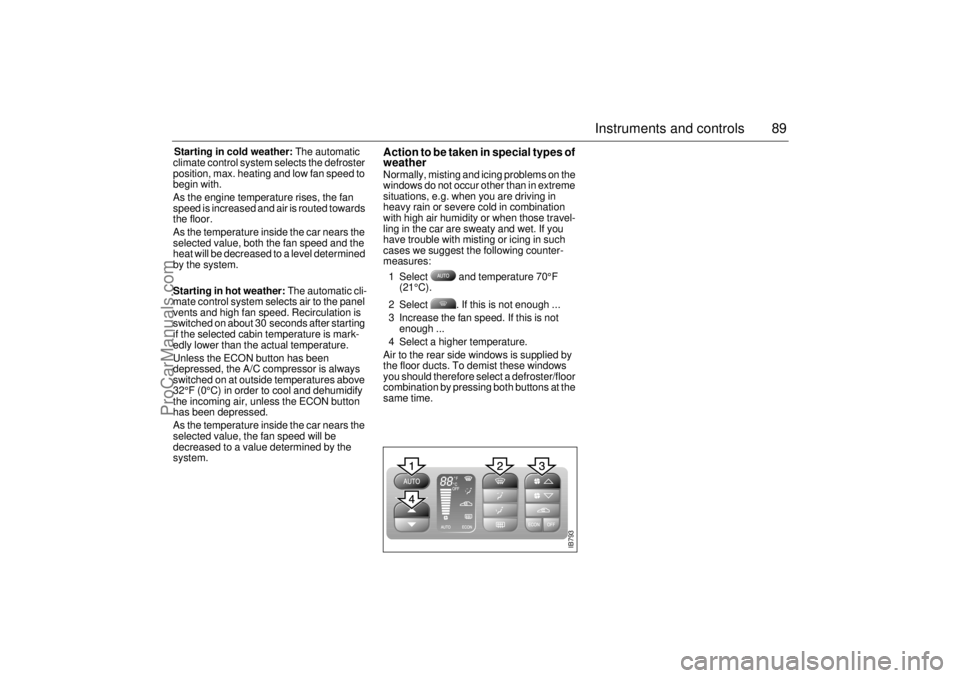
measures:
1 Select and temperature 70°F
(21°C).
2 Select . If this is not enough ...
3 Increase the fan speed. If this is not
enough ...
4 Select a higher temperature.
Air to the rear side windows is supplied by
the floor ducts. To demist these windows
you should therefore select a defroster/floor
combination by pressing both buttons at the
same time.
IB793
ProCarManuals.com
Page 90 of 256
90 Instruments and controlsCalibrationIf the battery has been disconnected or has run flat, the system will
recalibrate automatically.
Manual calibration:
1 Start the engine.
2 Press + at the same time. The ACC display flashes
once to indicate that calibration and self-testing have started.
During calibration the display indicates the figure 0 or the fault codes
(01-23) that have been found.
Calibration and self-testing takes about 30 seconds.
Programming IThe manual selections you have made can be saved so that the
ACC system always starts up on these selections every time the
ignition is switched on. But notice that the ignition must have been
off for at least 10 minutes before you try out the saved setting.
1 Select the desired settings.
2 Press + at the same time.
(The ACC background lighting flashes to confirm that the informa-
tion has been stored.)
Example:
If you want the ACC system to distribute the air to the dash vents
from the start, proceed as follows:
1 Start the engine.
2 Press the button .
3 Press and at the same time.
4 Shut off the key.
5 The system will memorize this new program 10 minutes after the
key is shut off.Cancelling program I A saved setting is deleted only by pressing + at the
same time.
(The ACC display flashes to confirm that deletion has been
effected.)
ProCarManuals.com
Page 91 of 256
91 Instruments and controls
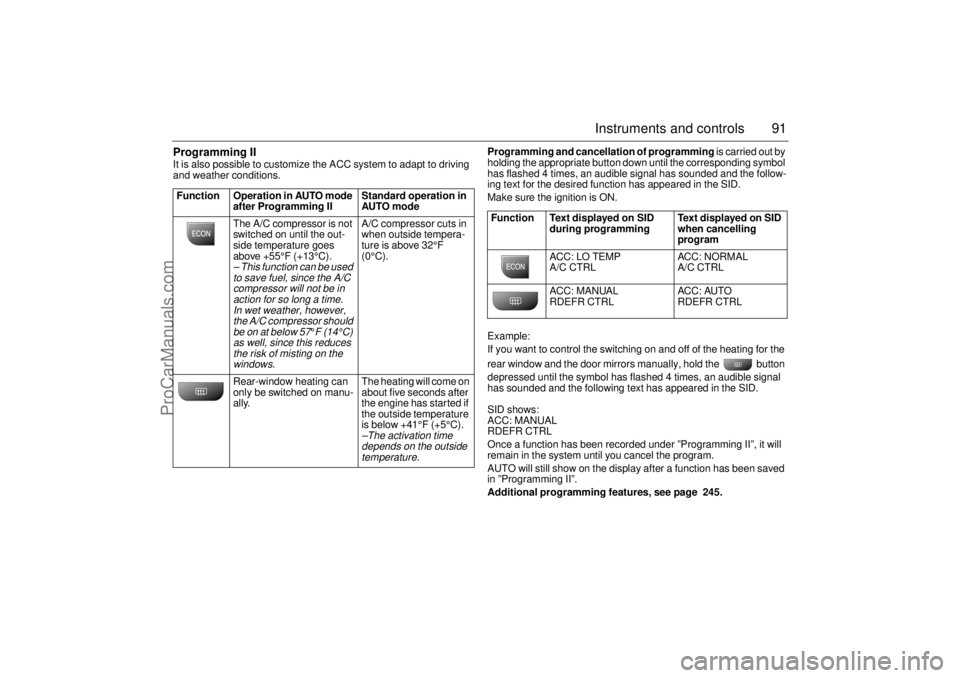
Programming II It is also possible to customize the ACC system to adapt to driving
and weather conditions. Programming and cancellation of programming is carried out by
holding the appropriate button down until the corresponding symbol
has flashed 4 times, an audible signal has sounded and the follow-
ing text for the desired function has appeared in the SID.
Make sure the ignition is ON.
Example:
If you want to control the switching on and off of the heating for the
rear window and the door mirrors manually, hold the button
depressed until the symbol has flashed 4 times, an audible signal
has sounded and the following text has appeared in the SID.
SID shows:
ACC: MANUAL
RDEFR CTRL
Once a function has been recorded under ”Programming II”, it will
remain in the system until you cancel the program.
AUTO will still show on the display after a function has been saved
in ”Programming II”.
Additional programming features, see page 245. Function Operation in AUTO mode
after Programming II Standard operation in
AUTO mode
The A/C compressor is not
switched on until the out-
side temperature goes
above +55°F (+13°C).
– This function can be used
to save fuel, since the A/C
compressor will not be in
action for so long a time.
In wet weather, however,
the A/C compressor should
be on at below 57
°F (14°C)
as well, since this reduces
the risk of misting on the
windows.
A/C compressor cuts in
when outside tempera-
ture is above 32°F
(0°C).
Rear-window heating can
only be switched on manu-
ally. The heating will come on
about five seconds after
the engine has started if
the outside temperature
is below +41°F (+5°C).–The activation time
depends on the outside
temperature.
Function Text displayed on SID
during programming Text displayed on SID
when cancelling
program
ACC: LO TEMP
A/C CTRL ACC: NORMAL
A/C CTRL
ACC: MANUAL
RDEFR CTRL ACC: AUTO
RDEFR CTRL
ProCarManuals.com
Page 115 of 256

115 OnStar - Telematics
Roadside assistance**There’s nothing worse than being stranded
on the road with car trouble. No matter what
the problem is (flat tire, out of gas, or engine
trouble), just call OnStar. They will contact
the help you need to get you quickly back on
the road.Stolen vehicle trackingOnStar doesn’t just protect you, it protects
your Saab, too. If your vehicle is ever stolen,
just contact OnStar by calling
1-888-4-ONSTAR. They will put you in
touch with the authorities and aid them in
locating your Saab. Ask your insurance car-
rier about possible premium discounts.Accident Assist™Accident Assist™ provides step-by-step
guidance about what to do in case of a
crash. Working with leading insurance com-
panies On Star has developed a ”best prac-
tices” list to assist you through most acci-
dent situations. OnStar Accident Assist™
can make the process of completing a
police report and/or insurance claim less
stressful.
OnStar Med-Net***OnStar MED-NET securely stores your per-
sonal medical information (e.g., physician’s
name, emergency contacts, medications,
chronic conditions) and, in an emergency,
can quickly send it to a medical facility. This
important information can help assist with
diagnosis and treatment. ******There will be no charge for Roadside Assistance as
long as your vehicle is under warranty.
***Requires activation and additional fee.
****Availability in Canada was undetermined at time of
pulbication. Please contact your local dealer in Canada.Hands-free communicationTalking to an OnStar advisor is easy and
hands-free. Simply press the OnStar but-
ton, and a small microphone picks up your
voice while the OnStar advisor talks to you
through your stereo speakers. Note: Audio
system must be switched on. You can even
adjust the volume to your liking with the
steering wheel controls or the radio volume
knob. Your hands remain on the steering
wheel, while your eyes remain on the road.Being safe on the road is important, but
there’s more to life than security. There’s liv-
ing. That’s why we have created the OnStar
Premium Services Plan. It gives you not
only the important protections of the Safety
and Security Plan, but also a whole range of
services which truly change driving from a
chore to a luxury. All new Saab models
come with one full year of the OnStar Pre-
mium Services Plan.* * New retail deliveries only.
The OnStar Premium
Services Plan *Route supportWith OnStar Route Support, an advisor can
help you find your way, no matter how far off
course you are. You can get exact street
directions, or guidance to nearby gas sta-
tions, restaurants, hotels or ATMs.Ride AssistIf you need a lift, anytime of the day or night,
just call OnStar. They’ll contact transporta-
tion and send it right to you.Information and Convenience ser-
vicesOnStar advisors have access to over five
million service listings including hotels, res-
taurants, gas stations, dealerships, hospi-
tals, ATMs and airports — more than 250
service categories in all. OnStar advisors
can even assist you with hotel and restau-
rant reservations.*All Saab models come with one full year of Premium
Service. New retail deliveries only.
ProCarManuals.com
Page 141 of 256
141 Interior equipment, trunk
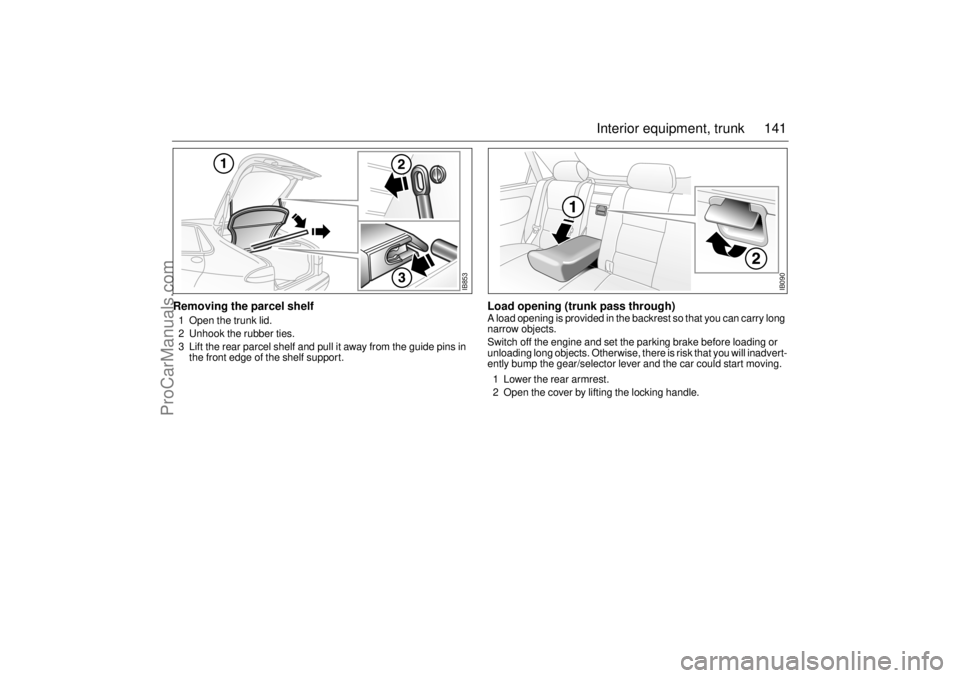
Removing the parcel shelf1 Open the trunk lid.
2 Unhook the rubber ties.
3 Lift the rear parcel shelf and pull it away from the guide pins in
the front edge of the shelf support.
Load opening (trunk pass through) A load opening is provided in the backrest so that you can carry long
narrow objects.
Switch off the engine and set the parking brake before loading or
unloading long objects. Otherwise, there is risk that you will inadvert-
ently bump the gear/selector lever and the car could start moving.
1 Lower the rear armrest.
2 Open the cover by lifting the locking handle.
IB853
IB090
ProCarManuals.com