SAAB 9-3 2005 Owners Manual
Manufacturer: SAAB, Model Year: 2005, Model line: 9-3, Model: SAAB 9-3 2005Pages: 292, PDF Size: 23 MB
Page 211 of 292
209 Car care
Always connect the positive (red) cable to
the battery’s positive (+) terminal, and the
negative (black) cable to the negative (-)
terminal of the battery. Always disconnect
both battery leads when boost charging the
battery.
A car with standard equipment specifica-
tions and a fully charged battery can be left
for up to 40 days and still have a sufficient
charge for starting. If extra equipment is fit-
ted, such as a mobile phone, the charge
may only be sufficient for about 15 days.NOTICE If boost charging never use anything
but a 12-volt charger, see page 193.
Do not connect the battery termi-
nals, + and –, incorrectly.
Serious damage can occur to the car’s
electrical system if a battery or alterna-
tor lead is disconnected while the
engine is running.
Exercise special care when removing
and fitting the positive (+) cable so as
not to damage the battery disconnect
switch.
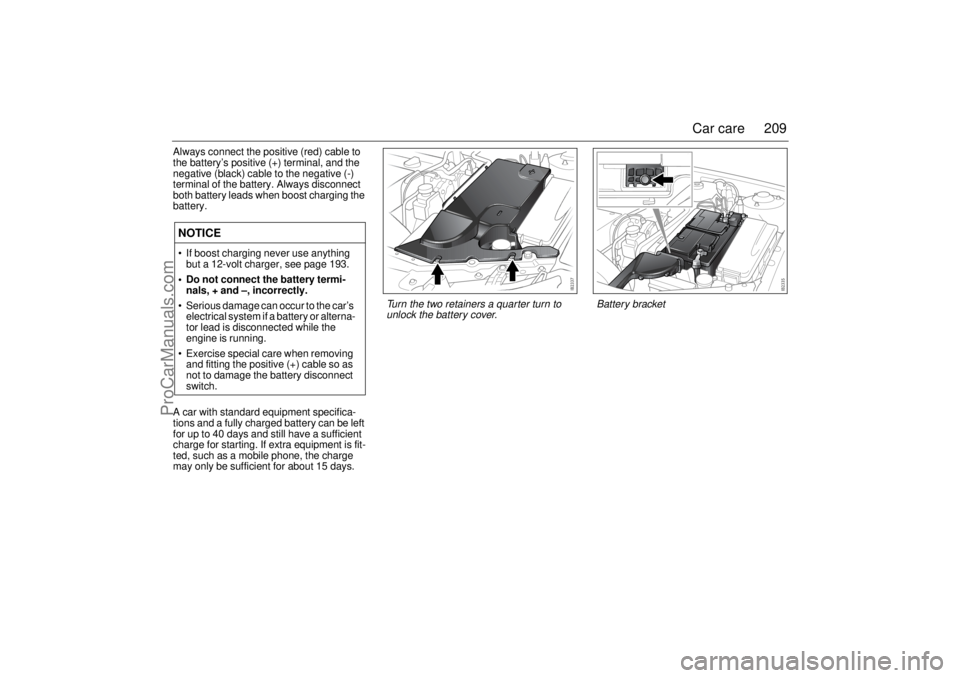
Turn the two retainers a quarter turn to
unlock the battery cover.
Battery bracket
ProCarManuals.com
Page 212 of 292
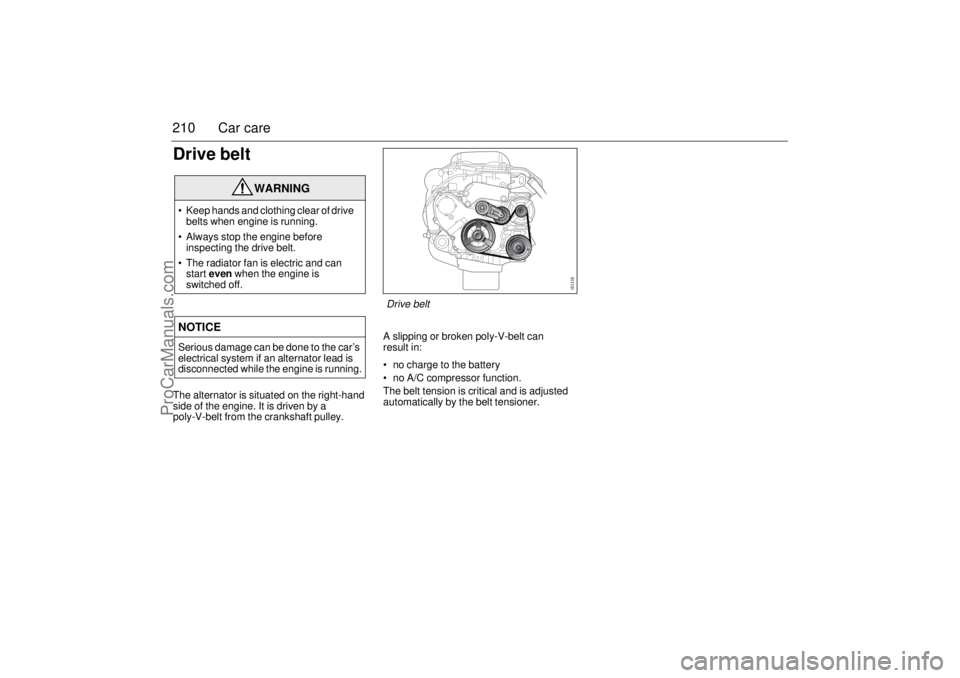
210 Car careDrive beltThe alternator is situated on the right-hand
side of the engine. It is driven by a
poly-V-belt from the crankshaft pulley.A slipping or broken poly-V-belt can
result in:
no charge to the battery
no A/C compressor function.
The belt tension is critical and is adjusted
automatically by the belt tensioner.
WARNING
Keep hands and clothing clear of drive
belts when engine is running.
Always stop the engine before
inspecting the drive belt.
The radiator fan is electric and can
start even when the engine is
switched off.NOTICESerious damage can be done to the car’s
electrical system if an alternator lead is
disconnected while the engine is running.
Drive belt
ProCarManuals.com
Page 213 of 292
211 Car care
Wipers and washersWiper bladesCheck and clean all wiper blades regularly.
If poor wiper performance is experienced,
clean the windshield with washer fluid. This
is particularly important if the car has been
through an automatic car wash, as these
sometimes leave a wax coating on the wind-
shield.
If wiper performance is still unsatisfactory,
fit new blades.
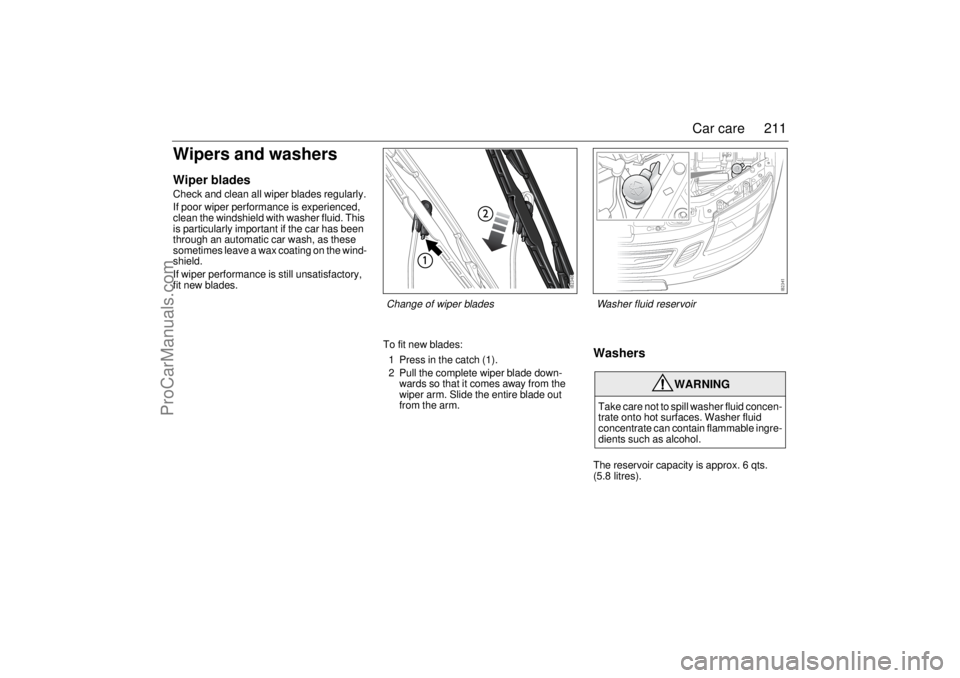
To fit new blades:
1 Press in the catch (1).
2 Pull the complete wiper blade down-
wards so that it comes away from the
wiper arm. Slide the entire blade out
from the arm.
WashersThe reservoir capacity is approx. 6 qts.
(5.8 litres).
WARNING
Take care not to spill washer fluid concen-
trate onto hot surfaces. Washer fluid
concentrate can contain flammable ingre-
dients such as alcohol.Washer fluid reservoir Change of wiper blades
ProCarManuals.com
Page 214 of 292
212 Car careWhen the washer fluid level drops below
1 quart (1 litre), the headlight washers (if
equipped) are deactivated. This is in order
to prioritize the windshield. The following
message is displayed on the SID:
Headlight washers are only available on
certain markets.
Fill with a mixture of washer fluid and water
as recommended by the table on
the packaging to reduce the risk of freezing
and to ensure effective cleaning (see also
page 100).
To prevent the smell of washer fluid from
entering the car, recirculation can be acti-
vated automatically while the windshield is
washed. The recirculation symbol will how-
ever not light up. This function is optional;
contact a Saab dealer.
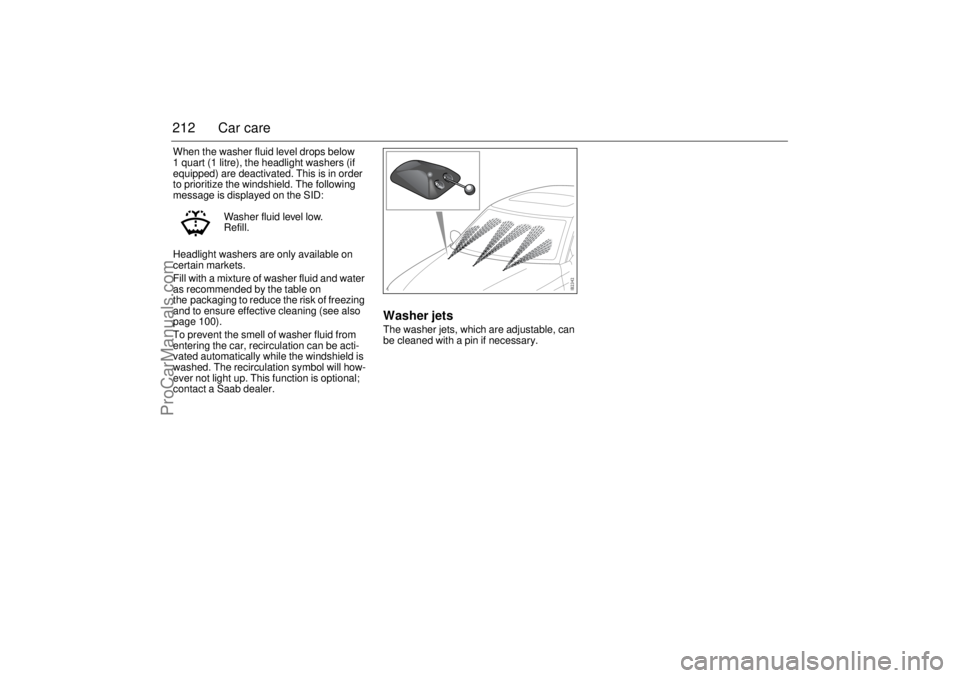
Washer jetsThe washer jets, which are adjustable, can
be cleaned with a pin if necessary. Washer fluid level low.
Refill.
ProCarManuals.com
Page 215 of 292
213 Car care
Changing bulbsAutochecking of lightsThe bulbs that are most important from the point of view of traffic
safety are monitored by the car’s electrical system. If one of these
bulbs should fail, a message will be displayed on the SID.
Example of SID message:
The following bulbs are not checked: parking lights, front fog lights,
reversing lights, license plate lighting, side marker lights and side
direction indicators.If a stop light bulb fails
If a stop light bulb fails, the adjacent taillight will act as a stop light to
ensure traffic safety. Change the broken bulb when possible.
All rear light bulbs are of the same type and rated 21 W, with the
exception of the license plate lighting which is rated 5 W.
Wrong bulb fitted
If a dipped or main beam bulb of too high a rating is fitted, a bulb
failure message will be shown on the SID (a too high wattage bulb
can damage the reflector).
If the following message is displayed but the bulb shines, it is most
likely that an incorrect bulb has been fitted.
Note:
When changing bulbs, fit the same type of bulb (e.g. Long-Life)
as that removed.
Headlight aiming, page 258.
WARNING
Before changing a bulb in the engine bay, switch off the engine
to avoid the danger of fingers and hands being injured by moving
parts.
The radiator fan can cut in even when the engine is switched off.NOTICESwitch off the ignition before changing a bulb, to avoid possible
short-circuiting.
Left low beam failure.
Right high beam failure.
ProCarManuals.com
Page 216 of 292
214 Car careXenon headlight, dipped beam(certain variants only)
Xenon headlights produce roughly two times as much light as halo-
gen bulbs and have a significantly longer service life.
The lamp units consist of a gas discharge lamp containing xenon.
When the lights are switched on a very high voltage activates the
xenon gas. The lamps soon reach full intensity.
Cars with xenon headlights have automatic levelling. The levelling
system is comprised of two sensors, one on the front suspension
and one on the rear suspension, and a control unit by the engine bay
fuse box. Headlight alignment is adjusted automatically to the car’s
load to prevent dazzling drivers in oncoming traffic.
If a fault is detected in the system, the following message will be dis-
played on the SID:
WARNING
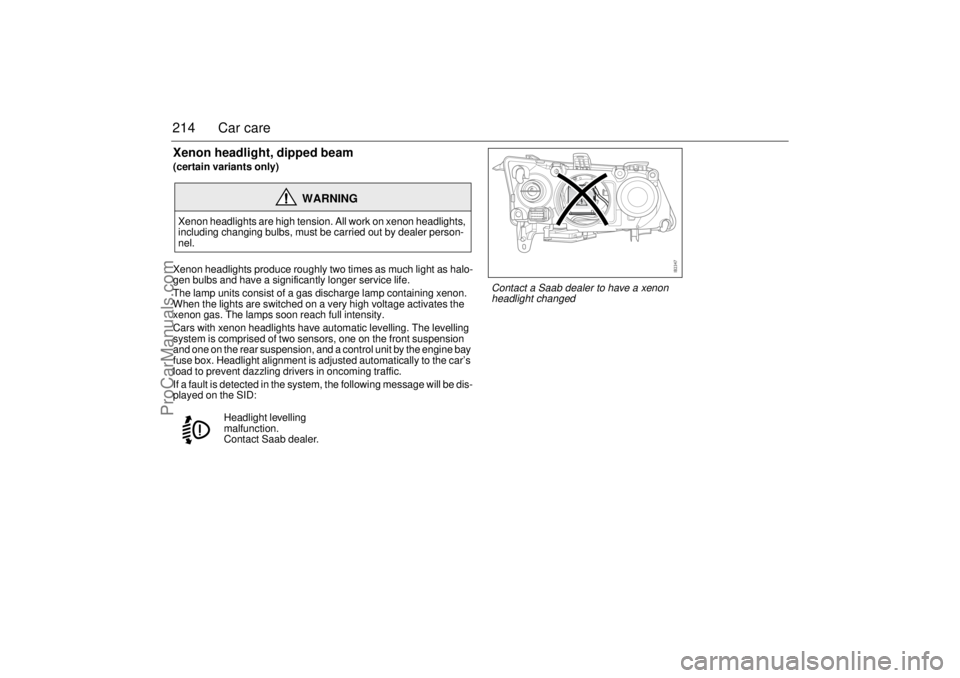
Xenon headlights are high tension. All work on xenon headlights,
including changing bulbs, must be carried out by dealer person-
nel.
Headlight levelling
malfunction.
Contact Saab dealer.
Contact a Saab dealer to have a xenon
headlight changed
ProCarManuals.com
Page 217 of 292

215 Car care
Low beam, halogenLeft-hand side
1 Lift aside the hose running along the side of the battery cover.
2 Release the two retainers (a quarter of a turn counterclockwise)
in the leading edge of the cover and remove the cover.
3 Pull up the washer fluid filler pipe.
4 Remove the air pipe from the front edge of the battery box.
5 Pull up the fuse panel in front of the battery (certain variants),
see page 233.
Both sides
1 Remove the cover from the rear of the headlight.
2 Twist the bulb holder counterclockwise and withdraw the holder
from the reflector.
3 Change the bulb without touching the glass with your fingers.
Insert the bulb holder into the reflector and twist it clockwise until
it locks.4 Refit the cover over the rear of the headlight.
Left-hand side
5 Refit the air pipe to the front of the battery box.
6 Refit the washer fluid filler pipe.
7 Refit the battery cover.
NOTICEDo not fit bulbs with a higher rating than 55 W as this could
damage the headlight reflector. Furthermore, the car’s wiring is
not designed to cope with higher wattages.
Retainers on the battery cover Changing the low beam bulb
ProCarManuals.com
Page 218 of 292
216 Car careHigh beam, halogenLeft-hand side
1 Lift aside the hose running along the side of the battery cover.
2 Release the two retainers (a quarter of a turn counterclockwise)
in the leading edge of the cover and remove the cover.
3 Pull up the washer fluid filler pipe.
4 Remove the air pipe from the front edge of the battery box.
5 Pull up the fuse panel in front of the battery (certain variants),
see page 233.
Both sides
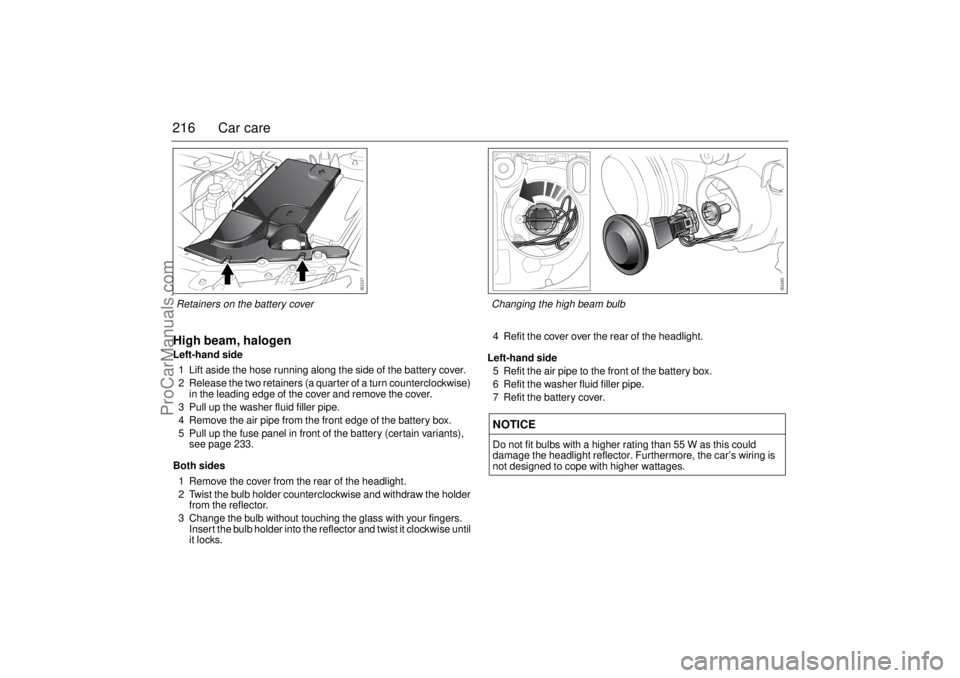
1 Remove the cover from the rear of the headlight.
2 Twist the bulb holder counterclockwise and withdraw the holder
from the reflector.
3 Change the bulb without touching the glass with your fingers.
Insert the bulb holder into the reflector and twist it clockwise until
it locks.4 Refit the cover over the rear of the headlight.
Left-hand side
5 Refit the air pipe to the front of the battery box.
6 Refit the washer fluid filler pipe.
7 Refit the battery cover.
NOTICEDo not fit bulbs with a higher rating than 55 W as this could
damage the headlight reflector. Furthermore, the car’s wiring is
not designed to cope with higher wattages.
Retainers on the battery cover Changing the high beam bulb
ProCarManuals.com
Page 219 of 292
217 Car care
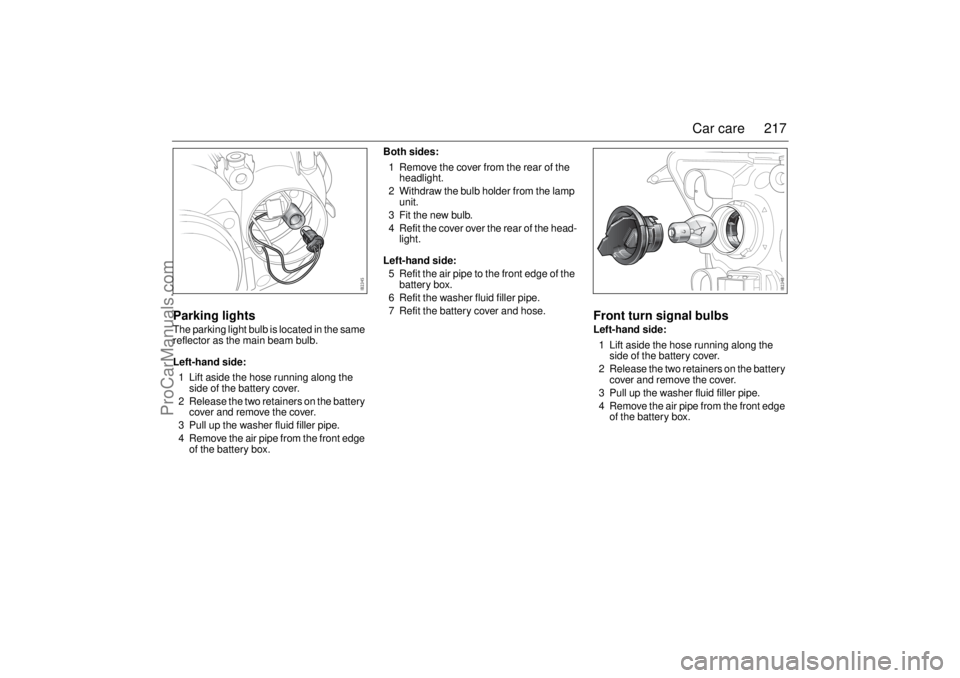
Parking lightsThe parking light bulb is located in the same
reflector as the main beam bulb.
Left-hand side:
1 Lift aside the hose running along the
side of the battery cover.
2 Release the two retainers on the battery
cover and remove the cover.
3 Pull up the washer fluid filler pipe.
4 Remove the air pipe from the front edge
of the battery box.Both sides:
1 Remove the cover from the rear of the
headlight.
2 Withdraw the bulb holder from the lamp
unit.
3 Fit the new bulb.
4 Refit the cover over the rear of the head-
light.
Left-hand side:
5 Refit the air pipe to the front edge of the
battery box.
6 Refit the washer fluid filler pipe.
7 Refit the battery cover and hose.
Front turn signal bulbsLeft-hand side:
1 Lift aside the hose running along the
side of the battery cover.
2 Release the two retainers on the battery
cover and remove the cover.
3 Pull up the washer fluid filler pipe.
4 Remove the air pipe from the front edge
of the battery box.
ProCarManuals.com
Page 220 of 292
218 Car careBoth sides:
1 The bulb holder has a bayonet fitting.
Turn the bulb holder counterclockwise
and withdraw it.
2 The bulb also has a bayonet fitting.
Press in the bulb and twist it counter-
clockwise.
3 Fit the new bulb.
4 To facilitate fitting, look in through the
headlight lens when fitting the bulb.
Check that the new bulb is firmly seated.
Left-hand side:
5 Refit the air pipe to the front edge of the
battery box.
6 Refit the washer fluid filler pipe.
7 Refit the battery cover and hose.
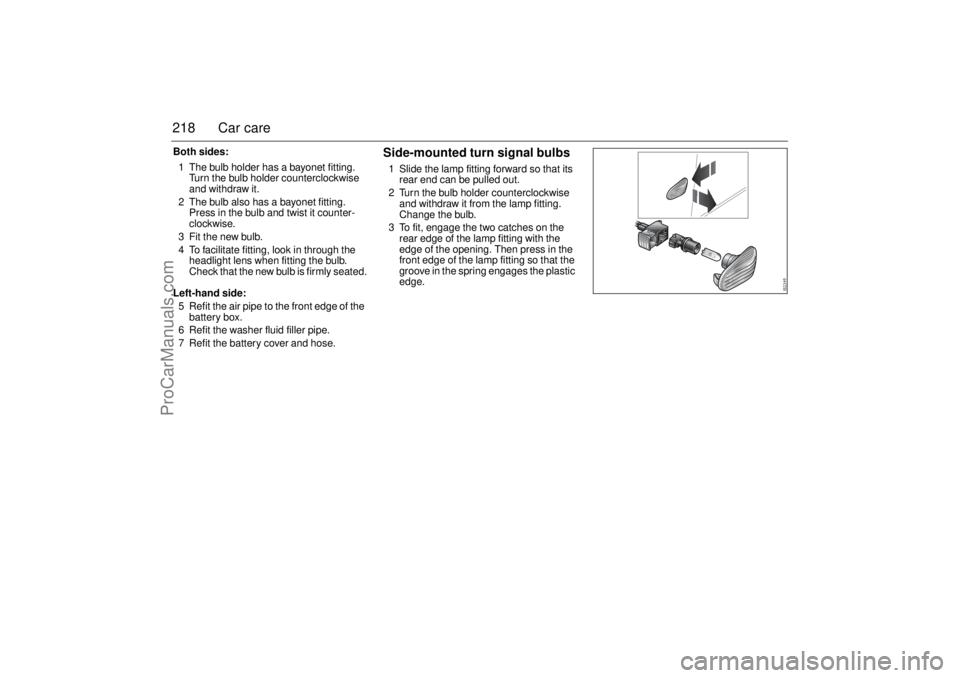
Side-mounted turn signal bulbs1 Slide the lamp fitting forward so that its
rear end can be pulled out.
2 Turn the bulb holder counterclockwise
and withdraw it from the lamp fitting.
Change the bulb.
3 To fit, engage the two catches on the
rear edge of the lamp fitting with the
edge of the opening. Then press in the
front edge of the lamp fitting so that the
groove in the spring engages the plastic
edge.
ProCarManuals.com