engine SAAB 9-3 2007 Owner's Manual
[x] Cancel search | Manufacturer: SAAB, Model Year: 2007, Model line: 9-3, Model: SAAB 9-3 2007Pages: 304, PDF Size: 26.16 MB
Page 90 of 304
90 Instruments and controlsPress the CLR button to acknowledge a SID
message. If you acknowledge a message
but do nothing about it, the message will be
displayed again the next time you start the
car.
When the engine is switched off the warn-
ing/indicator lights still active are displayed,
this is to remind the driver. At this point the
warning/indicator lights previously acknowl-
edged with the CLR button are also dis-
played.
You can adjust the settings of several of the
car’s systems, such as the alarm3, rain
sensor3 and climate control system. These
are known as Settings se page 94.Odometer and trip meterThe odometer records the distance trav-
elled in miles on U.S. vehicles and on Cana-
dian vehicles the distance indicated is in
kilometres, and the trip meter in miles and
tenths (kilometres and tenths of kilometres
on Canadian vehicles).xx
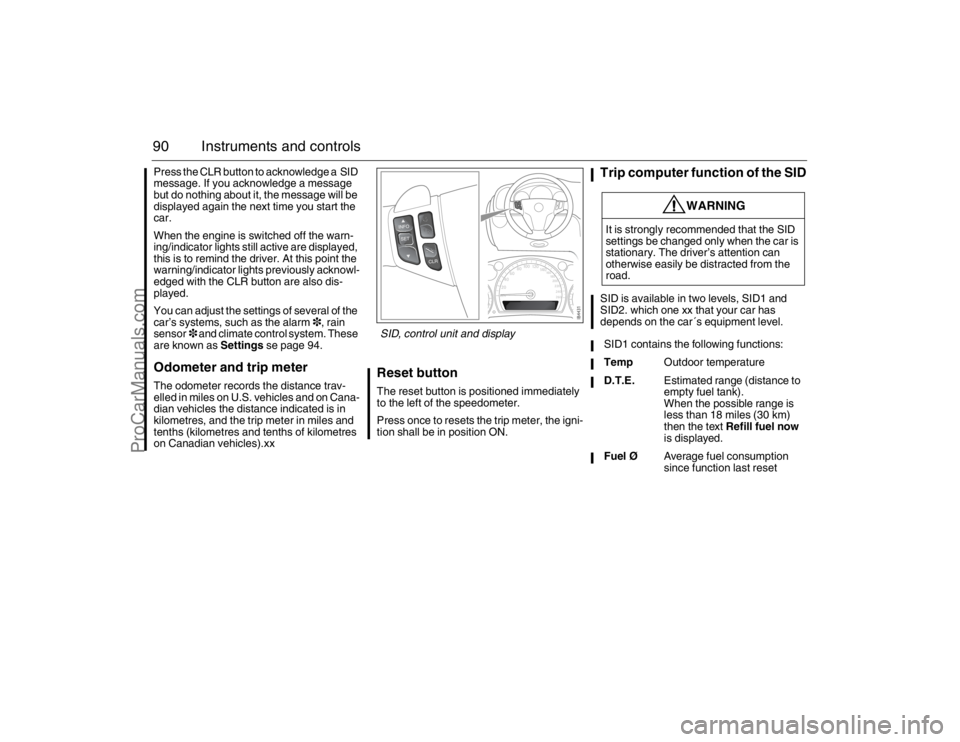
Reset buttonThe reset button is positioned immediately
to the left of the speedometer.
Press once to resets the trip meter, the igni-
tion shall be in position ON.
Trip computer function of the SIDSID is available in two levels, SID1 and
SID2. which one xx that your car has
depends on the car´s equipment level.
WARNING
It is strongly recommended that the SID
settings be changed only when the car is
stationary. The driver’s attention can
otherwise easily be distracted from the
road.
SID1 contains the following functions:
TempOutdoor temperature
D.T.E.Estimated range (distance to
empty fuel tank).
When the possible range is
less than 18 miles (30 km)
then the text Refill fuel now
is displayed.
Fuel ØAverage fuel consumption
since function last reset
SID, control unit and display
93_U S _M 07.book Page 90 W ednesday, April 12, 2006 9:30 AM
ProCarManuals.com
Page 91 of 304
91 Instruments and controls
When the engine is started, the function that
was selected when the engine was
switched off is displayed, with the following
exceptions:
Temp is displayed if the outside tempera-
ture is between 26 and 38°F (–3 and
+3°C).
D.T.E. is displayed if less than or equal to
30 miles (50 km).Outdoor temperature
The Temp function is always activated
(even in NIGHTPANEL mode) if the outdoor
temperature rises or falls to between 26 and
38°F (–3 and +3°C).
If the temperature sensor, located under the
front bumper, is covered by snow or ice,
temperature readings will be unreliable.Setting values
1 Select one of the functions using the
steering wheel controls, or .
Dist (preset to 100 miles (100 km) if not
previously set)
Speed W (preset to 55 mph (90 km/h)
2 Press and hold the SET button until
given audible confirmation.
3 Use the steering wheel controls to select
the value. (Press CLR to reset the
value.)
4 Press the SET button to finish setup.
Using DIST as a trip meter
1 Select Dist using the steering wheel
controls, or .
2 Press and hold the CLR button for
approx. 1 second.
An arrow will now appear on the right-hand
side of the display, indicating that the trip
meter is running. SID2 3 also contains the following fea-
tures:
DistDistance to destinations.
Function can also be used as
a trip meter
Speed ØAverage speed since func-
tion last reset
Speed WSpeed warning (chime)
SettingsSettings of features such as
alarm clock, language and
rain sensor3
Phone3Managing of number list, see
Infotainment Manual.
WARNING
Remember that roads can be icy even at
temperatures of above 38°F (+3°C),
especially on bridges and stretches of
road that are sheltered from the sun.
93_U S _M 07.book Page 91 W ednesday, April 12, 2006 9:30 AM
ProCarManuals.com
Page 96 of 304

96 Instruments and controlsExplanation of the various selections under
Settings.Resetting the service indication
Reset the service indication in accordance
with the following:
1 Turn the remote control to the ON posi-
tion, the engine must be switched off.
2 Select Settings using the steering
wheel controls, or .
3 Press and hold the SET button until
given audible confirmation.
4 Select Time for Service.
5 Press the SET button.
6 To the question Reset Service Ind?
select YES (Press CLR button to undo).
ClockAdjustments can be made in the Infotain-
ment system.
See separate Manual. Rain Sensor
The sensitivity has three levels.
Park Assistance
The Park Assistance can be shut off by
choosing OFF.
Alarm Clock
Setting of alarm clock is possible.
Language
Select the desired language. The
number of languages can vary
between markets.
Speed Scale Illum.
Select the proportion of the speedo-
meter to be illuminated in NIGHT-
PANEL mode.
Speed Scale Sel.
Select if both scales or just mph-scale
shall be illuminated in NIGHTPANEL
mode.
Unit
Select the desired group of units.
Next Service: xx%
Displayed percentage is approximately
equivalent to the condition of the
engine oil. 100% is equivalent to new
engine oil. The type of service that is
required is also shown here.
Time for Service.
:When it is time for service the required
service type is displayed.INTERMEDIATE
MAIN
MAIN & INTERMED
A service indication must only be
reset after the service has been
performed.
93_U S _M 07.book Page 96 W ednesday, April 12, 2006 9:30 AM
ProCarManuals.com
Page 97 of 304
97 Instruments and controls
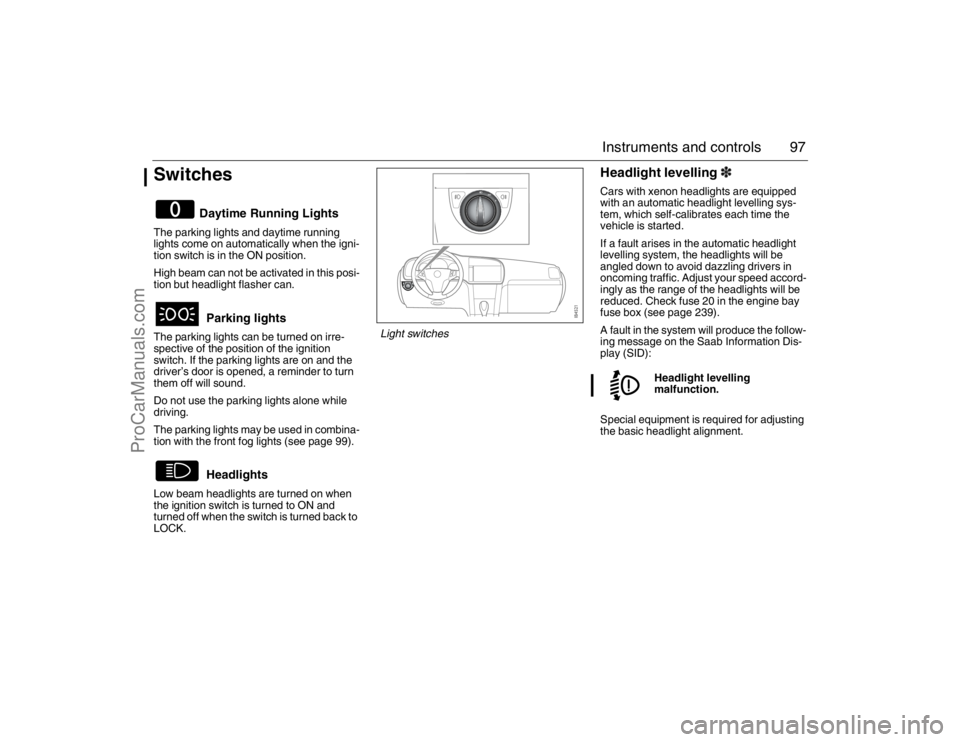
SwitchesThe parking lights and daytime running
lights come on automatically when the igni-
tion switch is in the ON position.
High beam can not be activated in this posi-
tion but headlight flasher can.
The parking lights can be turned on irre-
spective of the position of the ignition
switch. If the parking lights are on and the
driver’s door is opened, a reminder to turn
them off will sound.
Do not use the parking lights alone while
driving.
The parking lights may be used in combina-
tion with the front fog lights (see page 99).
Low beam headlights are turned on when
the ignition switch is turned to ON and
turned off when the switch is turned back to
LOCK.
Headlight levelling3Cars with xenon headlights are equipped
with an automatic headlight levelling sys-
tem, which self-calibrates each time the
vehicle is started.
If a fault arises in the automatic headlight
levelling system, the headlights will be
angled down to avoid dazzling drivers in
oncoming traffic. Adjust your speed accord-
ingly as the range of the headlights will be
reduced. Check fuse 20 in the engine bay
fuse box (see page 239).
A fault in the system will produce the follow-
ing message on the Saab Information Dis-
play (SID):
Special equipment is required for adjusting
the basic headlight alignment.
Daytime Running Lights
Parking lights
Headlights
Headlight levelling
malfunction.
Light switches
93_U S _M 07.book Page 97 W ednesday, April 12, 2006 9:30 AM
ProCarManuals.com
Page 98 of 304
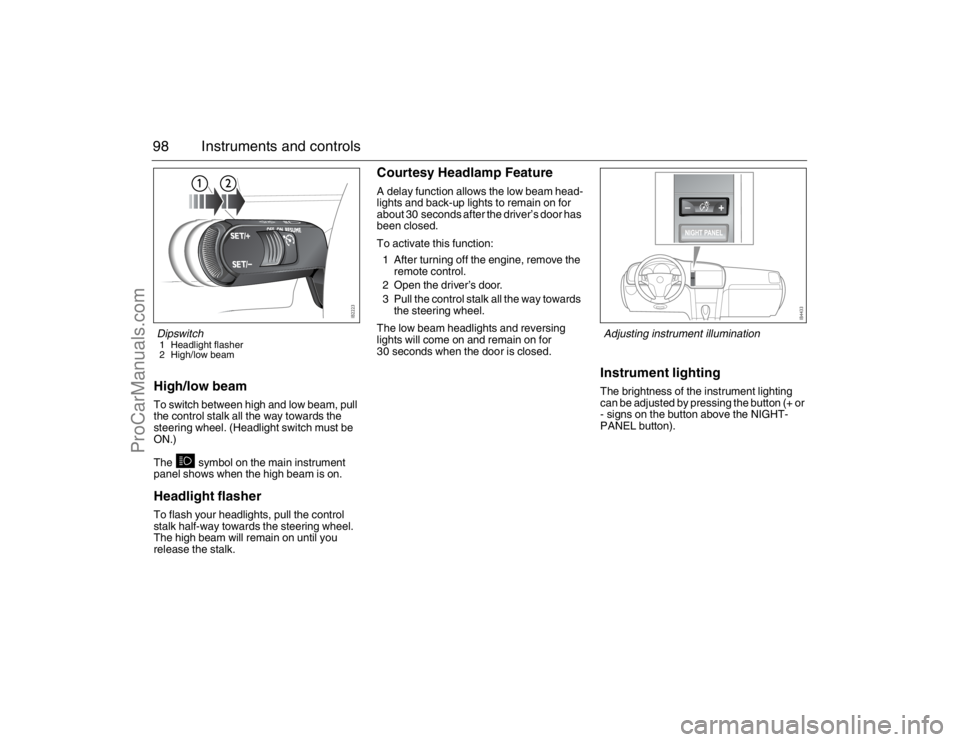
98 Instruments and controlsHigh/low beamTo switch between high and low beam, pull
the control stalk all the way towards the
steering wheel. (Headlight switch must be
ON.)
The symbol on the main instrument
panel shows when the high beam is on.Headlight flasherTo flash your headlights, pull the control
stalk half-way towards the steering wheel.
The high beam will remain on until you
release the stalk.
Courtesy Headlamp FeatureA delay function allows the low beam head-
lights and back-up lights to remain on for
about 30 seconds after the driver’s door has
been closed.
To activate this function:
1 After turning off the engine, remove the
remote control.
2 Open the driver’s door.
3 Pull the control stalk all the way towards
the steering wheel.
The low beam headlights and reversing
lights will come on and remain on for
30 seconds when the door is closed.
Instrument lightingThe brightness of the instrument lighting
can be adjusted by pressing the button (+ or
- signs on the button above the NIGHT-
PANEL button).
Dipswitch1 Headlight flasher
2 High/low beam
Adjusting instrument illumination
93_U S _M 07.book Page 98 W ednesday, April 12, 2006 9:30 AM
ProCarManuals.com
Page 99 of 304
99 Instruments and controls
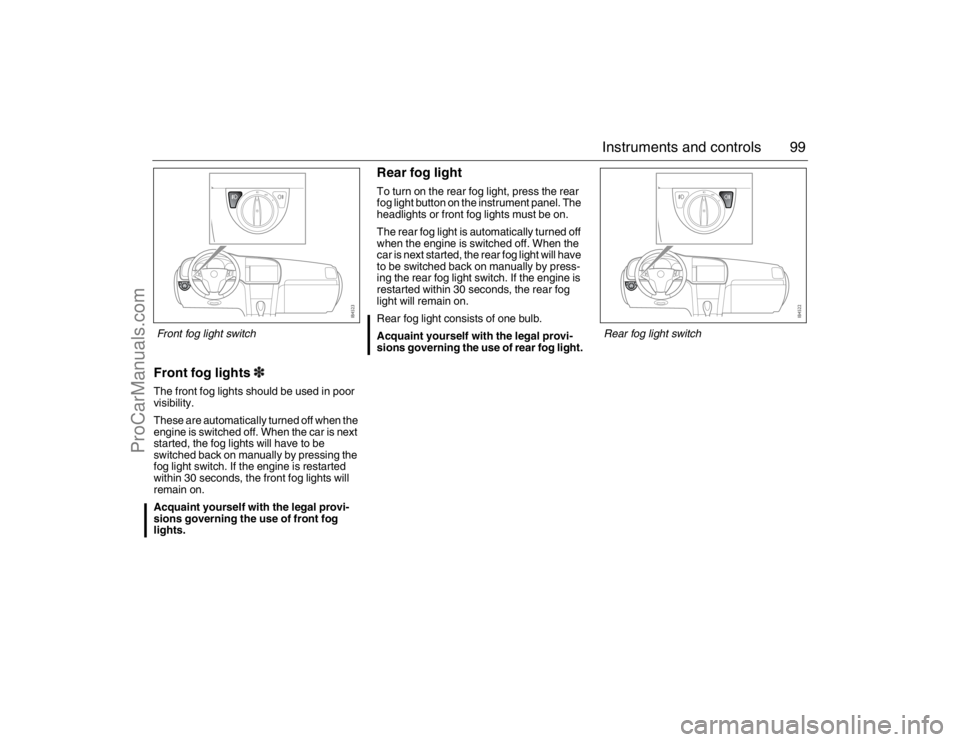
Front fog lights3 The front fog lights should be used in poor
visibility.
These are automatically turned off when the
engine is switched off. When the car is next
started, the fog lights will have to be
switched back on manually by pressing the
fog light switch. If the engine is restarted
within 30 seconds, the front fog lights will
remain on.
Acquaint yourself with the legal provi-
sions governing the use of front fog
lights.
Rear fog lightTo turn on the rear fog light, press the rear
fog light button on the instrument panel. The
headlights or front fog lights must be on.
The rear fog light is automatically turned off
when the engine is switched off. When the
car is next started, the rear fog light will have
to be switched back on manually by press-
ing the rear fog light switch. If the engine is
restarted within 30 seconds, the rear fog
light will remain on.
Rear fog light consists of one bulb.
Acquaint yourself with the legal provi-
sions governing the use of rear fog light.
Front fog light switch
Rear fog light switch
93_U S _M 07.book Page 99 W ednesday, April 12, 2006 9:30 AM
ProCarManuals.com
Page 100 of 304
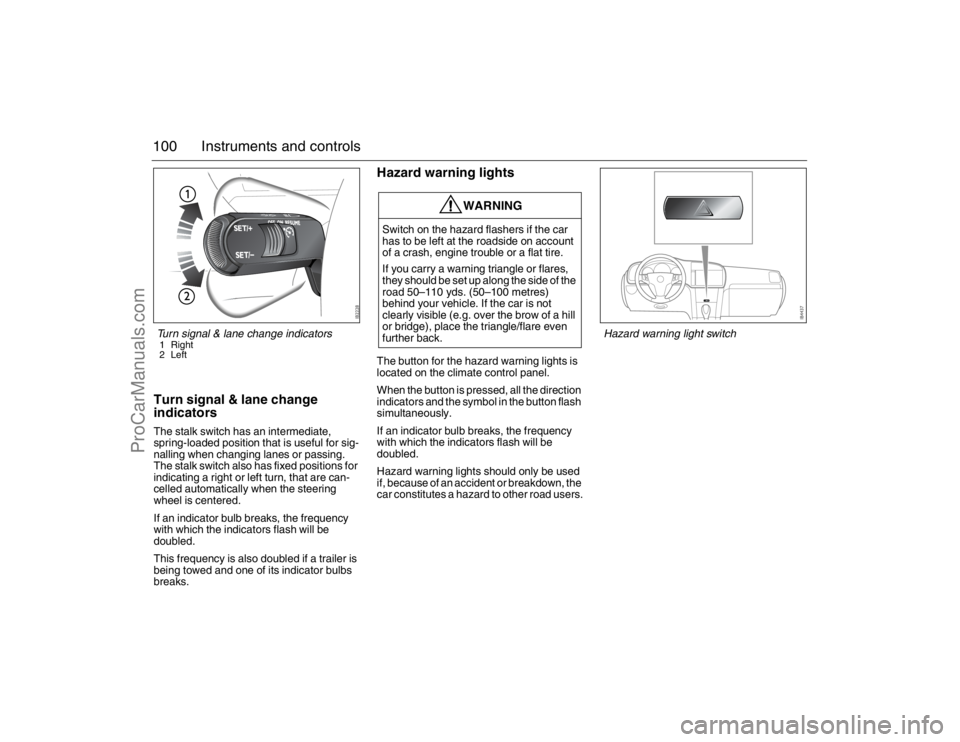
100 Instruments and controlsTurn signal & lane change
indicatorsThe stalk switch has an intermediate,
spring-loaded position that is useful for sig-
nalling when changing lanes or passing.
The stalk switch also has fixed positions for
indicating a right or left turn, that are can-
celled automatically when the steering
wheel is centered.
If an indicator bulb breaks, the frequency
with which the indicators flash will be
doubled.
This frequency is also doubled if a trailer is
being towed and one of its indicator bulbs
breaks.
Hazard warning lightsThe button for the hazard warning lights is
located on the climate control panel.
When the button is pressed, all the direction
indicators and the symbol in the button flash
simultaneously.
If an indicator bulb breaks, the frequency
with which the indicators flash will be
doubled.
Hazard warning lights should only be used
if, because of an accident or breakdown, the
car constitutes a hazard to other road users.
WARNING
Switch on the hazard flashers if the car
has to be left at the roadside on account
of a crash, engine trouble or a flat tire.
If you carry a warning triangle or flares,
they should be set up along the side of the
road 50–110 yds. (50–100 metres)
behind your vehicle. If the car is not
clearly visible (e.g. over the brow of a hill
or bridge), place the triangle/flare even
further back.
Turn signal & lane change indicators1 Right
2 Left
Hazard warning light switch
93_U S _M 07.book Page 100 W ednesday, April 12, 2006 9:30 AM
ProCarManuals.com
Page 101 of 304
101 Instruments and controls
Back-Up The back-up lights come on automatically
when reverse gear is engaged or selected
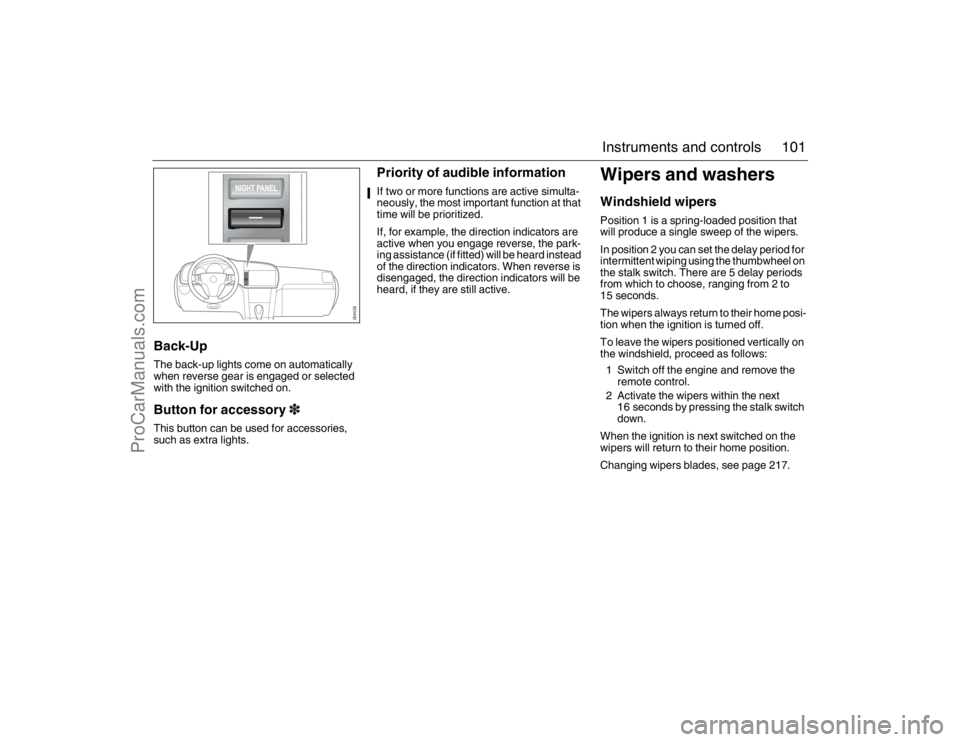
with the ignition switched on.Button for accessory3This button can be used for accessories,
such as extra lights.
Priority of audible informationIf two or more functions are active simulta-
neously, the most important function at that
time will be prioritized.
If, for example, the direction indicators are
active when you engage reverse, the park-
ing assistance (if fitted) will be heard instead
of the direction indicators. When reverse is
disengaged, the direction indicators will be
heard, if they are still active.
Wipers and washersWindshield wipersPosition 1 is a spring-loaded position that
will produce a single sweep of the wipers.
In position 2 you can set the delay period for
intermittent wiping using the thumbwheel on
the stalk switch. There are 5 delay periods
from which to choose, ranging from 2 to
15 seconds.
The wipers always return to their home posi-
tion when the ignition is turned off.
To leave the wipers positioned vertically on
the windshield, proceed as follows:
1 Switch off the engine and remove the
remote control.
2 Activate the wipers within the next
16 seconds by pressing the stalk switch
down.
When the ignition is next switched on the
wipers will return to their home position.
Changing wipers blades, see page 217.
93_U S _M 07.book Page 101 W ednesday, April 12, 2006 9:30 AM
ProCarManuals.com
Page 103 of 304
103 Instruments and controls
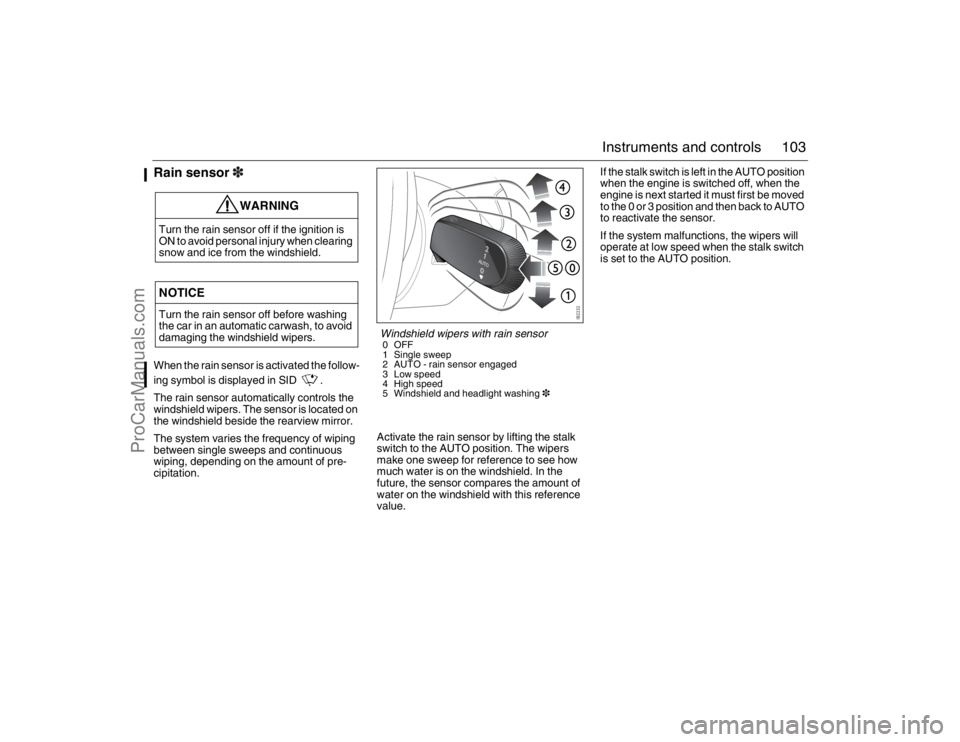
Rain sensor3When the rain sensor is activated the follow-
ing symbol is displayed in SID .
The rain sensor automatically controls the
windshield wipers. The sensor is located on
the windshield beside the rearview mirror.
The system varies the frequency of wiping
between single sweeps and continuous
wiping, depending on the amount of pre-
cipitation.Activate the rain sensor by lifting the stalk
switch to the AUTO position. The wipers
make one sweep for reference to see how
much water is on the windshield. In the
future, the sensor compares the amount of
water on the windshield with this reference
value.If the stalk switch is left in the AUTO position
when the engine is switched off, when the
engine is next started it must first be moved
to the 0 or 3 position and then back to AUTO
to reactivate the sensor.
If the system malfunctions, the wipers will
operate at low speed when the stalk switch
is set to the AUTO position.
WARNING
Turn the rain sensor off if the ignition is
ON to avoid personal injury when clearing
snow and ice from the windshield.NOTICETurn the rain sensor off before washing
the car in an automatic carwash, to avoid
damaging the windshield wipers.
Windshield wipers with rain sensor0OFF
1 Single sweep
2 AUTO - rain sensor engaged
3 Low speed
4 High speed
5 Windshield and headlight washing3
93_U S _M 07.book Page 103 W ednesday, April 12, 2006 9:30 AM
ProCarManuals.com
Page 105 of 304
105 Instruments and controls
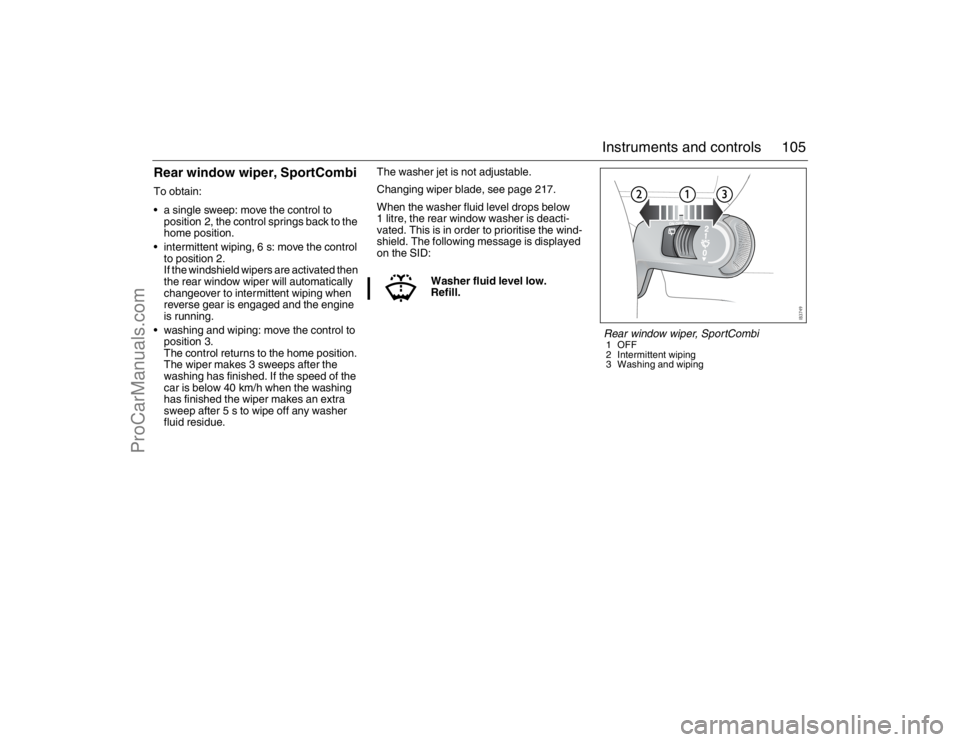
Rear window wiper, SportCombiTo obtain:
a single sweep: move the control to
position 2, the control springs back to the
home position.
intermittent wiping, 6 s: move the control
to position 2.
If the windshield wipers are activated then
the rear window wiper will automatically
changeover to intermittent wiping when
reverse gear is engaged and the engine
is running.
washing and wiping: move the control to
position 3.
The control returns to the home position.
The wiper makes 3 sweeps after the
washing has finished. If the speed of the
car is below 40 km/h when the washing
has finished the wiper makes an extra
sweep after 5 s to wipe off any washer
fluid residue.The washer jet is not adjustable.
Changing wiper blade, see page 217.
When the washer fluid level drops below
1 litre, the rear window washer is deacti-
vated. This is in order to prioritise the wind-
shield. The following message is displayed
on the SID:
Washer fluid level low.
Refill.
Rear window wiper, SportCombi1OFF
2 Intermittent wiping
3 Washing and wiping
93_U S _M 07.book Page 105 W ednesday, April 12, 2006 9:30 AM
ProCarManuals.com