brake SAAB 9-5 2003 User Guide
[x] Cancel search | Manufacturer: SAAB, Model Year: 2003, Model line: 9-5, Model: SAAB 9-5 2003Pages: 288, PDF Size: 16.78 MB
Page 60 of 288
60 Instruments and controls
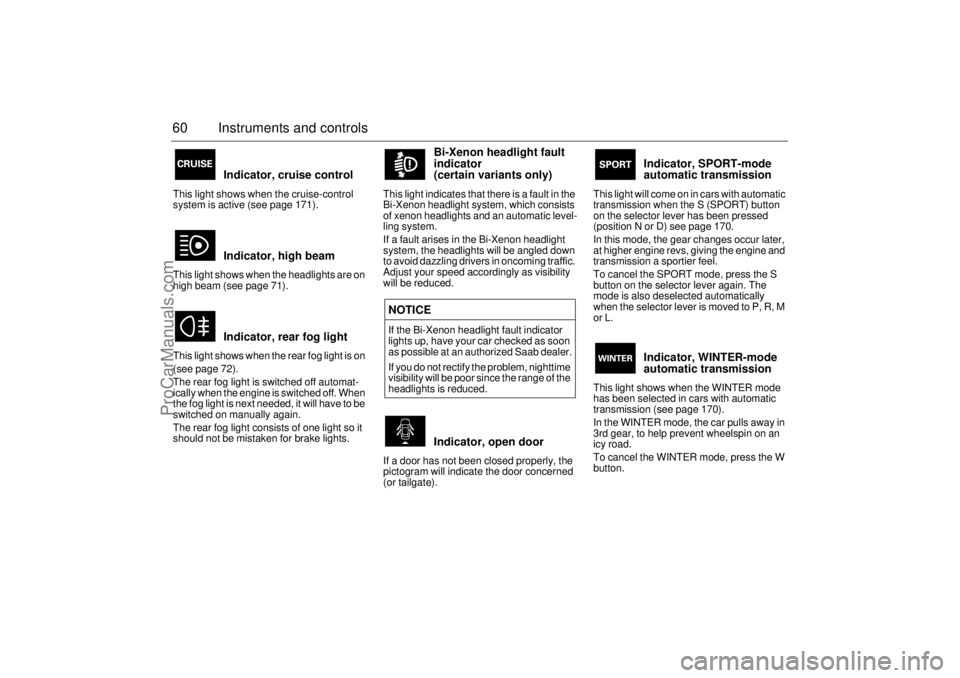
Indicator, cruise control
This light shows when the cruise-control
system is active (see page 171).
Indicator, high beam
This light shows when the headlights are on
high beam (see page 71).
Indicator, rear fog light
This light shows when the rear fog light is on
(see page 72).
The rear fog light is switched off automat-
ically when the engine is switched off. When
the fog light is next needed, it will have to be
switched on manually again.
The rear fog light consists of one light so it
should not be mistaken for brake lights.
Bi-Xenon headlight fault
indicator
(certain variants only)
This light indicates that there is a fault in the
Bi-Xenon headlight system, which consists
of xenon headlights and an automatic level-
ling system.
If a fault arises in the Bi-Xenon headlight
system, the headlights will be angled down
to avoid dazzling drivers in oncoming traffic.
Adjust your speed accordingly as visibility
will be reduced.
Indicator, open door
If a door has not been closed properly, the
pictogram will indicate the door concerned
(or tailgate).
Indicator, SPORT-mode
automatic transmission
This light will come on in cars with automatic
transmission when the S (SPORT) button
on the selector lever has been pressed
(position N or D) see page 170.
In this mode, the gear changes occur later,
at higher engine revs, giving the engine and
transmission a sportier feel.
To cancel the SPORT mode, press the S
button on the selector lever again. The
mode is also deselected automatically
w h e n t h e s e l e c t o r l e v e r i s m o v e d t o P , R , M
or L.
Indicator, WINTER-mode
automatic transmission
This light shows when the WINTER mode
has been selected in cars with automatic
transmission (see page 170).
In the WINTER mode, the car pulls away in
3rd gear, to help prevent wheelspin on an
icy road.
To cancel the WINTER mode, press the W
button.
NOTICEIf the Bi-Xenon headlight fault indicator
lights up, have your car checked as soon
as possible at an authorized Saab dealer.
If you do not rectify the problem, nighttime
visibility will be poor since the range of the
headlights is reduced.
ProCarManuals.com
Page 69 of 288

69 Instruments and controls
CHECK messages When the engine is started, CHECKING will
appear on the display for about four sec-
onds, while the SID checks are being per-
formed.
When a CHECK message is generated
while the car is being driven, a chime will
sound, INFO DISPL will illuminate on the
main instrument panel, and the message
will appear on the SID. The number of mes-
sages that can be displayed by the SID
varies with the specification of the car.
If more than one CHECK message has
been generated, the
+ symbol will appear to
the left of the text on the display. The mes-
sages appear in order of priority.
If a new fault occurs while another message
is being displayed, the message relating to
the new one will appear for 10 seconds,
after which the display will return to the ear-
lier one.
Press CLEAR once to acknowledge a mes-
sage, whereupon it will be cleared from the
display. It will not be displayed again before
the ignition has been switched off and then
on again. The following messages may be displayed:
1 This message will be displayed approxi-
mately 600 miles (1,000 km) before the next
scheduled service is due, or when 365 days
have elapsed since the last service. The
message should be cleared at the time of that
service (see the Saab Warranties & Service
Record Booklet).
This message can also be deleted by first
briefly pressing the CLEAR button, then
depressing it a second time for at least eight
seconds until ”SERVICE” appears on the dis-
play and a chime sounds. The message can
only be deleted when it is shown on the SID.
Night panelTo improve night-driving conditions inside
the car, the Night Panel mode can be
selected. In this mode, the amount of infor-
mation displayed is reduced, and only the
most important instruments and displays
will be illuminated.
When the Night Panel button is pressed,
only the speedometer will be illuminated (up
to the 87-mph or 140-km/h graduation), all
the other instruments illumination being
extinguished and their needles moved to
zero. Both the SID and the ACC displays will
be extinguished and the backlighting for
switches and other controls will be dimmed.
Note: All indicator and warning lights,
together with the display of CHECK mes-
sages, will operate as normal, except ”Out-
door temperature (Frost warning)”, see
page 66. Message See
page
FRONT LIGHT FAILURE 215
REAR LIGHT FAILURE 219
FOG LIGHT FAILURE 219
BRAKE LIGHT FAILURE 219
WASHER FLUID LEVEL LOW 213
FILL COOLANT FLUID 206
REPLACE KEY BATTERY 45
KEY NOT ACCEPTED 52
SERVICE THEFT ALARM 52
TRANSMISSION OVERHEATING 166
TIGHTEN FUEL FILLER CAP 158
TIME FOR SERVICE
1)
254
ProCarManuals.com
Page 72 of 288
72 Instruments and controlsCourtesy Headlight FeatureA delay function allows the headlights to
remain on low beam for about 30 seconds
after the driver’s door has been closed.
To activate this function,
Switch off the ignition and remove the key
Open the driver’s door
Pull the high/low beam control stalk
towards the steering wheel like you are
flashing the high beam, see page 71. The
low beam headlights will now come on
immediately after the driver’s door has
been closed (within 30 seconds) and will
remain on for about 30 seconds.
The length of time for this function can be
adjusted by your authorized Saab dealer.
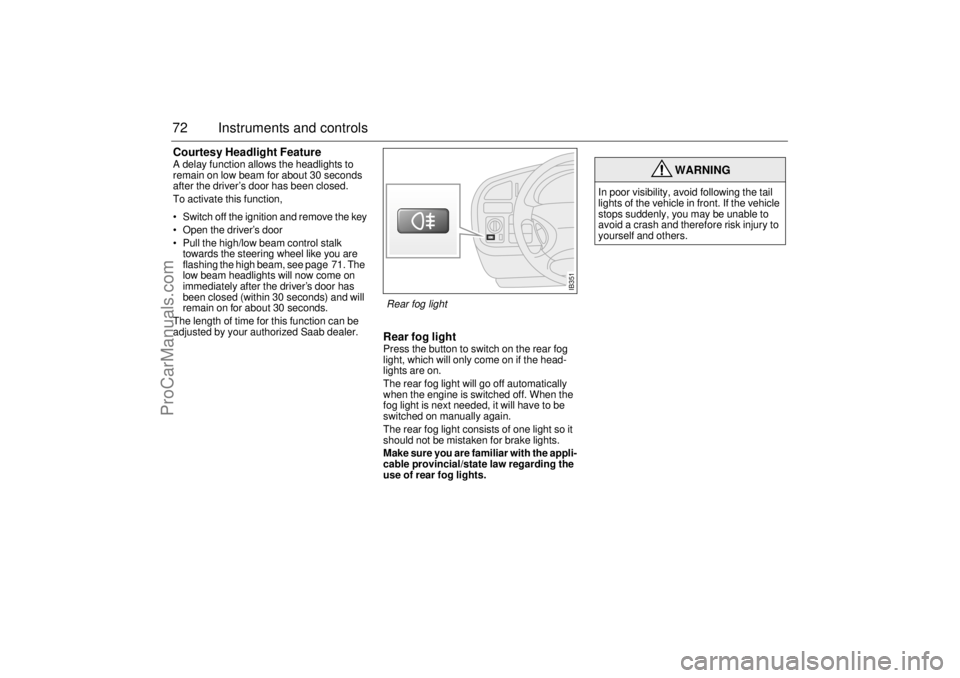
Rear fog lightPress the button to switch on the rear fog
light, which will only come on if the head-
lights are on.
The rear fog light will go off automatically
when the engine is switched off. When the
fog light is next needed, it will have to be
switched on manually again.
The rear fog light consists of one light so it
should not be mistaken for brake lights.
Make sure you are familiar with the appli-
cable provincial/state law regarding the
use of rear fog lights.
WARNING
In poor visibility, avoid following the tail
lights of the vehicle in front. If the vehicle
stops suddenly, you may be unable to
avoid a crash and therefore risk injury to
yourself and others.
IB351
Rear fog light
ProCarManuals.com
Page 139 of 288
139 Interior equipment and trunk
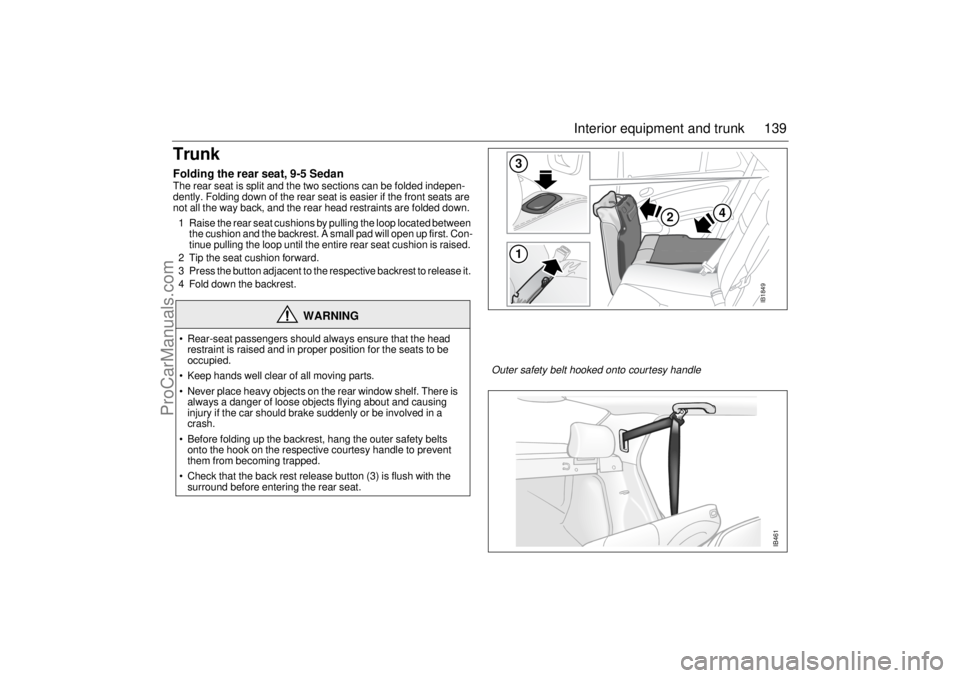
TrunkFolding the rear seat, 9-5 SedanThe rear seat is split and the two sections can be folded indepen-
dently. Folding down of the rear seat is easier if the front seats are
not all the way back, and the rear head restraints are folded down.
1 Raise the rear seat cushions by pulling the loop located between
the cushion and the backrest. A small pad will open up first. Con-
tinue pulling the loop until the entire rear seat cushion is raised.
2 Tip the seat cushion forward.
3 Press the button adjacent to the respective backrest to release it.
4 Fold down the backrest.
WARNING
Rear-seat passengers should always ensure that the head
restraint is raised and in proper position for the seats to be
occupied.
Keep hands well clear of all moving parts.
Never place heavy objects on the rear window shelf. There is
always a danger of loose objects flying about and causing
injury if the car should brake suddenly or be involved in a
crash.
Before folding up the backrest, hang the outer safety belts
onto the hook on the respective courtesy handle to prevent
them from becoming trapped.
Check that the back rest release button (3) is flush with the
surround before entering the rear seat.
31
2
4
IB1849
IB461
Outer safety belt hooked onto courtesy handle
ProCarManuals.com
Page 140 of 288
140 Interior equipment and trunk
WARNING
Place heavy items closest to the backrest and stow smaller
and lighter items on top.
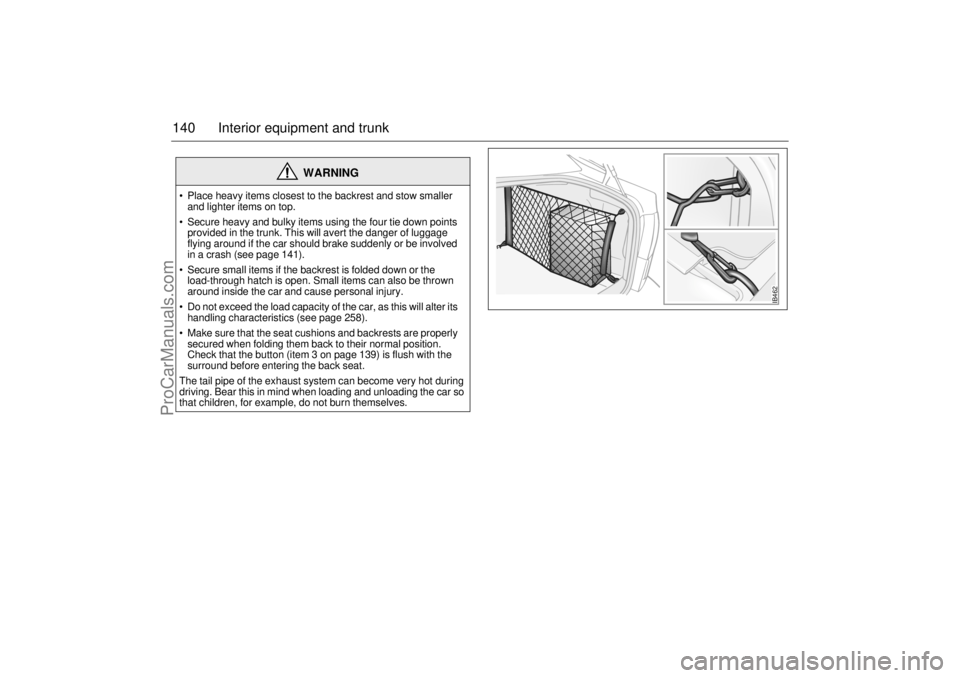
Secure heavy and bulky items using the four tie down points
provided in the trunk. This will avert the danger of luggage
flying around if the car should brake suddenly or be involved
in a crash (see page 141).
Secure small items if the backrest is folded down or the
load-through hatch is open. Small items can also be thrown
around inside the car and cause personal injury.
Do not exceed the load capacity of the car, as this will alter its
handling characteristics (see page 258).
Make sure that the seat cushions and backrests are properly
secured when folding them back to their normal position.
Check that the button (item 3 on page 139) is flush with the
surround before entering the back seat.
The tail pipe of the exhaust system can become very hot during
driving. Bear this in mind when loading and unloading the car so
that children, for example, do not burn themselves.
IB462
ProCarManuals.com
Page 141 of 288
141 Interior equipment and trunk
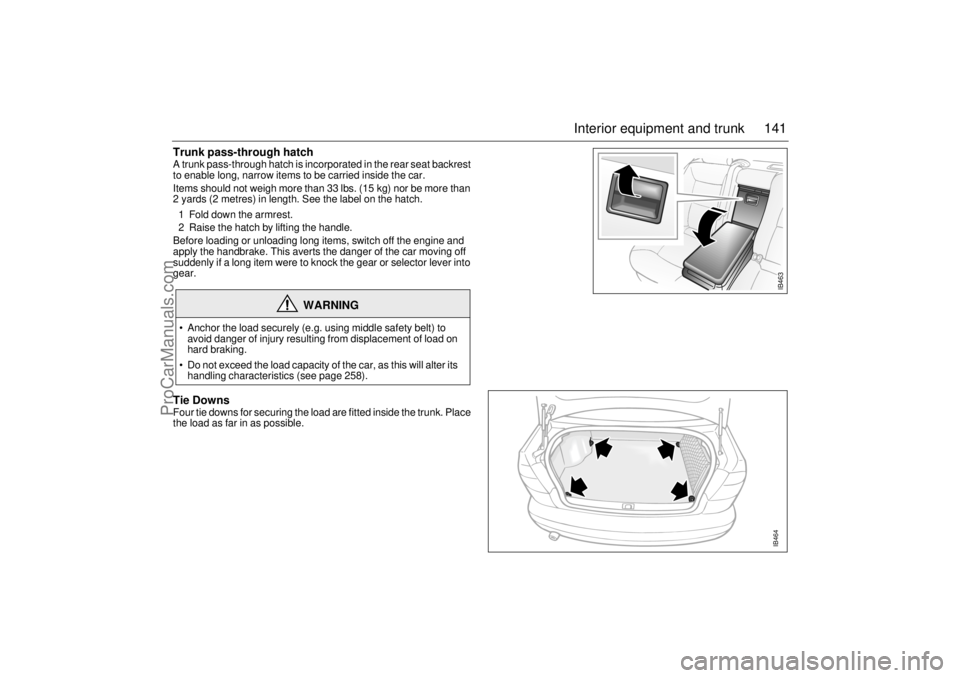
Trunk pass-through hatch A trunk pass-through hatch is incorporated in the rear seat backrest
to enable long, narrow items to be carried inside the car.
Items should not weigh more than 33 lbs. (15 kg) nor be more than
2 yards (2 metres) in length. See the label on the hatch.
1 Fold down the armrest.
2 Raise the hatch by lifting the handle.
Before loading or unloading long items, switch off the engine and
apply the handbrake. This averts the danger of the car moving off
suddenly if a long item were to knock the gear or selector lever into
gear. Tie DownsFour tie downs for securing the load are fitted inside the trunk. Place
the load as far in as possible.
WARNING
Anchor the load securely (e.g. using middle safety belt) to
avoid danger of injury resulting from displacement of load on
hard braking.
Do not exceed the load capacity of the car, as this will alter its
handling characteristics (see page 258).
IB463IB464
ProCarManuals.com
Page 143 of 288
143 Interior equipment and trunk
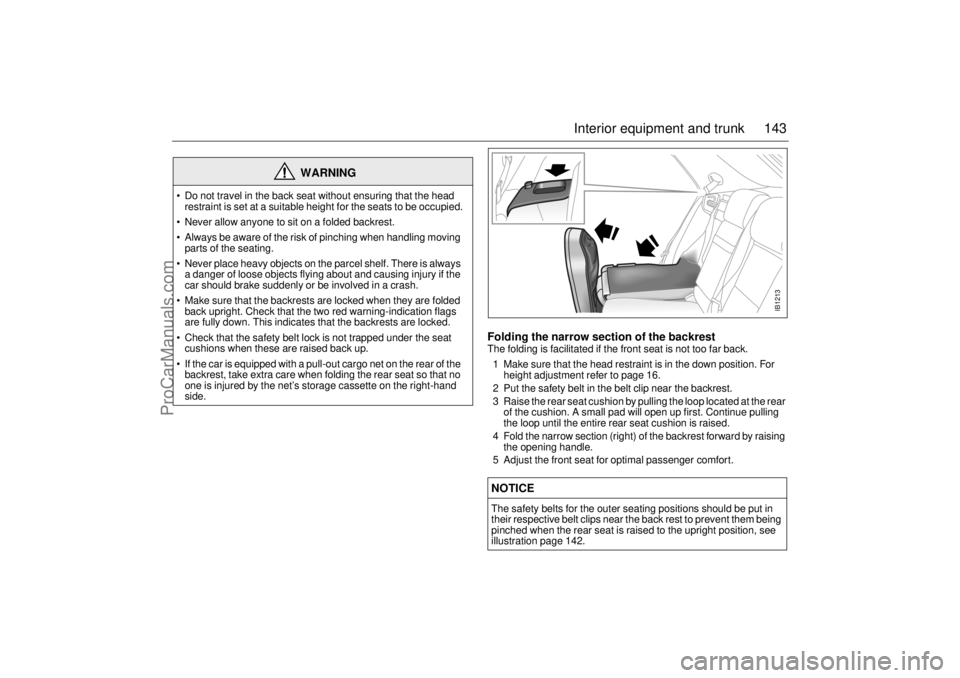
Folding the narrow section of the backrestThe folding is facilitated if the front seat is not too far back.
1 Make sure that the head restraint is in the down position. For
height adjustment refer to page 16.
2 Put the safety belt in the belt clip near the backrest.
3 Raise the rear seat cushion by pulling the loop located at the rear
of the cushion. A small pad will open up first. Continue pulling
the loop until the entire rear seat cushion is raised.
4 Fold the narrow section (right) of the backrest forward by raising
the opening handle.
5 Adjust the front seat for optimal passenger comfort.
WARNING
Do not travel in the back seat without ensuring that the head
restraint is set at a suitable height for the seats to be occupied.
Never allow anyone to sit on a folded backrest.
Always be aware of the risk of pinching when handling moving
parts of the seating.
Never place heavy objects on the parcel shelf. There is always
a danger of loose objects flying about and causing injury if the
car should brake suddenly or be involved in a crash.
Make sure that the backrests are locked when they are folded
back upright. Check that the two red warning-indication flags
are fully down. This indicates that the backrests are locked.
Check that the safety belt lock is not trapped under the seat
cushions when these are raised back up.
If the car is equipped with a pull-out cargo net on the rear of the
backrest, take extra care when folding the rear seat so that no
one is injured by the net’s storage cassette on the right-hand
side.
NOTICEThe safety belts for the outer seating positions should be put in
their respective belt clips near the back rest to prevent them being
pinched when the rear seat is raised to the upright position, see
illustration page 142.
IB1213
ProCarManuals.com
Page 151 of 288
151 Starting and driving
Starting and driving
B1754
Ignition switch ................. 152
Starting the engine .......... 153
Important considerations
for driving ....................... 155
Refueling .......................... 158
Engine Break-In Period ... 161
Gear changing ................. 162
Cruise control .................. 171
Braking ............................. 172
Traction Control System . 175
Electronic Stability
Program (ESP) ............... 176 Economical motoring ..... 178
Driving in cold weather... 179
Driving in hot weather .... 181
Towing a trailer ................ 181
Driving with a roof rack
load ................................. 185
Driving at night ................ 186
Driving with a load .......... 187
Driving considerations
with compact spare
wheel/tire fitted .............. 188 Driving with the trunk
lid/tailgate open .............. 188
Driving in deep water....... 188
Towing the car.................. 189
Jump starting ................... 191
Saab Parking Assistance 193
Parking brake ................... 195
Parking .............................. 195
ProCarManuals.com
Page 153 of 288
153 Starting and driving
If the car does not startIf the text ”KEY NOT ACCEPTED” is shown
on the SID, after a failed start attempt, the
cause could be a fault in the transmitter in
the key, or in the receiver in the ignition lock.
The following should be done:
Turn the key back to the LOCK position.
Turn the key to ON.
Press one of the buttons on the remote
control (the LED stops blinking).
Start the engine.
Try another key. If this works, then the fault
is in the first key.
Contact an authorized Saab dealer for
checking and rectification.
Note:
Certain electronic items, such as cellular
phones, may affect the starting produce-
dure. Be sure that all devices are clear of the
key/ignition switch area.
Starting the engine
NOTICETake care not to spill drinks or to drop
crumbs over the ignition switch. If dirt or
liquid gets into it, the switch may not
operate properly.
WARNING
Always remove the key before leaving
the car.
Always apply the parking brake before
removing the ignition key.
WARNING
When starting the engine:
- Sit down in the driver’s seat.
- Depress the clutch pedal fully. If the
gear lever is not in the neutral posi-
tion, the clutch pedal must be fully
depressed or the car will jump for-
wards or backwards, which may
cause a crash.
- Never start the car from outside the
vehicle, e.g. through a wound down
window. This could lead to serious
personal injury.
Engage reverse (R) (position P for
automatic transmission) to remove the
ignition key. The key can only be
removed in this gear position.
Carbon monoxide (CO) is a colorless,
odorless, poisonous gas. Be alert to
the danger of CO – always open the
garage doors before starting the
engine in the garage.
There is also a danger of CO poison-
ing if the exhaust system is leaking.
ProCarManuals.com
Page 154 of 288

154 Starting and drivingIt is possible for air to enter the lubricating
system in conjunction with an oil or oil-filter
change, or if the car has been stored for
some time. This air can cause the hydraulic
cam followers to emit a ticking noise, which
can persist for up to 15 minutes after start-
ing. Although this is quite normal and does
not indicate any malfunction, it is advisable
not to exceed 3,000 rpm before the noise
has disappeared.
The hydraulic cam lifters are completely
service free; the valve clearance is set up at
the factory and will not need any subse-
quent adjustment.
Starting the engineAvoid racing the engine or putting a heavy
load on it before it has warmed up. Drive
away as soon as the oil warning light has
been extinguished to enable the engine to
attain its normal temperature as quickly as
possible.
The engine has an automatic choke and
should be started as follows:
Cars with manual transmission
To start the engine the clutch pedal must
be fully depressed.
1 Depress the clutch pedal fully but do not
touch the accelerator.
2 Start the engine. Let the ignition key
spring back as soon as the engine has
started and is running smoothly – at very
low temperatures, you may need to run
the starter for up to 25 seconds. Wait
20–30 seconds before running the
starter again, to give the battery time to
recover.
Note:
On cars with manual transmission, if the
starter fails to engage when the ignition key
is turned to the start position, make sure the
clutch pedal is full depressed. Misposi-
tioned floor mats or other obstructions
under the clutch pedal may affect starting.
Let the engine idle for about 10 seconds. Do
not open the throttle wide for at least 2–
3 minutes after starting. Cars with automatic transmission
1 The selector lever must be in the P or N
position.
2 Keep your foot on the brake pedal.
3 Start the engine. Let the ignition key
spring back as soon as the engine has
started and is running smoothly – at very
low temperatures, you may need to run
the starter for up to 25 seconds. Wait
20–30 seconds before running the
starter again, to give the battery time to
recover.
Let the engine idle for about 10 seconds. Do
not open the throttle wide for at least
2–3 minutes after starting.
Useful tips on cold climate starting If the engine has failed to start after several
attempts in very cold weather, press and
hold the accelerator down to the floor and
run the starter for 5–10 seconds. This will
prevent the engine being flooded (exces-
sively rich fuel-air mixture).
Now start the engine in the normal way – do
not touch the accelerator.
If the engine stalls immediately after starting
(e.g. if the clutch was released too quickly),
do not touch the accelerator when restarting
the engine. The tail pipe of the exhaust system
can become very hot during driving.
Bear this in mind when loading and
unloading the car.
Do not rest or sleep in the car when
parked with the engine running. There
is a risk of depressing the accelerator
which could lead to engine damage.
ProCarManuals.com