SAAB 9-5 2004 Owners Manual
Manufacturer: SAAB, Model Year: 2004, Model line: 9-5, Model: SAAB 9-5 2004Pages: 288, PDF Size: 16.91 MB
Page 121 of 288
121 Interior equipment and trunk
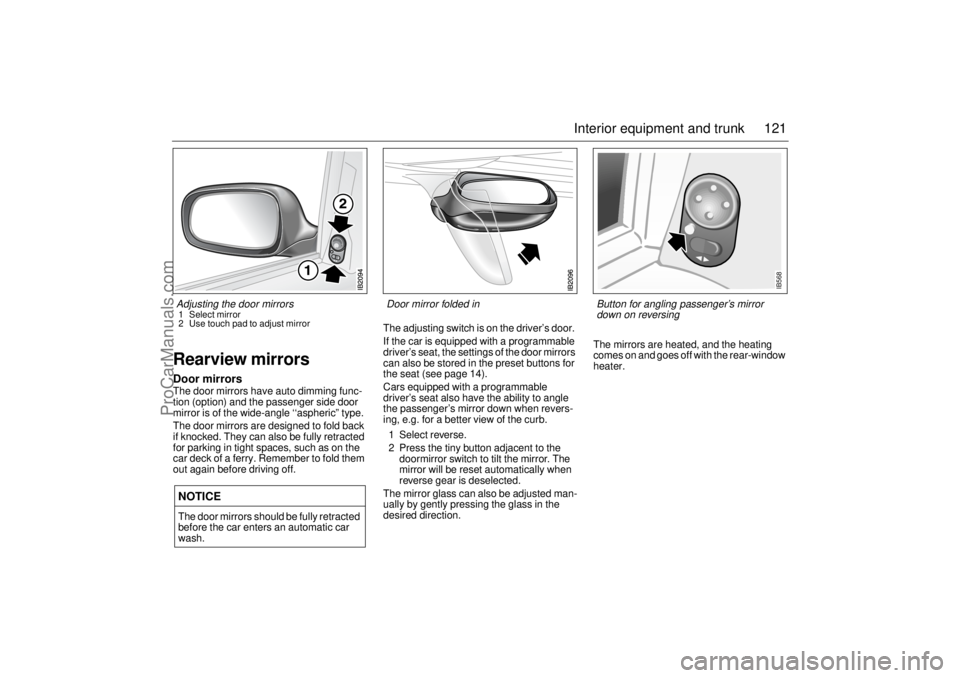
Rearview mirrorsDoor mirrorsThe door mirrors have auto dimming func-
tion (option) and the passenger side door
mirror is of the wide-angle ‘‘aspheric” type.
The door mirrors are designed to fold back
if knocked. They can also be fully retracted
for parking in tight spaces, such as on the
car deck of a ferry. Remember to fold them
out again before driving off.The adjusting switch is on the driver’s door.
If the car is equipped with a programmable
driver’s seat, the settings of the door mirrors
can also be stored in the preset buttons for
the seat (see page 14).
Cars equipped with a programmable
driver’s seat also have the ability to angle
the passenger’s mirror down when revers-
ing, e.g. for a better view of the curb.
1 Select reverse.
2 Press the tiny button adjacent to the
doormirror switch to tilt the mirror. The
mirror will be reset automatically when
reverse gear is deselected.
The mirror glass can also be adjusted man-
ually by gently pressing the glass in the
desired direction.The mirrors are heated, and the heating
comes on and goes off with the rear-window
heater.NOTICEThe door mirrors should be fully retracted
before the car enters an automatic car
wash.Adjusting the door mirrors 1 Select mirror
2 Use touch pad to adjust mirror
Door mirror folded in
IB568
Button for angling passenger’s mirror
down on reversing
ProCarManuals.com
Page 122 of 288
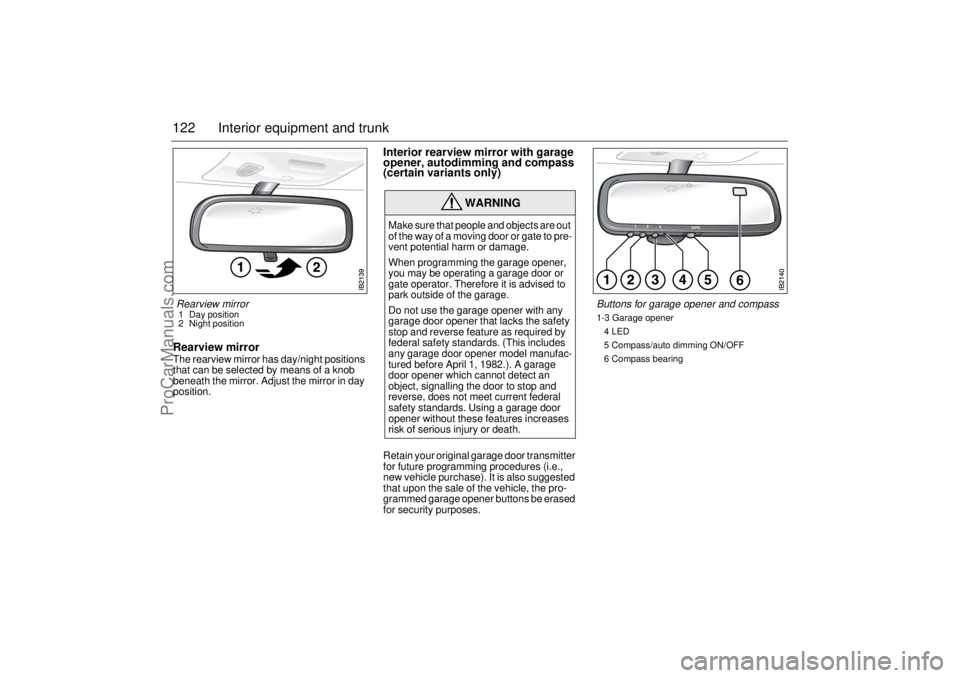
122 Interior equipment and trunkRearview mirrorThe rearview mirror has day/night positions
that can be selected by means of a knob
beneath the mirror. Adjust the mirror in day
position.
Interior rearview mirror with garage
opener, autodimming and compass
(certain variants only)Retain your original garage door transmitter
for future programming procedures (i.e.,
new vehicle purchase). It is also suggested
that upon the sale of the vehicle, the pro-
grammed garage opener buttons be erased
for security purposes.
WARNING
Make sure that people and objects are out
of the way of a moving door or gate to pre-
vent potential harm or damage.
When programming the garage opener,
you may be operating a garage door or
gate operator. Therefore it is advised to
park outside of the garage.
Do not use the garage opener with any
garage door opener that lacks the safety
stop and reverse feature as required by
federal safety standards. (This includes
any garage door opener model manufac-
tured before April 1, 1982.). A garage
door opener which cannot detect an
object, signalling the door to stop and
reverse, does not meet current federal
safety standards. Using a garage door
opener without these features increases
risk of serious injury or death.
Rearview mirror 1 Day position
2 Night position
Buttons for garage opener and compass1-3 Garage opener
4 LED
5 Compass/auto dimming ON/OFF
6 Compass bearing
ProCarManuals.com
Page 123 of 288

123 Interior equipment and trunk
Preparations for first-time programming
Before programming the garage opener for
the first time, you must delete any factory
codes.
Press and hold the two outer buttons until
the indicator light begins to flash-after
20 seconds. Release both buttons. Do not
hold for longer that 30 seconds. The garage
opener is now in the train (or learning) mode
and can be programmed at any time begin-
ning with "Programming" - step 2.
Programming
The garage opener can record and store the
frequencies of three different remote con-
trols.
The battery in the remote control should be
fairly new for programming to work well.
Do not repeat "Programming" - step two
to train additional devices to a second or
third button. Begin with "Programming" -
step three.
1 Turn the ignition ON.
2 Press and hold the two outer buttons
(buttons one and three) - releasing only
when the indicator light begins to flash
(after 20 seconds). Do not hold the but-
tons for longer than 30 seconds and do
not repeat step two to program a
second and/or third hand-held transmit-
ter to the remaining two buttons.
3 Position the end of your hand-held trans-
mitter 1-3 inches (5-14 cm) away from
the button you wish to program while
keeping the indicator light in view. The transmitter should face the mirror from
below or left side of the mirror.
4 Simultaneously press and hold both the
chosen and hand-held transmitter but-
tons. Do not release the buttons until
step 5 has been completed.
Note: Some gate operators and garage
door openers may require you to replace
this Programming Step 4 with procedures
noted in the "Gate Operator / Canadian Pro-
gramming" section.
5 After the indicator light changes from a
slow to a rapidly blinking light, release
both the mirror and hand-held transmit-
ter buttons.
6 Press and hold the just-trained button
and observe the indicator light.
If the indicator light stays on con-
stantly, programming is complete
and your device should activate when
the button is pressed and released.
Note: To program the remaining two but-
tons, begin with "Programming" - step
three. Do not repeat step two.
If the indicator light blinks rapidly for two
seconds and then turns to a constant
light continue with "Programming"
steps 7-9 to complete the programming of
a rolling code equipped device (most com-
monly a garage door opener).
7 At the garage door opener receiver
(motor-head unit) in the garage, locate
the "learn" or "smart" button. This can
usually
be found where the hanging antenna wire is attached to the
motor-head unit.
8 Firmly press and release the "learn" or
"smart" button. (The name and color of
the button may vary by manufacturer.)
Note: There are 30 seconds in which to ini-
tiate step nine.
9 Return to the vehicle and firmly press,
hold for two seconds and release the
programmed button. Repeat the
"press/hold/release" sequence a
second time, and, depending on the
brand of the garage door opener (or
other rolling code equipped device),
repeat this sequence a third time to com-
plete the programming process.
The garage opener should now activate
your rolling code equipped device.
Note: To program the remaining two but-
tons, begin with "Programming" -
step
three
. Do not repeat step two.
ProCarManuals.com
Page 124 of 288

124 Interior equipment and trunkGate Operator / Canadian Programming
Canadian radio-frequency laws require
transmitter signals to "time-out" (or quit)
after several seconds of transmission -
which may not be long enough for the
garage opener to pick up the signal during
programming. Similar to this Canadian law,
some U.S. gate operators are designed to
"time-out" in the same manner.
If you live in Canada or you are having diffi-
culties programming a gate operator by
using the "Programming" procedures
(regardless of where you live), replace
"Programming " step 4 with the following:
Note: If programming a garage door opener
or gate operator, it is advised to unplug the
device during the "cycling" process to pre-
vent possible overheating.
4 Continue to press and hold the button
while you press and release - every two
seconds ("cycle") your hand-held transmit-
ter until the frequency signal has success-
fully been accepted by the garage opener.
(The indicator light will flash slowly and then
rapidly.)
Proceed with "Programming" step five to
complete.Reprogramming a single button
To program a device to the garage opener
using a button previously trained, follow
these steps:
1 Press and hold the desired button. DO
NOT release the button.
2 The indicator light will begin to flash after
20 seconds. Without releasing the
button, proceed with "Programming" -
step 3.Erasing the three buttons
To erase programming from the three but-
tons (individual buttons cannot be erased
but can be "reprogrammed" as outlined
below), follow the step noted:
Press and hold the two outer buttons until
the indicator light begins to flash-after
20 seconds. Release both buttons. Do
not hold for longer that 30 seconds. The
garage opener is now in the train (or
learning) mode and can be programmed
at any time beginning with "Programming"
- step 3.NOTICESwitch off the power supply to the garage
door or gate (or park the car beyond the
range of the remote control) while
programming using the "cycling" method
to prevent damaging the electrical motor.
ProCarManuals.com
Page 125 of 288
125 Interior equipment and trunk
Opening a garage door
To operate, simply press and release the
programmed button. Activation will now
occur for the trained device (i.e. garage door
opener, gate operator, security system,
entry door lock, home/office lighting, etc.).
For convenience, the hand-held transmitter
of the device may also be used at any time.
Rearview mirrors with auto dimming
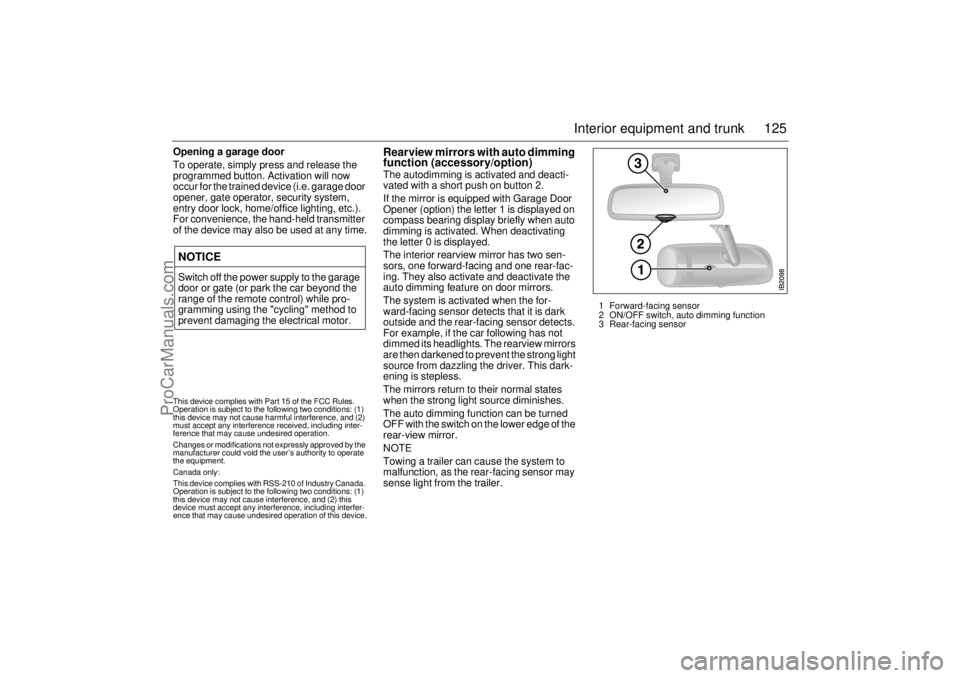
function (accessory/option)The autodimming is activated and deacti-
vated with a short push on button 2.
If the mirror is equipped with Garage Door
Opener (option) the letter 1 is displayed on
compass bearing display briefly when auto
dimming is activated. When deactivating
the letter 0 is displayed.
The interior rearview mirror has two sen-
sors, one forward-facing and one rear-fac-
ing. They also activate and deactivate the
auto dimming feature on door mirrors.
The system is activated when the for-
ward-facing sensor detects that it is dark
outside and the rear-facing sensor detects.
For example, if the car following has not
dimmed its headlights. The rearview mirrors
are then darkened to prevent the strong light
source from dazzling the driver. This dark-
ening is stepless.
The mirrors return to their normal states
when the strong light source diminishes.
The auto dimming function can be turned
OFF with the switch on the lower edge of the
rear-view mirror.
NOTE
Towing a trailer can cause the system to
malfunction, as the rear-facing sensor may
sense light from the trailer.
NOTICESwitch off the power supply to the garage
door or gate (or park the car beyond the
range of the remote control) while pro-
gramming using the "cycling" method to
prevent damaging the electrical motor.
1 Forward-facing sensor
2 ON/OFF switch, auto dimming function
3 Rear-facing sensor
This device complies with Part 15 of the FCC Rules.
Operation is subject to the following two conditions: (1)
this device may not cause harmful interference, and (2)
must accept any interference received, including inter-
ference that may cause undesired operation.
Changes or modifications not expressly approved by the
manufacturer could void the user’s authority to operate
the equipment.
Canada only:
This device complies with RSS-210 of Industry Canada.
Operation is subject to the following two conditions: (1)
this device may not cause interference, and (2) this
device must accept any interference, including interfer-
ence that may cause undesired operation of this device.
ProCarManuals.com
Page 126 of 288

126 Interior equipment and trunkCompass The compass is integrated in the rearview
mirror. The compass bearing is displayed in
the top right-hand corner of the mirror and is
updated every other second. The compass
displays the car’s direction of travel: N, NE,
E, etc.
Switch the compass display on and off by
pressing button 5 for 3 seconds.
Changing zones
The earth’s magnetic fields vary depending
on one’s position on the globe. If you drive
your car from one magnetic zone to another
the compass setting will need to be changed
to ensure a correct bearing.
1 Study the illustrations to determine the
correct zone.
2 Press and hold button 5 until "ZONE" is
shown in the display on the mirror (6 s).
The zone number setting now is also
shown.
3 Press button 5 repeatedly to change the
zone number. There are 15 zones from
which to choose. Once the correct zone
is selected, release the button and wait
4 seconds. The compass will now
display the bearing.Calibration
Calibration is performed automatically
during travel. If an accessory, such as a
mobile phone, is fitted and it can be
assumed that the compass is affected, the
compass may need to be calibrated manu-
ally.
1 Press and hold button 5 until "CAL" and
the compass bearing are displayed
(approx. 9 s).
2 Drive in circles (max. 5 mph/8 km/h) or
drive as normal until "CAL" is no longer
displayed.
Compass zones in US Compass zones in Canada
ProCarManuals.com
Page 127 of 288
127 Interior equipment and trunk
Electric windowsThe electric motors of the front windows are
equipped with overload protection (inte-
grated thermal protection). This protection
operates when the windows are wound
down automatically (switch pressed fully
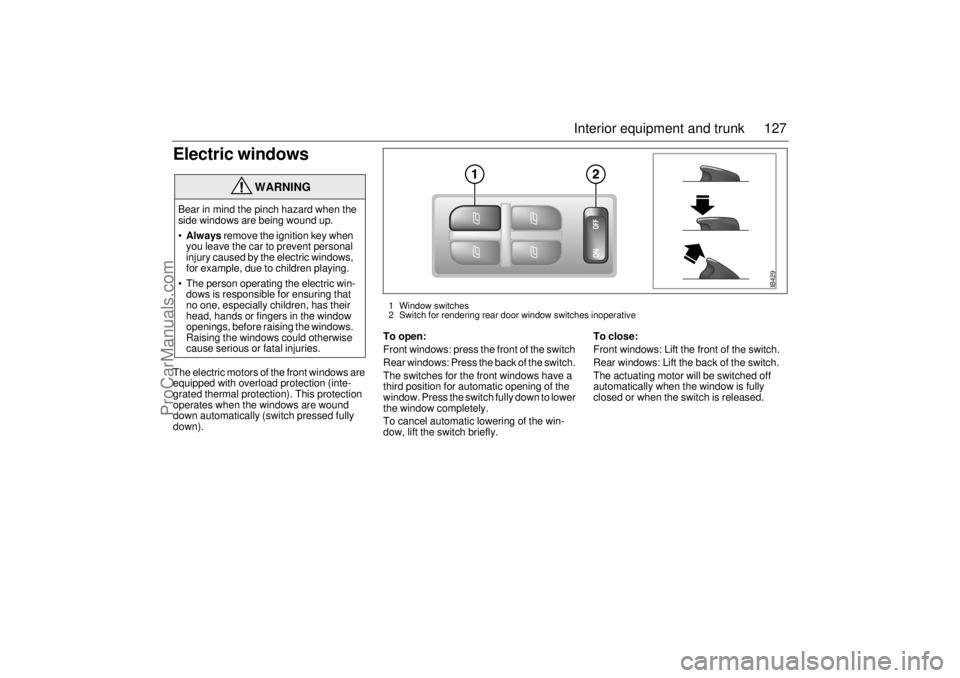
down).To open:
Front windows: press the front of the switch
Rear windows: Press the back of the switch.
The switches for the front windows have a
third position for automatic opening of the
window. Press the switch fully down to lower
the window completely.
To cancel automatic lowering of the win-
dow, lift the switch briefly.To close:
Front windows: Lift the front of the switch.
Rear windows: Lift the back of the switch.
The actuating motor will be switched off
automatically when the window is fully
closed or when the switch is released.
WARNING
Bear in mind the pinch hazard when the
side windows are being wound up.
Always remove the ignition key when
you leave the car to prevent personal
injury caused by the electric windows,
for example, due to children playing.
The person operating the electric win-
dows is responsible for ensuring that
no one, especially children, has their
head, hands or fingers in the window
openings, before raising the windows.
Raising the windows could otherwise
cause serious or fatal injuries.
IB429
1 Window switches
2 Switch for rendering rear door window switches inoperative
ProCarManuals.com
Page 128 of 288
128 Interior equipment and trunk
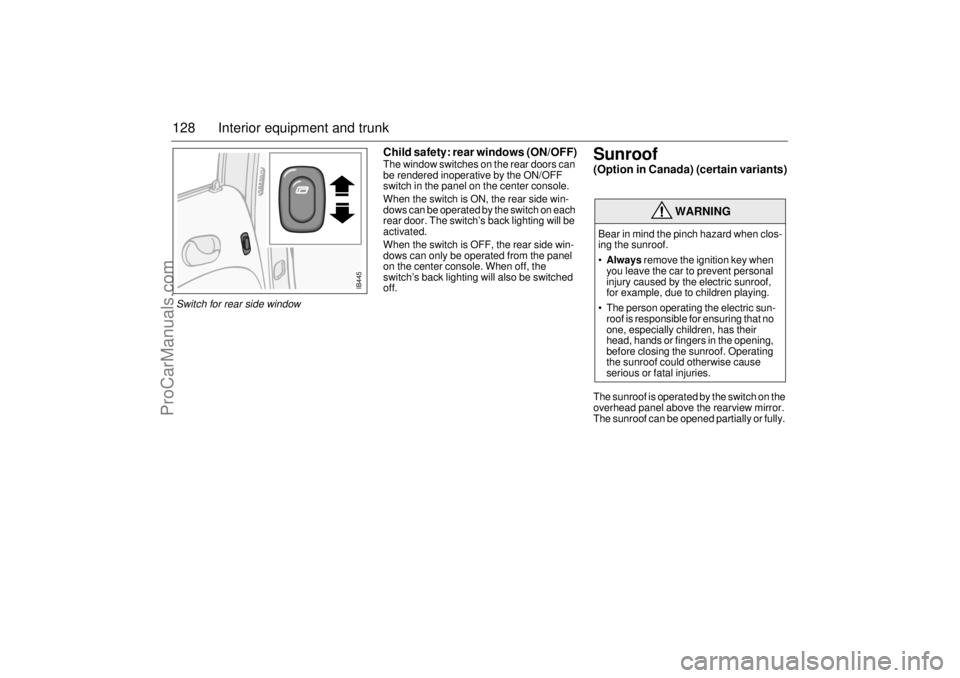
Child safety: rear windows (ON/OFF)The window switches on the rear doors can
be rendered inoperative by the ON/OFF
switch in the panel on the center console.
When the switch is ON, the rear side win-
dows can be operated by the switch on each
rear door. The switch’s back lighting will be
activated.
When the switch is OFF, the rear side win-
dows can only be operated from the panel
on the center console. When off, the
switch’s back lighting will also be switched
off.
Sunroof (Option in Canada) (certain variants)The sunroof is operated by the switch on the
overhead panel above the rearview mirror.
The sunroof can be opened partially or fully.
WARNING
Bear in mind the pinch hazard when clos-
ing the sunroof.
Always remove the ignition key when
you leave the car to prevent personal
injury caused by the electric sunroof,
for example, due to children playing.
The person operating the electric sun-
roof is responsible for ensuring that no
one, especially children, has their
head, hands or fingers in the opening,
before closing the sunroof. Operating
the sunroof could otherwise cause
serious or fatal injuries.
IB445
Switch for rear side window
ProCarManuals.com
Page 129 of 288
129 Interior equipment and trunk
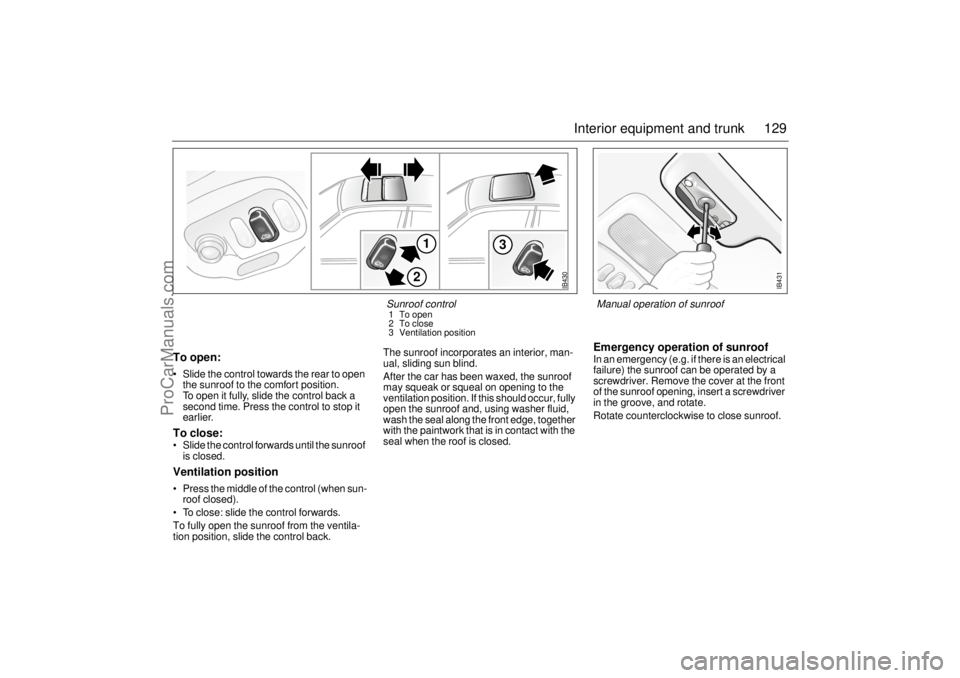
To open: Slide the control towards the rear to open
the sunroof to the comfort position.
To open it fully, slide the control back a
second time. Press the control to stop it
earlier. To close: Slide the control forwards until the sunroof
is closed. Ventilation position Press the middle of the control (when sun-
roof closed).
To close: slide the control forwards.
To fully open the sunroof from the ventila-
tion position, slide the control back. The sunroof incorporates an interior, man-
ual, sliding sun blind.
After the car has been waxed, the sunroof
may squeak or squeal on opening to the
ventilation position. If this should occur, fully
open the sunroof and, using washer fluid,
wash the seal along the front edge, together
with the paintwork that is in contact with the
seal when the roof is closed.
Emergency operation of sunroofIn an emergency (e.g. if there is an electrical
failure) the sunroof can be operated by a
screwdriver. Remove the cover at the front
of the sunroof opening, insert a screwdriver
in the groove, and rotate.
Rotate counterclockwise to close sunroof.
IB430
1
3
2
Sunroof control 1 To open
2 To close
3 Ventilation position
IB431
Manual operation of sunroof
ProCarManuals.com
Page 130 of 288
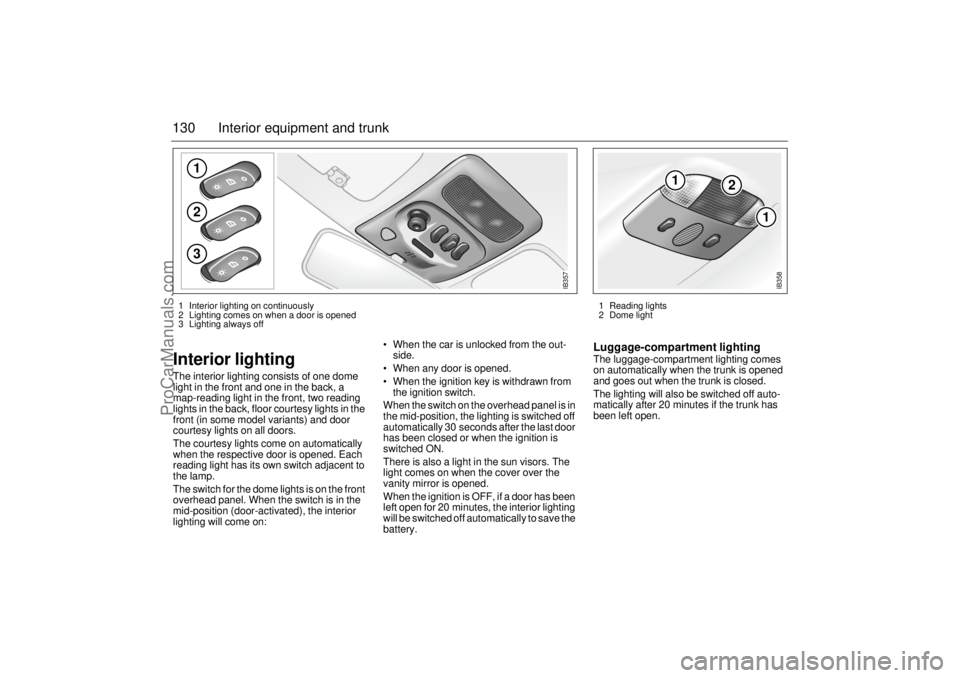
130 Interior equipment and trunkInterior lighting The interior lighting consists of one dome
light in the front and one in the back, a
map-reading light in the front, two reading
lights in the back, floor courtesy lights in the
front (in some model variants) and door
courtesy lights on all doors.
The courtesy lights come on automatically
when the respective door is opened. Each
reading light has its own switch adjacent to
the lamp.
The switch for the dome lights is on the front
overhead panel. When the switch is in the
mid-position (door-activated), the interior
lighting will come on: When the car is unlocked from the out-
side.
When any door is opened.
When the ignition key is withdrawn from
the ignition switch.
When the switch on the overhead panel is in
the mid-position, the lighting is switched off
automatically 30 seconds after the last door
has been closed or when the ignition is
switched ON.
There is also a light in the sun visors. The
light comes on when the cover over the
vanity mirror is opened.
When the ignition is OFF, if a door has been
left open for 20 minutes, the interior lighting
will be switched off automatically to save the
battery.
Luggage-compartment lightingThe luggage-compartment lighting comes
on automatically when the trunk is opened
and goes out when the trunk is closed.
The lighting will also be switched off auto-
matically after 20 minutes if the trunk has
been left open.
123
IB357
1
2
1
IB358
1 Reading lights
2 Dome light 1 Interior lighting on continuously
2 Lighting comes on when a door is opened
3 Lighting always off
ProCarManuals.com