climate control SATURN ASTRA 2009 Owners Manual
[x] Cancel search | Manufacturer: SATURN, Model Year: 2009, Model line: ASTRA, Model: SATURN ASTRA 2009Pages: 314, PDF Size: 1.94 MB
Page 1 of 314

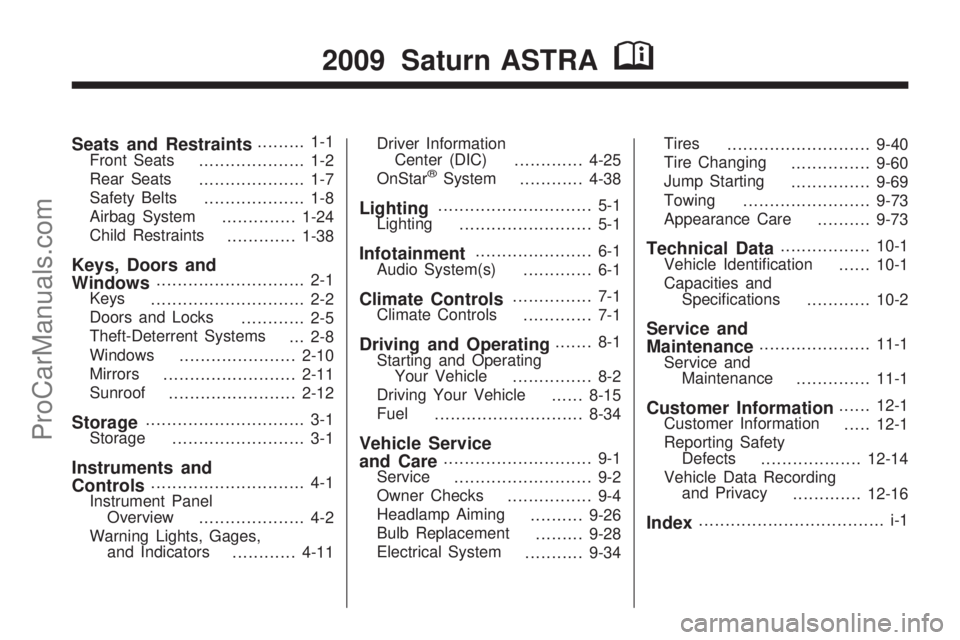
Seats and Restraints......... 1-1
Front Seats
.................... 1-2
Rear Seats
.................... 1-7
Safety Belts
................... 1-8
Airbag System
..............1-24
Child Restraints
.............1-38
Keys, Doors and
Windows............................ 2-1
Keys
............................. 2-2
Doors and Locks
............ 2-5
Theft-Deterrent Systems
... 2-8
Windows
......................2-10
Mirrors
.........................2-11
Sunroof
........................2-12
Storage.............................. 3-1
Storage
......................... 3-1
Instruments and
Controls............................. 4-1
Instrument Panel
Overview
.................... 4-2
Warning Lights, Gages,
and Indicators
............4-11Driver Information
Center (DIC)
.............4-25
OnStar
®System
............4-38
Lighting............................. 5-1
Lighting
......................... 5-1
Infotainment...................... 6-1
Audio System(s)
............. 6-1
Climate Controls............... 7-1
Climate Controls
............. 7-1
Driving and Operating....... 8-1
Starting and Operating
Your Vehicle
............... 8-2
Driving Your Vehicle
......8-15
Fuel
............................8-34
Vehicle Service
and Care............................ 9-1
Service
.......................... 9-2
Owner Checks
................ 9-4
Headlamp Aiming
..........9-26
Bulb Replacement
.........9-28
Electrical System
...........9-34Tires
...........................9-40
Tire Changing
...............9-60
Jump Starting
...............9-69
Towing
........................9-73
Appearance Care
..........9-73
Technical Data.................10-1
Vehicle Identi�cation
......10-1
Capacities and
Speci�cations
............10-2
Service and
Maintenance.....................11-1
Service and
Maintenance
..............11-1
Customer Information......12-1
Customer Information
.....12-1
Reporting Safety
Defects
...................12-14
Vehicle Data Recording
and Privacy
.............12-16
Index................................... i-1
2009 Saturn ASTRAM
ProCarManuals.com
Page 67 of 314

CAUTION (Continued)
Adjust the Climate Control
system to a setting that
brings in only outside air and
set the fan speed to the
highest setting. See Climate
Control System in the Index.
If the vehicle is equipped with
a power liftgate, disable the
power liftgate function.
For more information about
carbon monoxide, seeEngine
Exhaust on page 8-14.
Notice:If you open the liftgate
without checking for overhead
obstructions such as a garage
door, you could damage the
liftgate or the liftgate glass.
Always check to make sure the
area above and behind the liftgate
is clear before opening it.Press the touchpad located in the
handle of the liftgate and lift up
to open.Use the inside pull handle to lower
and close the liftgate.
Do not press the touchpad while
closing the liftgate. This will
cause the liftgate to be unlatched.
Always close the liftgate before
driving.
Keys, Doors and Windows 2-7
ProCarManuals.com
Page 72 of 314

Outside Power Mirror(s)
hi
(Power Mirrors):Press to
select the driver side or passenger
side mirror. Press the arrows to
move the selected mirror in the
desired direction.
Outside Heated Mirrors
The vehicle may have outside
heated mirrors which help clear the
condensation, snow, and ice.
<(Rear Window Defogger):
Press to heat the mirrors. See “Rear
Window Defogger” under,Climate
Control System on page 7-1for
more information.
Sunroof
On vehicles with a sunroof, the
switches are located in the overhead
console. To operate the sunroof,
the ignition must be turned on.
tVent/Open:With the sunroof in
the closed position, press to vent
the sunroof. With the sunroof in the
vent position, press to open the
sunroof. The sunshade will open
automatically with the sunroof.
uClose:Press to close the
sunroof. Press and hold to close
completely.
Sunshade
rSunshade Open:Press to
open the sunshade.
sSunshade Close:Press to
close the sunshade. Press and hold
to close completely.
2-12 Keys, Doors and Windows
ProCarManuals.com
Page 77 of 314

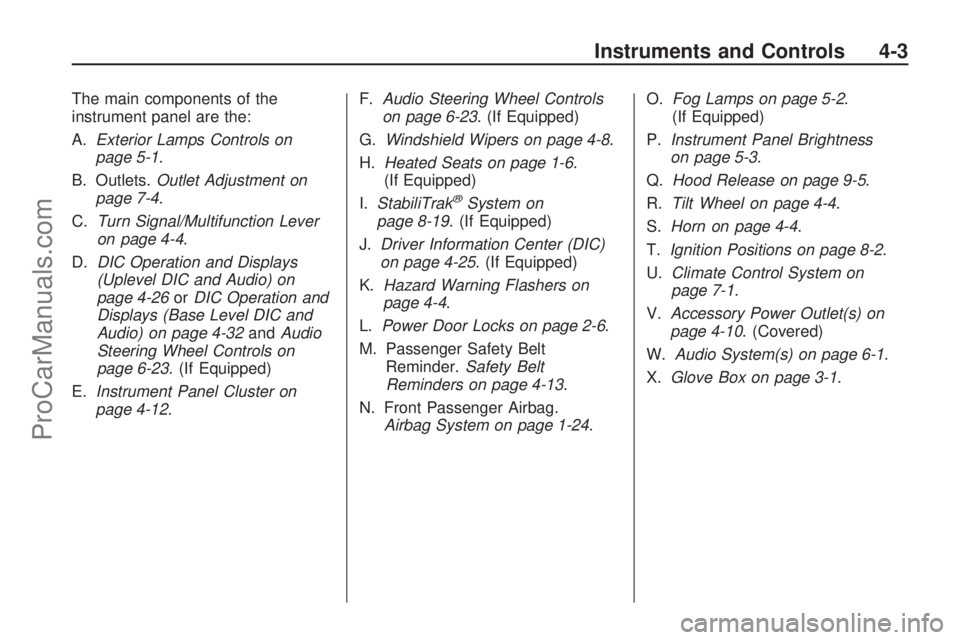
The main components of the
instrument panel are the:
A.Exterior Lamps Controls on
page 5-1.
B. Outlets.Outlet Adjustment on
page 7-4.
C.Turn Signal/Multifunction Lever
on page 4-4.
D.DIC Operation and Displays
(Uplevel DIC and Audio) on
page 4-26orDIC Operation and
Displays (Base Level DIC and
Audio) on page 4-32andAudio
Steering Wheel Controls on
page 6-23. (If Equipped)
E.Instrument Panel Cluster on
page 4-12.F.Audio Steering Wheel Controls
on page 6-23. (If Equipped)
G.Windshield Wipers on page 4-8.
H.Heated Seats on page 1-6.
(If Equipped)
I.StabiliTrak
®System on
page 8-19. (If Equipped)
J.Driver Information Center (DIC)
on page 4-25. (If Equipped)
K.Hazard Warning Flashers on
page 4-4.
L.Power Door Locks on page 2-6.
M. Passenger Safety Belt
Reminder.Safety Belt
Reminders on page 4-13.
N. Front Passenger Airbag.
Airbag System on page 1-24.O.Fog Lamps on page 5-2.
(If Equipped)
P.Instrument Panel Brightness
on page 5-3.
Q.Hood Release on page 9-5.
R.Tilt Wheel on page 4-4.
S.Horn on page 4-4.
T.Ignition Positions on page 8-2.
U.Climate Control System on
page 7-1.
V.Accessory Power Outlet(s) on
page 4-10. (Covered)
W.Audio System(s) on page 6-1.
X.Glove Box on page 3-1.
Instruments and Controls 4-3
ProCarManuals.com
Page 84 of 314

To turn on the rear washer, hold the
windshield wiper lever toward the
front of the vehicle to spray the
rear window.
The rear wiper turns on
automatically when the windshield
wiper is turned on and the shift lever
is in R (Reverse).
The rear window washer uses the
same �uid bottle as the windshield
washer. However, the rear window
washer will run out of �uid before
the windshield washer. If washer
�uid sprays onto the windshield but
not the rear window, check the
�uid level. SeeWindshield Washer
Fluid on page 9-20.
For information on replacing the
rear wiper blades, seeWindshield
Wiper Blade Replacement on
page 9-21.Accessory Power
Outlet(s)
The 12-volt accessory power outlets
can be used to connect electrical
equipment, such as a cellular phone.
There may be a accessory power
outlet located inside the console
below the climate controls.
Notice:Leaving electrical
equipment on for extended
periods will drain the battery.
Always turn off electrical
equipment when not in use and
do not plug in equipment that
exceeds the maximum 20 ampere
rating.
Certain electrical accessories
may not be compatible with the
accessory power outlet and could
result in blown vehicle or adapter
fuses. If there is a problem,
see your dealer/retailer for
additional information on the
accessory power outlet.Notice:Adding any electrical
equipment to your vehicle
may damage it or keep other
components from working as
they should. The repairs would not
be covered by your warranty.
Check with your dealer/retailer
before adding electrical
equipment.
When adding electrical equipment,
be sure to follow the installation
instructions included with the
equipment.
Notice:Improper use of the
power outlet can cause damage
not covered by the warranty.
Do not hang any type of
accessory or accessory bracket
from the plug because the
power outlets are designed for
accessory power plugs only.
4-10 Instruments and Controls
ProCarManuals.com
Page 143 of 314

Climate Controls
Climate Controls
Climate Control System......7-1
Outlet Adjustment...............7-4
Climate Controls
Climate Control System
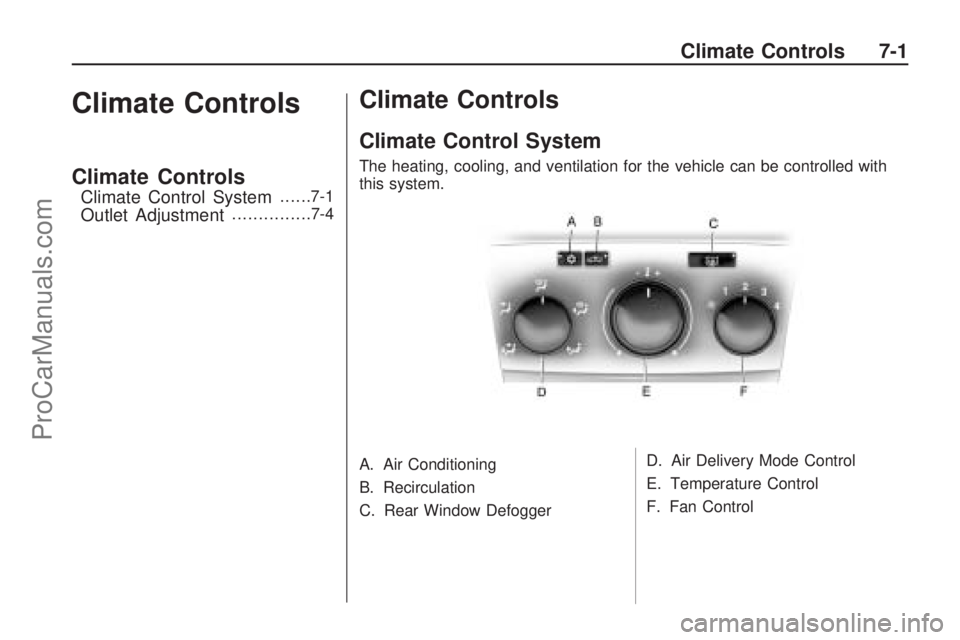
The heating, cooling, and ventilation for the vehicle can be controlled with
this system.
A. Air Conditioning
B. Recirculation
C. Rear Window Defogger D. Air Delivery Mode Control
E. Temperature Control
F. Fan Control
Climate Controls 7-1
ProCarManuals.com
Page 144 of 314

Air Delivery Mode Control:
Turn the knob clockwise or
counterclockwise to adjust the
air�ow direction inside the vehicle.
To change the current air delivery
mode, select one of the following:
)(Bi-Level):Air is directed to
the instrument panel and �oor
outlets. Cooler air is directed to the
upper outlets and warmer air to
the �oor outlets.
Y(Vent):Air is directed to the
instrument panel outlets.
X(Defog):Air is directed to the
windshield and front door windows.
To reduce fogging, press
#to
turn on the air conditioner. The fan
must also be on.
W(Defog/Floor):Air is directed to
the windshield, front door windows,
and �oor outlets. To reduce
fogging, press
#to turn on the air
conditioner. The fan must also
be on.
[(Floor):Air is directed to the
�oor outlets.
Temperature Control:Turn the
knob clockwise or counterclockwise
to increase or decrease the
temperature inside the vehicle.
Fan Control:Turn the knob
clockwise or counterclockwise to
increase or decrease the fan speed.
The speed settings can be adjusted
between 1 (Low) and 4 (High).
Turn the knob to
Ato turn the fan
off. When the fan is off, the air
conditioning compressor is also off.
There will be some air�ow from the
outlets when driving, even with the
fan in the off position.
Air Conditioning
For vehicles with air conditioning.
#(Air Conditioning):Press
to turn the air conditioning system
on or off. An indicator light comes on
when the air conditioning is on.
The air conditioning can only
be operated if the engine is on and
the fan is running.
When the air conditioning is on the
air is cooled and dehumidi�ed. If
cooling or dehumidi�cation is
not desired, turn off the air
conditioning to save fuel.
On hot days, open the windows
brie�y to let the hot inside air
escape, then close them. This helps
to reduce the time it takes for the
vehicle to cool down.
7-2 Climate Controls
ProCarManuals.com
Page 145 of 314

For quicker cool down, do the
following:
1. Press
#to turn on the air
conditioning.
2. Select
Ymode.
3. Set the temperature knob to the
coldest temperature.
4. Set the fan knob to 4.
5. Open all vents.
Recirculation
^(Recirculation):Press to
turn the recirculation mode on or off.
An indicator light inside the button
comes on when the recirculation
mode is active. This mode
recirculates air inside the passenger
compartment and prevents outside
air from entering the vehicle.
The quality of the passenger
compartment air may decrease
since the amount of outside
air entering the vehicle is reduced.When the recirculation mode is
used without air conditioning, the air
humidity increases, and the
windows may fog. Avoid using the
recirculation mode during high
periods of humidity or cool outside
temperatures since this may
result in increased window fogging.
If window fogging is experienced,
select the defrost mode.
Rear Window Defogger
The rear window defogger uses a
warming grid to remove fog from the
rear window.
The rear window defogger will only
work when the ignition is in
ON/RUN.
=(Rear Window Defogger):
Press to turn the rear window
defogger on or off. An indicator light
inside the button will be lit when
in use.If the vehicle has heated mirrors,
they turn on when the rear window
defogger button is pressed.
Press the button again to turn them
off. For more information, see
Outside Power Mirror(s) on
page 2-12.
The rear window defogger will stay
on for approximately 15 minutes
after the button is pressed, unless
the ignition is turned off.
Notice:Do not use anything
sharp on the inside of the rear
window. If you do, you could cut
or damage the warming grid, and
the repairs would not be covered
by the vehicle warranty. Do not
attach a temporary vehicle
license, tape, a decal or anything
similar to the defogger grid.
Climate Controls 7-3
ProCarManuals.com
Page 146 of 314

Outlet Adjustment
Use the thumbwheel below the air
outlets to change the direction of the
air �ow. Use the vertical thumbwheel
next to the outlets to control the
amount of air �ow or to shut off the
air�ow completely.
Keep all outlets open whenever
possible for best system
performance.
Operation Tips
Clear away any ice, snow, or
leaves from the air inlets at
the base of the windshield that
can block the �ow of air into
the vehicle.
Use of non-GM approved hood
de�ectors can adversely affect
the performance of the system.
Keep the path under all seats
clear of objects to help circulate
the air inside the vehicle
more effectively.
If fogging reoccurs while in vent
or bi-level modes with mild
temperature throughout the
vehicle, turn on the air
conditioner to reduce windshield
fogging.
7-4 Climate Controls
ProCarManuals.com
Page 174 of 314

Blizzard Conditions
Being stuck in snow can be in a
serious situation. Stay with the
vehicle unless there is help nearby.
If possible, use theRoadside
Assistance Program on page 12-6.
To get help and keep everyone
in the vehicle safe:
Turn on theHazard Warning
Flashers on page 4-4.
Tie a red cloth to an outside
mirror.
{CAUTION
Snow can trap engine exhaust
under the vehicle. This may cause
exhaust gases to get inside.
Engine exhaust contains carbon
monoxide (CO) which cannot be
seen or smelled. It can cause
unconsciousness and even death.
(Continued)
CAUTION (Continued)
If the vehicle is stuck in the snow:
Clear away snow from
around the base of your
vehicle, especially any that is
blocking the exhaust pipe.
Check again from time to
time to be sure snow does
not collect there.
Open a window about two
inches (5 cm) on the side of
the vehicle that is away from
the wind to bring in fresh air.
Fully open the air outlets on
or under the instrument
panel.
Adjust the Climate Control
system to a setting that
circulates the air inside the
vehicle and set the fan speed
to the highest setting. See
Climate Control System in the
Index.
(Continued)
CAUTION (Continued)
For more information about
carbon monoxide, seeEngine
Exhaust on page 8-14.
Snow can trap exhaust gases
under your vehicle. This can
cause deadly CO (carbon
monoxide) gas to get inside.
CO could overcome you and kill
you. You cannot see it or smell it,
so you might not know it is in your
vehicle. Clear away snow from
around the base of your vehicle,
especially any that is blocking the
exhaust.
Run the engine for short periods
only as needed to keep warm,
but be careful.
To save fuel, run the engine for
only short periods as needed
to warm the vehicle and then shut
the engine off and close the window
most of the way to save heat.
8-28 Driving and Operating
ProCarManuals.com