radio SATURN RELAY 2007 Workshop Manual
[x] Cancel search | Manufacturer: SATURN, Model Year: 2007, Model line: RELAY, Model: SATURN RELAY 2007Pages: 570, PDF Size: 3.41 MB
Page 333 of 570
Quick Start Guide
Selecting Your Mobile Digital Media as the
Active Source
Your radio and rear seat entertainment system
communicate with the GM Mobile Digital
Media system, as one compact unit that can be
accessed by everyone seated inside the vehicle.
The GM Mobile Digital Media system can hold
thousands of songs, hours of videos, and
hundreds of games.
To help use this system, see the following “Quick
Start” information:
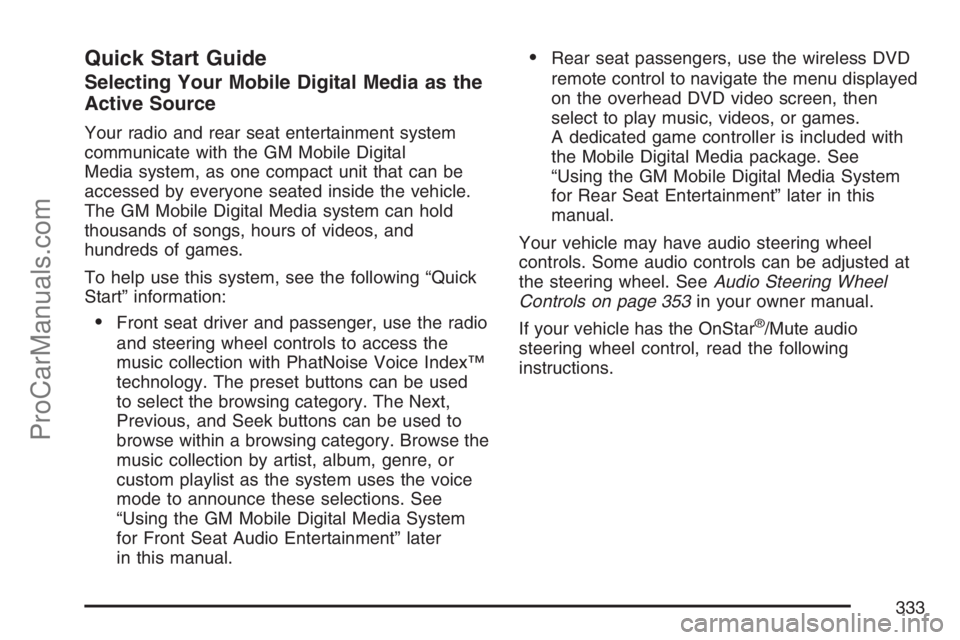
Front seat driver and passenger, use the radio
and steering wheel controls to access the
music collection with PhatNoise Voice Index™
technology. The preset buttons can be used
to select the browsing category. The Next,
Previous, and Seek buttons can be used to
browse within a browsing category. Browse the
music collection by artist, album, genre, or
custom playlist as the system uses the voice
mode to announce these selections. See
“Using the GM Mobile Digital Media System
for Front Seat Audio Entertainment” later
in this manual.
Rear seat passengers, use the wireless DVD
remote control to navigate the menu displayed
on the overhead DVD video screen, then
select to play music, videos, or games.
A dedicated game controller is included with
the Mobile Digital Media package. See
“Using the GM Mobile Digital Media System
for Rear Seat Entertainment” later in this
manual.
Your vehicle may have audio steering wheel
controls. Some audio controls can be adjusted at
the steering wheel. SeeAudio Steering Wheel
Controls on page 353in your owner manual.
If your vehicle has the OnStar
®/Mute audio
steering wheel control, read the following
instructions.
333
ProCarManuals.com
Page 335 of 570
The GM Mobile Digital Media is controlled through
the radio and steering wheel controls on your
vehicle’s audio system. This system functions
differently than a typical CD changer. The Digital
Media system allows you to switch between
different playback modes. These modes determine
the next song that will play. Using modes, you
can browse through playlists, artists, albums, and
genres while the system reads Voice Index™
names to you while you drive. By selecting Playlist
Mode, you can access the music collection in
the order placed onto the DMS cartridge, or you
can have the system sort the music by Album,
Artist, or Genre by selecting the corresponding
Modes.Starting the System for Front Seat
Entertainment
The GM Mobile Digital Media system is available
through the DMS mode of your radio. This
system will power on and off automatically and
resume where the system last stopped.
To begin playback, follow the instructions listed
below:
1. Insert the DMS cartridge into the GM Mobile
Digital Media player.
2. Turn on your radio and switch to the DMS
mode by pressing the CD/AUX button on
your radio.
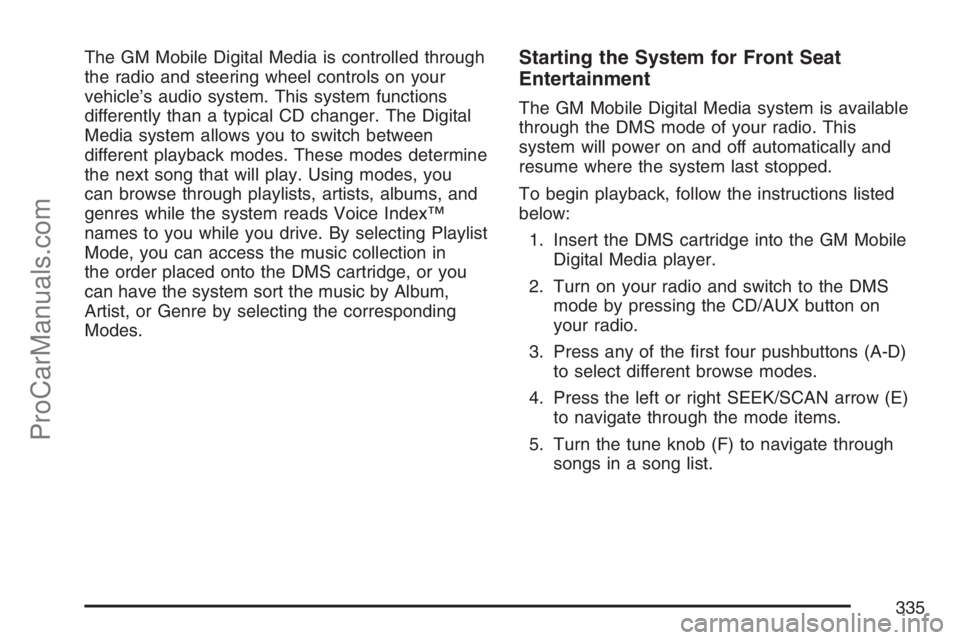
3. Press any of the �rst four pushbuttons (A-D)
to select different browse modes.
4. Press the left or right SEEK/SCAN arrow (E)
to navigate through the mode items.
5. Turn the tune knob (F) to navigate through
songs in a song list.
335
ProCarManuals.com
Page 346 of 570
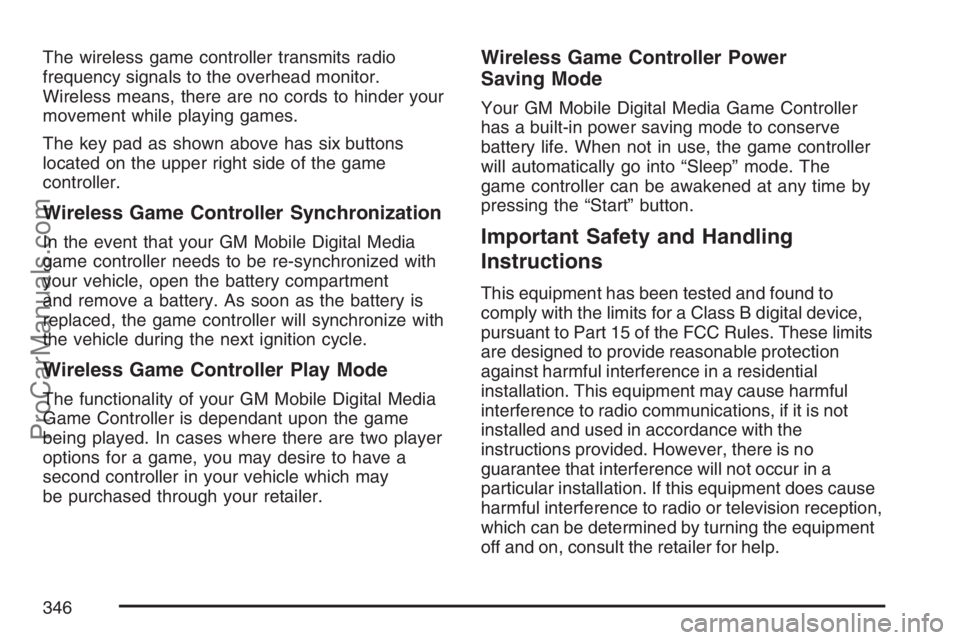
The wireless game controller transmits radio
frequency signals to the overhead monitor.
Wireless means, there are no cords to hinder your
movement while playing games.
The key pad as shown above has six buttons
located on the upper right side of the game
controller.
Wireless Game Controller Synchronization
In the event that your GM Mobile Digital Media
game controller needs to be re-synchronized with
your vehicle, open the battery compartment
and remove a battery. As soon as the battery is
replaced, the game controller will synchronize with
the vehicle during the next ignition cycle.
Wireless Game Controller Play Mode
The functionality of your GM Mobile Digital Media
Game Controller is dependant upon the game
being played. In cases where there are two player
options for a game, you may desire to have a
second controller in your vehicle which may
be purchased through your retailer.
Wireless Game Controller Power
Saving Mode
Your GM Mobile Digital Media Game Controller
has a built-in power saving mode to conserve
battery life. When not in use, the game controller
will automatically go into “Sleep” mode. The
game controller can be awakened at any time by
pressing the “Start” button.
Important Safety and Handling
Instructions
This equipment has been tested and found to
comply with the limits for a Class B digital device,
pursuant to Part 15 of the FCC Rules. These limits
are designed to provide reasonable protection
against harmful interference in a residential
installation. This equipment may cause harmful
interference to radio communications, if it is not
installed and used in accordance with the
instructions provided. However, there is no
guarantee that interference will not occur in a
particular installation. If this equipment does cause
harmful interference to radio or television reception,
which can be determined by turning the equipment
off and on, consult the retailer for help.
346
ProCarManuals.com
Page 352 of 570
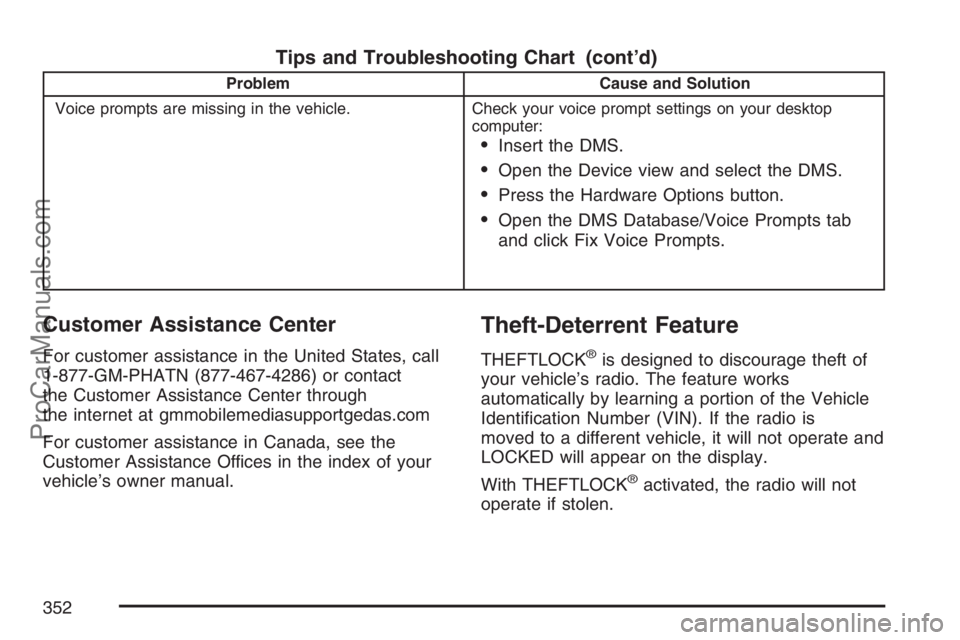
Tips and Troubleshooting Chart (cont’d)
Problem Cause and Solution
Voice prompts are missing in the vehicle. Check your voice prompt settings on your desktop
computer:
Insert the DMS.
Open the Device view and select the DMS.
Press the Hardware Options button.
Open the DMS Database/Voice Prompts tab
and click Fix Voice Prompts.
Customer Assistance Center
For customer assistance in the United States, call
1-877-GM-PHATN (877-467-4286) or contact
the Customer Assistance Center through
the internet at gmmobilemediasupportgedas.com
For customer assistance in Canada, see the
Customer Assistance Offices in the index of your
vehicle’s owner manual.
Theft-Deterrent Feature
THEFTLOCK®is designed to discourage theft of
your vehicle’s radio. The feature works
automatically by learning a portion of the Vehicle
Identi�cation Number (VIN). If the radio is
moved to a different vehicle, it will not operate and
LOCKED will appear on the display.
With THEFTLOCK
®activated, the radio will not
operate if stolen.
352
ProCarManuals.com
Page 353 of 570
Audio Steering Wheel Controls
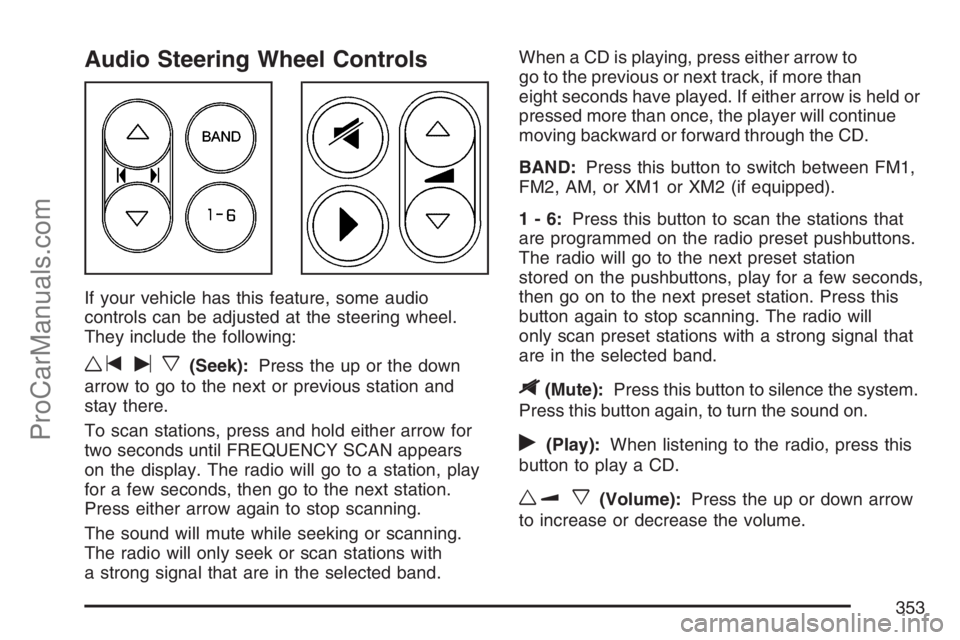
If your vehicle has this feature, some audio
controls can be adjusted at the steering wheel.
They include the following:
wtux(Seek):Press the up or the down
arrow to go to the next or previous station and
stay there.
To scan stations, press and hold either arrow for
two seconds until FREQUENCY SCAN appears
on the display. The radio will go to a station, play
for a few seconds, then go to the next station.
Press either arrow again to stop scanning.
The sound will mute while seeking or scanning.
The radio will only seek or scan stations with
a strong signal that are in the selected band.When a CD is playing, press either arrow to
go to the previous or next track, if more than
eight seconds have played. If either arrow is held or
pressed more than once, the player will continue
moving backward or forward through the CD.
BAND:Press this button to switch between FM1,
FM2, AM, or XM1 or XM2 (if equipped).
1-6:Press this button to scan the stations that
are programmed on the radio preset pushbuttons.
The radio will go to the next preset station
stored on the pushbuttons, play for a few seconds,
then go on to the next preset station. Press this
button again to stop scanning. The radio will
only scan preset stations with a strong signal that
are in the selected band.
$(Mute):Press this button to silence the system.
Press this button again, to turn the sound on.
r(Play):When listening to the radio, press this
button to play a CD.
wux(Volume):Press the up or down arrow
to increase or decrease the volume.
353
ProCarManuals.com
Page 354 of 570
Radio Reception
You may experience frequency interference and
static during normal radio reception if items
such as cellphone chargers, vehicle convenience
accessories, and external electronic devices
are plugged into the accessory power outlet. If
there is interference or static, unplug the item from
the accessory power outlet.
AM
The range for most AM stations is greater than for
FM, especially at night. The longer range can
cause station frequencies to interfere with each
other. For better radio reception, most AM
radio stations will boost the power levels during
the day, and then reduce these levels during
the night. Static can also occur when things like
storms and power lines interfere with radio
reception. When this happens, try reducing the
treble on your radio.
FM Stereo
FM stereo will give the best sound, but FM signals
will reach only about 10 to 40 miles (16 to 65 km).
Tall buildings or hills can interfere with FM
signals, causing the sound to fade in and out.
XM™ Satellite Radio Service
XM™ Satellite Radio Service gives digital radio
reception from coast-to-coast in the 48 contiguous
United States, and in Canada. Just as with FM,
tall buildings or hills can interfere with satellite
radio signals, causing the sound to fade in and out.
In addition, traveling or standing under heavy
foliage, bridges, garages, or tunnels may cause
loss of the XM™ signal for a period of time.
The radio may display NO SIGNAL to indicate
interference.
354
ProCarManuals.com
Page 356 of 570

XM™ Satellite Radio Antenna
System
The XM™ Satellite Radio antenna is located on
the roof of your vehicle. Keep this antenna clear of
snow and ice build up for clear radio reception.
Loading items onto the roof of your vehicle
can interfere with the performance of the XM™
system. Make sure that the XM™ satellite antenna
is not obstructed.
Chime Level Adjustment
The radio is used to adjust the vehicle’s chime
level. To change the volume level of the chime,
press and hold pushbutton 6 with the ignition
on and the radio power off. The volume level will
change from the normal level to loud, and
LOUD will appear on the radio display. To change
back to the default or normal setting, press and
hold pushbutton 6 again. The volume level
will change from the loud level to normal, and
NORMAL will appear on the radio display.
Removing the radio and not replacing it with a
factory radio or chime module will disable vehicle
chimes.
356
ProCarManuals.com
Page 451 of 570

Trying to start your vehicle by pushing or
pulling it will not work, and it could damage
your vehicle.
1. Check the other vehicle. It must have a
12-volt battery with a negative ground system.
Notice:If the other vehicle’s system is not a
12-volt system with a negative ground,
both vehicles can be damaged. Only use
vehicles with 12-volt systems with negative
grounds to jump start your vehicle.
2. Get the vehicles close enough so the jumper
cables can reach, but be sure the vehicles are
not touching each other. If they are, it could
cause a ground connection you do not
want. You would not be able to start your
vehicle, and the bad grounding could damage
the electrical systems.
To avoid the possibility of the vehicles rolling,
set the parking brake �rmly on both vehicles
involved in the jump start procedure. Put
an automatic transaxle in PARK (P) or
a manual transaxle in NEUTRAL before
setting the parking brake.Notice:If you leave your radio or other
accessories on during the jump starting
procedure, they could be damaged. The repairs
would not be covered by your warranty.
Always turn off your radio and other
accessories when jump starting your vehicle.
3. Turn off the ignition on both vehicles.
Unplug unnecessary accessories plugged into
the cigarette lighter or the accessory power
outlet. Turn off the radio and all lamps that are
not needed. This will avoid sparks and help
save both batteries. And it could save
the radio!
4. Open the hoods and locate the batteries.
Find the positive (+) and negative (−)
terminal locations on each vehicle.
You will not need to access your battery for
jump starting. Your vehicle has a remote
positive (+) jump starting terminal for
that purpose.
451
ProCarManuals.com
Page 512 of 570

Fuses and Circuit Breakers
The wiring circuits in your vehicle are protected
from short circuits by a combination of fuses,
circuit breakers, and fusible thermal links.
Look at the silver-colored band inside the fuse.
If the band is broken or melted, replace the fuse.
Be sure you replace a bad fuse with a new
one of the identical size and rating.
If you ever have a problem on the road and do not
have a spare fuse, you can borrow one that has
the same amperage or use one of the spare fuses
in the underhood fuse block. Just pick some
feature of your vehicle that you can get along
without, like the radio or cigarette lighter, and use
its fuse if it is the right amperage. Replace it
as soon as you can.
There are two fuse blocks in your vehicle, the
instrument panel fuse block and the underhood
fuse block.
Instrument Panel Fuse Block
The instrument panel fuse block is located at
the right end of the instrument panel, on the
passenger’s side of the vehicle. Open the front
passegner’s door, and remove the cover, to
access the fuse block.
Your vehicle may not have all of the fuses listed.
512
ProCarManuals.com
Page 513 of 570

Fuses Usage
1 Trunk, Door Locks
2 Electronic Level Control
3 Rear Wiper
4 Radio, DVD Player
5 Interior Lamps
6 OnStar
®
7 Keyless Entry Module
8Cluster, Heating, Ventilation,
Air Conditioning
9 Cruise Switch
10 Steering Wheel Illumination
11 Power Mirror
12 Stoplamp, Turn Lamps
13 Heated Seats
14 Blank
15 Electronic Level Control
513
ProCarManuals.com