Seat Alhambra 2006 Owner's Manual
Manufacturer: SEAT, Model Year: 2006, Model line: Alhambra, Model: Seat Alhambra 2006Pages: 299, PDF Size: 6.33 MB
Page 171 of 299
Driving169
Safety FirstOperating instructionsTips and MaintenanceTe c h n i c a l D a t a
Note
The two clutch system of the direct shift gearbox* has a system to protect
against excess strain, which may occur, for example, when the vehicle is held
on a hill with the clutch and the gearbox oil overheats. When the clutch is
overloaded, the vehicle begins to jerk and the position indicator of the
selector lever begins to flash. To avoid breakdowns, the clutch breaks the
power transmission between the engine and the gearbox, as a result of which
the vehicle loses impetus. If the clutch opens automatically due to over-
loading, depress the brake pedal and wait a few seconds before
continuing.
Selector lever positions
The selector lever positions and gears are shown on the
display in the combi-instrument.
Selector lever positions
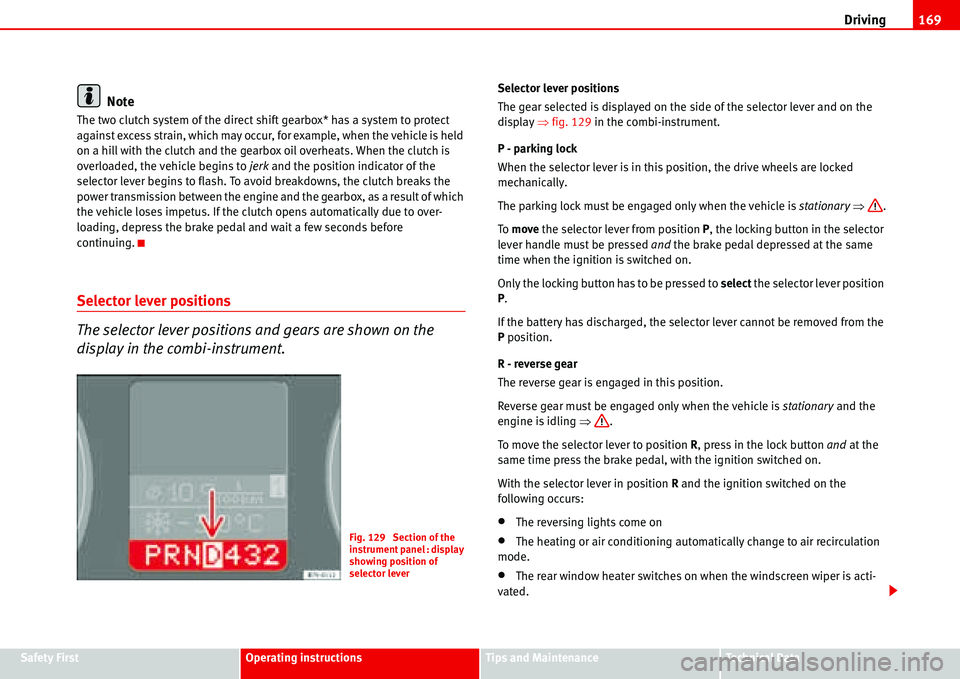
The gear selected is displayed on the side of the selector lever and on the
display �Ÿfig. 129 in the combi-instrument.
P - parking lock
When the selector lever is in this position, the drive wheels are locked
mechanically.
The parking lock must be engaged only when the vehicle is stationary �Ÿ.
To move the selector lever from position P, the locking button in the selector
lever handle must be pressed and the brake pedal depressed at the same
time when the ignition is switched on.
Only the locking button has to be pressed to select the selector lever position
P.
If the battery has discharged, the selector lever cannot be removed from the
P position.
R - reverse gear
The reverse gear is engaged in this position.
Reverse gear must be engaged only when the vehicle is stationary and the
engine is idling �Ÿ.
To move the selector lever to position R, press in the lock button and at the
same time press the brake pedal, with the ignition switched on.
With the selector lever in position R and the ignition switched on the
following occurs:
•The reversing lights come on
•The heating or air conditioning automatically change to air recirculation
mode.
•The rear window heater switches on when the windscreen wiper is acti-
vated.
Fig. 129 Section of the
instrument panel : display
showing position of
selector lever
Page 172 of 299
Driving 170
N - neutral (idling)
If this position is selected, the gearbox is in neutral. Power is not transmitted
to the wheels and the engine does not have a braking function.
Never use the N position to drive down a hill. The engine does not function as
a brake and the brakes are subjected to excessive stain.
You could damage the automatic gearbox if you drive down hills with the
selector lever in position N and the engine switched off.
D - Drive (forwards)
In this position the gearbox automatically changes automatically to a longer
or shorter gear, according to the driving style and speed. The braking effect
of the engine when driving downhill is very limited when the selector is in this
position. The display also shows which gear has been selected in addition to
position D.
If position N has been selected and you wish to select D, you must press the
foot brake if the vehicle is stationary, or travelling at under 5 km/h (approx.
3mph) �Ÿ.
WARNING
•Never move the selector lever to R or P when driving. Risk of accident!
•Never drive the vehicle with the engine and the ignition switched off.
You could loose control of the vehicle. The brake servo only functions when
the engine is running as does the elector-mechanical steering system. You
need more strength to steer and brake the vehicle when the engine and the
ignition are switched off. As you cannot steer and brake in the normal
manner, there is a greater risk of accidents and serious injury.
Caution
If you allow the vehicle to roll with the selector lever in position N with the
engine switched off, the automatic gearbox will be damaged as it will not be
lubricated.
Note
If the lever is moved accidentally to N when driving, take your foot off the
accelerator and let the engine speed drop to idling before selecting D
again.
Page 173 of 299
Driving171
Safety FirstOperating instructionsTips and MaintenanceTe c h n i c a l D a t a
Changing gear with “Tiptronic”
The “Tiptronic” system allows the driver to change gears
manually.Changing gear with “Tiptronic” (selector lever)
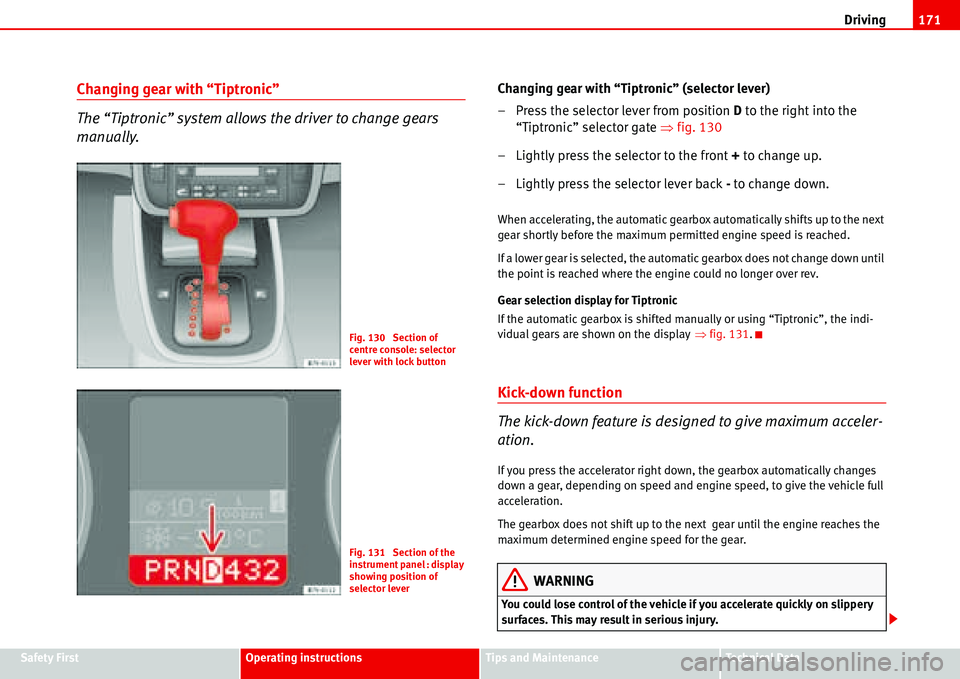
– Press the selector lever from position D to the right into the
“Tiptronic” selector gate �Ÿfig. 130
– Lightly press the selector to the front + to change up.
– Lightly press the selector lever back - to change down.
When accelerating, the automatic gearbox automatically shifts up to the next
gear shortly before the maximum permitted engine speed is reached.
If a lower gear is selected, the automatic gearbox does not change down until
the point is reached where the engine could no longer over rev.
Gear selection display for Tiptronic
If the automatic gearbox is shifted manually or using “Tiptronic”, the indi-
vidual gears are shown on the display�Ÿfig. 131.
Kick-down function
The kick-down feature is designed to give maximum acceler-
ation.
If you press the accelerator right down, the gearbox automatically changes
down a gear, depending on speed and engine speed, to give the vehicle full
acceleration.
The gearbox does not shift up to the next gear until the engine reaches the
maximum determined engine speed for the gear.
WARNING
You could lose control of the vehicle if you accelerate quickly on slippery
surfaces. This may result in serious injury.
Fig. 130 Section of
centre console: selector
lever with lock button
Fig. 131 Section of the
instrument panel : display
showing position of
selector lever
Page 174 of 299
Driving 172
•Be particularly careful, therefore, when using the kick-down function on
slippery road surfaces.
•You should use the kick-down function only when traffic and weather
conditions allow it to be used safely.
Handbrake
Using the handbrake
The handbrake should be applied firmly to prevent the
vehicle from accidentally rolling away.
Always apply the handbrake when you leave your vehicle and when
you park.
Using the handbrake
– Firmly pull the handbrake lever up all the way.
Releasing the handbrake
– Firmly pull the handbrake lever up all the way.
– Push in the lock button on the handbrake lever.
– Keep the locking knob pressed and push the lever all the way
down �Ÿ.
The handbrake is located at the side of the driver seat. Always apply the
handbrake firmly. This prevents you driving with the handbrake applied
�Ÿ.The handbrake warning lamp
�H lights up when the handbrake is applied
and the ignition switched on. The warning lamp goes out when the hand-
brake is released.
WARNING
•Never use the handbrake to slow down the vehicle when it is in motion.
The braking distance is considerably longer, as braking is only applied to
the rear wheels. Risk of accident!
•Never drive with the handbrake slightly applied. This could cause the
rear brakes to overheat and lose their braking efficiency. Risk of accident.
This also causes premature wear on the rear brake pads/linings.
Caution
Always apply the handbrake before you leave the vehicle. On cars with a
manual gearbox engage 1st gear, or for an automatic gearbox move the
selector lever to P.
Parking
The handbrake should always be firmly applied when the
vehicle is parked.
Always note the following points when parking the vehicle:
– Use the foot brake to stop the vehicle.
– Apply the handbrake firmly.
– On a manual gearbox engage 1st gear. On an automatic move
the selector lever to P .
WARNING (continued)
Page 175 of 299
Driving173
Safety FirstOperating instructionsTips and MaintenanceTe c h n i c a l D a t a
– Switch off the engine and remove the key from the ignition lock.
Turn the steering wheel slightly to engage the steering lock.
– Always take you car keys with you when you leave the vehicle
�Ÿ.
Additional notes on parking the vehicle on gradients:
Turn the steering wheel so that the vehicle would roll against the kerb if it did
start to roll.
•If the vehicle is facing downhill, turn the front wheels so that they point
towards the kerb.
•If the vehicle is facing uphill, turn the front wheels so that they point away
from the kerb.
WARNING
Take measures to reduce the risk of injury when you leave your vehicle
unattended.
•Never park where the hot exhaust system could ignite inflammable
materials, such as dry grass, low bushes, spilt fuel etc.
•Never allow vehicle occupants to remain in the vehicle when it is
locked. They would be unable to open the vehicle from the inside, and
could become trapped in the vehicle in an emergency. In the event of an
emergency, locked doors will delay assistance to occupants.
•Never leave children unsupervised in the vehicle. They could set the
vehicle in motion, for example, by releasing the handbrake or the gear
lever / selector lever.
•Depending on weather conditions, it may become extremely hot or cold
inside the vehicle. This can be fatal.
Parking distance warning system
Description
The parking distance warning system is a parking aid which
draws your attention to obstacles in front or behind the
vehicle.
The parking distance warning system assists the driver when parking. If the
rear of the vehicle is approaching an obstacle, an intermittent sound signal is
emitted. The shorter the distance, the shorter the intervals between tones. If
the vehicle is too close to the obstacle, the sound signal becomes constant.
The distance to an obstacle at the front is indicated via a high tone and via a
low tone at the rear. The shorter the distance, the shorter the intervals
between tones. If the vehicle is too close to the obstacle, the sound signal
becomes constant.
The obstacle may no longer be detected if the vehicle gets even closer to it!
The warning signal will stop when
•the vehicle moves away from the obstacle
•the outer sensors measure a constant distance for approximately 3
seconds.
The signal will not be switched off once the vehicle has reached the perma-
nent tone area.
Registering the obstacle
•Outer sensors front and rear: as of approx. 80 cm
•Centre sensors at the front: as of approx. 120 cm
•Centre sensors at the rear: as of approx. 160 cm
Page 176 of 299
Driving 174
Switching the parking distance warning system on and off
Switching on the parking distance warning system
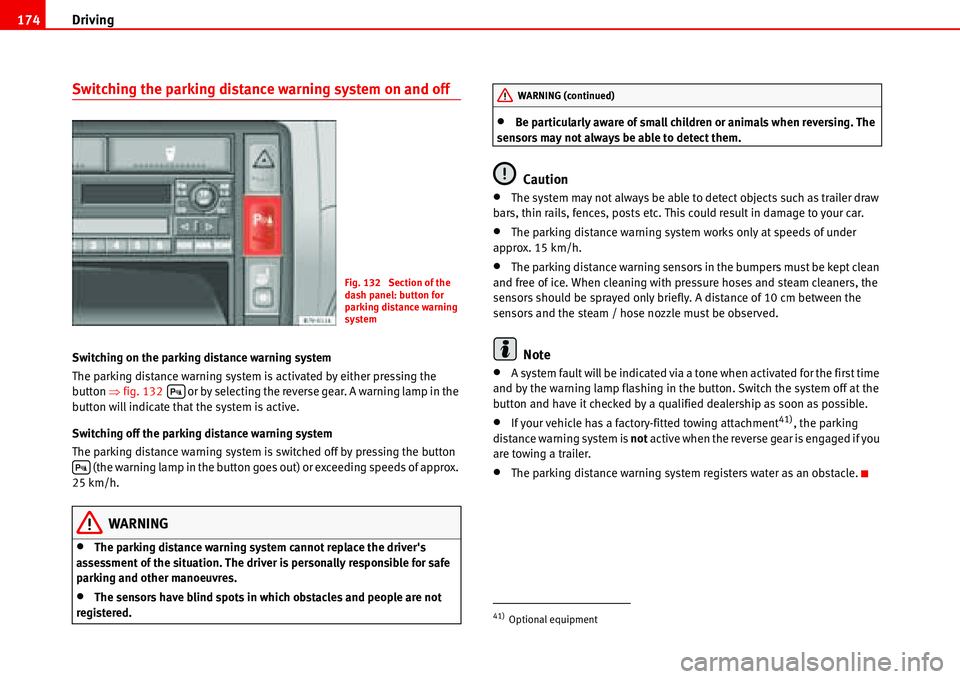
The parking distance warning system is activated by either pressing the
button �Ÿfig. 132 or by selecting the reverse gear. A warning lamp in the
button will indicate that the system is active.
Switching off the parking distance warning system
The parking distance warning system is switched off by pressing the button
(the warning lamp in the button goes out) or exceeding speeds of approx.
25 km/h.
WARNING
•The parking distance warning system cannot replace the driver's
assessment of the situation. The driver is personally responsible for safe
parking and other manoeuvres.
•The sensors have blind spots in which obstacles and people are not
registered.
•Be particularly aware of small children or animals when reversing. The
sensors may not always be able to detect them.
Caution
•The system may not always be able to detect objects such as trailer draw
bars, thin rails, fences, posts etc. This could result in damage to your car.
•The parking distance warning system works only at speeds of under
approx. 15 km/h.
•The parking distance warning sensors in the bumpers must be kept clean
and free of ice. When cleaning with pressure hoses and steam cleaners, the
sensors should be sprayed only briefly. A distance of 10 cm between the
sensors and the steam / hose nozzle must be observed.
Note
•A system fault will be indicated via a tone when activated for the first time
and by the warning lamp flashing in the button. Switch the system off at the
button and have it checked by a qualified dealership as soon as possible.
•If your vehicle has a factory-fitted towing attachment41), the parking
distance warning system is not active when the reverse gear is engaged if you
are towing a trailer.
•The parking distance warning system registers water as an obstacle.
Fig. 132 Section of the
dash panel: button for
parking distance warning
system
�'
�'
41)Optional equipment
WARNING (continued)
Page 177 of 299
Driving175
Safety FirstOperating instructionsTips and MaintenanceTe c h n i c a l D a t a
Cruise control system (CCS)
Cruise control operation
The cruise control system(CCS) is able to maintain the set
speed in the range from approx. 30 km/h to 180 km/h.
Once the desired speed has been reached and the setting stored, you may
take your foot off the accelerator.
In vehicles fitted with a manual gearbox and in vehicles with an automatic
gearbox with the lever in positions P, N or R the cruise control does not
operate in first gear.
WARNING
It could be dangerous to use the cruise control system (CCS) if it is not
possible to drive at constant speed.
•Do not use the cruise control in heavy traffic or on steep roads, with
several bends or in slippery circumstances (snow, ice, rain or loose gravel),
as there is a risk of accident.
•Always adapt your speed and the distance to the vehicles ahead to take
the traffic situation into consideration. This is the duty of the driver. The
cruise control system is merely an aid to the driver.
•Never use the cruise control system when driving off-road or on
unpaved roads . This feature is designed for use on paved roads only. Risk
of accident.
•Always switch off the CCS when you have finished using it. This will
prevent you using it by mistake.
•It is dangerous to use a set speed which is too high for the prevailing
road, traffic or weather conditions. This may cause an accident.
Caution
if the cruise control is activated the gearbox should not be set in neutral
without first releasing the clutch, as the engine speed will increase and this
may cause damage.
Note
When travelling down hills, the CCS cannot maintain a constant speed. The
vehicle will accelerate under its own weight. Reduce gears (with an automatic
gearbox, reduce gears using the “Tiptronic”) or brake using the footbrake.
Page 178 of 299
Driving 176
Lever for cruise control
The CCS can be operated using the controls on the turn signal
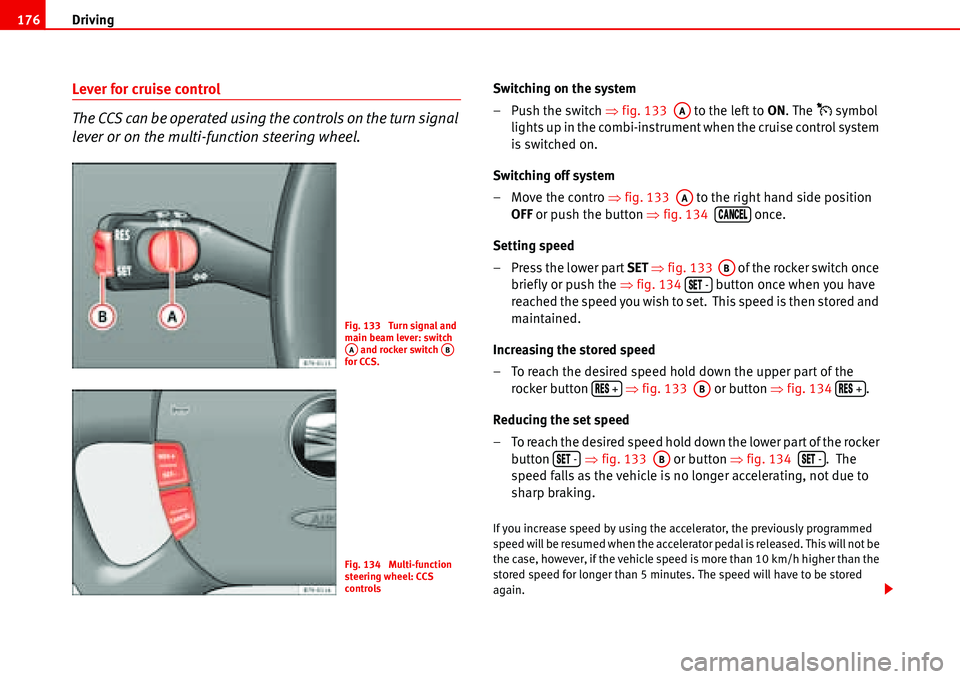
lever or on the multi-function steering wheel.Switching on the system
– Push the switch �Ÿfig. 133 to the left to ON. The
�% symbol
lights up in the combi-instrument when the cruise control system
is switched on.
Switching off system
– Move the contro �Ÿfig. 133 to the right hand side position
OFF or push the button �Ÿfig. 134 once.
Setting speed
–Press the lower part SET �Ÿfig. 133 of the rocker switch once
briefly or push the �Ÿfig. 134 button once when you have
reached the speed you wish to set. This speed is then stored and
maintained.
Increasing the stored speed
– To reach the desired speed hold down the upper part of the
rocker button �Ÿfig. 133 or button �Ÿfig. 134 .
Reducing the set speed
– To reach the desired speed hold down the lower part of the rocker
button �Ÿfig. 133 or button �Ÿfig. 134 . The
speed falls as the vehicle is no longer accelerating, not due to
sharp braking.
If you increase speed by using the accelerator, the previously programmed
speed will be resumed when the accelerator pedal is released. This will not be
the case, however, if the vehicle speed is more than 10 km/h higher than the
stored speed for longer than 5 minutes. The speed will have to be stored
again.
Fig. 133 Turn signal and
main beam lever: switch
and rocker switch
for CCS.
AAAB
Fig. 134 Multi-function
steering wheel: CCS
controls
AA
AA
�#�!�.�#�%�,
AB
�3�%�4 -
�2�%�3 +AB�2�%�3 +
�3�%�4 -AB�3�%�4 -
Page 179 of 299
Driving177
Safety FirstOperating instructionsTips and MaintenanceTe c h n i c a l D a t a Control of the set speed is switched off if you reduce speed by depressing the
brake pedal. You can reactivate the control by pressing once on the upper part
of the rocker switch or button .
WARNING
It is dangerous to use a set speed which is too high for the prevailing road,
traffic or weather conditions. This may cause an accident.
Switching off system temporarily
Switching off the control temporarily in vehicles with a manual
gearbox
– Depress the brake or clutch pedal or
–Push the switch �Ÿpage 176, fig. 133 to “OFF”, or
– Press the lower part of the button .
Switching off the control temporarily in vehicles with an automatic
gearbox
– Press the brake pedal or
– Select positions N or 1 or
–Push the switch �Ÿpage 176, fig. 133 to “OFF”, or
– Press the lower part of the rocker button .
The speed stored will remain in the cruise control memory if the control is
switched off temporarily, unless you select positions N or 1. In this case, the
speed stored in the memory will be deleted.To resume the control function, release the brake or clutch pedal, move the
switch to ON or press the button �Ÿpage 176, fig. 133 or button
�Ÿpage 176, fig. 134 once.
WARNING
It is dangerous to use a set speed which is too high for the current road,
traffic or weather conditions. Risk of accident.
�2�%�3 +
AA
CANCEL
AA
CANCEL
AA�2�%�3 +
Page 180 of 299
