interior lights Seat Alhambra 2011 Owner's Manual
[x] Cancel search | Manufacturer: SEAT, Model Year: 2011, Model line: Alhambra, Model: Seat Alhambra 2011Pages: 385, PDF Size: 7.92 MB
Page 5 of 385
Table of Contents
Manual structure
. . . . . . . . . . . . . . . . . . . . 5
Content . . . . . . . . . . . . . . . . . . . . . . . . . . . . . . . . 6
Safety First . . . . . . . . . . . . . . . . . . . . . . . . . . . . 7
Safe driving . . . . . . . . . . . . . . . . . . . . . . . . . . . . . . . 7
Dear SEAT Driver . . . . . . . . . . . . . . . . . . . . . . . . . . 7
Tips for driving . . . . . . . . . . . . . . . . . . . . . . . . . . . 7
Adjusting the seat position . . . . . . . . . . . . . . . . . 10
Transporting objects . . . . . . . . . . . . . . . . . . . . . . . 13
Seat belts . . . . . . . . . . . . . . . . . . . . . . . . . . . . . . . . . 16
Brief introduction . . . . . . . . . . . . . . . . . . . . . . . . . 16
Why wear seat belts? . . . . . . . . . . . . . . . . . . . . . . 19
Seat belts . . . . . . . . . . . . . . . . . . . . . . . . . . . . . . . 21
Seat belt tensioners . . . . . . . . . . . . . . . . . . . . . . . 26
Airbag system . . . . . . . . . . . . . . . . . . . . . . . . . . . . . 28
Brief introduction . . . . . . . . . . . . . . . . . . . . . . . . . 28
Airbag system . . . . . . . . . . . . . . . . . . . . . . . . . . . . 31
Child safety . . . . . . . . . . . . . . . . . . . . . . . . . . . . . . . 39
Child seats (accessories) . . . . . . . . . . . . . . . . . . . 39
Integrated child seat . . . . . . . . . . . . . . . . . . . . . . . 46
Operating instructions . . . . . . . . . . . . . 53
Cockpit . . . . . . . . . . . . . . . . . . . . . . . . . . . . . . . . . . . 53
Overview . . . . . . . . . . . . . . . . . . . . . . . . . . . . . . . . 53
Instrument panel . . . . . . . . . . . . . . . . . . . . . . . . . . 54
Instruments . . . . . . . . . . . . . . . . . . . . . . . . . . . . . . 57
SEAT information system . . . . . . . . . . . . . . . . . . . 62 Unlocking and locking
. . . . . . . . . . . . . . . . . . . . . 71
Vehicle key set . . . . . . . . . . . . . . . . . . . . . . . . . . . 71
Central locking and locking system . . . . . . . . . . . 74
Doors . . . . . . . . . . . . . . . . . . . . . . . . . . . . . . . . . . . 80
Sliding doors . . . . . . . . . . . . . . . . . . . . . . . . . . . . . 81
Tailgate . . . . . . . . . . . . . . . . . . . . . . . . . . . . . . . . . 84
Electric windows . . . . . . . . . . . . . . . . . . . . . . . . . . 89
Panorama sliding sunroof* . . . . . . . . . . . . . . . . . 92
Lights and visibility . . . . . . . . . . . . . . . . . . . . . . . . 95
Lights . . . . . . . . . . . . . . . . . . . . . . . . . . . . . . . . . . . 95
Sun blind . . . . . . . . . . . . . . . . . . . . . . . . . . . . . . . . 103
Windscreen wiper and washer . . . . . . . . . . . . . . . 105
Rear vision mirror . . . . . . . . . . . . . . . . . . . . . . . . . 110
Seats and storage compartments . . . . . . . . . . 114
Seat adjustment . . . . . . . . . . . . . . . . . . . . . . . . . . 114
Seat functions . . . . . . . . . . . . . . . . . . . . . . . . . . . . 117
Head restraints . . . . . . . . . . . . . . . . . . . . . . . . . . . 123
Centre armrest . . . . . . . . . . . . . . . . . . . . . . . . . . . . 125
Loading luggage compartment . . . . . . . . . . . . . . 125
Roof carrier system* . . . . . . . . . . . . . . . . . . . . . . . 138
Storage compartments . . . . . . . . . . . . . . . . . . . . . 141
Cup holders . . . . . . . . . . . . . . . . . . . . . . . . . . . . . . 148
Ashtray and cigarette lighter* . . . . . . . . . . . . . . . 150
Sockets . . . . . . . . . . . . . . . . . . . . . . . . . . . . . . . . . 151
Heating, Ventilation and Air conditioning . . . 155
Climate Control . . . . . . . . . . . . . . . . . . . . . . . . . . . 155
Auxiliary heater* (additional heater) . . . . . . . . . . 163
Driving . . . . . . . . . . . . . . . . . . . . . . . . . . . . . . . . . . . . 167
Steering . . . . . . . . . . . . . . . . . . . . . . . . . . . . . . . . . 167
Stopping and starting the engine . . . . . . . . . . . . 170
Changing gear . . . . . . . . . . . . . . . . . . . . . . . . . . . . 174
Braking, stopping and parking . . . . . . . . . . . . . . 183
Start assist systems . . . . . . . . . . . . . . . . . . . . . . . 194
Parking sensor system* . . . . . . . . . . . . . . . . . . . . 198 Park Assist system* . . . . . . . . . . . . . . . . . . . . . . . 202
Rear Assist system* . . . . . . . . . . . . . . . . . . . . . . . 207
Cruise control system* . . . . . . . . . . . . . . . . . . . . . 212
Lane Assist system* . . . . . . . . . . . . . . . . . . . . . . . 215
Sign Assist* . . . . . . . . . . . . . . . . . . . . . . . . . . . . . . 218
Tyre monitoring systems . . . . . . . . . . . . . . . . . . . . 221
Practical tips . . . . . . . . . . . . . . . . . . . . . . . . . . 225
Driving and the environment . . . . . . . . . . . . . . . 225
Running-in . . . . . . . . . . . . . . . . . . . . . . . . . . . . . . . 225
Ecological driving . . . . . . . . . . . . . . . . . . . . . . . . . 225
Engine management and exhaust gas
purific ation sy
stem . . . . . . . . . . . . . . . . . . . . . . . . 228
Trailer towing . . . . . . . . . . . . . . . . . . . . . . . . . . . . . . 231
Introduction . . . . . . . . . . . . . . . . . . . . . . . . . . . . . . 231
Driving with a trailer . . . . . . . . . . . . . . . . . . . . . . . 233
Vehicle maintenance and cleaning . . . . . . . . . 242
Care and cleaning the vehicle exterior . . . . . . . . 242
Caring for and cleaning the vehicle interior . . . . 249
Notes for the user . . . . . . . . . . . . . . . . . . . . . . . . . 255
Accessories, parts replacement and
modifications . . . . . . . . . . . . . . . . . . . . . . . . . . . . .
257
Accessories, replacement of parts and
modifications
. . . . . . . . . . . . . . . . . . . . . . . . . . . . 257
Checking and refilling levels . . . . . . . . . . . . . . . 264
Filling the tank . . . . . . . . . . . . . . . . . . . . . . . . . . . . 264
Fuel . . . . . . . . . . . . . . . . . . . . . . . . . . . . . . . . . . . . 267
Selective Catalytic Reduction* (AdBlue) . . . . . . . 271
Working in the engine compartment . . . . . . . . . . 275
Engine oil . . . . . . . . . . . . . . . . . . . . . . . . . . . . . . . . 279
Engine coolant . . . . . . . . . . . . . . . . . . . . . . . . . . . 283
Vehicle battery . . . . . . . . . . . . . . . . . . . . . . . . . . . 288 3
Table of Contents
Page 79 of 385
77
Unlocking and locking
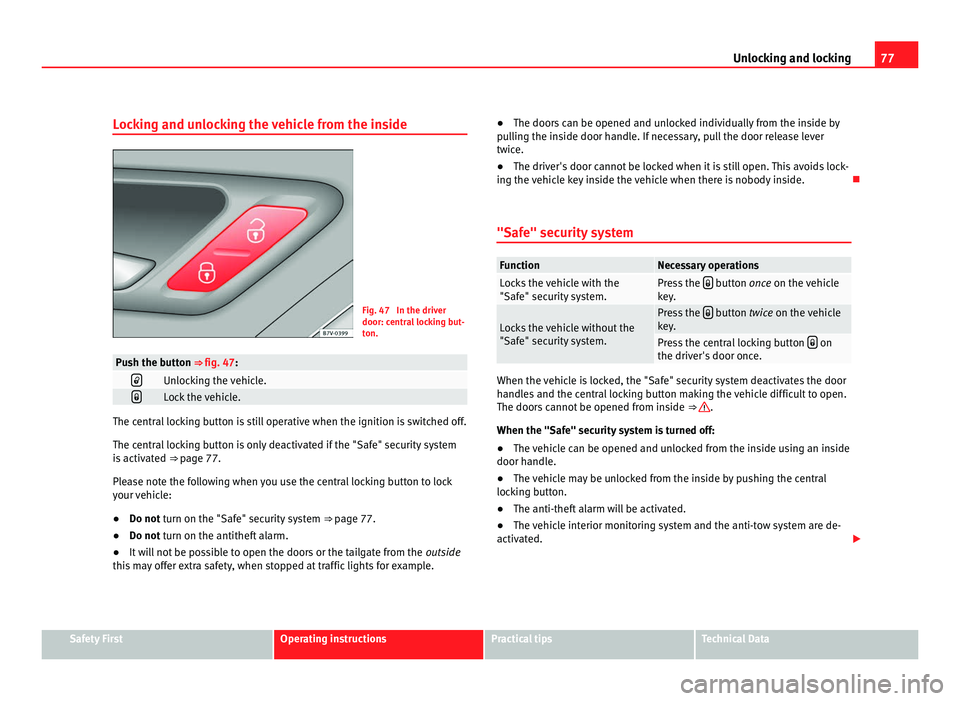
Locking and unlocking the vehicle from the inside Fig. 47 In the driver
door: centr
a
l locking but-
ton. Push the button ⇒ fig. 47:
Unlocking the vehicle.
Lock the vehicle.
The central locking button is still operative when the ignition is switched off.
The centr
al
locking button is only deactivated if the "Safe" security system
is activated ⇒ page 77.
Please note the following when you use the central locking button to lock
your vehicle:
● Do not turn on the "Safe" security system ⇒ pag
e 77.
● Do not turn on the antitheft alarm.
● It w
ill not be possible to open the doors or the tailgate from the outside
this
may offer extra safety, when stopped at traffic lights for example. ●
The doors c
an be opened and unlocked individually from the inside by
pulling the inside door handle. If necessary, pull the door release lever
twice.
● The driver's door cannot be locked when it is still open. This avoids lock-
ing the v
ehicle key inside the vehicle when there is nobody inside.
"Safe" security system Function Necessary operations
Locks the vehicle with the
"Safe" sec
urity
system. Press the
button once on the vehicle
k ey
. Locks the vehicle without the
"Safe" sec
urity
system. Press the
button twice on the vehicle
k ey
. Press the central locking button
on
the driver's door onc
e. When the vehicle is locked, the "Safe" security system deactivates the door
handl
e
s and the central locking button making the vehicle difficult to open.
The doors cannot be opened from inside ⇒ .
When the "Safe" sec urity
system is turned off:
● The vehicle can be opened and unlocked from the inside using an inside
door handle.
● The
vehicle may be unlocked from the inside by pushing the central
lockin
g button.
● The anti-theft alarm will be activated.
● The vehicle interior monitoring system and the anti-tow system are de-
activated. Safety First Operating instructions Practical tips Technical Data
Page 82 of 385
80
Unlocking and locking
● Push the
OFF button. A yellow warning lamp will light up in the button
unti l
the vehicle is locked.
● Lock all doors and tailgate.
● Use the key to lock the vehicle. The interior monitor and / or anti-towing
alarm are sw
itched off until the next time the vehicle is locked.
To turn off the interior monitoring and anti-tow systems before unlocking
the vehicle, for example in the following situations:
● When leaving animals inside the vehicle ⇒ page 74.
● When the
vehicle must be loaded.
● When the vehicle is being transported, for example, by ferry.
● When the vehicle must be towed with the axle raised.
Risk of
false alarms
The interior monitoring system only operates correctly if the vehicle is com-
pletely closed. Observe legal requirements. The alarm may be accidentally
triggered in the following cases:
● When a window is completely or partially open.
● If the sunglasses storage compartment in the roof console is open.
● When the panorama sliding sunroof is completely or partially open.
● When suspended objects are hung from the interior mirror (air freshen-
er) or there are loo
se papers in the vehicle.
● If the separation net is fitted and moves (due to heating).
● Due to a vibrating mobile telephone inside the vehicle. Note
Upon activating the alarm, if any door or the tailgate is open, only the alarm
wi l
l be activated. The interior monitoring and anti-tow systems will only be
activated when the doors and tailgate are fully closed. Doors
Introduction Additional information and warnings:
●
Vehicle key set ⇒ page 71
● C
entral locking and locking system ⇒ page 74
● Emer
gency locking and unlocking ⇒ page 314 WARNING
If a door is not correctly closed, it could open unexpectedly when driving
and cau se seriou
s injuries.
● Always stop immediately and close the door.
● When closing, ensure that the door has closed correctly. A closed
door should be flu
sh with the corresponding parts of the bodywork.
● Open and close doors only when nobody is in the way of the door. WARNING
A door held open by its retainer could be blown closed by the wind or
clo se if
the vehicle is on a hill causing injury.
● When opening and closing doors, always use the door handle.
Warning indicator lights up Possible cause Solution
At least one vehicle door is
open or not c
orr
ectly shut.
Stop driving immediately!
Open the c orr
esponding door
and close it immediately.
Page 101 of 385
99
Lights and visibility
Automatic dipped beam control
The autom atic
dipped beam control is merely intended as an aid and is not
able to recognise all driving situations.
When the light switch is in position , the vehicle lights and the instru-
ment panel and switch lighting switch on and off automatically in the fol-
lowing situations ⇒ :
Automatic switching on: Automatic switching off or switch to
da
ytime lightin
g: The photo sensor detects
darknes
s,
for example, when driving through a
tunnel. When adequate lighting is detected.
When driving at more than 140 km/
h for a f
ew sec
onds. When driving at less than 65 km/h
for a f
ew minut
es. The rain sensor detects rain and ac-
tivat
e
s the windscreen wipers. When the windscreen wiper has
been inactiv
e f
or a few minutes. Adaptive headlights (AFS)
The ad
aptiv
e headlights only operate when the dipped beam is on and at
speeds of over 10 km/h. When taking a bend, the adaptive headlights auto-
matically light up the road better.
The adaptive headlights can be switched on and off from the infotainment
system.
Static turning lights
When turning slowly to change direction or going round a tight bend, the
static cornering lights automatically come on. The static cornering lights on-
ly work at speeds of less than 40 km/h.
The static cornering lights may be incorporated into the fog lights or the
front headlights, depending upon the equipment. WARNING
If the road is not well lit and other road users cannot see the vehicle well
enough or at a l
l, accidents may occur.
● The automatic dipped beam control ( ) only sw
itches on the dip-
ped beam when there are no changes in brightness, and not, for example
when it is foggy.
● Never drive with daytime lights if the road is not well lit due to weath-
er or lighting condition
s. Daytime lights do not provide enough light to
illuminate the road properly or be seen by other road users.
Headlight adjustment Headlight adjustment (Light Assist)
The hea
dlight
adjustment automatically connects and disconnects the main
beam headlights depending on the environmental and traffic conditions
and on the speed, within the limitations of the system ⇒ . This is moni-
tor ed b
y a sensor located on the inside of the windscreen, above the interior
rear vision mirror.
Automatic headlight adjustment (Dynamic Light Assist)
The automatic headlight adjustment (Dynamic Light Assist) can reduce or
avoid dazzle for other road users within the limitations of the system ⇒ .
The sys t
em detects other road users and their distance with respect to the
vehicle and covers a certain area of the headlamps. If dazzling other road
users cannot be avoided, the lights are set automatically to dipped beam.
They are regulated with a camera positioned in the support of the interior
rear vision mirror. Safety First Operating instructions Practical tips Technical Data
Page 104 of 385
102
Lights and visibility
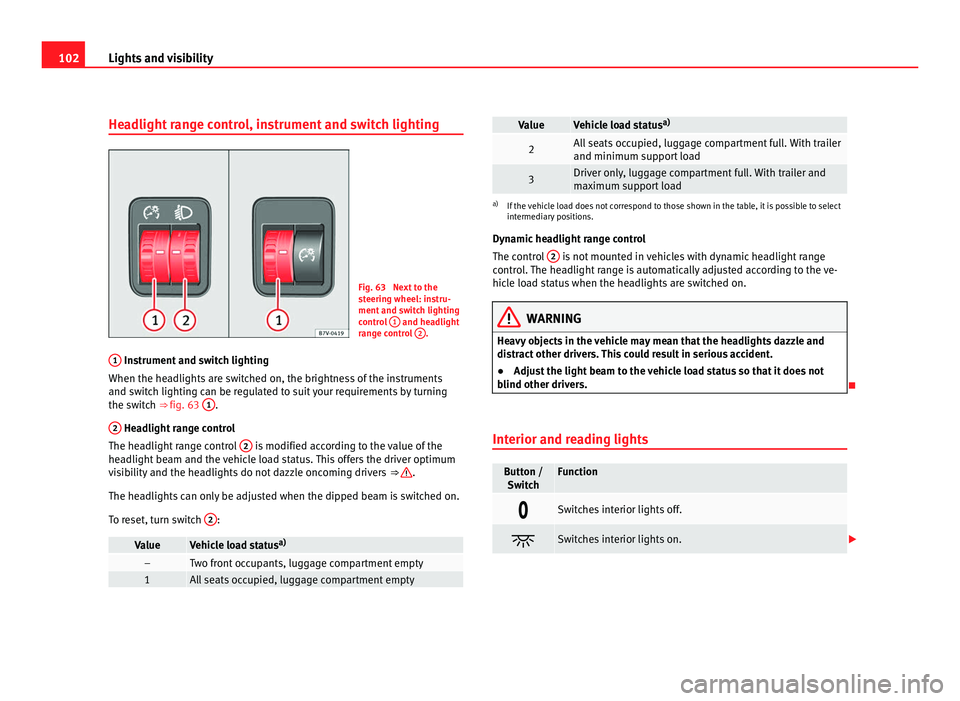
Headlight range control, instrument and switch lighting Fig. 63 Next to the
st
eerin
g wheel: instru-
ment and switch lighting
control 1 and headlight
ran g
e control 2 .
1 Instrument and switch lighting
When the hea dlights
are switched on, the brightness of the instruments
and switch lighting can be regulated to suit your requirements by turning
the switch ⇒ fig. 63 1 .
2 Headlight range control
The hea dlight
range control 2 is modified according to the value of the
hea dlight
beam and the vehicle load status. This offers the driver optimum
visibility and the headlights do not dazzle oncoming drivers ⇒ .
The hea dlights
can only be adjusted when the dipped beam is switched on.
To reset, turn switch 2 :
Value Vehicle load status
a) – Two front occupants, luggage compartment empty
1 All seats occupied, luggage compartment empty Value Vehicle load status
a) 2 All seats occupied, luggage compartment full. With trailer
and minimum sup
por
t load 3 Driver only, luggage compartment full. With trailer and
max
imum s
upport load a)
If the vehicle load does not correspond to those shown in the table, it is possible to select
intermedi ar
y positions.
Dynamic headlight range control
The control 2 is not mounted in vehicles with dynamic headlight range
contr o
l. The headlight range is automatically adjusted according to the ve-
hicle load status when the headlights are switched on. WARNING
Heavy objects in the vehicle may mean that the headlights dazzle and
dis tr
act other drivers. This could result in serious accident.
● Adjust the light beam to the vehicle load status so that it does not
blind other driver
s.
Interior and reading lights Button /
Swit c
h Function
Switches interior lights off.
Switches interior lights on.
Page 105 of 385
103
Lights and visibility Button /
Swit c
h Function
Switches door contact control on (central position).
The interior lights
c
ome on automatically when the vehicle is
unlocked, a door is opened or the key is removed from the ig-
nition.
The lights go off a few seconds after all the doors are closed,
the vehicle is locked or the ignition is switched on. Turning the reading light on and off
Storage and luggage compartment lighting
When the glov
e bo
x and the tailgate are opened and closed, a light auto-
matically switches on or off.
Background lighting
The background lighting in the front covering of the ceiling lights up the
controls on the central console from above when the side or dipped lights
are on.
In addition, the lever on the door moulding can also be illuminated. Note
The reading lights go out when the vehicle is locked, or a few minutes after
the key i
s removed from the ignition. This prevents the battery from dis-
charging. Sun blind
Introduction WARNING
Sun visors and sun blinds may reduce visibility when open.
● Always roll or fold sun blinds and visors away when not in use.
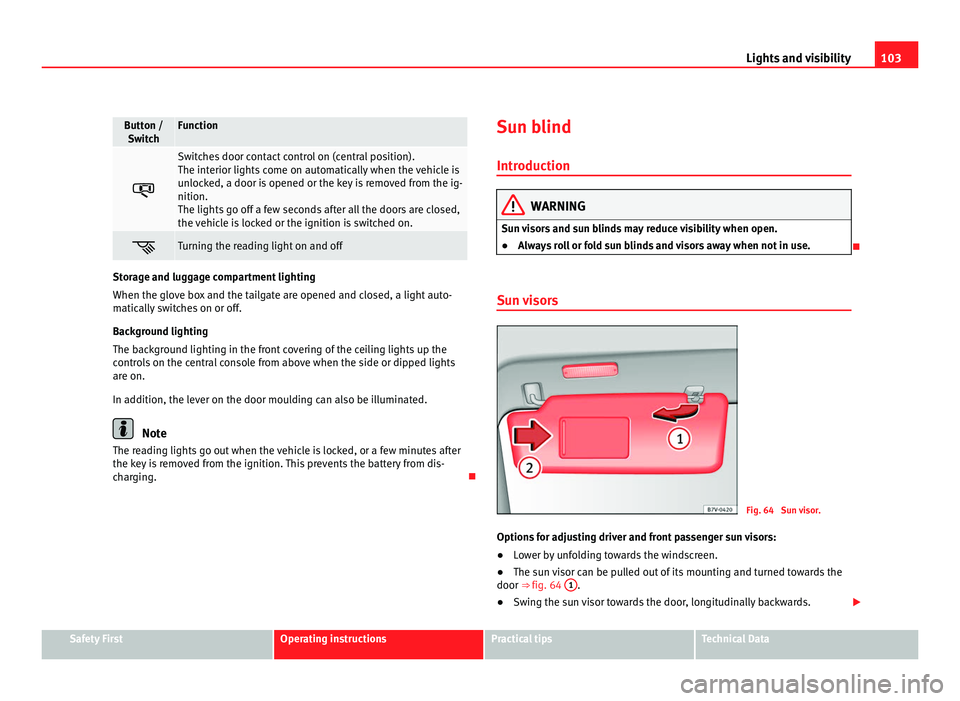
Sun visors Fig. 64 Sun visor.
Options for adjusting driver and front passenger sun visors:
● Lower by unfolding towards the windscreen.
● The sun visor can be pulled out of its mounting and turned towards the
door ⇒ fig. 64 1 .
● Swing the sun visor towards the door, longitudinally backwards. Safety First Operating instructions Practical tips Technical Data
Page 106 of 385
104
Lights and visibility
Make-up mirror light
There m a
y be a make-up mirror, with a cover, on the rear of the sun visor.
When the cover is opened 2 a light comes on.
The lamp g oe
s out when the make-up mirror cover is closed or the sun visor
is pushed back up. Note
The light above the sun visor automatically switches off after a few minutes
in cer t
ain conditions. This prevents the battery from discharging.
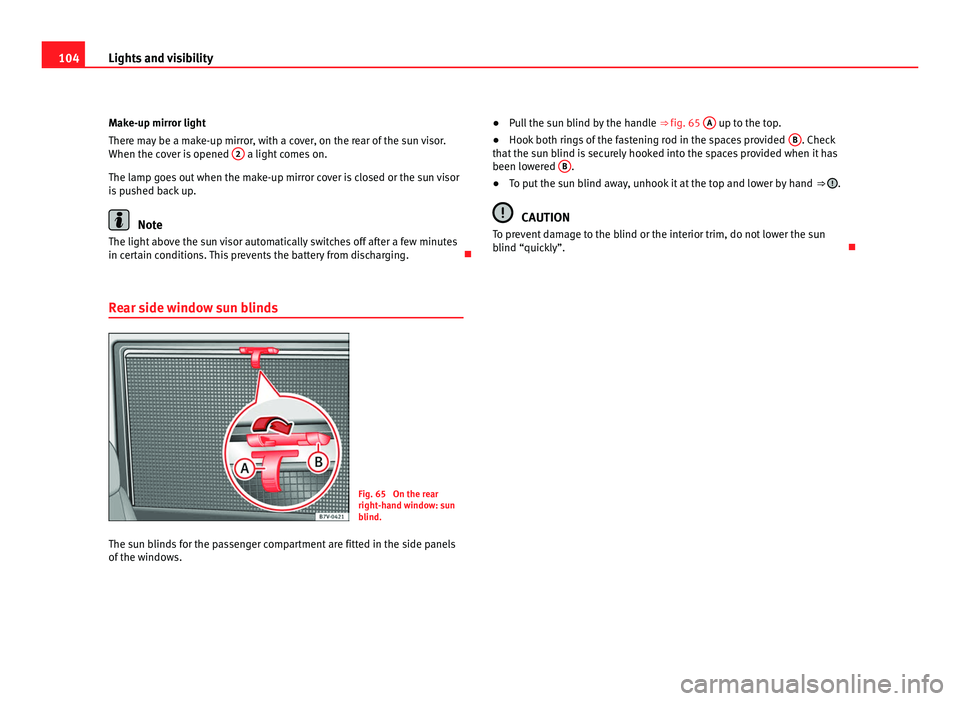
Rear side window sun blinds Fig. 65 On the rear
right-h
and w
indow: sun
blind.
The sun blinds for the passenger compartment are fitted in the side panels
of the windo
ws. ●
Pull the sun blind by the handle ⇒ fig. 65 A up to the top.
● Hook both rings of the fastening rod in the spaces provided B . Check
that the s
un blind is securely hooked into the spaces provided when it has
been lowered B .
● To put the sun blind away, unhook it at the top and lower by hand ⇒ .
CAUTION
To prevent damage to the blind or the interior trim, do not lower the sun
blind “quic k
ly”.
Page 113 of 385
111
Lights and visibility
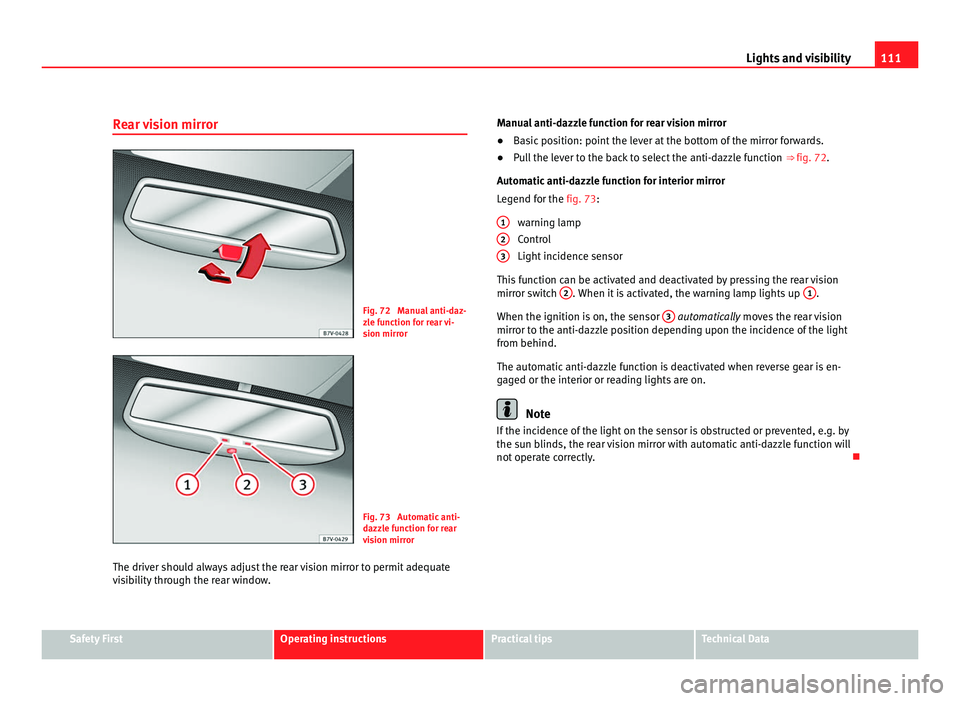
Rear vision mirror Fig. 72 Manual anti-daz-
zl
e f
unction for rear vi-
sion mirror Fig. 73 Automatic anti-
dazz
l
e function for rear
vision mirror
The driver should always adjust the rear vision mirror to permit adequate
vis
ibility through the rear window. Manual anti-dazzle function for rear vision mirror
●
Basic position: point the lever at the bottom of the mirror forwards.
● Pull the lever to the back to select the anti-dazzle function ⇒ fig. 72.
Automatic
anti-dazzle function for interior mirror
Legend for the fig. 73:
warning lamp
Control
Light incidence sensor
This function can be activated and deactivated by pressing the rear vision
mirror switch 2 . When it is activated, the warning lamp lights up
1 .
When the ignition is on, the sen
sor 3 automatically moves the rear vision
mirr or t
o the anti-dazzle position depending upon the incidence of the light
from behind.
The automatic anti-dazzle function is deactivated when reverse gear is en-
gaged or the interior or reading lights are on. Note
If the incidence of the light on the sensor is obstructed or prevented, e.g. by
the su n b
linds, the rear vision mirror with automatic anti-dazzle function will
not operate correctly.
1 2
3
Safety First Operating instructions Practical tips Technical Data
Page 168 of 385
166
Heating, Ventilation and Air conditioning
Checking programming
If the timer h
as been switched on after switching the ignition off, the instant
on button will remain lit for around ten seconds.
WARNING
Never program the independent heating system to be activated and oper-
ated in c lo
sed, unventilated areas. The auxiliary heater fumes contain
carbon dioxide, an odourless and colourless toxic gas. Carbon monoxide
can cause people to lose consciousness. It can also cause death.
Operating instructions The auxiliary heater exhaust system located below the vehicle must be kept
cl
e
ar of snow, mud and other objects. The exhaust fumes must not be ob-
structed in any way. The exhaust fumes generated by the auxiliary heater
are removed via an exhaust pipe fitted underneath the vehicle.
On heating the vehicle interior, depending on the outside temperature the
warm air is first directed at the windscreen and then to the rest of the pas-
senger compartment through the air vents. If the air vents are turned to-
wards the windows, for example, the form of air distribution may be affec-
ted.
Depending on the outside temperature, the temperature at which the auxili-
ary heater warms the vehicle interior may be somewhat higher if the heating
or climate control temperature control is set to maximum before switching
the heating on.
Depending on the engine, vehicles with auxiliary heater may be fitted with a
second battery in the luggage compartment that is responsible for powering
the auxiliary heater. Cases in which the auxiliary heater will not switch on
●
The auxiliary heater requires about as much power as the dipped head-
lights. If the batt
ery charge is low, the auxiliary heater will switch off auto-
matically or will not even switch on. This avoids problems when starting the
engine.
● The heater will switch just once each time. The timer will also have to be
switc
hed back on every time it is required. Note
● Noise will be heard while the auxiliary heater is running.
● When the air humidity i
s high and the outside temperature low, the
heating sy
stem may evaporate condensation from the auxiliary heater. In
this case, steam may be released from underneath the vehicle. This is com-
pletely normal and there is no need to suspect a fault!
● If the auxiliary heater runs several times over a prolonged period, the ve-
hicle b
attery may run flat. To re-charge the battery, drive the vehicle for a
long distance. In general: drive for as much time as the auxiliary heating
was working.
Page 245 of 385
243
Vehicle maintenance and cleaning
Washing the vehicle The longer substances such as insects, bird droppings, resinous tree sap,
ro
a
d dirt, industrial deposits, tar, soot or road salt and other aggressive ma-
terials remain on the vehicle, the more damage they do to the paintwork.
High temperatures (for instance due to strong sunlight) further intensify the
corrosive effect. The vehicle undercarriage should also be thoroughly wash-
ed at regular intervals.
Automatic car washes
Always observe the instructions provided at the automatic car wash. The
standard precautionary measures prior to entering the car wash should be
taken to avoid damage to the vehicle (close all windows, fold in exterior mir-
rors). If the vehicle is fitted with additional components (spoiler, roof-rack,
aerial...), check with the car wash supervisor whether these can enter the
car wash ⇒ .
The v ehic
le paintwork is so durable that the car can normally be washed
without problems in an automatic car washing tunnel. However, wear and
damage to the paintwork will depend on the type of car wash used. SEAT
recommends the use of car washed without brushes.
To remove traces of wax on windows and to prevent wiper blades from
scratching, please observe the following ⇒ page 245, Cleaning windows
and exterior mirrors.
Washing the car by hand
When washing the car by hand, use plenty of water to soften the dirt first,
and rinse off as well as possible.
Then clean the vehicle with a soft sponge, glove or brush using only slight
pressure. Start at the roof and work downwards. Special car shampoo
should only be used for very persistent dirt.
Rinse the sponge or glove thoroughly and often.
Wheels, sills and similar should be cleaned last. Use a second sponge for
this. WARNING
Sharp components on the vehicle may cause injury.
● Protect arms and hands from sharp edges when cleaning the vehicle
under c
arriage or the interior of the wheel hubs. WARNING
After the vehicle has been washed, the braking effect will be reduced
(and the brakin
g distance increased) due to moisture (and ice in winter)
on the brakes.
● Dry the brakes and remove ice by braking carefully. Ensure that you
are not end
angering other road-users or breaking traffic regulations in
the process. CAUTION
● The temperature of the water must not exceed +60°C (+140°F).
● To av
oid damage to the paintwork, do not wash the vehicle in full sun.
● Do not use rough sponges or similar which could damage the surface to
cle
an away the traces of insects.
● Never wipe the headlights with a dry cloth or sponge, always moisten
first
. It is best to use soapy water.
● Washing the vehicle in low temperatures: When washing the vehicle
with a hose, do not
direct water into the lock cylinders or the gaps around
the doors, tailgate, or sunroof. Locks and seals could freeze! CAUTION
To prevent damage to the vehicle, please observe the following before en-
terin g
an automatic car wash :
● Compare the distance between the vehicle wheels and the distance be-
tween the guide-rai
ls of the car wash to prevent damage to the wheels and
tyres! Safety First Operating instructions Practical tips Technical Data