instrument panel Seat Alhambra 2012 Workshop Manual
[x] Cancel search | Manufacturer: SEAT, Model Year: 2012, Model line: Alhambra, Model: Seat Alhambra 2012Pages: 388, PDF Size: 6.72 MB
Page 260 of 388
258Vehicle maintenance and cleaning
WARNING
Solvents cause the surfaces of the airbag modules to become porous. If
an airbag is accidentally triggered, the detachment of plastic parts could
cause serious injury.
● Never clean the instrument panel and the surfaces of the airbag mod-
ules with cleaners containing solvents.
Cleaning seat belts
If the seat belt is very dirty, the belt retractor may not work correctly thus
preventing the seat belt from operating correctly.
The seat belts should never be removed from the vehicle for cleaning.
● Use a soft brush to remove the worst dirt ⇒
.
● Pull the seat belt right out and leave it out.
● Clean dirty seat belts with a gentle soap and water solution.
● Wait until they are completely dry.
● Only allow the seat belt to retract when it is completely dry.
WARNING
Check the condition of all the seat belts at regular intervals. If the web-
bing or other parts of the belt are damaged, the vehicle should be taken
to a Technical Service immediately and the belts should be replaced. It is
extremely dangerous to drive using damaged seat belts and could result
in serious injury or loss of life.
● Seat belts and their components must never be cleaned with chemi-
cal products, nor should they be allowed to come into contact with corro-
sive liquids, solvents or sharp objects. This could affect the strength of
the seat belt webbing.
● Seat belts should be completely dry before retracting. Damp could
damage the belt retractor so that it is does not operate correctly.
● Do not allow liquids or foreign bodies to enter the buckle fastenings.
This could damage the buckles and seat belts.
● Never attempt to repair, modify or remove a seat belt yourself.
● Always have damaged seatbelts replaced immediately by seat belts
approved for the vehicle in question by SEAT. Seat belts which have been
worn in an accident and stretched must be replaced by a specialised
workshop. Renewal may be necessary even if there is no apparent dam-
age. The belt anchorage should also be checked.
Page 266 of 388
264Accessories, parts replacement and modifications
Retro-fitting of two-way radios
An exterior aerial is required for the use of two-way radios in the vehicle.
The retro-fitting of electrical or electronic appliances in the vehicle is sub-
ject to their approval for use in your vehicle. Under certain circumstances,
this could mean that your vehicle registration documents are no longer val-
id.
SEAT has approved your vehicle for use with two-way radios providing the
following conditions are observed:
●The exterior aerial must be mounted professionally.
● The maximum transmitting power is 10 watts.
An only external aerial is needed to give the equipment its optimal reach.
Check first with a qualified dealer if you wish to use a two-way radio with a
transmitting power of over 10 watts. The qualified workshops are familiar
with the technical options for installation. SEAT recommends visiting a Tech-
nical Service.
All legal requirements, together with the instructions for the use of two-way
radios must be observed.
WARNING
If the two-way radio is not securely fastened in position, it could be sent
flying around the vehicle in the event of sharp braking, sudden manoeu-
vres or accident, causing injury.
● While driving, two-way radios must be securely fastened in position,
outside the radius of action of the airbags, or safely stowed away.
WARNING
When using a two-way radio without a connection to an exterior aerial,
the maximum permitted levels of electromagnetic radiation may be ex-
ceeded. This is also the case if the aerial has not been correctly installed.
● You should only use a two-way radio inside the vehicle if it has first
been correctly connected to an exterior aerial.
Information stored by the control units
Your vehicle is fitted at the factory with a series of electronic control units
responsible for the engine and gearbox management. In addition, the con-
trol units supervise the performance of the exhaust gas system and the air-
bag systems.
Therefore, while the vehicle is being driven, these electronic control units
are continuously analysing the vehicle data. In the event of faults or devia-
tions from the theoretical values, only this data is stored. Normally, the
warning lamps on the instrument panel light up in the event of faults.
This data can only be read and analysed using special equipment.
The storing of the data allows specialised workshops to detect and repair
faults. Stored data may include:
● Data relating to the engine or the gearbox
● Speed
● Direction of travel
● Braking force
● Detection of seat belt
The vehicle control units never record conversations held by passengers in
the vehicle.
Page 267 of 388
265
Accessories, parts replacement and modifications
In vehicles equipped with an emergency call function via the mobile phone
or other appliances connected in the vehicle, it is possible to send the vehi-
cle position. If the control unit records an accident with airbag activation,
the system may automatically send a signal. This will depend on the net-
work operator. Normally, transmission is only possible in areas with good
coverage.
Event Data Recorder
The vehicle is not fitted with an event data recorder.
An event data recorder temporarily stores the vehicle information. There-
fore, in the event of accident, it is possible to obtain detailed information
about how the accident occurred. For example, in vehicles with airbag sys-
tems, data relating to speed of impact, seat belt status, seat positions and
airbag activation times may be stored. The volume of data depends on the
manufacturer.
Event data recorders can only be mounted with authorisation from the vehi-
cle owner and, in some countries, they are governed by local legislation.
Reprogramming control units
On the whole, all the data required for the component management is stor-
ed in the control units. The programming of certain convenience functions,
such as the convenience indicators, individual door opening and instruc-
tions on the display can be modified using special equipment at the work-
shop. If this is the case, the information and descriptions given in the in-
structions manual will not match the original functions. Therefore, SEAT rec-
ommends that any modifications are recorded in the section “Other work-
shop notes” in the Maintenance Programme.
The Technical Service must have a record of any modification to the pro-
gramming.
Reading the vehicle fault memory
There is a diagnostics connector in the vehicle interior for reading the vehi-
cle fault memory. The fault memory documents errors and deviations from
the theoretical values of the electronic control units. The diagnostics connector is in the driver's side footwell area, next to the
lever for opening the bonnet, below a cover.
The fault memory should only be read and reset by a Technical Service.
Using a mobile telephone in a vehicle without connection
to an exterior aerial
Mobile telephones transmit and receive radio waves, both when in use and
when on stand-by. Scientific studies state that radio waves exceeding cer-
tain values may be harmful to the human body. International committees
and authorities have established limits and directives in order to ensure
electromagnetic radiation from mobile phones remains within certain limits
that do not endanger human health. However, there is no available conclu-
sive scientific evidence that cordless phones are completely safe.
Therefore, some experts recommend that use of mobile phone be kept to a
minimum until the results of current research are published.
When a mobile phone not connected to an exterior aerial is used inside the
vehicle, the electromagnetic radiation may be greater than if the mobile
phone were connected to a built-in aerial or to another exterior aerial.
If the vehicle is fitted with a suitable hands-free device, it will comply with
the legislation in many countries which only permits the use of mobile
phones inside vehicles using a hands-free device.
The hands-free system mounted at the factory has been designed for use
with conventional mobile phones and phones with Bluetooth technology.
Mobile phones should be placed on a suitable phone cradle. In addition,
the cradle should always be correctly fitted into the base plate. This ensures
that the mobile phone is securely fastened to the instrument panel and con-
nected to the exterior aerial of the vehicle.
If the mobile phone is connected to an aerial incorporated into the vehicle
or an exterior aerial connected to the vehicle, this will help to reduce the
Safety FirstOperating instructionsPractical tipsTechnical Specifications
Page 272 of 388
270Checking and refilling levels
WARNING
Driving with insufficient fuel reserve could result in the vehicle breaking
down in traffic and a serious accident.
● If the fuel level is too low then the fuel supply to the engine can be-
come irregular especially on slopes.
● If the engine “is choked” or stalls due to lack of or irregularity of the
fuel supply, the power steering as well as all of the driver assistance sys-
tems including braking assistance will stop working.
● Always refuel when there is only one quarter of the fuel tank left to
avoid running out of fuel.
CAUTION
● Always pay attention to any lit lamps and to the corresponding descrip-
tions and instructions to avoid damage to the vehicle.
● Never run the tank completely dry. An irregular fuel supply may lead to
ignition faults and unburnt fuel could enter the exhaust system. This could
damage the catalytic converter filter or the diesel particulate filter!
Note
The arrow next to the fuel pump symbol on the instrument panel ⇒ fig. 164
indicates the side of the vehicle on which the tank flap is located. Filling the tank with petrol or diesel
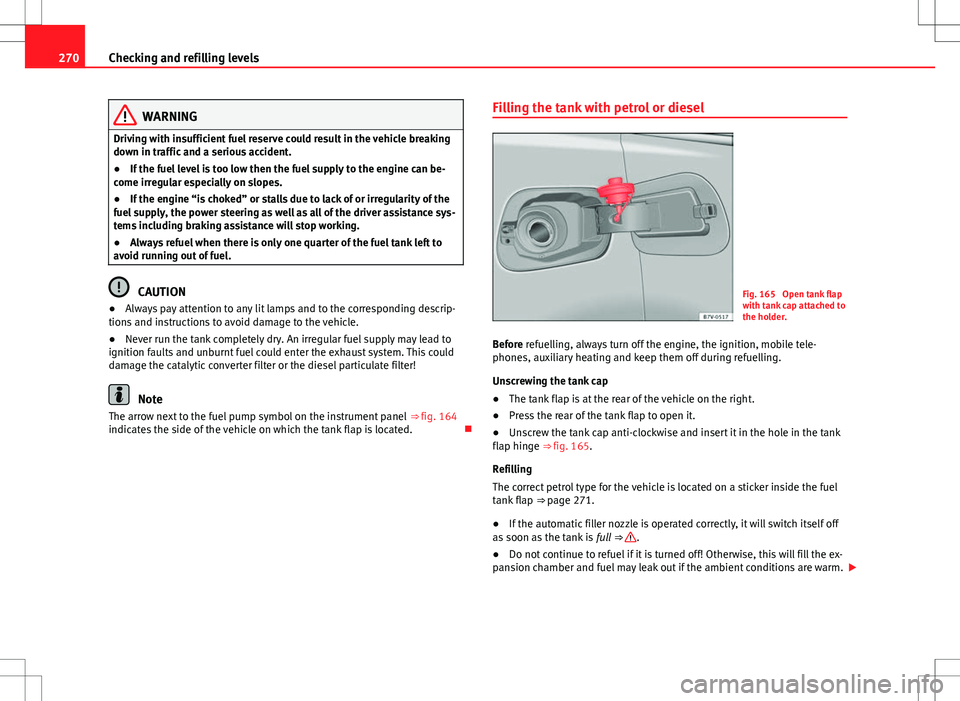
Fig. 165 Open tank flap
with tank cap attached to
the holder.
Before refuelling, always turn off the engine, the ignition, mobile tele-
phones, auxiliary heating and keep them off during refuelling.
Unscrewing the tank cap
● The tank flap is at the rear of the vehicle on the right.
● Press the rear of the tank flap to open it.
● Unscrew the tank cap anti-clockwise and insert it in the hole in the tank
flap hinge ⇒ fig. 165.
Refilling
The correct petrol type for the vehicle is located on a sticker inside the fuel
tank flap ⇒ page 271.
● If the automatic filler nozzle is operated correctly, it will switch itself off
as soon as the tank is full ⇒
.
● Do not continue to refuel if it is turned off! Otherwise, this will fill the ex-
pansion chamber and fuel may leak out if the ambient conditions are warm.
Page 278 of 388
276Checking and refilling levels
WARNING
If the warning lamps and messages are ignored, the vehicle may stall in
traffic, or may cause accidents and severe injuries.
● Never ignore the warning lamps or text messages.
● Stop the vehicle safely as soon as possible.
CAUTION
Failure to heed the warning lamps and text messages when they appear
may result in faults in the vehicle.
Information on AdBlue
In vehicles with Selective Catalytic Reduction, a special urea solution (AdBl-
ue) is injected into the exhaust gas system in front of the catalytic converter
to reduce nitrogen oxide emissions.
The consumption of AdBlue depends on individual driving style, the tem-
perature at which the system operates and the outside temperature where
the vehicle is driven. AdBlue is kept in an independent tank in the vehicle and should be refilled
at an official supplier. The AdBlue tank holds about 17 litres.
A message will be displayed on the instrument panel around 2400 km be-
fore the next service to indicate that AdBlue must be refilled
⇒ page 277. If
you ignore this message and do not refill, you will be unable to start the en-
gine afterwards ⇒ page 275.
SEAT recommends contacting a specialised workshop. If you are unable to
visit a qualified specialised workshop, you should temporarily refill with a
minimum of 10.0 litres of AdBlue. Only refill using AdBlue expressly ap-
proved by SEAT.
When the indicators and light simultaneously, there is a fault. SEAT
recommends visiting the closest qualified workshop.
AdBlue ®
is a registered trademark in the US, Germany, the European Union
and other countries belonging to the German automobile industry ("Ver-
band der Automobilindustrie e. V.", VDA).
Page 290 of 388
288Checking and refilling levels
For the sake of the environment
Coolants and additives can contaminate the environment. Collect any spilt
fluids in suitable containers and dispose of in accordance with legislation
and with the utmost respect for the environment.
Coolant temperature warning lamp and gauge
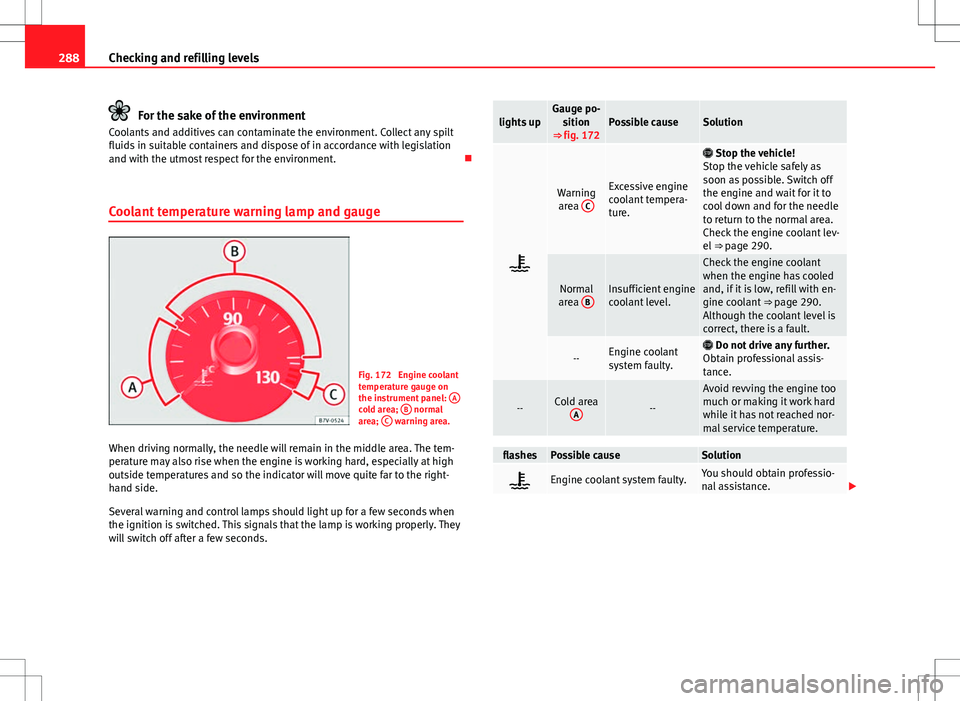
Fig. 172 Engine coolant
temperature gauge on
the instrument panel: A
cold area; B normal
area; C warning area.
When driving normally, the needle will remain in the middle area. The tem-
perature may also rise when the engine is working hard, especially at high
outside temperatures and so the indicator will move quite far to the right-
hand side.
Several warning and control lamps should light up for a few seconds when
the ignition is switched. This signals that the lamp is working properly. They
will switch off after a few seconds.
lights upGauge po- sition
⇒ fig. 172Possible causeSolution
Warning
area CExcessive engine
coolant tempera-
ture.
Stop the vehicle!
Stop the vehicle safely as
soon as possible. Switch off
the engine and wait for it to
cool down and for the needle
to return to the normal area.
Check the engine coolant lev-
el ⇒ page 290.
Normal
area BInsufficient engine
coolant level.
Check the engine coolant
when the engine has cooled
and, if it is low, refill with en-
gine coolant
⇒ page 290.
Although the coolant level is
correct, there is a fault.
--Engine coolant
system faulty. Do not drive any further.
Obtain professional assis-
tance.
--Cold area A--
Avoid revving the engine too
much or making it work hard
while it has not reached nor-
mal service temperature.
flashesPossible causeSolution
Engine coolant system faulty.You should obtain professio-
nal assistance.
Page 306 of 388
304Wheels and tyres
Driving style : driving round bends fast or sudden acceleration or braking
speed up the wear of tyres. When the driving style is normal, if the tyres
wear too quickly, have the running gear settings checked at a Technical
Service.
Wheel run-out: The wheels on new vehicles are balanced. However, certain
circumstances may lead to imbalance (run-out), which is detected as vibra-
tions in the steering wheel. Run-out leads to wear of the steering and sus-
pension. In the event of run out, the wheels should be balanced again.
When a new wheel is fitted, it should be balanced again.
Running gear settings : an incorrectly positioned running gear increases the
wear of tyres and affects your safety while driving. If tyres wear too quickly,
have the wheel alignment checked at a specialised workshop.
WARNING
If you notice unusual vibration or the car pulls to one side while driving,
this may indicate that one of the tyres is damaged.
● Reduce speed immediately and stop, while observing the highway
code.
● Check the wheels and tyres for damage.
● Never carry on driving on worn tyres or wheels. Request qualified as-
sistance immediately.
● If there is no visible exterior damage, drive slowly and carefully to the
nearest qualified workshop and have the vehicle checked.
Winter tyres*
In winter conditions winter tyres will considerably improve the vehicle's han-
dling. The design of summer tyres (width, rubber compound, tread pattern)
gives less grip on ice and snow. Winter tyres also improve the vehicle brak-
ing performance, reducing the braking distance in winter weather. SEAT rec- ommend that winter tyres be fitted to the vehicle at temperatures below
+7 °C (+45 °F).
The performance of winter tyres is much reduced if the
tyre tread is worn be-
low 4 mm (1/16 inch). The age of the tyre is another factor affecting per-
formance, regardless of the depth of the tyre tread.
Please observe the following when using winter tyres:
● Observe legal requirements in each country.
● Winter tyres must be fitted on all four wheels.
● Only use winter tyres in wintery weather conditions.
● Only use winter tyres of the size authorised for the vehicle.
● Only use radial winter tyres of the same type, size (rolling circumference)
and tread pattern.
● Adjust speeds to within the limits indicated (code letter on tyre) ⇒
.
Speed limit
A code letter indicating the speed limit is stamped on all winter tyres
⇒ page 307.
In some vehicles, it is possible to set a speed warning in the MFA (multifunc-
tion indicator) menu on the instrument panel ⇒ page 62.
If you use V-rated tyres the speed limits and tyre pressure will be deter-
mined by engine size. Please ask your Technical Service for further informa-
tion on the maximum permitted speed and the required pressures for the
tyres.
All-wheel drive*
Thanks to its all-wheel drive, your car will have plenty of traction in winter
conditions, even with the standard tyres. Nevertheless, SEAT still recom-
mend that winter tyres or all-season tyres should be fitted on all four wheels
when winter road conditions are expected, mainly because this will give a
better braking response.
Page 318 of 388
316If and when
If and when
In case of emergency
Introduction
Additional information and warnings:
● Braking, stopping and parking ⇒ page 185
● Emergency locking and unlocking ⇒ page 318
● Vehicle tools ⇒ page 324
WARNING
A faulty vehicle in traffic represents a risk of accident for the driver and
for other road users.
● Stop the vehicle safely as soon as possible. Park the vehicle a safe
distance from surrounding traffic to lock all the doors in case of an emer-
gency. Turn on the hazard warning lights to warn other road users.
● Never leave children or disabled people alone in the vehicle if the
doors are to be locked. In case of an emergency, passengers will be trap-
ped inside the vehicle. Individuals locked in the vehicle can be exposed
to very high or very low temperatures.
Protecting yourself and securing the vehicle
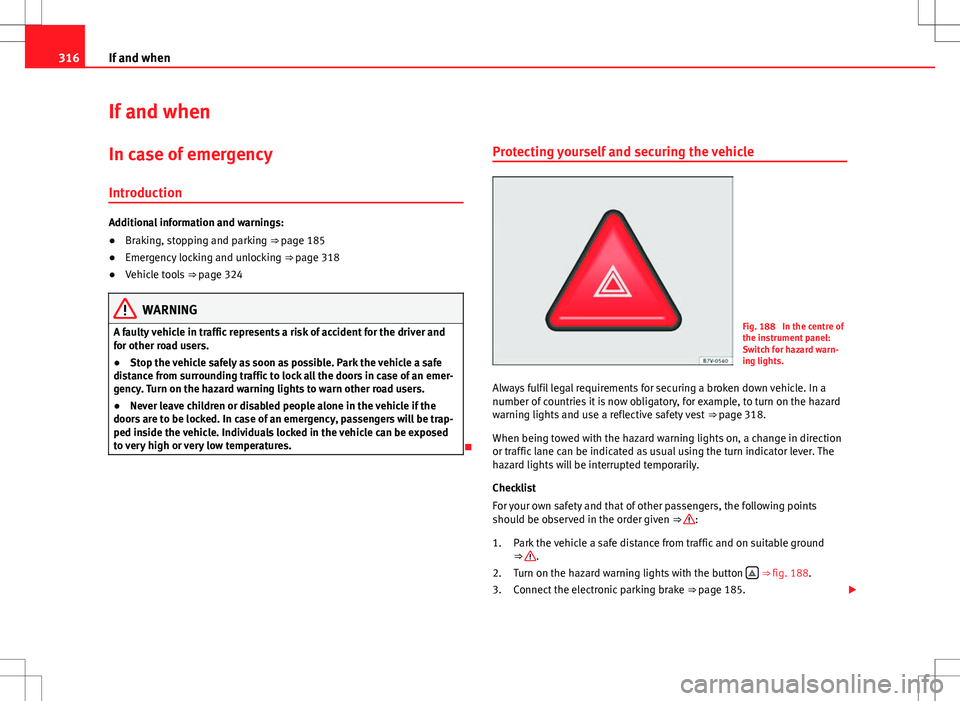
Fig. 188 In the centre of
the instrument panel:
Switch for hazard warn-
ing lights.
Always fulfil legal requirements for securing a broken down vehicle. In a
number of countries it is now obligatory, for example, to turn on the hazard
warning lights and use a reflective safety vest ⇒ page 318.
When being towed with the hazard warning lights on, a change in direction
or traffic lane can be indicated as usual using the turn indicator lever. The
hazard lights will be interrupted temporarily.
Checklist
For your own safety and that of other passengers, the following points
should be observed in the order given ⇒
:
Park the vehicle a safe distance from traffic and on suitable ground
⇒
.
Turn on the hazard warning lights with the button ⇒
fig. 188.
Connect the electronic parking brake ⇒ page 185.
1.
2.
3.
Page 333 of 388

331
If and when
Several warning and control lamps should light up for a few seconds when
the ignition is switched. This signals that the lamp is working properly. They
will switch off after a few seconds.
Checking the bulbs of a trailer
For vehicles with the factory fitted trailer system, certain trailer lights are al-
so controlled if the socket is correctly connected.
A fault on a trailer turn indicator is indicated on the instrument panel by the
indicator blinking twice as fast ( or ) ⇒ page 95.
● General fault of all indicators on one side.
● Fault in one tail light (on some models, also the registration light).
● Fault in two brake lights.
WARNING
If the warning lamps and messages are ignored, the vehicle may stall in
traffic, or may cause accidents and severe injuries.
● Never ignore the warning lamps or text messages.
● Stop the vehicle safely as soon as possible.
CAUTION
Failure to heed the warning lamps and text messages when they appear
may result in faults in the vehicle.
Note
A fault in the LED on the tail lights will not be indicated. However, if the fault
affects all the LEDs then this will be indicated by the indicator . Information for replacing bulbs
Checklist
To replace a bulb, carry out the following operations always in the order giv-
en ⇒
:
Park the vehicle a safe distance from traffic and on suitable ground.
Connect the electronic parking brake ⇒ page 185.
Turn the light switch to position 0 ⇒ page 95.
Move the gear lever into the neutral position ⇒ page 95.
Automatic gearbox: Move selector lever to position P ⇒ page 176.
Stop the engine and remove the key from the ignition ⇒ page 172.
Manual gearbox: Select a gear ⇒ page 176.
Wait until all of the passenger compartment lights are turned off
⇒ page 95.
Allow the corresponding bulb to cool. Visually inspect fuses to see if any are blown ⇒ page 326.
Replace the bulb according to the instructions ⇒
. Bulbs should only
be replaced by new identical models. Bulb information is displayed on
the bulb socket or on the bulb itself.
In general, never touch the bulb glass directly. The heat of the bulb
would cause the fingerprint to evaporate and condense on the reflector.
This will impair the brightness of the headlight.
Check if the new bulb is working. If the bulb is not working, it may not
have been correctly fitted, it could be damaged or the connector may
not be correctly connected.
Every time a bulb for the headlights is replaced, visit a specialised
workshop to check the headlights.
1.
2.
3.
4.
5.
6.
7.
8.
9.
10.
11.
12.
13.
14.
Safety FirstOperating instructionsPractical tipsTechnical Specifications
Page 371 of 388
Index
A
AbroadExtended stay abroad with your vehicle . . 259
Sale of vehicle . . . . . . . . . . . . . . . . . . . . . . 259
ABS See "Brake assist systems" . . . . . . . . . . . . 191
Accessories . . . . . . . . . . . . . . . . . . . . . . . . . . . . 261
Acoustic warnings Headlights . . . . . . . . . . . . . . . . . . . . . . . . . . 97
Adaptive headlights Dynamic . . . . . . . . . . . . . . . . . . . . . . . . . . . . 99
AdBlue Control lamp . . . . . . . . . . . . . . . . . . . . . . . . 275
Information . . . . . . . . . . . . . . . . . . . . . . . . . 276
Minimum quantity for a refill . . . . . . . . . . . 276
Refilling . . . . . . . . . . . . . . . . . . . . . . . . . . . . 277
Specifications . . . . . . . . . . . . . . . . . . . . . . . 278
Tank filling capacity . . . . . . . . . . . . . . . . . . 276
Warning lamp . . . . . . . . . . . . . . . . . . . . . . . 275
Additional equipment . . . . . . . . . . . . . . . . . . . 262
Additional heater See "Auxiliary heater" . . . . . . . . . . . . . . . . 165
Adjusting passenger exterior mirror . . . . . . . . 112
Adjustment Correct sitting position . . . . . . . . . . . . . . . . 12
Electric front seat . . . . . . . . . . . . . . . . . . . . 115
Head restraints . . . . . . . . . . . . . . . . . . . . . . 123
Mechanical front seat . . . . . . . . . . . . . . . . 114
Rear seats . . . . . . . . . . . . . . . . . . . . . . . . . . 116 Seat with position memory . . . . . . . . . . . . 118
Steering wheel . . . . . . . . . . . . . . . . . . . . . . 171
Adjustments Folding the backrest of the front passengerseat . . . . . . . . . . . . . . . . . . . . . . . . . . . . . 121
Headlight range . . . . . . . . . . . . . . . . . . . . . 101
Aerial . . . . . . . . . . . . . . . . . . . . . . . . . . . . . . . . . 259
Aerial built into the window . . . . . . . . . . . . . . . 259
AFS . . . . . . . . . . . . . . . . . . . . . . . . . . . . . . . . . . . 99
Airbag system . . . . . . . . . . . . . . . . . . . . . . . . 28, 31 Cleaning instrument panel . . . . . . . . . . . . 257
Curtain airbags . . . . . . . . . . . . . . . . . . . . . . . 37
Deactivating the front passenger airbag . . 35
Deactivating using the key switch . . . . . . . . 35
Description . . . . . . . . . . . . . . . . . . . . . . . . . . 31
Differences between front passenger airbagsystems . . . . . . . . . . . . . . . . . . . . . . . . . . . 34
Faults . . . . . . . . . . . . . . . . . . . . . . . . . . . . . 263
Front airbags . . . . . . . . . . . . . . . . . . . . . . . . 33
Function . . . . . . . . . . . . . . . . . . . . . . . . . . . . 31
Knee airbag . . . . . . . . . . . . . . . . . . . . . . . . . 38
Locking the vehicle after airbag deploy- ment . . . . . . . . . . . . . . . . . . . . . . . . . . . . . . 75
Repairs . . . . . . . . . . . . . . . . . . . . . . . . . . . . 263
Side airbags . . . . . . . . . . . . . . . . . . . . . . . . . 36
Use of child seats . . . . . . . . . . . . . . . . . . . . . 35
Vehicle care . . . . . . . . . . . . . . . . . . . . . . . . 257
Warning lamp . . . . . . . . . . . . . . . . . . . . . . . . 30
Air conditioner Faults . . . . . . . . . . . . . . . . . . . . . . . . . . . . . 162 Air conditioning
see "Climate control" . . . . . . . . . . . . . . . . . 157
Air recirculation mode . . . . . . . . . . . . . . . . . . . 163
Air vents . . . . . . . . . . . . . . . . . . . . . . . . . . . . . . 163
Alarm system . . . . . . . . . . . . . . . . . . . . . . . . . . . 78
Alcantara . . . . . . . . . . . . . . . . . . . . . . . . . . . . . . 255
All-wheel drive Snow chains . . . . . . . . . . . . . . . . . . . . . . . . 305
Winter tyres . . . . . . . . . . . . . . . . . . . . . . . . . 304
Alternator . . . . . . . . . . . . . . . . . . . . . . . . . . . . . 293
Ambient lighting . . . . . . . . . . . . . . . . . . . . . . . 102
Anodized surfaces . . . . . . . . . . . . . . . . . . . . . . 251
Anti-lock brake system (ABS) . . . . . . . . . . . . . 191
Anti-theft alarm Trailer . . . . . . . . . . . . . . . . . . . . . . . . . . . . . 240
Anti-theft alarm system False alarms . . . . . . . . . . . . . . . . . . . . . . . . . 79
Anti-theft bolts . . . . . . . . . . . . . . . . . . . . . . . . . 325
Anti-theft locking bolts . . . . . . . . . . . . . . . . . . 309
Anti-theft wheel locking bolts . . . . . . . . . . . . . 311
Anti-tow system . . . . . . . . . . . . . . . . . . . . . . . . . 79
Anti-trap function Electric windows . . . . . . . . . . . . . . . . . . . . . . 90
Panorama sliding sunroof . . . . . . . . . . . . . . 94
Sunshade . . . . . . . . . . . . . . . . . . . . . . . . . . . 94
Antifreeze . . . . . . . . . . . . . . . . . . . . . . . . . . . . . 289
Antitheft alarm . . . . . . . . . . . . . . . . . . . . . . . . . . 78
369
Index