traction control Seat Alhambra 2014 Owner's Manual
[x] Cancel search | Manufacturer: SEAT, Model Year: 2014, Model line: Alhambra, Model: Seat Alhambra 2014Pages: 381, PDF Size: 5.75 MB
Page 59 of 381
57
Cockpit
WARNING (Continued)
● A faulty vehicle represents a risk of accident for the driver and for oth-
er road users. If necessary, switch on the hazard warning lamps and put
out the warning triangle to advise other drivers.
● Before opening the bonnet, switch off the engine and allow it to cool.
● In any vehicle, the engine compartment is a hazardous area and could
cause severe injuries ⇒ page 279.
CAUTION
Failure to heed the control lamps and text messages when they appear may
result in faults in the vehicle. Instruments
Introduction
Additional information and warnings:
● Control and warning lamps ⇒ page 54
● Gear engaged display (automatic gearbox) ⇒ page 176.
● Instructions for inspection intervals ⇒ Booklet Maintenance Programme
WARNING
Any distraction may lead to an accident, with the risk of injury.
● Do not operate the instrument panel controls when driving.
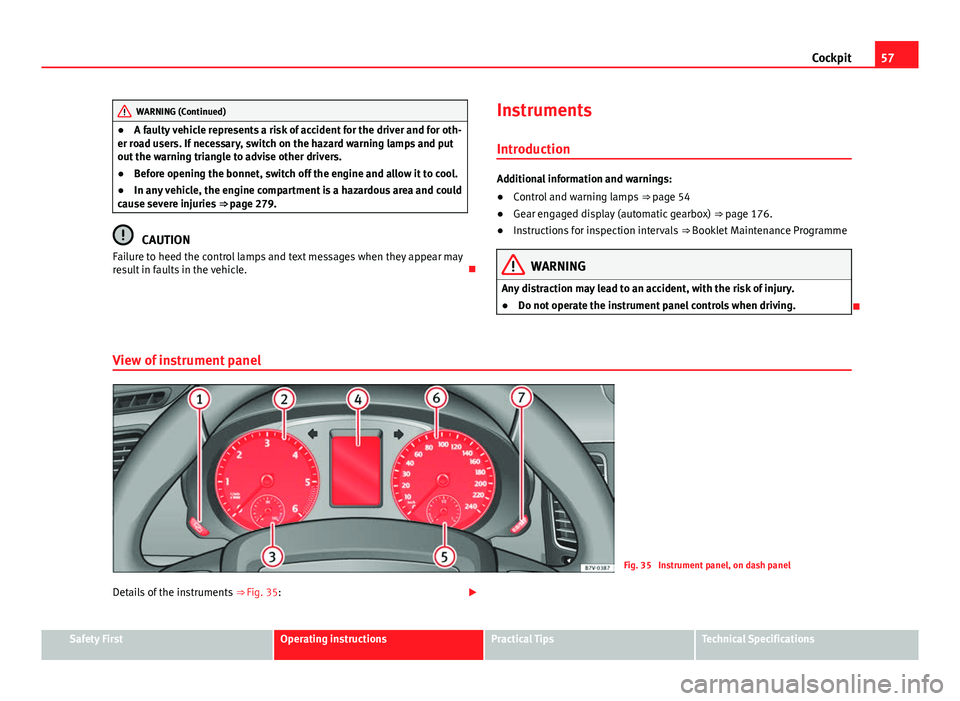
View of instrument panel
Fig. 35 Instrument panel, on dash panel
Details of the instruments ⇒ Fig. 35:
Safety FirstOperating instructionsPractical TipsTechnical Specifications
Page 64 of 381
62Cockpit
The service interval display is reset
If the service was not carried out by a Technical Service, the display can be
reset as follows:
In vehicles with text messages:Select the Settings menu.In the submenu Service, select the option Reset.Confirm with OK when requested to do so by the system.
In vehicles without text messages:Switch the ignition off.Press and hold the 0.0 / SET button.Switch the ignition back on.Release the 0.0 / SET button and, press for the next 20 seconds.
Do not reset the indicator to zero between two intervals, otherwise the dis-
play will be incorrect.
If, while the LongLife service is valid, the service interval display is reset to
zero, the “service will be activated by time or mileage”. The service interval
is no longer calculated individually
⇒ Booklet Maintenance Programme.
Note
● The service message disappears after a few seconds, when the engine is
started or when OK
is pressed.
● In vehicles with the LongLife system in which the battery has been dis-
connected for a long period of time, it is not possible to calculate the date
of the next service. Therefore the service interval display may not be correct.
In this case, please check the maximum permitted service intervals ⇒ Book-
let Maintenance Programme. SEAT information system
Introduction
With the ignition switched on, it is possible to read the different functions of
the display by scrolling through the menus.
In vehicles with a multifunction steering wheel, there are no buttons on the
windscreen wiper lever. The multifunction display can only be controlled
from the buttons on the multifunction steering wheel.
The number of menus displayed on the instrument panel will vary according
to the vehicle electronics and equipment.
A specialised dealer will be able to programme or modify additional func-
tions, according to the vehicle equipment. SEAT recommends visiting a
Technical Service.
Some menu options can only be read when the vehicle is at a standstill.
As long as a priority 1 warning is displayed, it will not be possible to read
the menus. To display the menus, confirm the warning by pressing OK
.
Additional information and warnings:
● Exterior mirrors ⇒ page 111
● Auxiliary heating ⇒ page 165
WARNING
Any distraction may lead to an accident, with the risk of injury.
● Do not read the instrument panel menus when driving.
Page 178 of 381
176Driving
Note
● In vehicles with automatic gearbox, the key can only be removed when
the selector lever is in position P.
● After stopping the engine, the engine compartment fan may continue
running for a few minutes, even when the ignition has been switched off or
the key removed. The radiator fan is automatically switched off.
Electronic immobiliser
The gear lock prevents the engine from being started with an unauthorised
key and the vehicle being moved.
The vehicle key has a built-in chip. It automatically deactivates the electron-
ic immobiliser when the key is inserted into the ignition lock.
For this reason, the vehicle can only be used with a genuine SEAT key with
the correct code. Coded keys can be obtained from your Technical Services
⇒ page 72.
If an unauthorised key is used, the message SAFE or Immobiliser active is
displayed on the instrument panel. The vehicle cannot be started in this
case
Note
The correct operation of the vehicle is only guaranteed when original SEAT
keys are used. Changing gear
Introduction
When reverse gear is engaged and the ignition is switched on the following
takes place:
● Reverse lights light up.
● When reversing, the air conditioner automatically changes to air recircu-
lation mode.
● The rear window heater switches on when the windscreen wiper is acti-
vated.
● Also, the parking sensor system, the optical parking sensor and the
camera for the reverse assist system are connected.
Additional information and warnings:
● Instruments ⇒ page 57
● Braking, stopping and parking ⇒ page 185
● Parking sensor system ⇒ page 200
● Park Assist system ⇒ page 204
● Reverse assist system (Rear Assist) ⇒ page 209
● Air conditioning ⇒ page 157
● Electronic power control and exhaust gases purification system
⇒ page 232
● Emergency locking and unlocking ⇒ page 318
WARNING
Rapid acceleration can cause loss of traction and skidding, especially on
slippery ground. This could cause loss of control of the vehicle resulting
in an accident and considerable damage.
● Only use the kick-down function or rapid acceleration if visibility,
weather, road and traffic conditions so permit.
Page 185 of 381
183
Driving
● You should reduce speed accordingly.
● Press the selector lever from position D to the right into the Tiptronic se-
lector gate ⇒ page 182.
● Gently pull the selector lever back to change down a gear.
● OR: Reduce using the steering wheel paddles ⇒ page 182.
Back-up programme
If all the selector lever positions on the instrument panel display are shown
with a light-coloured background, this means there is a fault in the system.
The automatic gearbox will operate in back-up mode. When the backup pro-
gramme is activated, it is possible to drive the vehicle, however, at low
speeds and within a selected range of gears.
For the DSG ®
dual clutch gearbox, in some cases, this may mean that the
reverse gear does not engage . The gearbox should be checked by a special-
ised workshop as soon as possible.
Overload protection for the 6-speed DSG gearbox ®
When the clutch is overloaded, the vehicle begins to jerk and the selector
lever position indicator begins to flash. To prevent damage to the clutch,
this interrupts the power transmission between the engine and the gearbox.
There is no more traction and it is not possible to accelerate. If the clutch is
opened automatically due to overloading, press the brake pedal. Wait a few
seconds before starting to move again.
Kick-down
The kick-down system provides maximum acceleration when the gear selec-
tor lever is in the positions D, S or in the Tiptronic position.
When the accelerator pedal is pressed right down, the automatic gearbox
will shift down to a lower gear, depending on road speed and engine speed.
This takes advantage of the maximum acceleration of the vehicle ⇒
.
When the accelerator is pressed to the floor, the automatic gearbox shifts to
the next gear only after the engine reaches the specified maximum engine
speed. Launch-Control Programme
The Launch-Control programme enables maximum acceleration while at a
standstill.
●
Switch off the ASR ⇒ page 185.
● Press and hold the brake pedal with your left foot.
● Place the selector lever in position S or Tiptronic.
● Press the accelerator with the right foot until the vehicle reaches an en-
gine speed of approximately 3200 rpm.
● Lift the left foot off the brake ⇒
. The vehicle starts with maximum ac-
celeration.
● Turn on the ASR after accelerating!
WARNING
Rapid acceleration can cause loss of traction and skidding, especially on
slippery ground. This could cause loss of control of the vehicle resulting
in an accident and considerable damage.
● Only use kick-down and rapid acceleration when weather conditions,
surface conditions and traffic conditions permit; accelerate and drive in a
manner that does not endanger other road users.
● Please remember that the driven wheels can slip and the vehicle can
skid if the ASR is turned off, especially on slippery ground.
● Turn on the ASR after accelerating!
CAUTION
● If you stop on a hill with a gear range engaged, do not try to prevent the
vehicle from rolling back by pressing on the accelerator. This could cause
overheating and damage the automatic gearbox.
● Never allow the vehicle to move with the gear selector lever in N, espe-
cially with the engine turned off. The automatic gearbox will not be lubrica-
ted and could be damaged.
Safety FirstOperating instructionsPractical TipsTechnical Specifications
Page 193 of 381
191
Driving
Brake assist systems
The brake assist systems ESC, ABS, BAS, ASR and EDL only operate when
the ignition is switched on. They contribute significantly to increasing active
safety.
Electronic Stability Control (ESC)
ESC reduces the risk of skidding and increases the vehicle stability by brak-
ing individual wheels under specific driving conditions. ESC detects critical
handling situations, such as understeer, oversteer and wheelspin on the
driven wheels. The system stabilises the vehicle by braking individual
wheels or by reducing the engine torque.
The ESC has limits. It is important to realise that the ESC is also subject to
the laws of physics. ESC will not be able to deal with all situations with
which drivers may be faced. For example, if the road surface changes sud-
denly then ESC will not be useful in all cases. If the vehicle suddenly enters
a section covered by water, mud or snow then ESC will not provide assis-
tance in the same way as on dry ground. If the vehicle loses its grip on the
ground and moves on a film of water (aquaplaning), the ESC will not be able
to assist the driver to control the vehicle due to the loss of adherence with
the road surface preventing braking and steering. If the vehicle is driven
through series of bends at high speed, the ESC will not always be as effec-
tive: the vehicle reaction to aggressive driving is not the same as at reduced
speeds. When driving with a trailer, ESC does not provide the same amount
of vehicle control as without a trailer.
Adjust your speed and driving style to road, traffic and weather conditions.
ESC cannot push the limits of the laws of physics; improve the transmission
available or maintain the vehicle on the road if a lack of driver attention cre-
ates an inevitable situation. Otherwise, ESC assists in maintaining vehicle
control in extreme situations and uses the movements of the steering made
by the driver to maintain the vehicle moving in the desired direction. If the
vehicle is driven at such a speed that it will leave the road before ESC can
intervene then the system cannot provide assistance. The ABS, BAS, ASR and EDL systems are incorporated into the ESC. The ESC
is always on. The ESC should only be turned off using the ASR button
⇒
Fig. 138 when traction is insufficient. Always remember to turn on the
ASR once more when the vehicle has traction again.
Anti-lock brake system (ABS)
ABS can prevent the wheels from locking during braking until just before
the vehicle stops thus helping the driver to steer the vehicle and maintain
control. This means that, even during full braking, the risk of skidding is re-
duced:
● Press and hold the brake pedal fully. Do not remove your foot from the
brake pedal or reduce braking force!
● Do not “pump” the brake pedal, or reduce braking force!
● Maintain vehicle direction when braking fully.
● When the brake pedal is released or when the brake force is reduced,
ABS is turned off.
ABS control can be observed by vibration of the brake pedal and noise. You
should never expect the ABS to reduce the braking distance under any cir-
cumstances. Braking distances will increase when driving on gravel, recent
snow or on icy and slippery ground.
When driving on loose ground, the all-terrain configuration of the ABS is au-
tomatically turned on. When ABS is activated, the front wheels may lock
briefly. This shortens the braking distance in off-road situations as the
wheels are prevented from digging into loose surfaces. All-terrain ABS only
intervenes when driving in a straight line. When the front wheels are turned,
the normal ABS is activated.
Brake assist system (BAS)
The brake assist system may reduce the required braking distance. The
brake assist system boosts the braking force if you press the brake pedal
quickly in an emergency. As a result, the braking pressure increases rapidly,
the braking force is multiplied and the braking distance is reduced. This en-
ables the ABS to be activated more quickly and effectively.
Safety FirstOperating instructionsPractical TipsTechnical Specifications
Page 194 of 381
192Driving
!Do not lift your foot off the brake pedal! When the brake pedal is released
or when the brake force is reduced, braking assist automatically turns off
the brake servo.
Traction control when accelerating (ASR)
In the event of wheelspin, the traction control system reduces the engine
torque to match the amount of grip available. The ASR makes some situa-
tions easier, for example, when starting, accelerating or going uphill, even
in unfavourable road conditions.
The ASR can be switched on or off manually ⇒ page 193.
Electronic differential lock system (EDL and XDS)
EDL is available when driving in straight lines under normal conditions.
When the EDL detects wheelspin, it brakes the spinning wheel and directs
the power to the other drive wheels. To prevent the disc brake of the braked
wheel from overheating, the EDL cuts out automatically if subjected to ex-
cessive loads. The EDL will switch on again automatically when the brake
has cooled down.
The XDS function is an extension of the electronic differential lock. The XDS
does not react to the traction of the driving wheels, but to the adherence of
the front wheel on the inside of the curve whilst gripping rapidly in corners.
The XDS gives pressure to the brakes of the wheel on the interior of the cor-
ner to prevent skidding. This improves traction, which assists the vehicle in
continuing the required line.
WARNING
Driving at high speed on icy, slippery wet ground can result in loss of ve-
hicle control and serious injury to the driver and passengers.
● Adjust your speed and driving style to visibility, road, traffic and
weather conditions. Even though the brake assist systems, ABS, BAS,
EDL, ASR and ESC, provide more security, do not take unnecessary risks
while driving.
WARNING (Continued)
● Brake assist systems can not overcome the laws of physics. Even with
ESC and other systems, slippery and wet roads will always be dangerous.
● Driving to quickly on wet ground can result in the wheels losing con-
tact with the ground in an effect known as aquaplaning. Without adher-
ence, it is impossible to brake, steer or control the vehicle.
● Brake assist systems cannot avoid accidents if, for example, the driv-
er does not respect safety distances or drives to quickly in difficult condi-
tions.
● Even though brake assist systems are extremely effective and help
control the vehicle in difficult situations, remember that the vehicle sta-
bility depends on tyre grip.
● When accelerating on a slippery surface, for example on ice and
snow, press the accelerator carefully. The wheels can still slip even with
brake assist systems resulting in loss of vehicle control.
WARNING
The effectiveness of the ESC can be considerably reduced if other compo-
nents and systems affecting driving dynamics are not maintained or are
not functioning correctly. This includes, among others, brakes, tyres and
other systems already mentioned.
● Remember that changing and fitting other components to the vehicle
can affect operation of the ABS, BAS, ASL EDL and ESC.
● Changes to the vehicle suspension or using unapproved wheel/tyre
combinations can affect operation of the ABS, BAS, ASL EDL and ESC and
their effectiveness.
● Likewise, the effectiveness of ESC depends on the use of suitable
tyres ⇒ page 297.
Page 195 of 381
193
Driving
Note
● To ensure that the ESC and ASR work properly, all four wheels must be
fitted with identical tyres. Any differences in the rolling radius of the tyres
can cause the system to reduce engine power when this is not desired.
● If a malfunction should occur in the ABS, the ESC, EDL and ASR will also
be out of action.
● Noises may be heard while any of the above systems are operating.
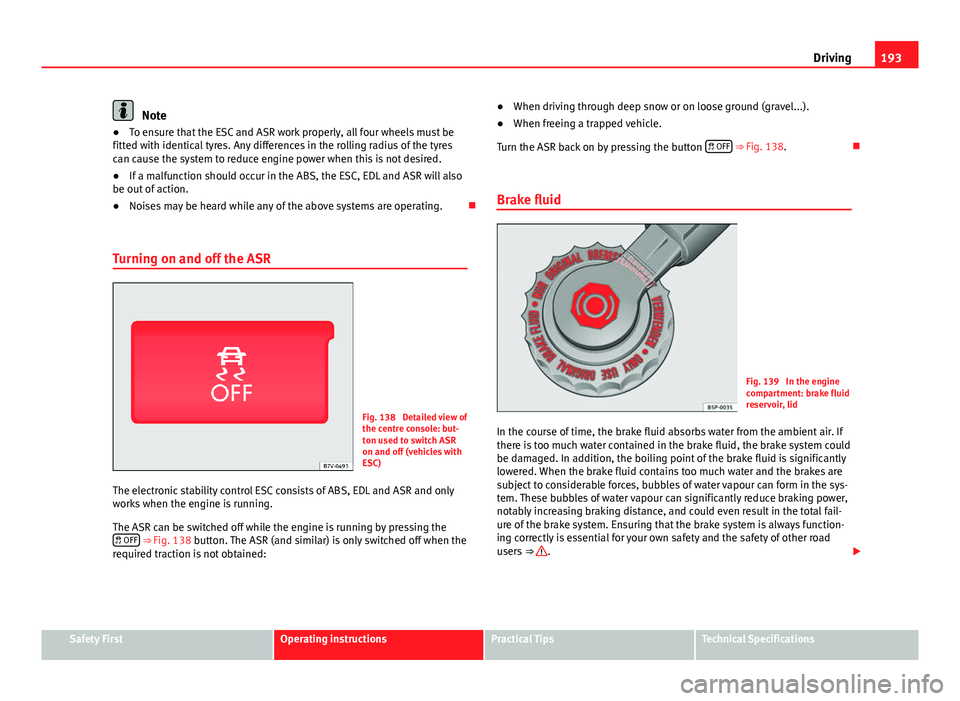
Turning on and off the ASR
Fig. 138 Detailed view of
the centre console: but-
ton used to switch ASR
on and off (vehicles with
ESC)
The electronic stability control ESC consists of ABS, EDL and ASR and only
works when the engine is running.
The ASR can be switched off while the engine is running by pressing the OFF
⇒ Fig. 138 button. The ASR (and similar) is only switched off when the
required traction is not obtained: ●
When driving through deep snow or on loose ground (gravel...).
● When freeing a trapped vehicle.
Turn the ASR back on by pressing the button OFF
⇒ Fig. 138.
Brake fluid
Fig. 139 In the engine
compartment: brake fluid
reservoir, lid
In the course of time, the brake fluid absorbs water from the ambient air. If
there is too much water contained in the brake fluid, the brake system could
be damaged. In addition, the boiling point of the brake fluid is significantly
lowered. When the brake fluid contains too much water and the brakes are
subject to considerable forces, bubbles of water vapour can form in the sys-
tem. These bubbles of water vapour can significantly reduce braking power,
notably increasing braking distance, and could even result in the total fail-
ure of the brake system. Ensuring that the brake system is always function-
ing correctly is essential for your own safety and the safety of other road
users ⇒
.
Safety FirstOperating instructionsPractical TipsTechnical Specifications
Page 207 of 381
205
Driving
● To ensure that the system works properly, the bumper sensors must be
kept clean, free of ice and snow and uncovered.
● The bumper sensors may become damaged or misaligned, for example,
when parking.
● When cleaning the sensors with high-pressure or steam cleaning equip-
ment, spray the sensors briefly at a distance of no less than 10 cm.
Note
Contact a specialised workshop with any system faults. SEAT recommends
visiting a Technical Service.
Parking using the park assist system
Fig. 146 Detailed view of
the centre console: but-
ton to switch the park as-
sist system on manually
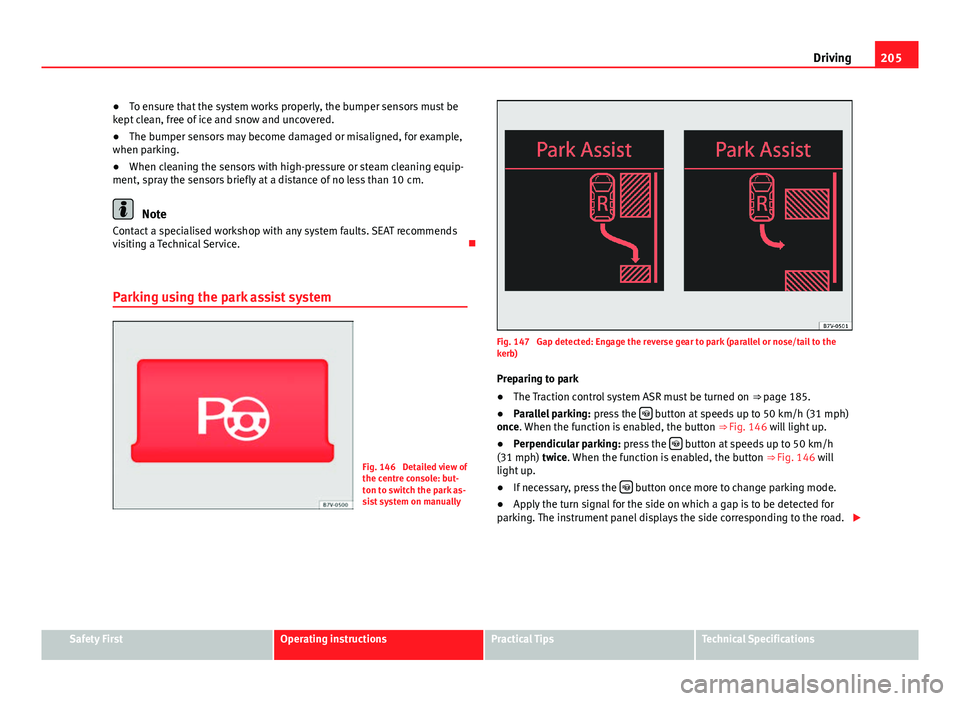
Fig. 147 Gap detected: Engage the reverse gear to park (parallel or nose/tail to the
kerb) Preparing to park
● The Traction control system ASR must be turned on ⇒ page 185.
● Parallel parking: press the
button at speeds up to 50 km/h (31 mph)
once. When the function is enabled, the button ⇒ Fig. 146 will light up.
● Perpendicular parking: press the
button at speeds up to 50 km/h
(31 mph) twice. When the function is enabled, the button ⇒ Fig. 146 will
light up.
● If necessary, press the
button once more to change parking mode.
● Apply the turn signal for the side on which a gap is to be detected for
parking. The instrument panel displays the side corresponding to the road.
Safety FirstOperating instructionsPractical TipsTechnical Specifications
Page 307 of 381

305
Wheels and tyres
● Only use radial winter tyres of the same type, size (rolling circumference)
and tread pattern.
● Adjust speeds to within the limits indicated (code letter on tyre) ⇒
.
Speed limit
A code letter indicating the speed limit is stamped on all winter tyres
⇒ page 308.
In some vehicles, it is possible to set a speed warning in the MFA (multifunc-
tion display) menu on the instrument panel ⇒ page 62.
If you use V-rated tyres the speed limits and tyre pressure will be deter-
mined by engine size. Please ask your Technical Service for further informa-
tion on the maximum permitted speed and the required pressures for the tyres.
All-wheel drive*
Thanks to its all-wheel drive, your car will have plenty of traction in winter
conditions, even with the standard tyres. Nevertheless, SEAT still recom-
mend that winter tyres or all-season tyres should be fitted on all four wheels
when winter road conditions are expected, mainly because this will give a
better braking response.
Please observe all instructions and warnings when using snow chains
⇒ page 305.
WARNING
Although winter tyres help to make driving safer in the winter, you
should not take unnecessary risks.
● Adjust your speed and driving style to visibility, road, traffic and
weather conditions.
● Never exceed the maximum permitted speed or loads specified for the
type of winter tyre fitted on your vehicle.
For the sake of the environment
When winter is over, change back to summer tyres. In temperatures above
+7 °C (+45 °F), performance will be improved if summer tyres are used. Fuel
consumption, wear and noises while driving will all be reduced.
Note
● If the vehicle is fitted with a tyre control system, this should be “reprog-
rammed” whenever a tyre is changed ⇒ page 227.
● Please ask at a Technical Service for information about the permitted
sizes for winter tyres.
Snow chains
When using snow chains, applicable local legislation and maximum permit-
ted speed limits must be observed.
In winter weather, snow chains not only help to improve grip but also im-
prove the braking capacity.
Snow chains must only be mounted on the front wheels, even on all-wheel
drive vehicles, and only with the tyre and rim combinations listed below:
Tyre sizeWheel rim205/60 R166 1/2 J x 16 ET 33
SEAT recommends you ask a Technical Service for further information on
wheel, tyre and chain sizes.
Wherever possible use fine-link chains measuring less than 15 mm
(37/64 inch) including the lock.
Remove wheel hub covers and trim rings before fitting snow chains ⇒
.
The wheel bolts should be covered with caps for safety reasons. These are
available from Technical Services.
Safety FirstOperating instructionsPractical TipsTechnical Specifications
Page 364 of 381
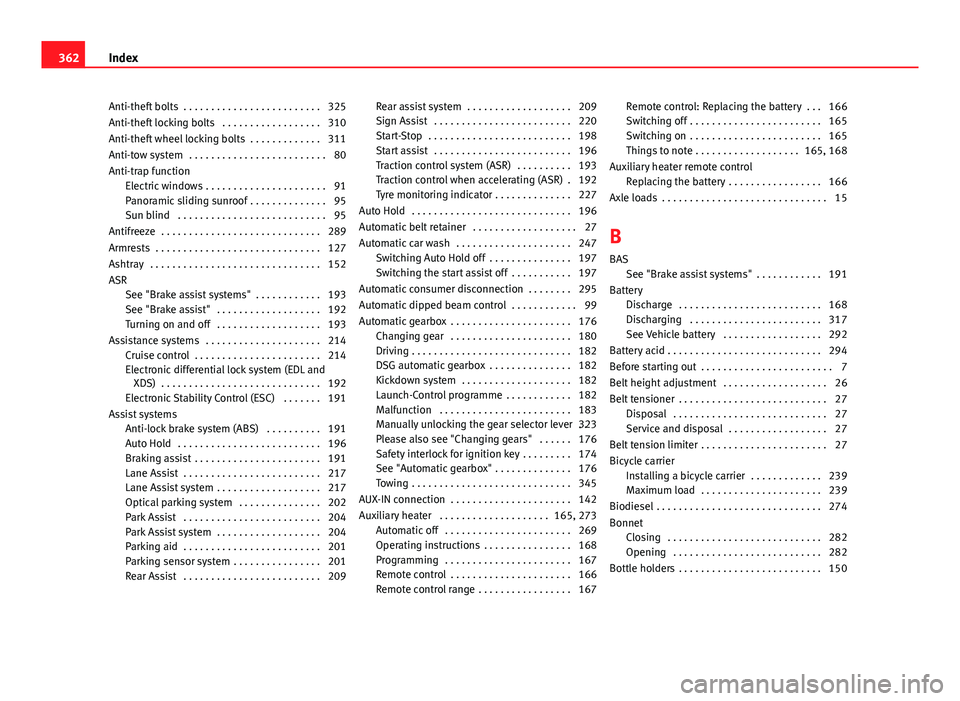
Anti-theft bolts . . . . . . . . . . . . . . . . . . . . . . . . . 325
Anti-theft locking bolts . . . . . . . . . . . . . . . . . . 310
Anti-theft wheel locking bolts . . . . . . . . . . . . . 311
Anti-tow system . . . . . . . . . . . . . . . . . . . . . . . . . 80
Anti-trap functionElectric windows . . . . . . . . . . . . . . . . . . . . . . 91
Panoramic sliding sunroof . . . . . . . . . . . . . . 95
Sun blind . . . . . . . . . . . . . . . . . . . . . . . . . . . 95
Antifreeze . . . . . . . . . . . . . . . . . . . . . . . . . . . . . 289
Armrests . . . . . . . . . . . . . . . . . . . . . . . . . . . . . . 127
Ashtray . . . . . . . . . . . . . . . . . . . . . . . . . . . . . . . 152
ASR See "Brake assist systems" . . . . . . . . . . . . 193
See "Brake assist" . . . . . . . . . . . . . . . . . . . 192
Turning on and off . . . . . . . . . . . . . . . . . . . 193
Assistance systems . . . . . . . . . . . . . . . . . . . . . 214 Cruise control . . . . . . . . . . . . . . . . . . . . . . . 214
Electronic differential lock system (EDL andXDS) . . . . . . . . . . . . . . . . . . . . . . . . . . . . . 192
Electronic Stability Control (ESC) . . . . . . . 191
Assist systems Anti-lock brake system (ABS) . . . . . . . . . . 191
Auto Hold . . . . . . . . . . . . . . . . . . . . . . . . . . 196
Braking assist . . . . . . . . . . . . . . . . . . . . . . . 191
Lane Assist . . . . . . . . . . . . . . . . . . . . . . . . . 217
Lane Assist system . . . . . . . . . . . . . . . . . . . 217
Optical parking system . . . . . . . . . . . . . . . 202
Park Assist . . . . . . . . . . . . . . . . . . . . . . . . . 204
Park Assist system . . . . . . . . . . . . . . . . . . . 204
Parking aid . . . . . . . . . . . . . . . . . . . . . . . . . 201
Parking sensor system . . . . . . . . . . . . . . . . 201
Rear Assist . . . . . . . . . . . . . . . . . . . . . . . . . 209 Rear assist system . . . . . . . . . . . . . . . . . . . 209
Sign Assist . . . . . . . . . . . . . . . . . . . . . . . . . 220
Start-Stop . . . . . . . . . . . . . . . . . . . . . . . . . . 198
Start assist . . . . . . . . . . . . . . . . . . . . . . . . . 196
Traction control system (ASR) . . . . . . . . . . 193
Traction control when accelerating (ASR) . 192
Tyre monitoring indicator . . . . . . . . . . . . . . 227
Auto Hold . . . . . . . . . . . . . . . . . . . . . . . . . . . . . 196
Automatic belt retainer . . . . . . . . . . . . . . . . . . . 27
Automatic car wash . . . . . . . . . . . . . . . . . . . . . 247 Switching Auto Hold off . . . . . . . . . . . . . . . 197
Switching the start assist off . . . . . . . . . . . 197
Automatic consumer disconnection . . . . . . . . 295
Automatic dipped beam control . . . . . . . . . . . . 99
Automatic gearbox . . . . . . . . . . . . . . . . . . . . . . 176 Changing gear . . . . . . . . . . . . . . . . . . . . . . 180
Driving . . . . . . . . . . . . . . . . . . . . . . . . . . . . . 182
DSG automatic gearbox . . . . . . . . . . . . . . . 182
Kickdown system . . . . . . . . . . . . . . . . . . . . 182
Launch-Control programme . . . . . . . . . . . . 182
Malfunction . . . . . . . . . . . . . . . . . . . . . . . . 183
Manually unlocking the gear selector lever . .323
Please also see "Changing gears" . . . . . . 176
Safety interlock for ignition key . . . . . . . . . 174
See "Automatic gearbox" . . . . . . . . . . . . . . 176
Towing . . . . . . . . . . . . . . . . . . . . . . . . . . . . . 345
AUX-IN connection . . . . . . . . . . . . . . . . . . . . . . 142
Auxiliary heater . . . . . . . . . . . . . . . . . . . . 165, 273 Automatic off . . . . . . . . . . . . . . . . . . . . . . . 269
Operating instructions . . . . . . . . . . . . . . . . 168
Programming . . . . . . . . . . . . . . . . . . . . . . . 167
Remote control . . . . . . . . . . . . . . . . . . . . . . 166
Remote control range . . . . . . . . . . . . . . . . . 167 Remote control: Replacing the battery . . . 166
Switching off . . . . . . . . . . . . . . . . . . . . . . . . 165
Switching on . . . . . . . . . . . . . . . . . . . . . . . . 165
Things to note . . . . . . . . . . . . . . . . . . . 165, 168
Auxiliary heater remote control Replacing the battery . . . . . . . . . . . . . . . . . 166
Axle loads . . . . . . . . . . . . . . . . . . . . . . . . . . . . . . 15
B
BAS See "Brake assist systems" . . . . . . . . . . . . 191
Battery Discharge . . . . . . . . . . . . . . . . . . . . . . . . . . 168
Discharging . . . . . . . . . . . . . . . . . . . . . . . . 317
See Vehicle battery . . . . . . . . . . . . . . . . . . 292
Battery acid . . . . . . . . . . . . . . . . . . . . . . . . . . . . 294
Before starting out . . . . . . . . . . . . . . . . . . . . . . . . 7
Belt height adjustment . . . . . . . . . . . . . . . . . . . 26
Belt tensioner . . . . . . . . . . . . . . . . . . . . . . . . . . . 27 Disposal . . . . . . . . . . . . . . . . . . . . . . . . . . . . 27
Service and disposal . . . . . . . . . . . . . . . . . . 27
Belt tension limiter . . . . . . . . . . . . . . . . . . . . . . . 27
Bicycle carrier Installing a bicycle carrier . . . . . . . . . . . . . 239
Maximum load . . . . . . . . . . . . . . . . . . . . . . 239
Biodiesel . . . . . . . . . . . . . . . . . . . . . . . . . . . . . . 274
Bonnet Closing . . . . . . . . . . . . . . . . . . . . . . . . . . . . 282
Opening . . . . . . . . . . . . . . . . . . . . . . . . . . . 282
Bottle holders . . . . . . . . . . . . . . . . . . . . . . . . . . 150
362 Index