fuel type Seat Arona 2017 Owner's Manual
[x] Cancel search | Manufacturer: SEAT, Model Year: 2017, Model line: Arona, Model: Seat Arona 2017Pages: 308, PDF Size: 6.66 MB
Page 41 of 308
The essentialsIllustra-
tionKey to ››› Fig. 46
A Do not continue driving!
The bonnet is open or is not properly
closed ››› page 267.
B Do not continue driving!
The rear lid is open or is not properly
closed ››› page 16.
C, D Do not continue driving!
A vehicle door is open or is not properly
closed ››› page 126.
›››
page 114 Warning and information messages
The system runs a check on certain compo-
nents
and f
u
nctions when the ignition is
switched on and while the vehicle is moving.
Faults in the operation are displayed on the
screen using red and yellow symbols and
messages on the instrument panel display
( ›››
page 117,
››› page 44) and, in
some cases, with audible warnings. The dis-
play may vary according to the type of instru-
ment panel fitted.
Priority 1 warning (red symbols)
Symbol flashing or lit; partly combined with audible
warnings.
Stop the vehicle! It is dangerous ››› in Warning
symbols on page 117!
Check the function that is faulty and repair it. If necessa-
ry, request assistance from specialised personnel.
Priority 2 warning (yellow symbols)
Symbol flashing or lit; partly combined with audible
warnings.
A faulty function, or fluids which are below the correct
levels may cause damage to the vehicle! ›››
in Warn-
ing symbols on page 118
Check the faulty function as soon as possible. If neces-
sary, request assistance from specialised personnel.
Informative text
Information relating to different vehicle processes.
›››
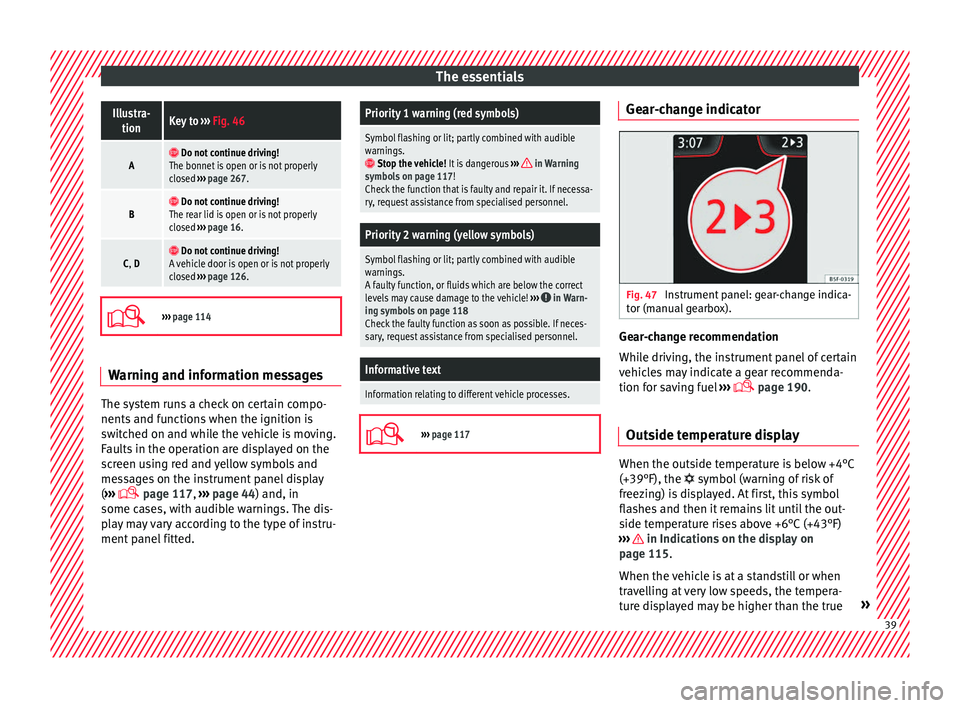
page 117 Gear-change indicator
Fig. 47
Instrument panel: gear-change indica-
t or (m
anual
gearbox). Gear-change recommendation
Whi
l
e driv
ing, the instrument panel of certain
vehicles may indicate a gear recommenda-
tion for saving fuel ›››
page 190.
Outside temperature display When the outside temperature is below +4°C
(+39°F), the
symbol
(w
arning of risk of
freezing) is displayed. At first, this symbol
flashes and then it remains lit until the out-
side temperature rises above +6°C (+43°F)
››› in Indications on the display on
p ag
e 115
.
When the vehicle is at a standstill or when
travelling at very low speeds, the tempera-
ture displayed may be higher than the true » 39
Page 58 of 308
The essentials
Engine oil specificationsEngine typeFlexible service (LongLife)Set Service (dependent on time/distance travel- led)
Petrol enginesVW 508 00
VW 504 00 a)VW 504 00
VW 502 00 b)
Engines with Particulate filter (DPF) c)VW 507 00VW 507 00
a)
Use of engine oil compliant with the VW 504 00 specification instead of VW 508 00 may have a slight negative effect on the vehicle’s exhaust gas values.
b) If the quality of the fuel available in the country does not fulfil the EN 228 (for petrol) and EN 590 (for diesel) standards.
c) Only use recommended oils, otherwise you may damage the engine.
››› in Changing engine oil on page 273
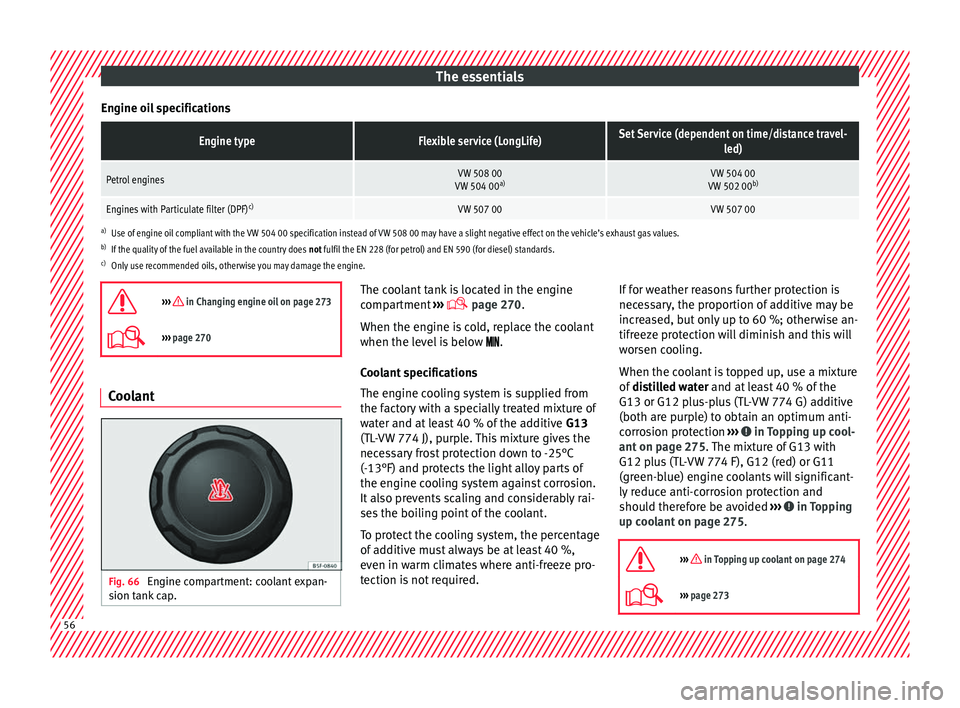
››› page 270 Coolant
Fig. 66
Engine compartment: coolant expan-
s ion t
ank
cap. The coolant tank is located in the engine
c
omp
ar
tment ›››
page 270.
When the engine is cold, replace the coolant
when the level is below .
Coolant specifications
The engine cooling system is supplied from
the factory with a specially treated mixture of
water and at least 40 % of the additive G13
(TL-VW 774 J), purple. This mixture gives the
necessary frost protection down to -25°C
(-13°F) and protects the light alloy parts of
the engine cooling system against corrosion.
It also prevents scaling and considerably rai-
ses the boiling point of the coolant.
To protect the cooling system, the percentage
of additive must always be at least 40 %,
even in warm climates where anti-freeze pro-
tection is not required. If for weather reasons further protection is
neces
sary, the proportion of additive may be
increased, but only up to 60 %; otherwise an-
tifreeze protection will diminish and this will
worsen cooling.
When the coolant is topped up, use a mixture
of distilled water and at least 40 % of the
G13 or G12 plus-plus (TL-VW 774 G) additive
(both are purple) to obtain an optimum anti-
corrosion protection ››› in Topping up cool-
ant on p ag
e 275
. The mixture of G13 with
G12 plus (TL-VW 774 F), G12 (red) or G11
(green-blue) engine coolants will significant-
ly reduce anti-corrosion protection and
should therefore be avoided ››› in Topping
up c oo
l
ant on page 275.
››› in Topping up coolant on page 274
››› page 273 56
Page 259 of 308
Care and maintenance
WARNING
● Car -c
are products can be toxic. Because of
this, they must always be kept closed in their
original container. Keep them out of the reach
of children. Failure to comply could result in
poisoning.
● Always read and observe the instructions
and warning
s on the package before using
car-care products. Improper use could cause
health problems or damage the vehicle. The
use of certain products may produce noxious
vapours; they should be used in well ventila-
ted areas.
● Never use fuel, turpentine, engine oil, nail
varnish r
emover or other volatile fluids.
These are toxic and highly flammable. Risk of
fire and explosion.
● Before washing your vehicle, or carrying
out any
maintenance, switch the engine off,
apply the handbrake firmly and remove the
key from the ignition. CAUTION
Never attempt to remove dirt, mud or dust if
the sur f
ace of the vehicle is dry. Never use a
dry cloth or sponge for cleaning purposes.
This could damage the paintwork or the win-
dows of your vehicle. Soak dirt, mud or dust
with plenty of water. For the sake of the environment
● When pur c
hasing car care products, try to
select ones that are not harmful to the envi-
ronment.
● The waste from car-care products should
not be dis
posed of with ordinary household
waste. Observe the disposal information on
the package. Care of the vehicle exterior
Autom atic
car wash tunnel The vehicle paintwork is so durable that the
v
ehic
l
e can normally be washed without
problems in an automatic car wash tunnel.
However, the paintwork wear depends to a
large extent on the kind of the car wash tun-
nel, the brushes used, its water filtering and
the type of cleaning and preservative prod-
ucts.
Before going through a car wash, be sure to
take the usual precautions such as closing
the windows. There is nothing to note apart
from that.
If the vehicle has special accessories such as
spoilers or a roof rack or two-way radio aerial,
etc., it is advisable to consult the car wash
tunnel operator first. After washing, the brake
s could take some
time to respond as the brake discs and pads
could be wet, or even frozen in winter. “Dry”
the brakes by braking several times. WARNING
Water, ice and salt on the brake system can
reduc e br
aking effectiveness. Risk of acci-
dent. Hand-washing
Vehicle washing
– First soften the dirt and rinse it off with wa-
ter
.
– C
lean your vehicle from top to bottom with
a soft s
ponge, a glove or a brush. Use very
light pressure.
– Rinse the sponge or glove often with clean
water
.
– Special car shampoo should only be used
for v
ery stubborn dirt.
– Leave the wheels, sill panels etc. until last,
usin
g a different sponge or glove.
– Rinse the vehicle thoroughly with water.
– Dry the vehicle surface gently with a cha-
mois l
eather.
– In cold temperature, dry the rubber seals
and their sur
faces to prevent them from »
257
Technical data
Advice
Operation
Emergencies
Safety
Page 267 of 308
Checking and refilling levels
Checking and refilling levels
R ef
uel
ling
Refuelling Read the additional information carefully
›› ›
page 54
If the automatic filler nozzle is operated cor-
rectly, it will switch itself off as soon as the
tank is “full”. Never attempt to fill beyond
this point, as this will fill the expansion
chamber. Fuel may leak out if ambient condi-
tions are warm.
The correct fuel grade for your vehicle is giv-
en on a sticker on the inside of the fuel tank
flap. WARNING
● Fuel i
s highly flammable and can cause se-
rious burns and other injuries.
–Never smoke or come into contact with
sparks when filling the fuel tank of the
vehicle or a spare fuel canister with fuel.
This is an explosion hazard.
– Follow legal requirements for the use of
spare fuel canisters.
– For safety reasons we do not recommend
carrying a spare fuel canister in the vehi-
cle. The canister could be damaged in an
accident and leak. ●
If, in e x
ceptional circumstances, you have
to carry a spare fuel canister, please observe
the following:
–Never fill the spare fuel canister inside
the vehicle or on it. An electrostatic
charge could build up during filling, caus-
ing the fuel fumes to ignite. This could
cause an explosion. Always place the
canister on the ground to fill it.
– Insert the fuel nozzle into the mouth of
the canister as far as possible.
– If the spare fuel canister is made of met-
al, the filling nozzle must be in contact
with the canister during filling. This
helps prevent an electrostatic charge
building up.
– Never spill fuel in the vehicle or in the
luggage compartment. Fuel vapours are
explosive. Danger of death. CAUTION
● Fuel s
pills should be removed from the
paintwork immediately.
● Never run the tank completely dry. Irregular
fuel s
upply can cause misfiring. As a result,
unburnt fuel could enter the catalytic convert-
er and cause damage.
● When filling the fuel tank after having run it
compl
etely dry on a vehicle with a diesel en-
gine the ignition must be switched on for at
least 30 seconds before starting the engine.
Subsequently, when you start the engine it
may take longer than normal to start firing (up to one minute). This is due to the fact that
the fuel
sy
stem has to purge itself of air be-
fore starting. For the sake of the environment
Do not try to put in more fuel after the auto-
m atic fi
ller nozzle has switched off, this may
cause the fuel to overflow if it becomes warm. Note
There is no emergency mechanism for the
manua l
release of the fuel tank flap. If neces-
sary, request assistance from specialised per-
sonnel. Fuel
Ty
pe
s of petrol The correct grade of petrol is listed inside the
f
uel
t
ank flap.
The vehicle is equipped with a catalytic con-
verter and must only be run on unleaded pet-
rol. The petrol must comply with European
Standard EN 228 or German standard DIN
51626-1 and must be unleaded. You can re-
fuel with a maximum ethanol proportion of
10 % (E10). The types of petrol are differenti-
ated by their octane rating (RON). »
265
Technical data
Advice
Operation
Emergencies
Safety
Page 280 of 308
Advice
The position of the battery is shown in the
c orr
e
sponding engine compartment diagram
››› page 270.
The “magic eye” indicator, located on the top
of the battery changes colour, depending on
the charge state and electrolyte level of the
battery.
There are two different colours:
● Black: correct charge status.
● Transparent/clear yellow: the battery must
be repl
aced. Contact a specialised workshop.
Charging or changing the battery The battery is maintenance-free and is
c
hec
k
ed during the inspection service. All
work on the vehicle battery requires special-
ist knowledge.
If you often drive short distances or if the ve-
hicle is not driven for long periods, the bat-
tery should be checked by a specialised
workshop between the scheduled services.
If the battery has discharged and you have
problems starting the vehicle, the battery
might be damaged. If this happens, we rec-
ommend you have the vehicle battery
checked by a Technical Service where it will
be re-charged or replaced. Charging the battery
The vehic
le battery should be charged by a
specialised workshop only, as batteries us-
ing special technology have been installed
and they must be charged in a controlled en-
vironment.
Replacing a vehicle battery
The battery has been developed to suit the
conditions of its location and has special
safety features.
Genuine SEAT batteries meet the mainte-
nance, performance and safety specifications
of your vehicle. WARNING
● We r ec
ommend you use only maintenance-
free or cycle free leak-proof batteries which
comply with standards T 825 06 and
VW 7 50 73. This standard applies as of
2001.
● Before starting any work on the batteries,
you mus
t read and observe the warnings
››› in Symbols and warnings on handling
the batt er
y on page 276. For the sake of the environment
Batteries contain toxic substances such as
su lphuric
acid and lead. They must be dis-
posed of appropriately and must not be dis-
posed of with ordinary household waste. Wheels
Wheel s
and ty
res
General notes Avoiding damage
– If you have to drive over a kerb or similar
ob s
tacle, drive very slowly and at a right
angle.
– Keep grease, oil and fuel off the tyres.
– Inspect the tyres regularly for damage
(cuts, c r
acks or blisters, etc.). Remove any
foreign objects embedded in the treads.
Storing tyres
– When you remove the tyres, mark them in
order to m
aintain the same direction of ro-
tation when they are installed again.
– When removed, the wheels and/or tyres
should be s
tored in a cool, dry and prefera-
bly dark location.
– Store tyres in a vertical position, if they are
not fitted on wheel
rims.
New tyres
New tyres must be run in ›››
page 191.
The tread depth of new tyres may vary, ac-
cording to the type and make of tyre and the
tread pattern.
278
Page 283 of 308
Wheels
For the sake of the environment
Under-inflated tyres will increase fuel con-
sumption. New tyres and wheels
New tyres and wheels have to be run in.
The tyr
e
s and wheel rims are an essential
part of the vehicle's design. Those approved
by SEAT are specially matched to the charac-
teristics of the vehicle and make a major con-
tribution to good road-holding and safe han-
dling ››› .
T y
r
es should be replaced at least in pairs and
not individually (i.e. both front tyres or both
rear tyres together). A knowledge of tyre des-
ignations makes it easier to choose the cor-
rect tyres. Radial tyres have the tyre designa-
tions marked on the sidewall, for example:
195/55 R16 91V
This contains the following information:
Tyre width in mm
Height/width ratio in %
Tyre construction: Radial
Rim diameter in inches
Load rating code
Speed rating
195
55
R
16
91
V The tyres could also have the following infor-
mation:
● A direction of
rotation symbol
● “Reinforced” denotes heavy-duty tyres.
The manufact
uring date is also indicated on
the tyre sidewall (possibly only on the inner
side of the wheel).
“DOT ... 1116 ...” means, for example, that
the tyre was produced in the 11th week of
2016.
We recommend that work on tyres and
wheels be carried out by a Technical Service.
They are familiar with the procedure and
have the necessary special tools and spare
parts as well as the proper facilities for dis-
posing of the old tyres.
Any technical service has full information on
the technical requirements when installing or
changing tyres, wheels or wheel trims. WARNING
● We r ec
ommend that you use only wheels
and tyres which have been approved by SEAT
for your model. Failure to do so could impair
vehicle handling. Risk of accident.
● Avoid running the vehicle on tyres that are
more than 6
years old. If you have no alterna-
tive, you should drive slowly and with extra
care at all times. ●
Never u se o
ld tyres or those with an un-
known “history of use”.
● If wheel trims are retrofitted, you must en-
sure th
at the flow of air to the brakes is not
restricted. This could cause the brake system
to overheat.
● All four wheels must be fitted with radial
tyre
s of the same type, size (rolling circumfer-
ence) and the same tread pattern. For the sake of the environment
Old tyres must be disposed of according to
the l aw
s in the country concerned. Note
● A S EA
T Service Centre should be consulted
to find out whether wheels or tyres of differ-
ent sizes to those originally fitted by SEAT
can be fitted, and to find out about the com-
binations allowed between the front axle
(axle 1) and the rear axle (axle 2).
● For technical reasons, it is not generally
poss
ible to use the wheels from other vehi-
cles. This can also apply to wheels of the
same model. The use of wheels or tyres
which have not been approved by SEAT for
use with your model may invalidate the vehi-
cle's type approval for use on public roads.
● If the spare tyre is not the same as the
tyre
s that are mounted on the vehicle (e.g.
winter tyres) you should only use the spare
tyre for a short period of time and drive with » 281
Technical data
Advice
Operation
Emergencies
Safety
Page 288 of 308
Technical data
Vehicle data sticker
The d at
a s
ticker is placed on the inside of the
spare wheel well, in the boot and on the rear
cover of the Maintenance Programme.
The following information is provided on the
vehicle data sticker: ››› Fig. 242
Vehicle identification number (chassis
number)
Vehicle type, model, capacity, engine
type, finish, engine power and gearbox
type
Engine code, gearbox code, external
paint code and internal equipment code
Optional extras and PR numbers
Identifying letters
The identifying letters of the engine can be
viewed on the instrument panel when the en-
gine is switched off and the ignition is on.
● Hold down the 0.0/SET
4
› ›
› Fig. 124
but-
ton for more than 15 seconds.
Information on fuel consump-
tion
Fuel c
onsumption Approved consumption values are derived
fr
om me
a
surements performed or supervised
1 2
3
4 by certified EU laboratories, according to the
l
e
gi
slation in force at the time (for more infor-
mation, see the Publications Office of the Eu-
ropean Union on the EUR-Lex website: © Eu-
ropean Union, http://eur-lex.europa.eu/) and
apply to the specified vehicle characteristics.
The values relating to fuel consumption and
CO 2 emissions can be found in the documen-
tation provided to the purchaser of the vehi-
cle at the time of purchase.
Fuel consumption and CO 2 emissions depend
on the equipment/features of each individual
vehicle, as well as on the driving style, road
conditions, traffic conditions, environmental
conditions, load or number of passengers. Note
In practice, and considering all the factors
mentioned here, c on
sumption values can dif-
fer from those calculated in the current Euro-
pean regulations. Weights
Kerb weight refers to the basic model with a
f
uel
t
ank filled to 90% capacity and without
optional extras. The figure quoted includes
75 kg to allow for the weight of the driver.
Special versions, optional equipment fittings
or retro-fitting accessories will increase the
weight of the vehicle ››› . WARNING
● Ple a
se note that the centre of gravity may
shift when transporting heavy objects; this
may affect vehicle handling and lead to an ac-
cident. Always adjust your speed and driving
style to suit road conditions and require-
ments.
● Never exceed the gross axle weight rating
or the gros
s vehicle weight rating. If the per-
missible axle load or the permissible total
weight is exceeded, the driving characteris-
tics of the vehicle may change, leading to ac-
cidents, injuries and damage to the vehicle. Trailer mode
Tr
ai
ler weights The trailer weights and drawbar loads ap-
pr
o
v
ed are selected in intensive trials accord-
ing to precisely defined criteria. The ap-
proved trailer weights are valid for vehicles in
the EU for maximum speeds of 80 km/h (50
mph) (in certain circumstances up to 100
km/h (62 mph)). The figures may be different
in other countries. All data in the official vehi-
cle documentation takes precedence over
these data at all times ››› .
286